Before you use an SD card on your Mac, you need to format it to make the card compatible with your device. Though many users find it convenient to use their camera or another device for this, you can also easily format the SD card with your Mac.
Most MacBooks have a built-in SD card slot that you can use, but you can still erase a card even if your Mac doesn’t have one. In this guide, I’ll walk you through each and everything you need to know about formatting SD cards on Mac. That said, let’s roll in!
How to Format SD Card on Mac (With SD Card Slot)
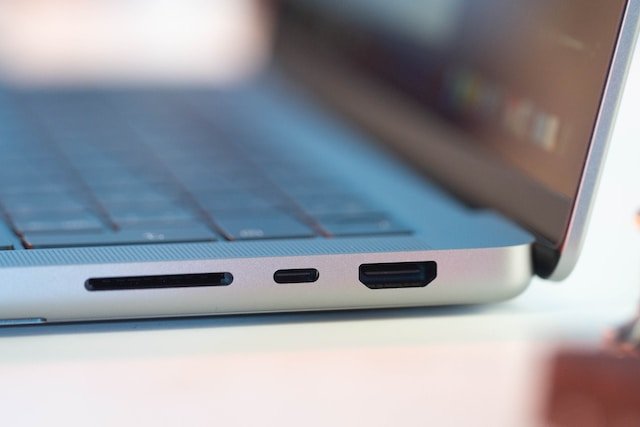
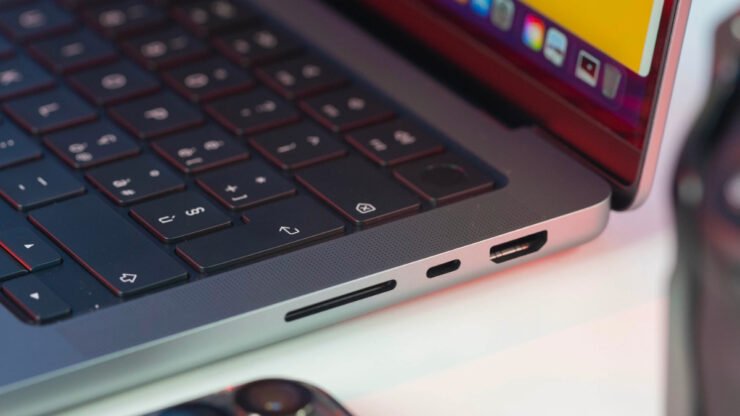
Usually, Macs have built-in SD card slots that you can use to format SD cards. You can look for an SD card slot on the left side of your MacBook Pro. If the slot is present, no additional equipment is required for formatting except the SD card itself.
Your Mac is likely to have an SDXC card slot if you have any of these models:
- Mac Studio 2022 or later
- 14-inch MacBook Pro models 2021 or later
- 16-inch MacBook Pro models 2021 or later
- MacBook Pro 2011 through 2015
- Mac Mini 2011 through 2014
- 13-inch MacBook Air models 2013 through 2017
- 27-inch iMac models 2010 or later
- 21.5-inch iMac models in 2010 or later
How to Format SD Cards on Mac (Without an SD Card Slot)
Can you format an SD card with a Mac that doesn’t come with a built-in SD card slot?
Yes, you can do that. But because your Mac doesn’t have a built-in card slot, you’ll need a third-party card reader. This external device will allow your Mac to recognize and interact with the SD card.
Other than the card reader, you’ll also need a cable to connect the reader to your Mac. This method is also useful if your Mac has its own card reader but fails to recognize the card.
Once connected, your Mac should recognize the external card reader as a storage device. You can then proceed with tasks such as formatting, transferring files, or accessing data from SD cards.
Things to Do Before You Format SD Cards on Mac
Before you format SD cards using your Mac, there are a few important things to check:
- Check Mac’s SD Card Slot Compatibility: If you’re using your Mac’s SD card slot (and not an external card reader), make sure the card is compatible with the Mac’s slot. The DXC card slot on your Mac supports several cards, including MMC, Default Speed, High Speed, UHS-I, UHS-II (UHS‑II (for Mac Studio 2022 or later, MacBook Pro 2021 or later, iMac 2020, and iMac Pro only).
- If your Mac doesn’t have a built-in SDXC card reader and you plan on using an external card reader, get the right SD card reader and cable for smooth data transfer and formatting speed.
- Back up any images and files from the card and remove it from any devices it’s currently in before formatting it.
- If the SD card you want to format is mini/micro/nano, you need an adaptor to fit it into a standard SD card slot for formatting.
- macOS before 10.6.6 (Snow Leopard) doesn’t support the exFAT file system. So, make sure to update your Mac before formatting an SD card.
Once all these conditions are checked, you can format your SD card using a Mac.
How to Format SD Cards on Mac
Let’s see various methods to format SD cards on a Mac.
Method 1: Format SD Card Using Disk Utility
Disk Utility is a built-in application on Mac that manages and troubleshoots storage devices, including SD cards. It offers a simple way to format SD cards by selecting the target drive and erasing the card to your preferred file system.
Here is a step-by-step tutorial to do that:
- Insert the SD card into your Mac’s SD card slot. Or, connect an external SD card reader to a USB slot on a Mac with a cable and insert the card in the reader.
- Once your Mac recognizes the card, go to “Applications” > “Utilities” > “Disk Utility.”
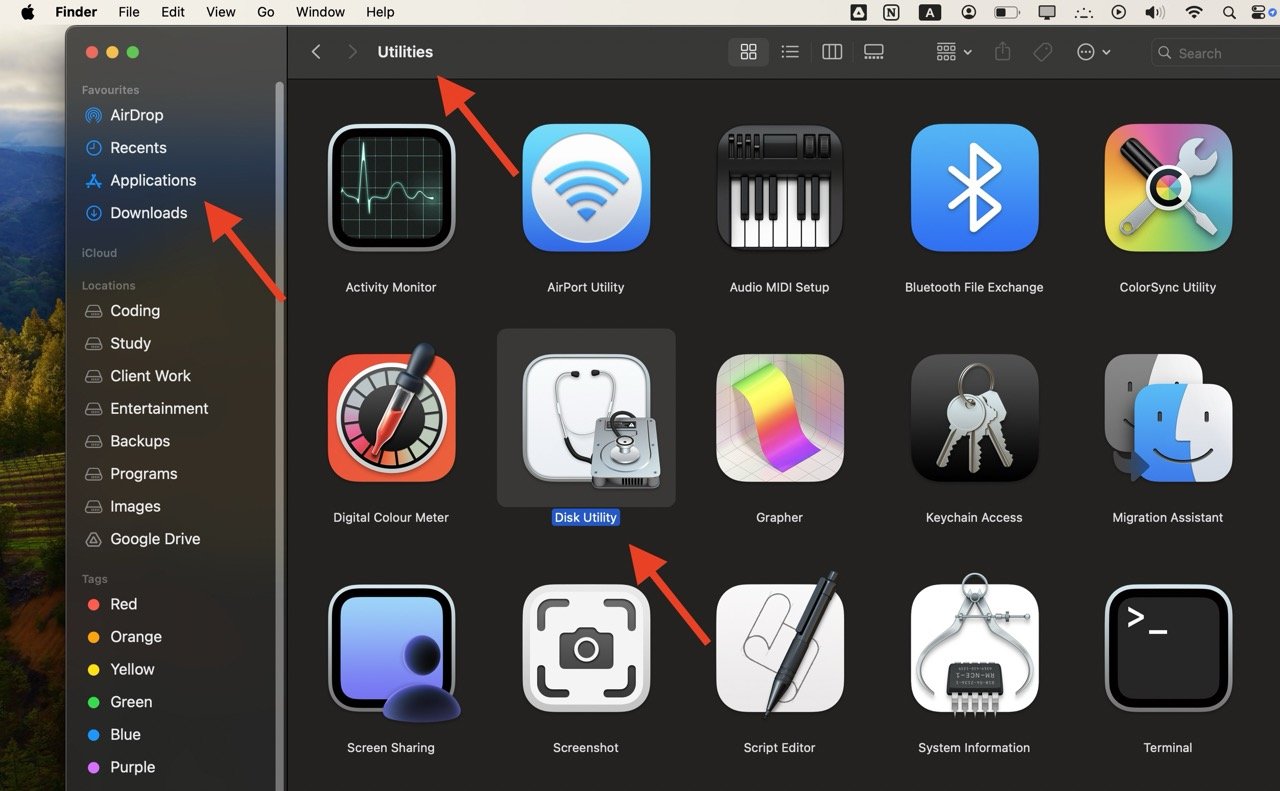
Note: If your Mac doesn’t recognize the SD card due to any reason, use an external card reader. Simply plug the card reader into one of the USB slots on your Mac and continue with the next steps in Disk Utility.
- In the Disk Utility window, find the list of available drives in the left-hand pane and select the specific SD card you want to format.
- Click “Erase” at the top of the window. A pop-up window will appear.
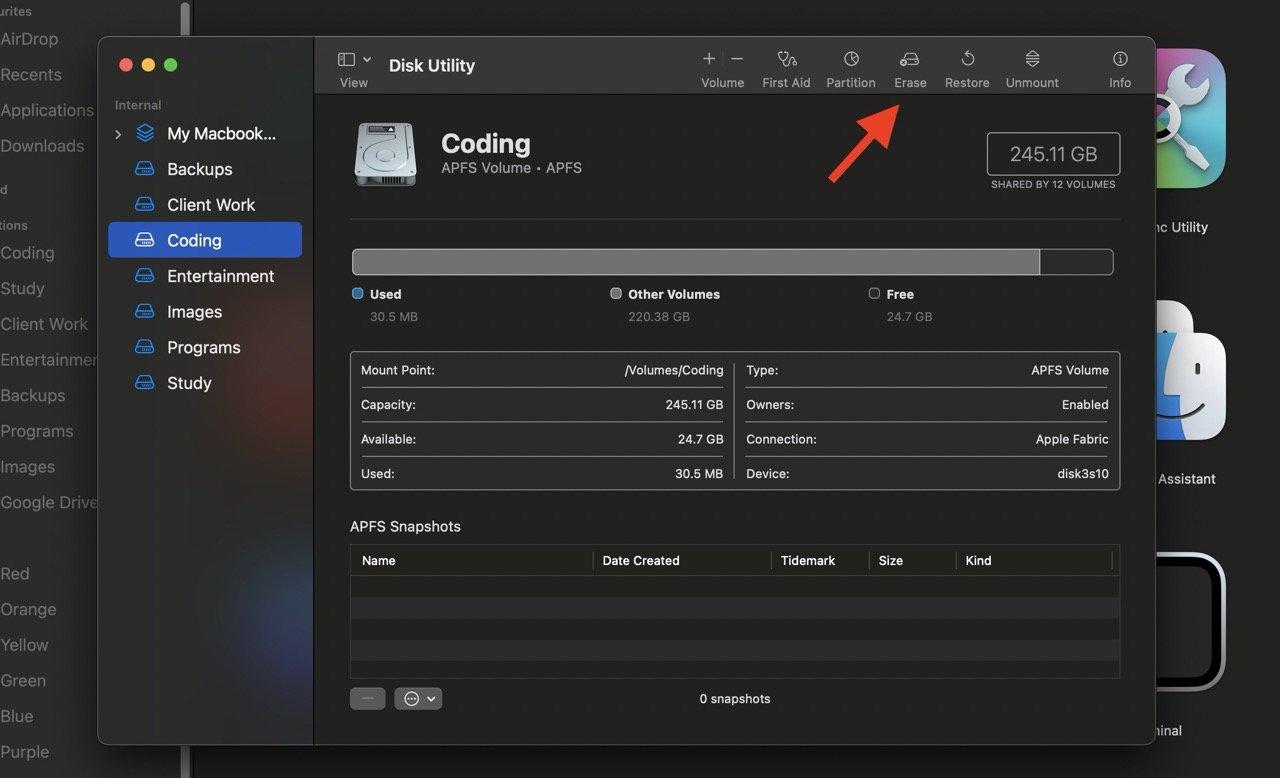
- In the pop-up window, pick a format type for the SD card (e.g., FAT or ExFAT, as per your camera’s compatibility). If you don’t know the right format for your card, check the manufacturer’s instructions in the manual.
- Next, select a name for the SD card (in case you have multiple cards). Lastly, include a sequence number or letter to recognize your SD card easily.
- Click “Erase” again to start formatting your SD card. This may take some time (a few seconds or minutes), depending on the SD card’s size, format type, and the speed of the card reader.
Method 2: Format SD Card Using Terminal
Terminal is another built-in macOS application that you can use to format an SD card on a Mac. It works on a command-line interface where you can enter specific commands to format and manage storage devices like an SD card.
Simply follow these steps:
- Insert the SD card into the SD card slot on your Mac. Or, connect an external SD card reader to a USB slot on a Mac using a cable and insert the card in the reader.
- Write “$ diskutil list” in Terminal and press Enter. This shows a list of connected drives on your Mac. Pick your SD card from the list.
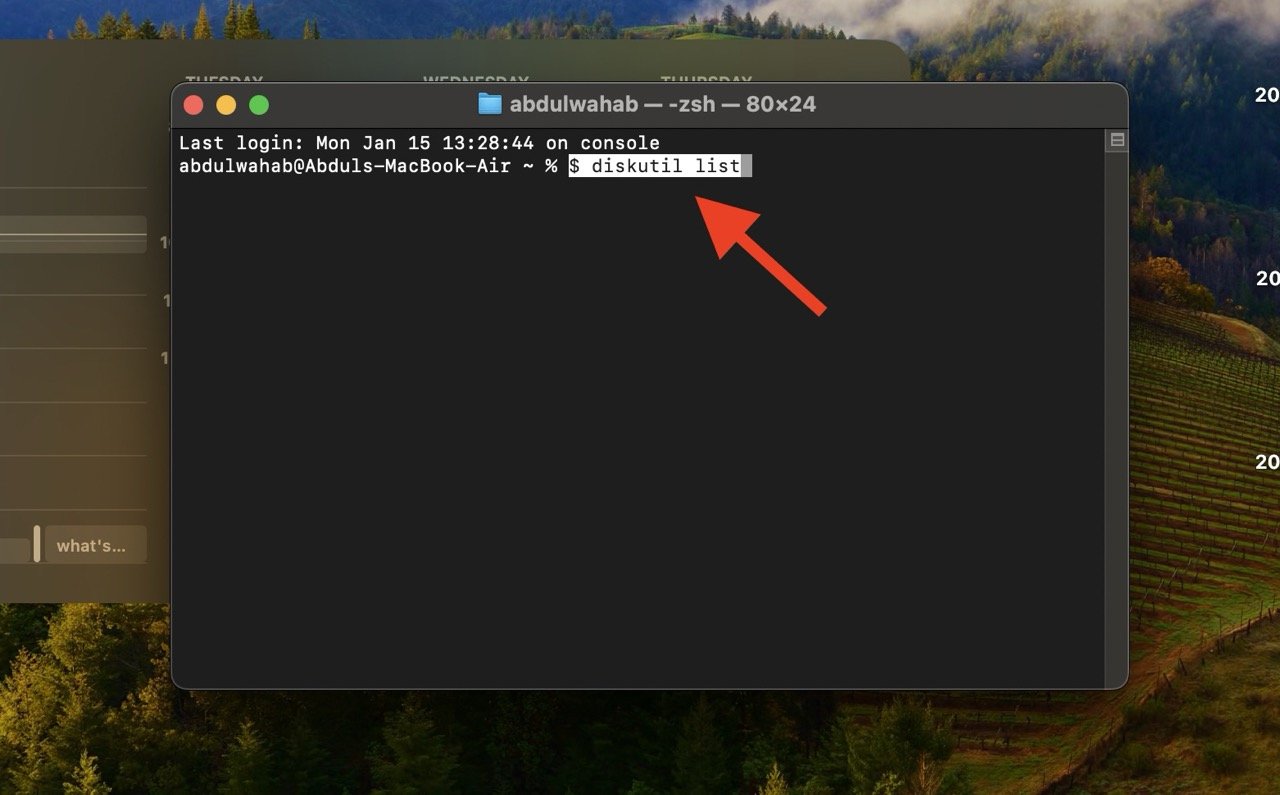
- Write “$ diskutil reformat disk2” and press Enter, but change “disk2” to your SD card’s name (that you recognized from the list in step 2). This step will format the SD card while keeping its current file format.
- But, if you want to change the SD card’s file system, write “diskutil eraseDisk FAT32 MBRFormat /dev/disk2” (again, replace “disk2” with your SD card’s name) and replace “dev” with your SD card’s location.
- When you are done, press “Enter” to format your SD card.
- Write “$ diskutil list” again in Terminal to check if the SD card is formatted correctly.
Method 3: Use Third Party Software to Format SD Cards on a Mac
Built-in tools are good for formatting SD cards on your Mac. But there are also other options, like third-party tools, that offer advanced features over built-in tools. Two such useful third-party tools to format SD cards on Mac are SD Formatter and iPartitioner.
SD Formatter: Free to Use
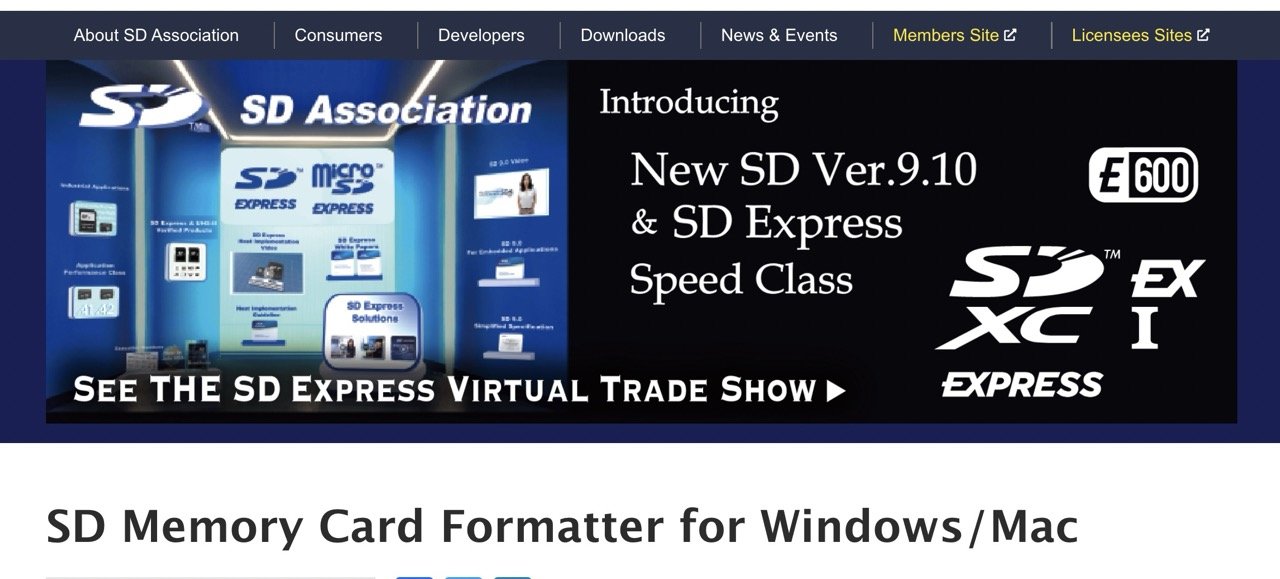
SD Formatter is a free tool for formatting SD cards on your Mac, especially microSD cards for phones or cameras. You can download it from the official website, and it won’t harm your devices during formatting.
Furthermore, it works with different types of cards, and you can choose between Quick and Overwrite format options. Plus, it also supports high-capacity memory cards like SDXC and microSDXC cards from 32GB to 2TB.
iPartition: Free to Use, But Advanced Features Require a Fee
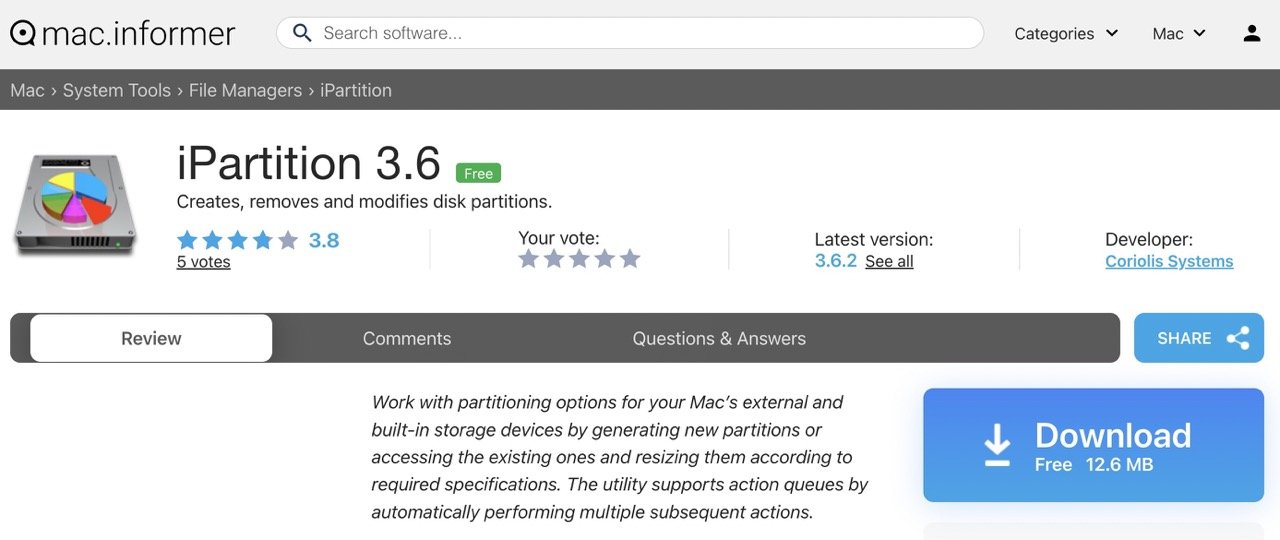
iPartition is another useful tool for organizing, deleting, and formatting storage drives on your Mac, including removable ones. It’s quick and works well with both regular flash drives/SD cards and bigger external hard drives.
Moreover, iPartition can create, delete, resize, move, or clone partitions on hard drives. It can also resize Mac OS Extended (HFS) partitions and Windows partitions while keeping their contents intact.
Because of these advanced features, iPartition comes with a fee. However, you can try it for free and buy the full version if you need its premium features.
How to Remove SD Card Properly
After formatting is done, safely remove the SD card from your Mac by doing any of the following:
Option 1: Drag the SD card icon to the trash icon in the Dock. The system treats it as if you are ejecting the device. However, dragging to the trash doesn’t delete any files; it’s simply a way to signal to the operating system that you want to safely disconnect the device before physically removing it.
Option 2: Click the eject icon in the Finder by following these steps:
- Open the Finder on your Mac.
- Locate the SD card in the list of devices or on the desktop.
- Look for the eject icon next to the SD card’s name.
- Click on the eject icon to safely disconnect the SD card.
- Wait for the icon to disappear, indicating that it’s safe to remove the SD card from your Mac.
Once the SD card is ejected, you can physically remove it from the card slot or card reader. Next, you can insert the SD card back into the device where you intend to use it.
Final Words
Formatting SD cards with a Mac is easy, as all you need is to use built-in tools to do that. The process becomes even more straightforward if your Mac has an SD card slot. But if there is no slot available, an external SD card reader should work just fine.
Apart from formatting, you can also copy or move photos, videos, or documents from your Mac to your SD card. Third-party tools offer even more extra features, like recovering lost files from your Mac’s SD card!
If you've any thoughts on How to Format SD Cards on Mac, then feel free to drop in below comment box. Also, please subscribe to our DigitBin YouTube channel for videos tutorials. Cheers!
