Are you worried about the slow performance of your Windows PC? It may occur due to apps installed on your machine that you do not use. On Windows 11 you get pre-installed several apps that most users barely use. These apps are referred to as bloatware.
Besides pre-installed and third-party apps, cached app data stored in the hard drive slows down your computer significantly and consumes the storage. It is important to remove such apps and data from the PC.
Several third-party and Windows apps installed on Windows 11 are configured to launch during the Windows startup. Once your PC boots up, these apps also open automatically one after the other slowing down your computer’s functioning. This guide explains different methods to debloat Windows 11 to experience better performance.
Top Ways to Remove Unwanted Apps from Windows 11 PC
There are different methods available for Windows users using which you can easily debloat apps on Windows PC. So, let’s get started with them:
1. Remove Bloatware Via Windows Settings
You can use the Windows Settings page to debloat Windows PC and improve performance.
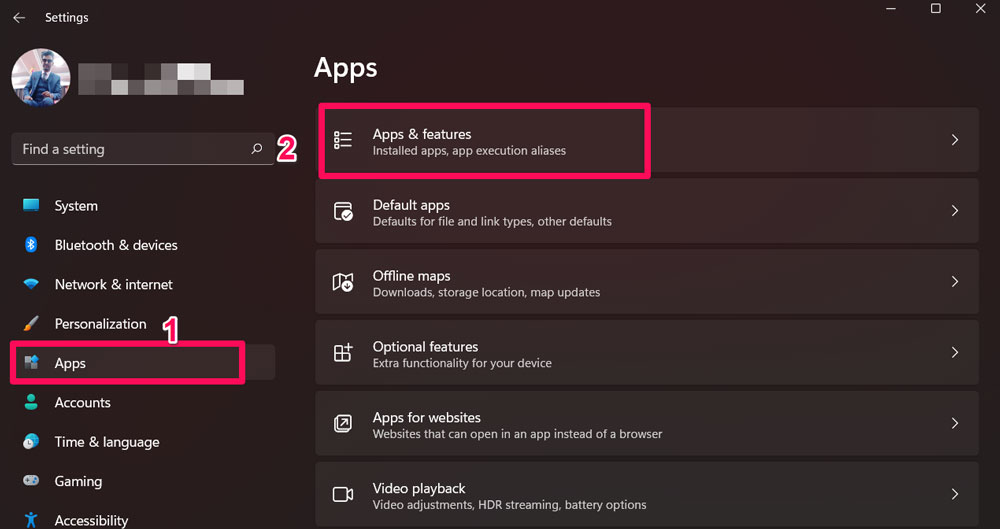
- Initially, press Win+I and open the Windows Settings page.
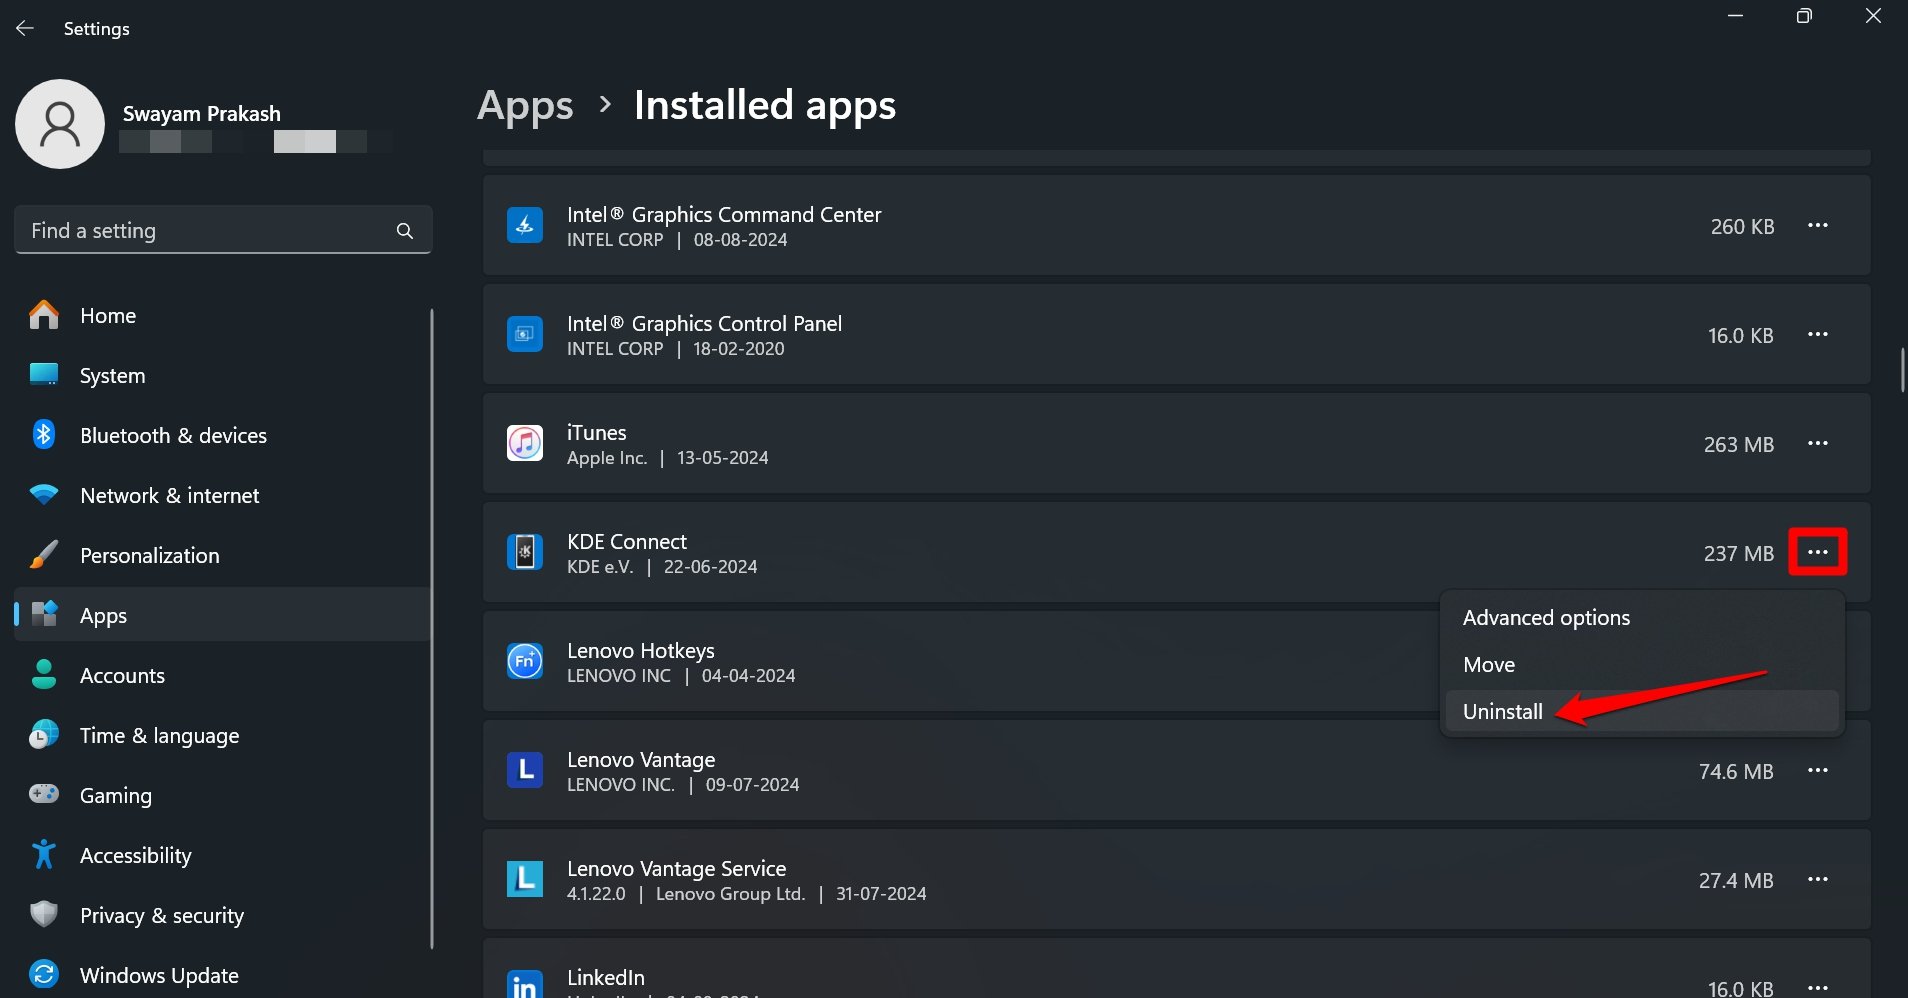
- After that, go to the Apps section > Apps and Features.

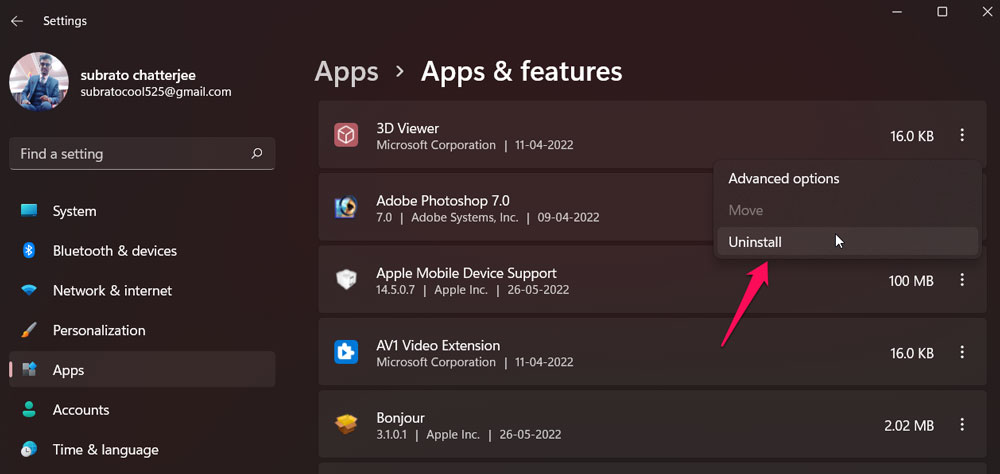
- Now, select the app you think consumes most of your system resources and tap the three-dot button.
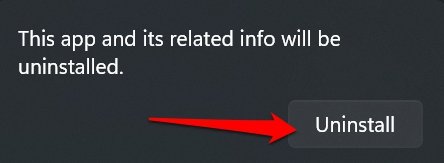
- Then, hit the Uninstall option from the next drop-down menu.

NOTE: Along with removing the bloatware apps, delete the cached data, temporary files and log files to improve the computer’s overall performance.
That’s it. Repeat this for the other applications. However, there are chances that some of the system applications don’t get deleted from your system using this method as you need to perform some advanced tricks to remove them.
2. Via Power Shell
If you like to automate things, use a simple PowerShell script to remove bloatware from your PC. The script removes all the pre-installed apps on Windows 11, turns off telemetry, and disables Bing from Windows search.
- Download the PowerShell Script here. [Zip File]
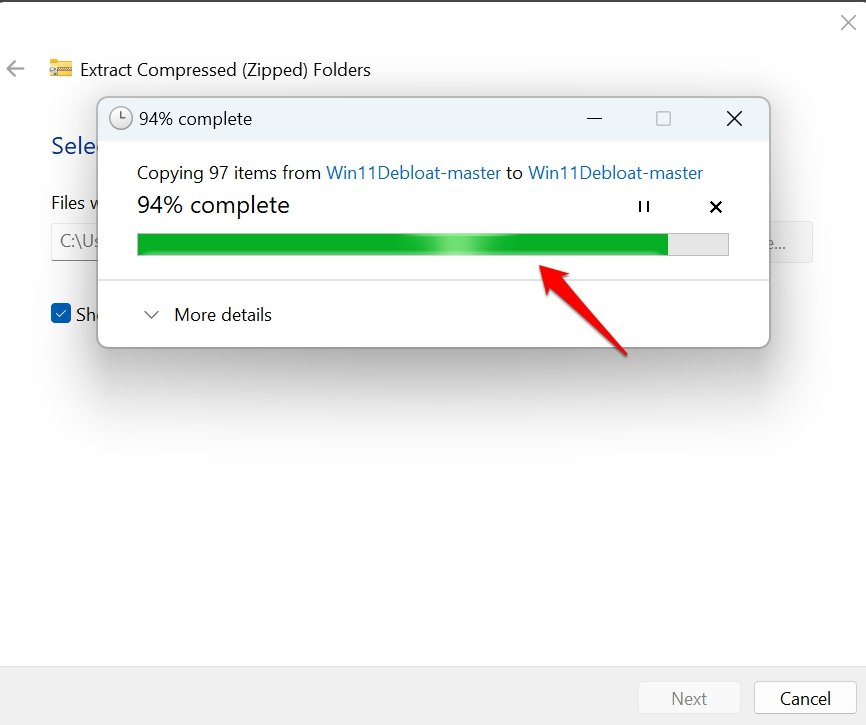
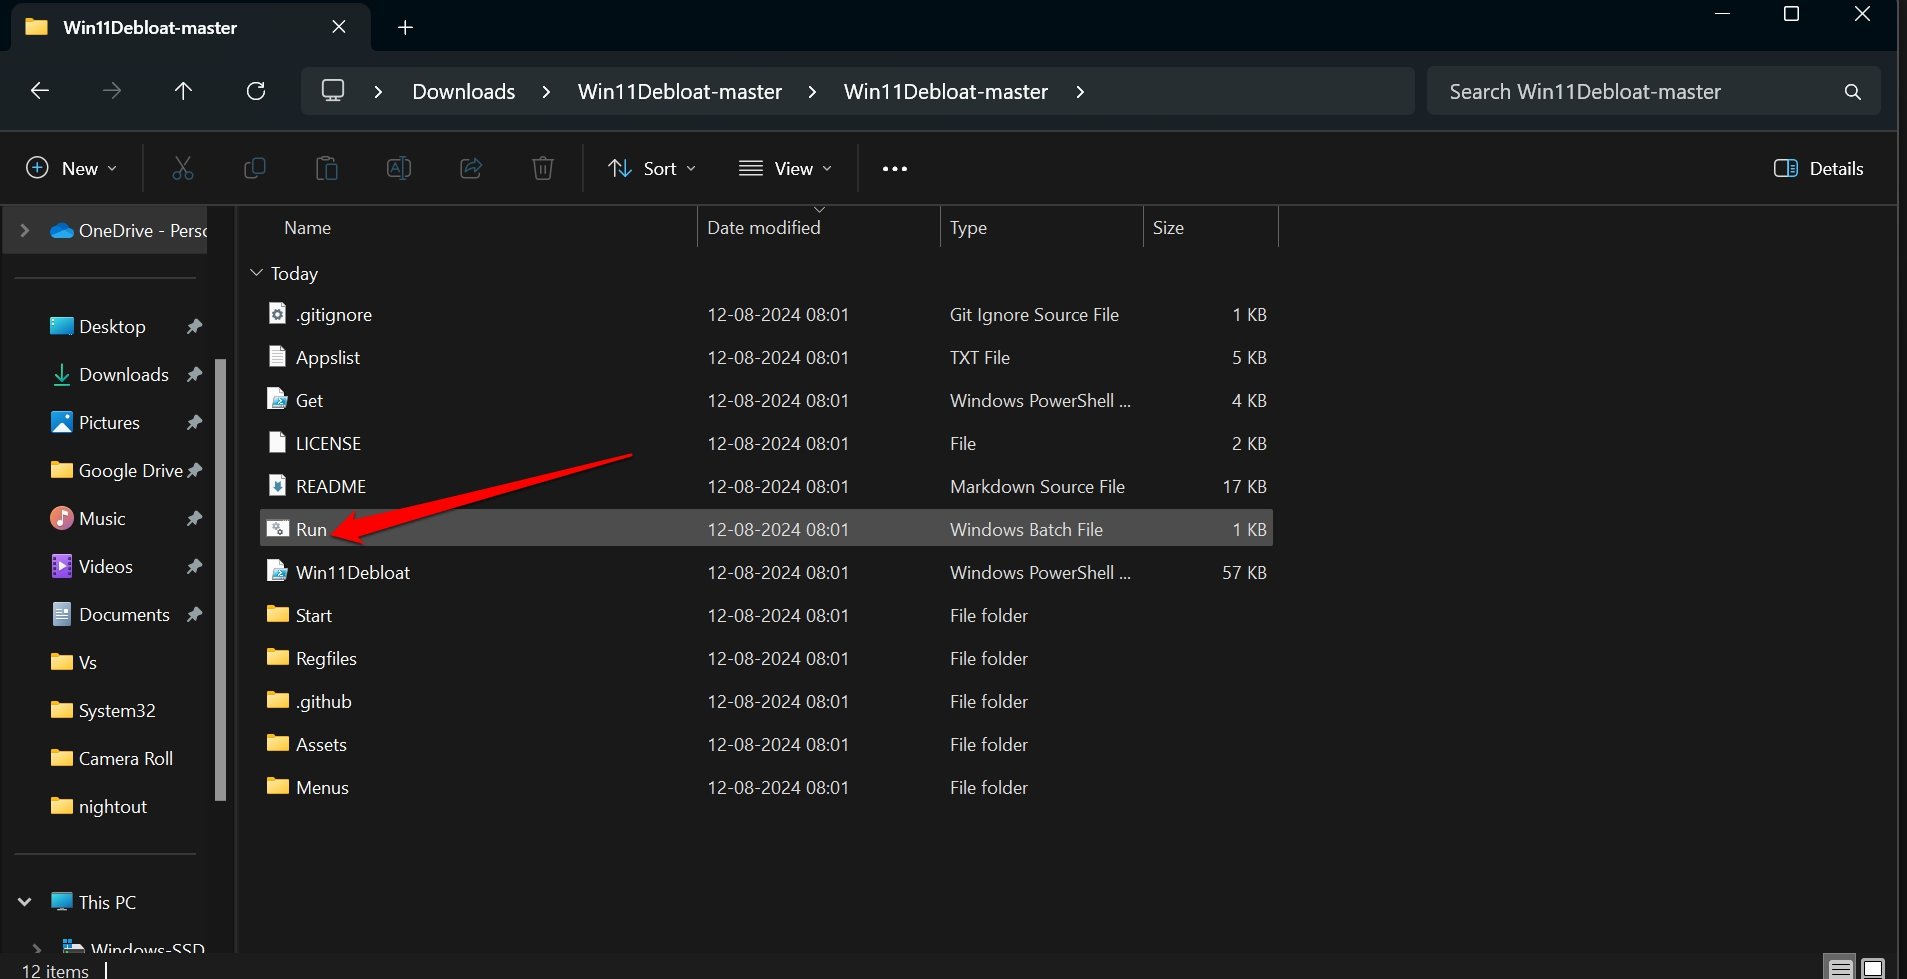
- Extract the Win11Debloat folder.

- Find the Run.bat file and double-click to run it.

- If you see the UAC Permission window, comply to allow the script to run.
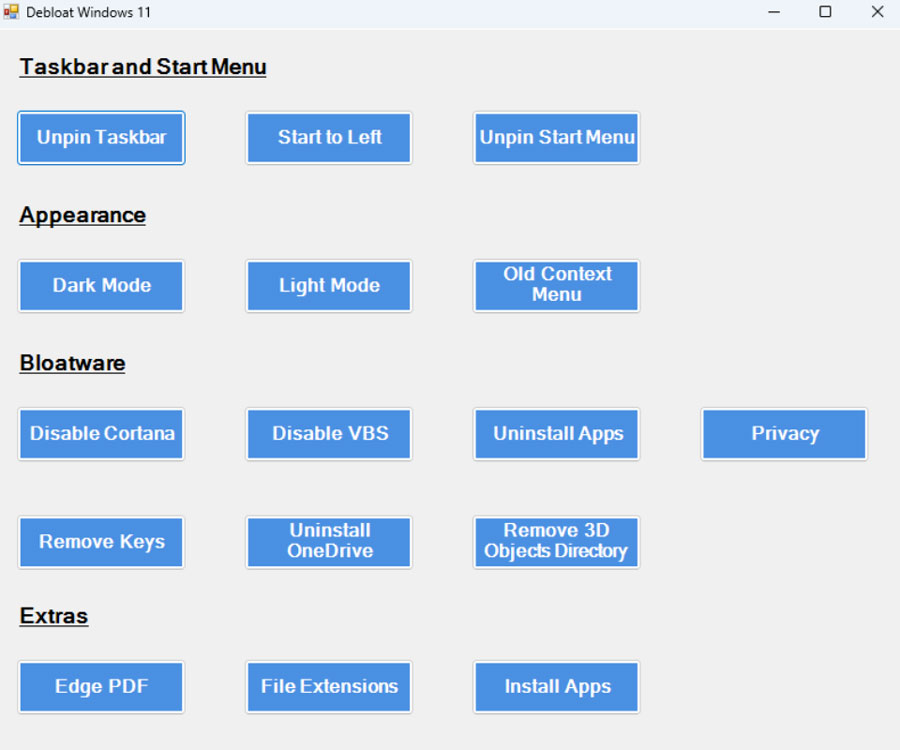
- Select between the default or custom mode.
- Follow the instructions on the screen to run the script and debloat your PC.
Visit GitHub to understand the technicality behind the Win11Debloat script. Anytime you need the uninstalled bloatware back on your PC, go to the Microsoft Store to reinstall the apps.
Other Method
- Firstly, press Win+X and select the Windows PowerShell (Admin) option.
- Then, execute the command:
iwr https://git.io/debloat11|iex
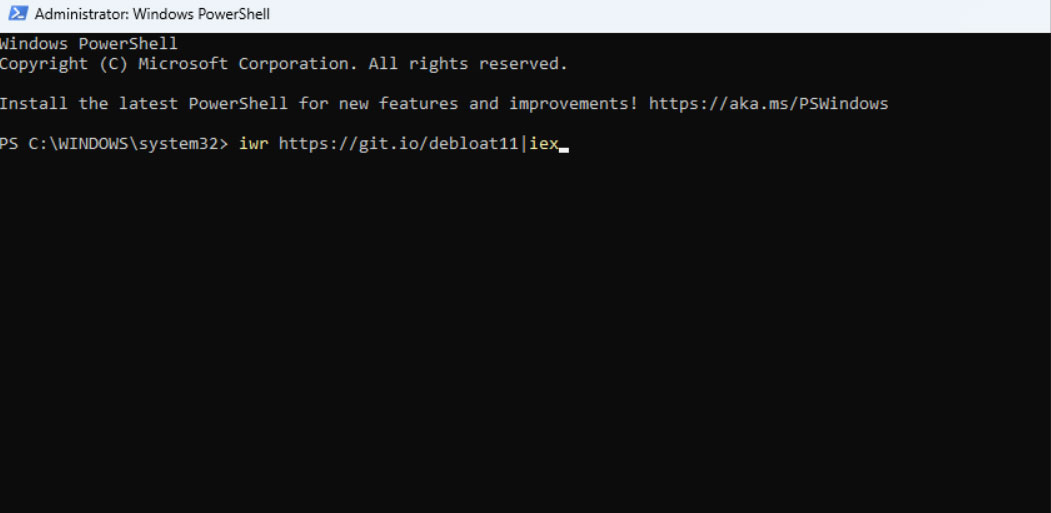
- In the Bloatware section, select the feature that you wish to remove from your Windows 11 PC and follow the on-screen instructions to remove it permanently.

Now, check if your system performance increased or not. However, most probably this will work for you, but in case it doesn’t give you proper results, then don’t worry! We have more options for you.
3. Delete Cached Data from Windows Hard Drive
To provide swift access to apps, data associated with specific apps are cached by Windows OS. Even though you delete an app (supposed bloatware) from the PC, its cached data stays on the hard drive and consumes storage.
Here are the steps to delete the cached data in Windows 11.
- Press the Windows + E shortcut to launch the File Explorer.
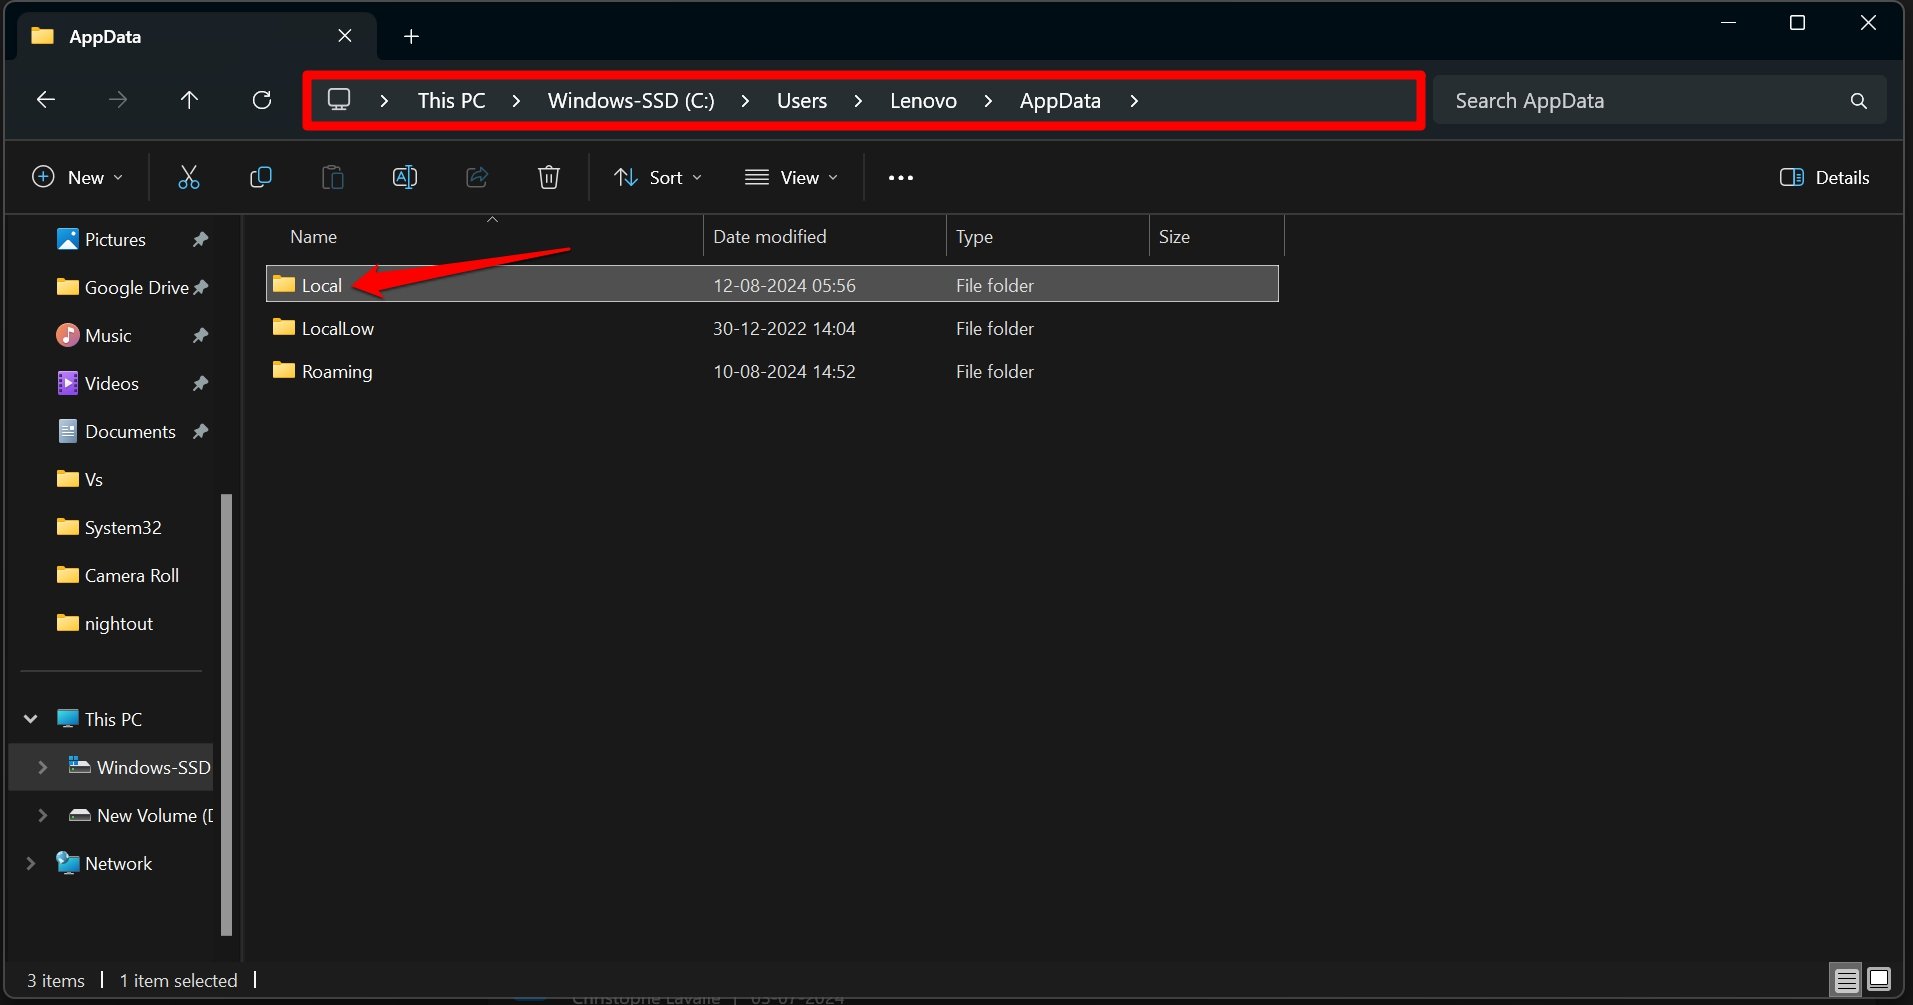
- Click the C Drive under This PC.
- Follow this path.
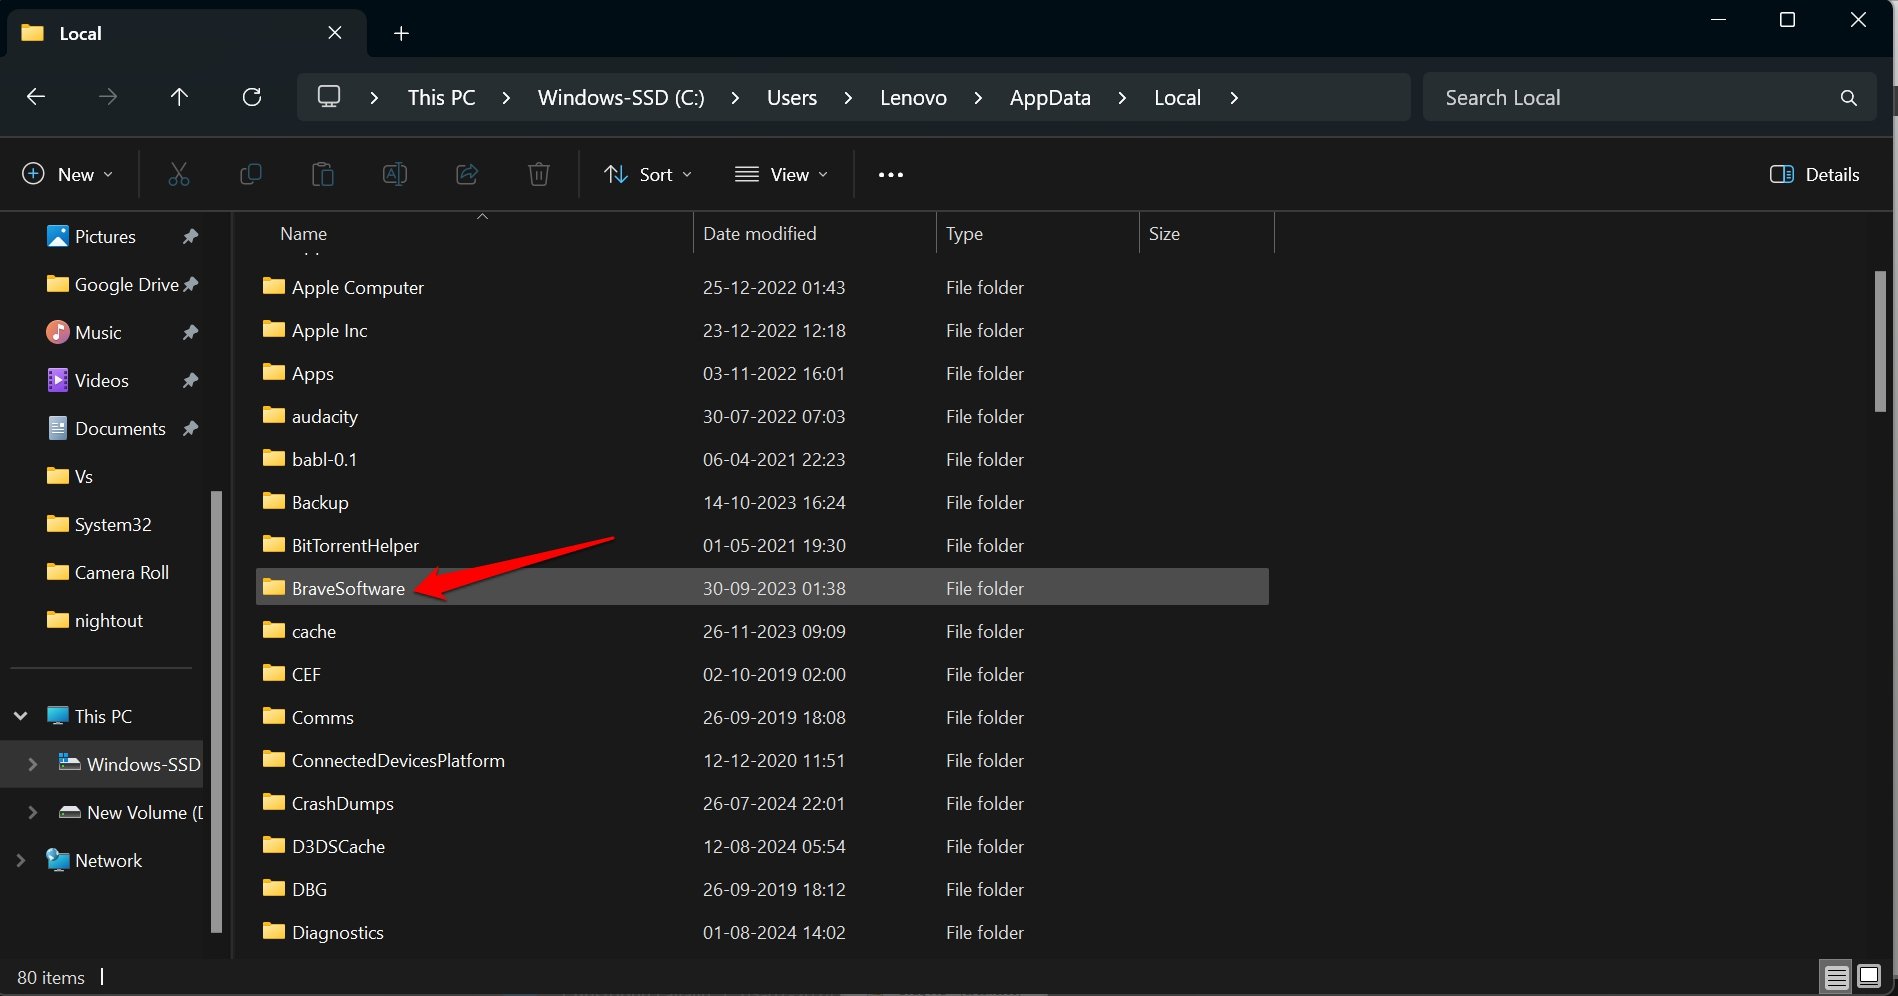
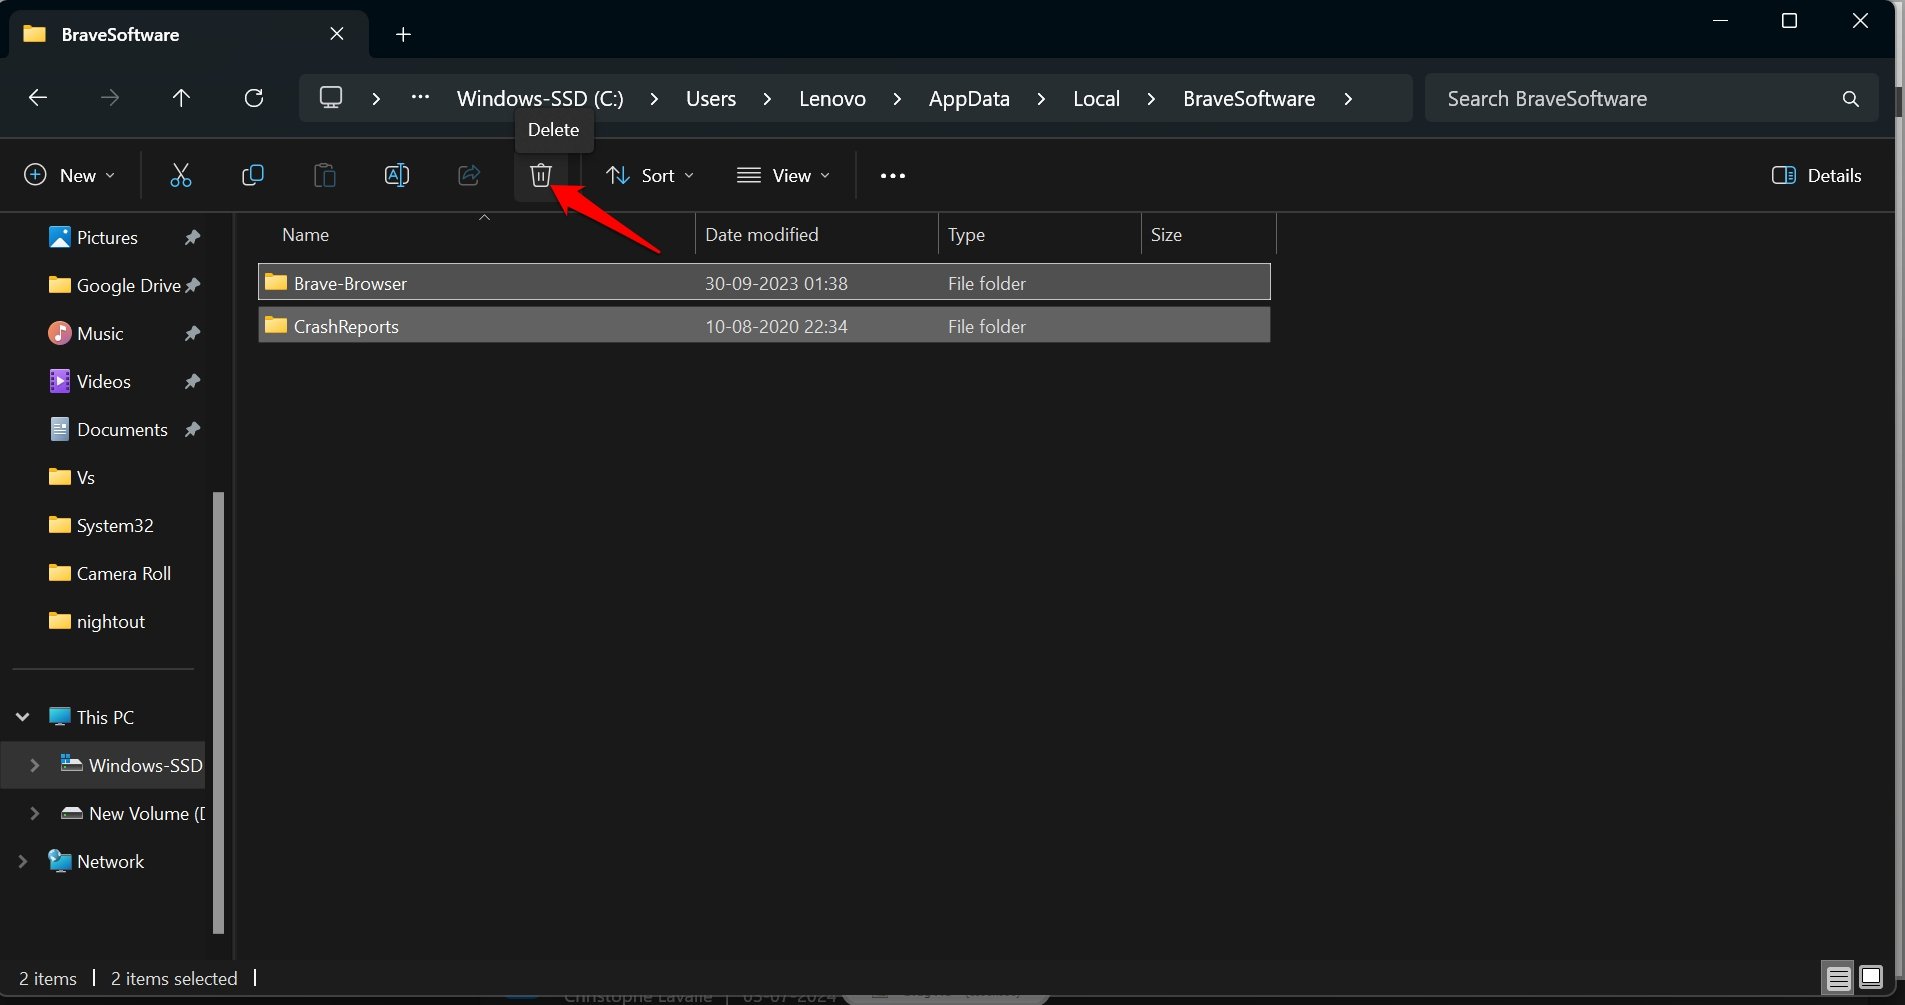
Users > Username > AppData > Local.

- Open the app data folder of any app.

- Select all the folders and press Shift + Delete(or click the trash icon)to remove them.

- Repeat the steps for the apps you have uninstalled.
Usually, the AppData folder stays hidden. To view it, click View > Show > Hidden Items.
NOTE: Replace the “Username” with the actual username of your PC. For example, you can see my PC username is Lenovo.
4. Use Third-Party Tool
You can use a third-party tool if the above two methods don’t work for you. You can simply hover over to the GitHub page and get a debloater software for Windows 11. However, several users are there who have reported that using the GitHub debloated for Windows 11, they were successfully able to remove the unwanted feature to make their PC fast. So, try this and let us know if this method helped you.
5. Turn Off Apps at Windows Startup
Having a lot of apps launching during the Windows startup also slows down the computer. Almost none of these third-party apps are required during the bootup phase.
Follow these steps and turn off the third-party apps from opening at the startup.
- Press Windows + I to launch the settings.
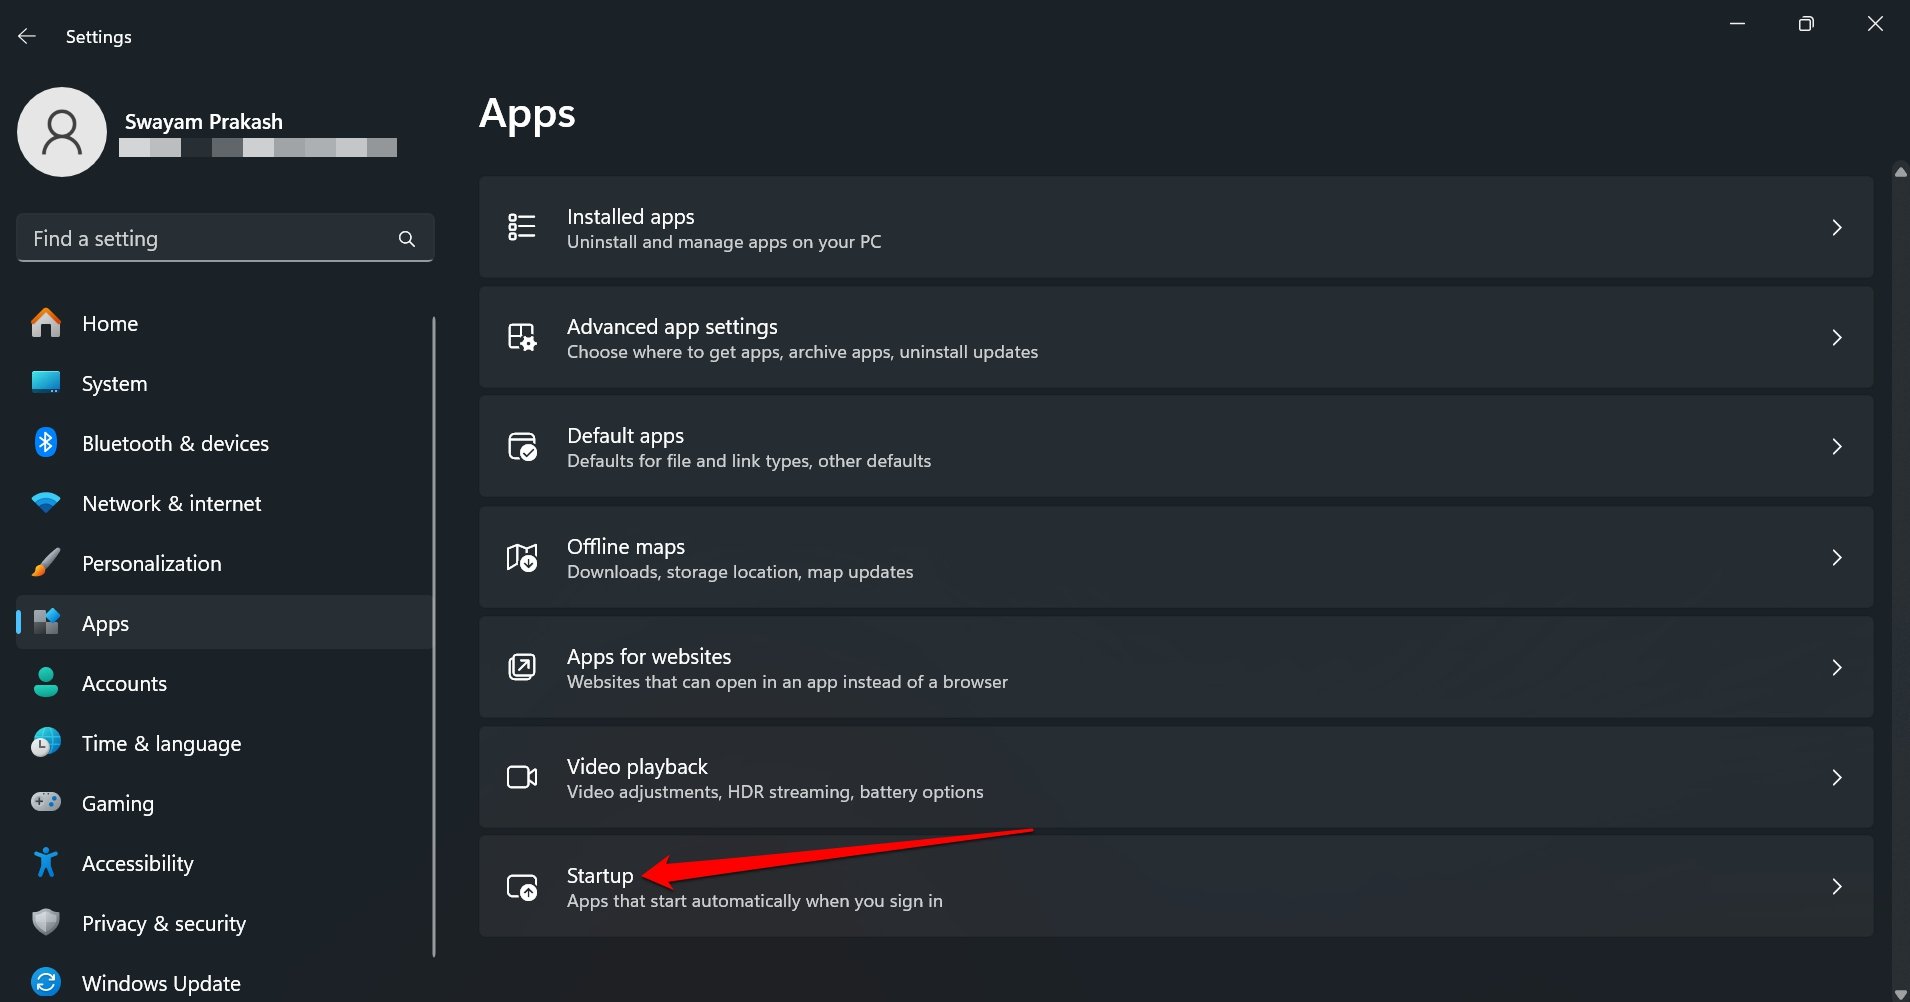
- Click Apps > Startup.

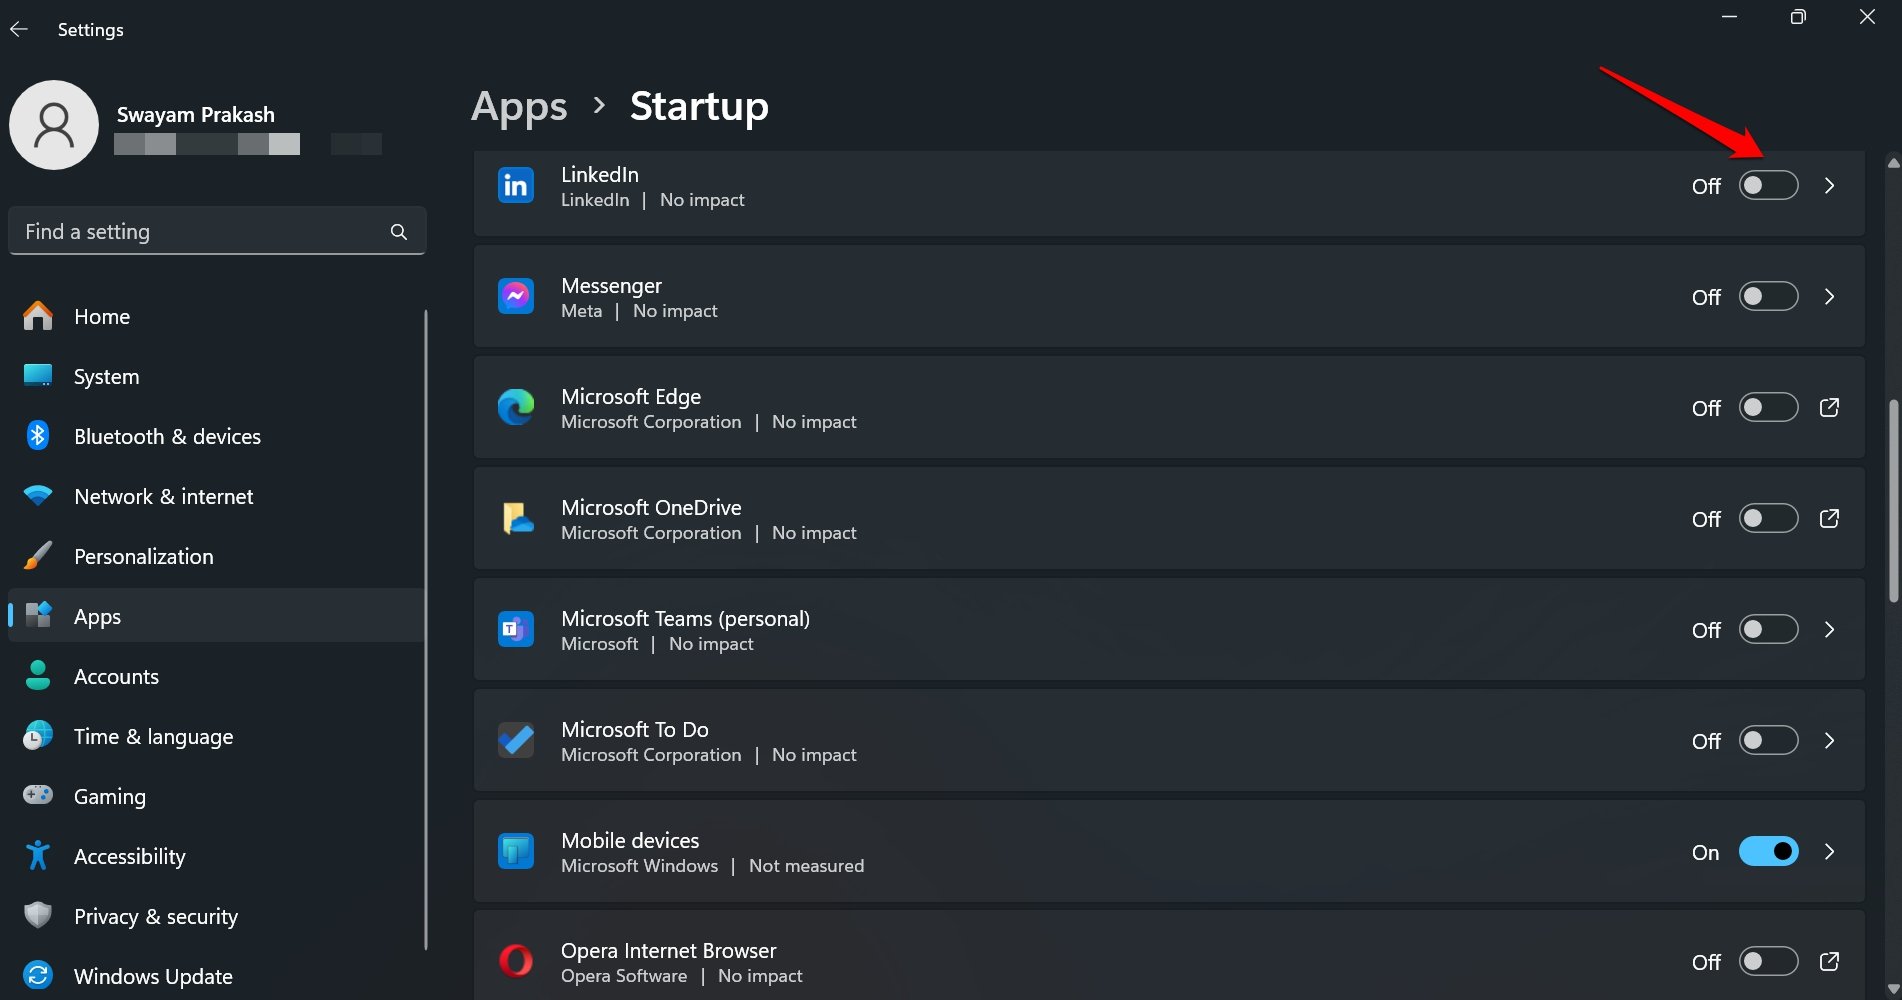
- Press the toggle next to the apps you don’t want to launch at startup.

It is better to uninstall the unused apps to debloat the PC using any of the steps mentioned in this guide.
6. Via DISM
In case nothing helps you remove the bloatware from your Windows 11 PC, then you can try running the DISM command on Windows Power Shell. So, to do this, you have to perform the needy steps we have mentioned below:
- First of all, press Win+X and select the Windows PowerShell (Admin) option.
- Then, execute the command:
DISM /Online /Get-ProvisionedAppxPackages | select-string Packagename

- Now, the script will show you all the programs that are installed on your Windows 11 PC. So, you have to manually locate the app that you want to remove and copy it.
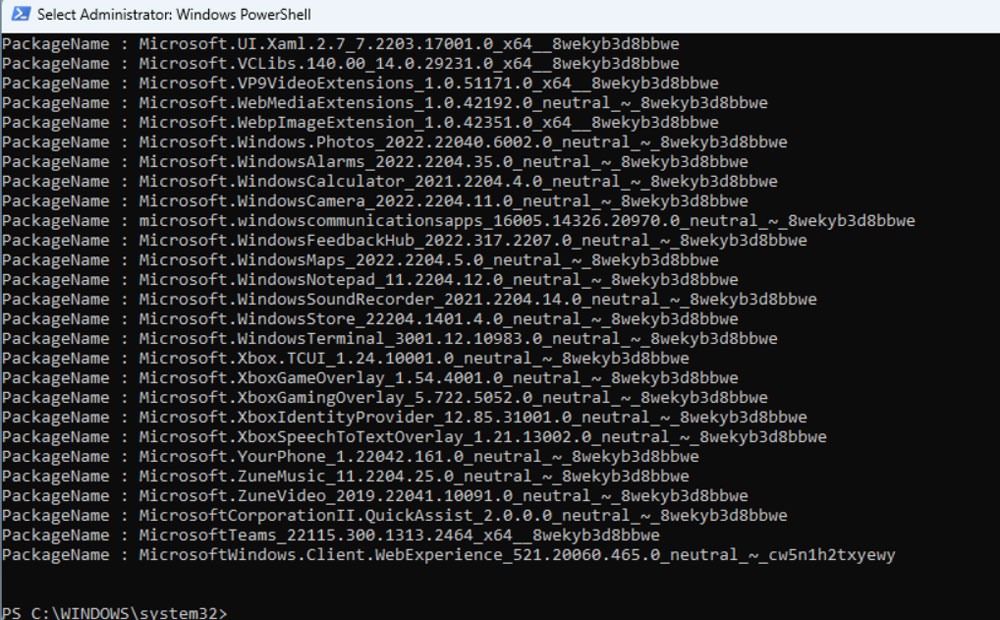
- Then, again execute the command:
DISM /Online /Remove-ProvisionedAppxPackage /PackageName: Abc
Don’t forget to replace the ABC with the application path you have copied before and hit the enter key to initiate. That’s it. This will remove the particular application from your PC.
7. Uninstall Apps from Windows Storage
Access your computer’s storage to eliminate the unused apps on it. You may also summon the disk cleanup tool to view the installed apps you don’t use and remove them instantly.
- Press the Windows + I shortcut to open the Windows 11 settings.
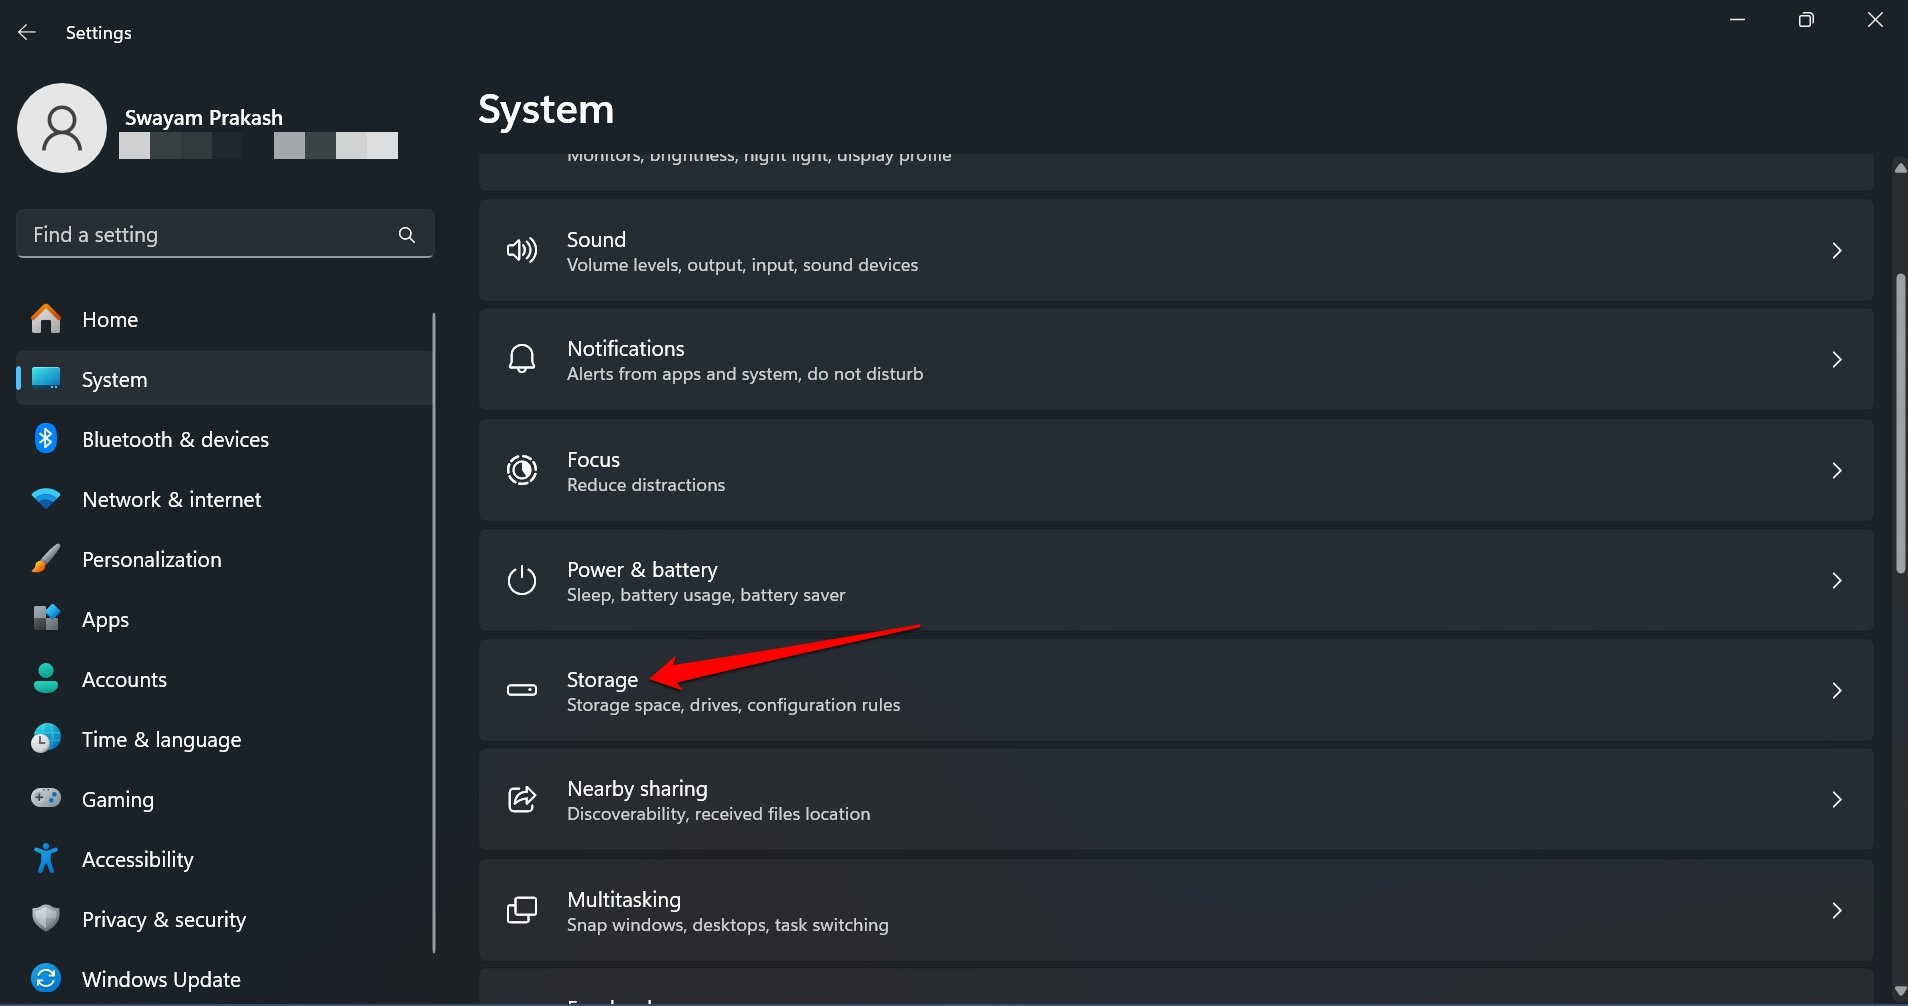
- Click on System > Storage.

- Go to Installed Apps.
- Click the overflow menu button and select Uninstall.

- Again press Uninstall to confirm.

NOTE: Along with removing the bloatware apps, delete the cached data, temporary files and log files to improve the computer’s overall performance.
Conclusion
There is no need to keep unused bloatware on your PC and slow down its performance. Automate the debloat process using the PowerShell Script or manually uninstall the applications from the Windows 11 settings. Also, get rid of the cached data, and temporary files associated with unused and uninstalled apps.
If you've any thoughts on How to Debloat Windows 11 to Improve Performance, then feel free to drop in below comment box. Also, please subscribe to our DigitBin YouTube channel for videos tutorials. Cheers!
