Android TVs are the best place to kill your free time. Similar to a smartphone, it also features plenty of applications that you can use. It also comes with the option of Google Assistant, which you can use to access TV using your voice command. However, for doing all this exciting stuff, you must be connected to a Wi-Fi network.
With that said comes the topic of the day, i.e. how to fix WiFi not working on Android TV. It is a very common issue faced by Android TV users, and according to them it also occurs even while the Wi-Fi is working on other devices perfectly. Your Android WiFi may not turn on, WiFi is on but is not connecting to the internet, router signal may not be good for Android TV, and many other reasons for Android Smart TV WiFi not working.
So, without any further ado, let’s check out a different workaround to resolve WiFi not working on Android TV.
Android TV Not Getting Connected to WiFi? Here are Working Fixes
They can be several reasons because of which your Android TV can’t connect to Wi-Fi. So, let’s check them out one by one, along with their respective workarounds.
1. Change Date and Time
Sounds silly, but your Wi-Fi is not working if your Android TV doesn’t have the correct date and time. You will have to adjust the date and time settings to fix the issue. So, here are the steps you need to follow.
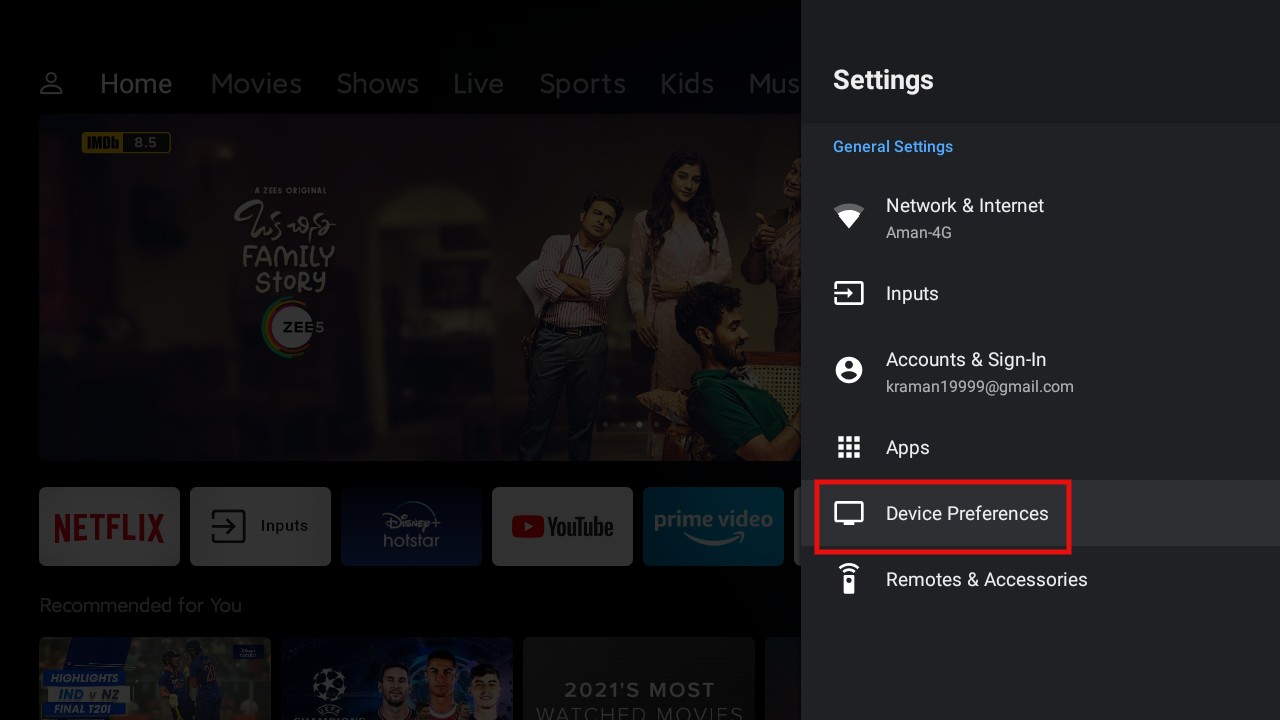
- Open Settings on your Android TV, and then select “Device Preferences“.

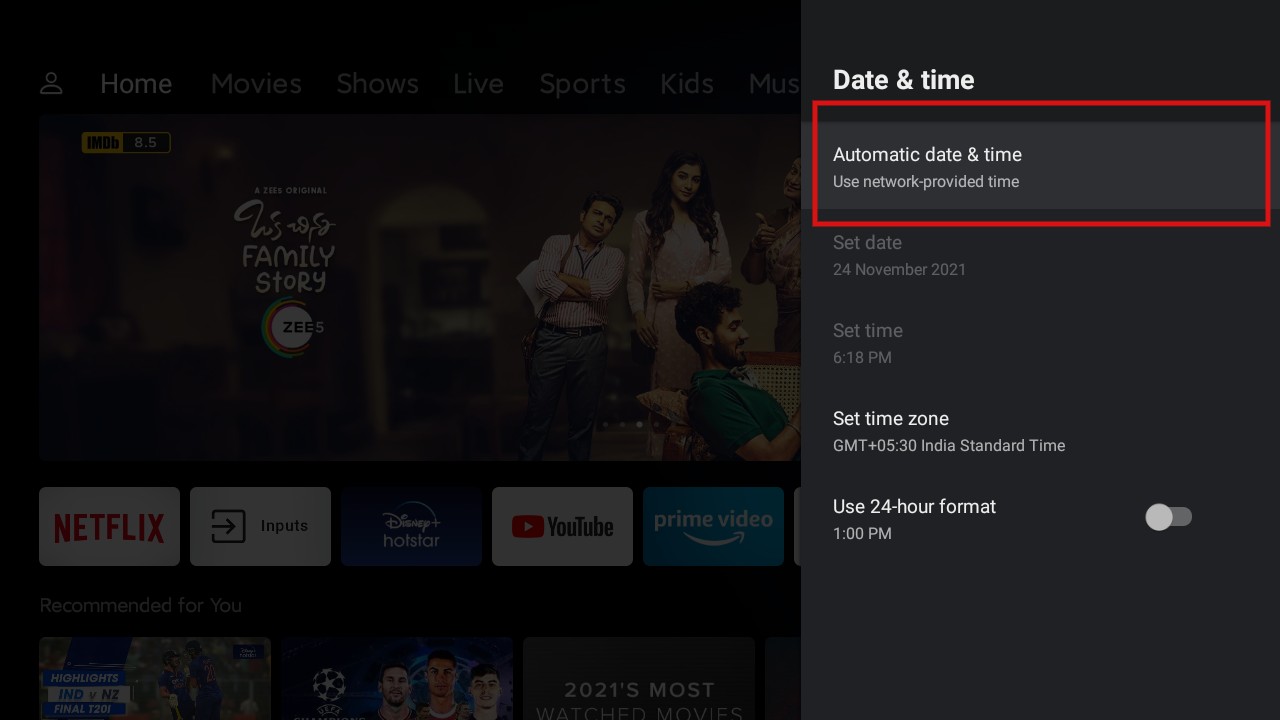
- Tap on “Date and Time” and select “Automatic Date and Time” on the follow-up page.

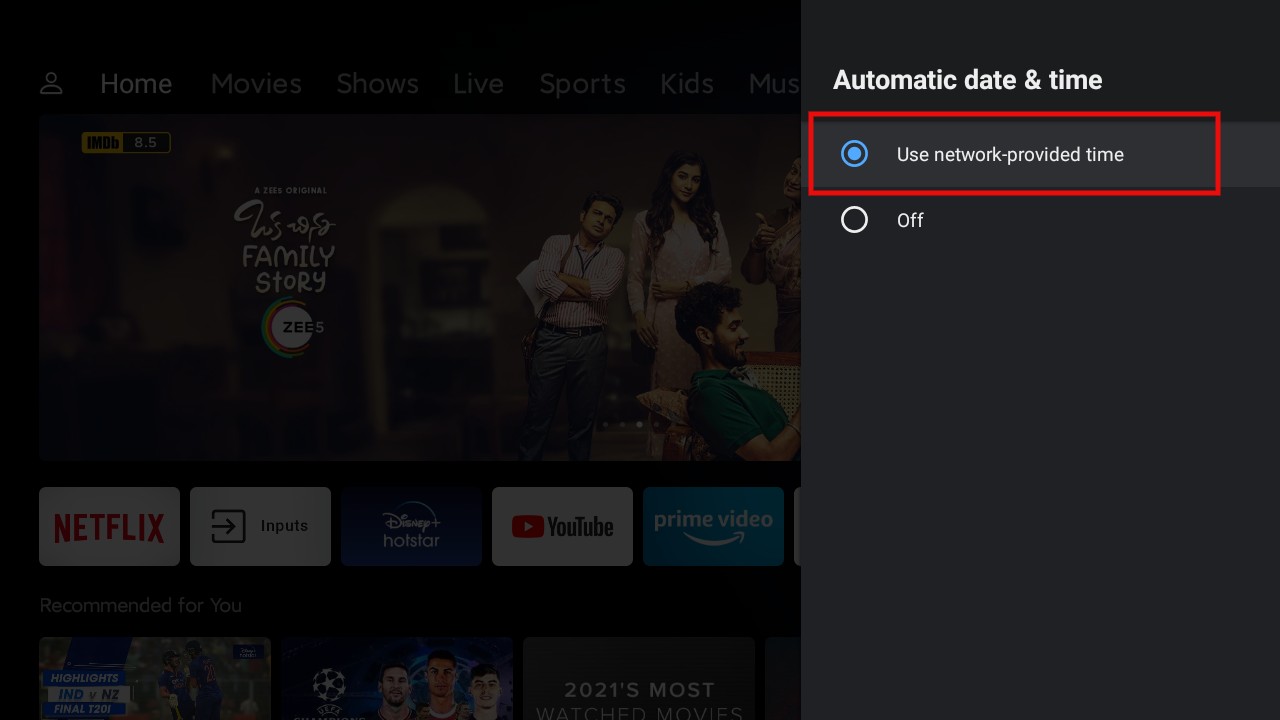
- Now, select the “Use network provider time” option.

That’s it. For most Android TV users, doing this workaround would have to solve the issue. This workaround is also helpful in solving the problem, “Connected, no internet“.
2. Restart Wi-Fi Connection
It might be the case that there will be a temporary error because of which your Android TV box is not getting connected to the Wi-Fi connection. For fixing this you can try turning it off then on the Wi-Fi connection on your Android TV.
3. Forget Wi-Fi Network
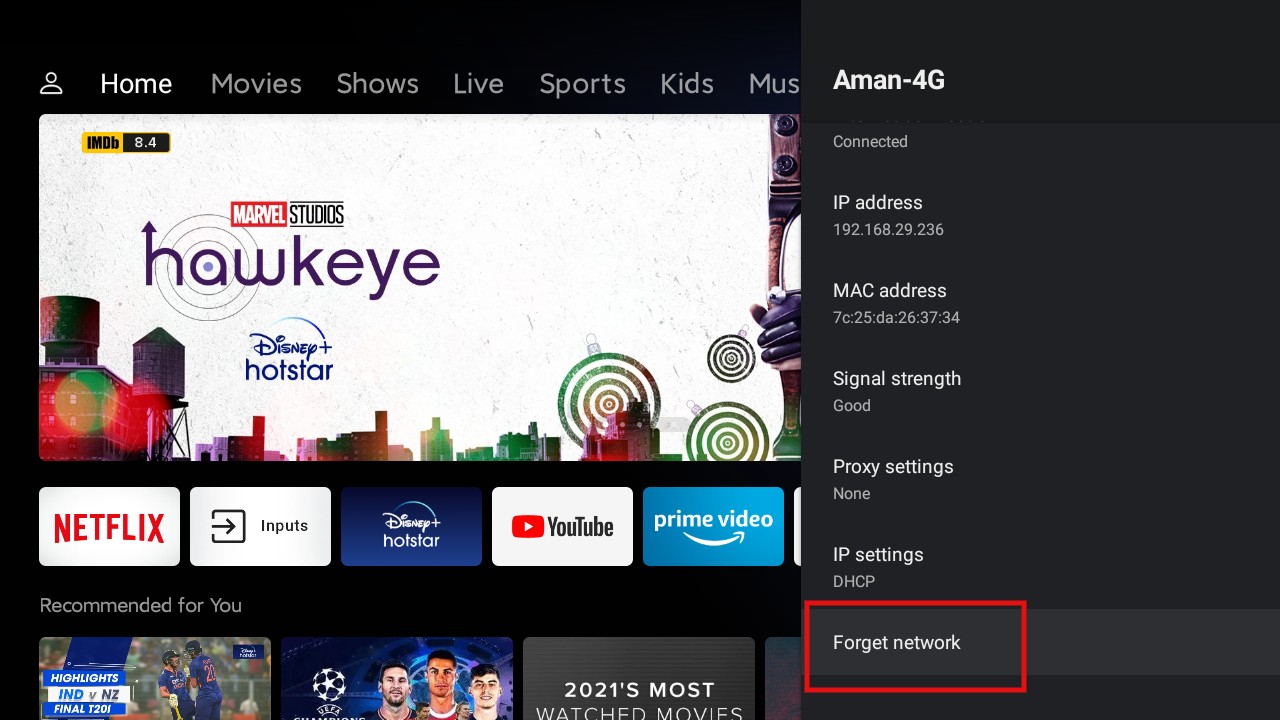
If turning off-on the Wi-Fi connection on doesn’t work for you, you can try the “Forget Network” option. Here are the steps you need to follow to get the work done.
- Tap on the Wi-Fi icon present on your Android TV.

- Choose your Wi-Fi connection, and then tap on “Forget Network“.
Now, reconnect with the Wi-Fi network by entering the password, and see if the issue is fixed or not.
4. Check Advanced Settings
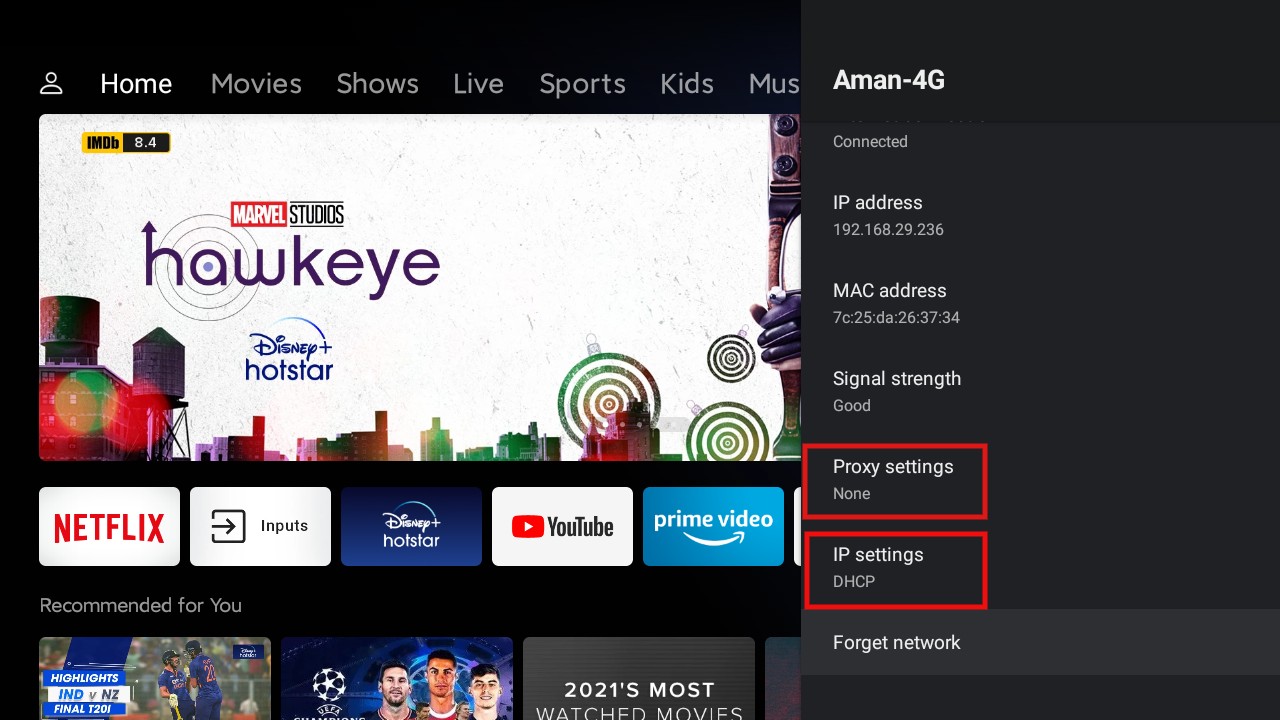
If the issue persists, then you’ll have to tweak with the advanced settings to get the work done. So, here are the steps you need to follow.
- Open Settings on your Android TV, and then go to Network and Internet.
- Tap on “Proxy Settings“, and set it to “None“.

- Next, tap on IP Settings and make sure it to set to “DHCP”.
That’s it. Your issue would have been fixed by now. If not, check out our next workaround.
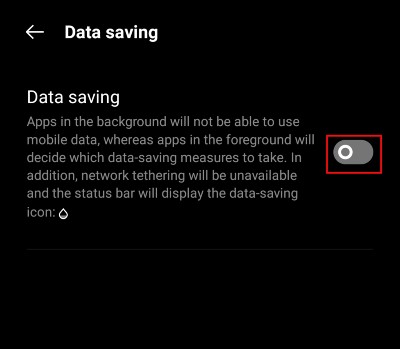
5. Disable Data Saver Mode (Android)
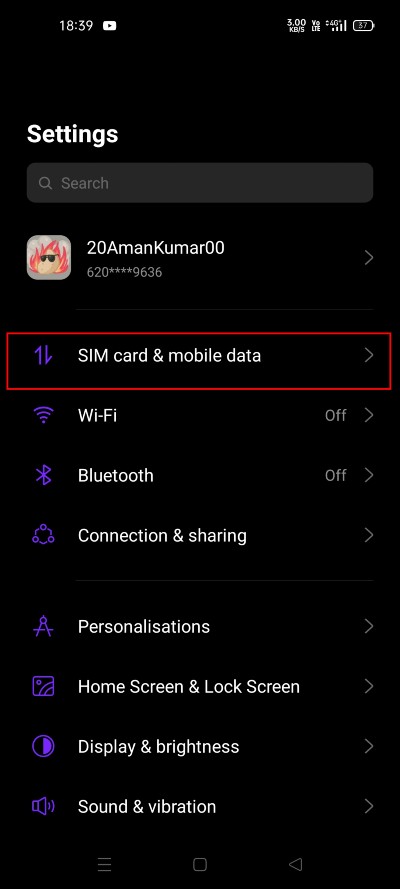
In case, you don’t have dedicated Wi-Fi connectivity, and you rely on your smartphone hotspot to access Android TV, then there’s a possibility that you might be facing this issue. It arises if you have data saver mode on your smartphone. So, here are the steps you need to follow to turn off data saver mode.
- Open Settings, and head towards the “SIM card & mobile data” option.

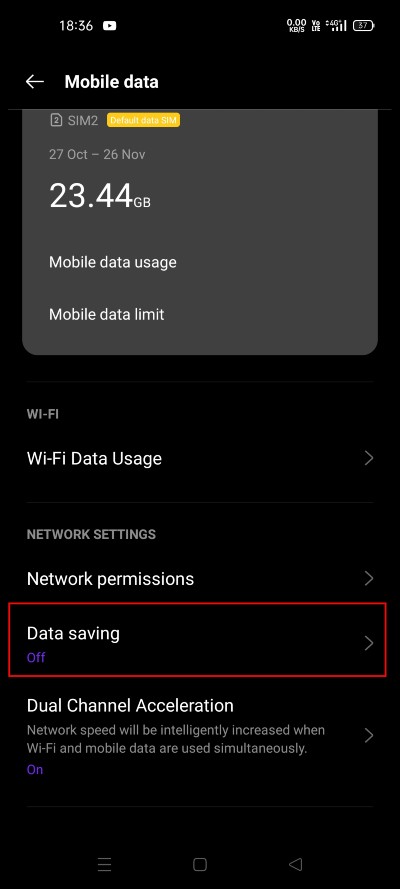
- Tap on the “Data Usage” option and then select the “Data Saving” option on the follow-up page.

- Now, turn off the Data Saving feature on the next page.

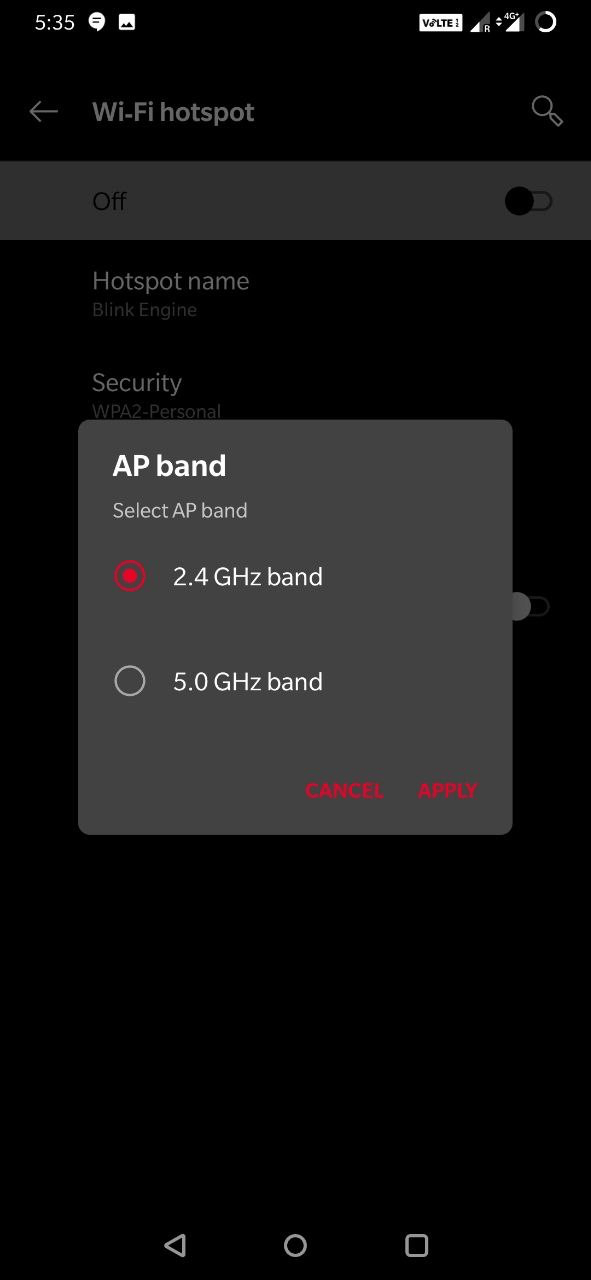
6. Change AP Band (Android)
Older devices generally use the 2.4 GHz band, while modern mobiles come with both 5 GHz and 2+ GHz. 5GHz might be a great idea to speed up the mobile hotspot, but it lacks the range, also the connected device(s) must have the supports for this frequency. White 2.4 GHz transfers data slightly slow, it has a good range and supports almost all devices.
Try switching the band and check if the internet is working. To do so;
- Go to Android Setting.
- Here click on the Hotspot and Tethering option.
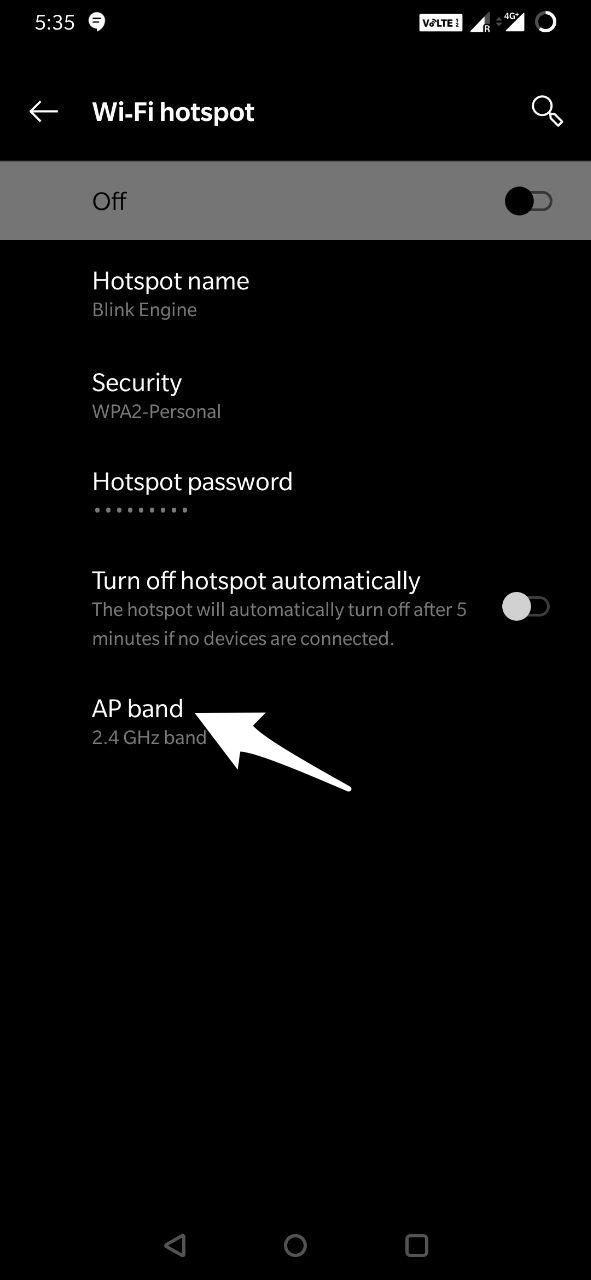
- Now open the Hotspot option and change the AP band
7. Reset Android TV
If none of the above-mentioned methods worked, the only option left with you uses to hard reset your Android TV. Although it will erase all the files, apps, and settings of your Android TV, it will make sure that you can connect your Android TV to the Wi-Fi network.
So, this was all about how to fix WiFi not working on Android TV. Let us know in the comments whether the above-mentioned fixes worked for you or not.
If you've any thoughts on How to Fix Wi-Fi Not Working On Android TV, then feel free to drop in below comment box. Also, please subscribe to our DigitBin YouTube channel for videos tutorials. Cheers!
