Windows 11 is the most advanced operating system from Microsoft. It has unique features like the new and advanced start menu, futuristic widgets, teaming up using Microsoft teams, viewing tasks and virtual desktops, etc. But even with all these features, Windows 11 is still prone to bugs.
When you set up Windows 11 on your PC, you go through a process called OOBE, or Out Of The Box Experience by Microsoft. OOBE is responsible for choosing the language and region, setting a password, accepting the license agreement, connecting to the internet, logging in or signing up for a Microsoft account, and more while setting up Windows 11.
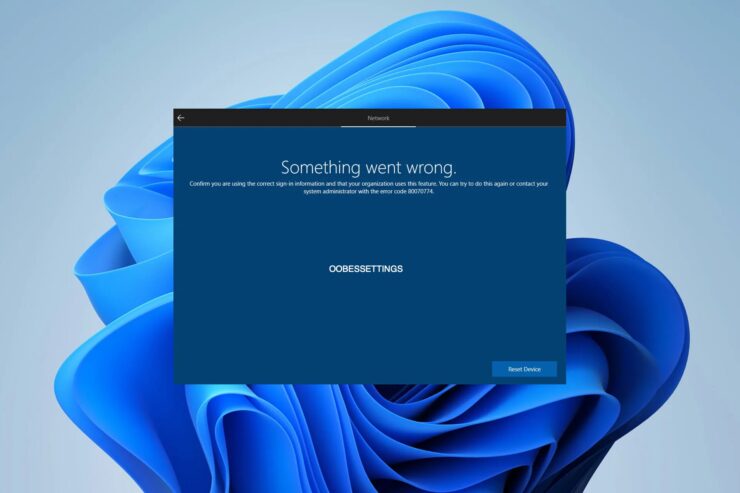
But sometimes, you may receive an error message saying, “Something Went Wrong.” Oobesettings may not open because of some faulty settings inside the Windows Registry. This issue can be quickly resolved as it doesn’t involve any hardware.
Read the article to find out how to fix oobesettings in Windows 11. But first, let’s know more about why oobesettings error occurs in Windows 11.
Why does oobesettings error appear in Windows 11?
The oobesettings in Windows are used to reset settings and preferences in Windows 11. It helps you configure your device after a network or hardware change, such as adding or removing add-in cards and changing the power settings to install new software.
It functions as a configuration for the operating system by witnessing essential hardware components and updating system settings. It is a part of Windows that doesn’t require any installation to run.
The OOBESETTINGS error is a prevalent issue among Windows 11 users. It occurs while opening specific applications or games. Usually, the error messages appear like this.
Can not start the application. This app failed to start because oobesettings.dll was not found.
A corrupt registry could be one of the many reasons these error messages can occur. It can be irritating to look for a solution, but fortunately, this issue can be fixed easily.
Fix 1: Restart Your Device
Restarting your computer is probably the easiest way to fix this issue. It will eliminate the issue if it has occurred because of a pending service pack or an installed application.
Fix 2: Run SFC
Corrupted or malicious files can also be responsible for the oobesettings error in Windows 11. Run an SFC scan to check any corrupt files are present on your PC. Here is how you can run an SFC scan:
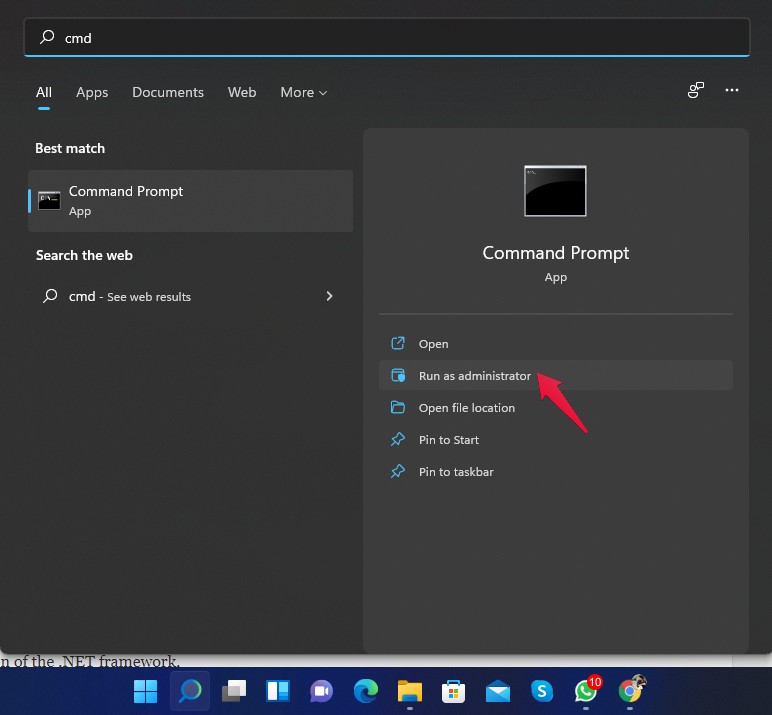
- Search for cmd in the Start menu.
- Click on “Run as administrator“.

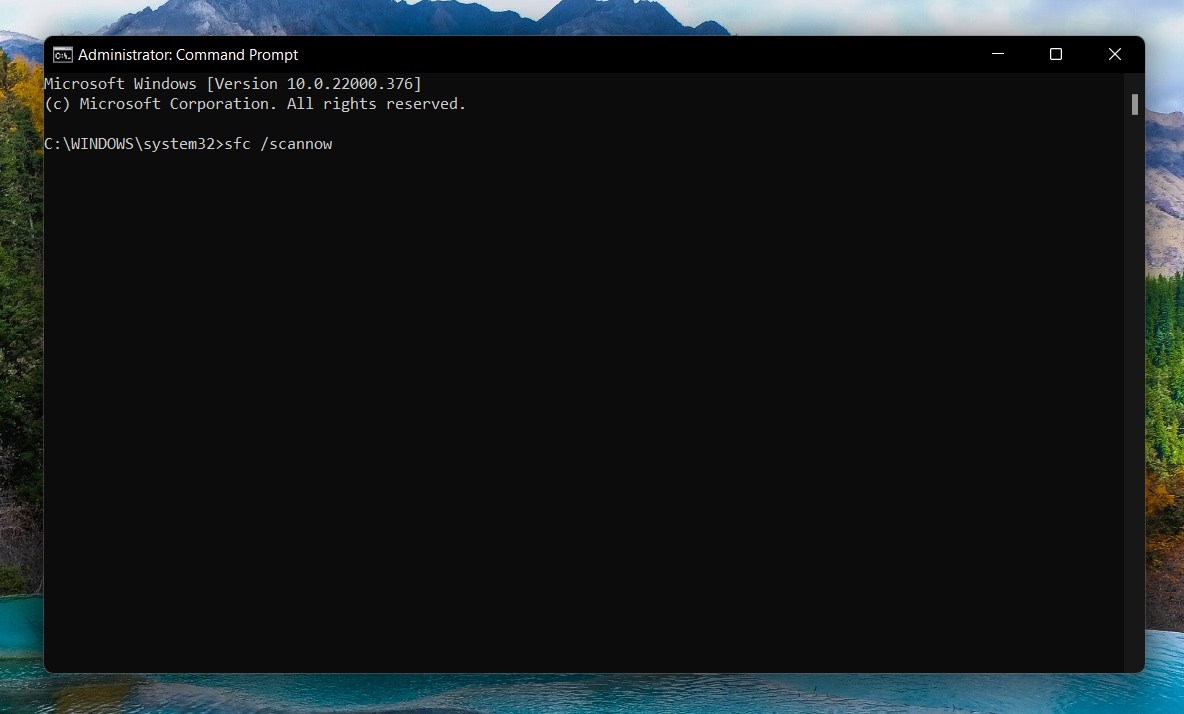
- Type sfc /scannow in the command prompt and press Enter.

- Now the scanner will run and search for corrupted files automatically.
- Close the command prompt and restart your computer once the method is complete and check if the issue has been resolved or not.
Fix 3: Repair the Registry
Here is how you can repair the Registry:
- Press Windows key + R on your keyboard to open the “Run” dialogue box.
- Type regedit in the Run window and press Enter to open the Windows registry editor.

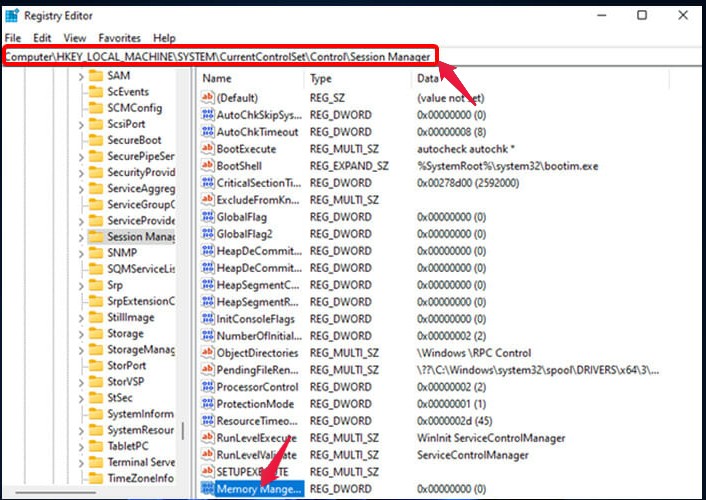
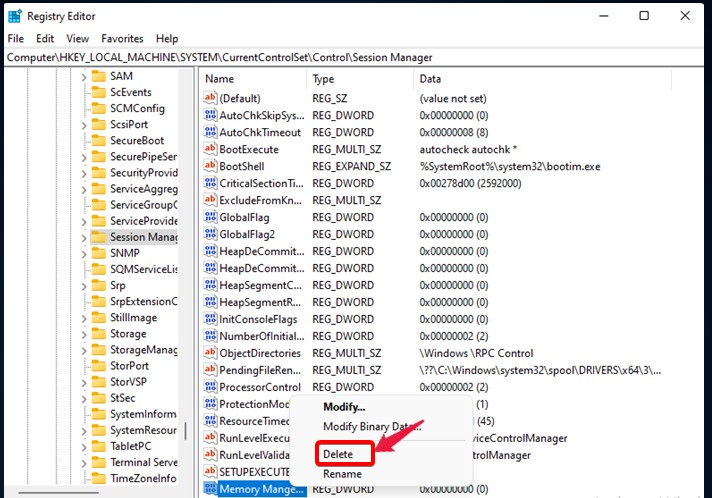
- Navigate through or copy and paste the following path:
HKEY_LOCAL_MACHINE/SYSTEM/CurrentControlSet/Control/Session Manager/ Memory Management

- Right-click on the CommitLimit value in the right pane and click on Delete. Click yes when a confirmation message appears.

- Close the Windows Registry Editor and restart your computer.
Fix 4: Run Windows Troubleshooter
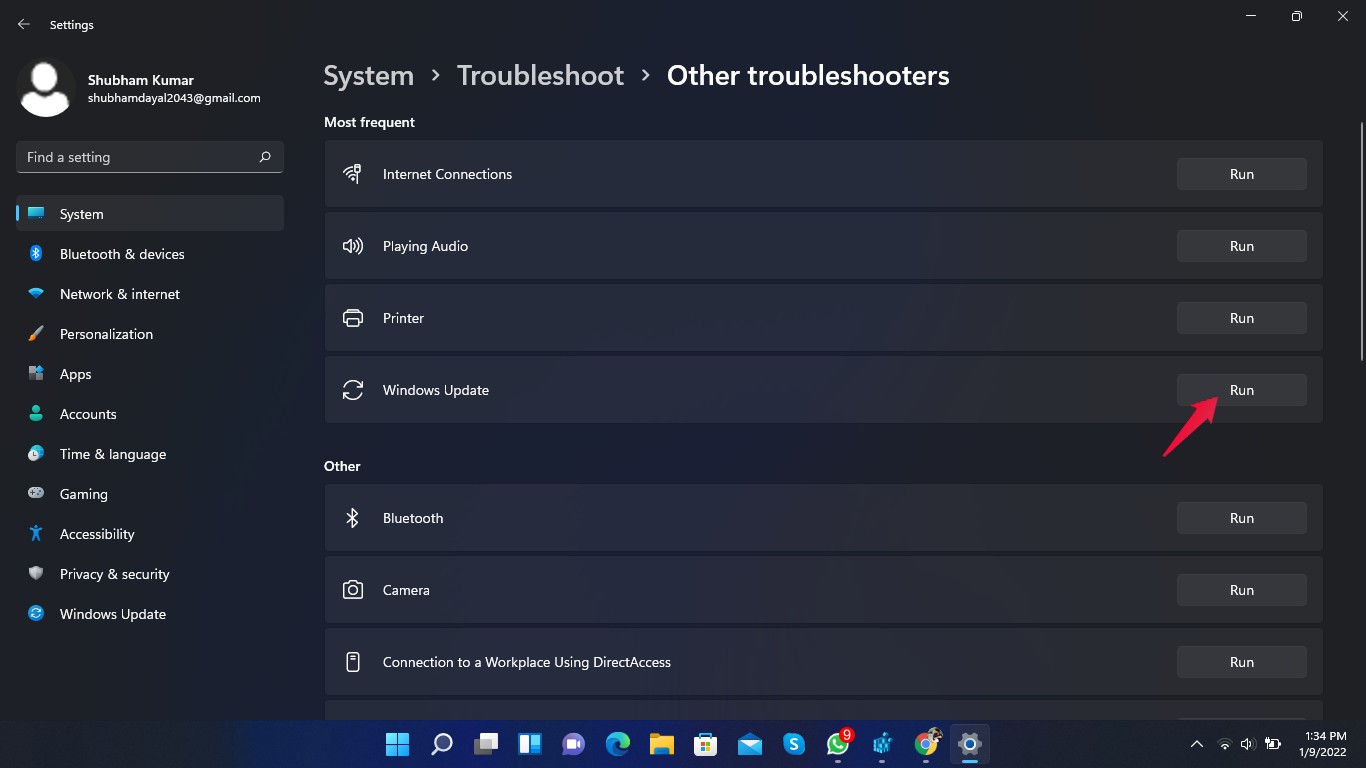
Running the Windows troubleshooter can help in finding what’s causing the oobesettings error on your Windows 11 PC. Here is how you can run the Windows troubleshooter:
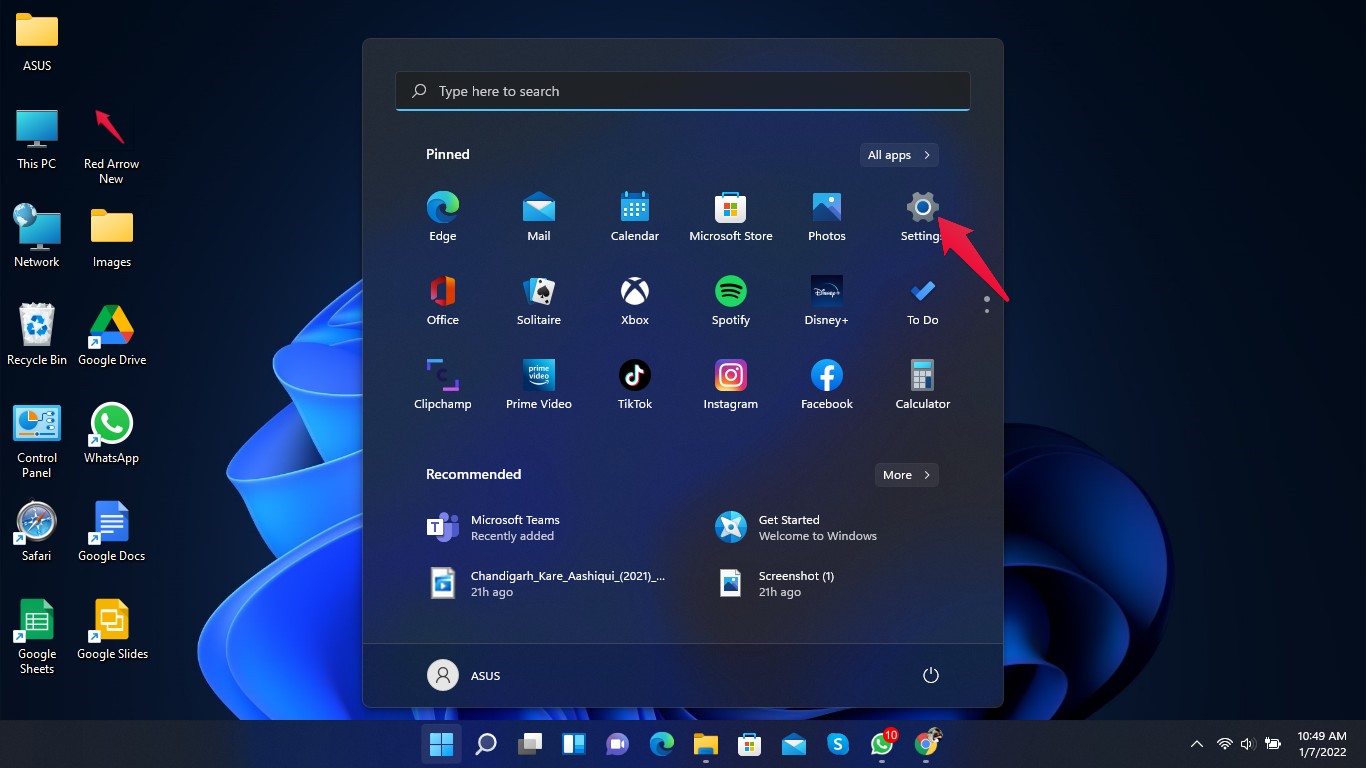
- Click on the Start button and open Settings.

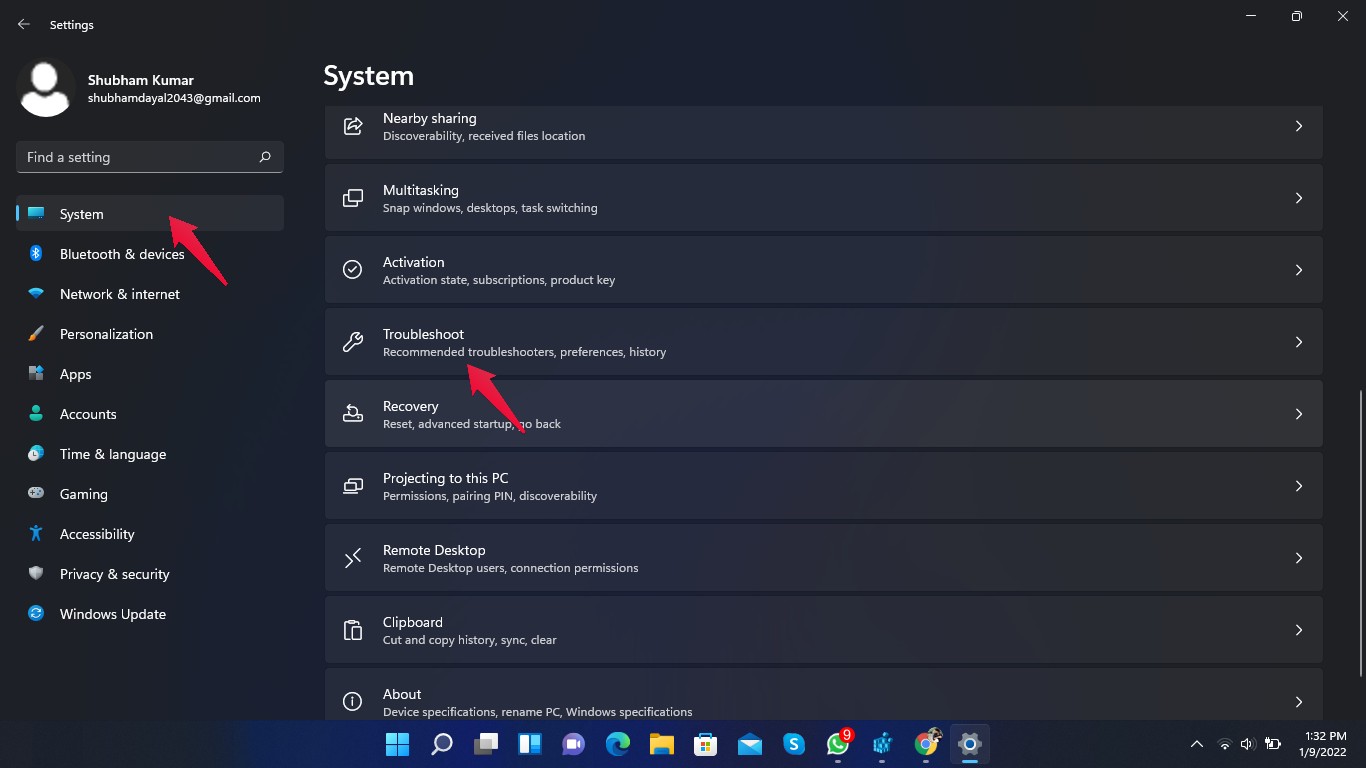
- Click on System, scroll down, and click on Troubleshoot in the right pane.

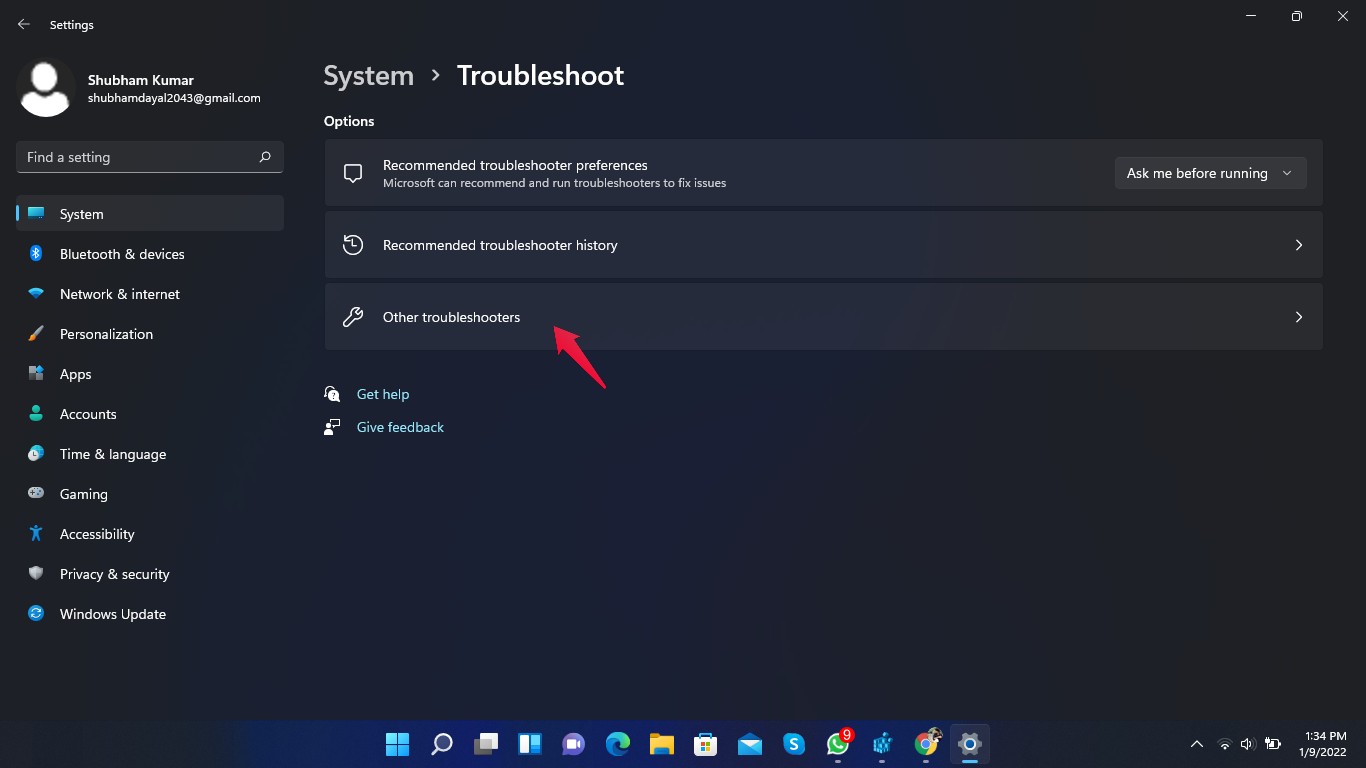
- Then click on “Other troubleshooters.”

- Click on “Run” beside “Windows Update” and follow the on-screen instructions.

Fix 5: Reset your PC
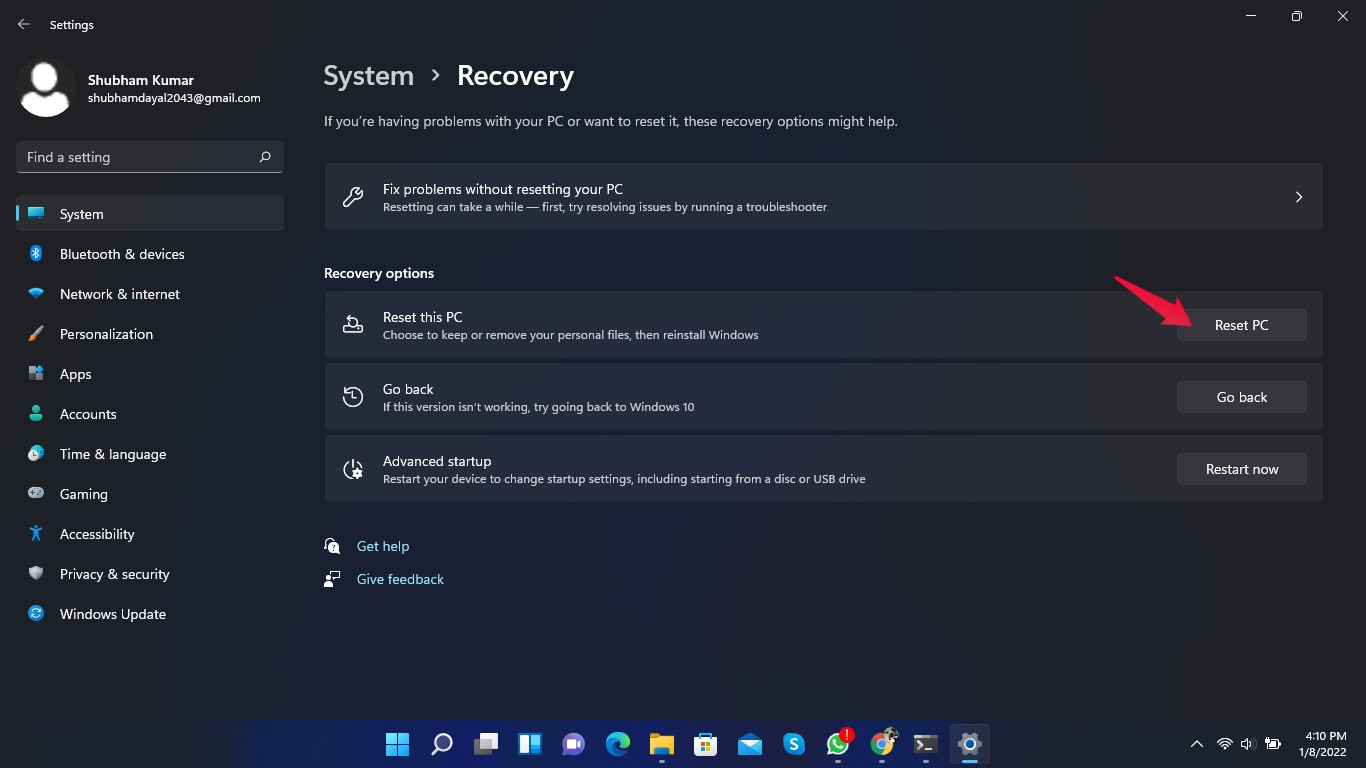
If none of the above-mentioned steps worked for you, then you need to reset your PC. Follow these steps to reset your PC:
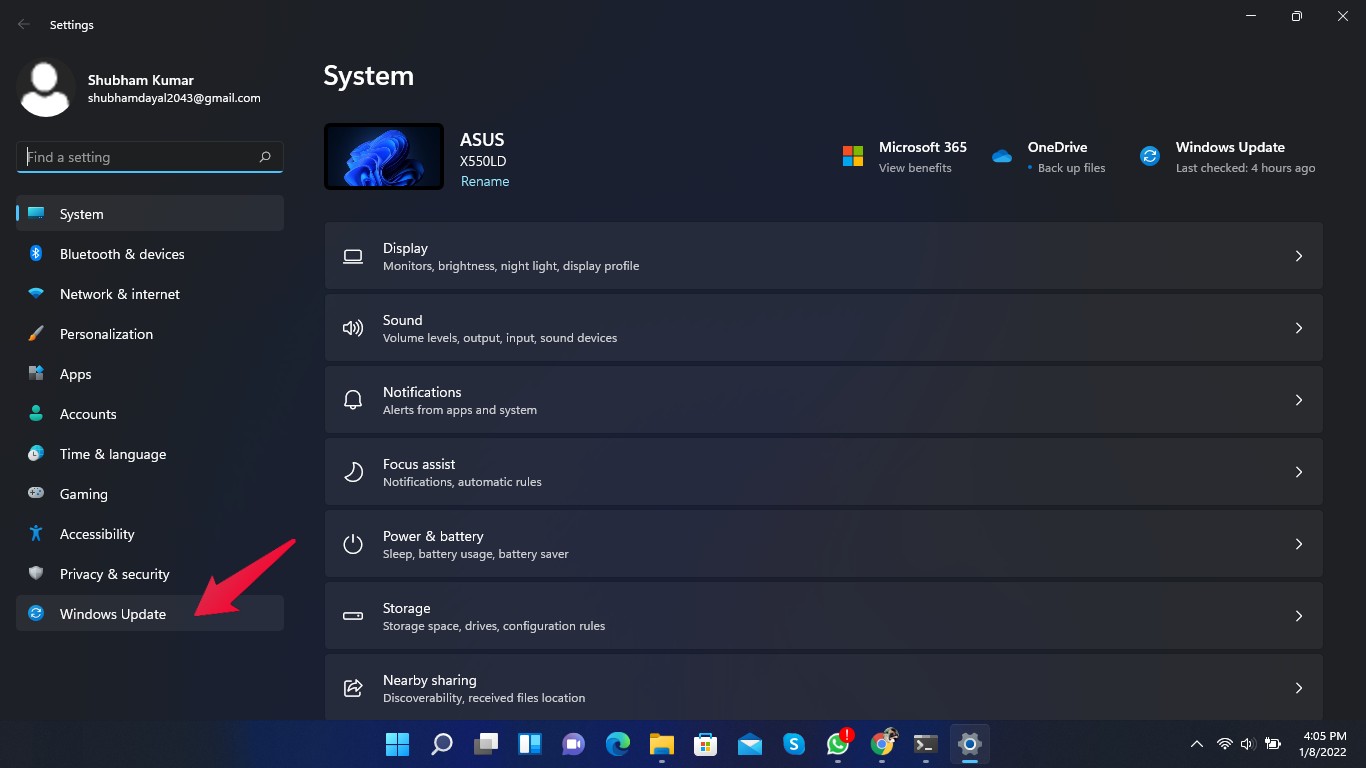
- Click on Settings.
- Click on Windows Update.

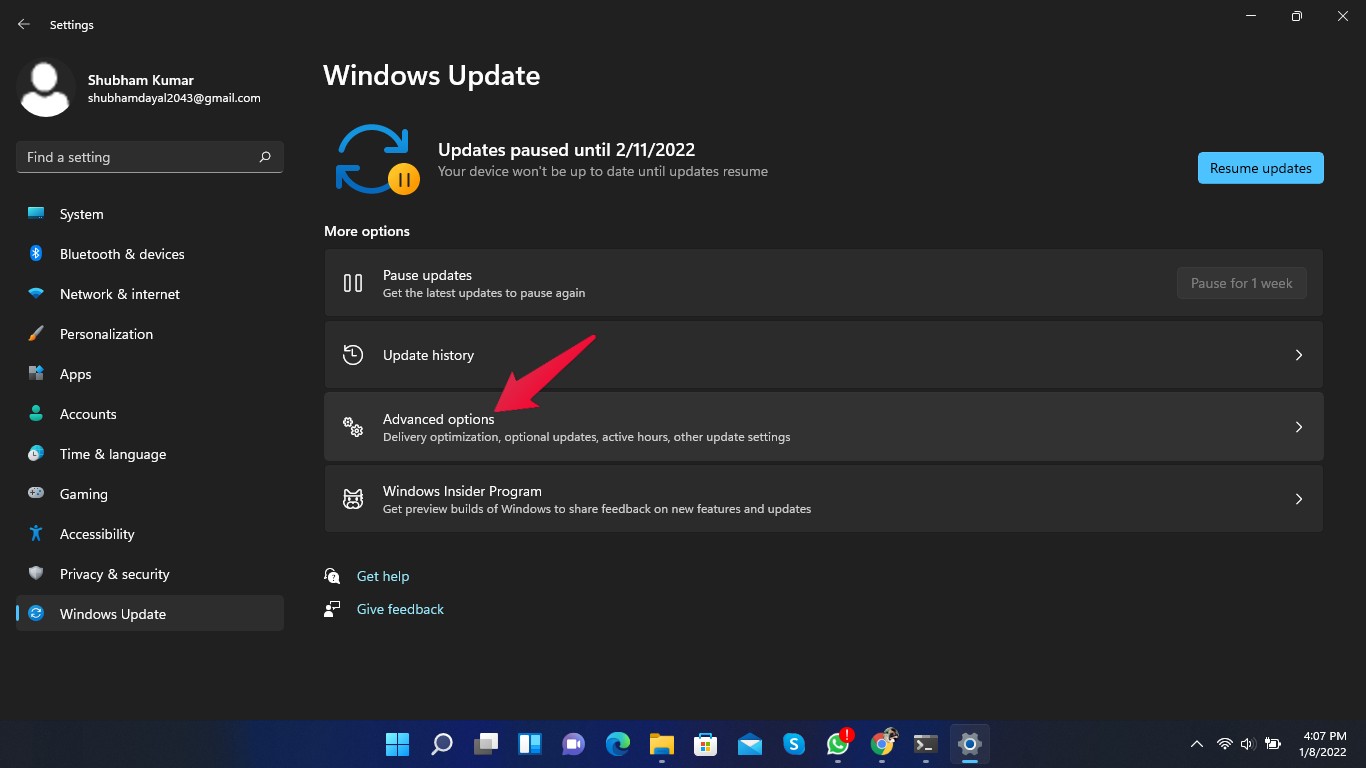
- Click on “Advanced.”

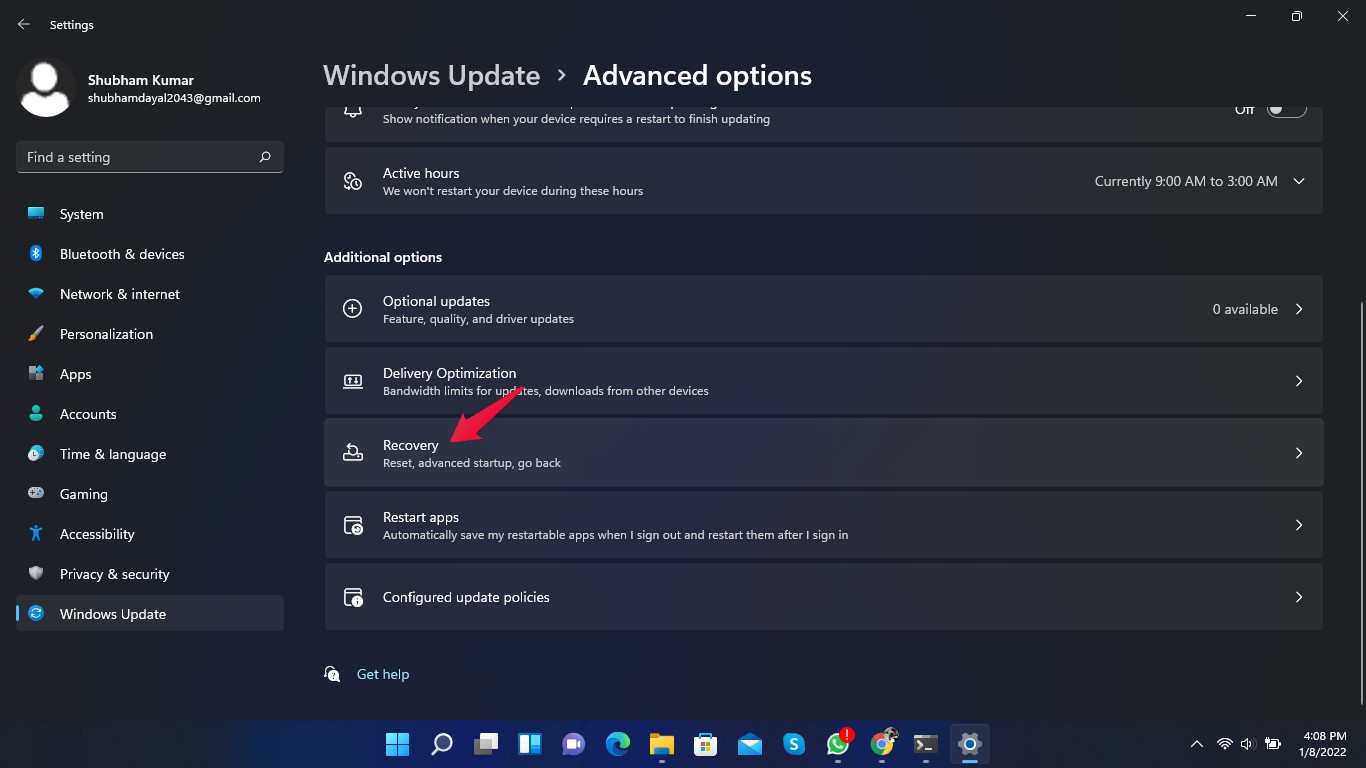
- Scroll down and click on “Recovery.”

- Now click on Reset this PC and follow the instructions given on the screen.

End Words
Keep in mind that this error prevents you from using your computer. It is a serious issue that occurs due to corrupted files in the Windows 11 registry. Moreover, oobesettings can also occur because of a damaged OS registry or a faulty hard drive.
This was all about how you can fix oobesettings error in Windows 11. Use the troubleshooting methods mentioned above to fix the oobesettings error in Windows 11. Still, if you have any trouble, do let us know in the comments section.
If you've any thoughts on How to Fix OOBESETTINGS Error in Windows 11?, then feel free to drop in below comment box. Also, please subscribe to our DigitBin YouTube channel for videos tutorials. Cheers!
