In this guide, I have explained how to enable Clipboard syncing in Windows 11 using various methods. Clipboard stores the items that you have copied from one place and want to paste them on another place. If you have to copy a single item multiple times, you can retrieve it from the Clipboard instead of repeatedly performing copy and paste manually.
On Windows 11, you can enable clipboard syncing using Group Policy Editor, Registry Editor, and from the Windows OS settings. You can also enable clipboard syncing between PC and mobile devices. This will make your work more productive and easier.
Enable Clipboard Syncing from Windows Settings
It is the easiest way to enable clipboard syncing on your Windows PC.
- Launch the Windows 11 Settings by pressing Windows + I hotkeys.
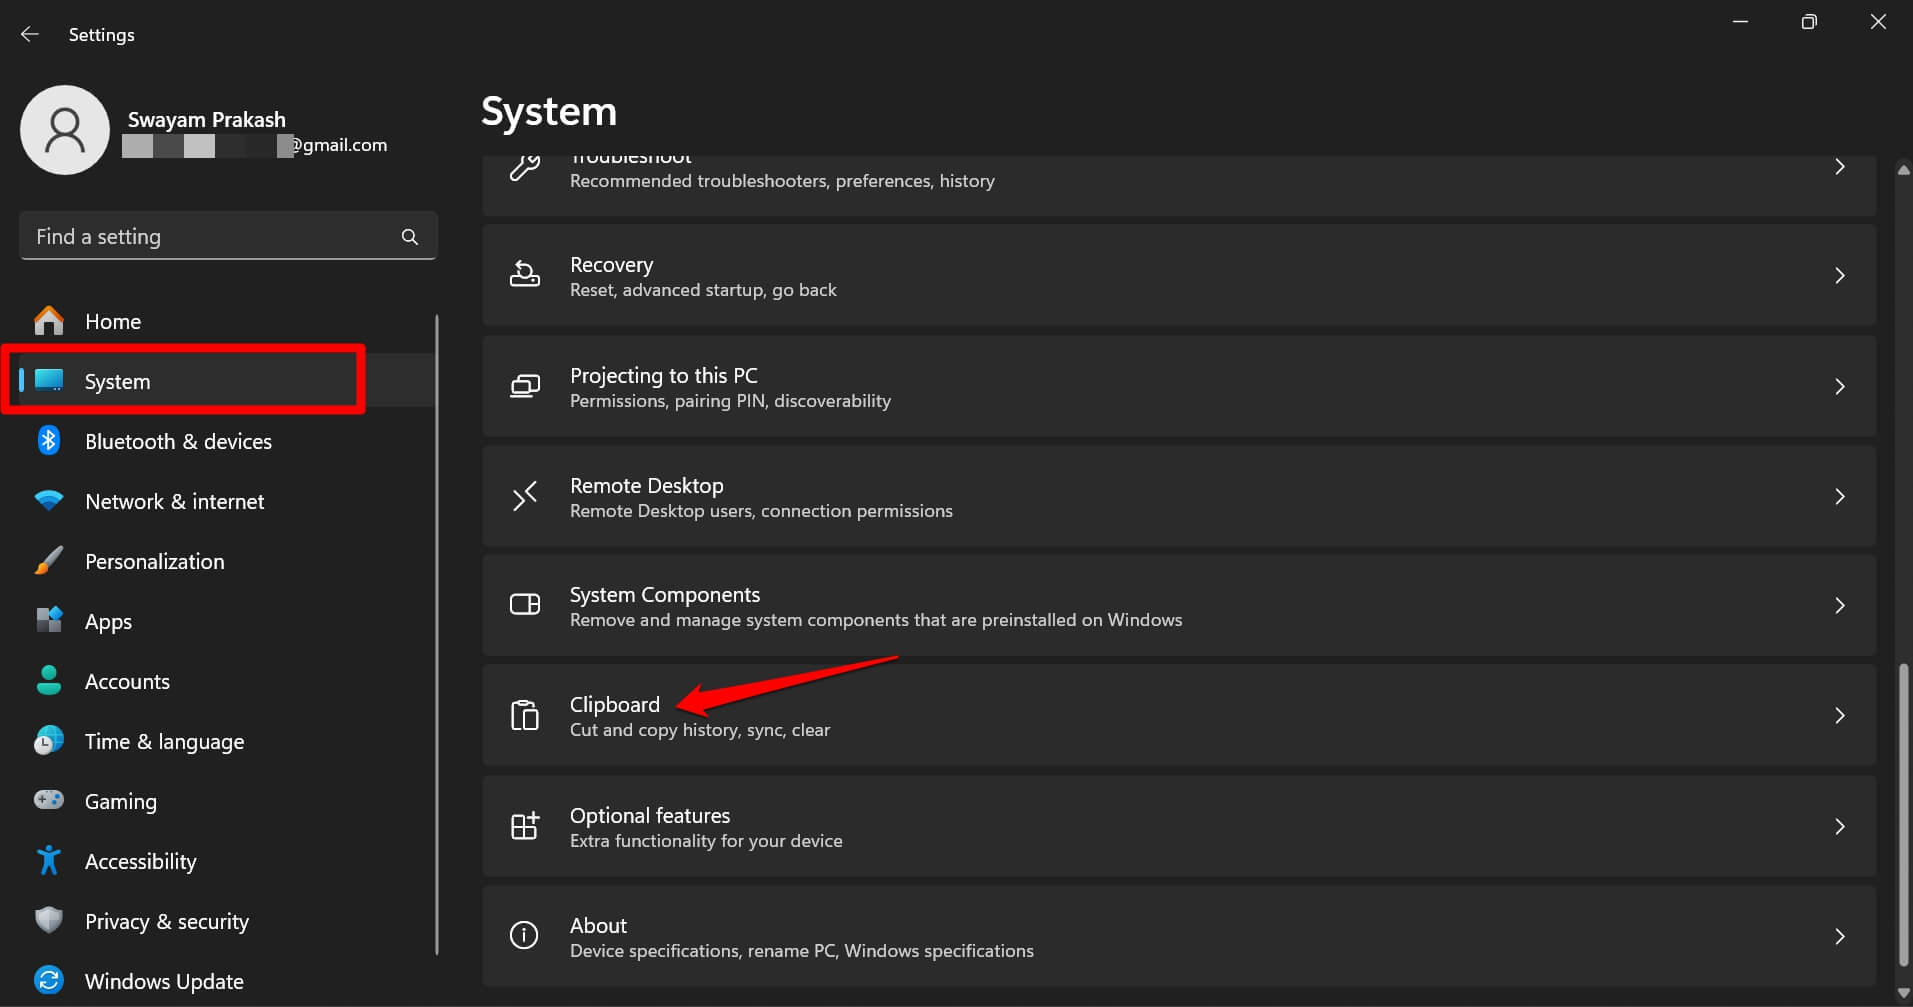
- On the left-hand panel of Settings, click on System.
- Scroll to Clipboard and click on it.

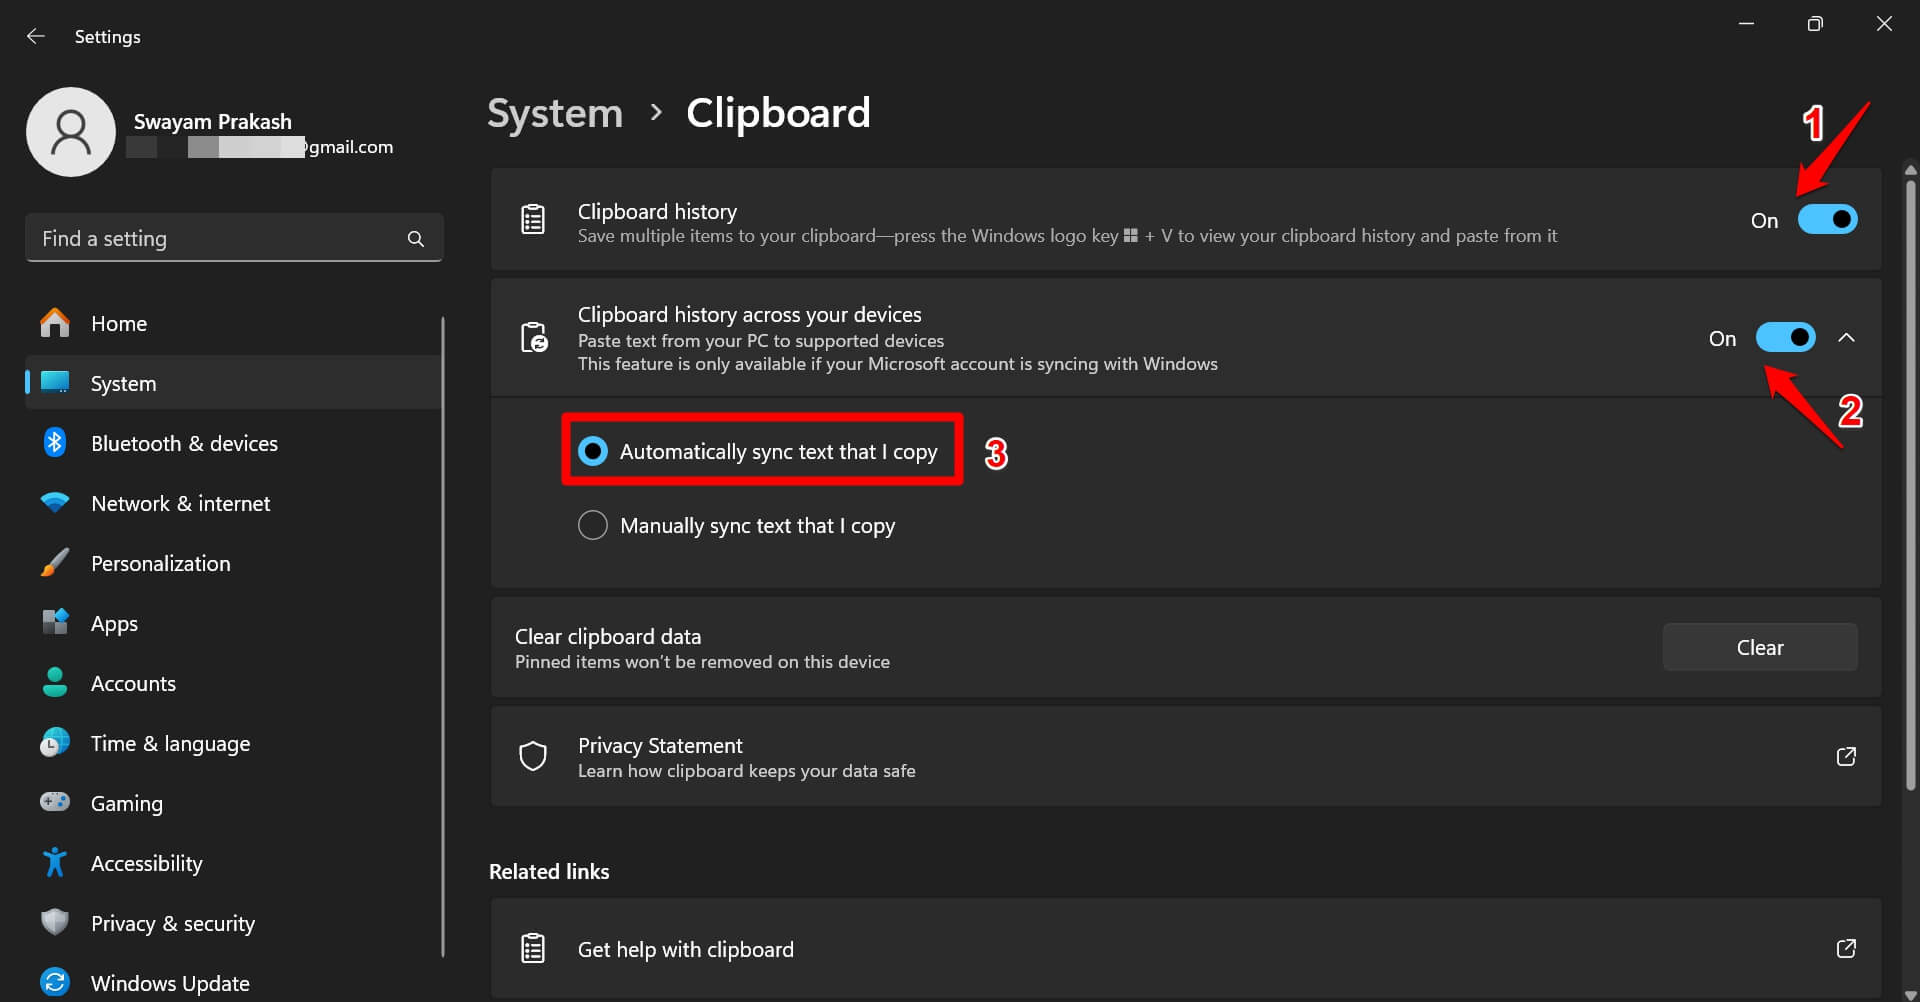
- Enable the toggle beside Clipboard History.
- Also, activate the Clipboard History feature across your devices.
- Click the radio button next to Sync Text that I Copy Automatically.

The last step explained above will allow syncing of clipboard history between the PC and devices linked to it.
Enable Clipboard Syncing Using Group Policy Editor
You can access the Local Group Policy Editor and turn on clipboard syncing for your Windows PC. Here are the steps for you.
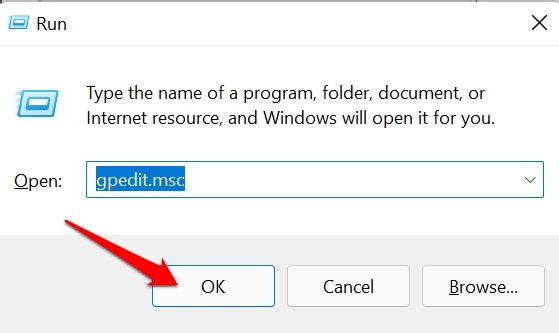
- Press Windows + R to launch the Run box.
- Type in gpedit.msc and press enter.

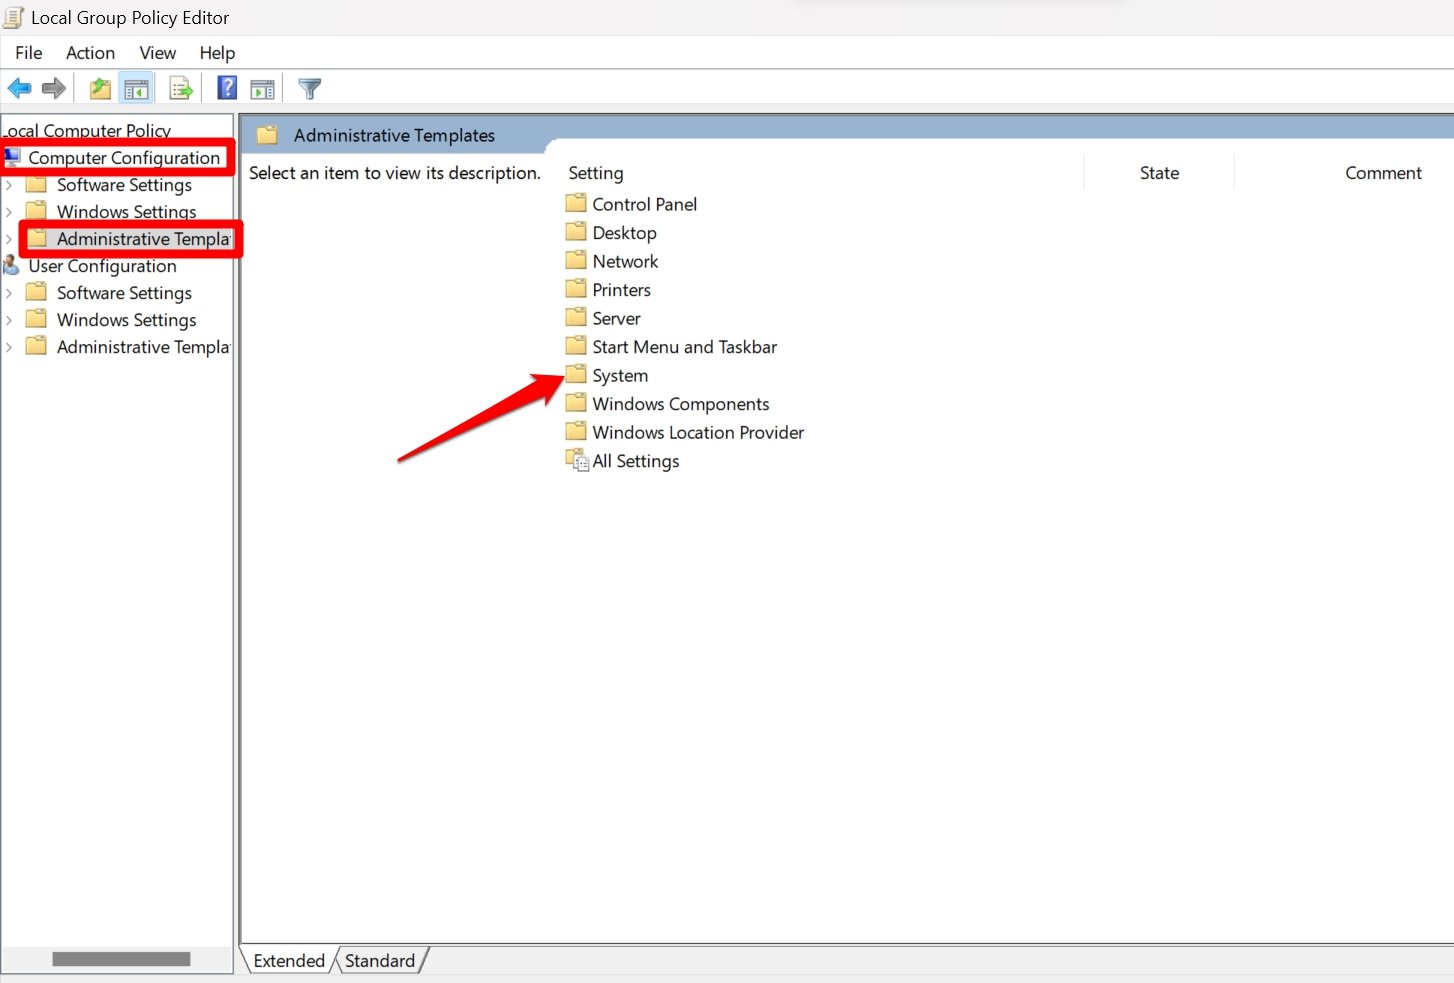
- Click on Local Computer Policy.
- Next, select Computer Configuration.
- Navigate below and double-click on Administrative Templates.

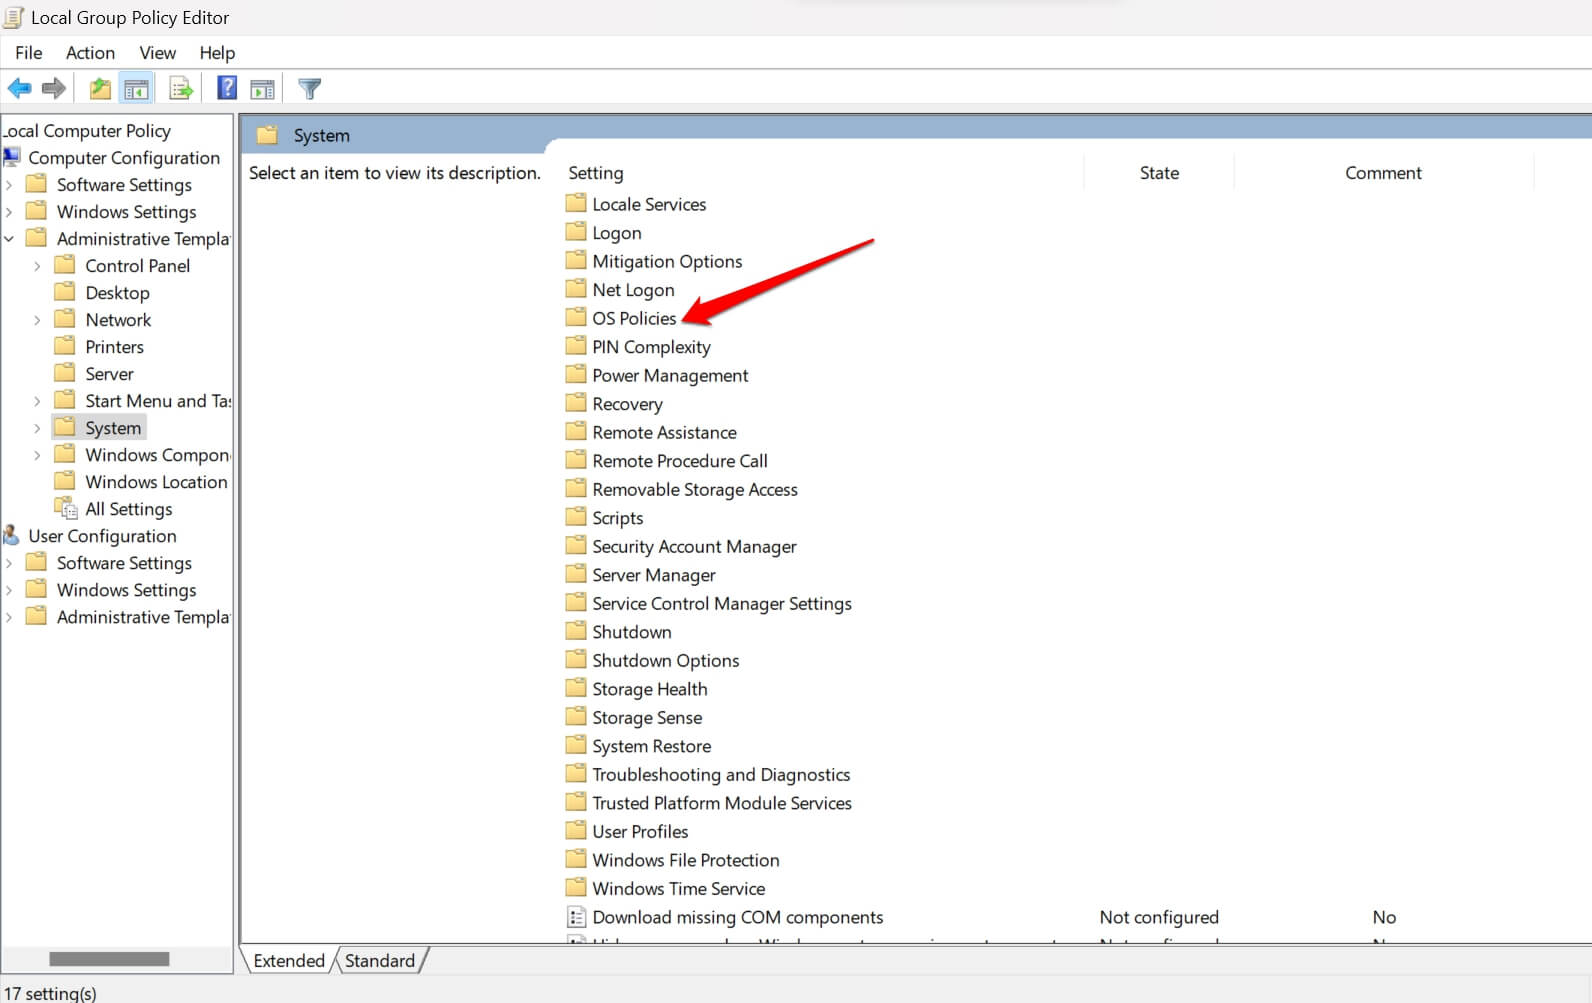
- Click on the item System followed by OS Policies.

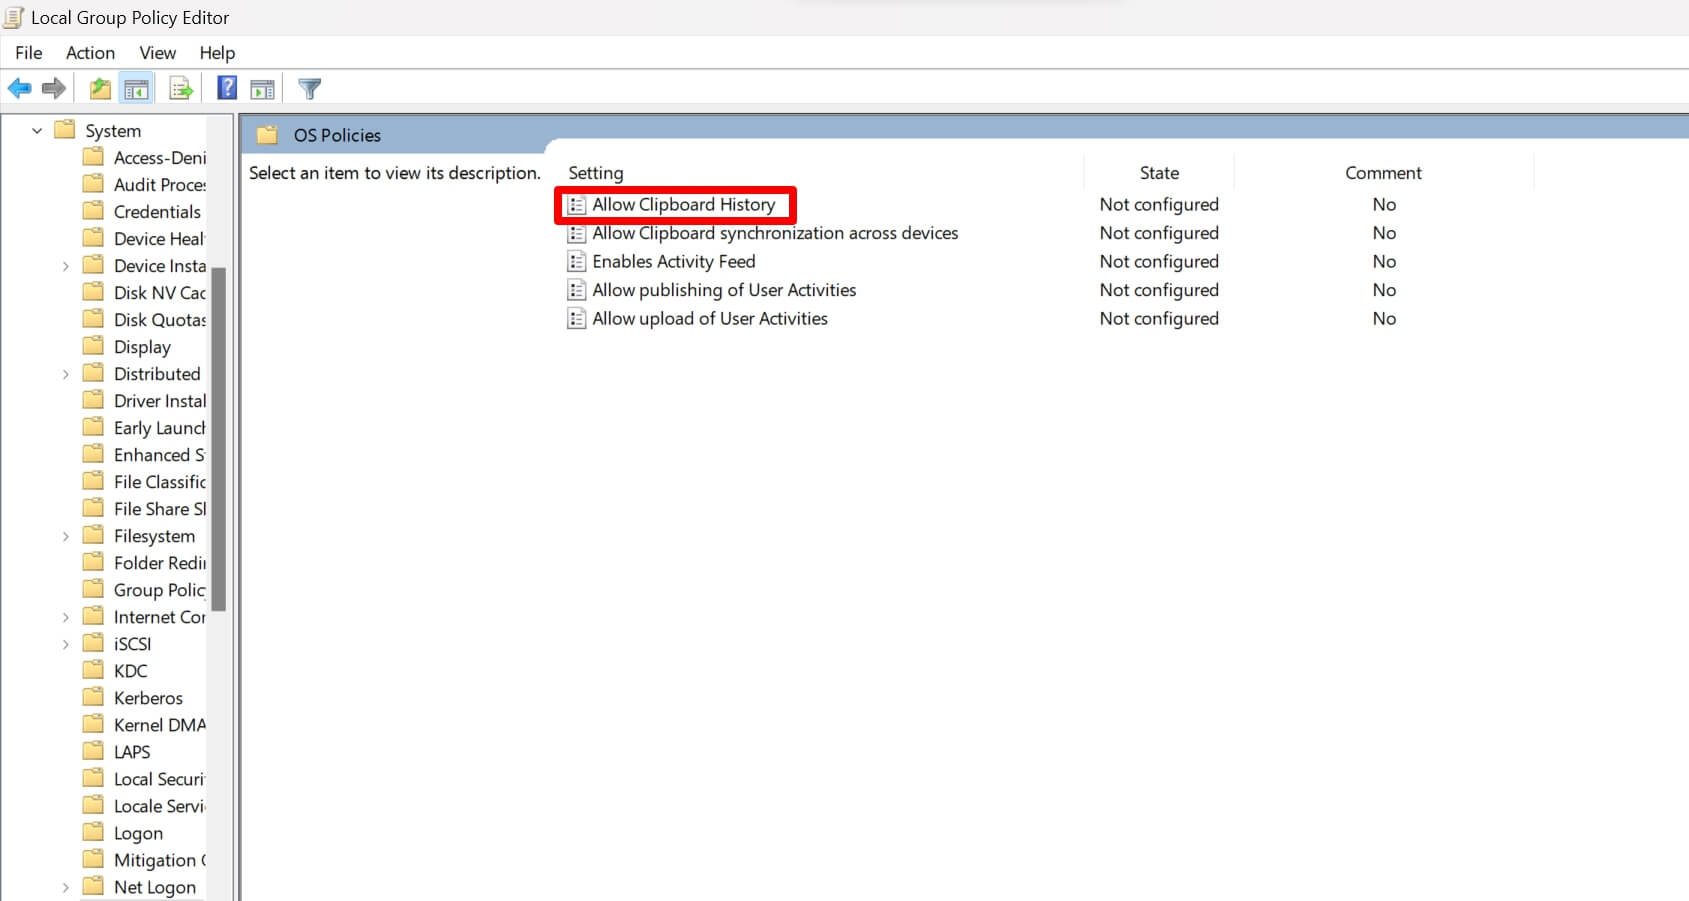
- Within the OS Policies section, double-click on Allow Clipboard History.

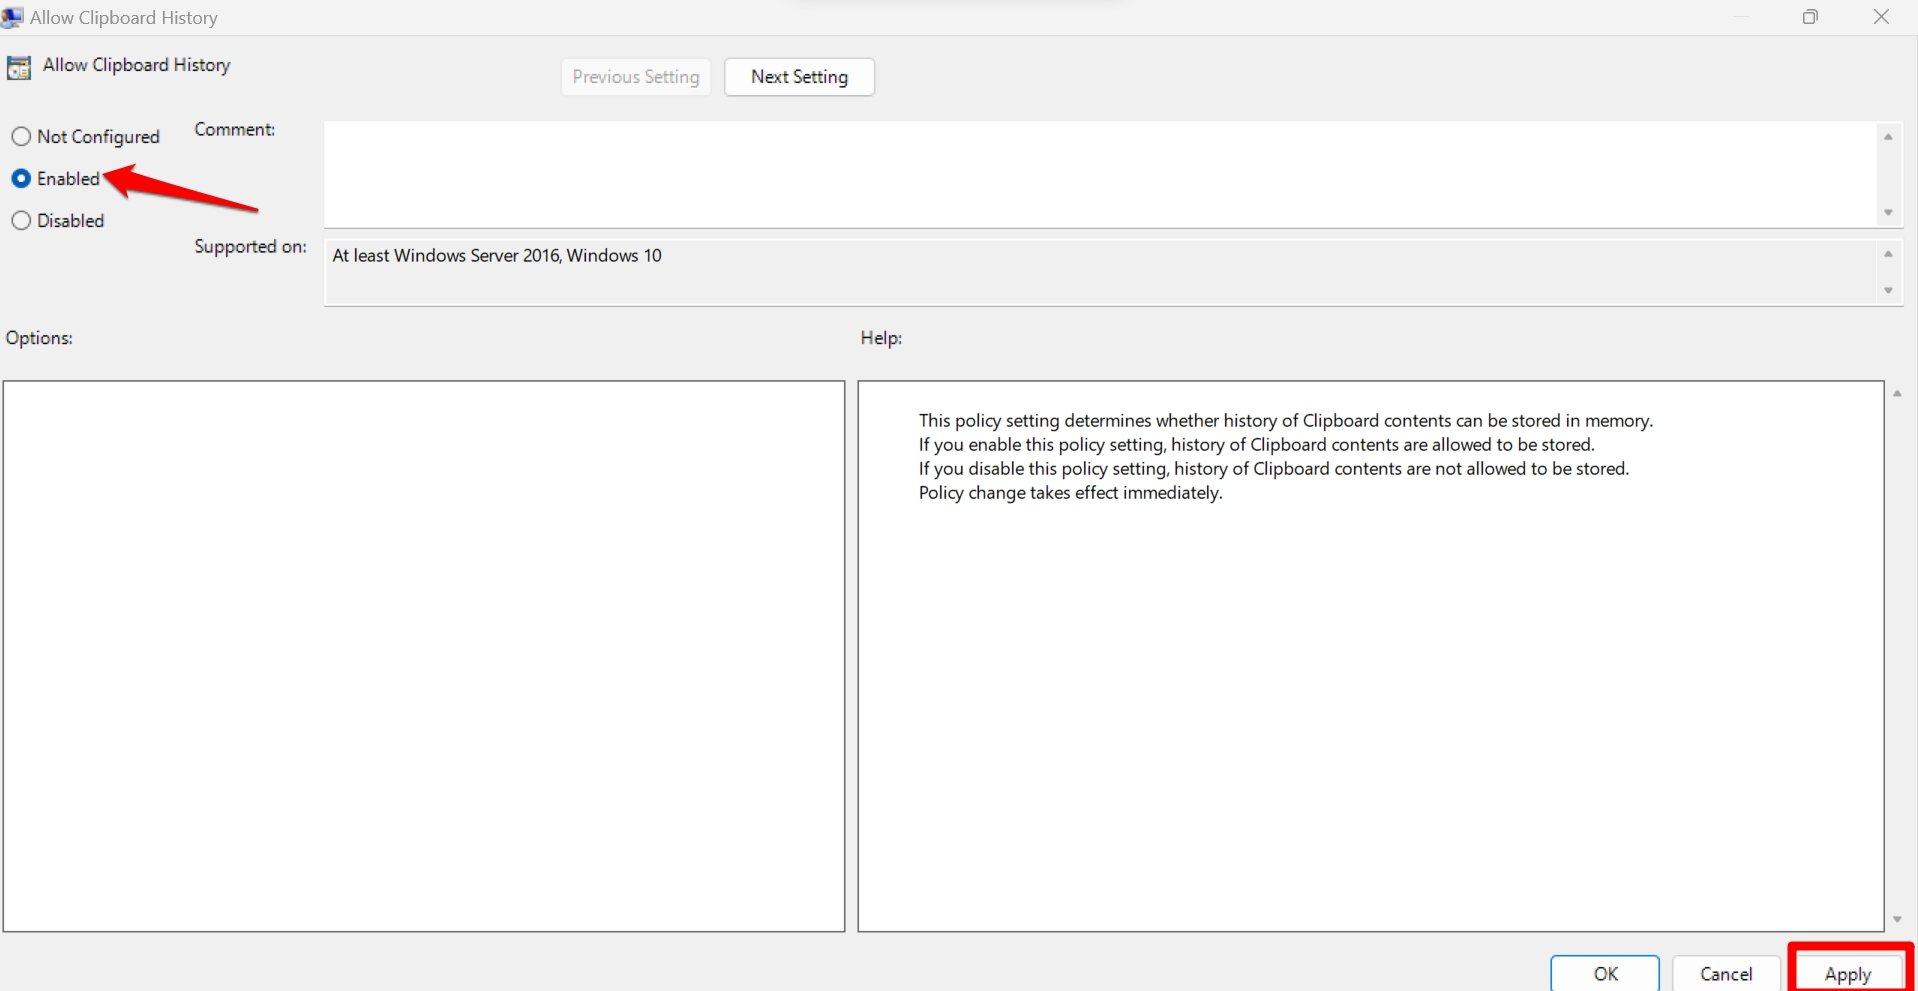
- Set the status of Allow Clipboard History as enabled.
- Click on Apply > OK to save the changes.

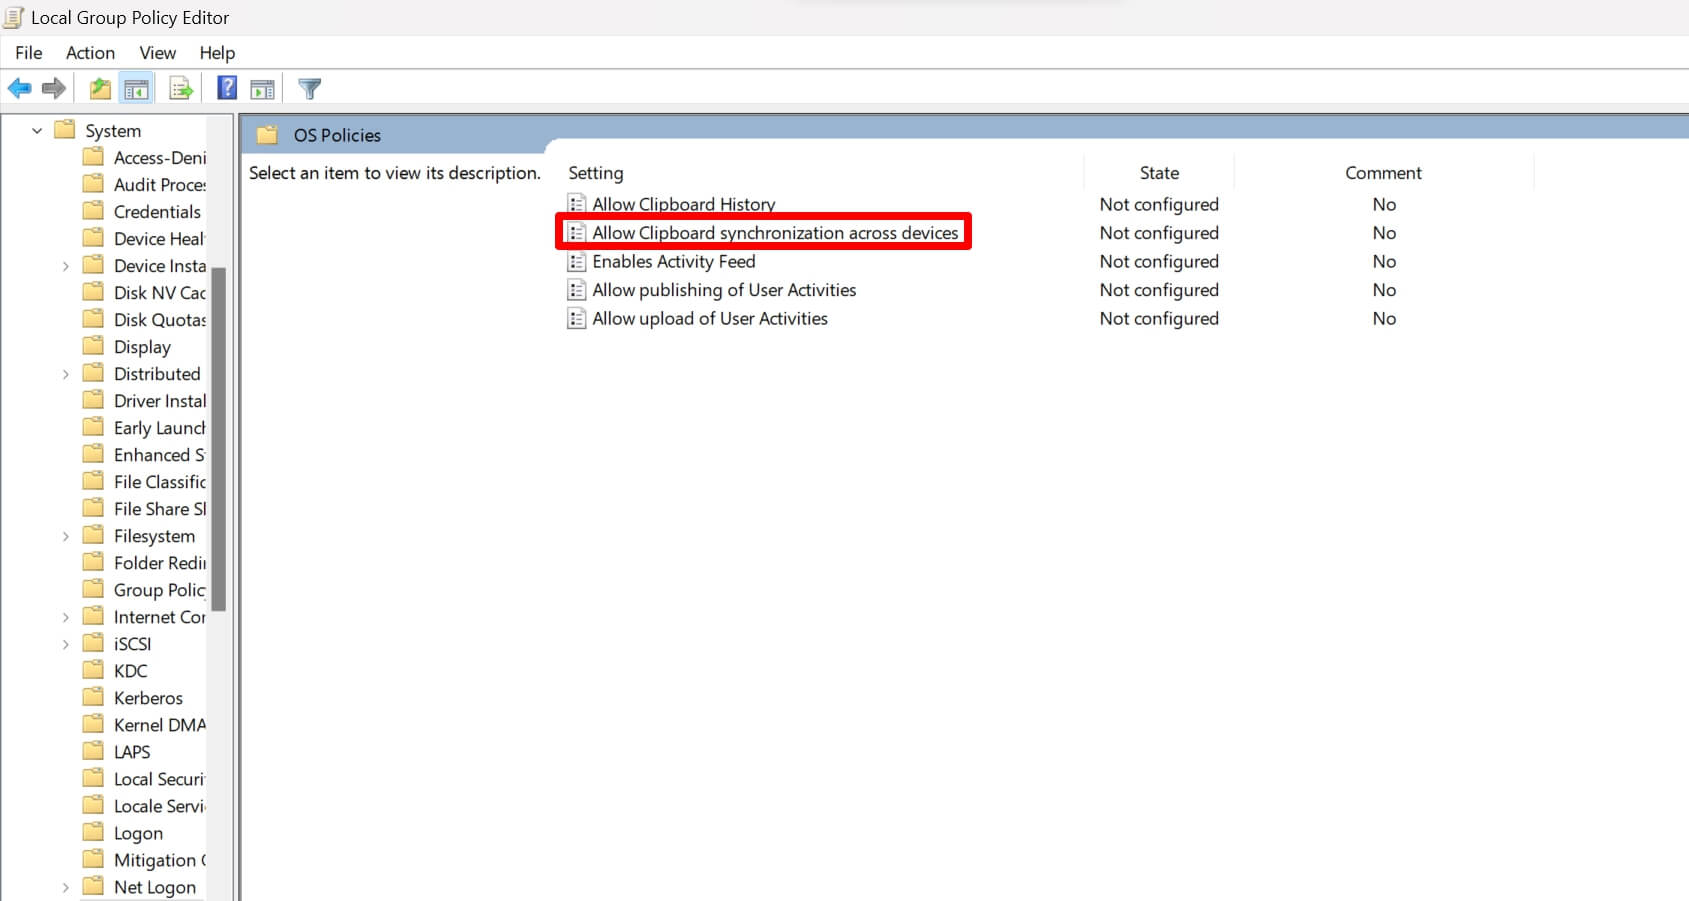
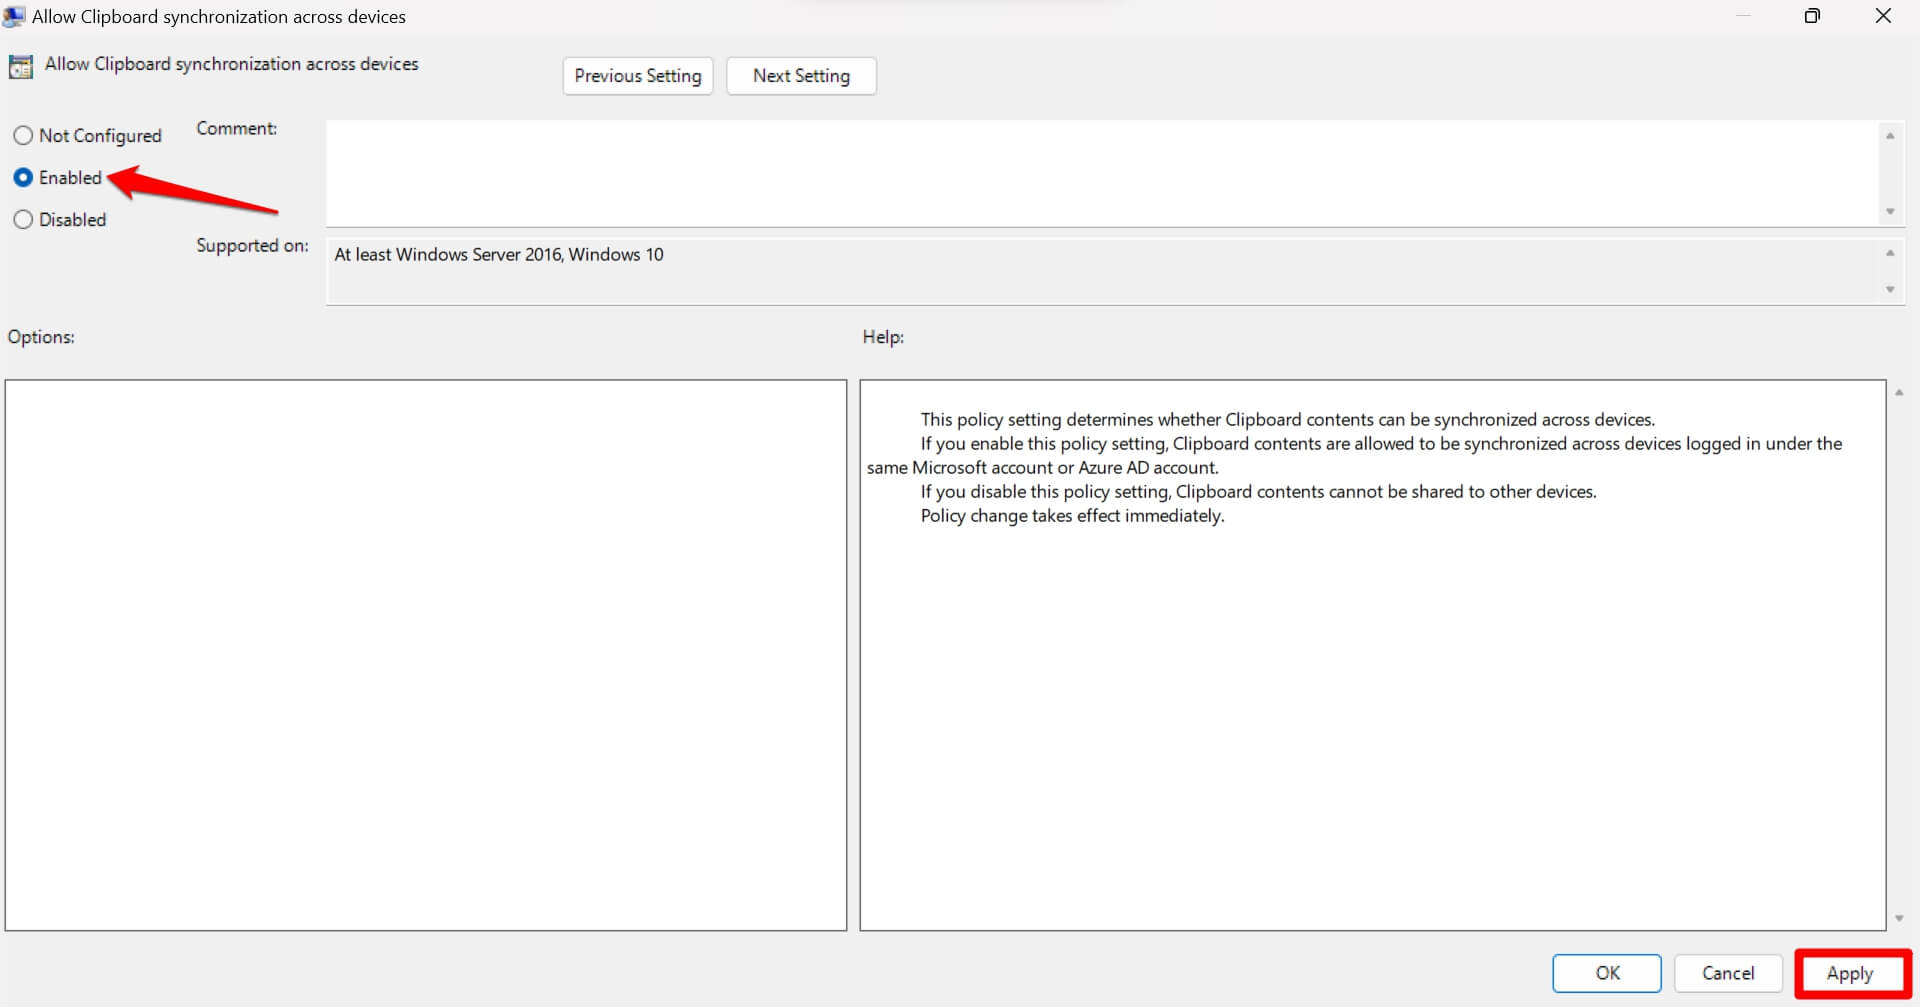
- Get back to the OS Policies section and double-click on Allow Clipboard Synchronization across Devices.

- Set it to Enabled. Click on Apply followed by OK to save the changes.

Turn On Windows 11 Clipboard Syncing Using Registry Editor
Use the Registry Editor to enable Clipboard syncing on Windows 11 only if the other two methods do not work for you. Modifying the registry may cause the computer to behave weirdly. You may back up your registry data before making changes ot it.
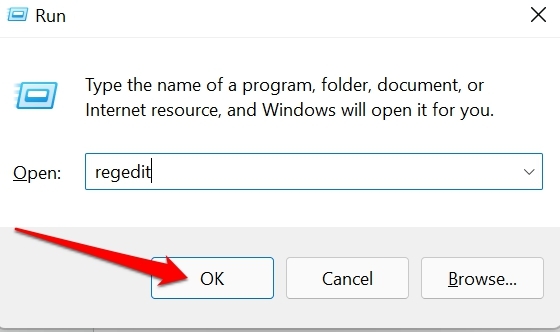
- Press Windows + R to bring up the Run box.
- Type regedit.exe and press enter key.

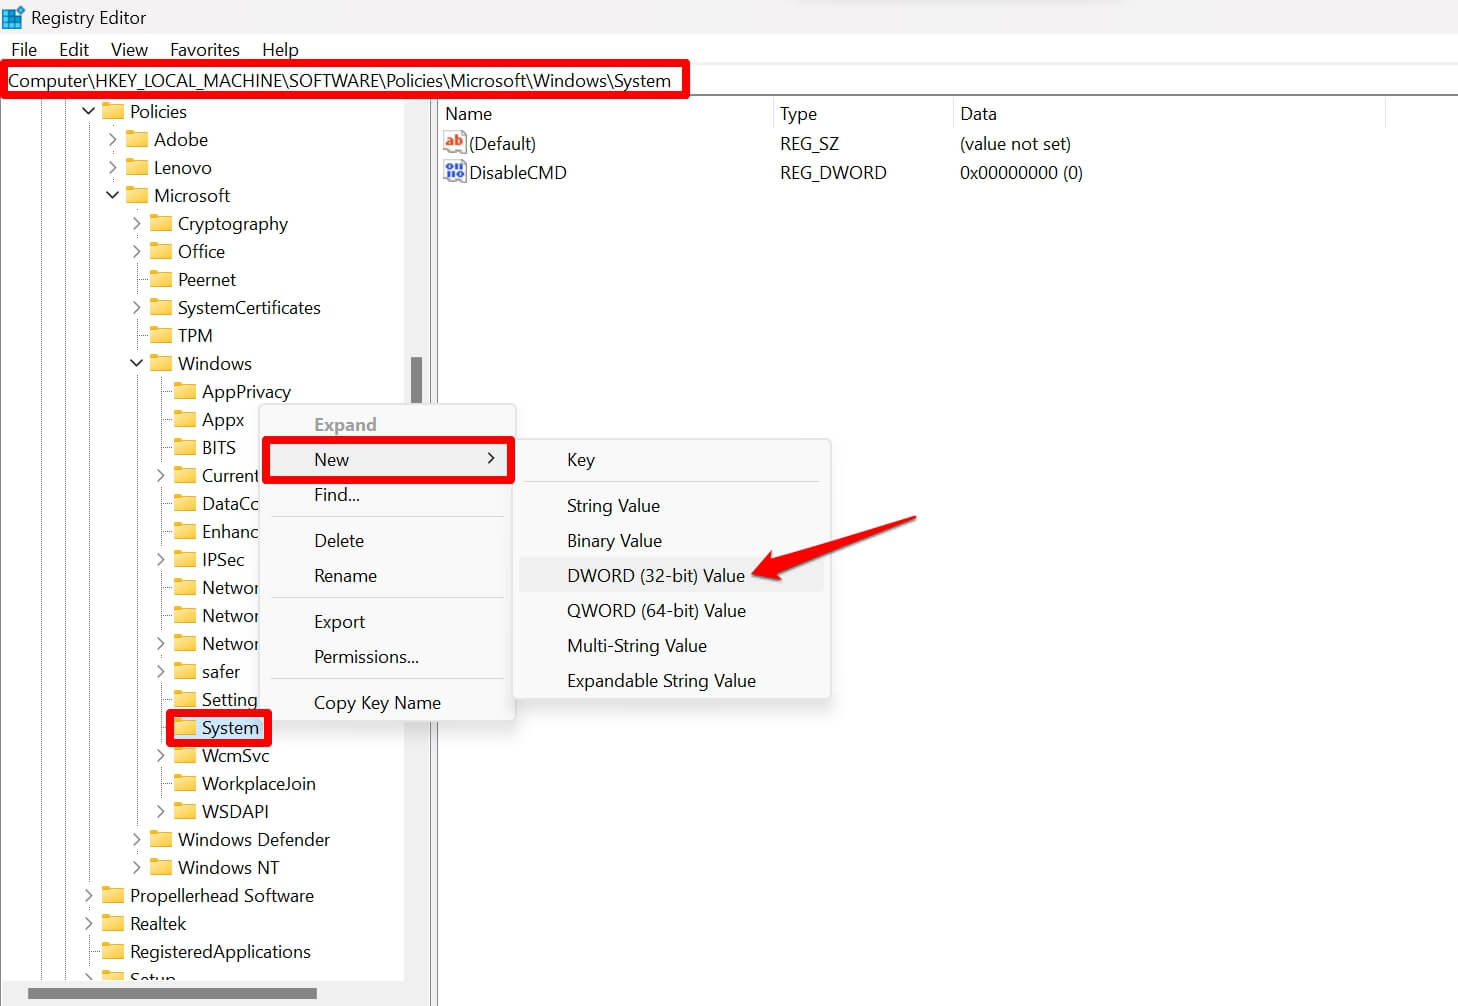
- Within the Windows Registry, follow this path.
HKEY_LOCAL_MACHINE\SOFTWARE\Policies\Microsoft\Windows\System
- Right-click on the System key and select New.
- From the menu, click on DWORD (32-bit) Value.

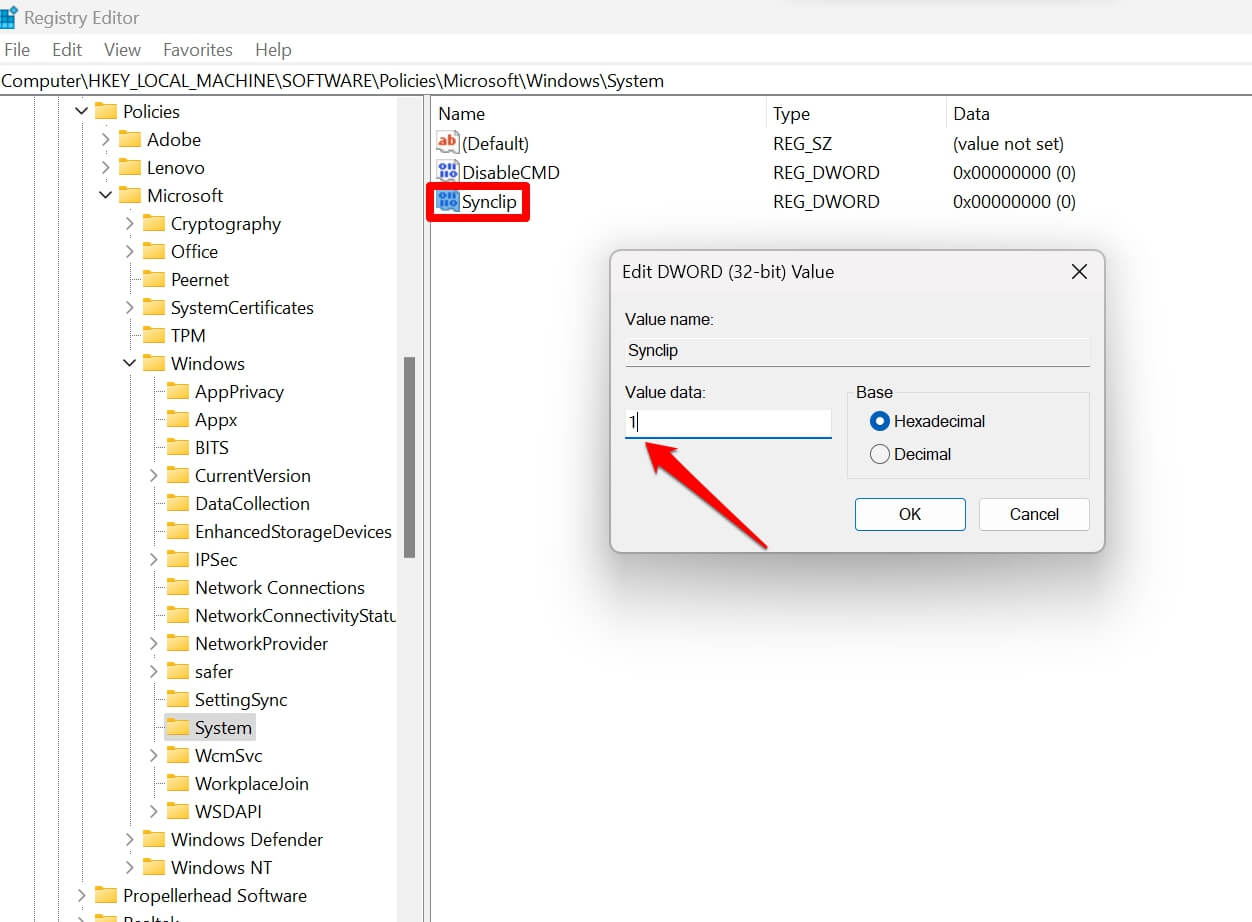
- Double-click on the new DWORD Value and set a name such as SynClip.
- Again double-click on SynClip.
- Set the Value Data as 1 to enable the feature. Press OK.

- Exit the registry and restart your computer.
How do you enable Clipboard Syncing between Windows PC and mobile devices?
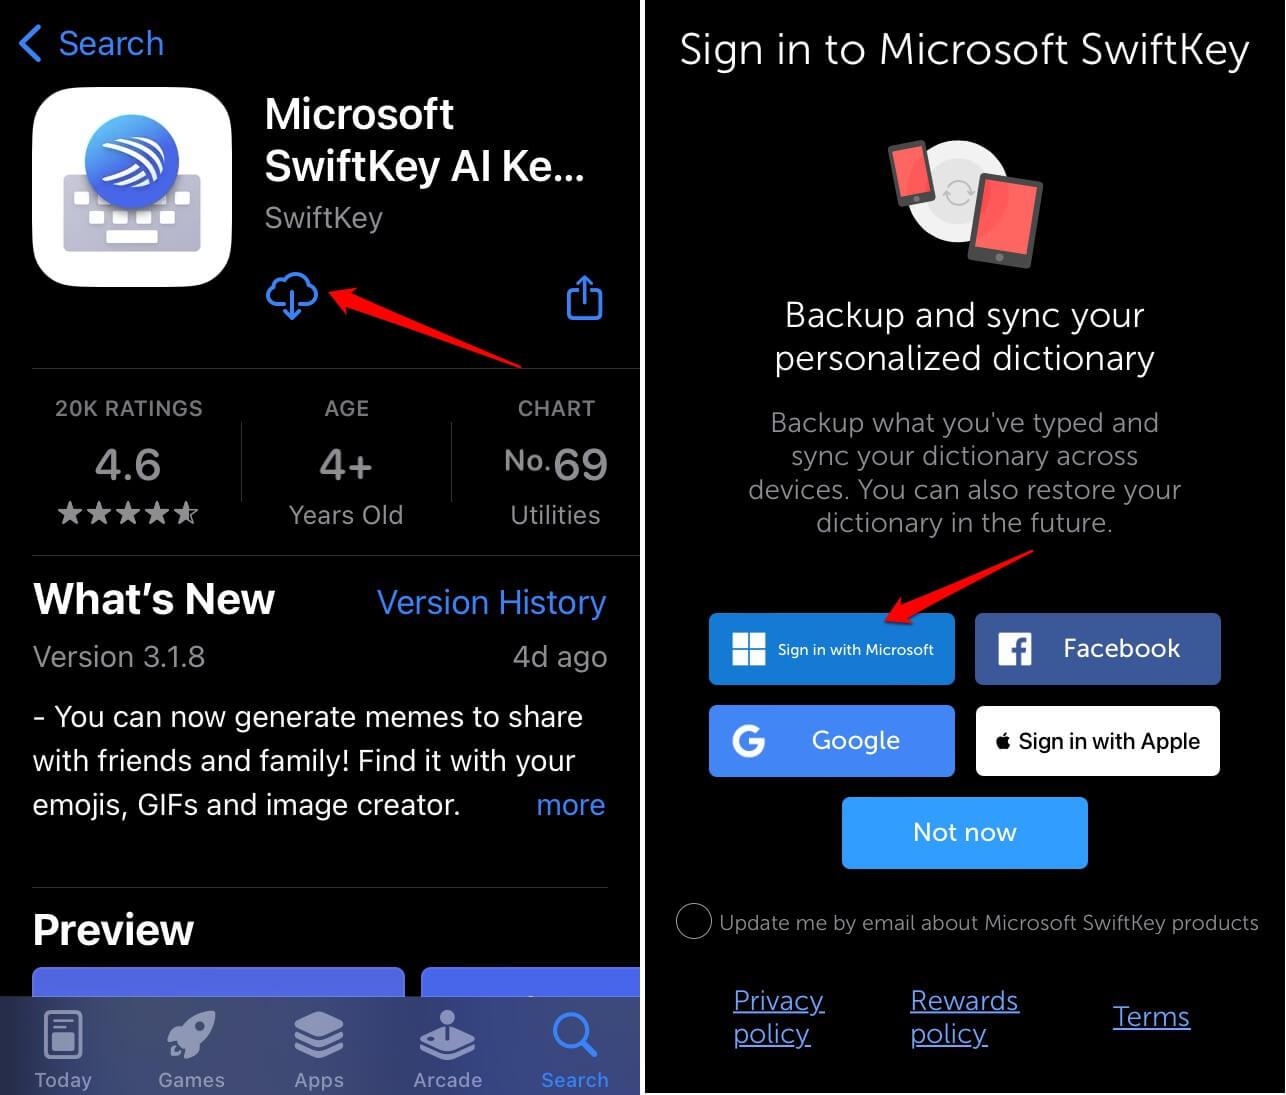
As you are using a Windows PC, install the Microsoft Swiftkey keyboard on your Android or iOS devices.
- Launch the keyboard app that you have installed.
- Sign into the account of the keyboard using the same account you use for your Windows PC.

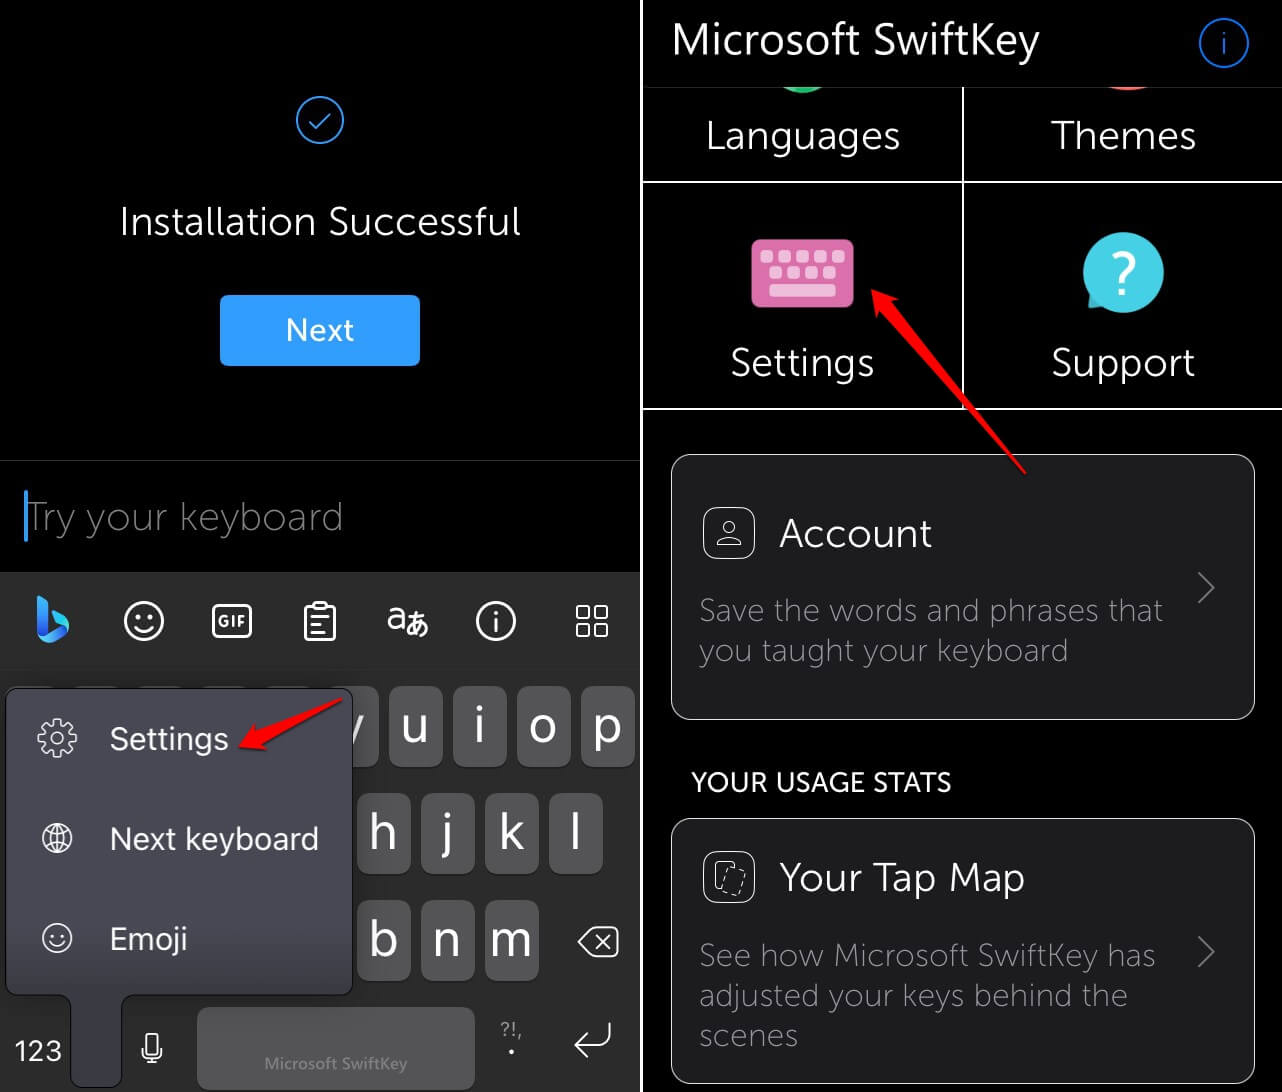
- Go to the SwiftKey settings.

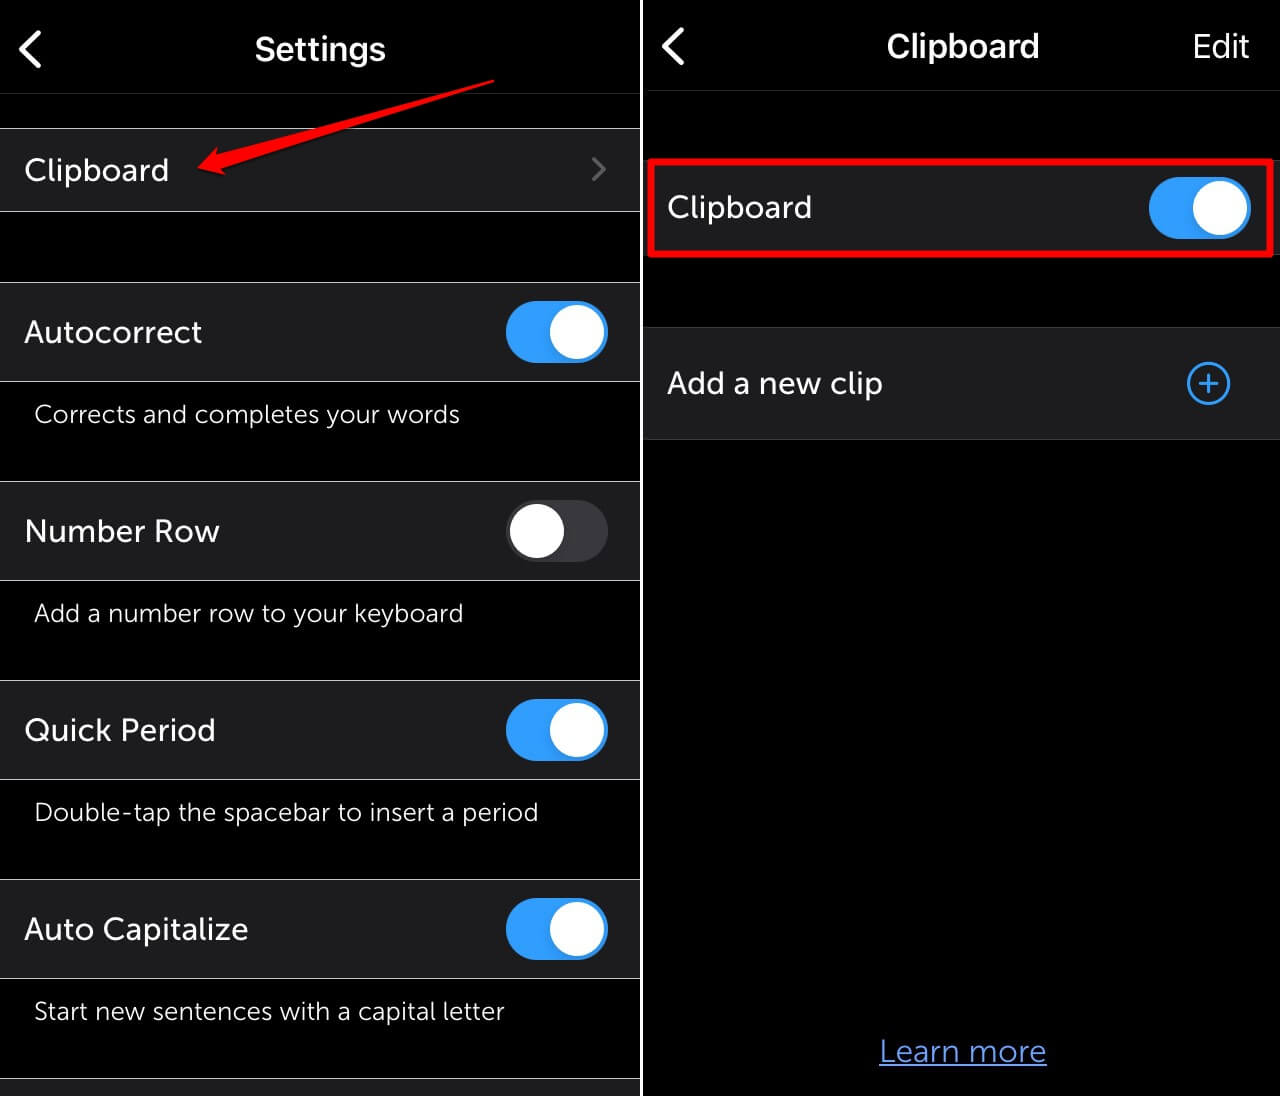
- Tap on Clipboard. Next, tap the switch beside Clipboard to enable it on Swiftkey.

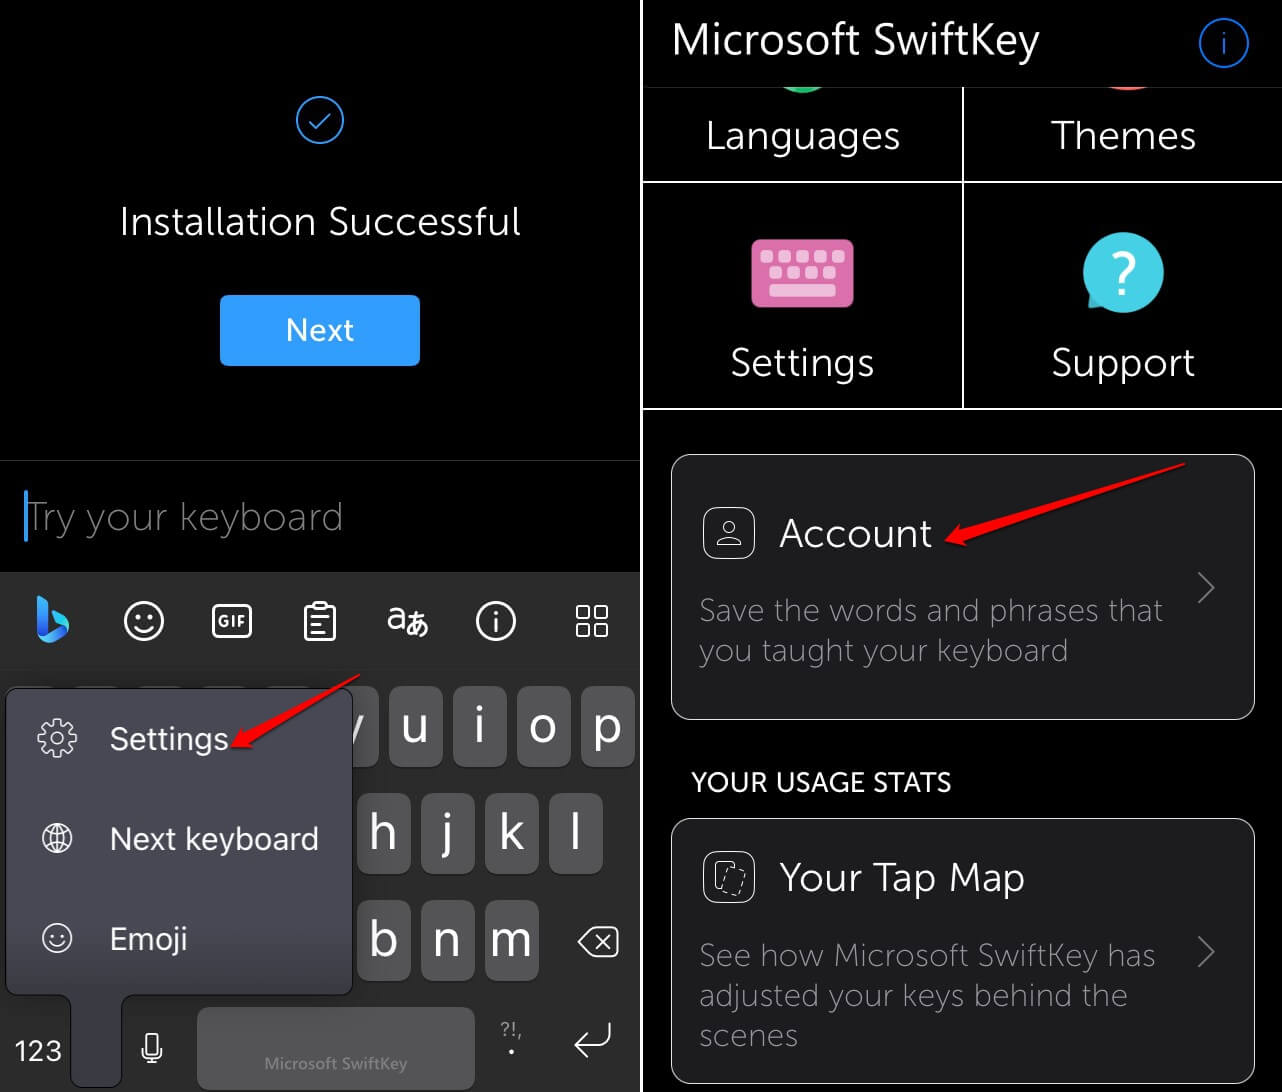
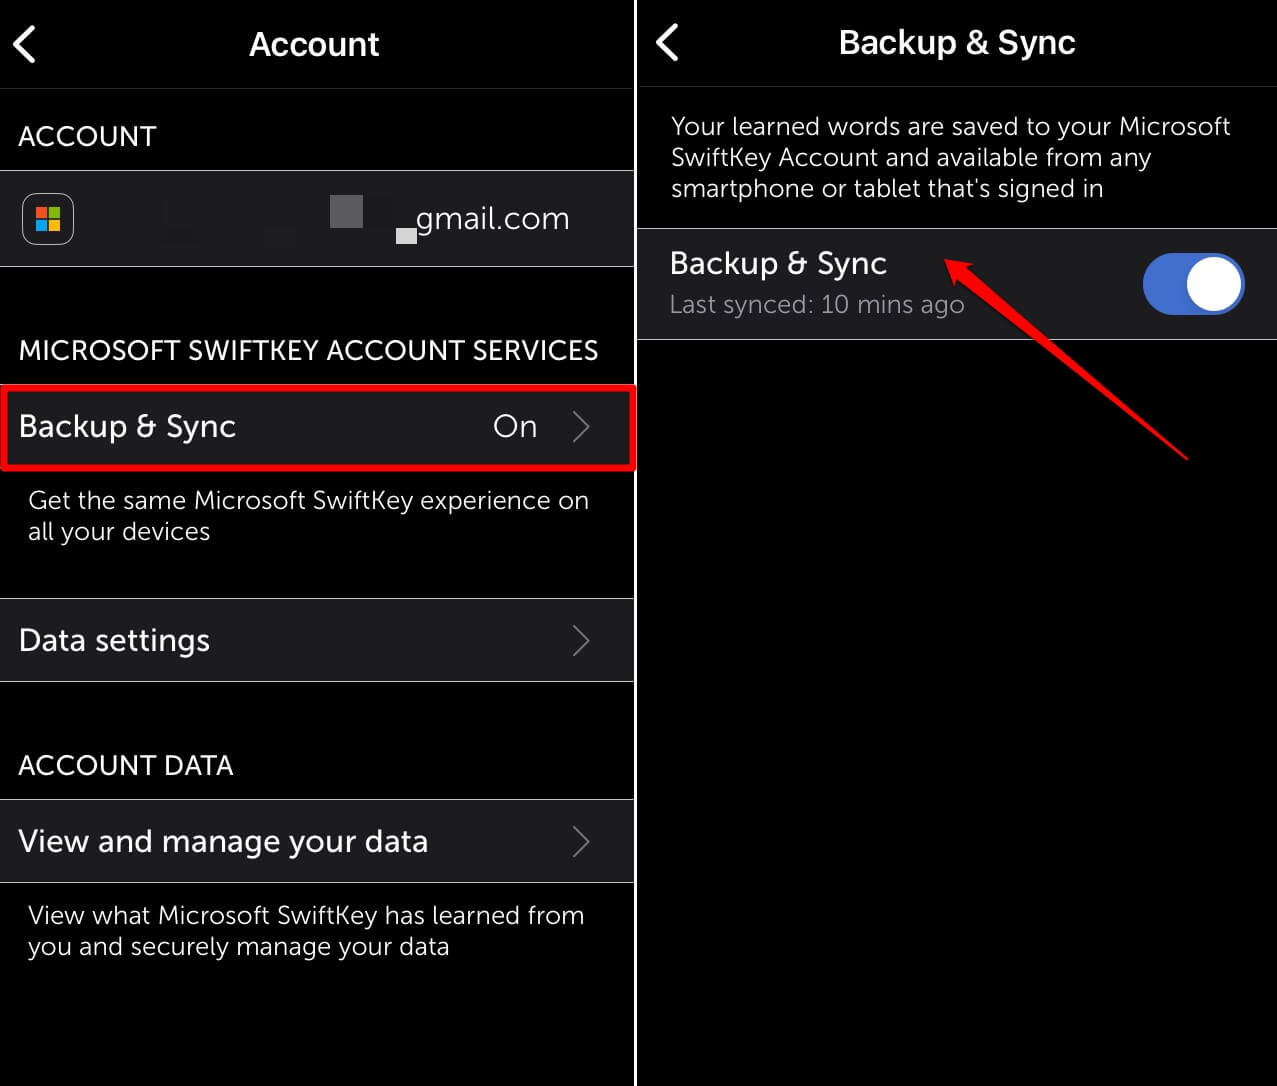
- Tap on Swiftkey account settings.

- Enable Backup & Sync to link the actions performed on Swiftkey on your PC and phone.

The above steps were carried out on an iPhone. The steps will be fairly similar on the Android version of the app.
Frequently Asked Questions(FAQs)
What are the Various Items that can be Copied to the Clipboard?
Primarily, you can copy text and images to the Clipboard.
Is it Possible to Sync the Clipboard Between a PC and a Mobile Phone?
Yes. If a computer and phone are linked, you can sync the clipboard items from one device with another.
Is Clipboard Sync Between Devices Dependent on Internet Connection?
Yes. You must have an internet connection over which both the PC and the mobile are connected to use clipboard syncing between them.
How Much Items Can I Copy to the Clipboard?
Up to 25 items can be stored on the clipboard history.
Do the Items Copied to the Clipboard Remain Even After Turning the PC Off?
No. When you turn off the computer, all the items stored on the Clipboard get removed.
Bottom Line
That’s a wrap for this guide about enabling clipboard sync on Windows 11. This feature lets you sync the clipboard items between your phone and the PC to improve your workflow. Try it out.
If you've any thoughts on How to Enable Clipboard Syncing in Windows 11, then feel free to drop in below comment box. Also, please subscribe to our DigitBin YouTube channel for videos tutorials. Cheers!
