In this guide, I have shared some of the best ways to clear the clipboard history in Windows 11. A clipboard is a virtual space that contains the items you have copied for pasting. The purpose is to provide ease of using the copied item in the future so that you do not have to waste time doing copy-paste.
Sometimes, you may end up copying some sensitive data to paste. It may be a phone number, address, or any sort of password. It is not wise to keep such information available on a clipboard. What if someone has access to your PC and gets to see that information on the clipboard?
What if your PC gets hacked? The chances for that to happen might be slim, but you sure would not want to risk your data lying around on the clipboard for someone to see. So, it is a wise move to clear the clipboard history.
Best Ways to Clear Clipboard History in Windows 11
Here are some of the easy ways to remove the information present on your clipboard history if you are using Windows OS.
1. Use the Settings App to Clear the Clipboard History
Here are the steps to delete the information in the Windows clipboard from the Settings app.
- Press Windows + I hotkeys to access the Windows 11 settings.
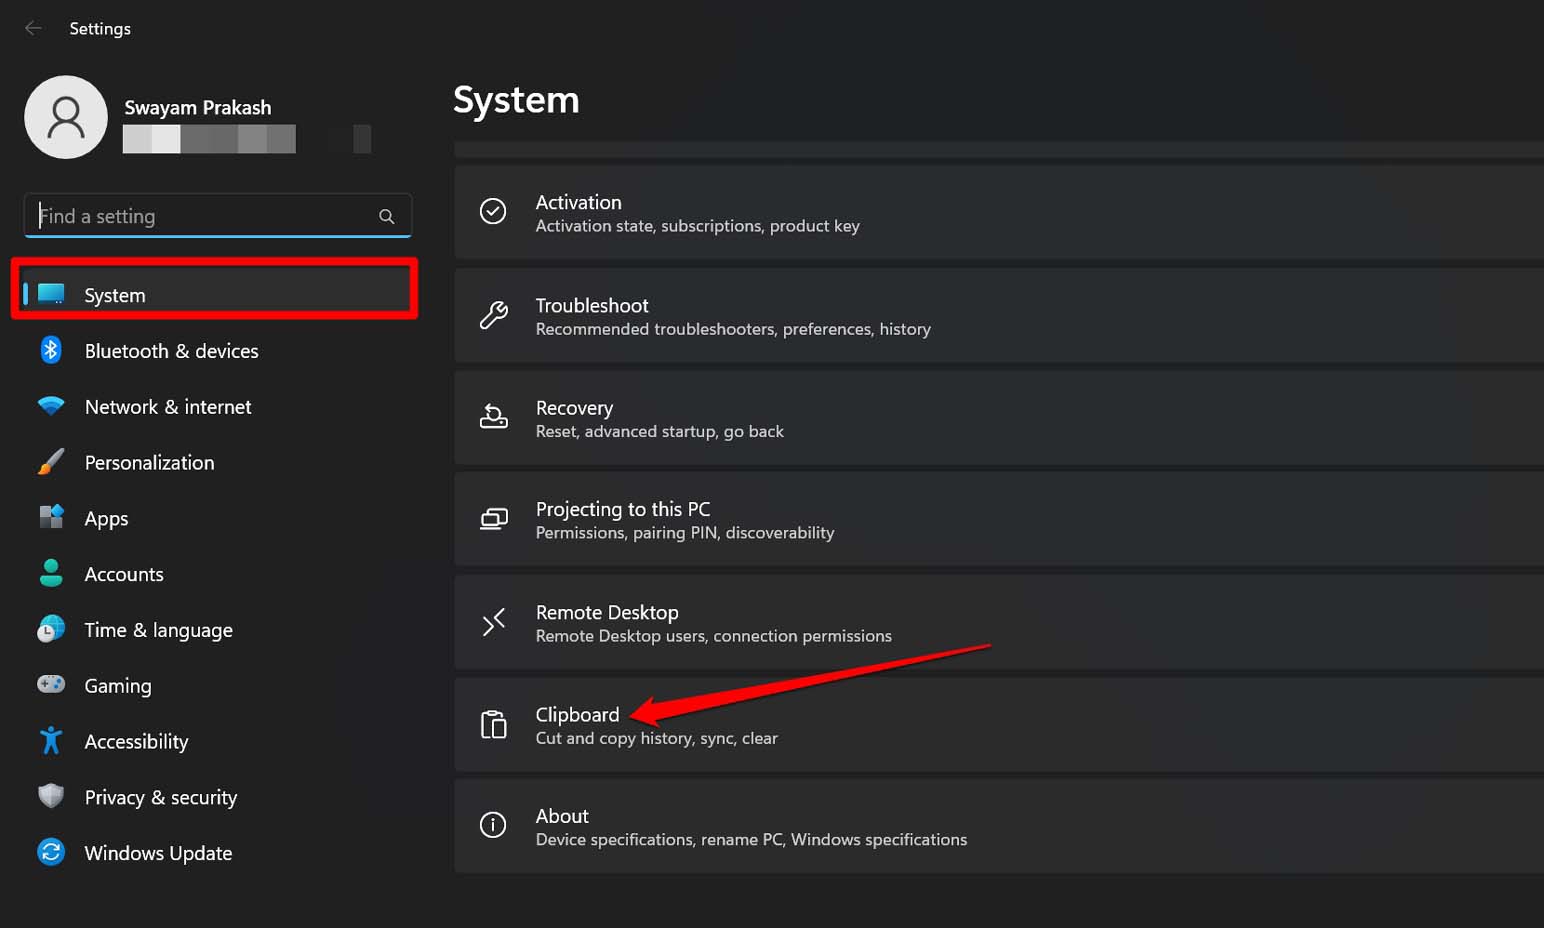
- On the left-hand panel of Settings, click on System > Go to Clipboard and click on it.

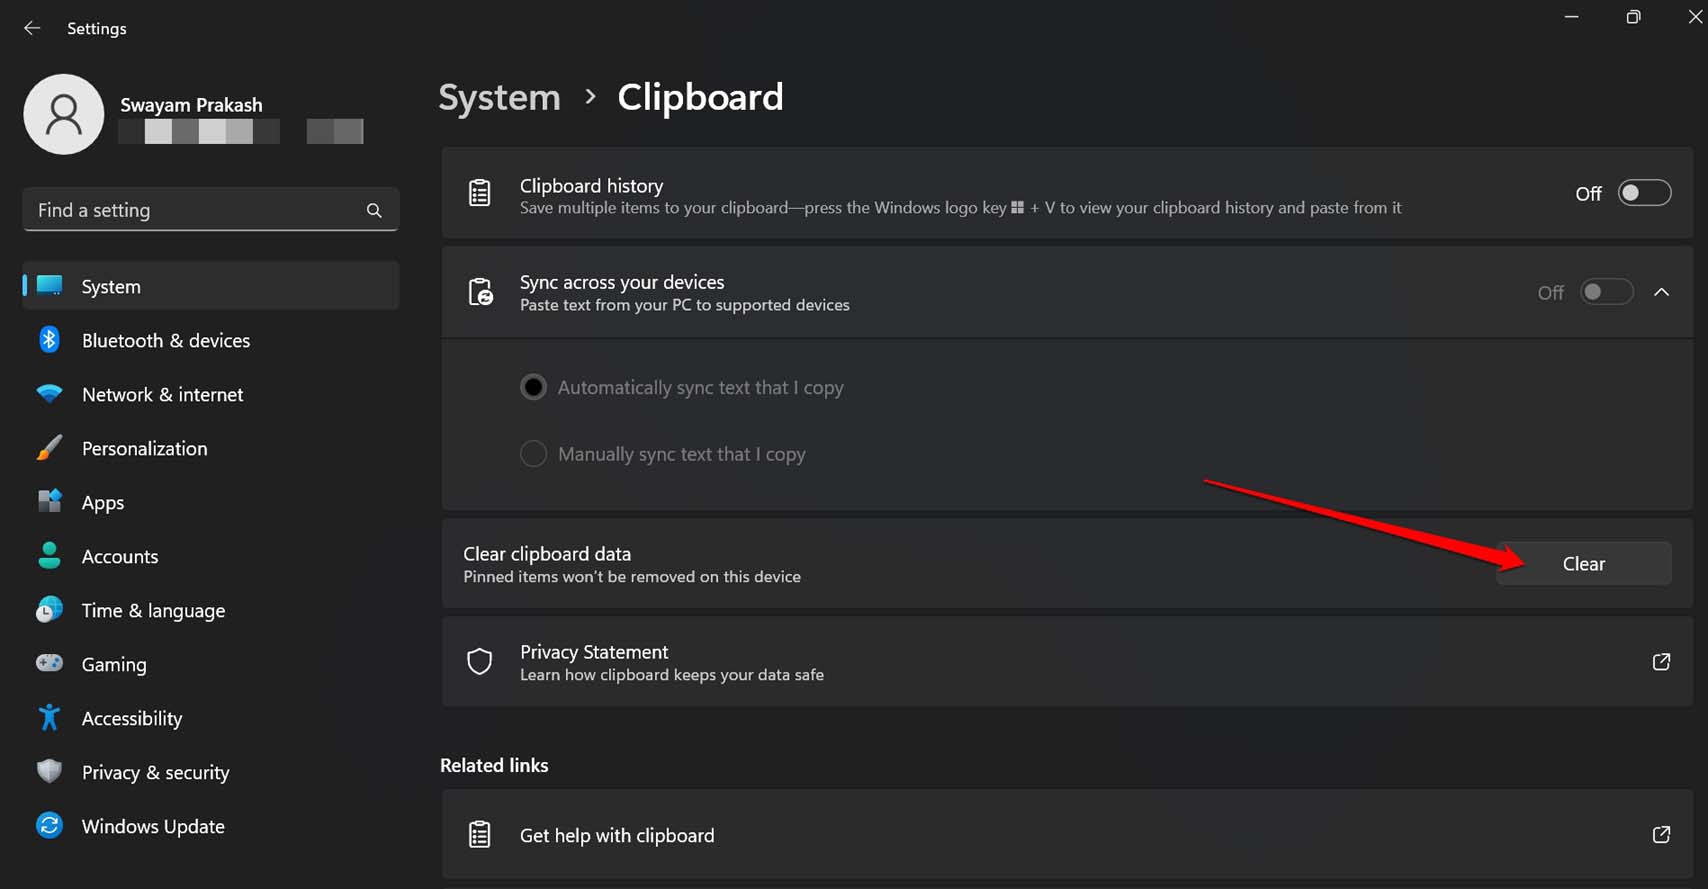
- Under that besides, the Clear Clipboard Data, click on the button Clear Data.

2. Disable Clipboard History to Stop Saving Items on Clipboard
As you are within the Windows settings, let me share an interesting tip with you. You can disable saving any text item on the clipboard. You can turn off the clipboard history from its settings. After disabling the clipboard history, if you are copying any item, it will not stay on the clipboard.
- Launch Windows Settings by pressing Windows + I.
- Go to System > Clipboard.

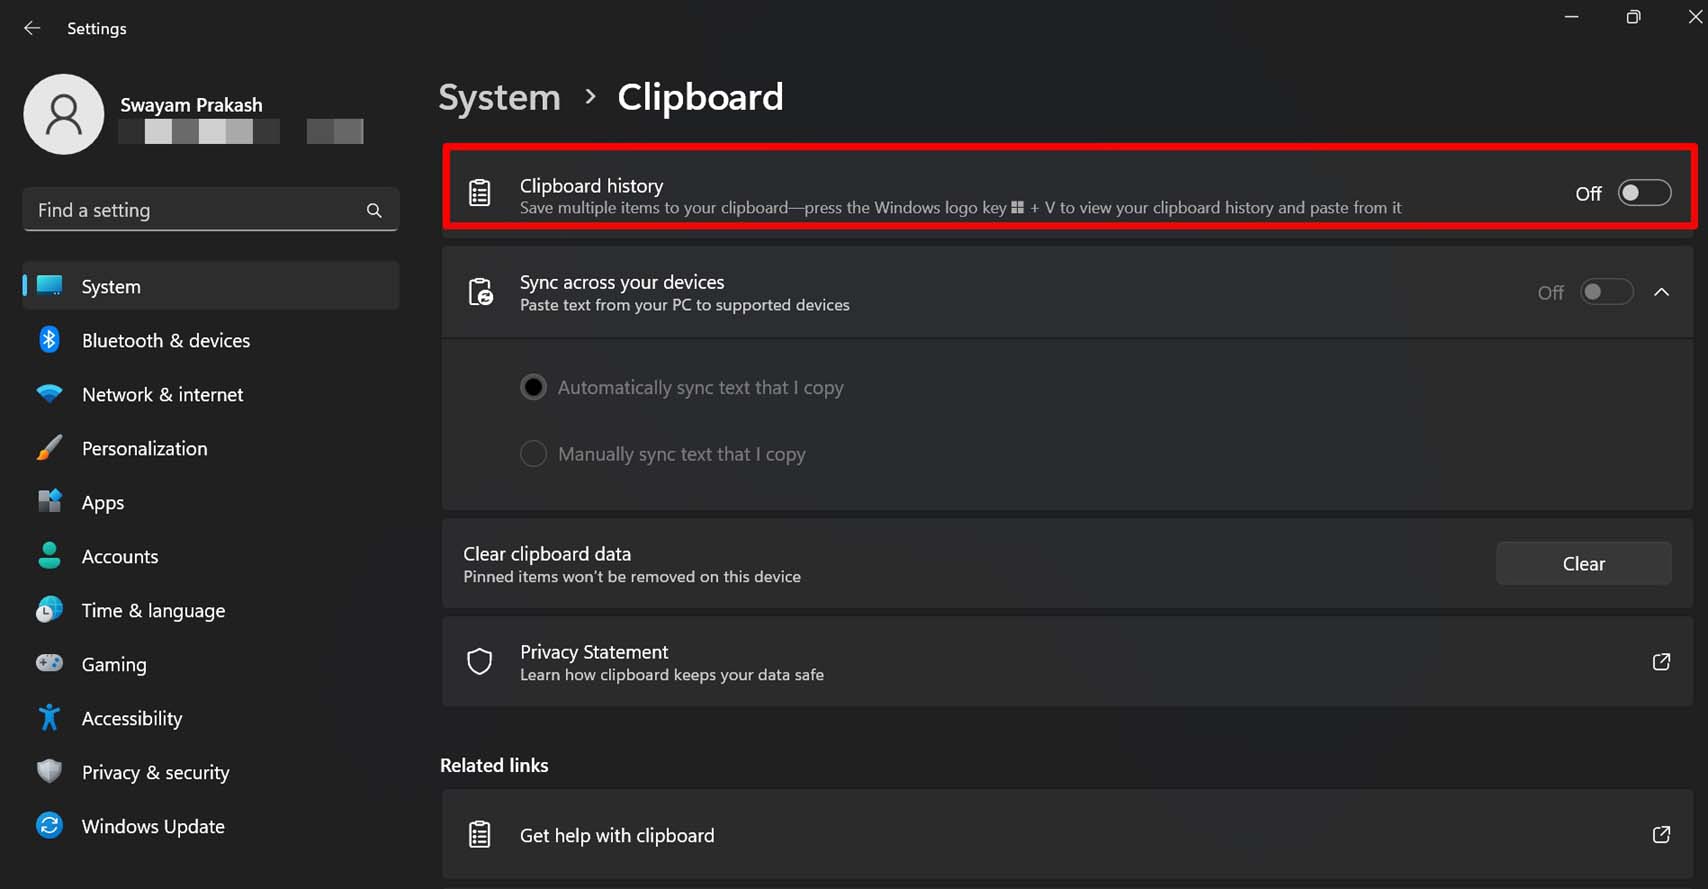
- Click the toggle beside Clipboard history to grey it out and disable it.

3. Clear Clipboard History Using Command Prompt
Command Prompt is another useful tool to remove items on the clipboard in Windows 11. Here is how to use it.
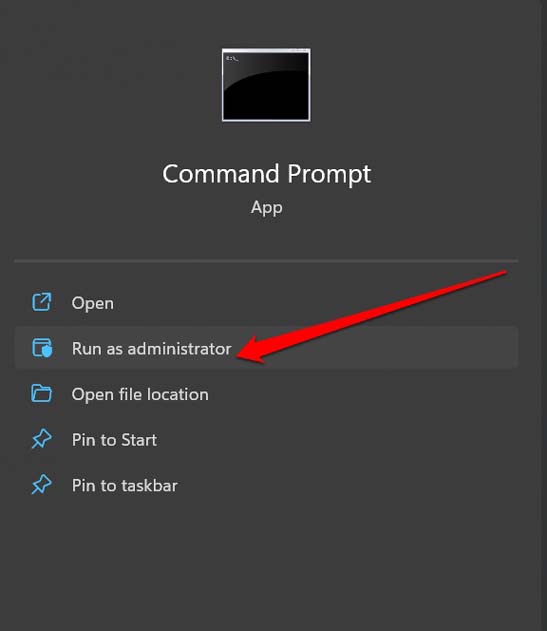
- Launch the Command Prompt as Administrator.

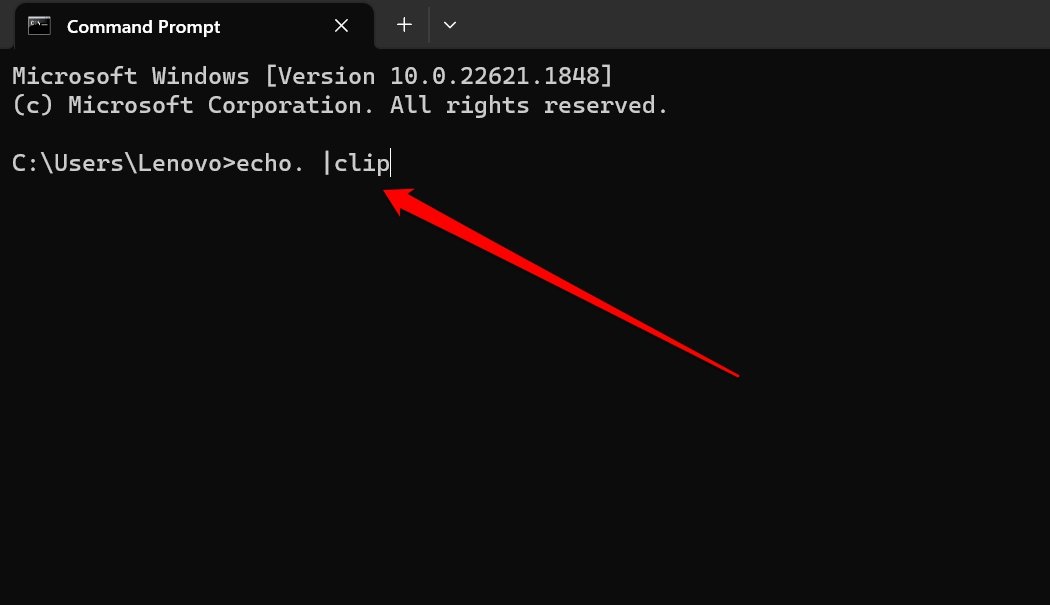
- enter the following command.
echo. |clip

- Press enter key.
4. Steps to Clear Clipboard History Using Windows PowerShell
You may also use the other command line tool PowerShell to issue a single command to clear the clipboard history.
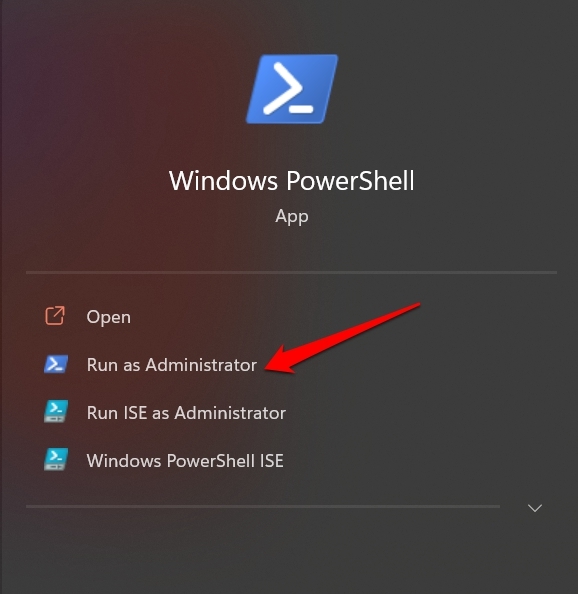
- Launch the Windows PowerShell using Windows search. (Win+S hotkeys)

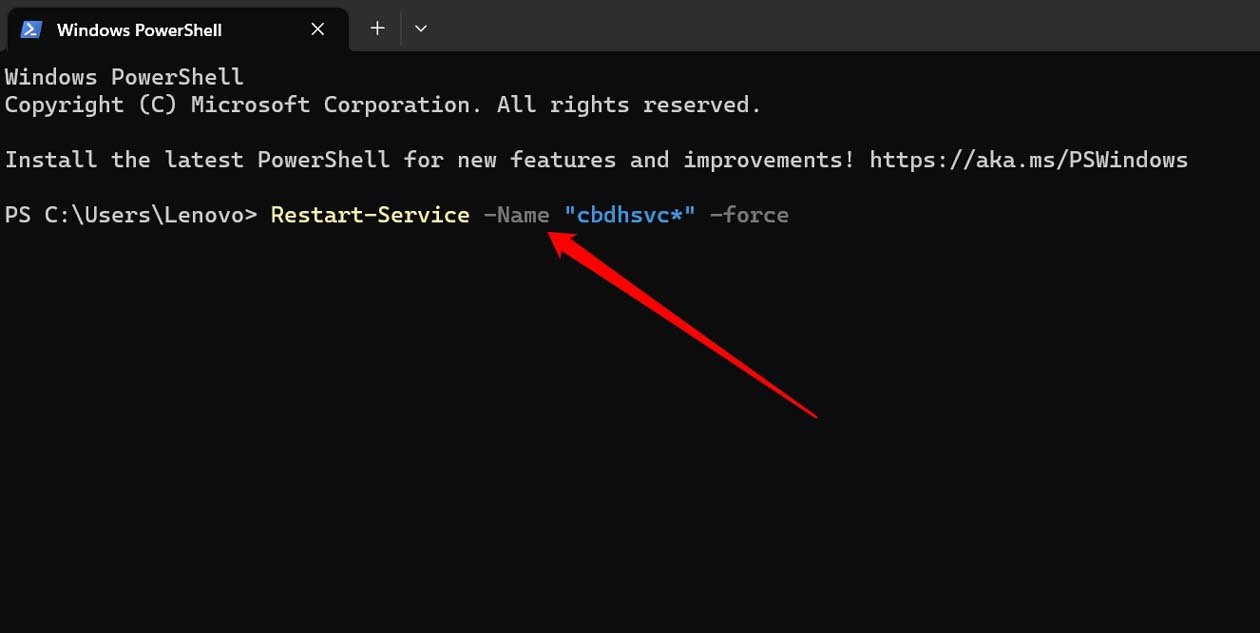
- Issue this command.
Restart-Service -Name "cbdhsvc*" -force

- Hit the enter key to proceed.
5. How to Clear Clipboard History from the Clipboard Tab
The quickest way to clear clipboard history is to access the clipboard tab.
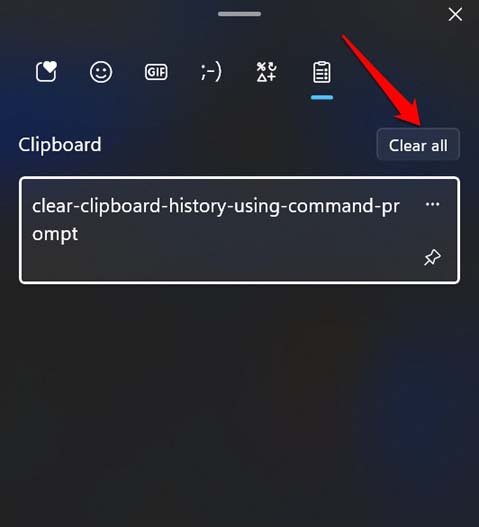
- Press Windows + V to launch the clipboard tab.
- Click on Clear All to remove the entire clipboard history.

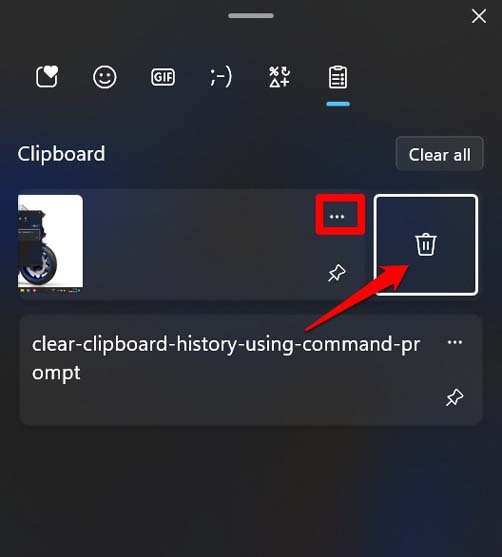
- Otherwise, to delete any particular item on the clipboard history, click the 3-dot icon next to it.
- Click the Trash icon.

6. Create a Shortcut to Clear the Clipboard History on Windows 11
If you are a tech-savvy individual and want to get creative with deleting your clipboard history, then this trick is for you. You can design a custom shortcut in Windows 11 that, when invoked, can clear the clipboard history. Let us know how to create that shortcut.
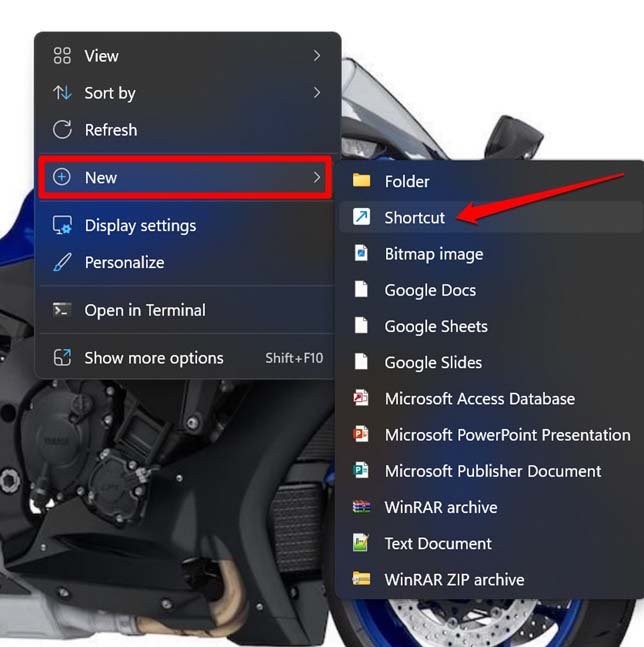
- Go to your Windows desktop by pressing Windows + D hotkeys.
- Then right-click on the desktop and select the option Shortcut from the context menu.

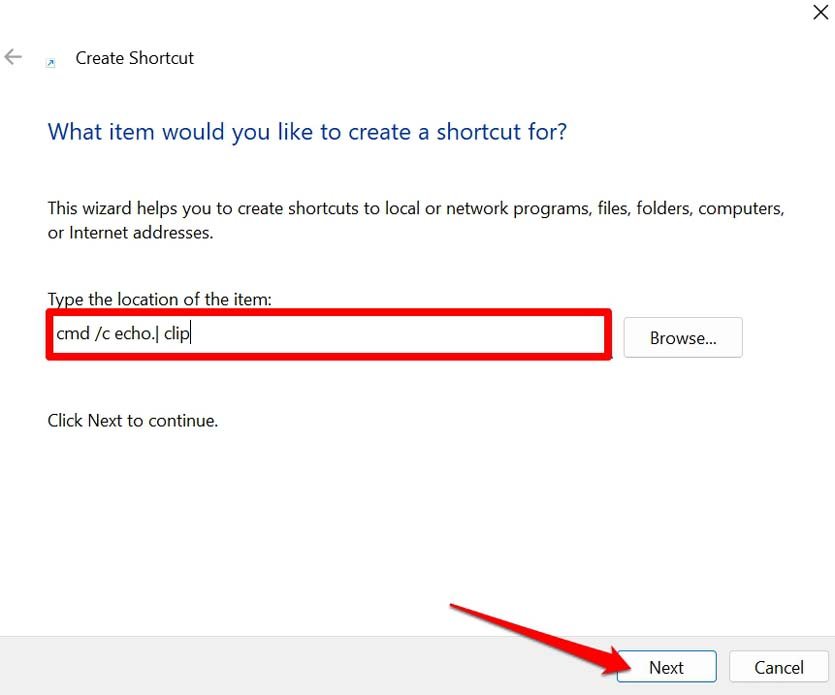
- Within the “Type the location of the item“, enter the following value.
cmd /c echo.| clip

- Click on Next.
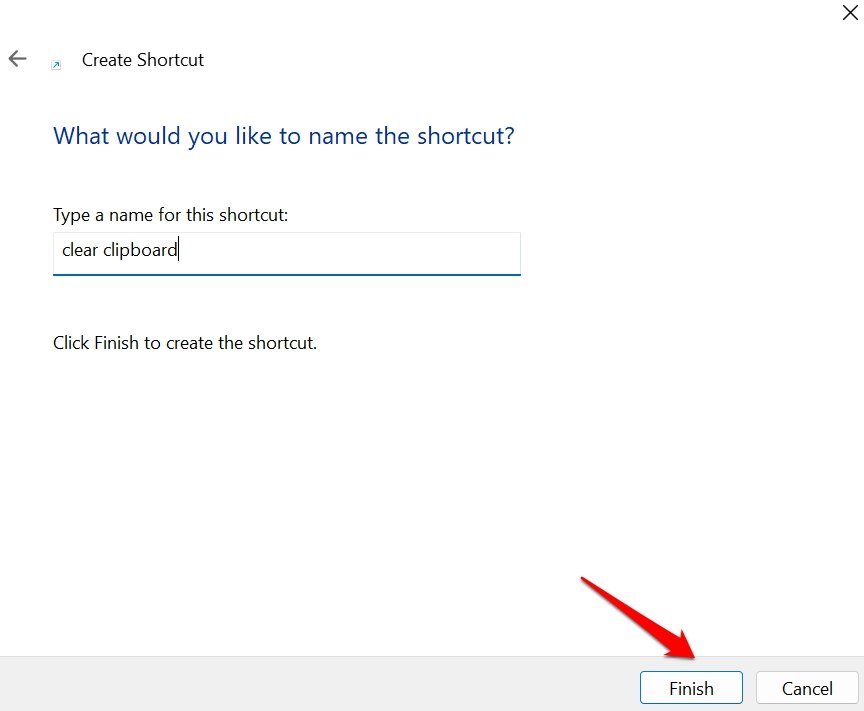
- Enter the name of the shortcut.
- Click on Finish, and the shortcut will be created.

This shortcut will be placed on your desktop. Now, all you have to do is simply double-click the above shortcut anytime and it will clear the clipboard history instantly.
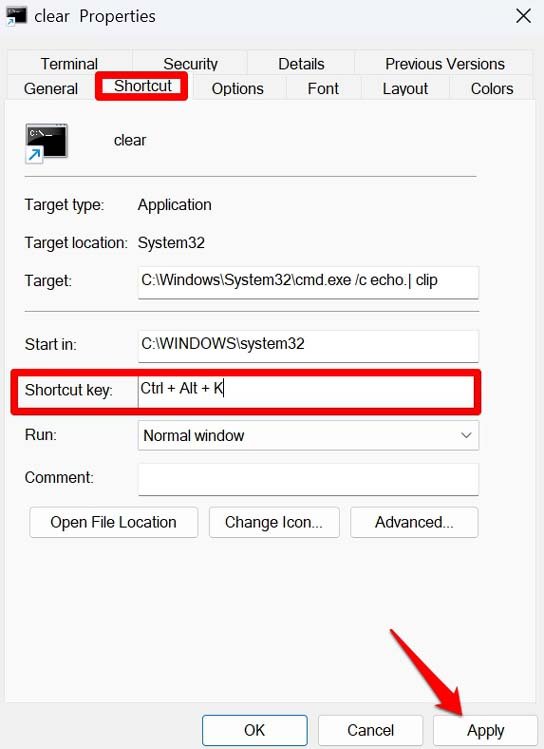
You can even set a keyboard shortcut to invoke this shortcut. To set that up, follow these steps.
- Right-click on the above shortcut you created and select Properties.
- In the Properties dialog box, click on the tab Shortcut.
- Scroll to the field “Shortcut Key” and enter a keyboard keys combination. (any combination of keys of your choice)
- To finalize the settings, click on Apply and OK.

Get back to the desktop, press the keyboard shortcut, and check if it clears out the clipboard history.
Keep that Clipboard Clean
These are the various methods that can help you clear the Windows 11 clipboard history almost instantly. You can remove individual items on the clipboard as well. It is so easy to implement and also keeps the sensitive data safe if you have copied them to the clipboard. I hope you found this guide useful.
If you've any thoughts on Top 6 Ways to Clear the Clipboard History in Windows 11, then feel free to drop in below comment box. Also, please subscribe to our DigitBin YouTube channel for videos tutorials. Cheers!
