This tutorial outlines five different methods through which you could fix Windows 11 search high CPU usage issues. The Windows OS beholds a handy search functionality, which has been given a much more prominent spot in its twelfth iteration.
This feature is now baked directly into the Taskbar; hence you could easily invoke it in just a single click. Furthermore, this search feature also beholds quite a nifty benefit- its in-depth query exploration technique. Not only does it scans your hard drive for the input query, but it would even bring up the search results from the online world.
However, while it’s indexing your query and looking for the appropriate results to display, it might end up hogging an astronomical amount of CPU and RAM. This would not only lead to a delay in getting the search result but could also slow down the entire system.
In this regard, there do exist some handy methods through which you could fix Windows 11 search high CPU usage. And this guide shall make you aware of just that. So without any further ado, let’s get started.
Best Ways to Fix ‘High CPU and Disk 100% Usage’ in Windows 11
Do keep in mind that there’s no universal fix as such. You will have to try out each of the below-mentioned workarounds until one of them spells out success for you.
Fix 1: Use Search Troubleshooter
Windows 11 comes with quite a few troubleshooter apps pertaining to different programs and features. And one of them is built specifically for its Search functionality. So let’s put it to the test and try and rectify the underlying issue via it.
- Bring up the Settings menu via Windows+I shortcut keys.
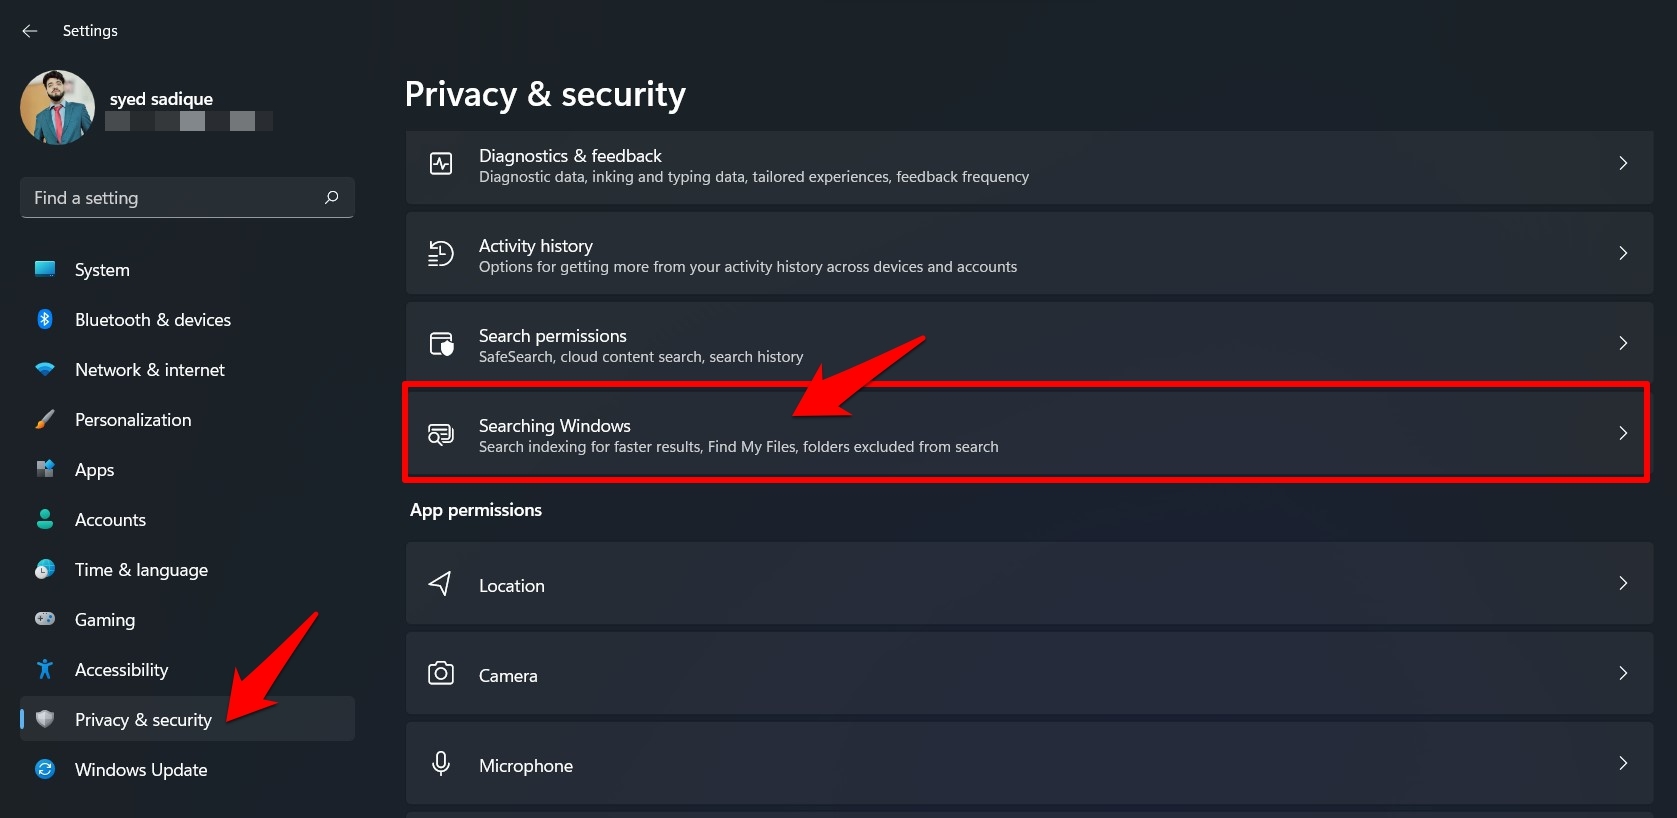
- Within that, go to the Privacy and Security section from the left menu bar.
- Then scroll to the Searching Windows section and open it.

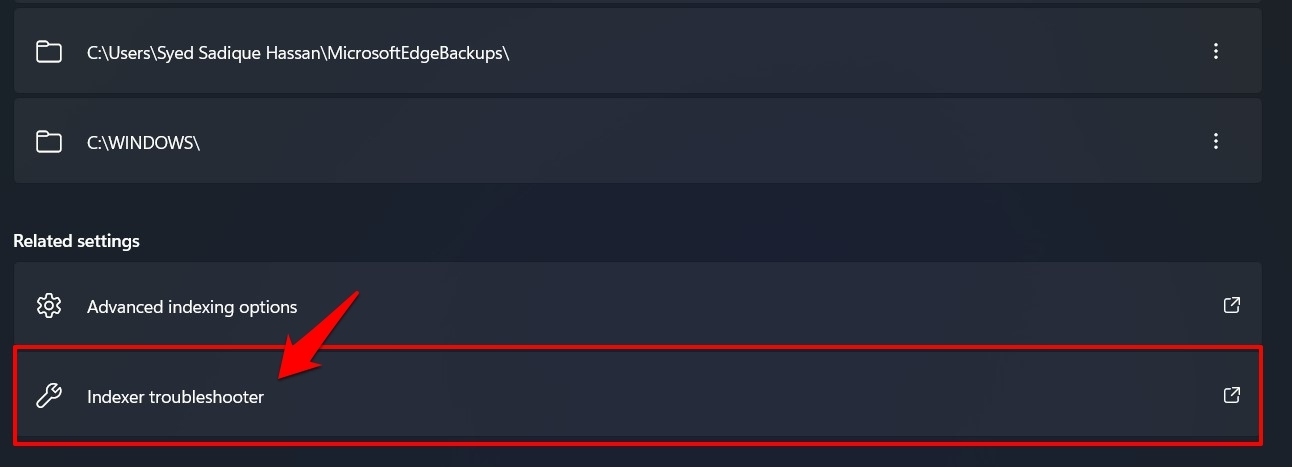
- Now click on the Indexer Troubleshooter present at the end of the page.

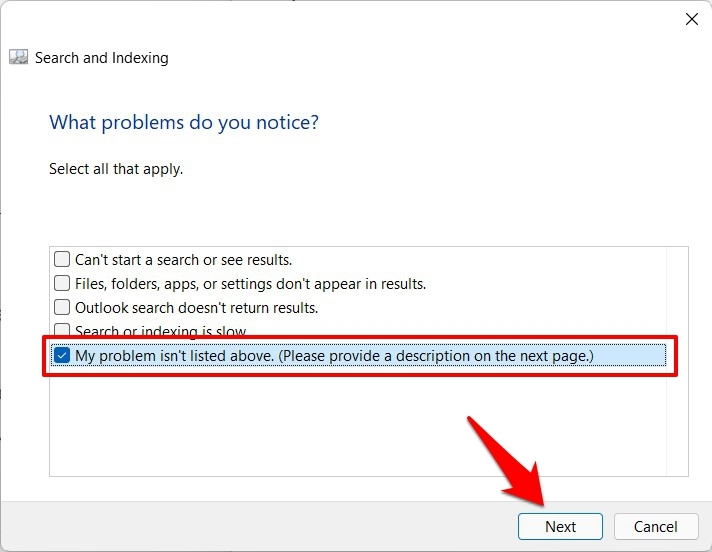
- It shall launch the Search and Indexing Troubleshooter. Select “My problem isn’t listed above” and click Next.

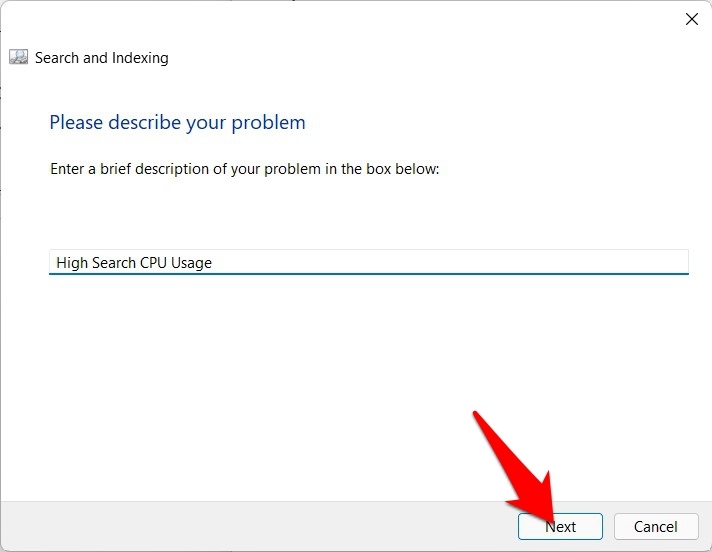
- After that, type in High Search CPU Usage (optional, you may leave this field blank as well) and click Next.

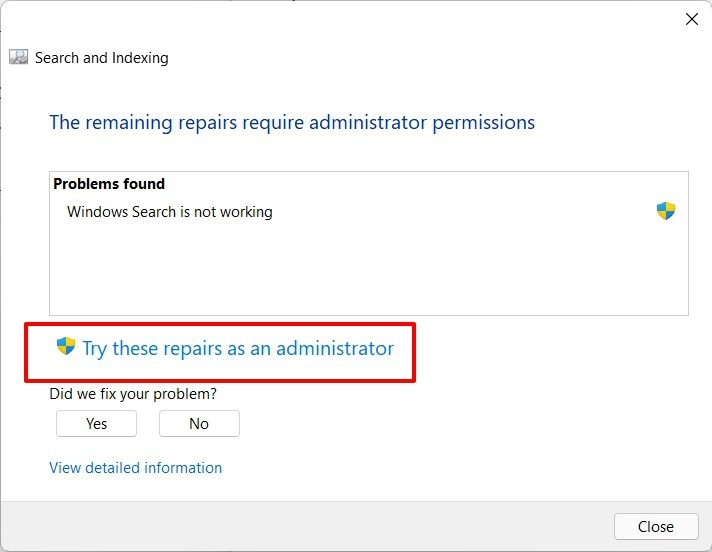
- The troubleshooter shall now bring up the required fixes corresponding to the said query.
- Click on “Try these repairs as an administrator” to apply these fixes.

- Once that is done, restart your PC and then check if it is able to fix Windows 11 search high CPU usage.
Fix 2: Restart Search Services
The Search Service is responsible for the proper working of the Windows search feature. If there’s an issue with it, then there’s bound to be a few issues with Search. Right from its inability to display the query results to the consumption of high system resources, these problems are along the expected lines. Fortunately, the rectification of this issue is quite easy to execute- you just need to restart the Search Service. Here’s how:
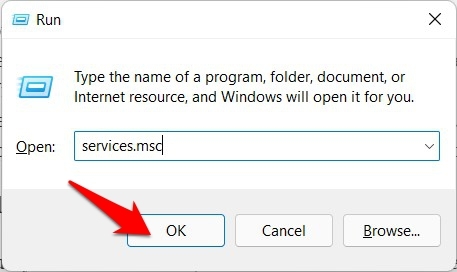
- Use the Windows+R shortcut keys to bring up the Run dialog box.
- Then type in services.msc and hit Enter. This shall open the Services settings menu.

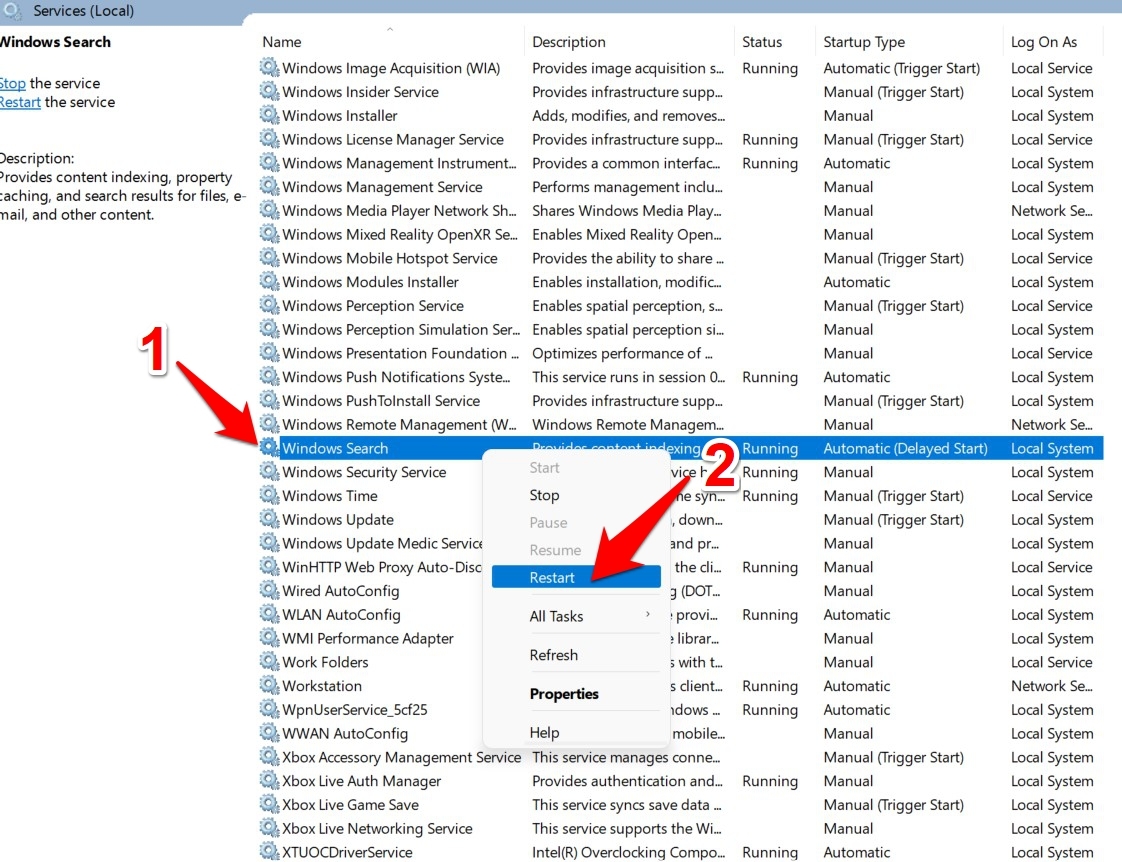
- Please scroll to the Windows Search, right-click on it, and select Restart.

- Now give it a few seconds until the service is up and running again.
- Once that happens, verify whether it was able to fix Windows 11 search high CPU usage issue.
Fix 3: Reduce Indexing Directories
When you input a query in the search field, Windows indexes all the directories on your PC. This is a resource-intensive task and requires a handful of minutes to be executed successfully. And while this indexing is going on, it could spike up the usage of RAM and other related resources.
In this regard, you could exclude a few folders from being indexed that you rarely interact with. This, in turn, would translate to dual benefits- faster indexing and fewer utilization of resources. Here’s how it could be done:
- To begin with, open Settings from the Start menu.
- Then select Privacy and Security from the left menu bar.
- Go to the Searching Windows section.

- Now click on the Add an excluded folder button.

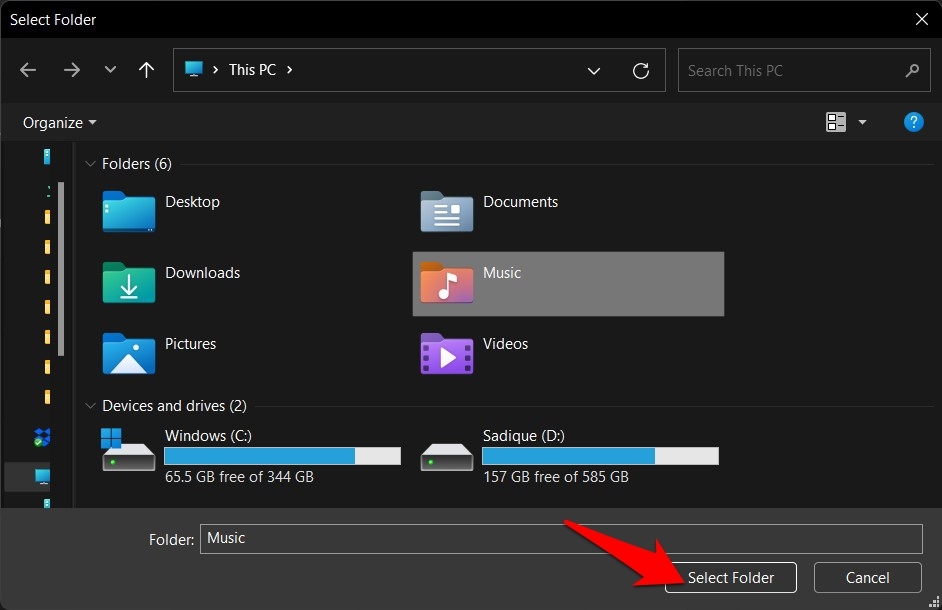
- Navigate to the desired folder that you wish to blacklist and hit Select folder.

From now on, Windows will no longer index those folders, and this, in turn, would speed up the index. Likewise, it could also fix Windows 11 search high CPU usage.
Fix 4: Use the SFC and DISM commands.
In some instances, broken or corrupt configuration files could lead to a spike in resource consumption. In this regard, you should consider using the SFC and DISM commands.
The System File Checker and Disk Deployment Image Servicing and Management are two command-line tools that scan for corrupted Windows Image, Recovery, and Registry files and replaces them with their working counterparts.
- So head over to the Start Menu, search CMD, and launch it as an administrator.
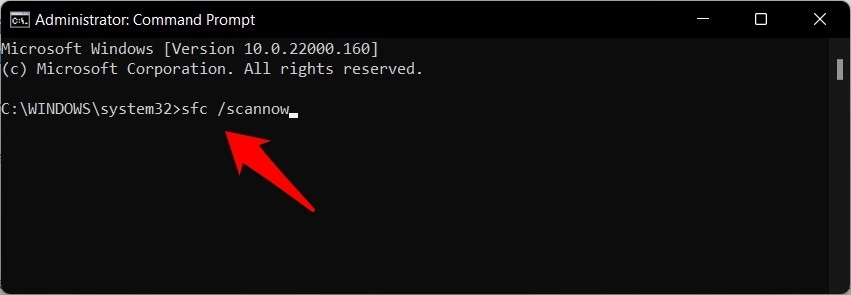
- Then type in the below command and hit Enter:
sfc /scannow

- Now, please wait for the SFC tool to carry out its task.
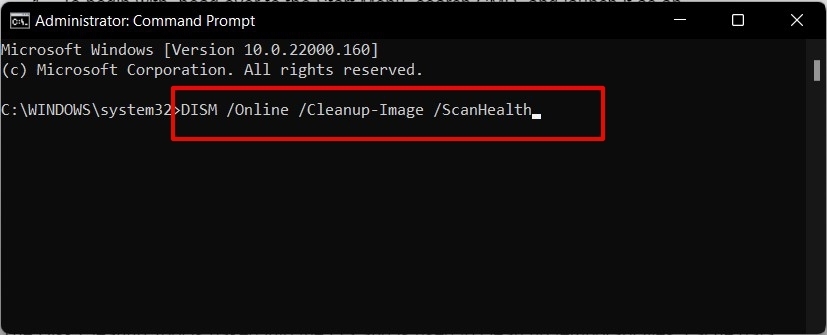
- Once done, execute the below command:
DISM.exe /Online /Cleanup-image /Restorehealth

- It shall launch the DISM Tool, which will scan and fix the corrupt system files.
Now that both the commands have been successfully executed restart your PC. Once it boots up, check whether it is able to fix Windows 11 search high CPU usage.
Fix 5: Rebuild Windows 11 Search Index
If the Indexing database has a few corrupt or outdated queries lying around, then it could spell out trouble for the entire Search functionality. The best way to get out of this is to rebuild the entire database. Though it might take a few minutes, the end result would definitely be worth the wait.
- Open the Settings menu and go to the Privacy and Security section.
- Within that, head over to the Searching Windows.
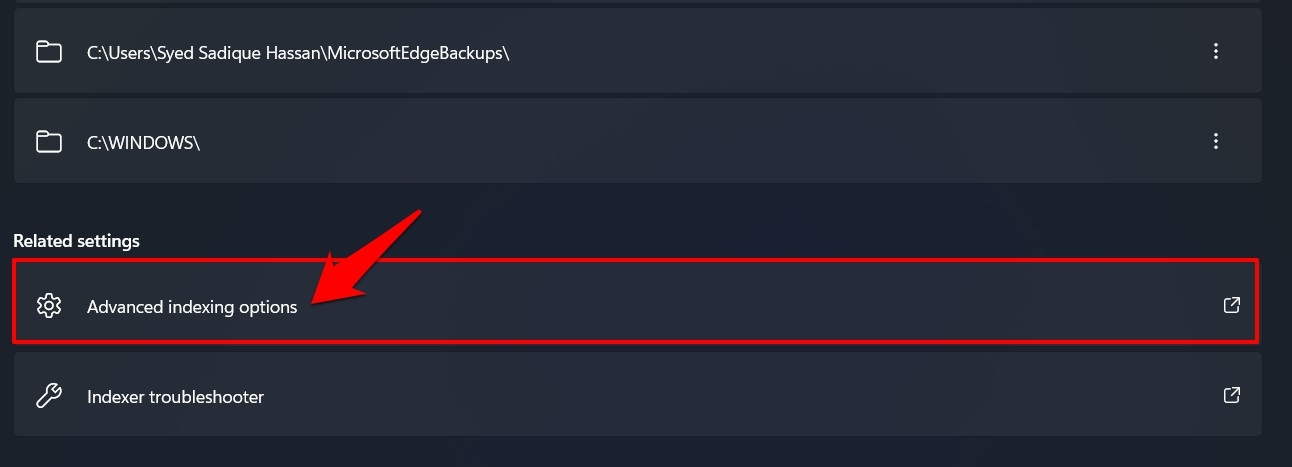
- Then click on Advanced Indexing Options.

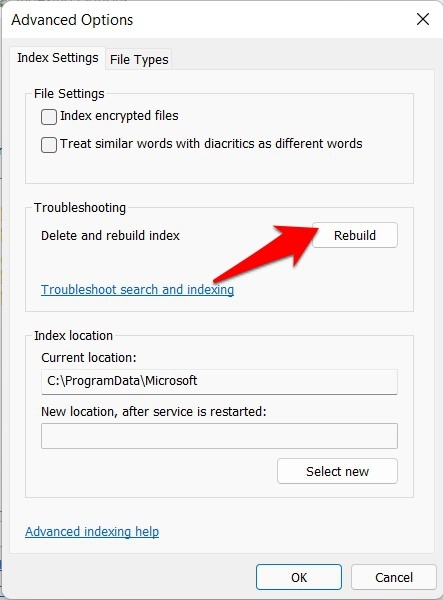
- After that, click on the Advanced button in the Indexing Options dialog box.

- Finally, click Rebuild and wait for the process to complete.

- Once the rebuilding is done, it shall fix the high resource consumption issue.
Conclusion
So with this, we round off the guide on how you could fix Windows 11 high CPU usage. We have shared five different fixes for the same. Do let us know in the comments section which methods worked out for you.
If you've any thoughts on How to Fix Windows 11 Search High CPU Usage?, then feel free to drop in below comment box. Also, please subscribe to our DigitBin YouTube channel for videos tutorials. Cheers!
