If you’re not sure how your network data is consumed or what all websites you’re are sending data then consider adding the OpenDNS. The OpenDNS monitors all the incoming and outgoing request over the WiFi router.
This network monitor program works without any software, just you need to use their DNS IP address and the tracking will be enabled. The DNS settings are available on every WiFi router, thus these steps work on all the Routers.
One of the best features of OpenDNS is the ability to block the domain request also know as web content filtering. This helps in blocking all the network connection between your laptop, desktop, mobile phone as well as Smart TV connected to the router.
Before we start to make sure that we have pre-requisites:
- A network WiFi router.
- Stable internet connection.
- That’s it! no software or no app is needed.
Without further delay, let’s get started to set up OpenDNS on Router —
Step 1: Add OpenDNS IP Addresses in Router
Login to your WiFi Routers Admin portal (mostly http://192.168.1.1/) and look for the DNS settings page within the admin area.
The DNS settings are supported by all major network router manufacturers. Whether you are using the Netgear, D-Link, TP-Link or any local router device, the DNS settings are available at the admin area.
Here is the DNS settings page in my beetel Router which I got along with my ISP connection.
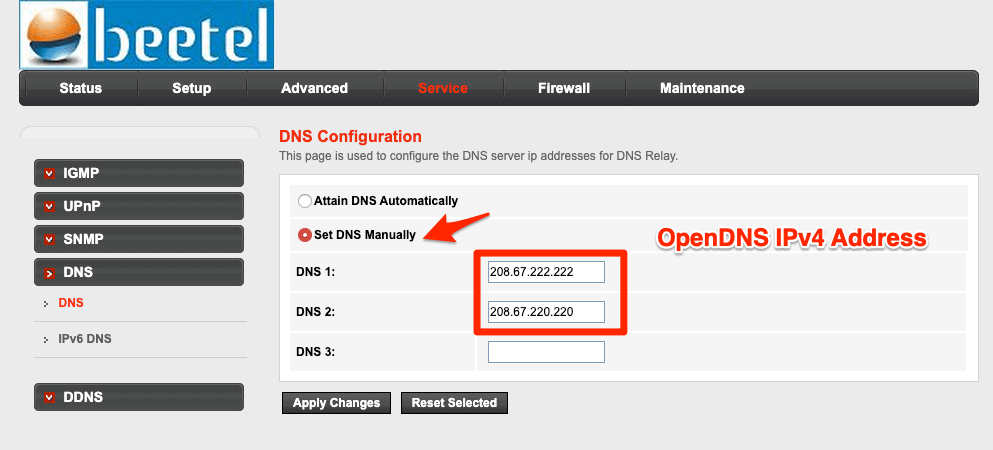 All you need is to switch the DNS settings from automatic to manual DNS setup. In manual DNS settings, enter the below OpenDNS IPv4 addresses:
- 208.67.222.222
- 208.67.220.220
Save and restart your WiFi network router to commit these changes. It will take a few minutes to make the changes to your router.
Step 2: Test OpenDNS configuration
After your router is restarted try accessing this welcome OpenDNS page to verify if the DNS configuration is successful.
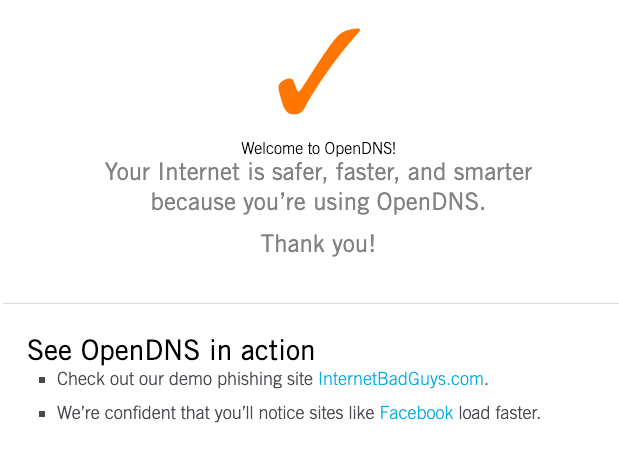
You will get this orange color tick symbol along with the message: Your Internet is safer, faster, and smarter because you’re using OpenDNS. This means your router is successfully configured to use the OpenDNS service.
Step 3: Create a Free OpenDNS Home Account
Next, we need to create an OpenDNS account for free personal home-usage. Head over to the OpenDNS Home Sign up page and fill in with the requested details.
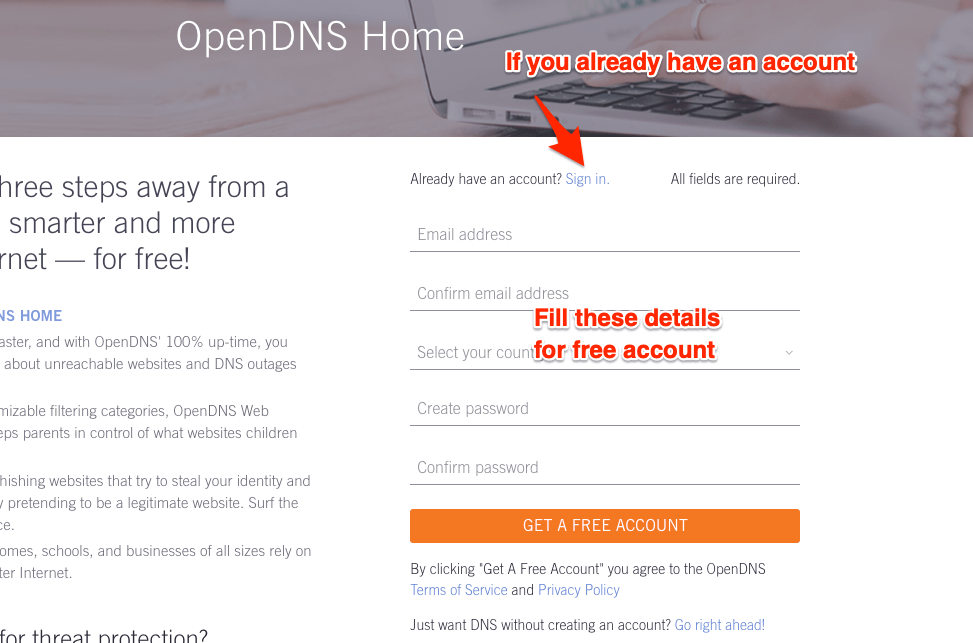
You’ll also receive a confirmation mail to verify the email ID. Post that, sign in to OpenDNS Dashboard using the same credential used while registration.
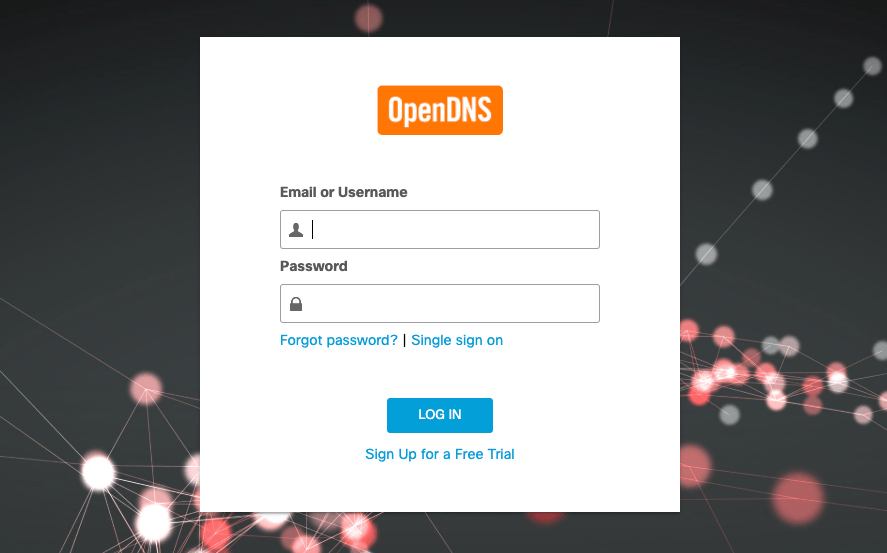
Step 4: Configure Network IP address in OpenDNS
After you sign in the OpenDNS dashboard, switch to the Settings tab. You will be displayed with the option to create or add a network with prefilled IP address and settings. This IP address is currently assigned by your ISP provider.
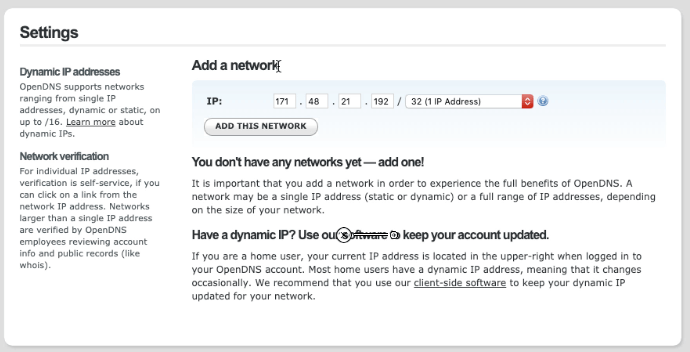
Just hit on [ADD THIS NETWORK] button and give it a name, say Home WiFi or Work WiFi.
Now your ISP network IP is mapped with OpenDNS service.
Note: If your ISP assigns the dynamic IP addresses, then you can use an OpenDNS updater software program that will automatically renew the network with the new dynamic IP address. You can download the latest OpenDNS updater from these download links:
Step 5: Enable Stats and Logs Record
Lastly, enable the stats and logs recording in the OpenDNS. The option is available below the web content filtering tab on the same network settings page.
Just enable the checkbox against the Stats and Logs option and hit on [Apply] button.
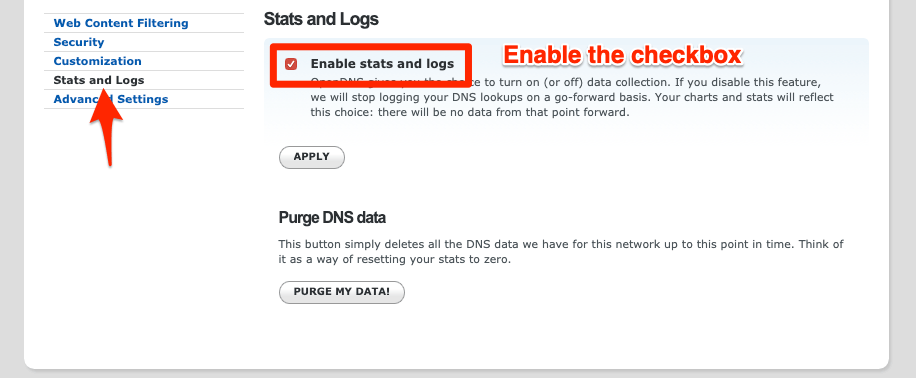
This will start monitoring all the network flow from your router. If you switch to the STATS tab > Domains and select the date range, you will be able to see the network logs.
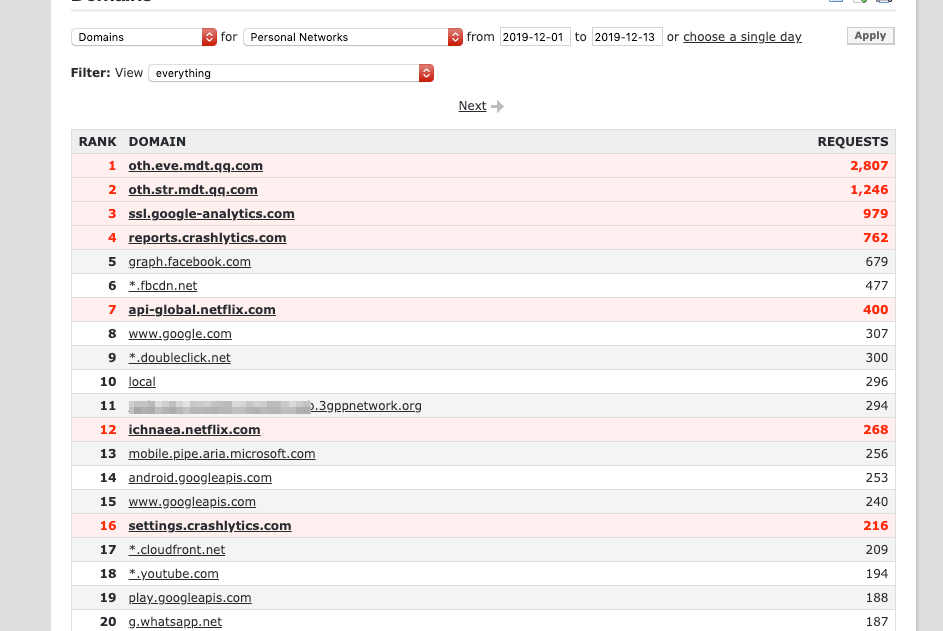
Records appearing in red are blocked requests and rest everything is whitelisted.
Block Website and App using OpenDNS
As mentioned earlier, the OpenDNS can be used as a network monitor and as a content filtering. It can be used for blocking all the network requests on a router without any software. All you need is to all the domain names of the request to the blocked list.
Here are a few examples that I’ve set up using OpenDNS content filtering:
Let me know if you find this information useful or facing any challenge for the OpenDNS setup on Router.
If you've any thoughts on How to Setup OpenDNS on any Router? (Easy Steps Added), then feel free to drop in below comment box. Also, please subscribe to our DigitBin YouTube channel for videos tutorials. Cheers!



HOW TO BLOCK AN APP NAMED “GARENA FREE FIRE” ON ROUTER (DLINK)