With this guide, I will explain to you how to fix if indexing is paused on Windows 11. Let us first check out what does indexing means? Well, on your Windows PC, to access any file or any drive, instead of browsing around with a trackpad or mouse, you press Windows + S. It invokes the search console, and you simply type out the search keyword related to the file or folder. That’s it. You land right on the location where the file or folder is present.
How to know if indexing is paused on Windows 11 or it is not working? When you search for something via Windows + S hotkeys, the search results never appear. This happens because the contents you are trying to access are not indexed. This may primarily happen if the Windows search service has been disabled. There are a few other reasons as well, which I have discussed in the next section.
Reasons Why Indexing is Paused on Windows 11?
Search is one of the many processes that actively run in the background of windows OS. If the laptop is low on battery, then Windows may pause a few services until juice is restored on the PC. You can make the changes in the power settings of Windows OS so that the search indexing feature will ignore the power status. Even if power is low, search indexing will not get affected.
Glitches and bugs on Windows OS can also cause the search indexing to malfunction. The presence of corrupt system files on the PC may also pause the indexing on Windows 11. The indexing data may have been corrupted on your PC; thus, the feature is not working.
Best Ways to Fix Indexing is Paused on Windows 11
Here are the various fixes that can resolve this snag on your Windows computer.
Update Windows OS
Start by removing the bugs from the Windows OS. To do this, you need to install the latest version of Windows OS launched by Microsoft. Normally, if your PC remains connected to a WiFi network, all the latest updates should be downloaded and notified to you. Then you can restart the PC and perform a quick installation.
You may also manually perform a search for the latest Windows OS that may be available.
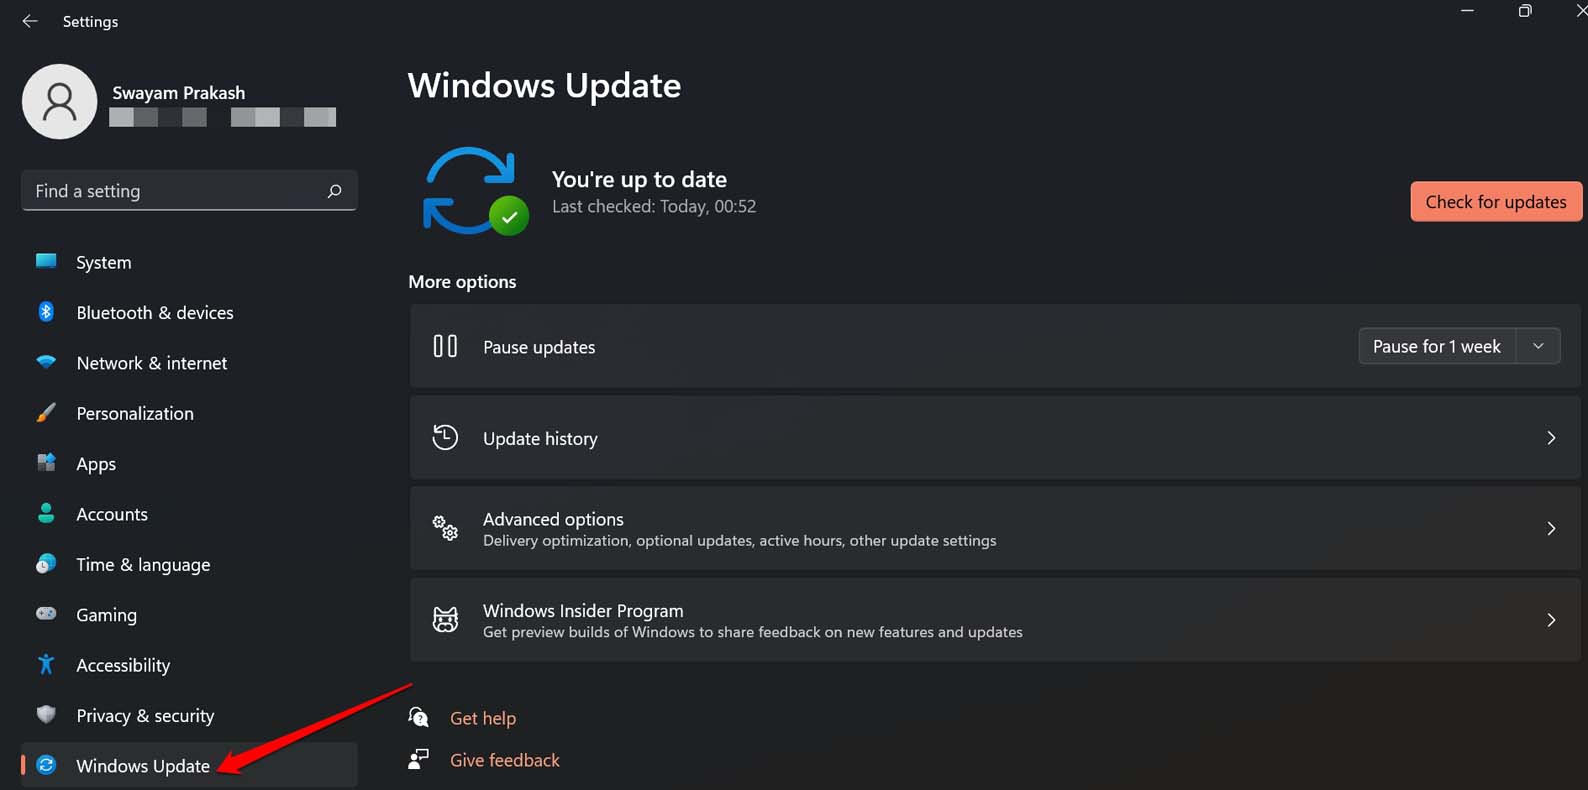
- Go to Settings by pressing Windows + I hotkeys.
- Then click on Windows Update on the bottom left panel.

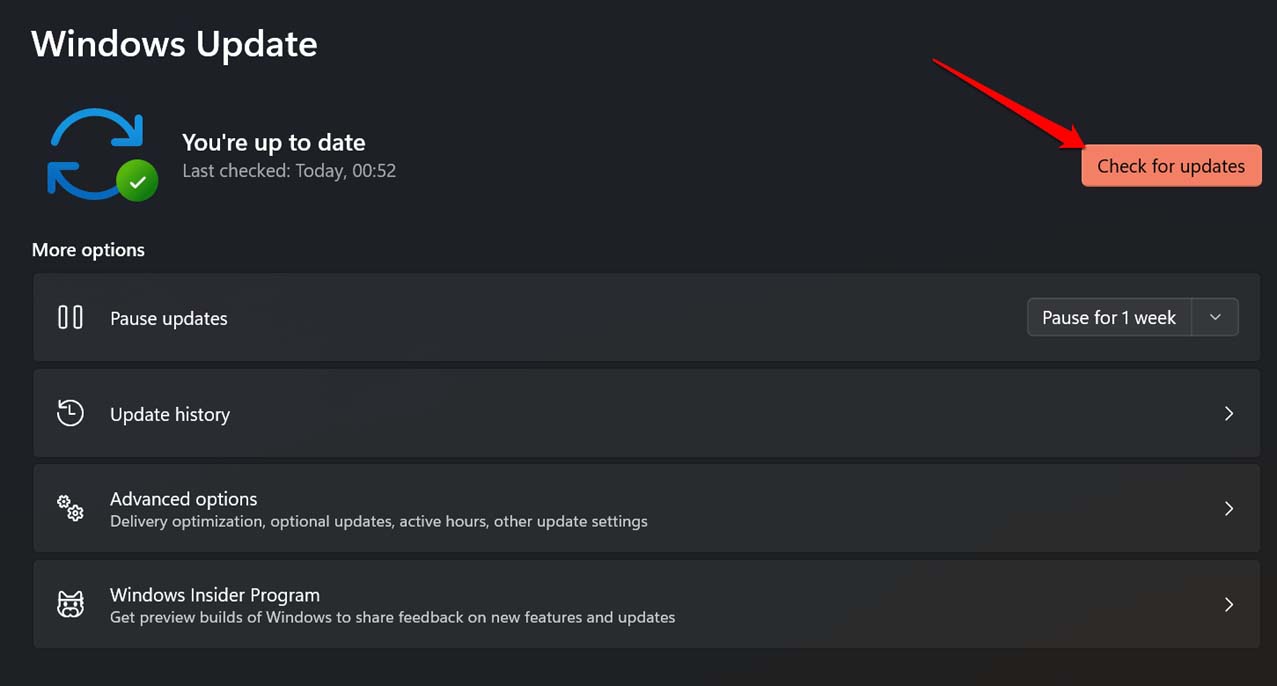
- Next, click on Check for Updates.

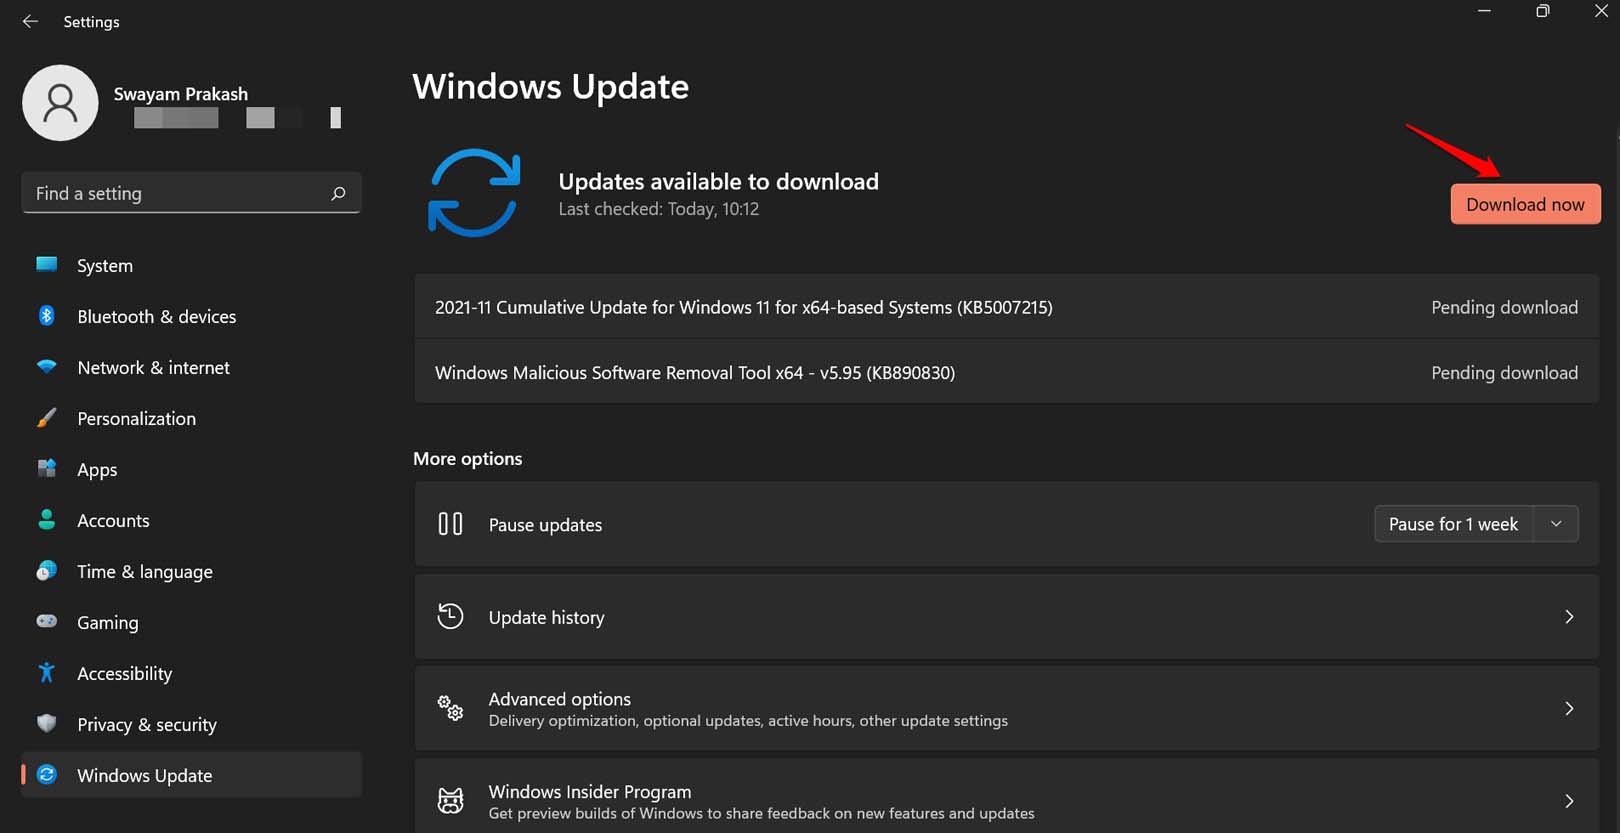
- If a new software bundle shows up, click on Download Now to grab it.

- Then proceed with the on-screen instruction to move ahead with the installation process.
Restart the Computer
Often when I come across the issue of Windows search not working, I simply perform a reboot. Then after the restart, the search function works well. You may give it a try as well.
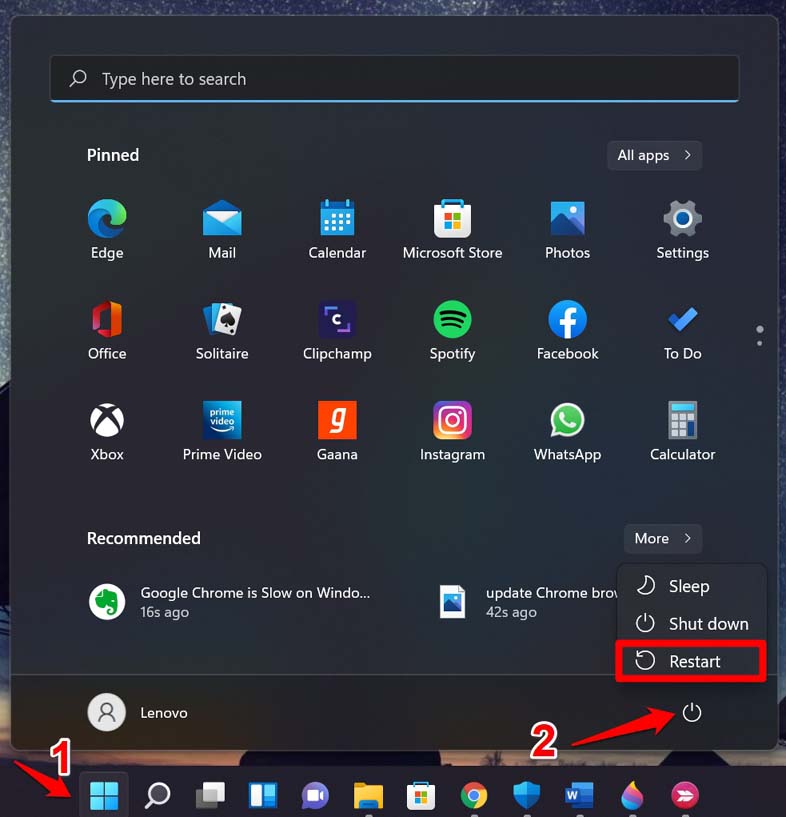
- Press the Windows key.
- The search console will pop up.
- At its bottom right corner, click on the power icon.
- From the small menu that appears, select Restart, and then wait for a few seconds.

- Once the PC reboots, Press Windows + S.
- Type your search query and check whether you are available to retrieve any search results.
If you are still facing the indexing error on Windows 11, try out the other troubleshooting tips mentioned in this guide.
Use the in-built Troubleshooter Tool
Windows has several native tools baked within the system that you can use to fix snags related to various technical aspects of Windows. There is one such dedicated troubleshooter for search and indexing as well.
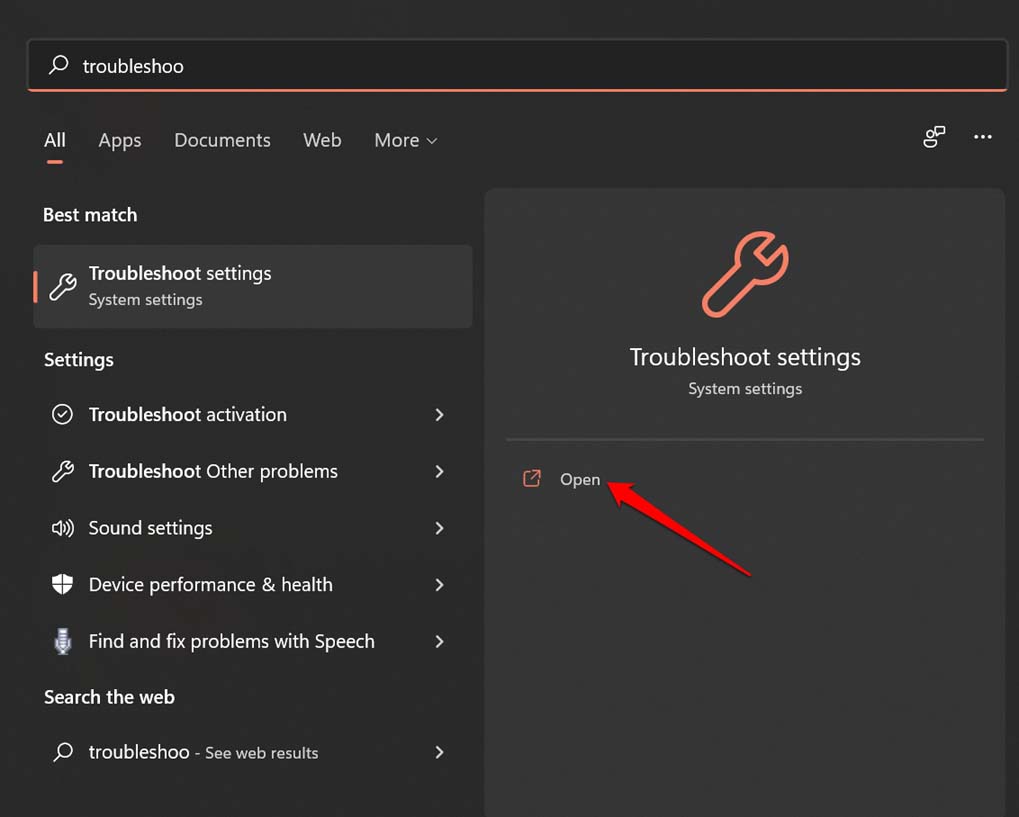
- Press on the Windows key.
- In the search console, type Troubleshoot settings.
- Click Open.

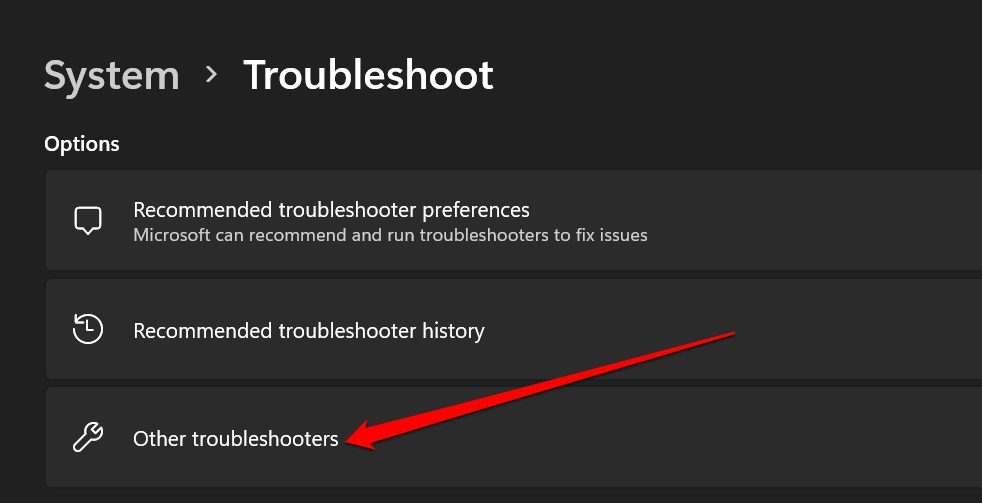
- Then click on Other Troubleshooters.

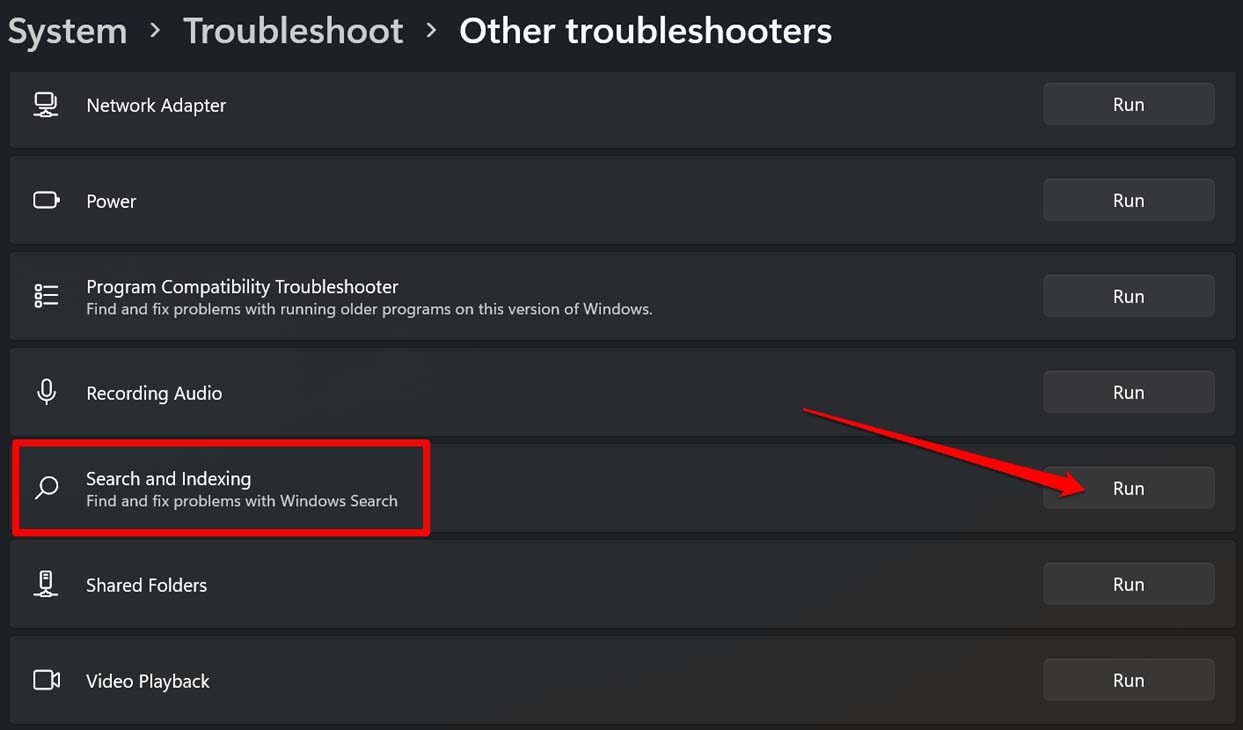
- Navigate to Search and Indexing and click on the button Run.

The tool will look for errors with the service and fix the same.
Rebuild the Indexing Data on your PC
To fix a corrupt index library on Windows 11, you have to rebuild the index. Here are the steps to do that.
- Press Windows + I to get to the settings.
- Click on the Privacy & Security tab in the left-hand corner.
- Then under that, click on Searching Windows.
- Navigate to the Related Settings tab and within that, click on Advanced Indexing options.
- A dialog box will open. Click on the Advanced button.[make sure to have administrator access to do this.]
- Under the Troubleshooting section., click on Rebuild.
Keep in mind that, depending upon the amount of data you have on your PC, rebuilding the index library may take a reasonable amount of time. So, have patience.
Enable Search Indexing on Low Power
To allow Windows to perform search and indexing without any hassle even when the power is significantly low on the PC, here are a few steps you need to execute.
- Access the settings by pressing Windows + I.
- Next, click on the Privacy & Security tab in the left-hand corner.
- Then under that, click on Searching Windows.
- Next, go to the option Respect Power Setting when Indexing.
- Turn this feature off by clicking on the switch beside it.
Restart the Search Service on Windows
The search and indexing service should be enabled to work or provide you with relevant search results. To check if it is enabled or not,
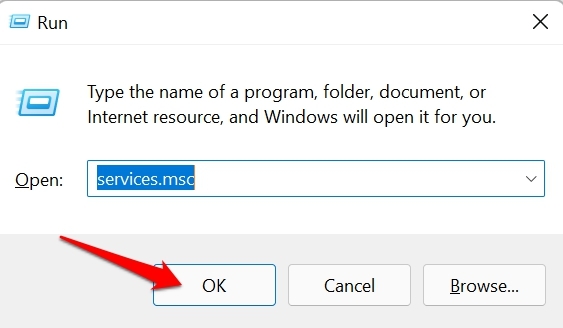
- Press Windows + R.
- In the Run dialog box, type services.msc and press enter.

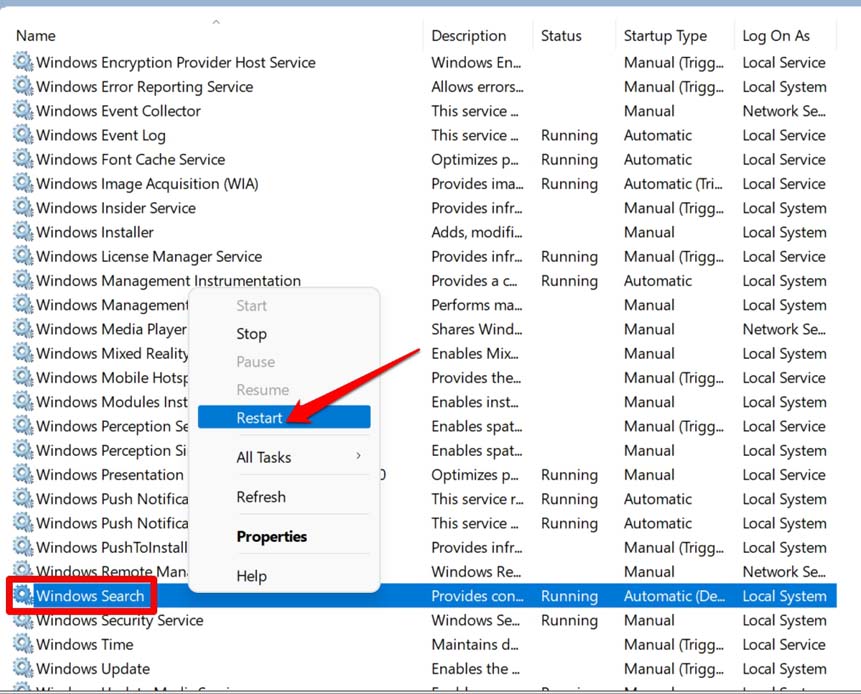
- In the service dialog box, click on Windows Search to highlight it.
- Then right-click on it and select restart. The issue should be fixed now.

Scan for Corrupt System Files
During copying files from other devices or installing any apps or even system updates, improper execution in the process may lead to corruption of system files within the OS. Fortunately, there is a command-line tool to find and fix such files.
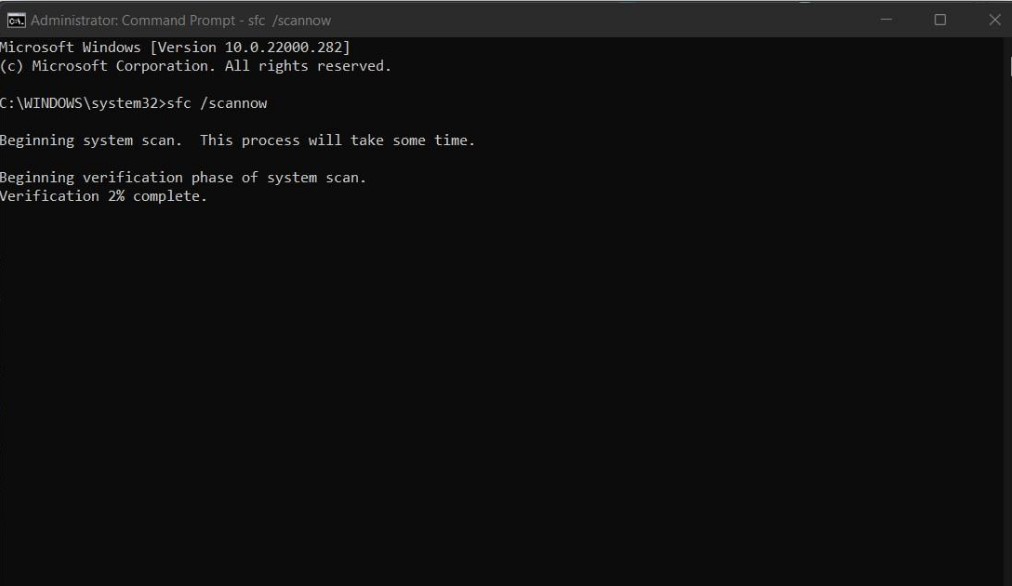
- Open the command prompt.
- Give the command
sfc /scannow

- Press enter.
- Wait while the tool fixes the corrupt system files.
- Restart the PC once the process is over.
- Then, check if indexing is working or not.
Perform a System Restore
You may consider performing a system restore to go back to a point in time when the search and indexing were working fine on the Windows.
- Press the Windows key.
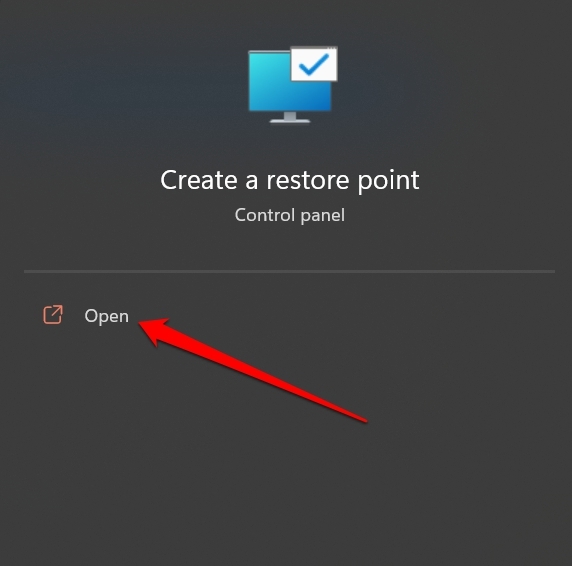
- Type in restore in the search console.
- As you see the option Create A Restore Point, click on Open.

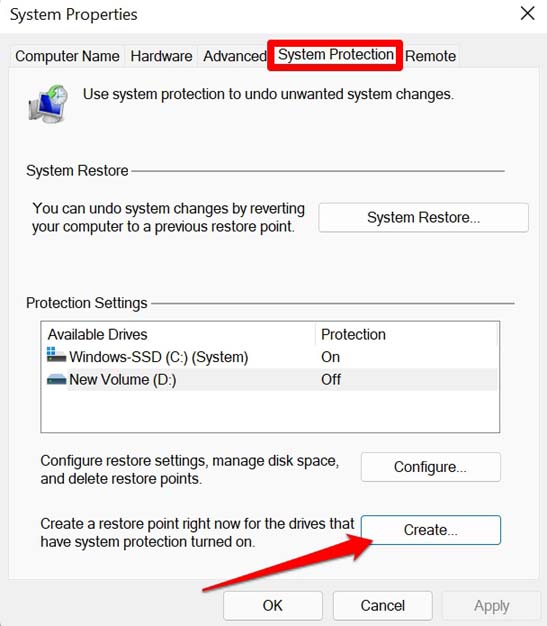
- On the System Properties dialog box, click on System Restore.

- Select an automatic restore point provided by the Windows, or if you have previously created restore points manually, you may choose from that as well.
- Click on Next and follow the further on-screen instructions to perform the system restore.
Modify Windows Registry
if none of the other methods worked in fixing the paused indexing issue on your PC, then try to modify the registry by creating a new key by the name Windows Search and enabling it.
- Open the Registry by pressing Windows + R > type Regedit.
- Follow the path I have mentioned below.
HKEY_LOCAL_MACHINE\SOFTWARE\Policies\Microsoft\Windows
- Right-click on windows > Select New > click on Key
- Name this key as NewSearchIndex.
- Now, right-click on the NewSearchIndex key.
- Select New > click on DWORD(32-bit)Value.
- Double-click on the DWORD Value you just created.
- Set its value to 1 and click on OK.
- Close the registry editor and restart your PC.
Conclusion
It will be difficult for you to browse in and out of various Windows directories without indexing and to access your files. To swiftly access the files on your hard drive, follow this troubleshooting guide and get the snag resolved right away.
If you've any thoughts on How to Fix Indexing is Paused on Windows 11?, then feel free to drop in below comment box. Also, please subscribe to our DigitBin YouTube channel for videos tutorials. Cheers!

