Threat policies are executed in Exchange Online to rescue customers from phishing emails and viruses, ensuring these harmful messages never reach their mailboxes. But occasionally, valid emails are accidentally filtered into the spam bin.
It can be easier to address this at the managerial level within your Office 365 tenant, even though individuals can individually mark these emails as safe senders in Outlook. You can utilize mail flow rules or your anti-spam policy settings to whitelist an email address, as We’ll present in this article.
What is Whitelisting an Email and Why Should you Consider it?
Whitelisting an email involves alerting your service provider that you want to acquire emails from a specific sender straight into your inbox rather than automatically sorting them into your spam folder.
Understanding the concept of whitelisting is essential to avoiding the inconvenience of crucial emails being wrongly filtered as spam, directing you to wade through your spam folder for potentially powerful communications. When you whitelist an email address, you ensure that emails from that sender are always provided to your inbox, thereby improving the functionality of your email account.
Failing to whitelist trusted email senders can result in missing crucial notifications for necessary emails you must read. Regardless of your email service, it’s vital to learn how to whitelist emails to guarantee that you don’t skip out on crucial communications.
How to Whitelist email addresses?
To Whitelist email addresses, follow these steps:
- Launch the Exchange Admin Center on your web browser and enter the login credentials to sign in successfully.
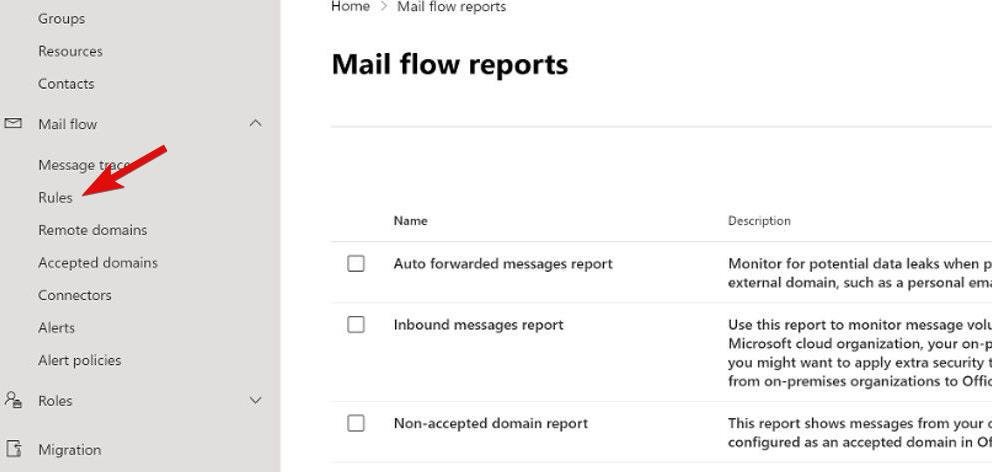
- Navigate to the window’s left sidebar and click the Mail Flow dropdown to reveal the hidden settings. Select Rules from the options dropdown.


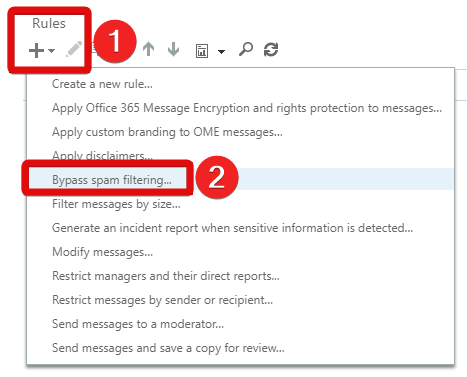
- Make a new rule by pressing the Plus icon under the rules section and choosing the Bypassing spam filtering option.


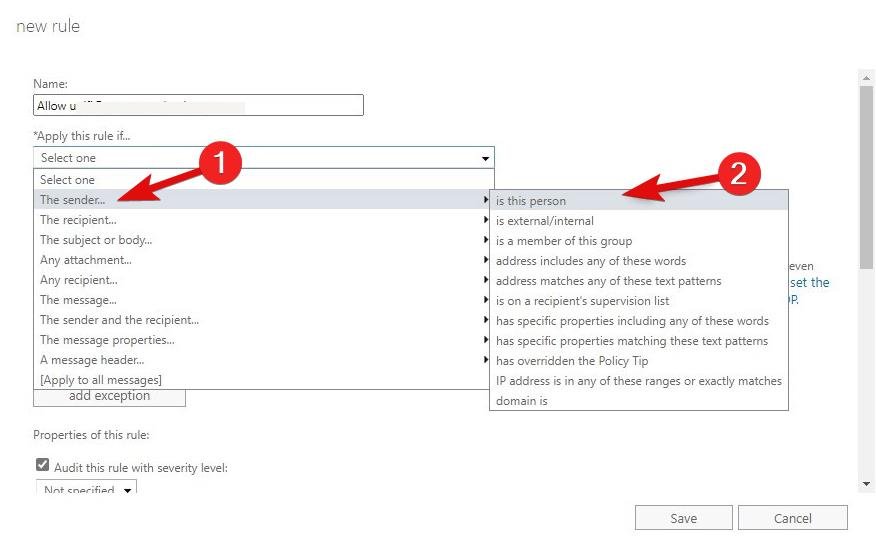
- In the New rule window, click the drop-down under the Apply this rule if… section and choose ‘sender’ followed by ‘is this person’ from the next drop-down.

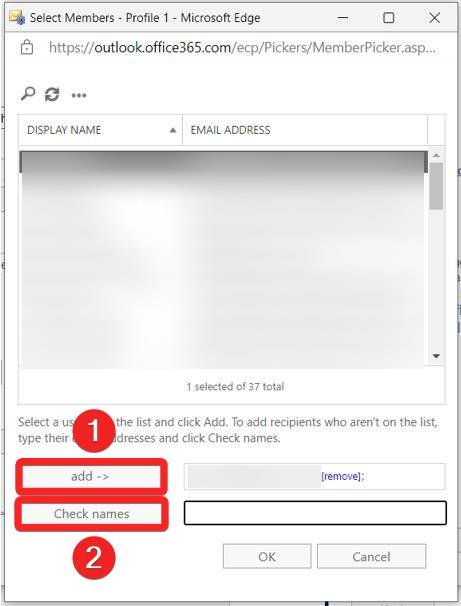
- In the field next to the Check names button, input the email address you expect to Whitelist.
- Next, hit the Check Names button to verify and add your preferred email address to the “Add ->” field.

- Choose the OK button to save the changes and exit the window.
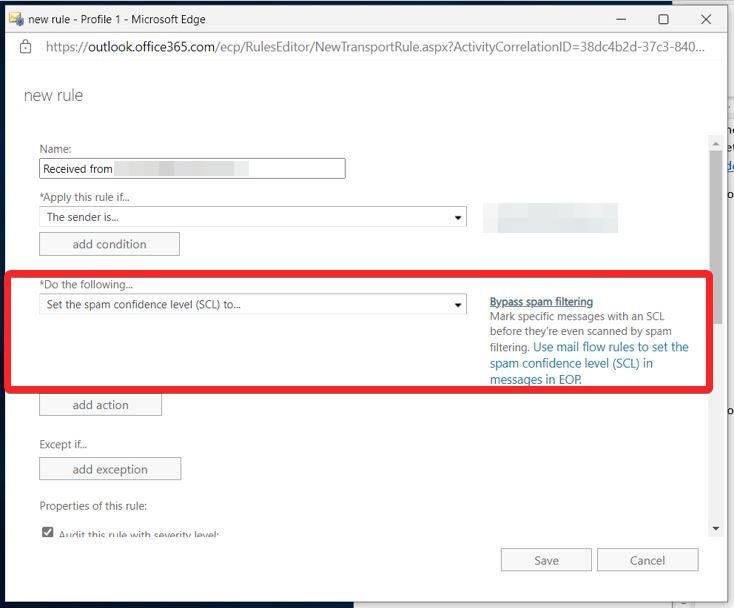
- Expand the drop-down under the Do the following… section and choose the Set the Spam confidence level (SCL) to Avoid Spam Filtering option.


- Once the changes are done, click the Save button to apply the policy.
How to Whitelist an Email Domain?
Similar to whitelisting an email address, you can also whitelist the complete email domain to ensure you do not miss any of the messages from them. Here is how you can do that:
- Visit the Exchange Admin Center using your preferred browser.
- Click the Mail Flow option to reveal the drop-down in the left sidebar and choose Rules from the list of options.
- Now you need to make a new rule to Bypass the Spam Filtering option. For this, scroll down to the Rules section in the right sidebar and click the Plus + icon. Choose the Bypass Spam Filtering option from the drop-down.
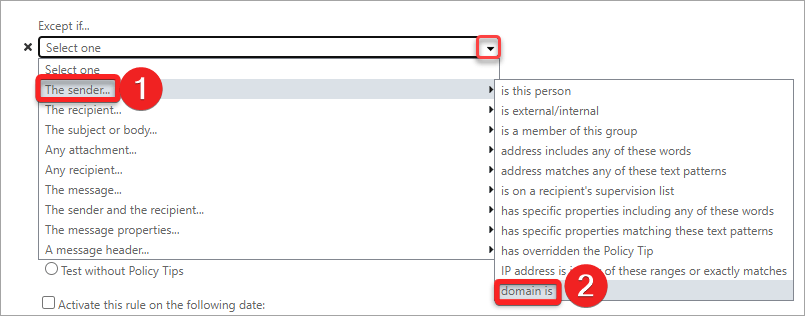
- In the New rule window, expand the ‘Apply this rule if‘ drop down and choose The sender from the options available.
- Next, select the ‘domain is’ option in the next drop-down revealed.

- Enter the desired domain into the Specify Domain popup and click the Plus icon to include the domain in your policy.
- You may add more domains to the list or click OK to exit the popup window.
- Within the Do the following… field, you should discover that the choice to Set the spam confidence level (SCL) to Bypass Spam Filtering is pre-selected.
- Finally, save your settings and implement your policy by clicking on the Save button.
Whitelist Email Address using an Anti-Spam Policy
The alternative and a more straightforward method to implement involves adding the sender to the allowed sender list within Office 365. You’ll need to adjust the Anti-Spam policy, which can be accessed through Microsoft 365 Defender. Here are the steps you need to follow to achieve it.
- Navigate to the Microsoft 365 Defender using your web browser.
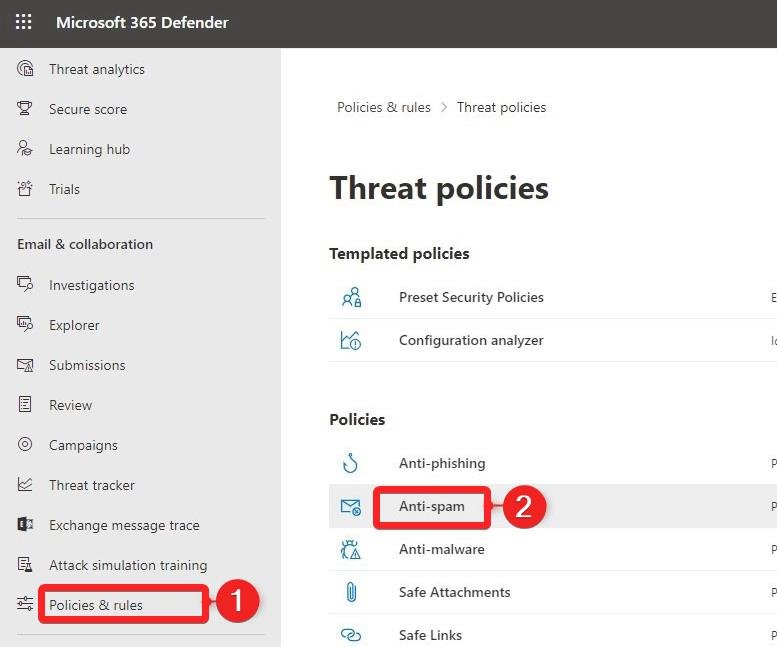
- Select Policies and rules from the left sidebar.
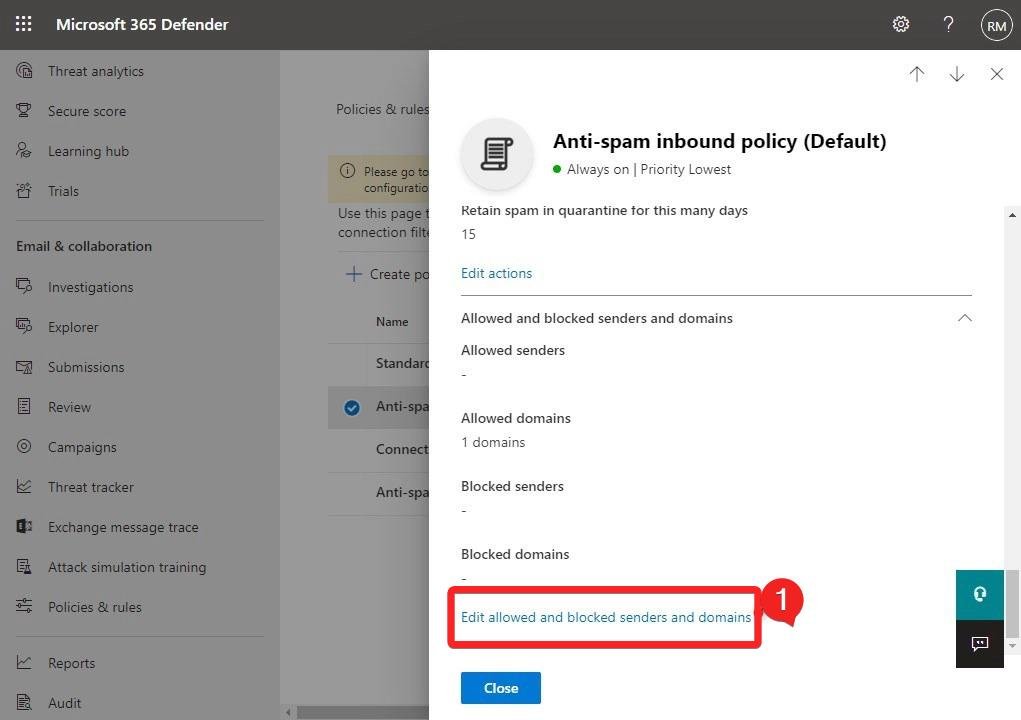
- Next, click the Anti-spam option located under the Policies section on the right sidebar.

- Scroll down to the bottom of the fly-out and click the Allowed and blocked senders and domains link.

- To whitelist an email address from Office 365, go to the Allowed section and click Manage sender(s).
- Choose Add senders to retain a new sender in the list.
- Identify the email address you want to whitelist.
- Once you’ve added the sender, click Done and save your changes to apply the settings.
Conclusion
When you wish to whitelist an email address within Office 365, it is advisable to employ mail flow rules primarily. Incorporating an additional verification layer into the rule, such as a keyword, server validation, or DMARC authentication pass, is essential.
If you've any thoughts on How to Whitelist an Email Address in Office 365, then feel free to drop in below comment box. Also, please subscribe to our DigitBin YouTube channel for videos tutorials. Cheers!