So, you know those little arrows you see on icons in Windows 11? They tell you that the icon is a shortcut to something else, like a file or a program. Well, some people don’t like those arrows because they think they make their desktops look messy. By removing the arrows, the icons look cleaner and more organised.
But no worries! Even if you remove the arrows, the shortcuts will still work the same way and take you to the right place. In Windows 11, there isn’t a built-in option to turn off the arrows, but you can still get rid of them using a few simple steps. So, without further ado, let’s start with the first method.
How to Remove Shortcut Arrows in Windows 11
The registry is like a big database of settings for Windows. To remove the shortcut arrows, you need to make a change in the registry. Don’t worry, it’s not as complicated as it sounds! Just follow these steps carefully: Here’s what you can do:
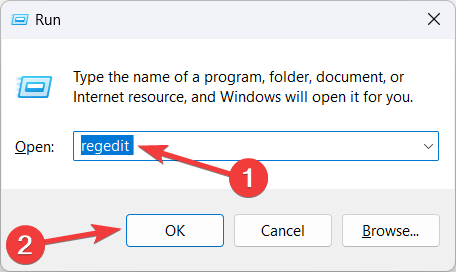
- Press the Windows key and the R key on your keyboard at the same time. This will open the Run dialog box.
- Type “regedit” in the box (without the quotes) and press Enter. This will open the Registry Editor, which is where you can make changes to the registry.

- Click OK to bring up the Registry Editor.
- Now, select the following within the Registry Editor’s left navigation pane.
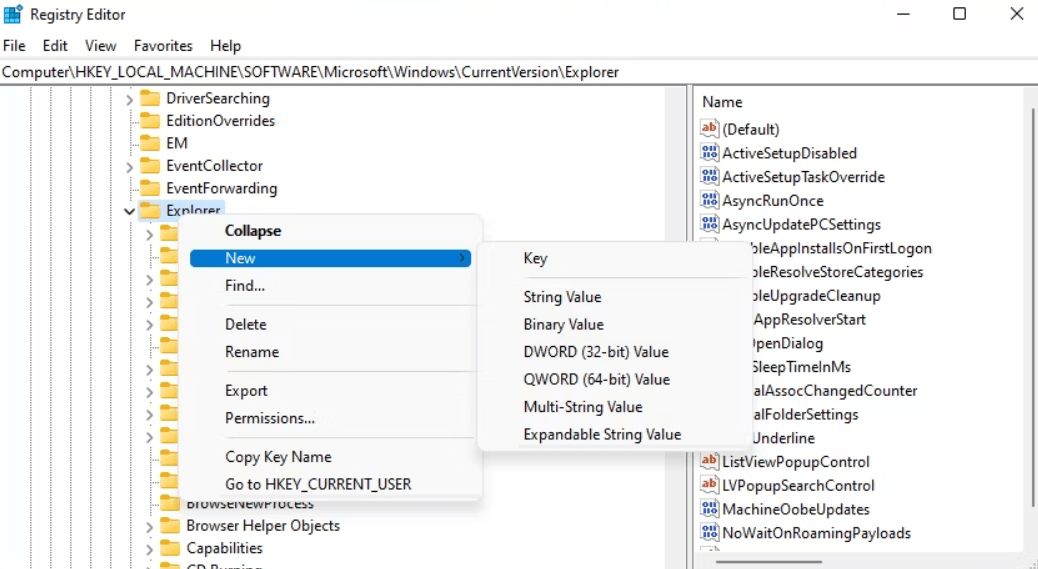
HKEY_LOCAL_MACHINE\SOFTWARE\Microsoft\Windows\CurrentVersion\Explorer
- Right-click on the “Explorer” folder, choose “New“, and then “Key“. Name the new folder “Shell Icons“.

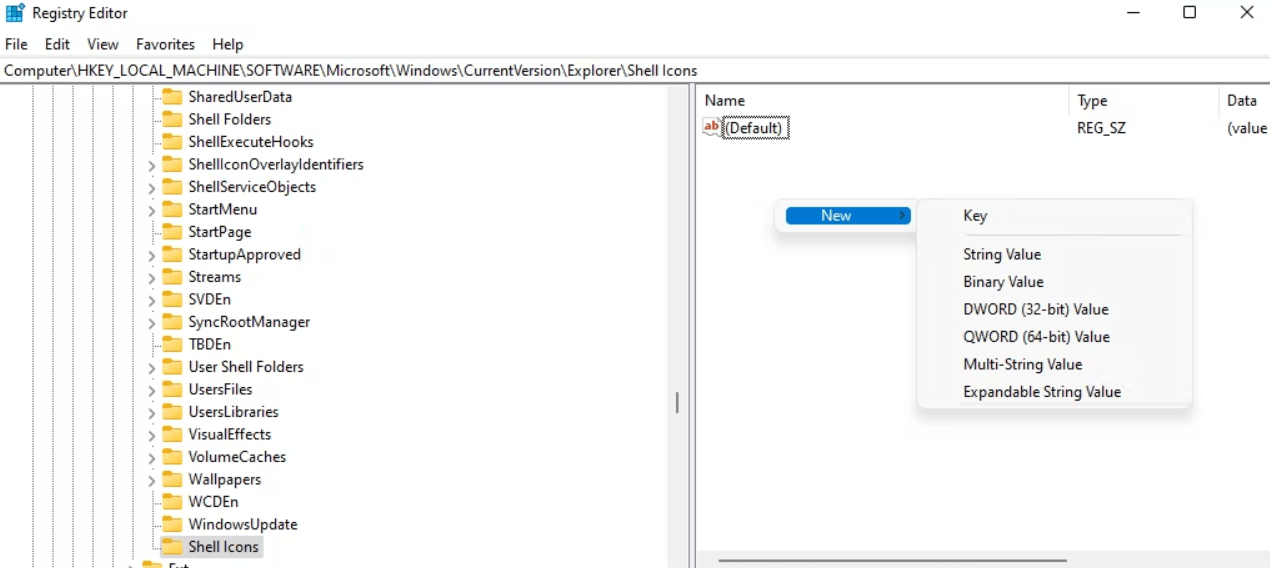
- Now, with the “Shell Icons” folder selected, you need to create a new file inside it.
- Right-click on the empty space on the right-hand side of the window, choose “New“, and then “String Value“.

- Name the new file “29” (without the quotes).
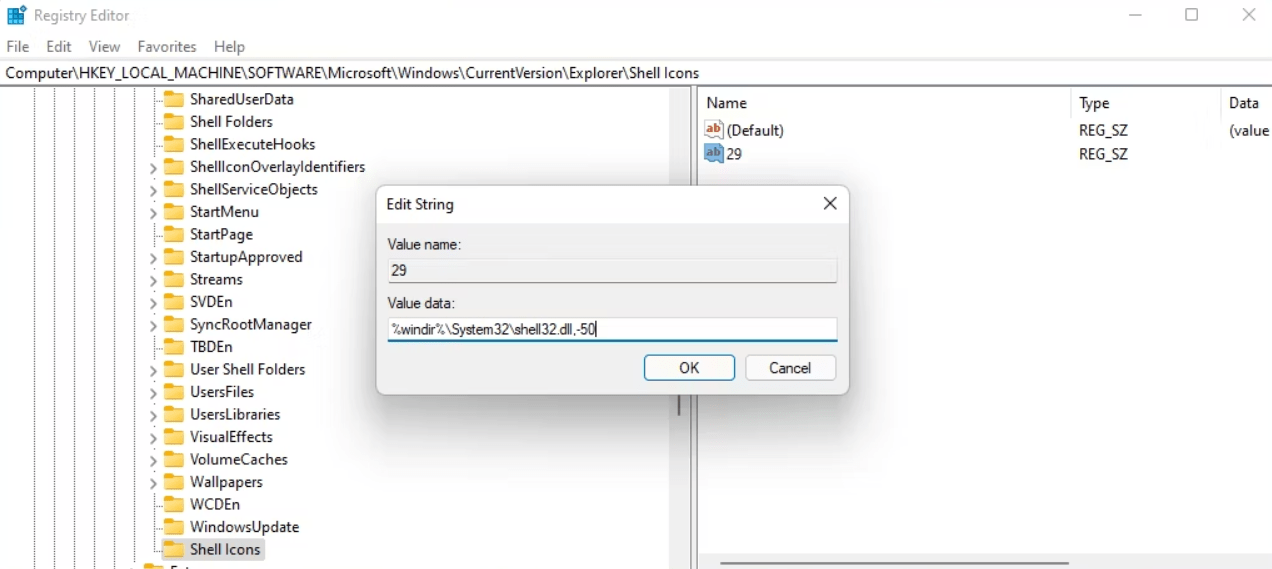
- Double-click on the “29” file, and a box will pop up. In that box, you need to type the location of an empty icon file.
- Input %windir%\System32\shell32.dll,-50 in the data text box

- Finally, close the Registry Editor and restart your computer.
Once you restart the computer, you’ll see that the shortcut icons on your desktop won’t have those little arrows on them anymore.
How to Remove Arrows From Shortcuts With Third-Party Software
You can remove arrows from shortcuts using third-party software. There are various software options available that allow you to customize your desktop icons, including removing the shortcut arrows. With this software, you can easily remove the arrows from your desktop shortcuts.
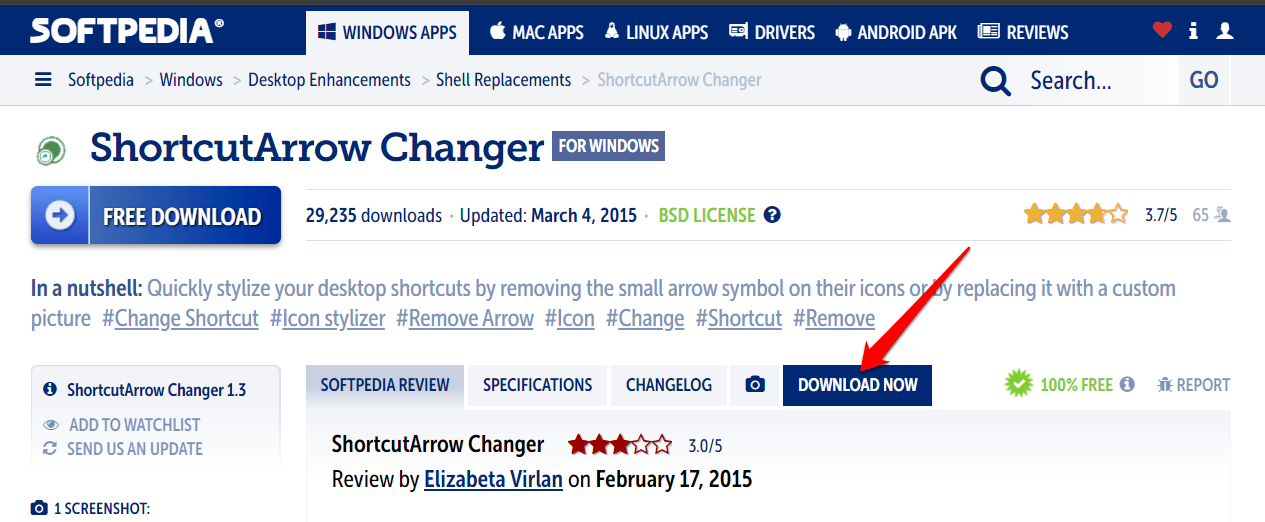
- Go to Softpedia and download ShortcutArrow Changer.
- Click the Download Now button.

- Now, select the Softpedia Secure Download (US) option.

- Click the folder icon to open Explorer from the taskbar.
- Locate and open the folder where the ShortcutArrow Changer setup file is located.
- Double-click “[bti soft] shortcutarrow changer setup” to open the installer’s window.
- Click the Next option, and select the I accept the agreement radio button.
- Select Next again a couple of times.
- Click the Browse option to select the ShortcutArrow Changer installation folder, then click Next to continue.

- Click Next a few more times to reach the Install option.
- Press the Install button.
- After installing ShorcutArrow Changer, double-click the desktop shortcut for that software.
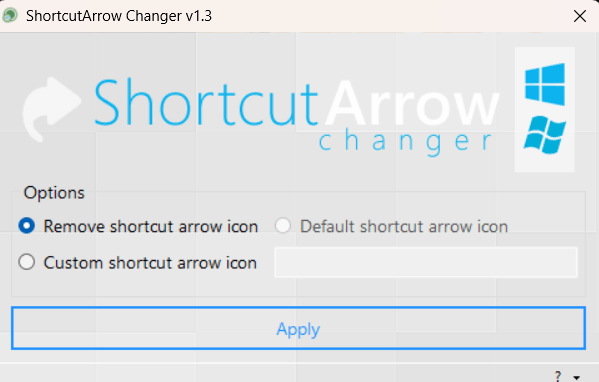
- Select the Remove shortcut icon arrow radio button shown directly below.
- Click Apply to remove the desktop shortcuts’ arrows.

How to Remove Arrows From Shortcuts With Winaero Tweaker
Winaero Tweaker is a tool you can use to change and customize different things on your Windows 11 computer. It’s completely free to use and can help you remove those little arrows that show up on your desktop shortcuts. So, if you don’t like those arrows and want a cleaner look for your desktop, Winaero Tweaker can help you out.
- Open your web browser and go to the official Winaero Tweaker website.
- Look for the download link on the website and click on it.
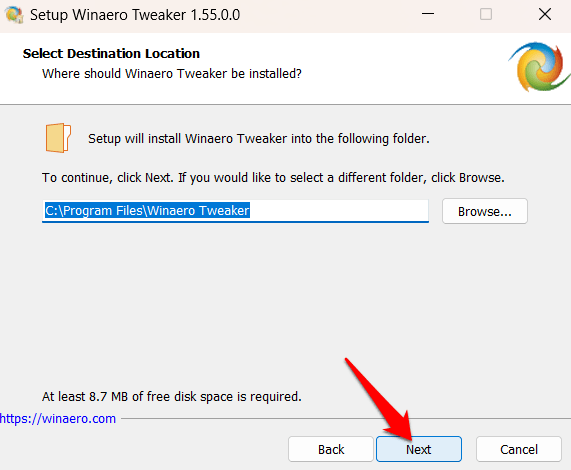
- Once the download is complete, locate the downloaded file. Unzip the downloaded ZIP file and install Winaero Tweaker with its setup wizard from its extracted folder.

- Follow the on-screen instructions to install Winaero Tweaker. Make sure to read and accept any terms or agreements.

- Once the installation is complete, you can launch Winaero Tweaker from your desktop or start menu.
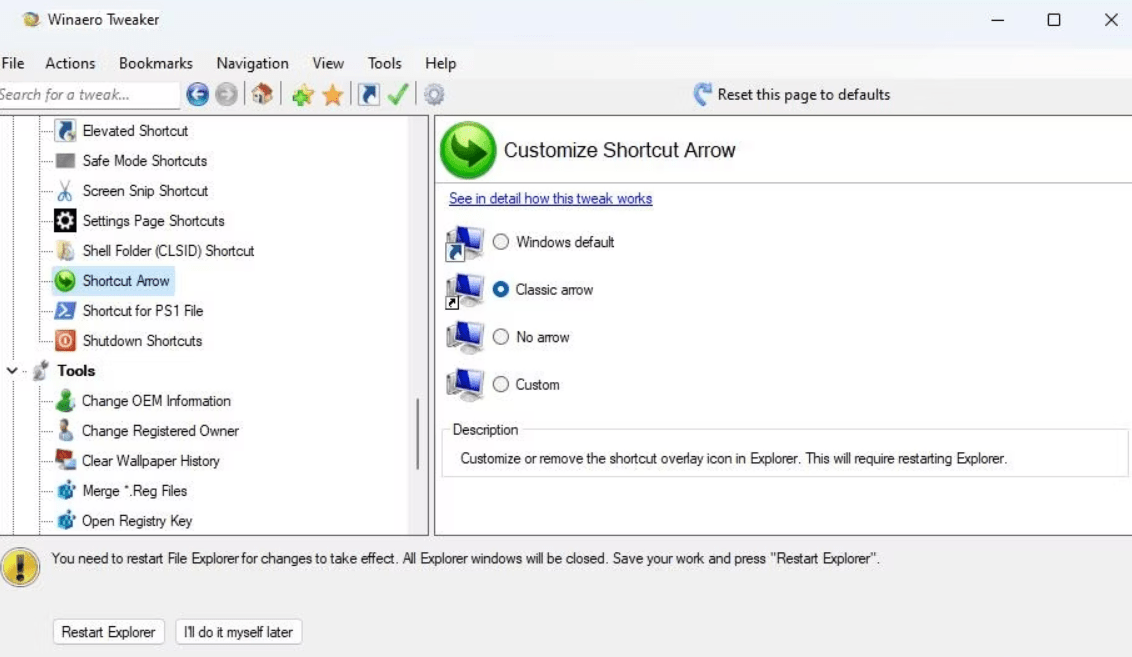
- Open the Winaero Tweaker window and double-click the Shortcuts category in the sidebar.

- Go to the Shortcut Arrow setting in the sidebar.
- Click the No Arrow radio button.
- Press the Restart Explorer button that appears in Winaero Tweaker after selecting the setting.
After making your desired changes, close Winaero Tweaker and enjoy your arrow-free desktop.
Conclusion
If you find those shortcut arrows in Windows 11 irritating and want to get rid of them, you can easily remove those arrows and have a cleaner-looking desktop. Just follow the steps I mentioned above, and you’ll be able to enjoy a shortcut- and arrow-free experience on your Windows 11 computer. We sincerely hope that this guide helped you find a resolution to your issue. If you have any further questions or concerns, please feel free to ask. I’m here to assist you.
If you've any thoughts on How to Remove Shortcut Arrows in Windows 11, then feel free to drop in below comment box. Also, please subscribe to our DigitBin YouTube channel for videos tutorials. Cheers!
