Twitch is a video streaming service that focuses on video game live-streaming, esports competitions, music broadcasts, and creative content. Twitch is one of the most popular game streaming services that work on Android, iPhone, MacBook, Windows PC, and the Web.
There is the standalone Twitch app for mac that allows you to stream from your MacBook PC. If Twitch Studio is not working on your Mac PC, then here is the simple Guide to Fix Twitch Not Working on your MacBook.
1. Reset Twitch
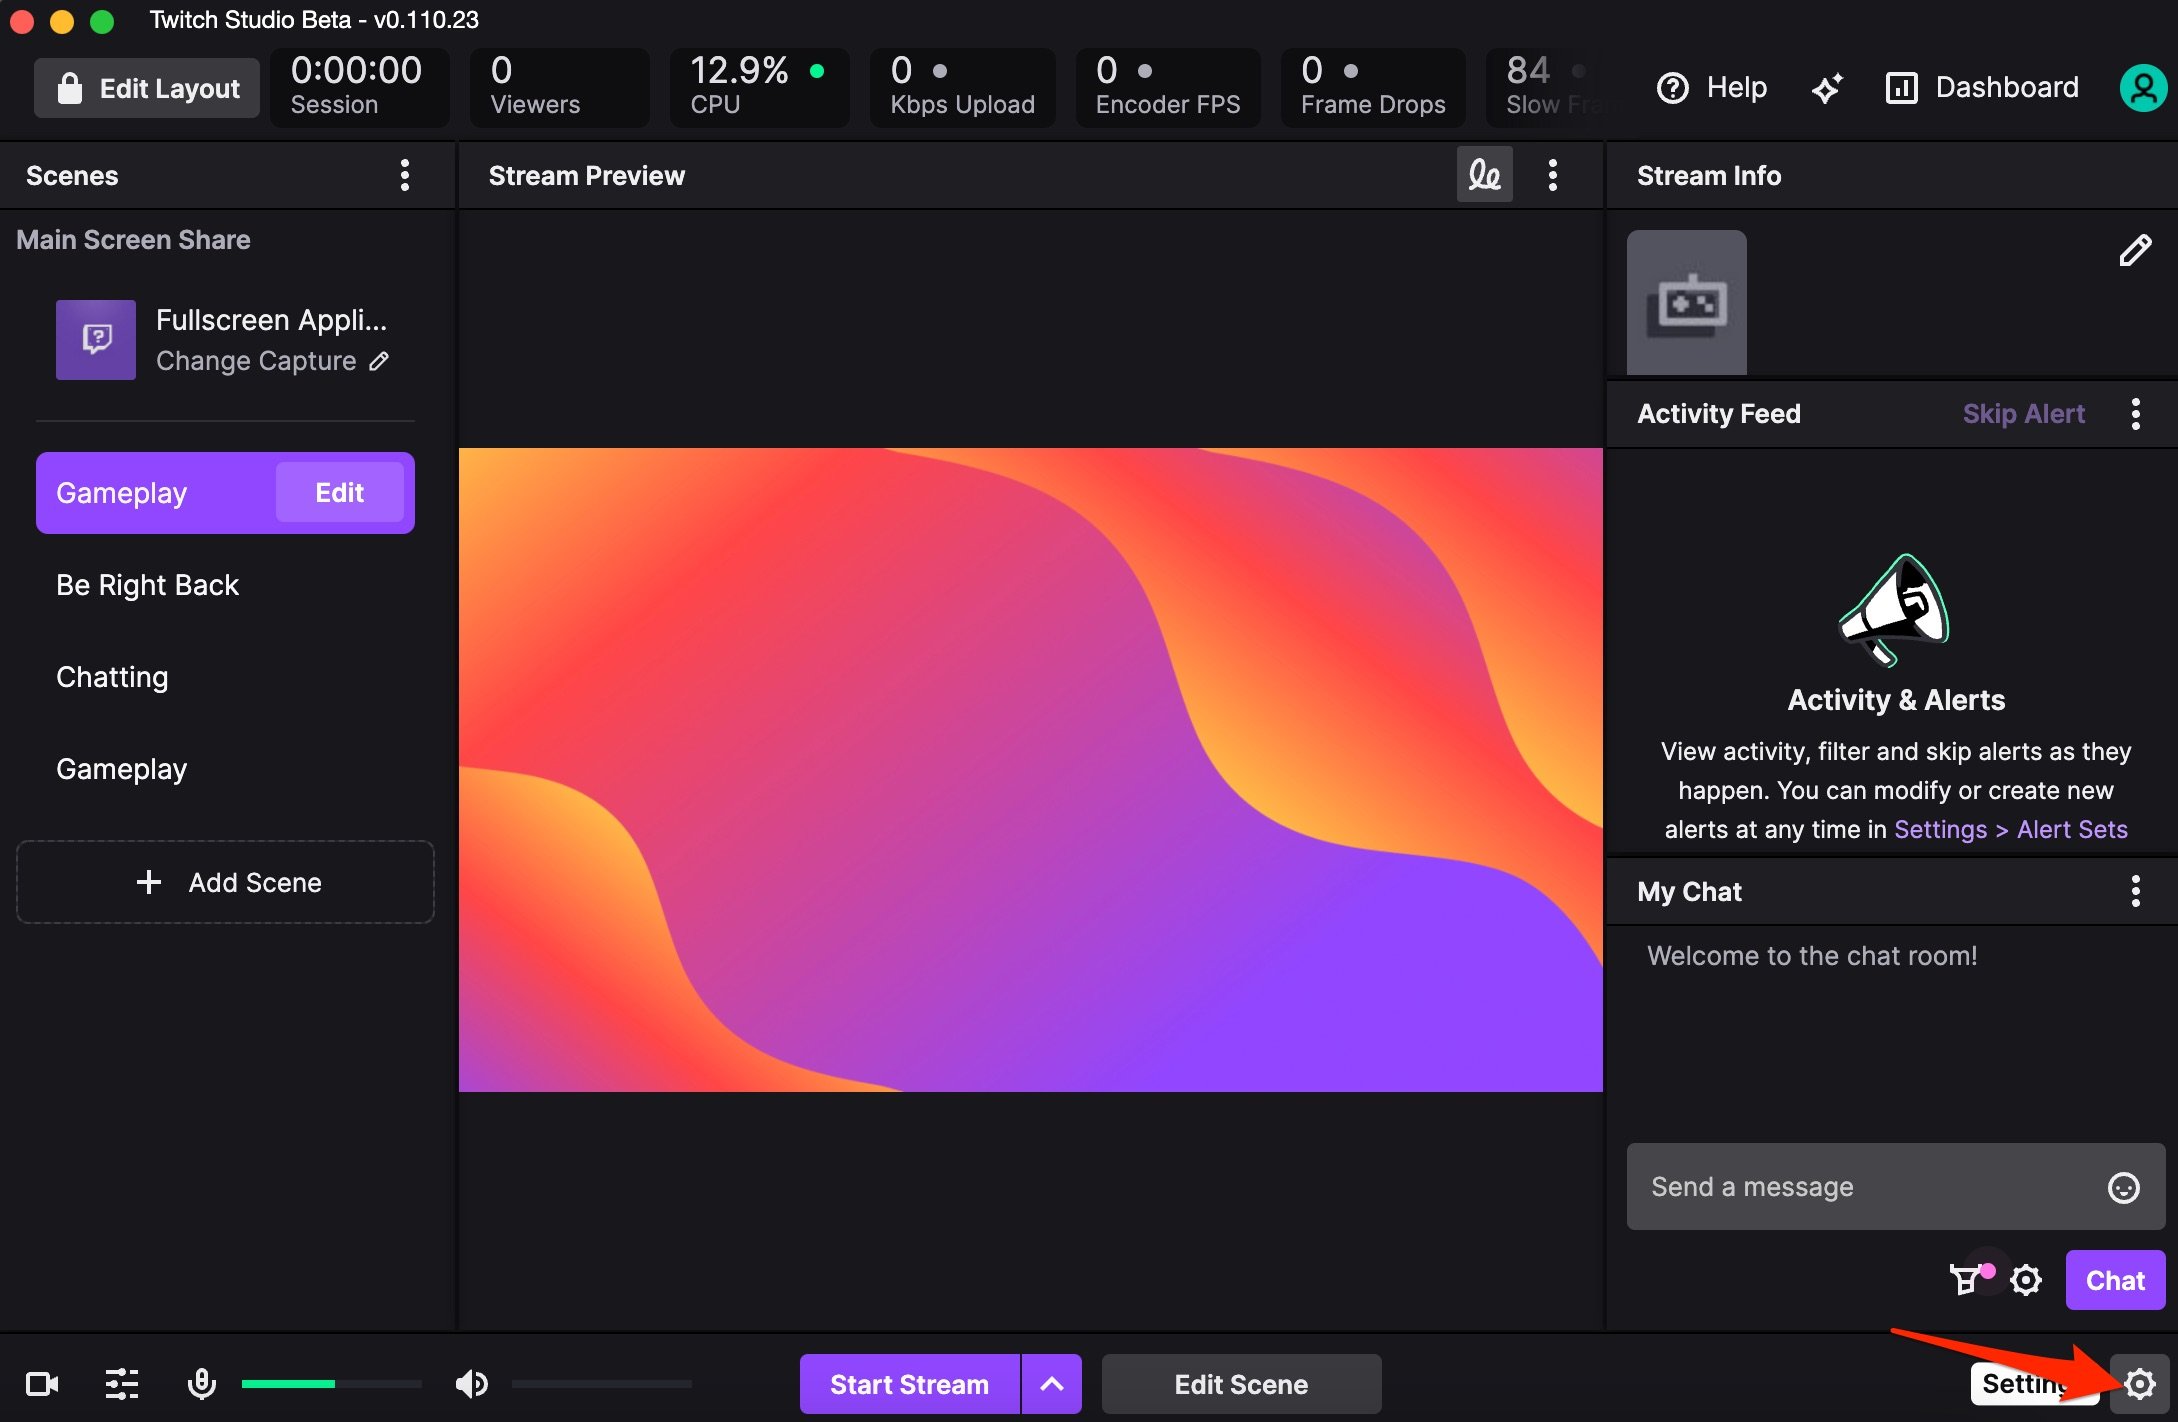
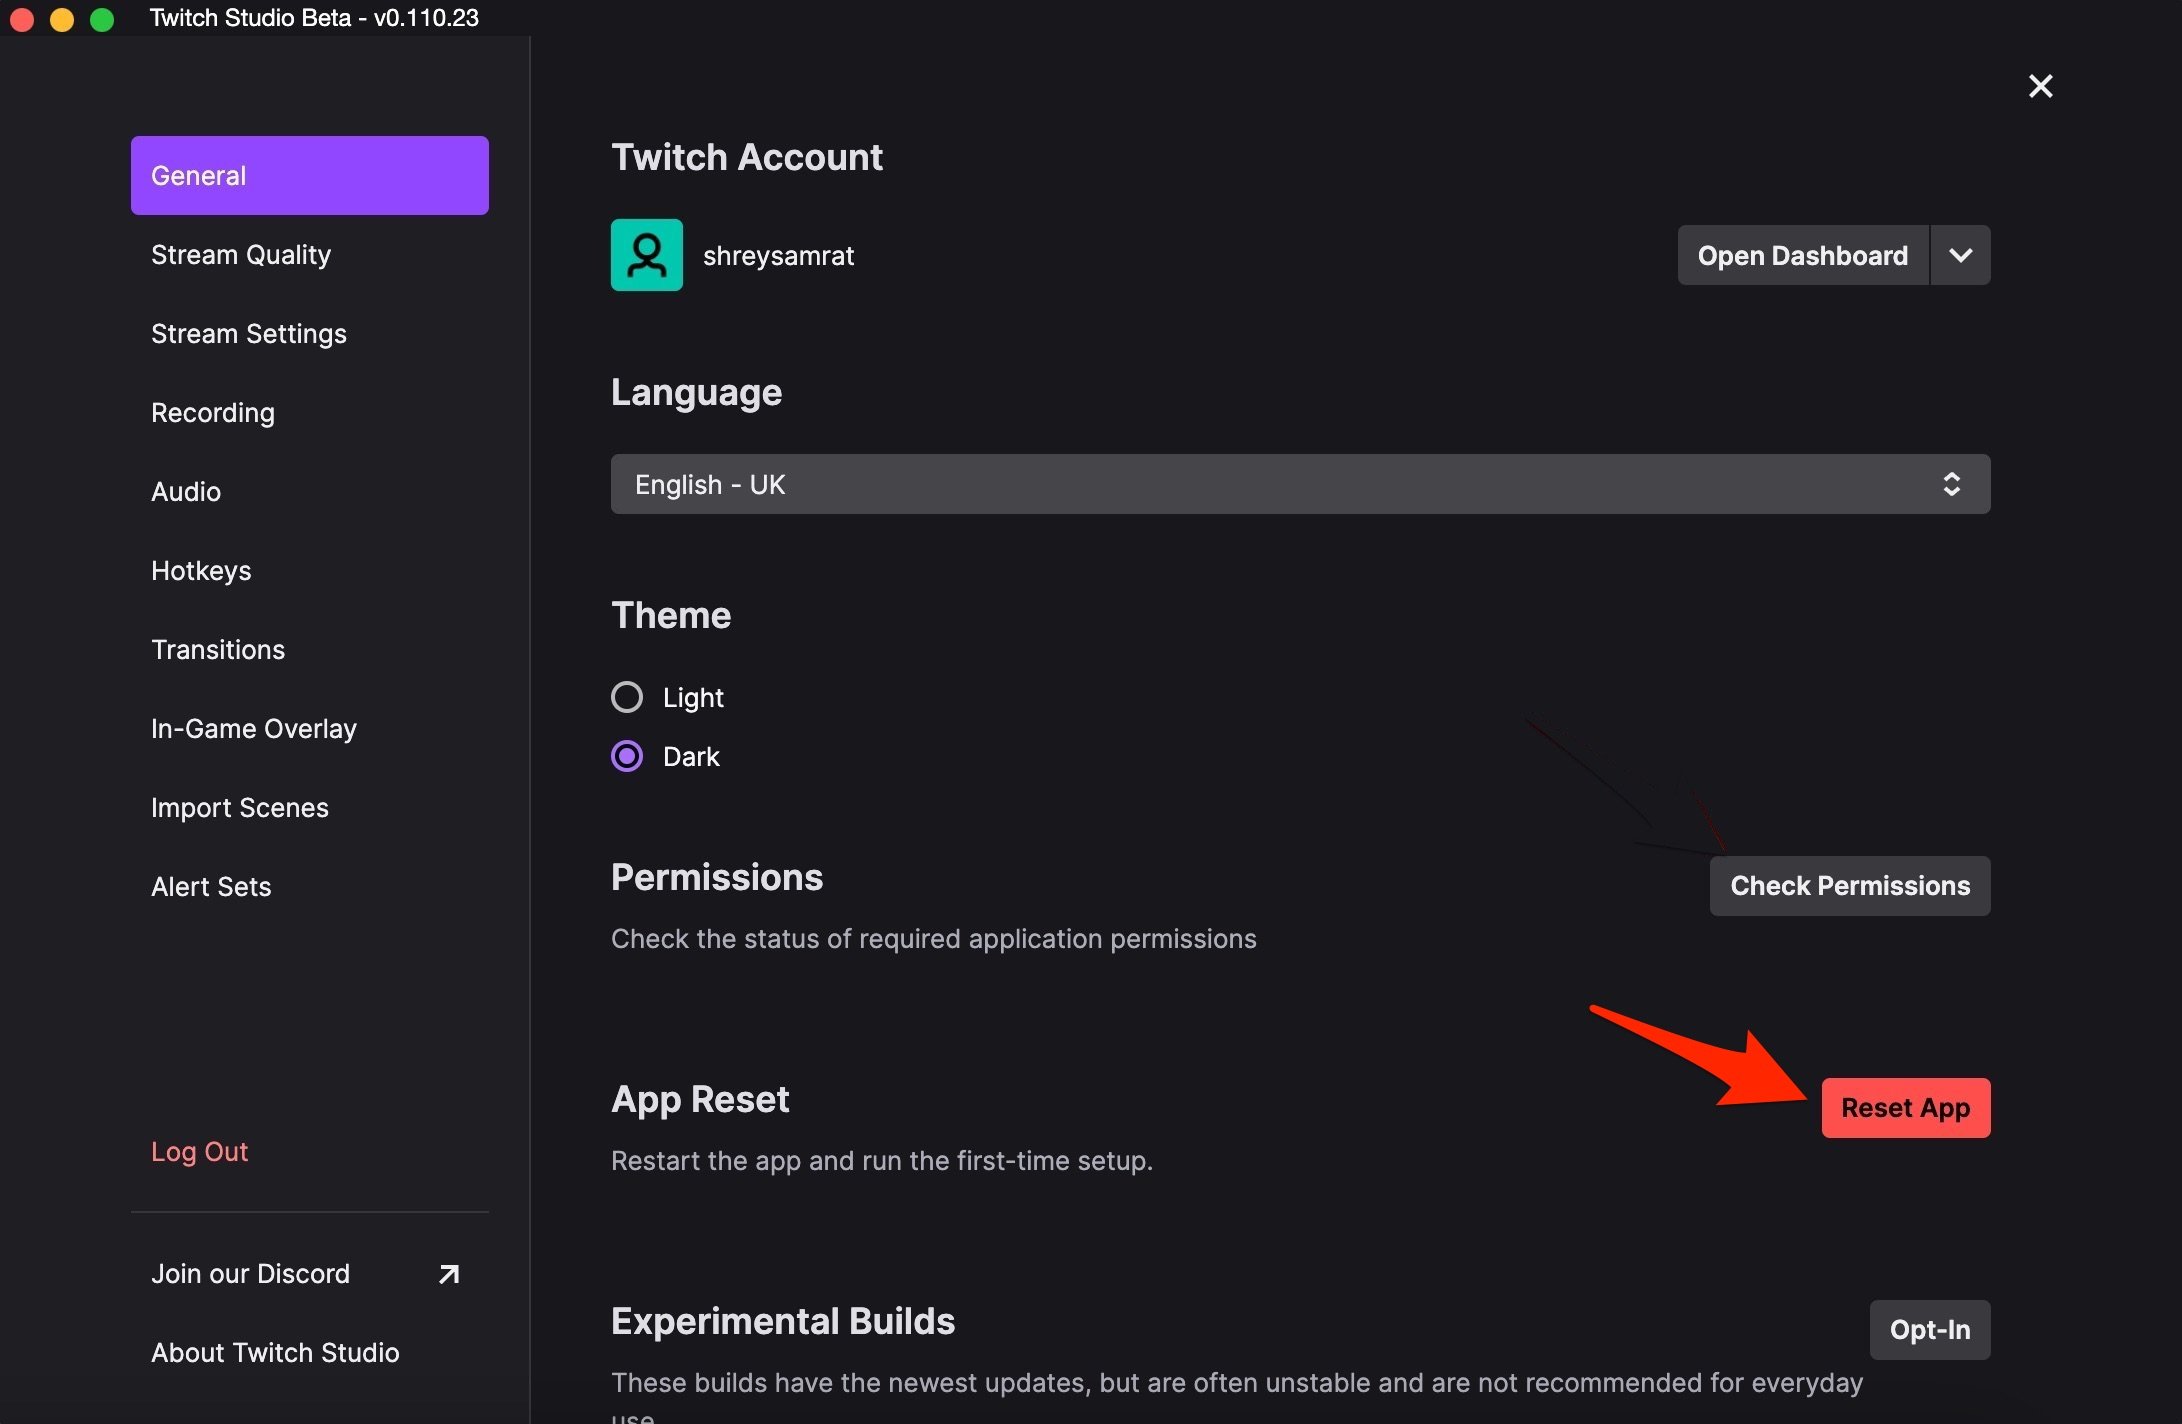
If the app is malfunctioning or if you made any changes to settings that you are unaware of, then it is best to reset Twitch Studio on Mac. Follow the simple steps below to reset the app.
- Open Settings on Twitch App.

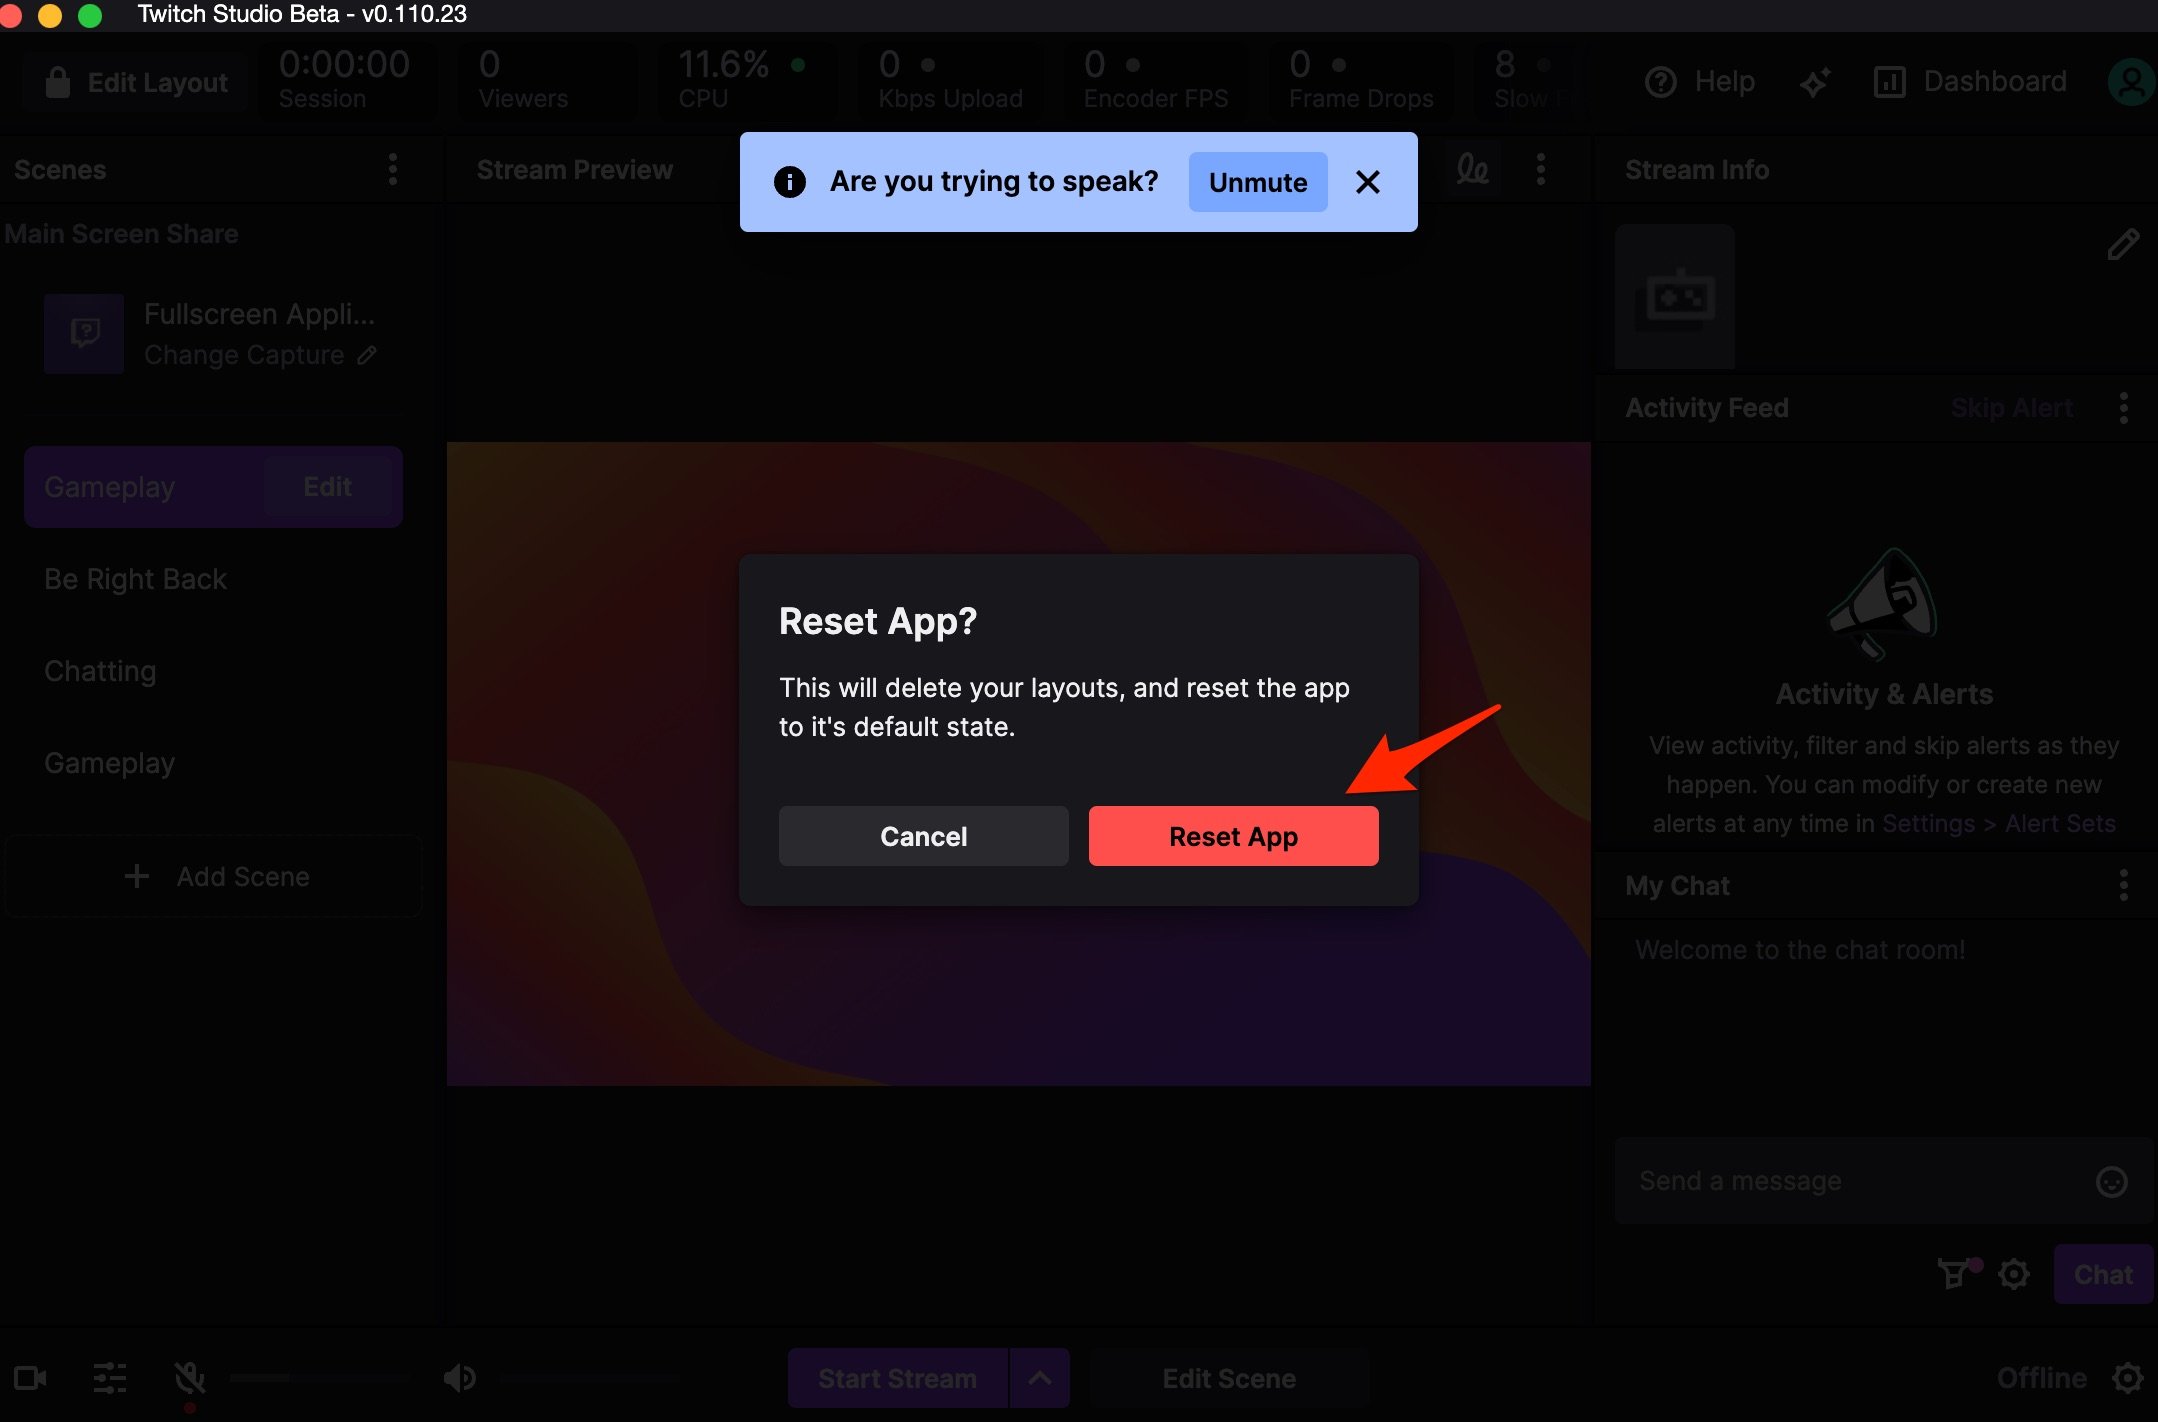
- Now click on Reset to bring the app back to your initial installation settings.

- Confirm Reset.

2. Desktop Audio is Not Working
For Mac versions, Twitch Studio is unable to capture desktop audio. If you are trying to capture a game or any other desktop audio, you will be unable to do so.
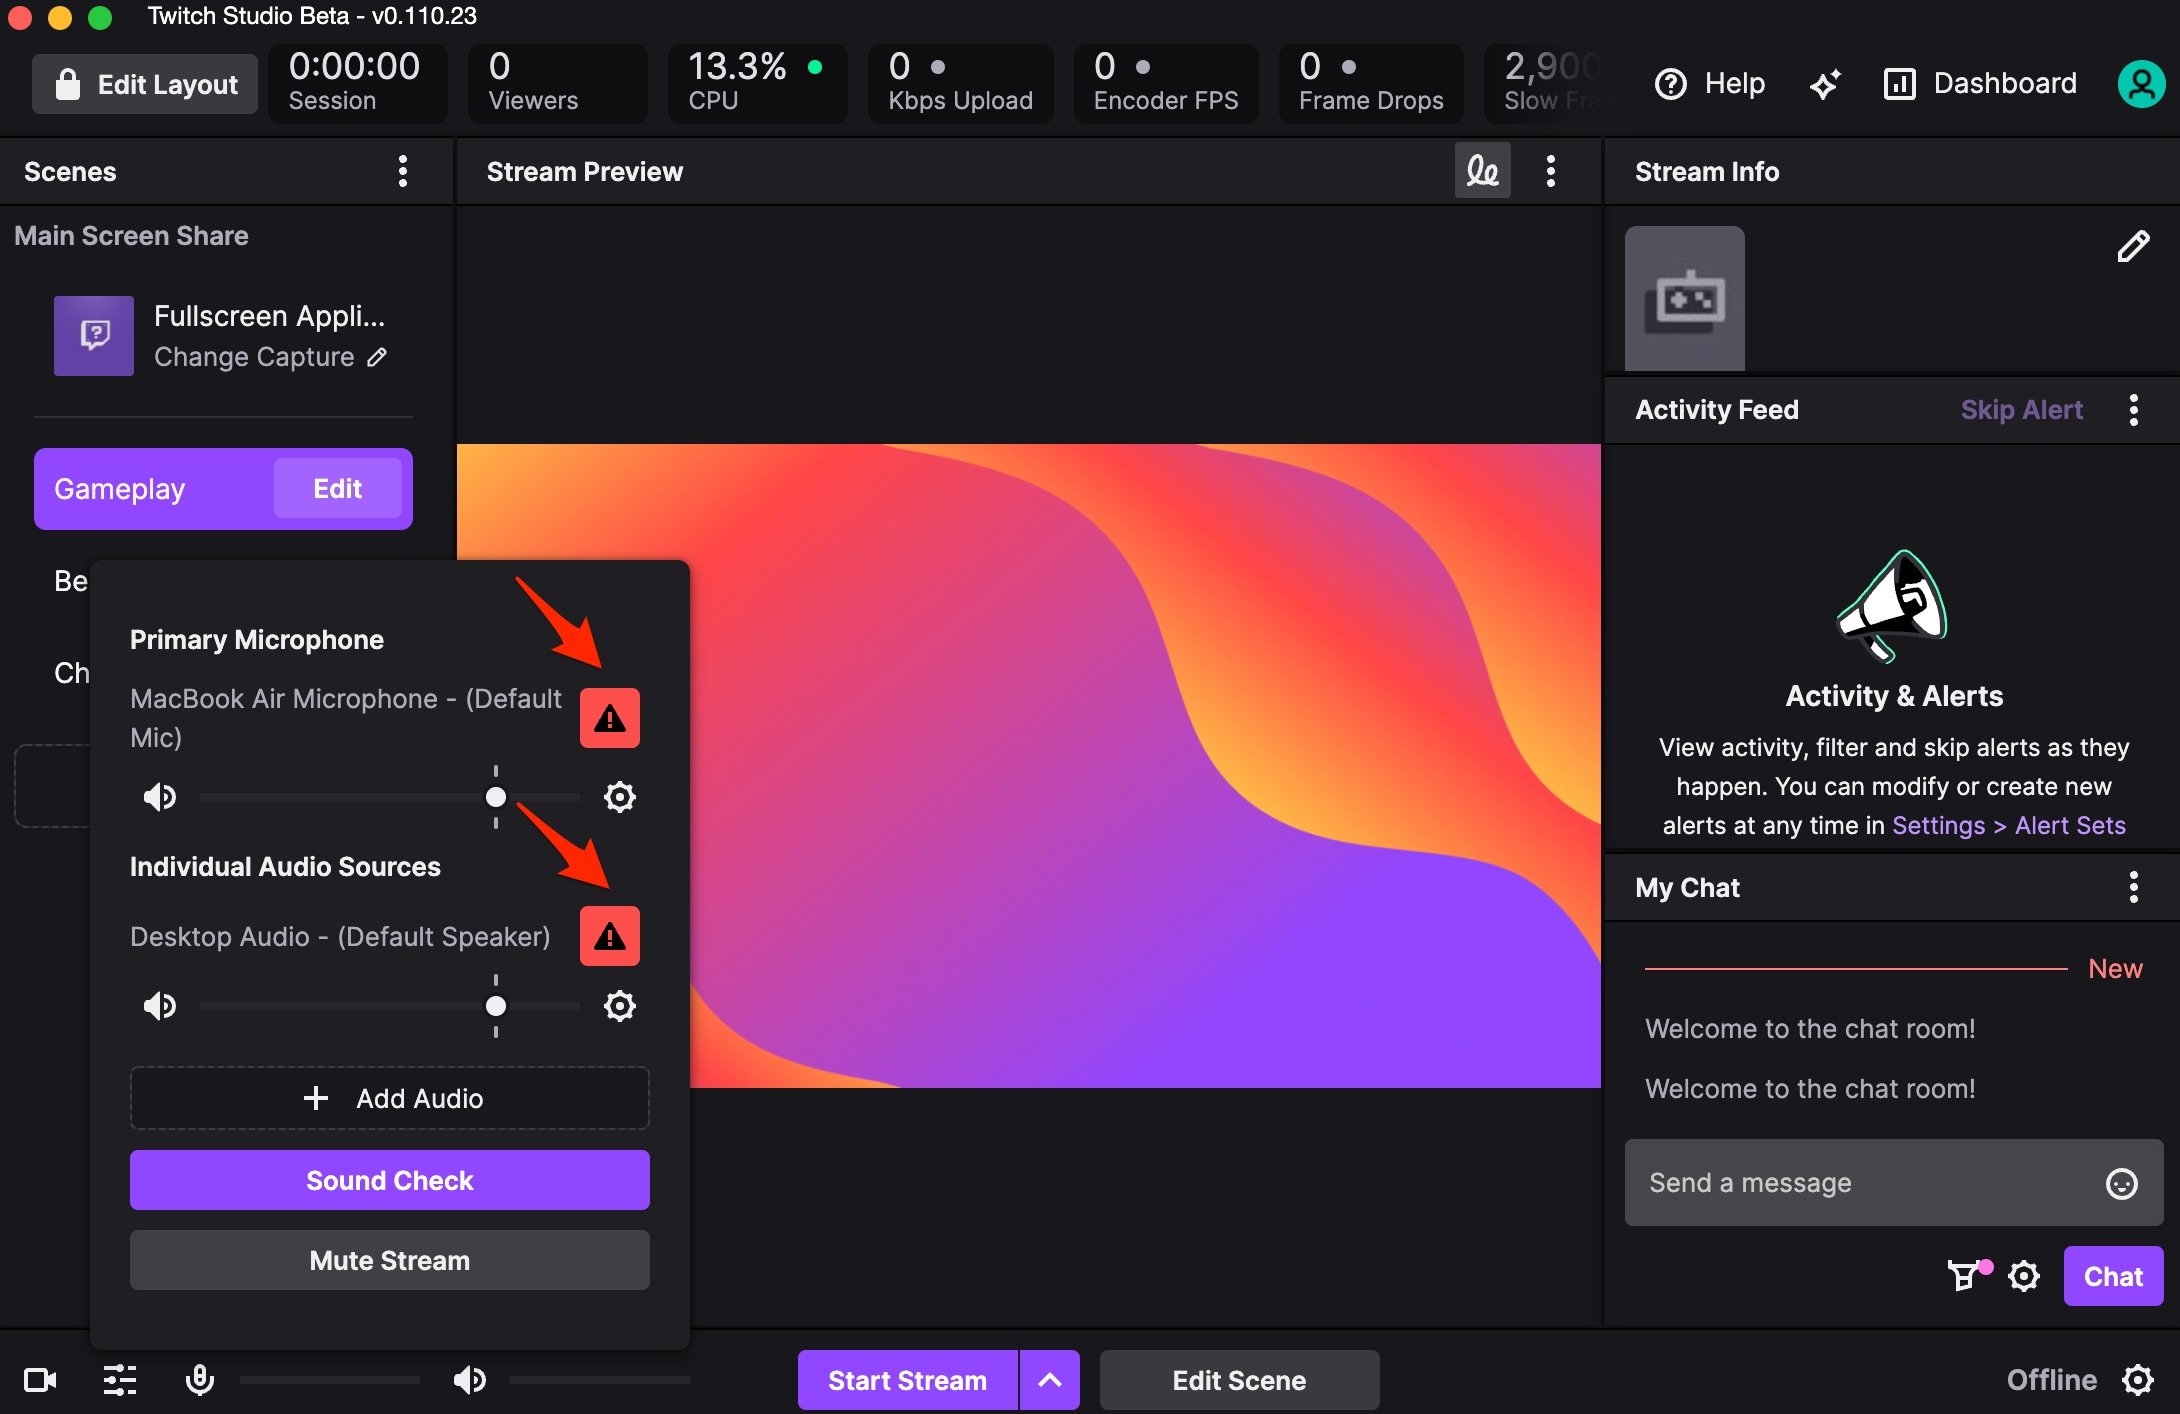
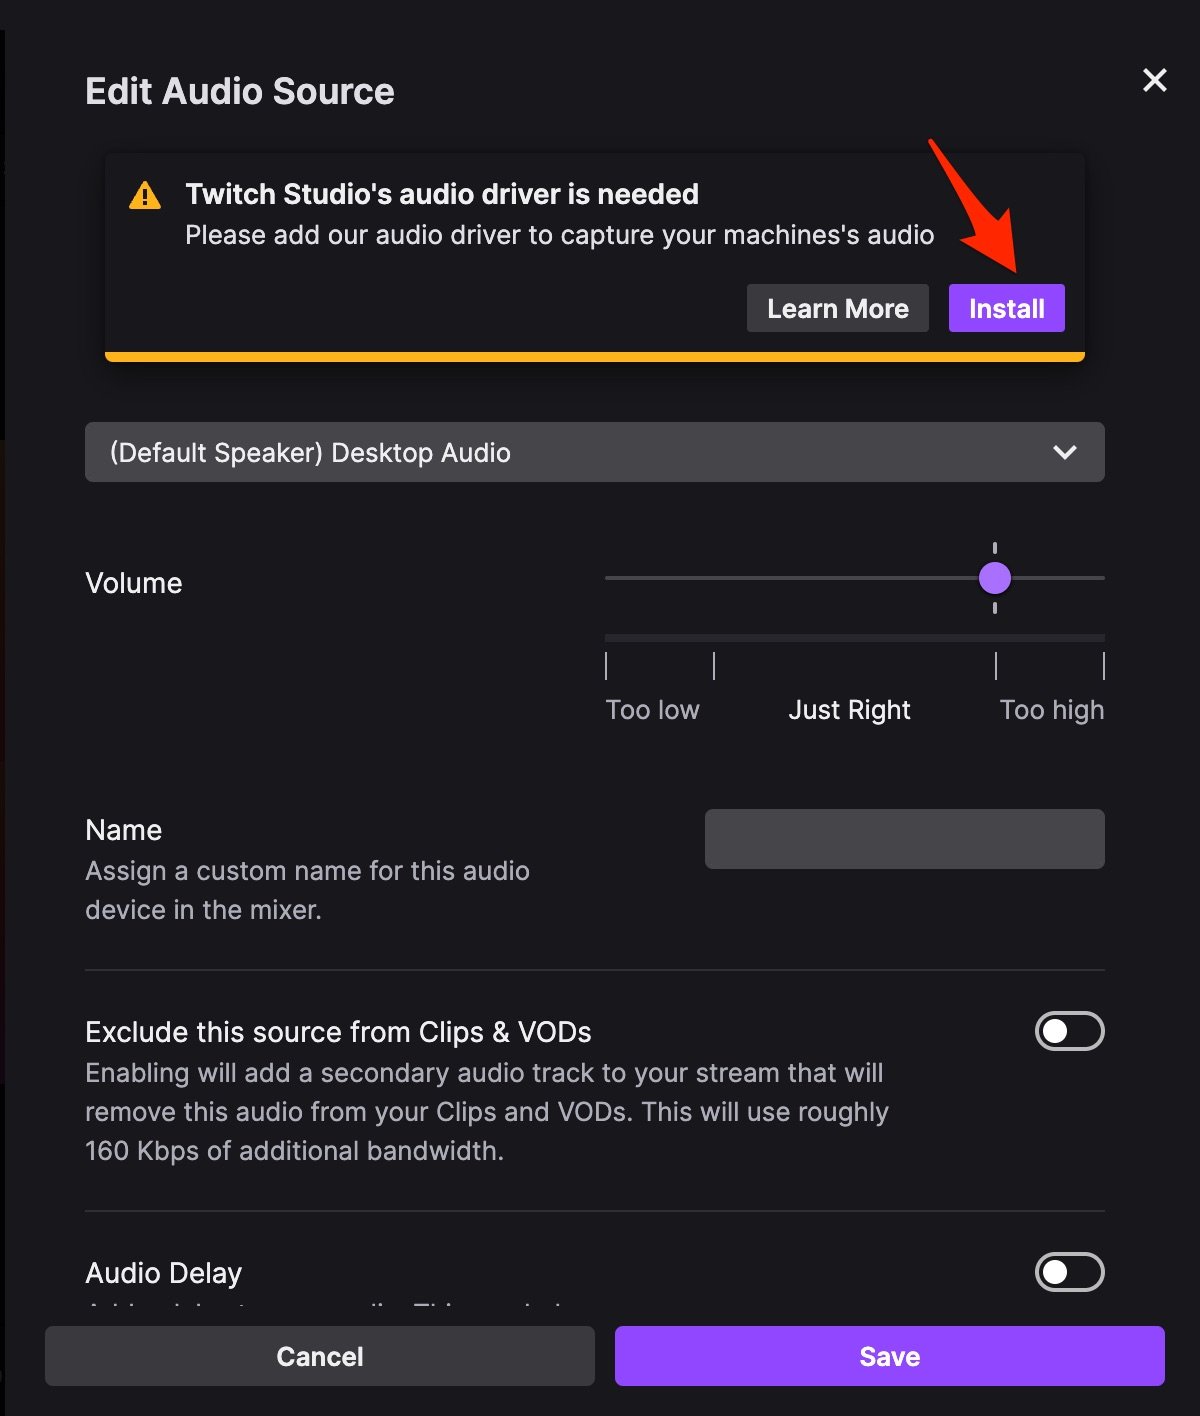
- Click on the Audio Mixer icon in the bottom left corner of the app.

- Click on the Red Marker error if showing.

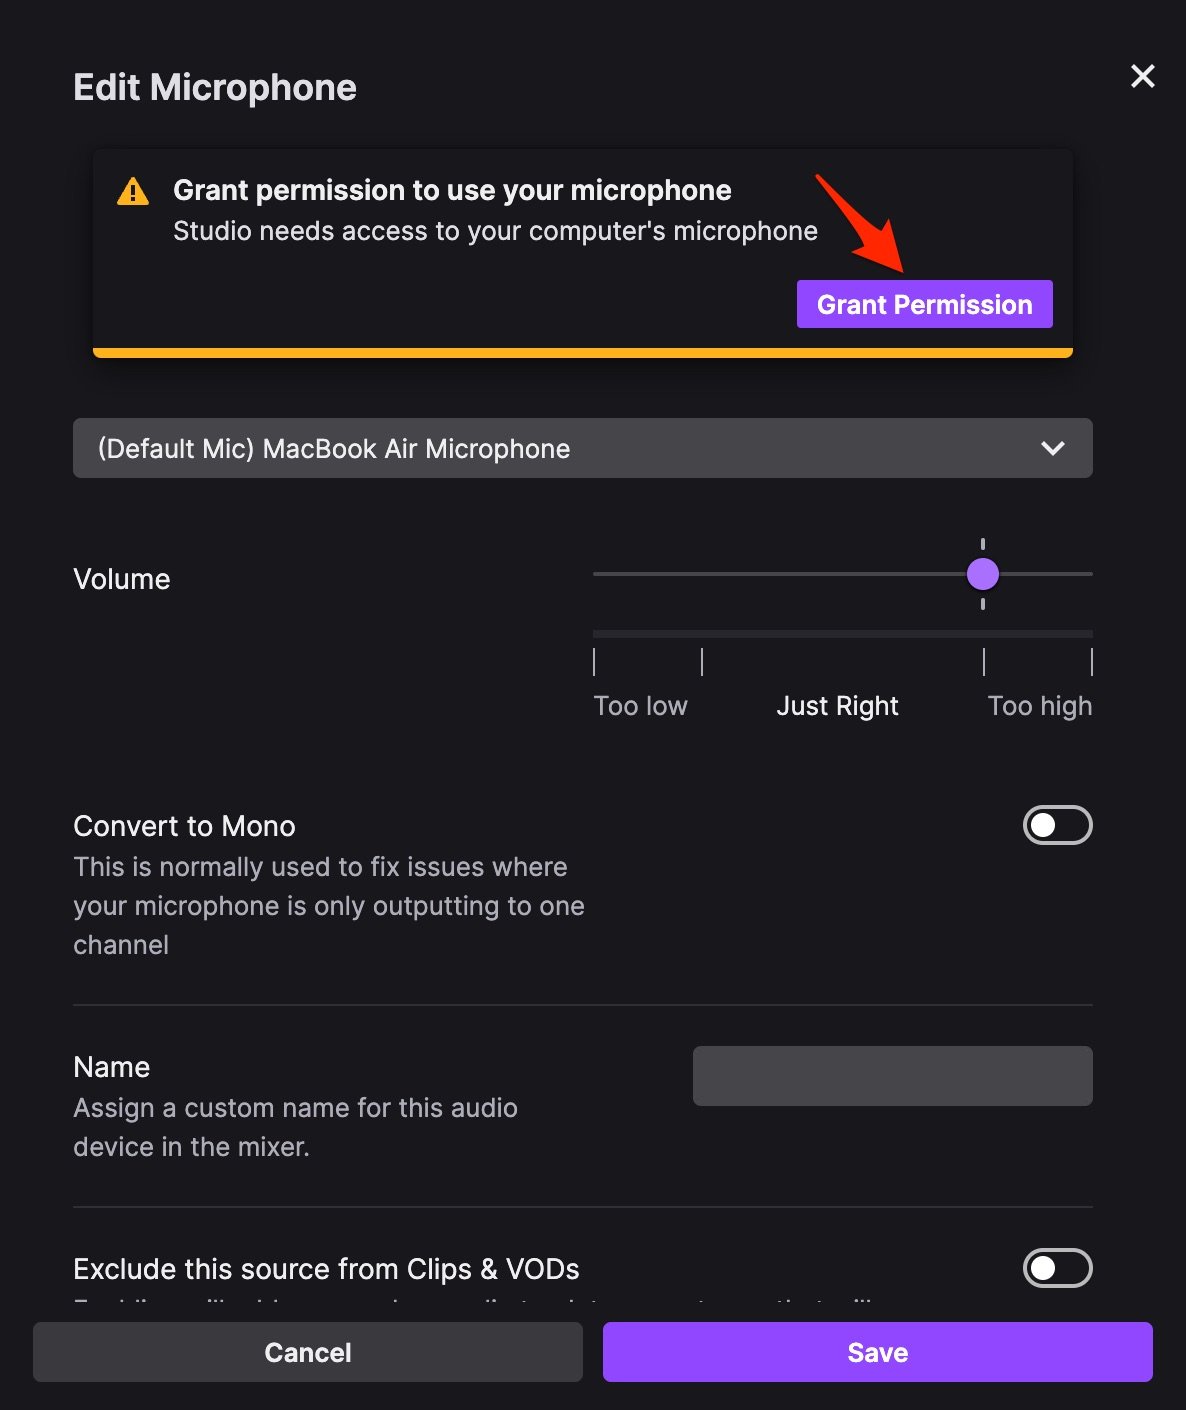
- Now install Audio Driver and Grant Audio Permission to Twitch.
3. Unable to Capture System Audio
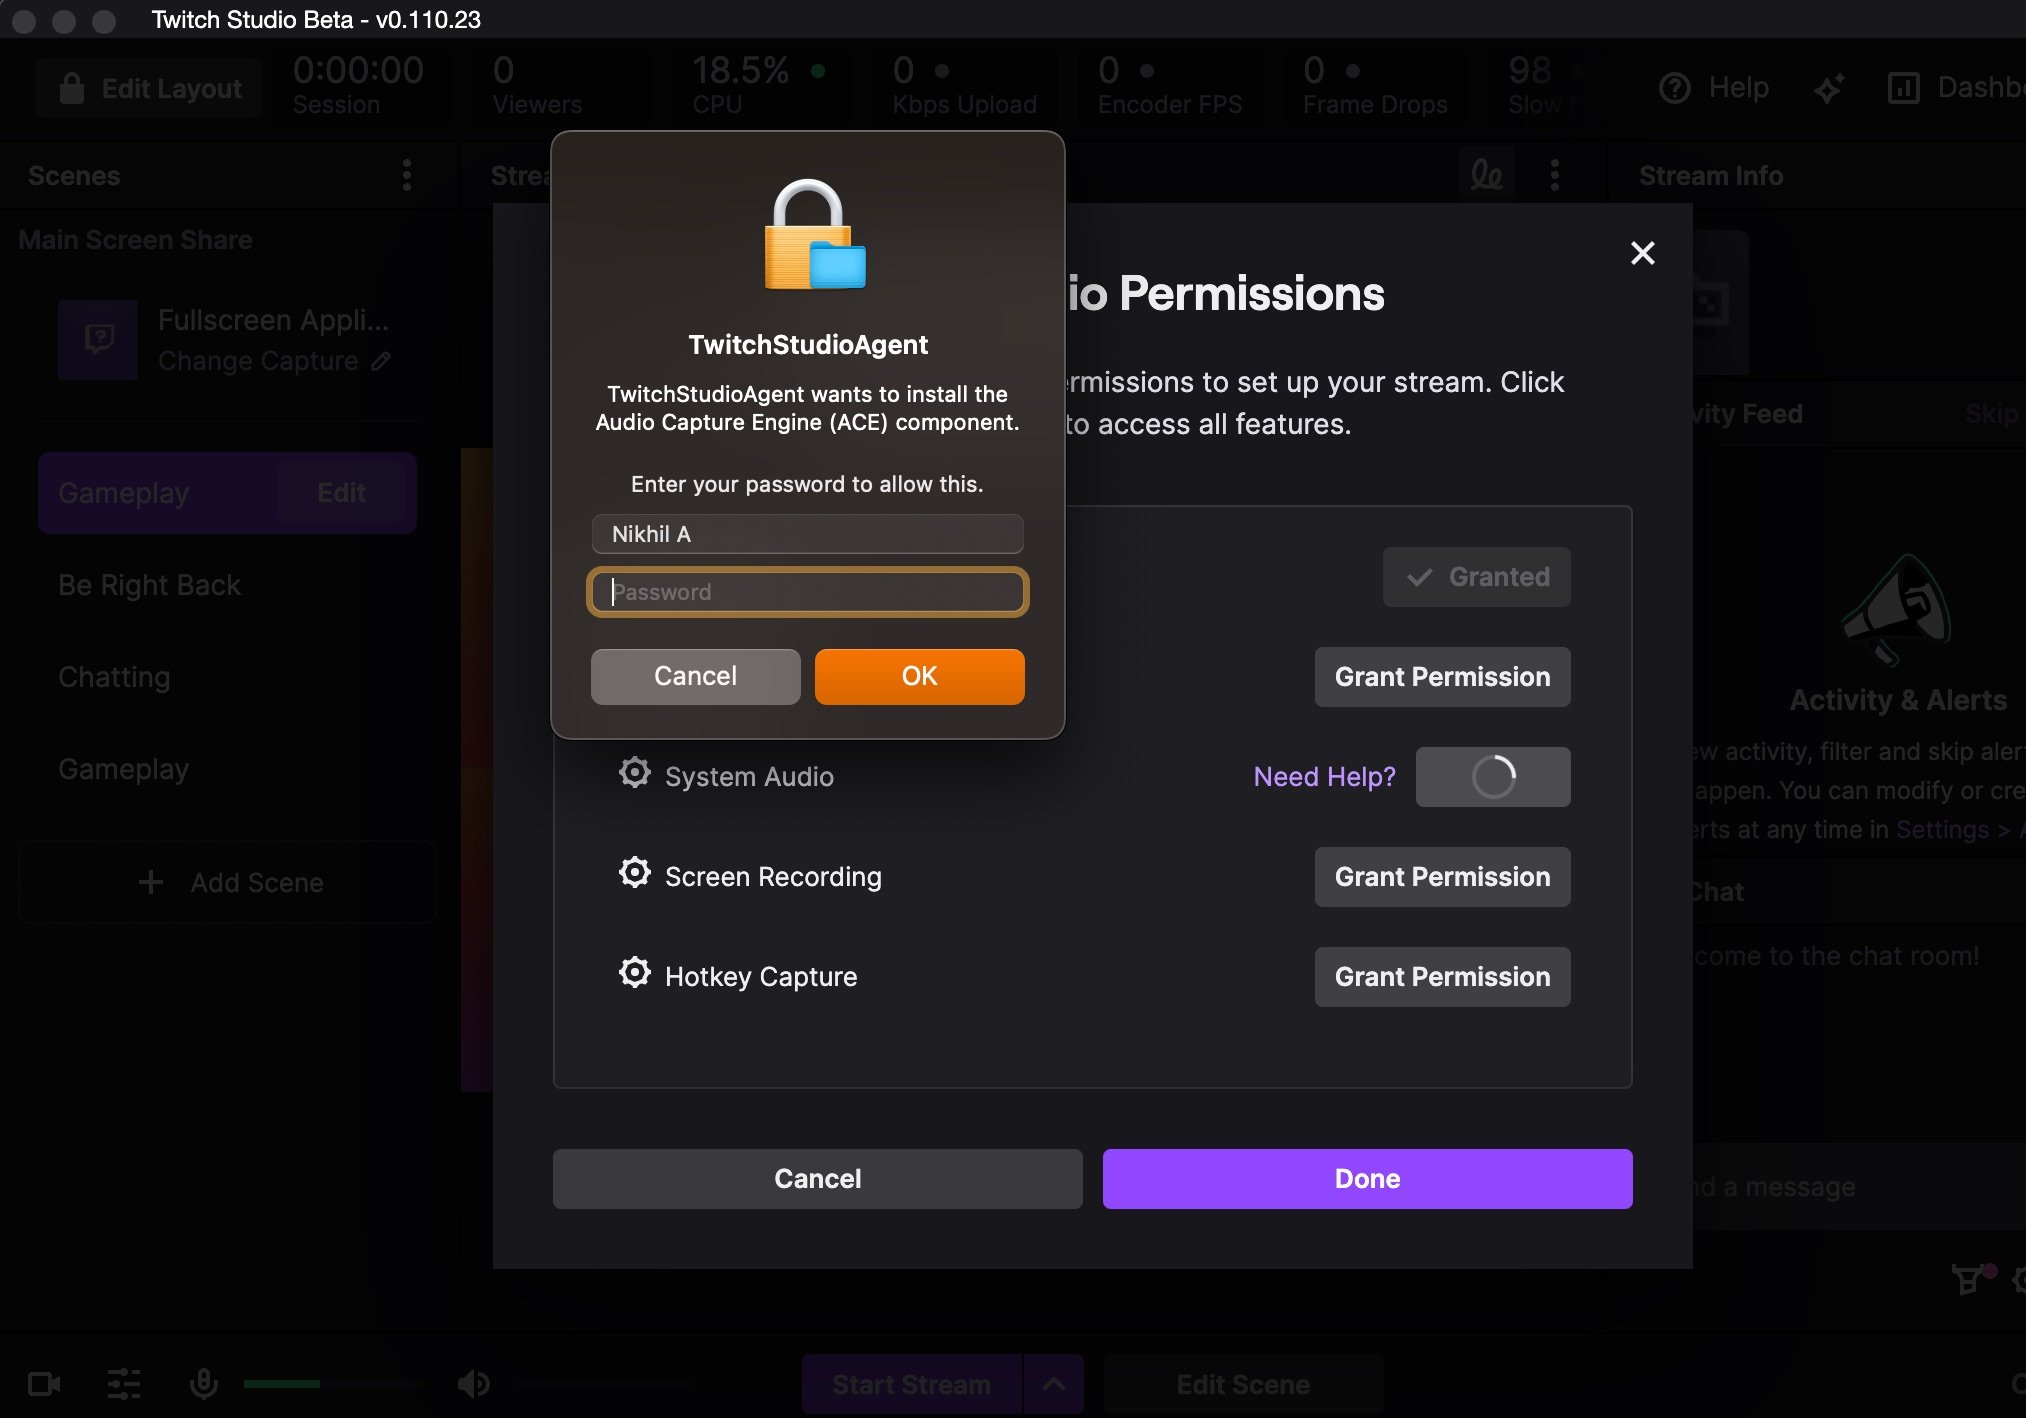
You need to perform some action to capture system audio; the process is a little technical but easy to follow. You need to install an Audio Capture Engine ACE component to capture Mac Audio on Twitch stream.
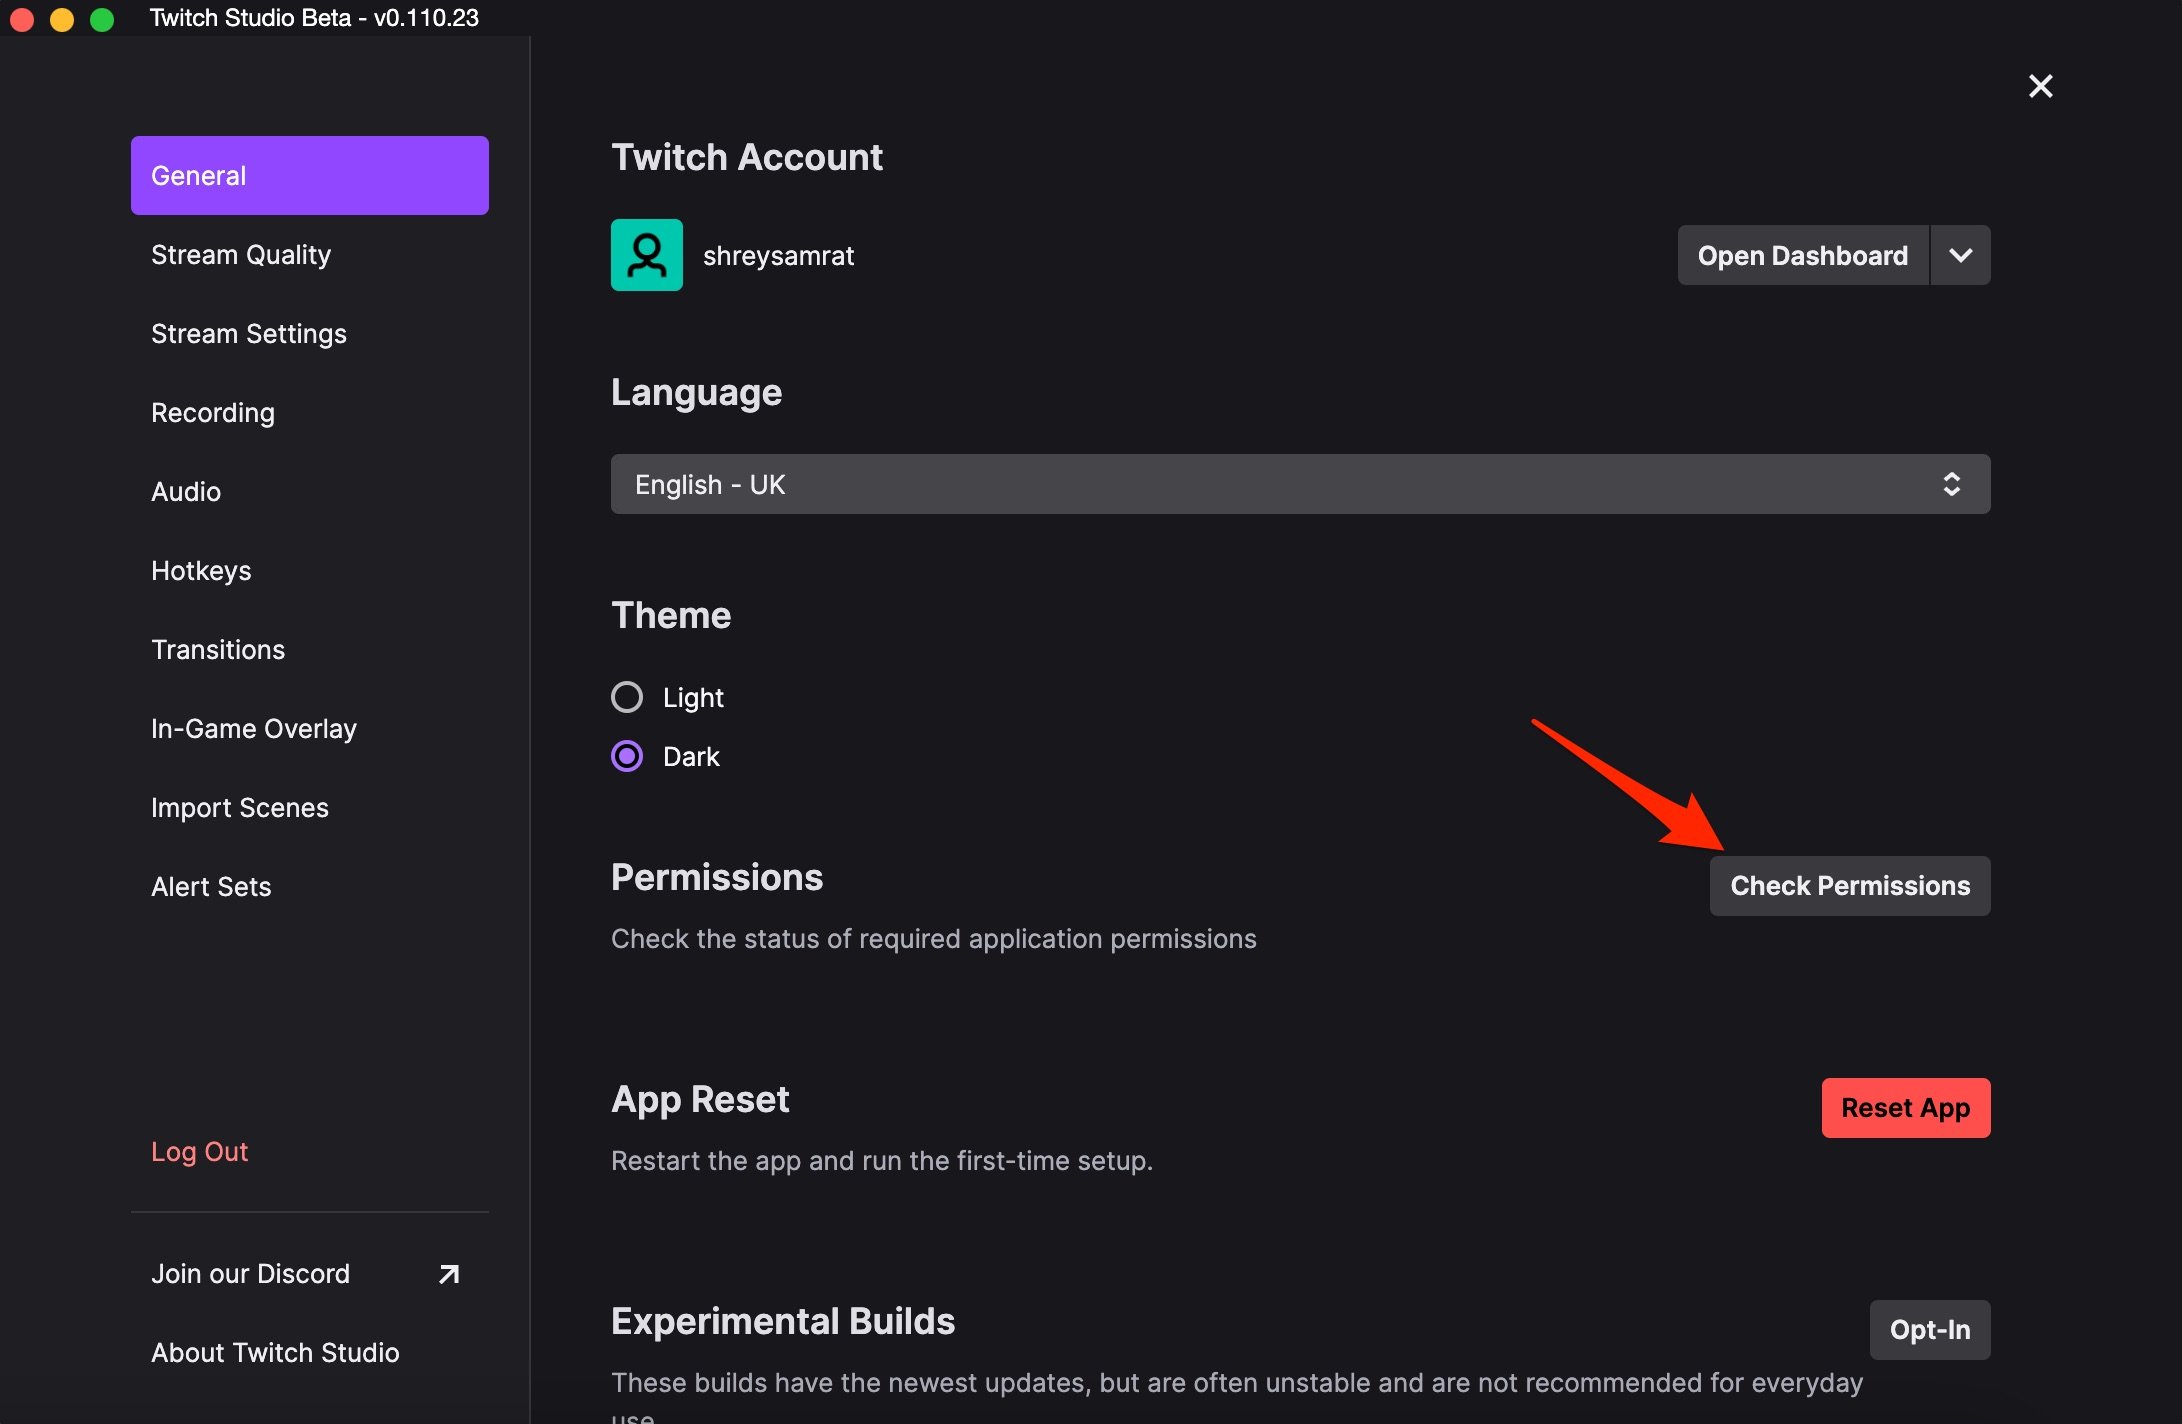
- Open Settings on Twitch App.

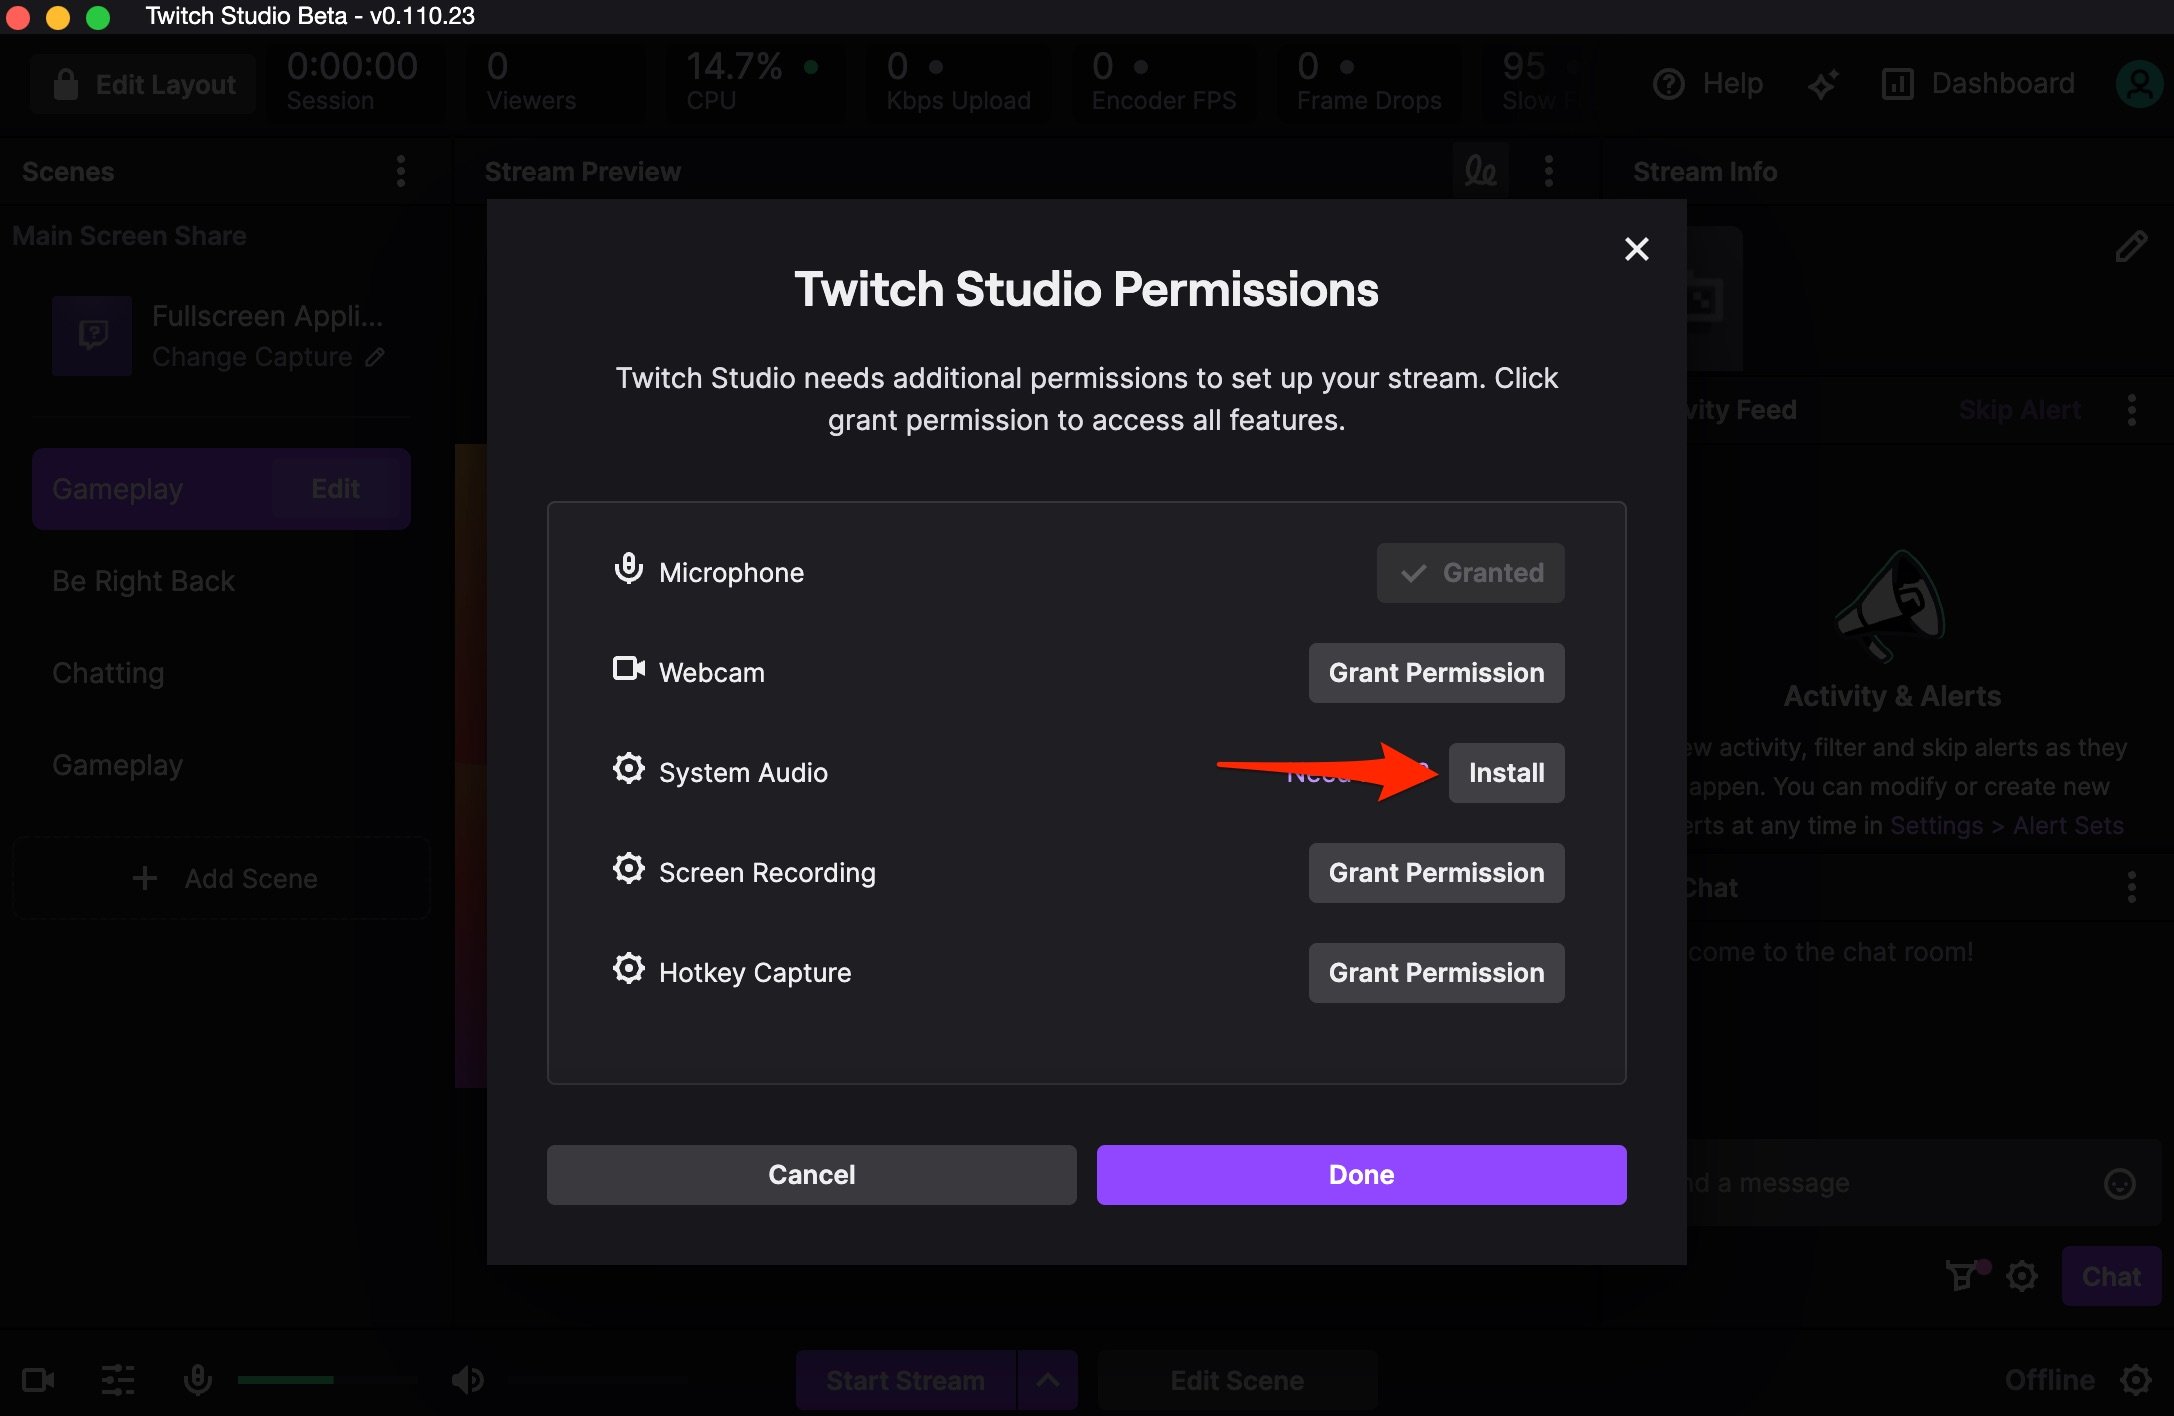
- Here under General open Check Permissions.

- Install System Audio.

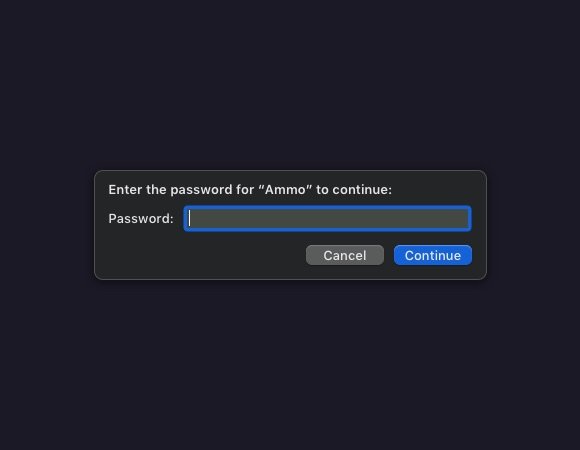
- Enter the Mac Password to install the Audio Capture Engine ACE component.

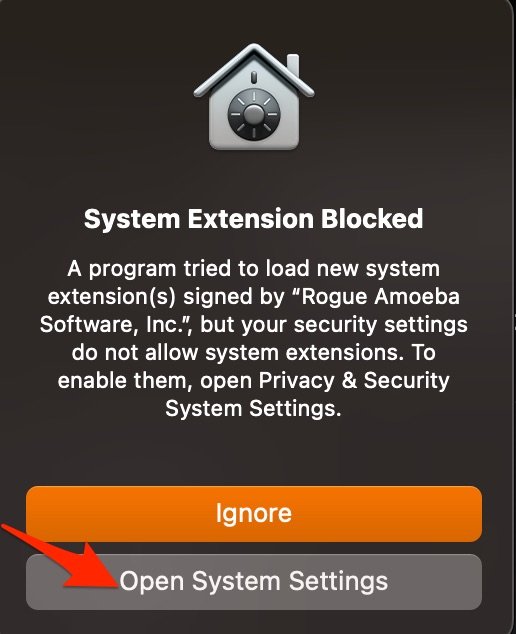
- Open System Settings.

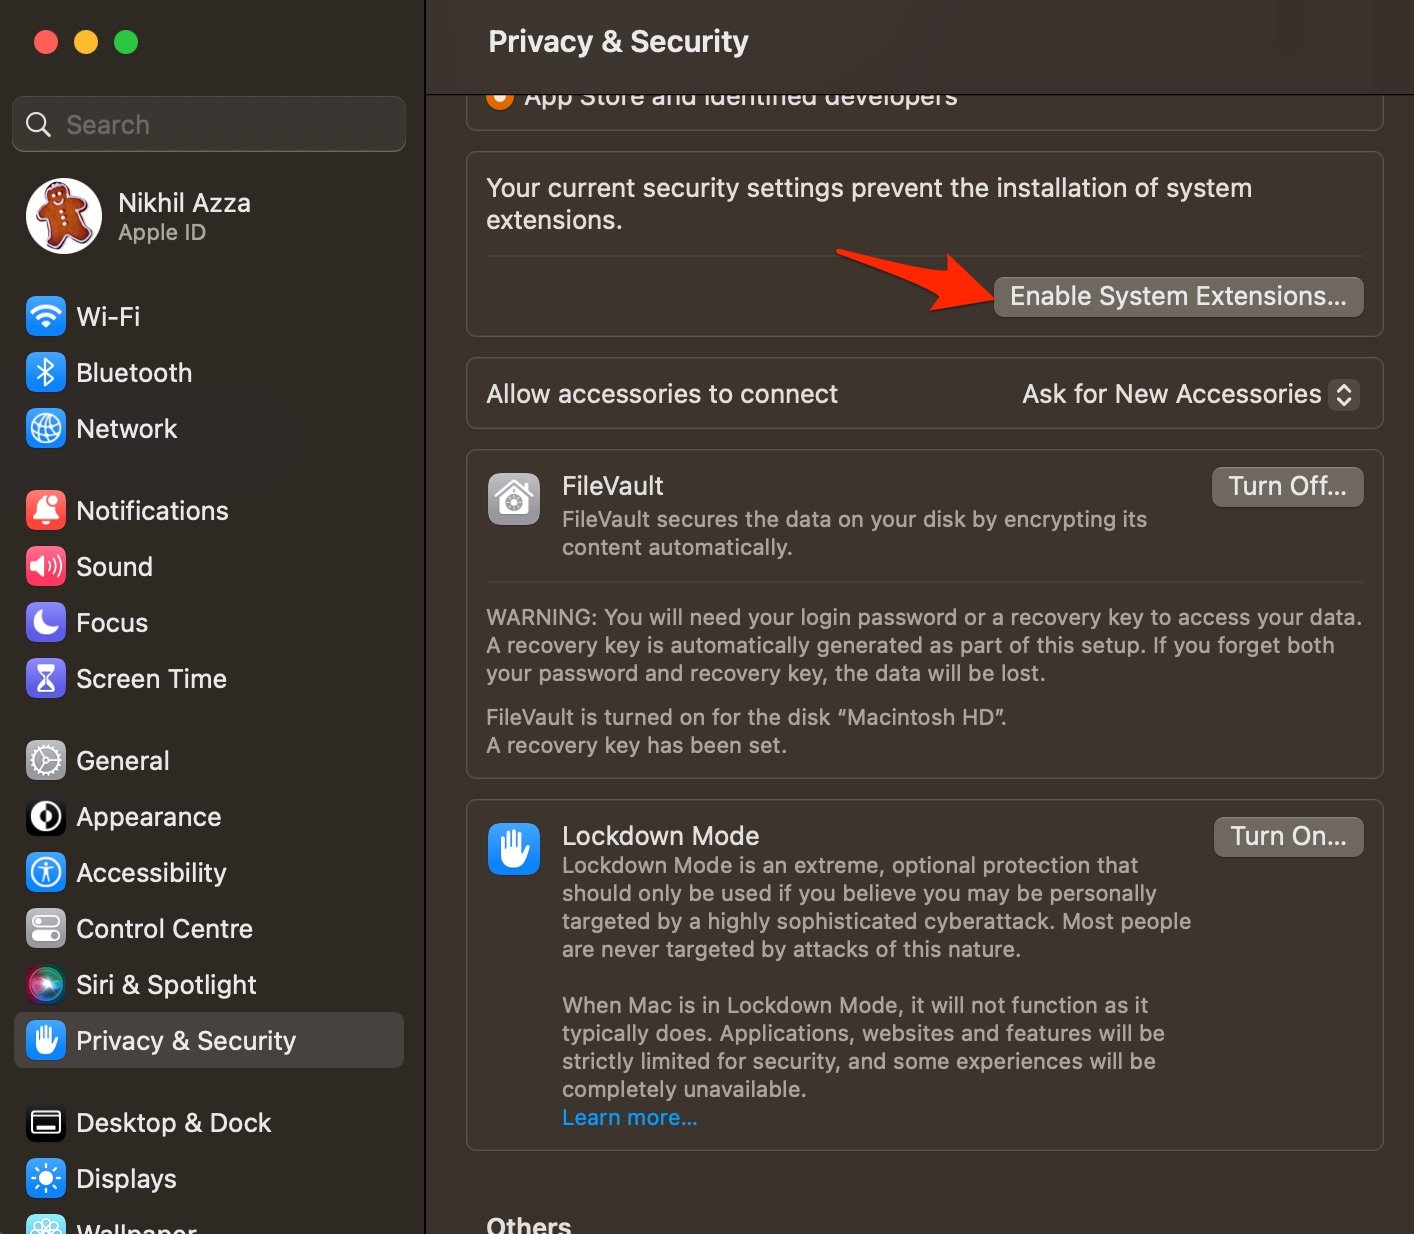
- Click the Enable system extensions.

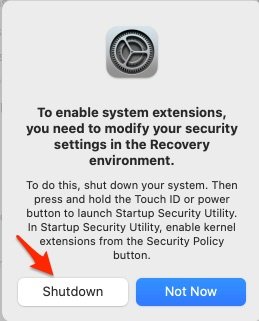
- Shut down and Restart the Mac PC for changes to take effect.

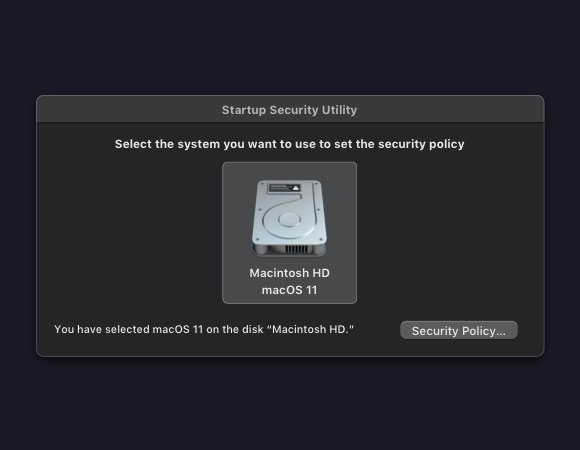
- You need to recover into recovery mode. To boot to Mac’s Recovery environment, press and hold the Touch ID or power button on your Mac. When the screen says Loading startup options, release the button.

- Enter your user password.

- Click the Security Policy. You can now adjust the security policy so ACE can run.

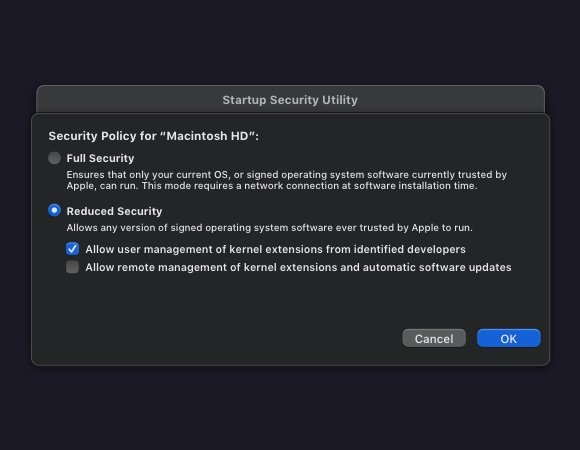
- Select Reduced Security and enable the checkbox; Allow user management of kernel extensions from identified developers and hit OK.

- Approve the change. Enter your password, then click the OK button. Again Restart, then log back into your account as normal.
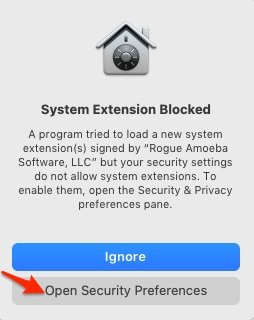
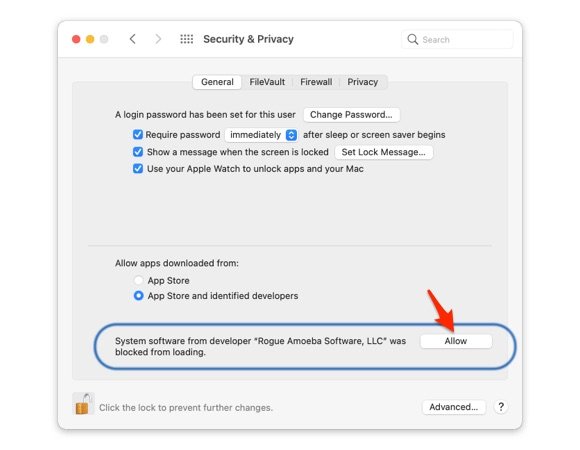
- Click the Open Security Preferences button to proceed.

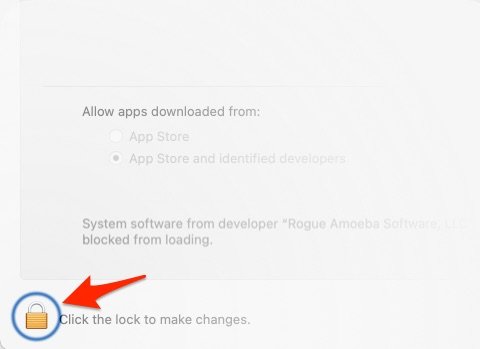
- Click the lock in the lower left corner, then enter your Administrator password.

- Click the Allow button to permit ACE to run on your Mac.

- Restart, and you’re done.
4. Disable In-Game Overlay
The in-game overlay will allow you to read chat, view events in your Activity Feed, and see your stream status and viewer count directly over any game that you are capturing. This feature may have game compatibility issues. If you experience any issues or crashes, turn off the overlay.
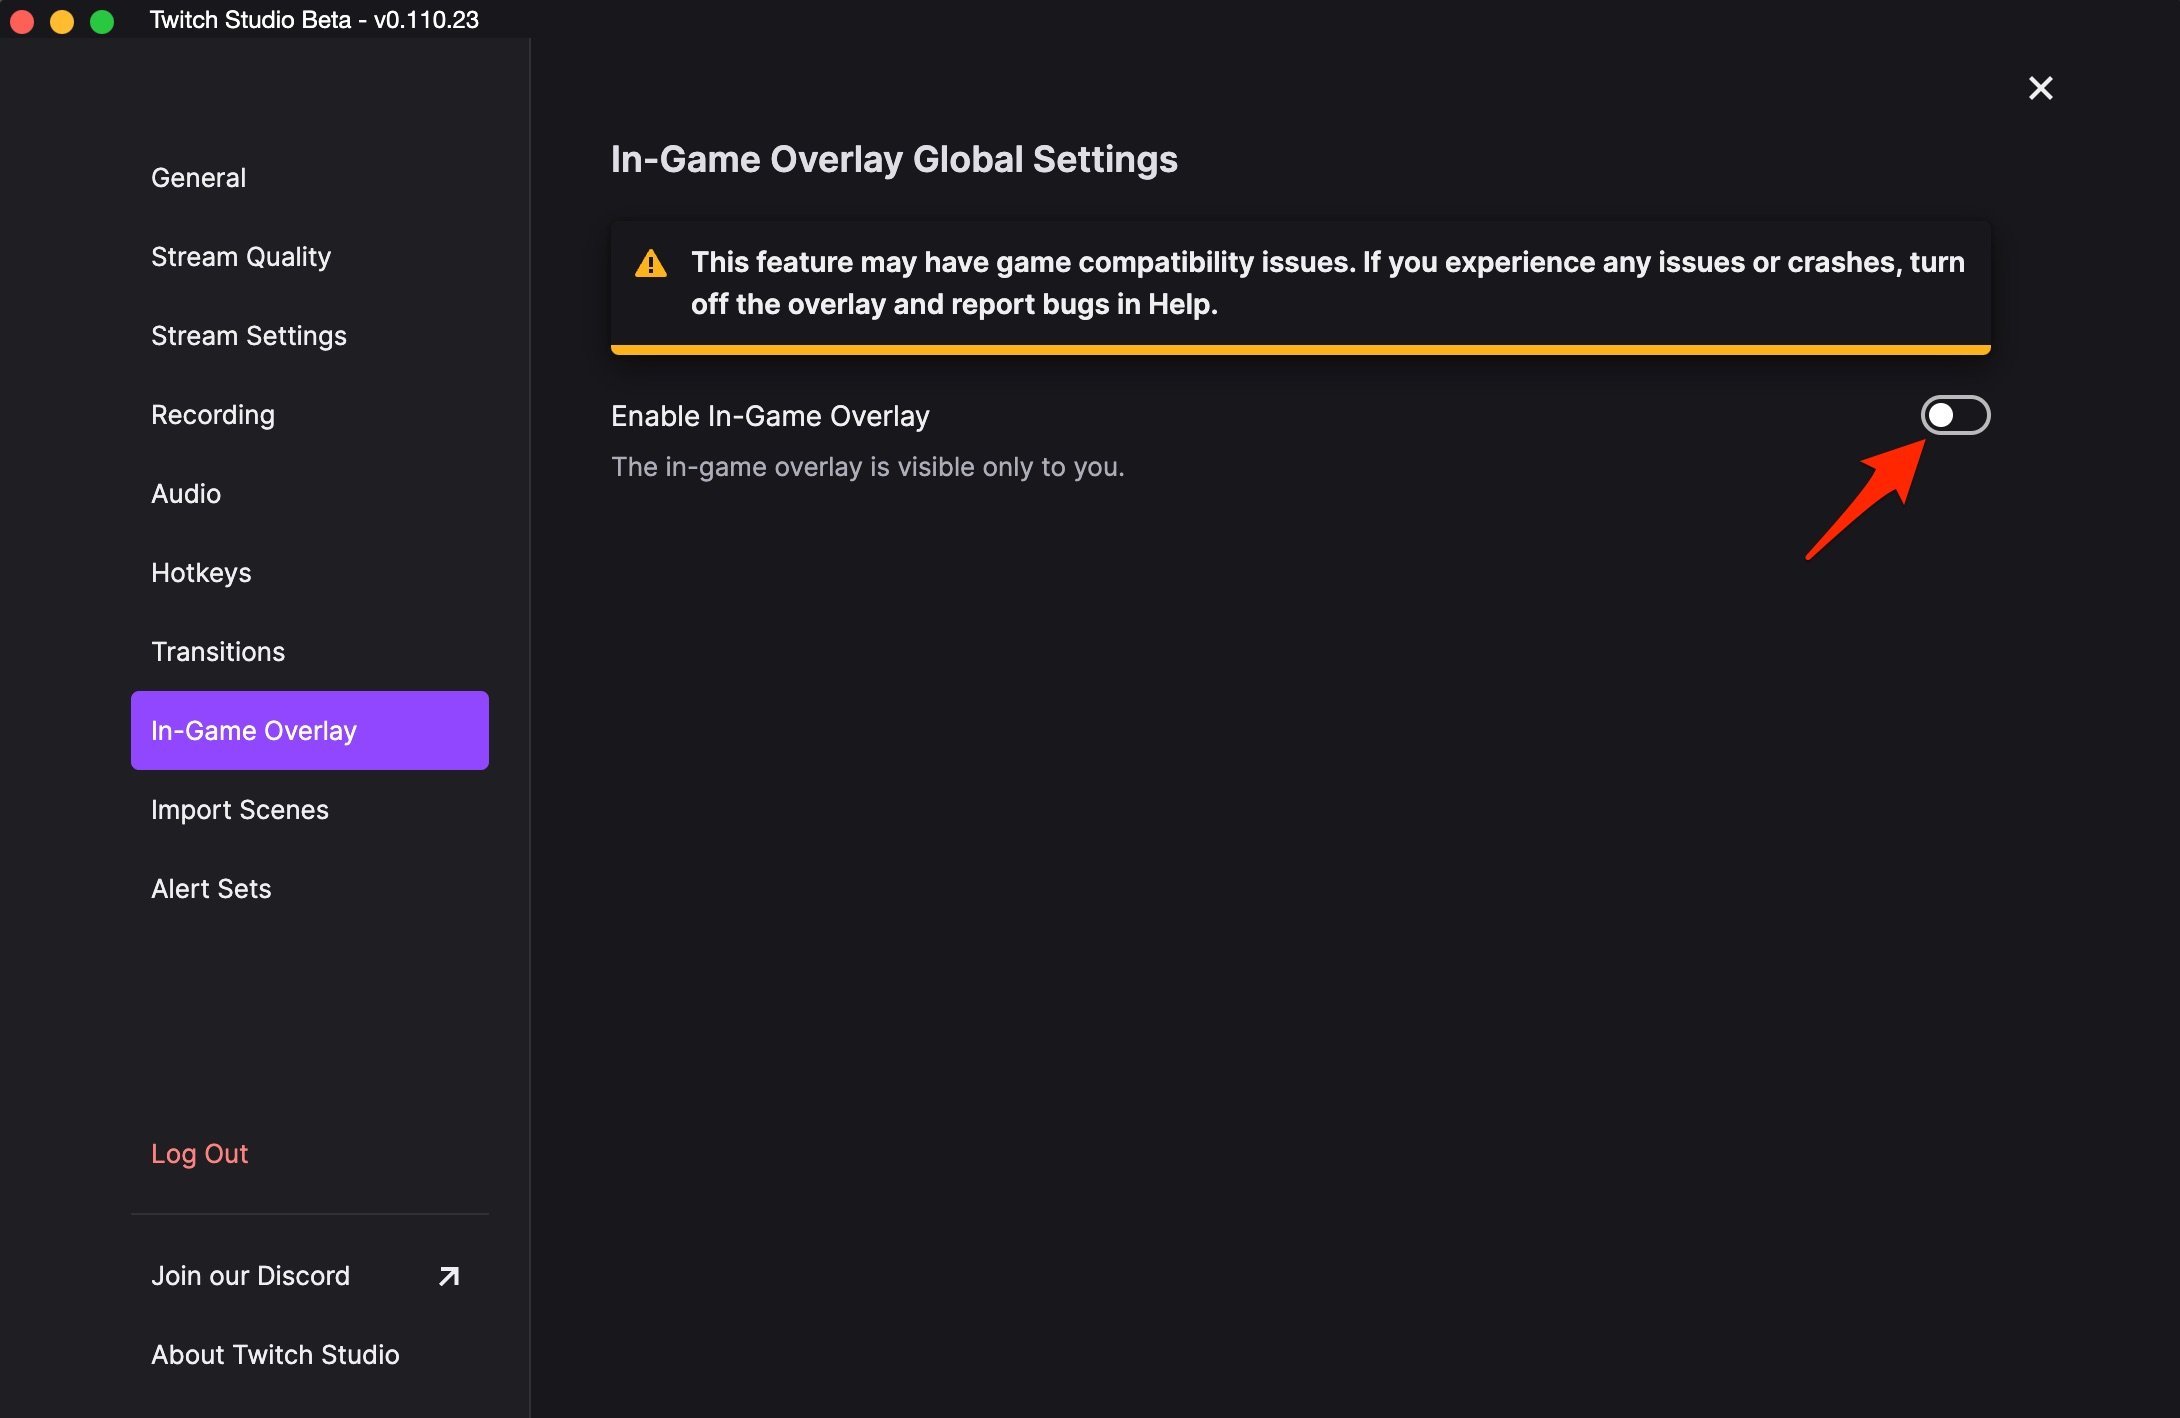
- Open Settings on Twitch App.

- Turn Off In-Game Overlay to fix any crash issues.

If you've any thoughts on How to Fix Twitch Not Working on MacBook?, then feel free to drop in below comment box. Also, please subscribe to our DigitBin YouTube channel for videos tutorials. Cheers!

