This guide will make you aware of three different methods to fix the app process, not the closing issue in Windows 11. There are a plethora of services running in the background on your Windows PC at a particular point in time. While some are associated with third-party apps, others belong to system-related components essential for the OS’s proper functioning.
However, these processes aren’t free from their fair share of issues. Sometimes, they might not perform along the expected lines and could lead to a high impact on the CPU’s performance. This, in turn, would slow down your PC, but that’s just one of the many negative outcomes of this event.
Any issues with a service could have direct consequences on its associated app or even the OS if the process in question is linked to a system app. In this regard, the best route forward is to close that process via Task Manager and give it a new instance to work upon. However, in some instances, the service would just refuse to close.
It would either hang the Task Manager or wouldn’t react to the user’s action of clicking on the Disable button. If you are also getting bugged with this issue, then fret not. This guide will show you various approaches to fix the app process, not closing the issue in Windows 11. Follow along,
Ways to Fix the App Process not Closing issue in Windows 11
There exist three different methods through which you could carry out the aforementioned task- without involving the use of Task Manager. We have listed all these three approaches below; you may try out the one that meets your requirement.
Method 1: Terminate the App
Windows 11 has revamped the Settings page and added a bunch of useful functionalities to it. One of them is directly terminating the app and its processes in just one click. Here’s how you could use it:
- Press the Windows+I shortcut keys to open the Settings menu.
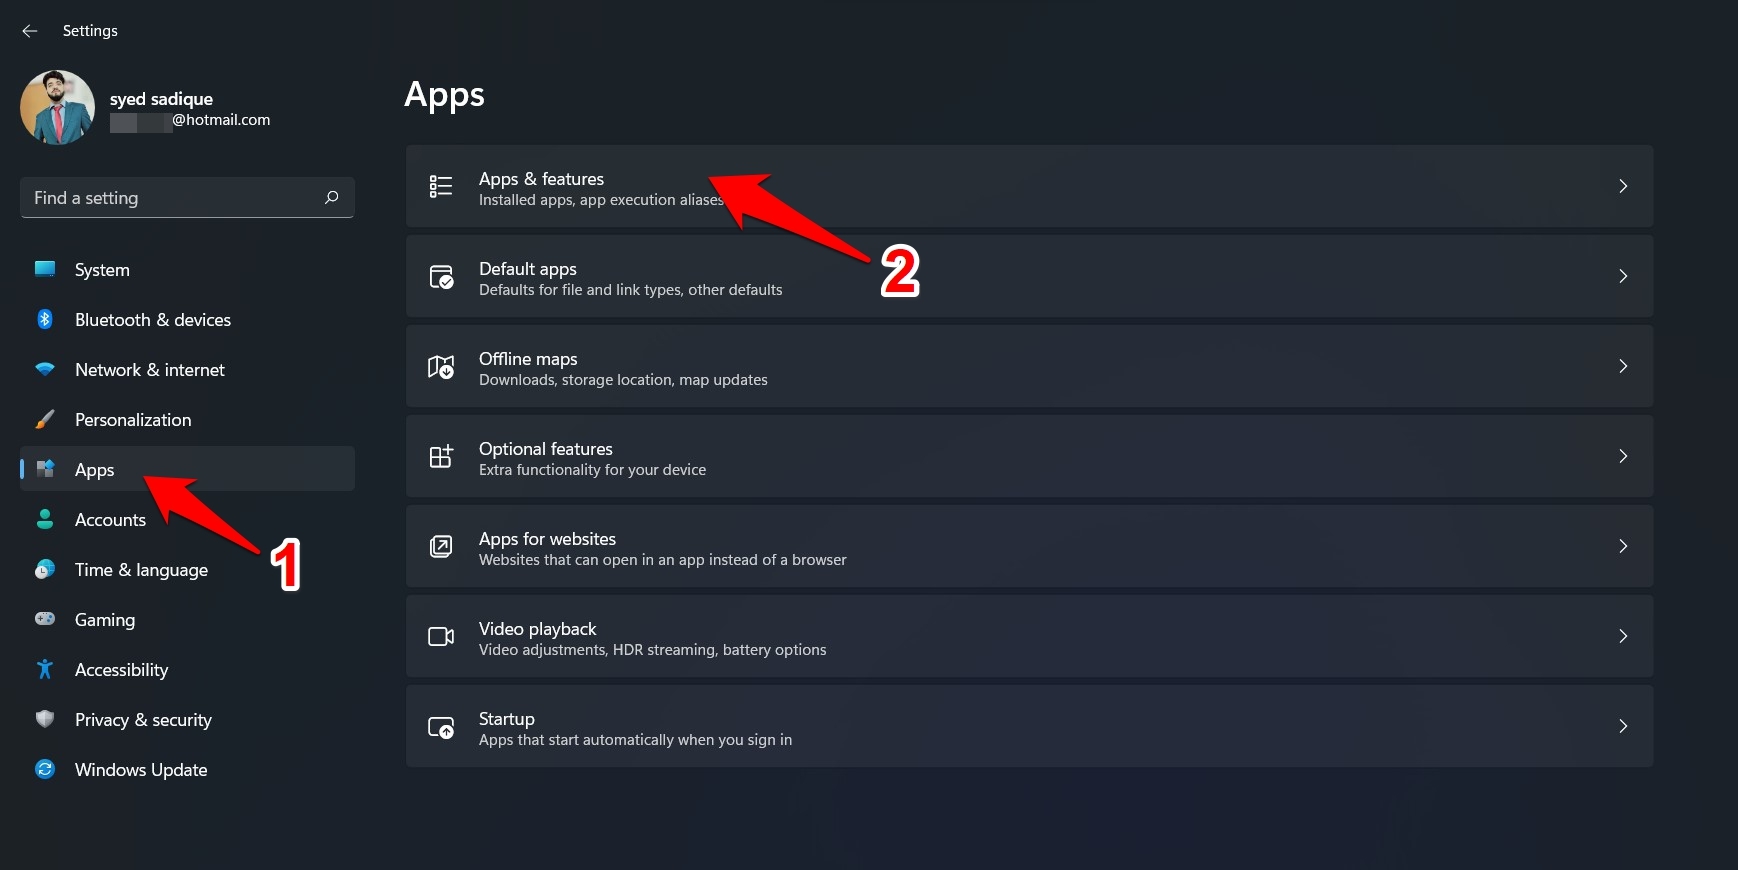
- Then go to the Apps section from the left menu bar and select Apps and Features.

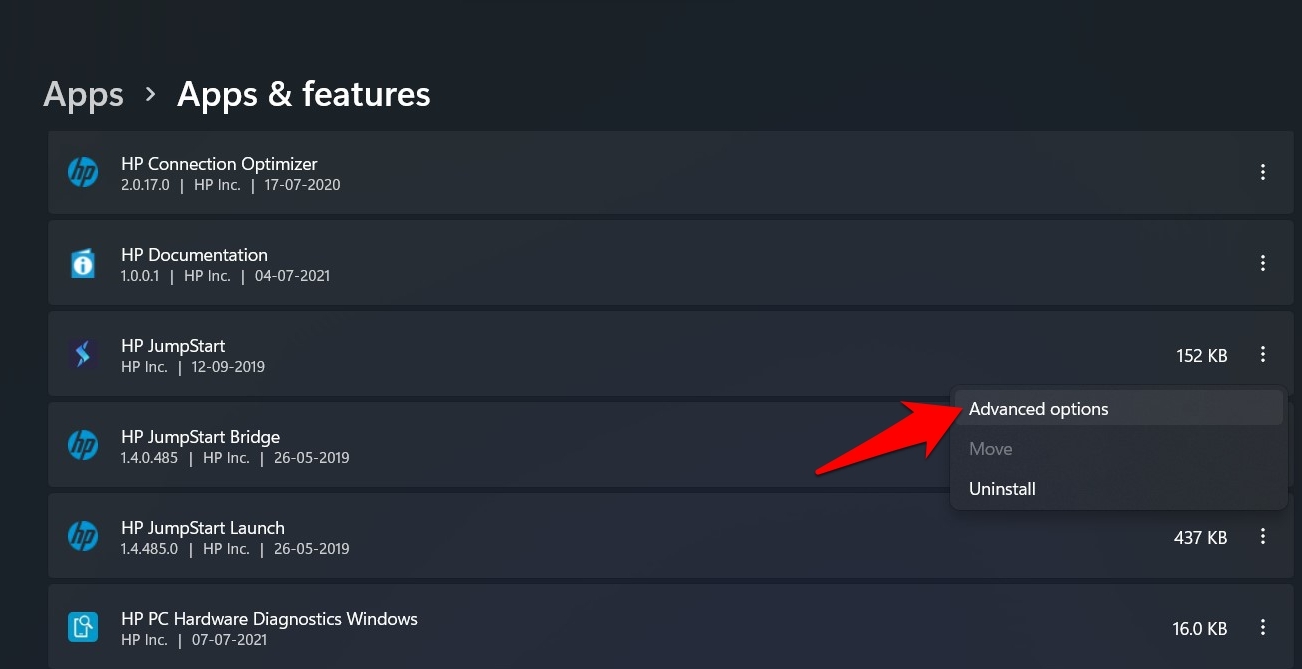
- Scroll to the app whose service is causing an issue or two.
- Click on the overflow icon next to it and select Advanced options.

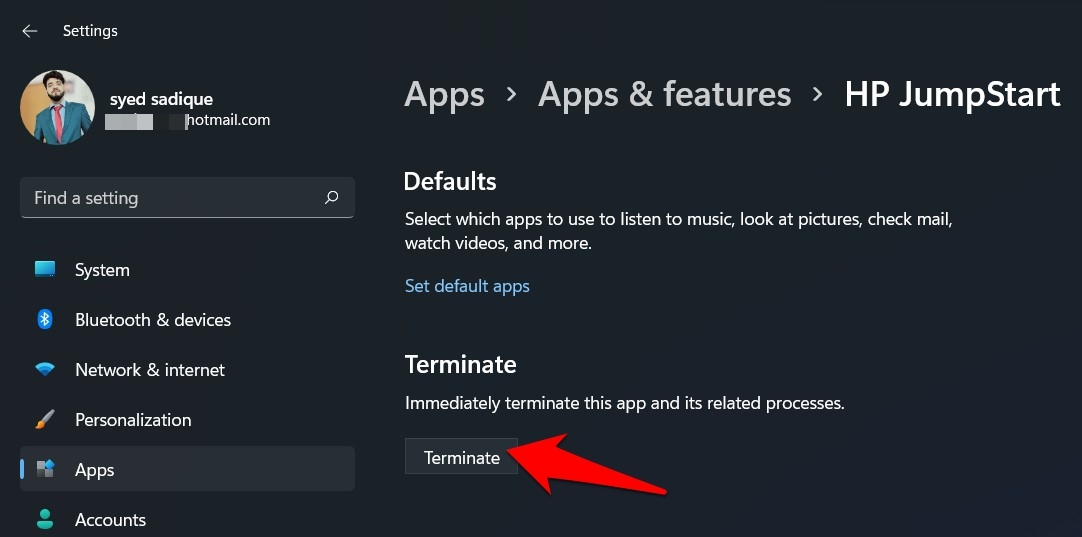
- Finally, click on the Terminate button and wait for a few seconds.

- Check if it is able to fix the app process not closing issue in Windows 11.
Method 2: Close it via Command Prompt
While a slightly technical method, closing the app’s process via the Task Kill command is a fool-proof method that has a high degree of success. So let’s put it to test right away:
- Head over to the Start menu, search CMD and open it.
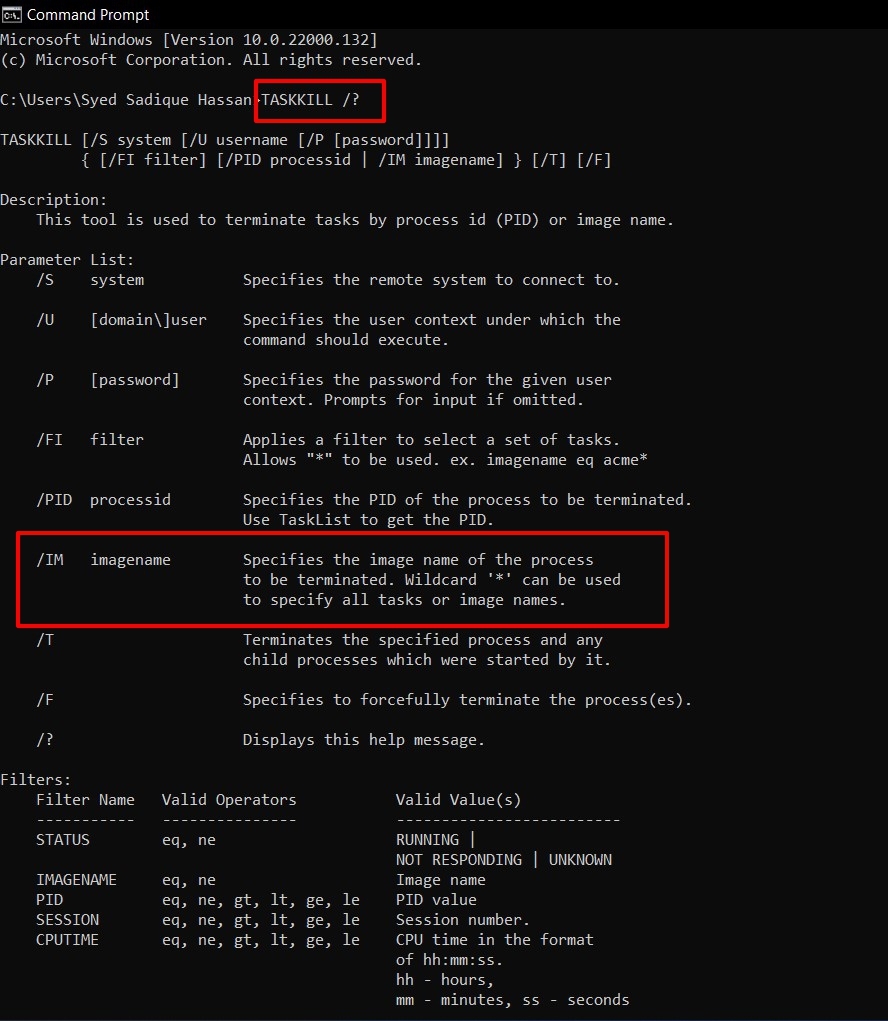
- Now type in the below command to bring up the syntax of Task Kill:
TASKKILL /?

- Out of all the available formats, we would be using the /IM imagename.
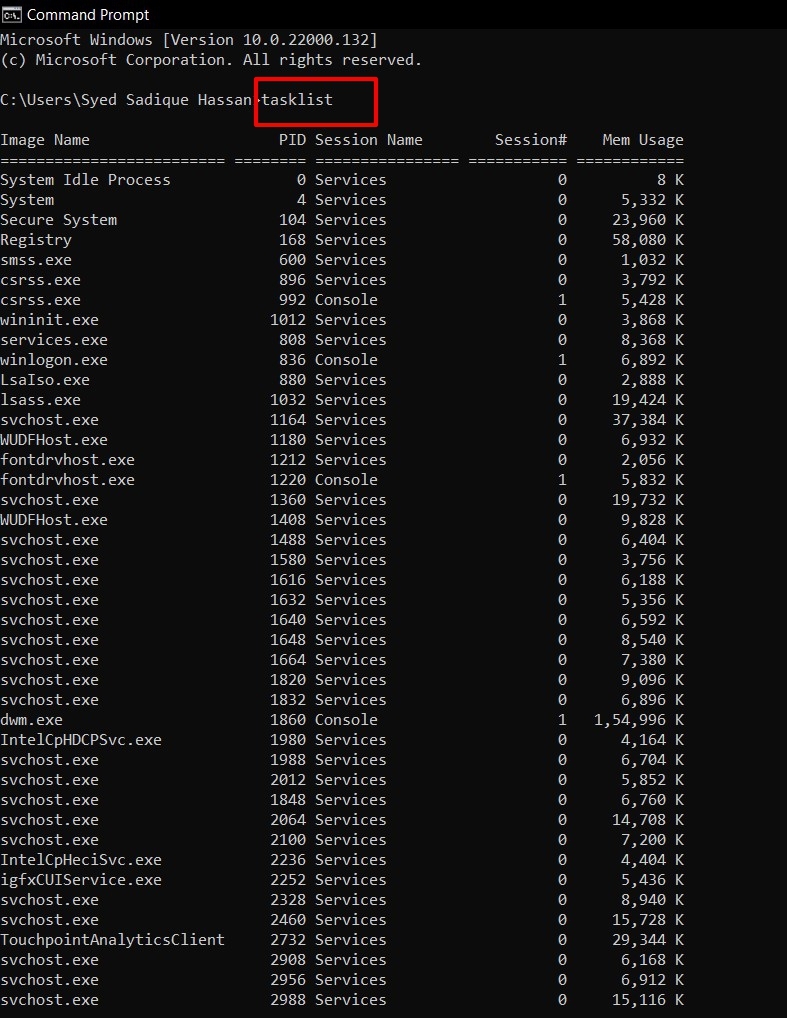
- But for that, we need to get hold of the imagename of the process that we need to close. So input the below command for that:
Tasklist

- This shall bring up a list of all the running processes on your PC. The first column signifies the Image Name. Make a note of the one that you need to close.
- Finally, use the below syntax and replace the imagename tag with the appropriate process name.
taskkill /IM imagename
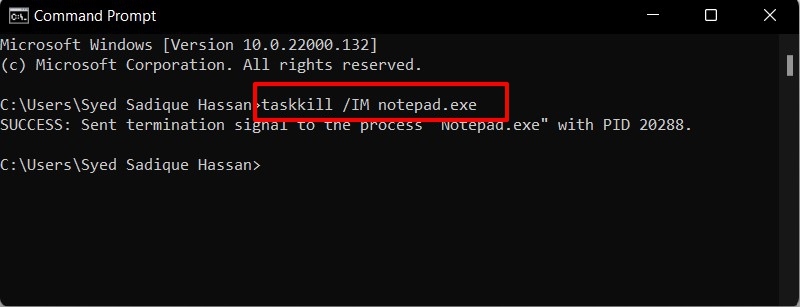
- For example, if you want to close Notepad, then the above command will transform to
taskkill /IM notepad.exe

That’s it. This was the second method to fix the app process, not the closing issue in Windows 11. Let’s make you aware of the third and final one.
Method 3: Disable the Process via System Configuration
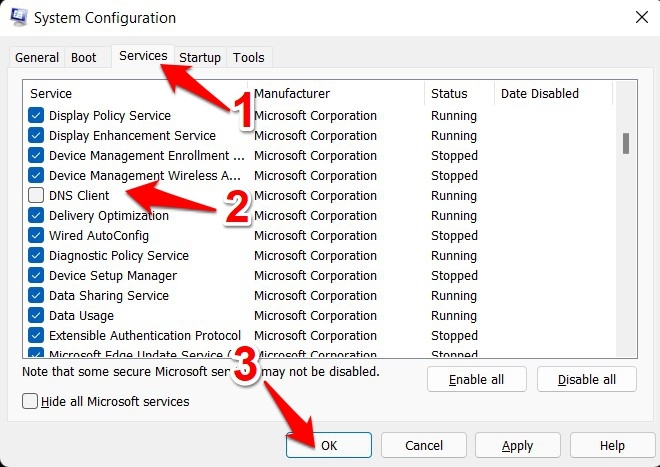
If you are unable to close an app’s process, then you could rather consider disabling it. The process will just lie idle in the background without consuming any additional system resources. However, do keep in mind that as opposed to the earlier two methods, here, you will have to manually re-enable that process as and when needed. To try it out, here’s what you need to do:
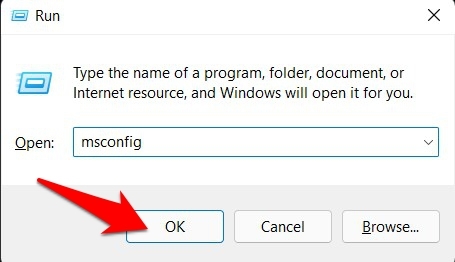
- Bring up the Run dialog box via Windows+R shortcut keys.
- Then type in msconfig and hit Enter. This shall launch the System Configuration menu.

- Now go to the Services tab, uncheck the process that you need to disable, and click OK.

- Finally, restart the PC for the changes to take place.
- As and when you need to restart that process, just go back to the Service tab and checkmark the required service.
While this method is fairly easy to execute, but it has a caveat. Not every process have their associated services. So if you come across any such app, then the above method would prove to be futile.
Conclusion
With this, we conclude the guide on how you could fix the app process not closing issue in Windows 11. We have shared three different methods for the same, along with their perks and downsides. Do let us know in the comments section which of the approaches spelled out success for you.
If you've any thoughts on [3 Methods] Fix the App Process not Closing issue in Windows 11, then feel free to drop in below comment box. Also, please subscribe to our DigitBin YouTube channel for videos tutorials. Cheers!
