This guide explains various troubleshooting tips to fix the issue of the Steam app for PCs getting stuck in offline mode. To play games in the offline mode on Steam means no need to use an active internet connection. When you have limited access to the internet, but you are craving some engaging gaming session, fulfill that by using Steam in offline mode.
Some gamers report that they cannot switch to the online mode after using the Steam app offline. They get stuck in the offline mode. This issue is happening to the users accessing Steam on Windows 11. Offline mode on Steam is quite useful. However, you cannot update the games if you are offline. Also, installing Steam updates will require an active internet connection.
Tips to Fix Steam Won’t go Online on PC
Follow these troubleshooting tips to come out of the Steam offline mode on your Windows PC.
1. Sign-Out and Sign-in Back to Your Steam Account
Let us begin with the simple fixes. This one involves signing out of your account and successively signing in again. Often, it has been seen that these quick fixes can effectively deal with minor bugs and help resolve the problems it was causing.
- Click the tab Steam in the menu bar.
- Select Sign out from the menu.
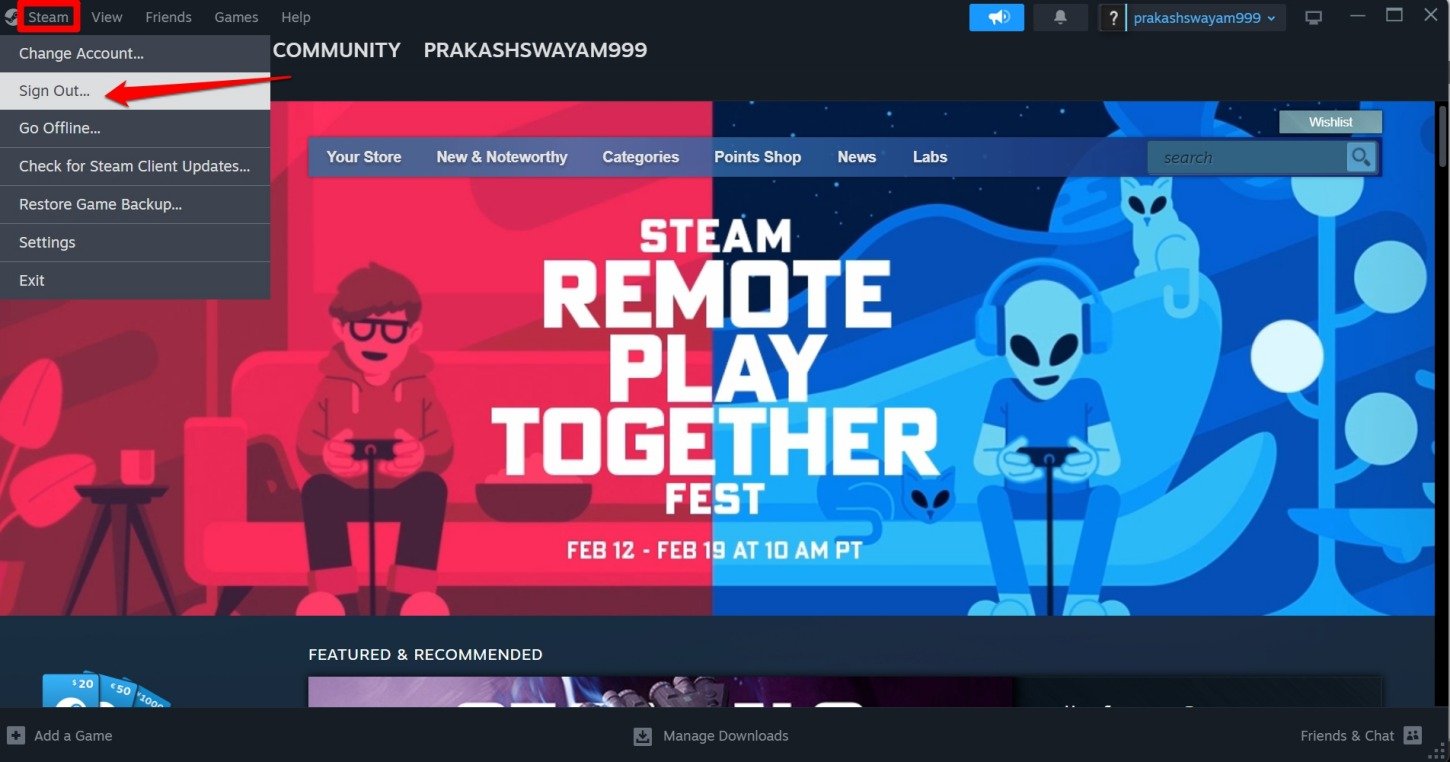
- Next, click on the Confirm button.

- Enter the credentials on the login screen and sign into your profile.
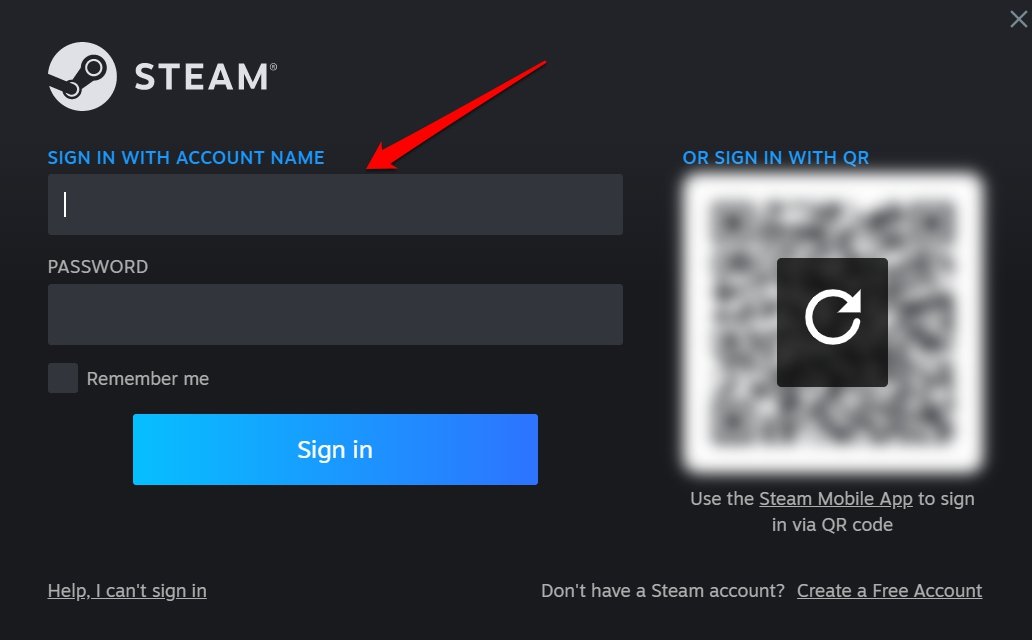
Check if Steam switched to the online mode.
2. Check if Windows Firewall is Blocking Steam
The Windows Firewall may behave weirdly and block apps installed on your PC from launching. You need to check if the same is happening with Steam.
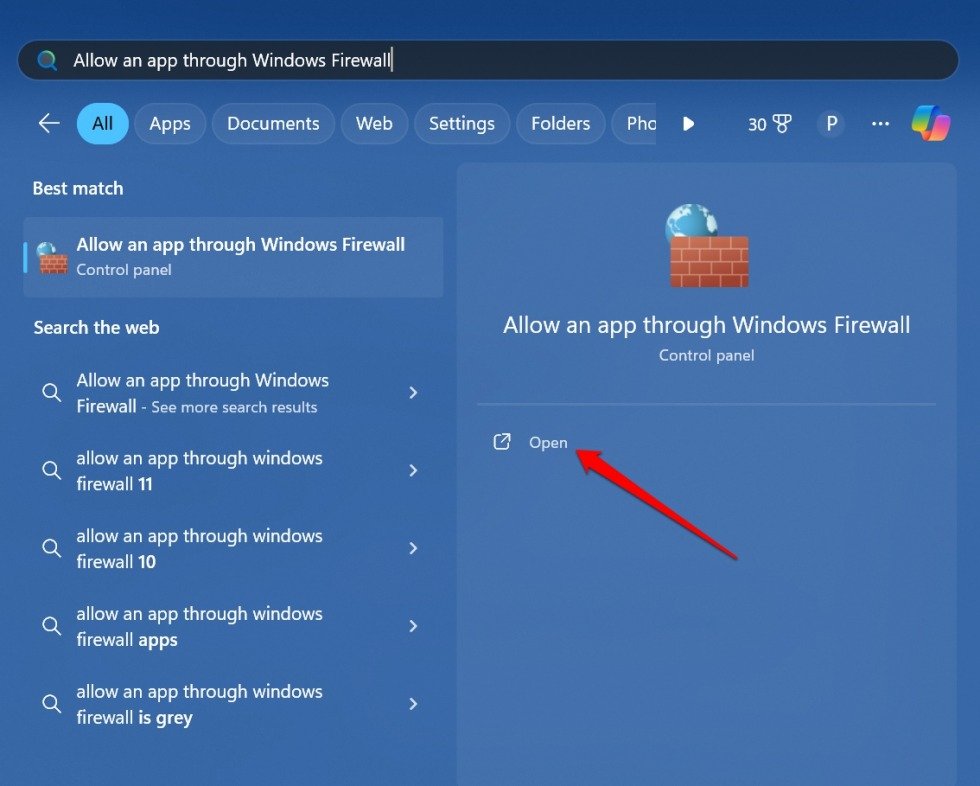
- Press the hotkeys Windows + S. This will bring up the search panel.
- In the search field, type Allow an app through Windows Firewall.
- When the relevant results appear on the search, click Open.
- Click on Change Settings.
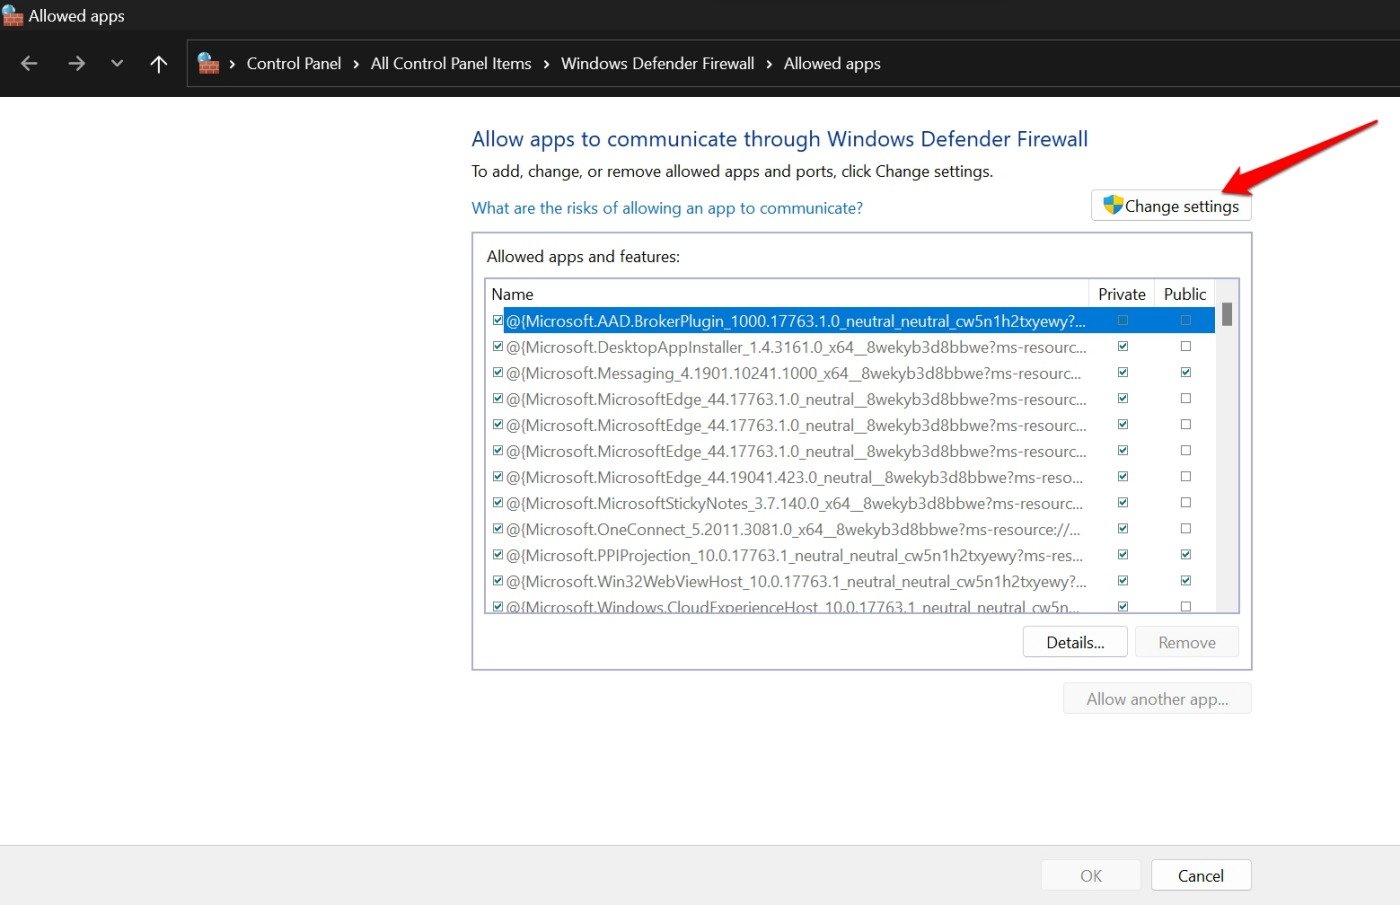
- Under the Allowed Apps and Features, scroll to Steam.
- Click the checkboxes Private and Public next to Steam.
- To confirm the changes, click on OK.
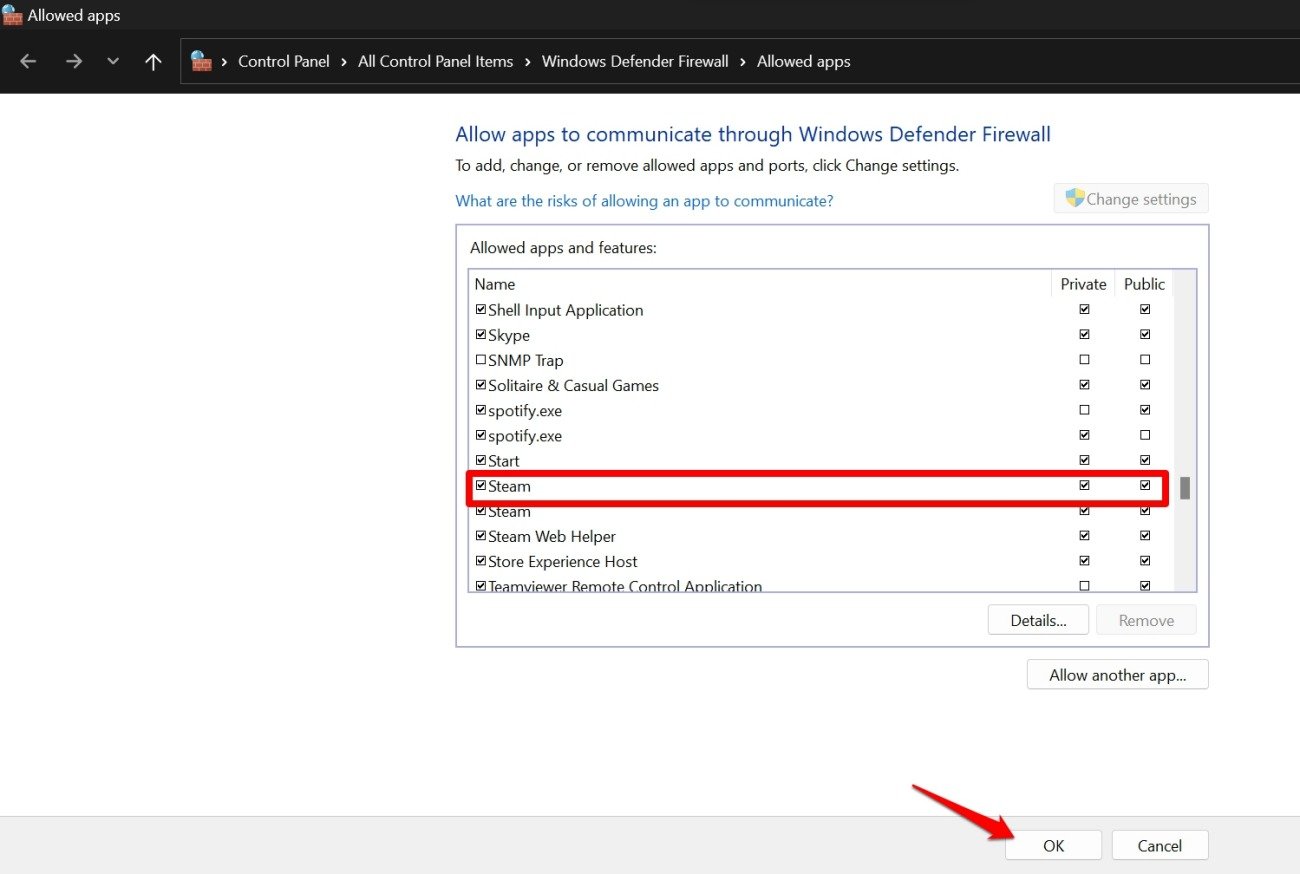
- Now, relaunch Steam.
You should now access Steam in online mode. If Steam still launches in Offline mode, check your internet connection.
3. Fix the Internet Connectivity Issues
You need to fix your internet connection if Steam is launching offline after you whitelist it from getting blocked by the Windows firewall.
Turn off the modem and disconnect the PC from the network. Then, reconnect the PC to the network by turning the modem on subsequently. Try using other apps that require the internet to function. If other apps on Windows are not working, the problem lies with the internet connection.

Contact your ISP support and register a complaint. Connect your computer to other available networks and check if Steam launches online. Additionally, you can run an internet speed test to know the stability and efficiency of the available networks.
4. Clear the Cache of the Steam App
The Steam app cache may have accumulated loads of junk data, hindering it from going online. Clear the cache and check if that solves the issue of Steam being stuck in offline mode.
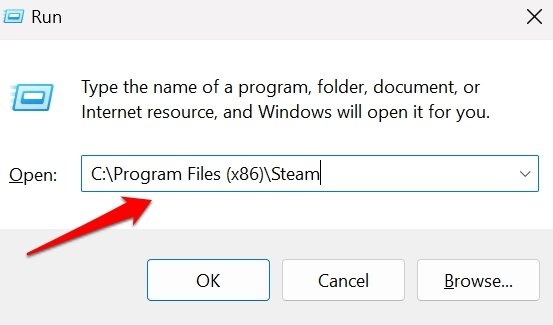
- Press Windows + R hotkeys to launch the Run box.
- Type C:\Program Files (x86)\Steam and press enter.
- Within the Steam directory, find the folder ‘appcache’.
- Select the folder ‘appcache‘ and press Shift + Delete to remove it. [or press the trash icon]
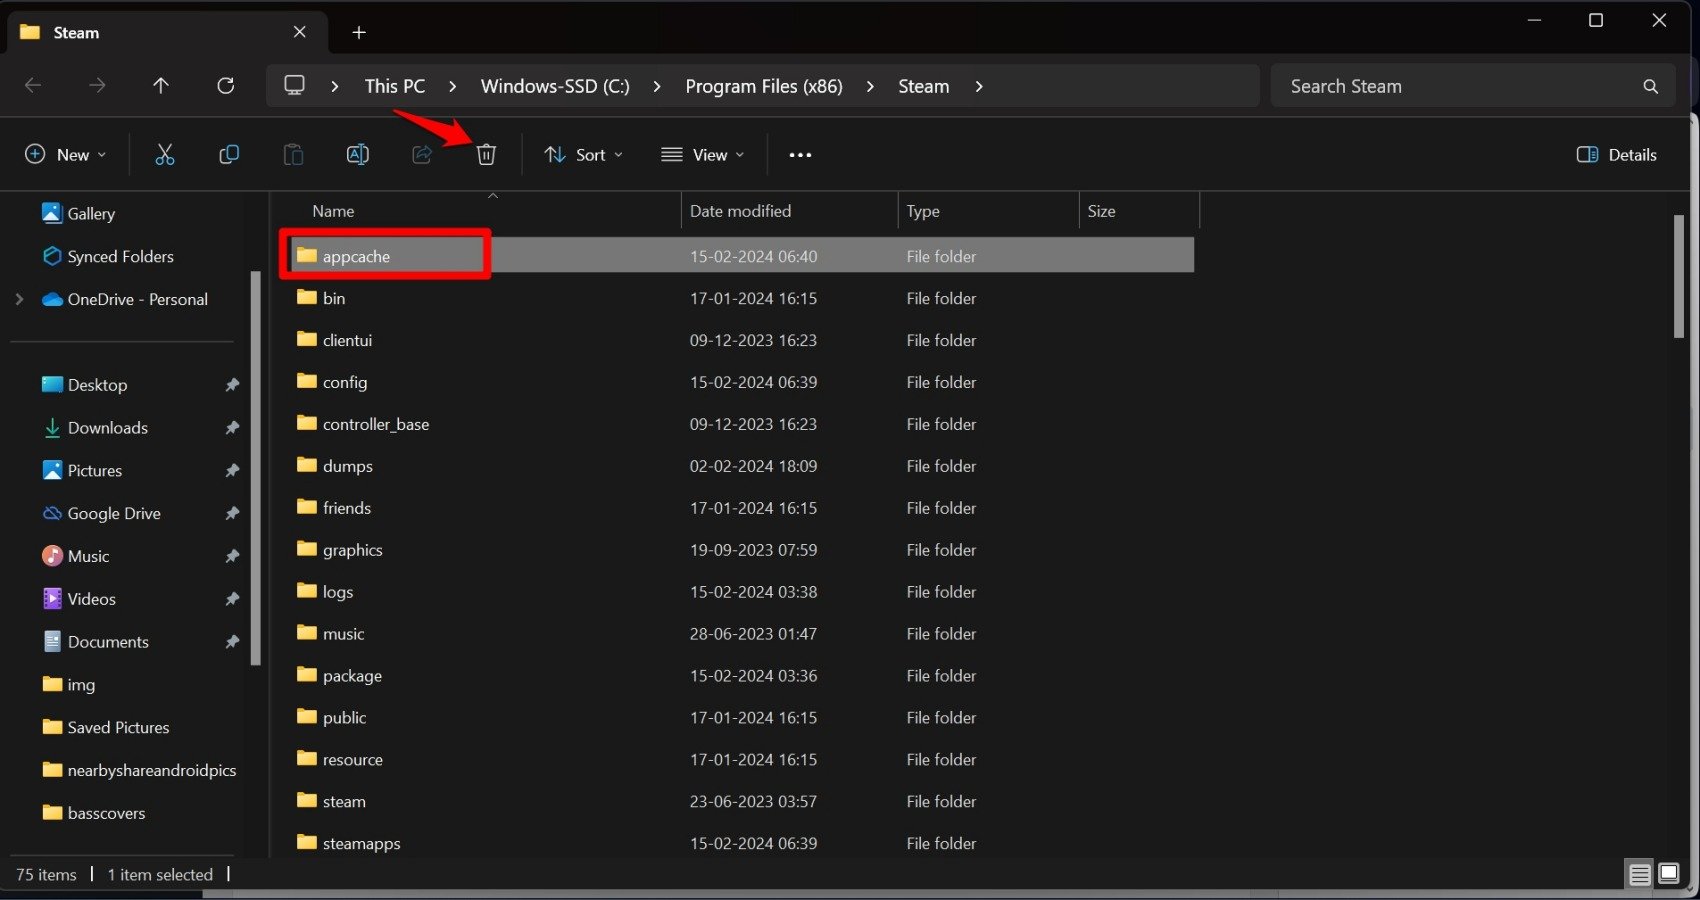
- Now, relaunch Steam and check if it goes online.
5. Change the Internet Protocol of Steam
You have to change the internet protocol of Steam from UDP to TCP. Primarily, Steam relies on UDP to access its servers. If UDP has any problem, Steam cannot connect to its servers. Hence, you end up getting stuck in the offline mode.
To change the internet protocol of Steam,
- Right-click on the Steam shortcut icon.
- Select Properties from the menu.
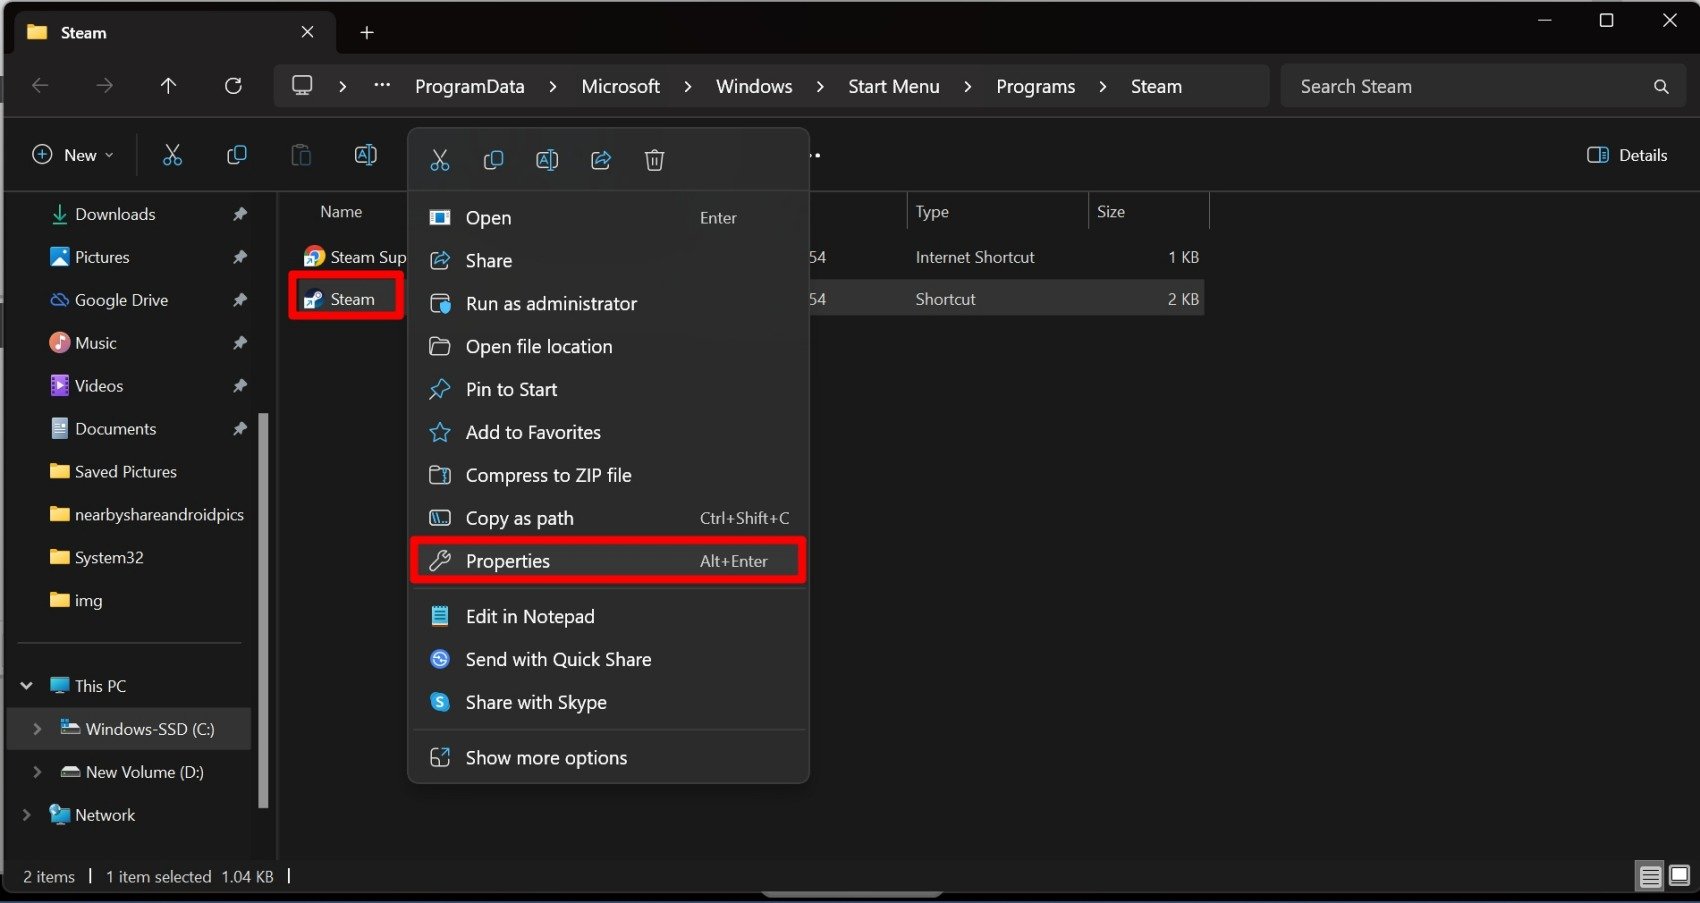
- Click the Shortcut tab.
- Go to the section Target.
- Add “-tcp” as the suffix of the file path.
- Click on Apply > OK.
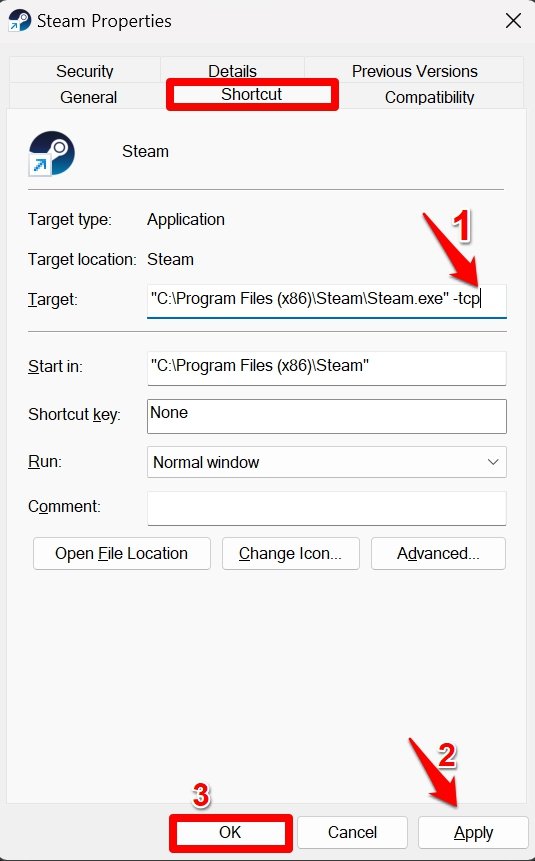
- Restart Steam and check if it connects to its online servers.
6. Reset Windows Sockets
It could be some network problem causing the Steam app to get stuck in the offline mode. Fix the network issues by resetting the Windows Sockets, also known as Winsock.
- Press the Windows key to bring up the search panel.
- Type cmd.
- When the relevant search result appears, click on Run As Administrator to launch Command Prompt.
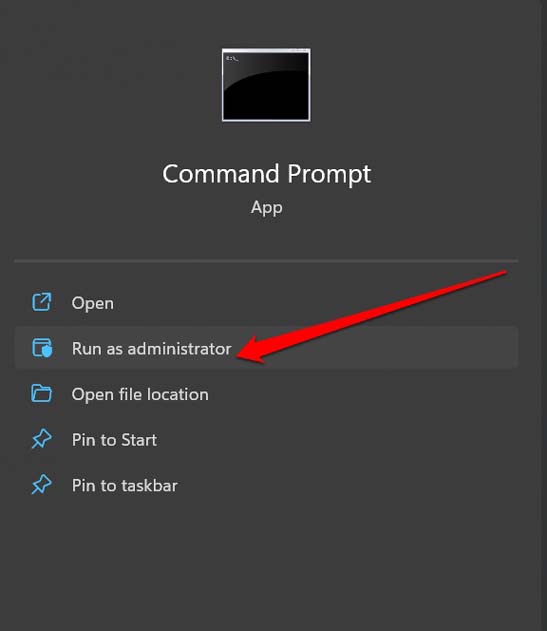
- Execute the following commands on the command prompt.
netsh winsock reset

netsh int IP reset
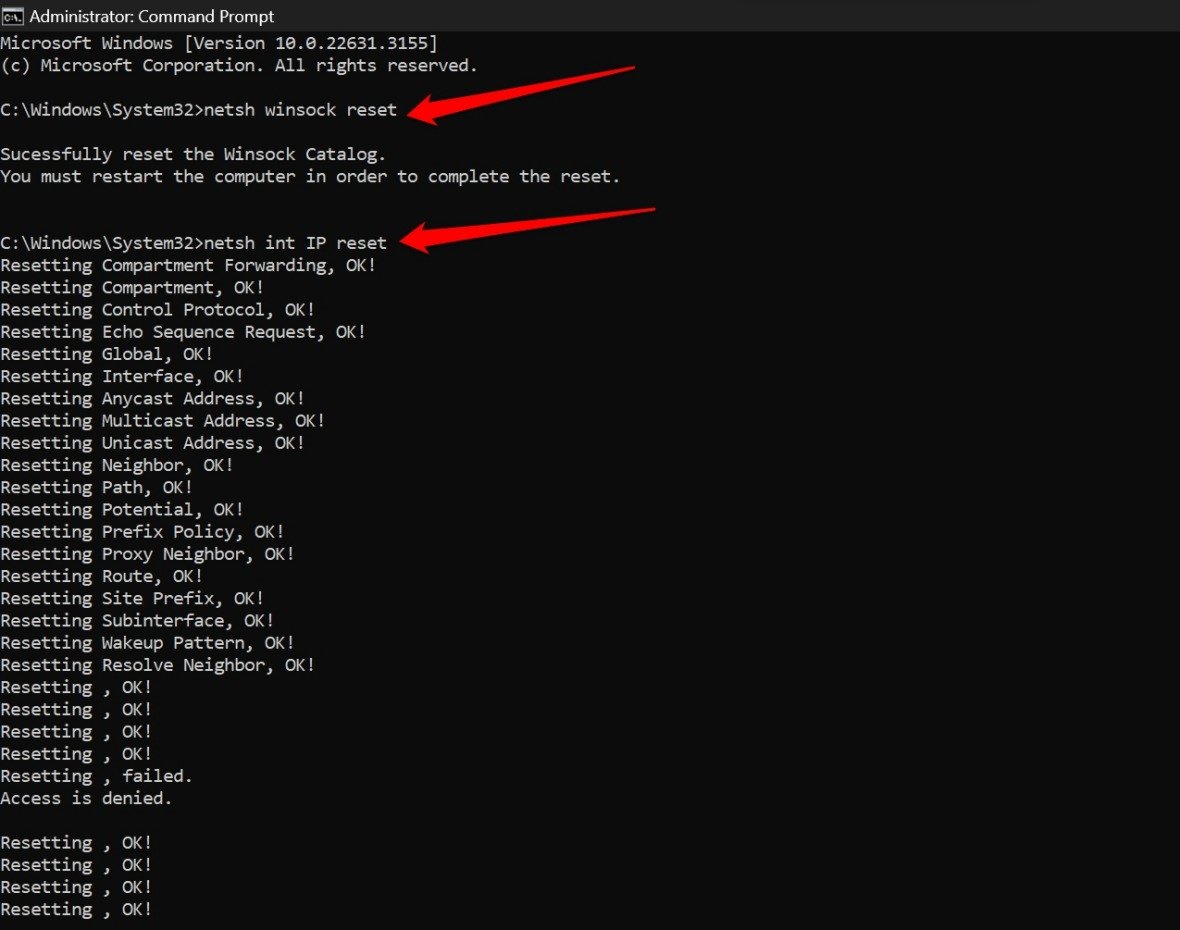
- Close the command prompt after executing these commands and launch Steam to check if it went online.
7. Check if Steam is Down
The Steam server may be down. It doesn’t happen quite often. When the servers go through debugging or maintenance, the platform may become inaccessible, and the users cannot go online. Here is how you can check the status of the Steam server.
- Go to the site Downdetector.
- Search for Steam.
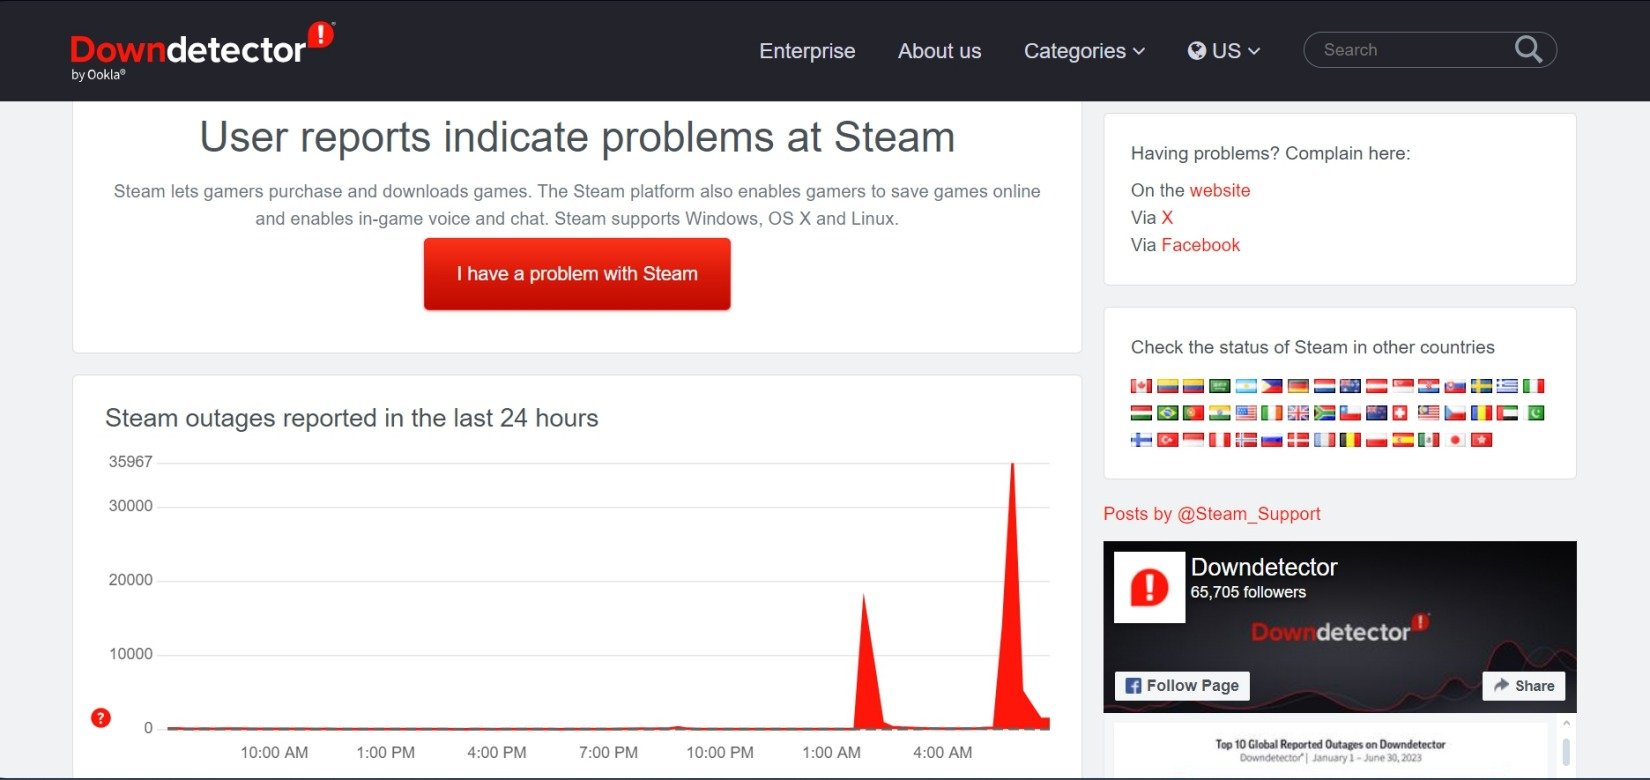
You will see a complete detail of all active outages of the Steam server in any part of the world. Otherwise, you can browse through social media apps like Reddit or X to stay informed about issues of widespread Steam server outages.
8. Uninstall and Reinstall Steam
When other troubleshooting tips are not working, uninstall Steam from your PC. Don’t worry, for it is not permanent. You can reinstall Steam on Windows 11 immediately.
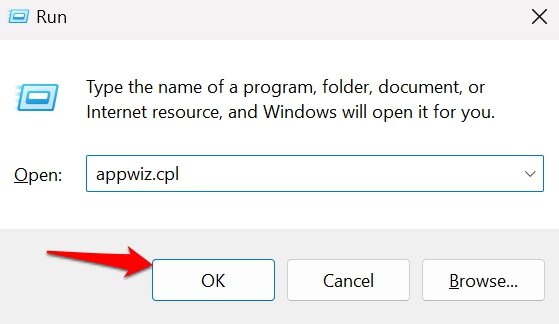
- Press the Windows + R hotkeys to invoke the Run box.
- Type “appwiz.cpl” and press enter. You will be redirected to the list of apps installed on your PC in the Control Panel.
- Scroll to Steam, right-click on it, and select Uninstall.
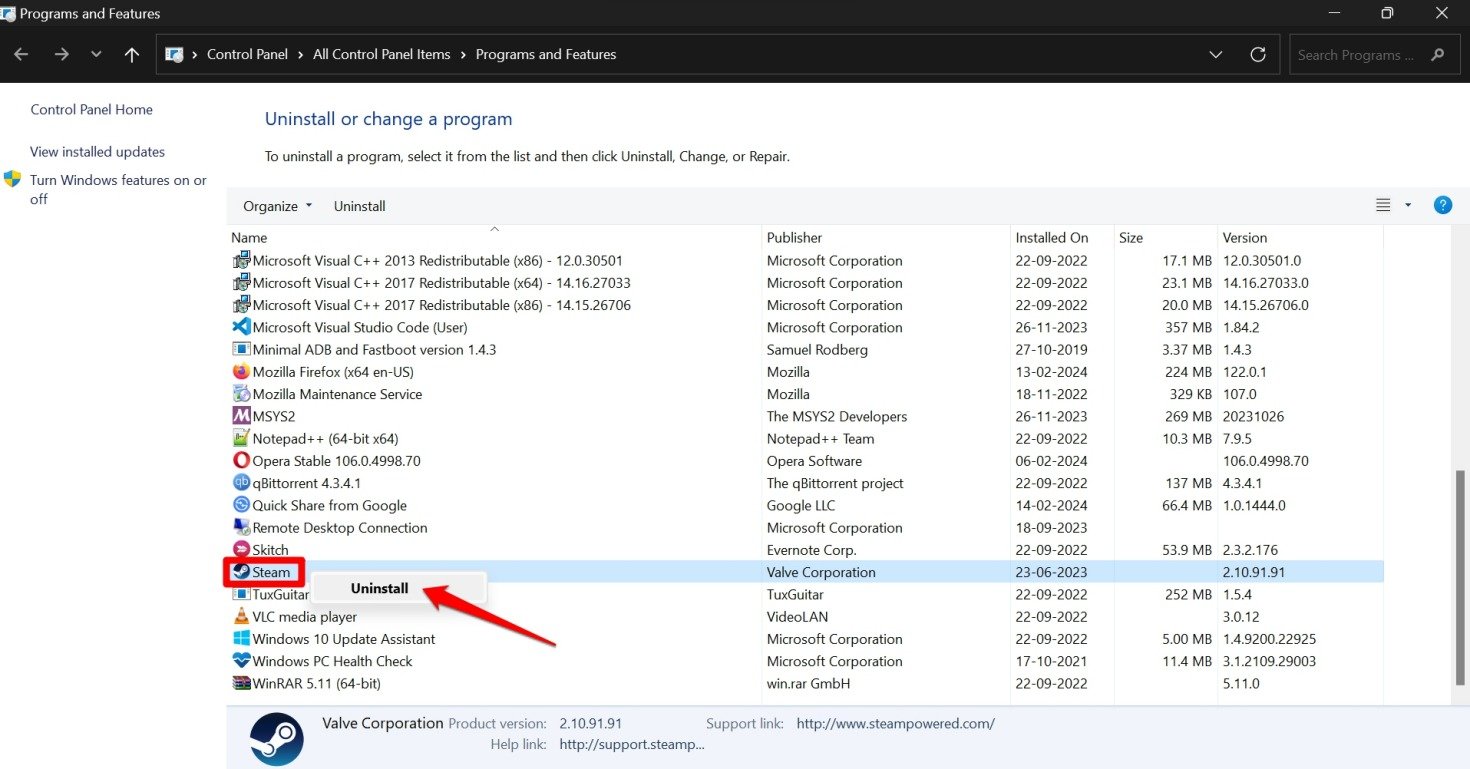
- Follow the instructions on the screen and prefer a complete uninstallation of Steam and its components from the computer.
- Download the Steam app for Windows 11 and install it.
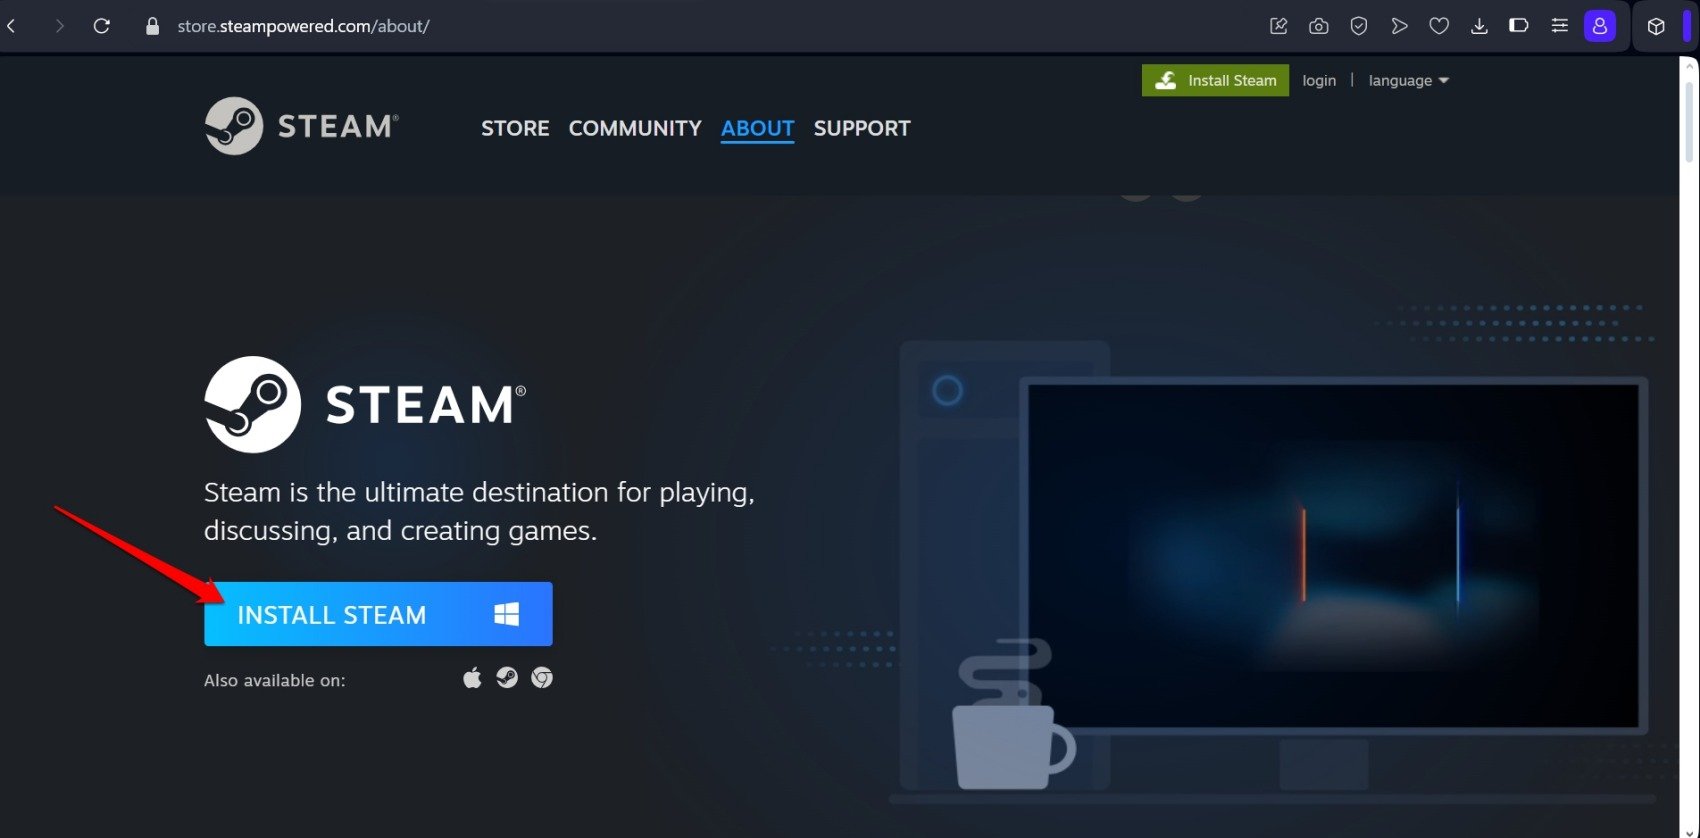
- Use your credentials to log into the app.
The Steam offline mode error should now be fixed, and you can get online on the platform.
Bottom Line
Using Steam with online connectivity allows you to try various games, update the games you have purchased, update the Steam app to fix bugs, and do much more. While Steam offline mode allows enjoying games during limited access to the internet, getting stuck there doesn’t seem like a good idea. Use the fixes in this guide and switch back from the Steam offline mode on Windows 11.
If you've any thoughts on How to Fix Steam Stuck in Offline Mode on Windows 11, then feel free to drop in below comment box. Also, please subscribe to our DigitBin YouTube channel for videos tutorials. Cheers!


