Millions of users control Logitech peripherals via Logitech G Hub client, and only a minority of consumers know how to use it. There is no rocket science on what you can do with the G Hub software, and I want to give you a glimpse of it. The Swiss-American manufacturer’s popular products are desktop mice and keyboards. Of course, you can find other products on the official site, but gaming mouse is what Logitech is known for around the world.
What is Logitech G Hub?

Logitech G Hub is a Windows and macOS client to control Logitech products. The Swiss-American manufacturer is selling a wide range of computer peripherals globally, and you can get your hands on the premium products online.
The software client allows the users to control the computer peripheral to eliminate the physical button usage.
The G Hub program is integrated with a wide range of features, and the notable feature is its customization.
Connect the Logitech peripheral and unleash the advanced features of the product. The offline client saves the customization and settings in the Windows or macOS machine, so you don’t have to configure the settings every time the machine restarts.
Allow me to give you a glimpse of what G Hub software can do, its features, and its limitations.
G Hub System Requirements
Every program requires CPU, RAM, and HDD/SSD resources, and it is important to take note of it. Nobody wants to lose that extra RAM for G Hub because it may not be worth it.
G Hub Resources Consumption:
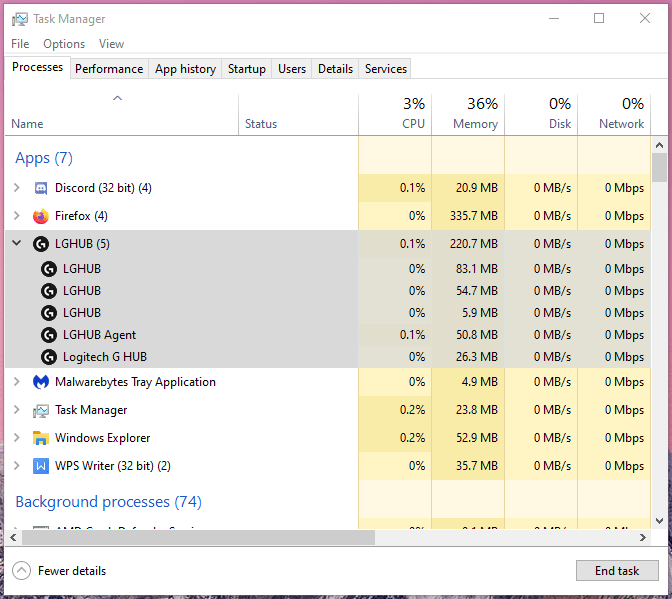
CPU (Ryzen 5 1600): 0.2%, RAM: 220 MB, Disk: 0% and Network: 0%
G Hub Background Resources Consumption:
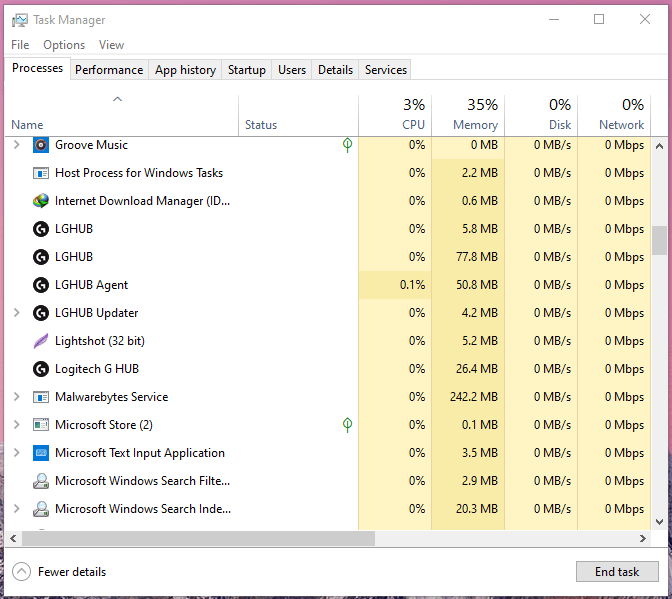
CPU (Ryzen 5 1600): 0.1%, RAM: 165 MB, Disk: 0% and Network: 0%
Oh yes, you have to allow G Hub to run in the background all the time, and it is one of the reasons why it can remember the customization. If you are planning to use the G Hub features, then you cannot escape from “run on startup” permission.
I skipped traditional system requirement information as I believe in real-life resource consumption. Readers have to look out for an extra 250MB RAM for a smooth transition, and that is what G Hub needs to run in the background. All you need is Windows or macOS software, whereas Linux OS is ignored by the Swiss-American manufacturer.
Download & Install G Hub
Connect the Logitech peripheral to desktop or laptop as G Hub will recognize it and install the necessary drivers if required.
Step 1: Go to the official Logitech site and download G Hub.
Step 2: Launch the installer and click on Install.
Step 3: The installer will download the rest of the files over the internet, so be patient and let the installation process complete.

Step 4: Click on the > arrow to continue.
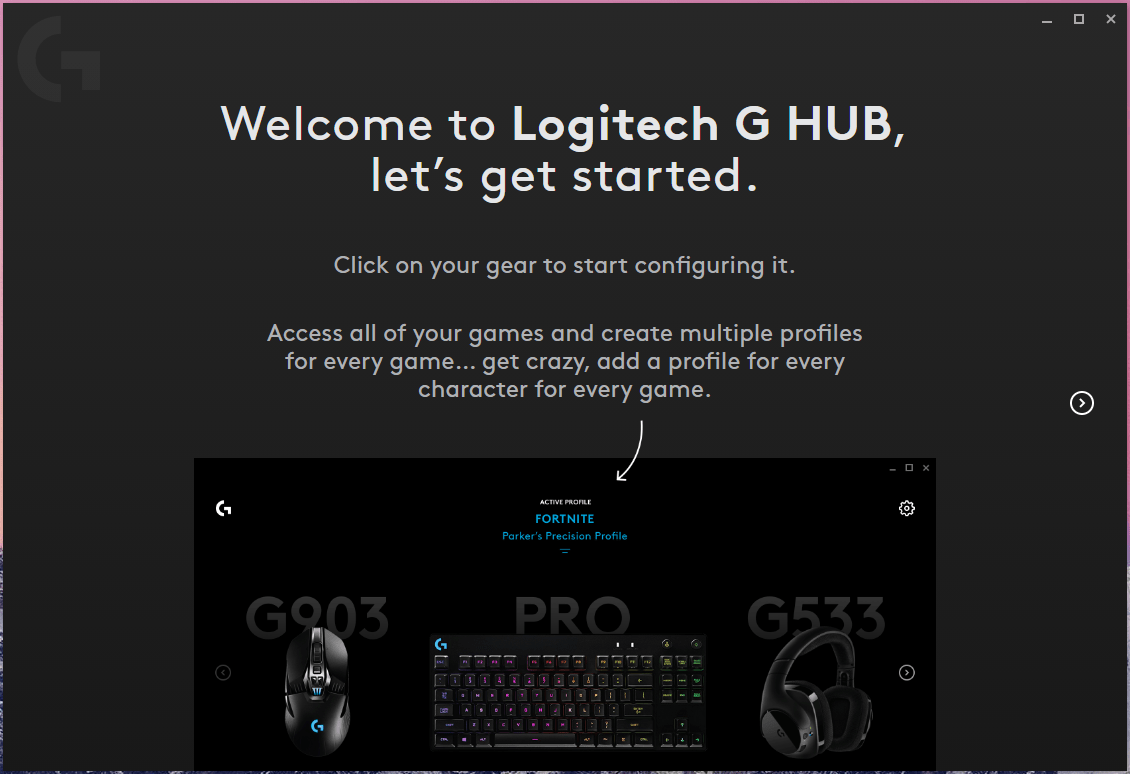
Step 5: Click on “Launch G Hub” to continue.

Step 6: G Hub prompts the users to grant permission or deny permission to collect analytical data.

- Make my experience better
- I’ll decide later (opt-in within the global settings)
I have chosen the second option and then click on “Decide Later” to continue.
Step 7: You are greeted by the G Hub dashboard.
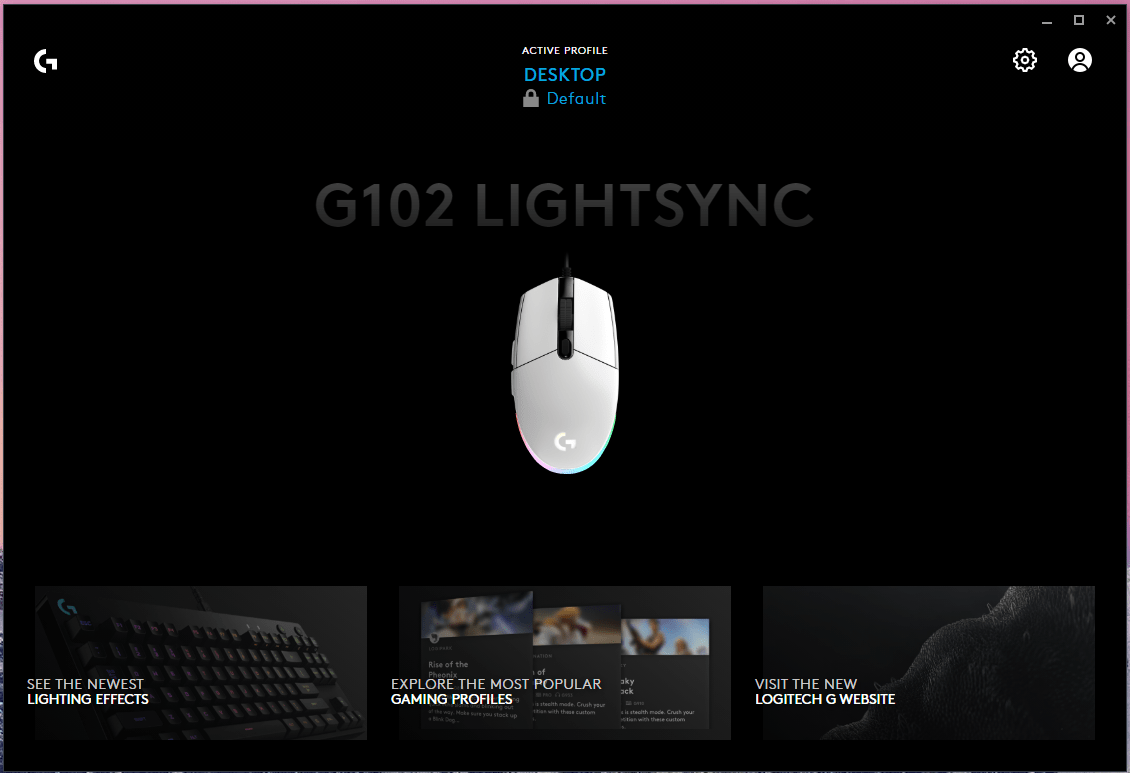
Now, you are inside the G Hub dashboard, where the magic happens, so take time to let it sink in.
Customize Logitech Peripheral RBG Settings
I’m confident that most of the users have installed it to control RGB settings. The beauty of RBG lights of another world, and adds a pinch of unique light to the gaming machine setup.
Note: The peripheral image on the right side is a preview window, so you can witness what the new changes look like in real-time.
Step 1: Click on the peripheral icon.
Step 2: Choose “Presets.”
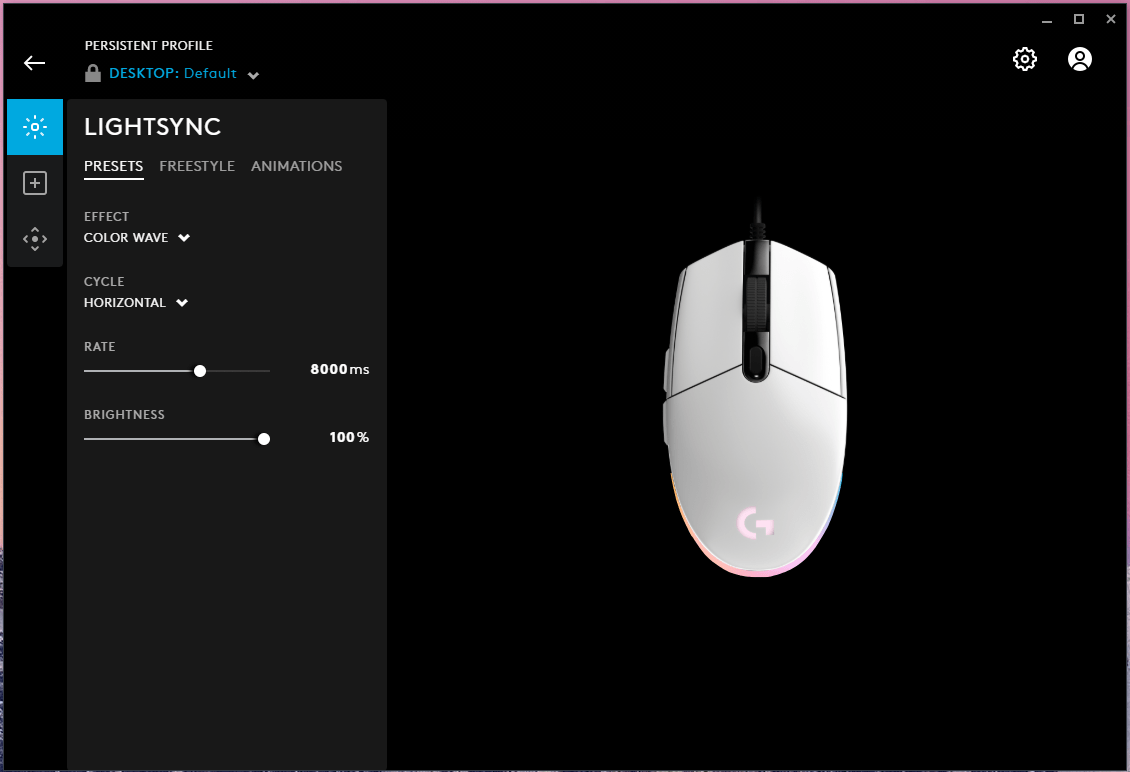
Effect: You have seven effects for G 102 Light sync.
Cycle: You have horizontal and reserve horizontal.
Rate: Effects speed.
Brightness: You can increase the brightness or decrease the brightness.
Step 3: You can customize the color choice in Freestyle.
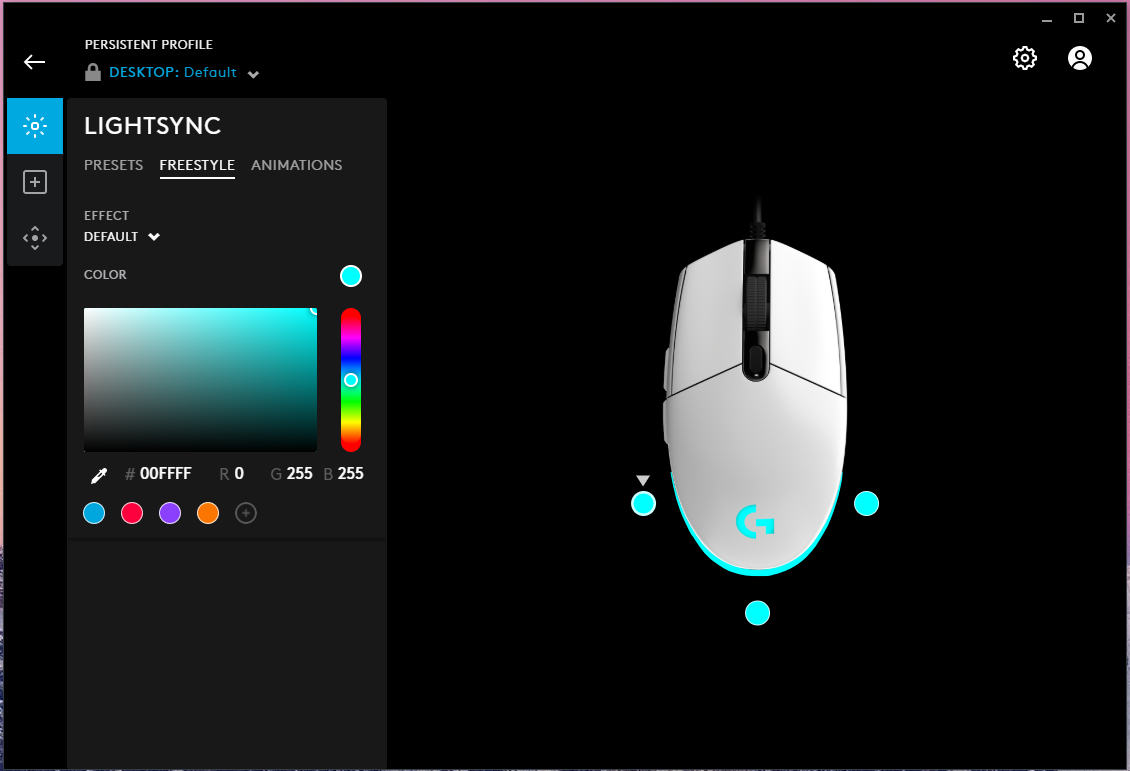
Effects: Add a freestyle.
Color: Choose the colors.
Step 4: You can customize the animation effect in Animations.
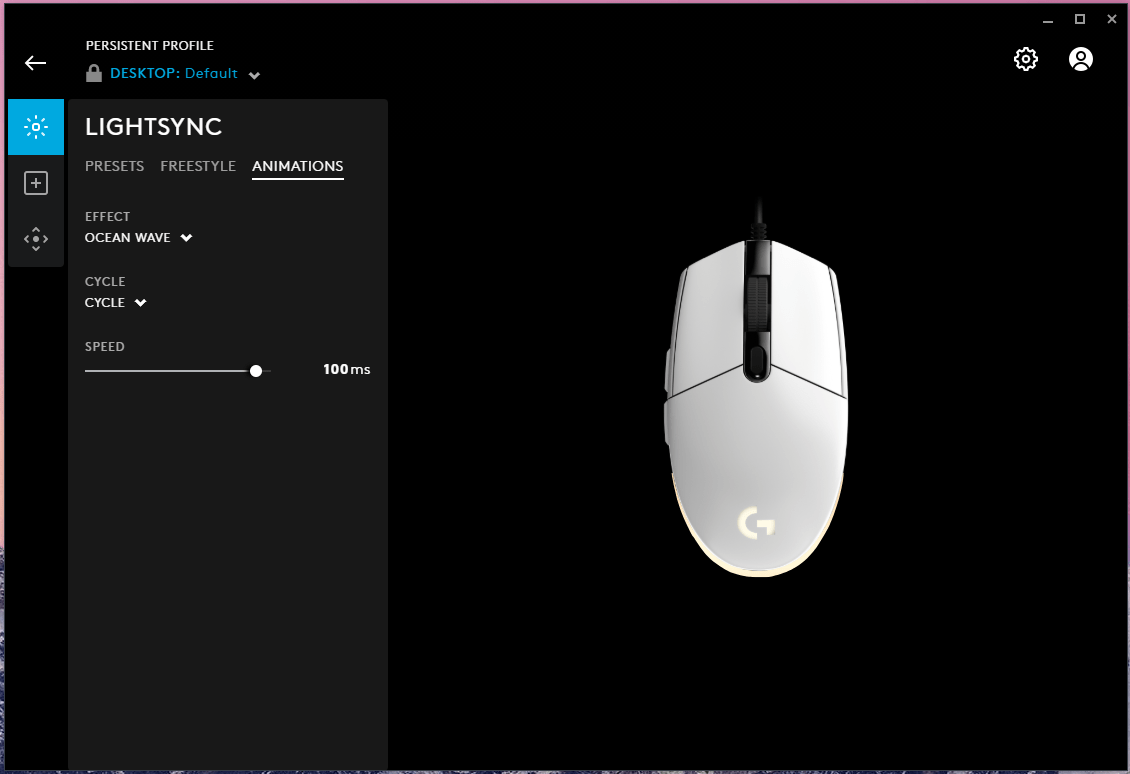
Effects: G 102 Light Sync got three effects in the tank.
Cycle: Play around with the setting.
Speed: Control the effect speed.
You get complete control over the peripheral RBG, which is an important part because the light does get annoying during nighttime.
Assignments (Buttons Control)
Logitech is known for its gaming mice/mouse lineup, such as G102, G402, G304, G502, and other wireless peripherals. You have an advanced option to assign shortcuts in the extra buttons on the mouse.
G102 Lightsync has six clickable buttons on the mouse, and you can customize the buttons to perform additional tasks. An FPS gamer will find it useful during intense fights and reload the weapons from the mouse itself.
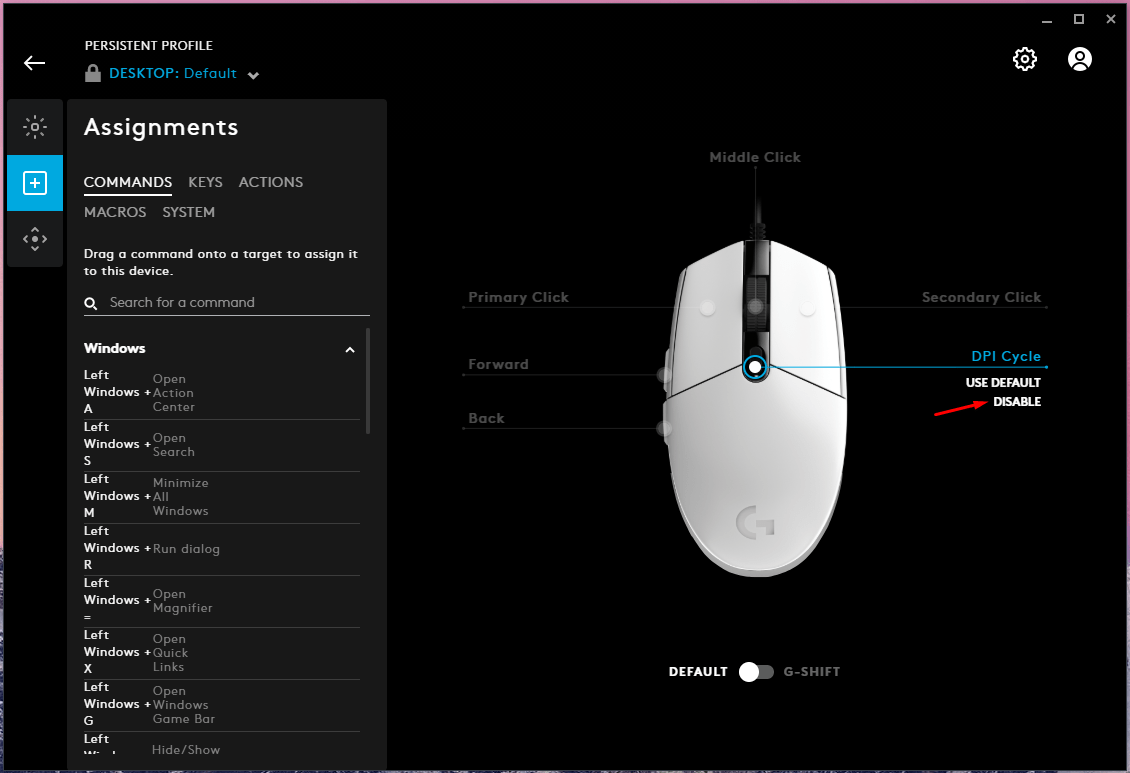
Allow me to demonstrate how you can disable a button, and I will disable the DPI button to prevent accidental clicks.
Step 1: Open G Hub dashboard.
Step 2: Choose “Assignments” to continue.
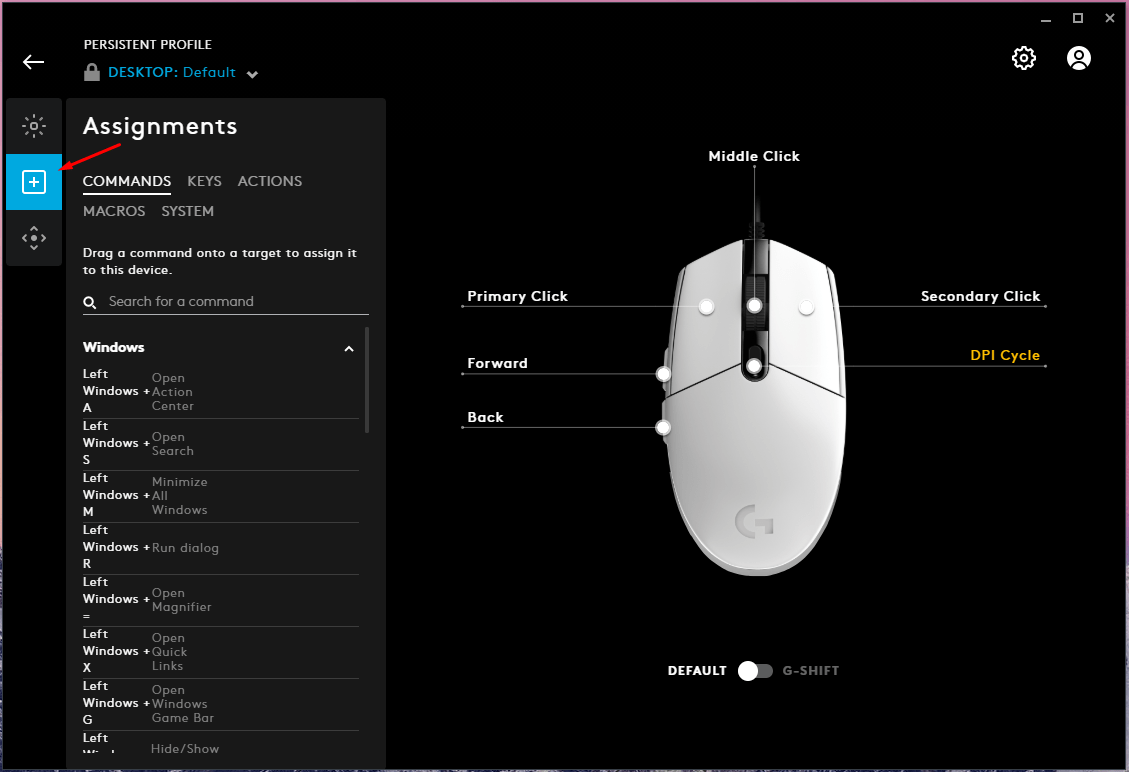
Step 3: Click on the button to assign or disable the button.
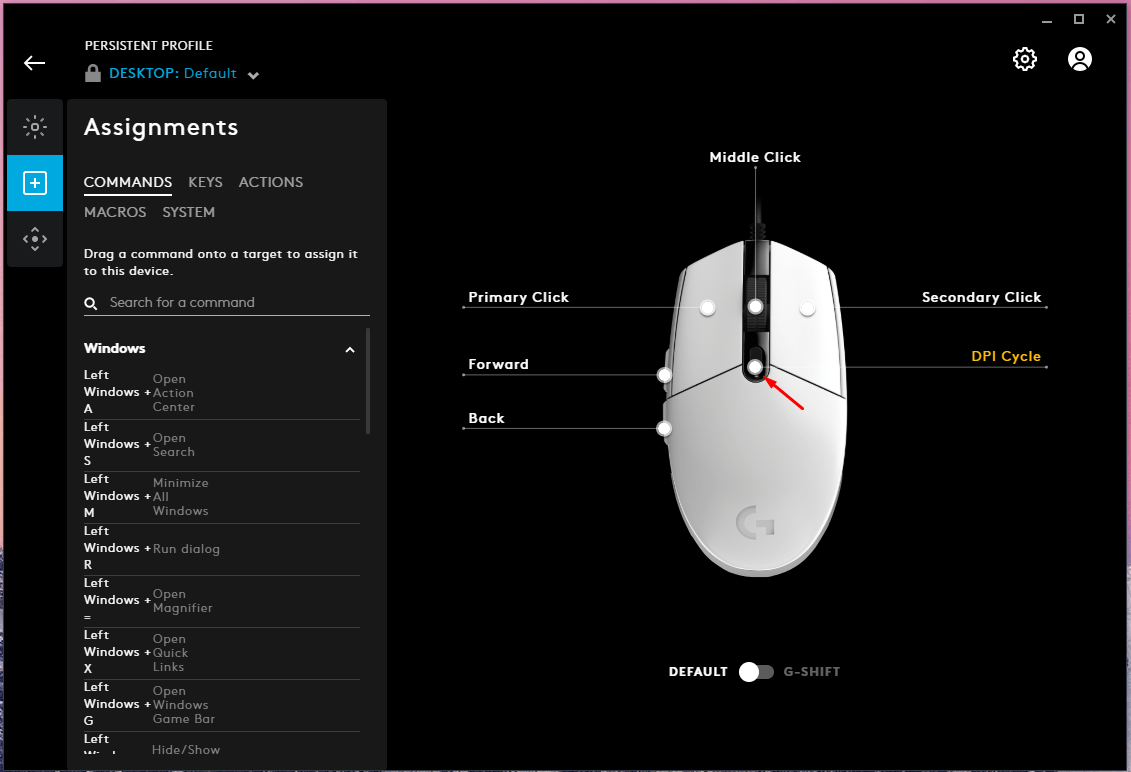
Step 4: Click on “Disable” to shut off the button.
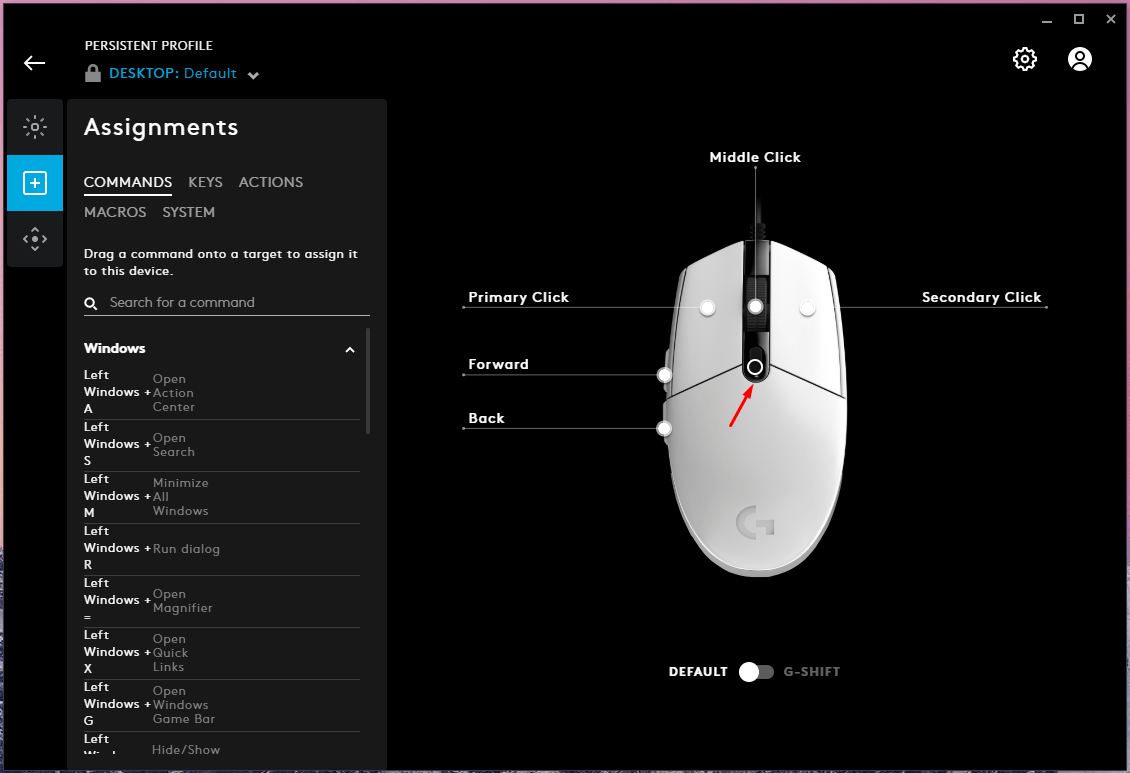
Step 5: The button is disabled.
You have to play around here to understand what Keys, Commands, Actions, Macros, and System does. No one can explain all options in “Assignments”, and we have to give Logitech for paying attention to G Hub software.
Set Sensitivity (DPI) in G Hub
If you are using a Logitech gaming mouse or wireless mouse, then you should learn to control DPI settings.
Step 1: Open G Hub dashboard.
Step 2: Choose “Sensitivity DPI” to continue.
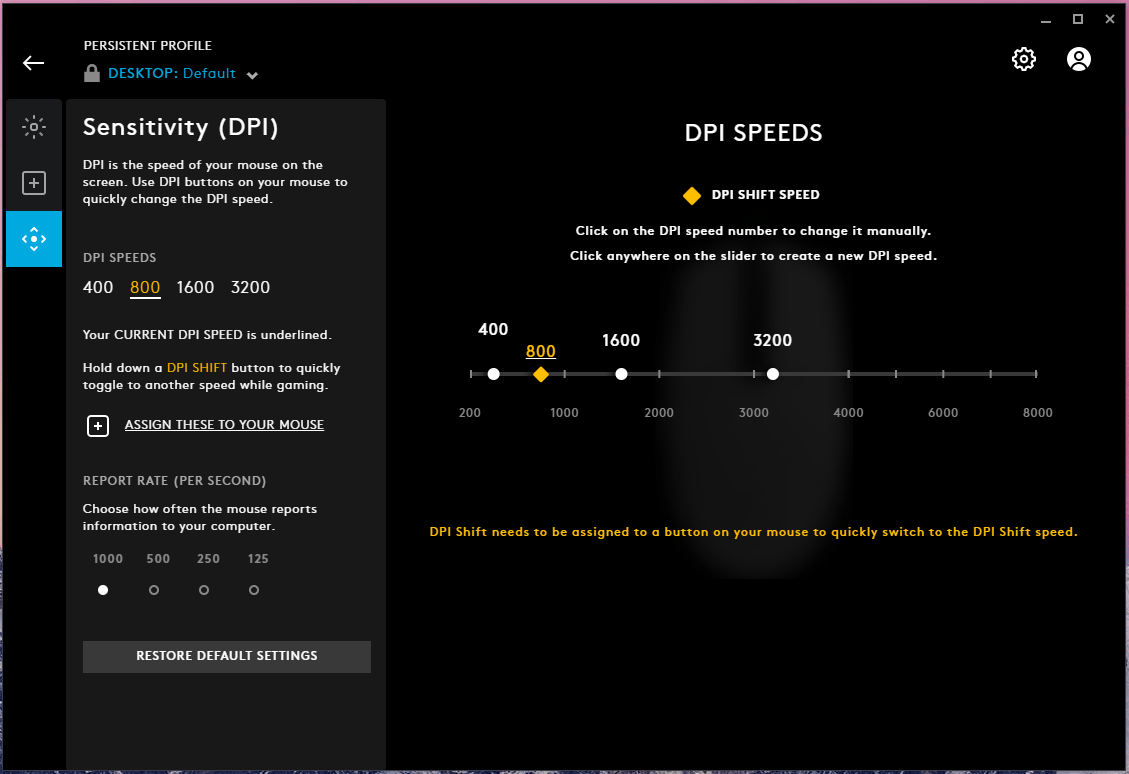
Step 3: Choose DPI speed.
Dots Per Inch (DPI) allows the users to control the cursor speed. An FPS gamer should choose from 400 – 1200, and you can always tweak the in-game sensitivity to meet the muscle memory requirements.
400 DPI is the slowest, and 8000 DPI is the highest, which allows the users to move the Windows or macOS cursor faster.
Step 4: Choose Polling Rate or Report Rate.
Report rate plays a crucial role in transferring the mouse click information to the PC. Let us assume that I have clicked on the right button to open the file then Windows PC will register it. 1000 report rate ensures that Windows is getting real-time information on button clicks, so the file will open faster.
Wireless mouse users should be aware that a higher polling rate will lower the battery life, but I prefer 1000 for superior speed.
Bottom Line
Logitech G Hub is an advanced program to control computer peripherals, and it indeed beats the competition. However, there is always room for improvement, and the Swiss-American manufacturer should listen to the existing consumers for an excellent user experience. Let us know what things you love about G Hub in the comment section below.
If you've any thoughts on How to Customise Logitech G HUB Mouse on PC?, then feel free to drop in below comment box. Also, please subscribe to our DigitBin YouTube channel for videos tutorials. Cheers!


