Live Caption is a feature that allows Chrome users to read captions simultaneously when the video is playing. It is the default feature that is coming with all the latest chrome Browsers and presently only supports English. Users are loving it as there are many videos that don’t have subtitles support but the Live caption CC feature allows them to instantly read the captions without the need for them to download one from the internet.
The Live captions have some limitations themselves, they may not properly sync with the video at times and may even misspell the words. Also, if the video has multilingual audio then the feature will find it hard to show the subtitle.
Though the feature is stable, there are people who are still facing issues on the Chrome Browser. Many users are not able to see the live captions on the videos and are facing issues with subtitles stuck. Here are some of the potential solutions to fix live captions not working, not loading, or stuck issues on Chrome Browser for PC.
1. Enable Live Caption
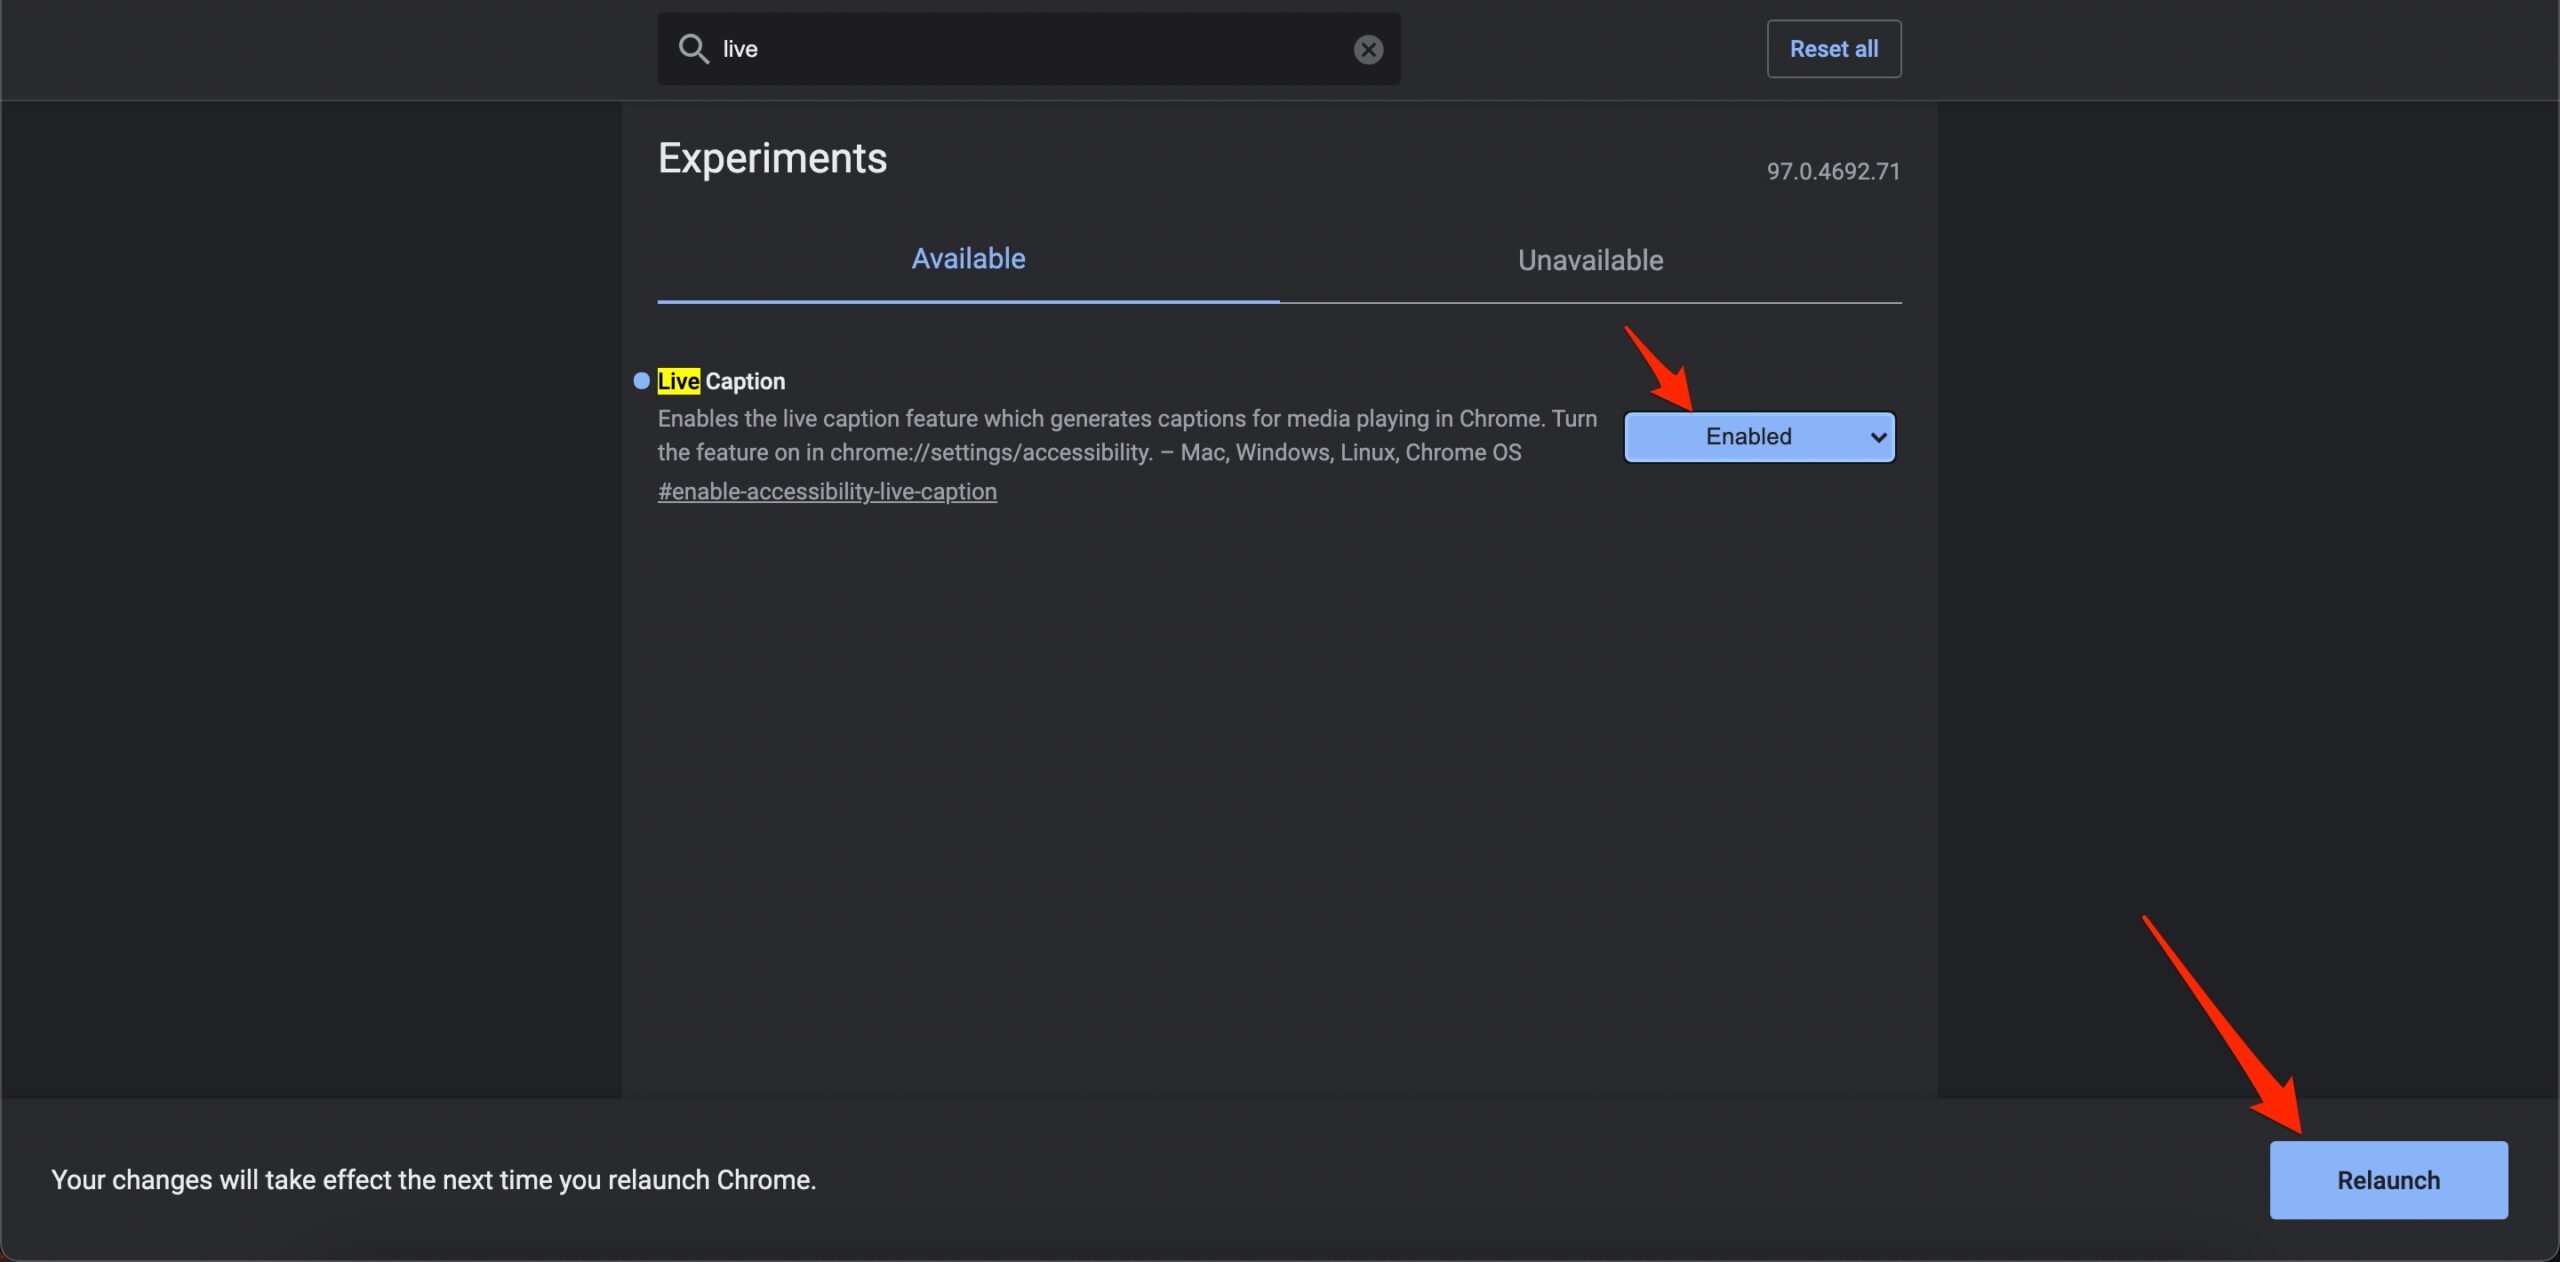
Live caption is a feature developed by Chrome to show captions on the go while you are watching the video. The feature is available as a Chrome flag experiment, and the option is set to default (enabled) in the flags, so it is good to change the option to Enabled and relaunch the Chrome browser and then check if live captions are working. Here’s how you can do it;
- Open chrome://flags
- Search for Live Caption
- Change the option to Enabled.
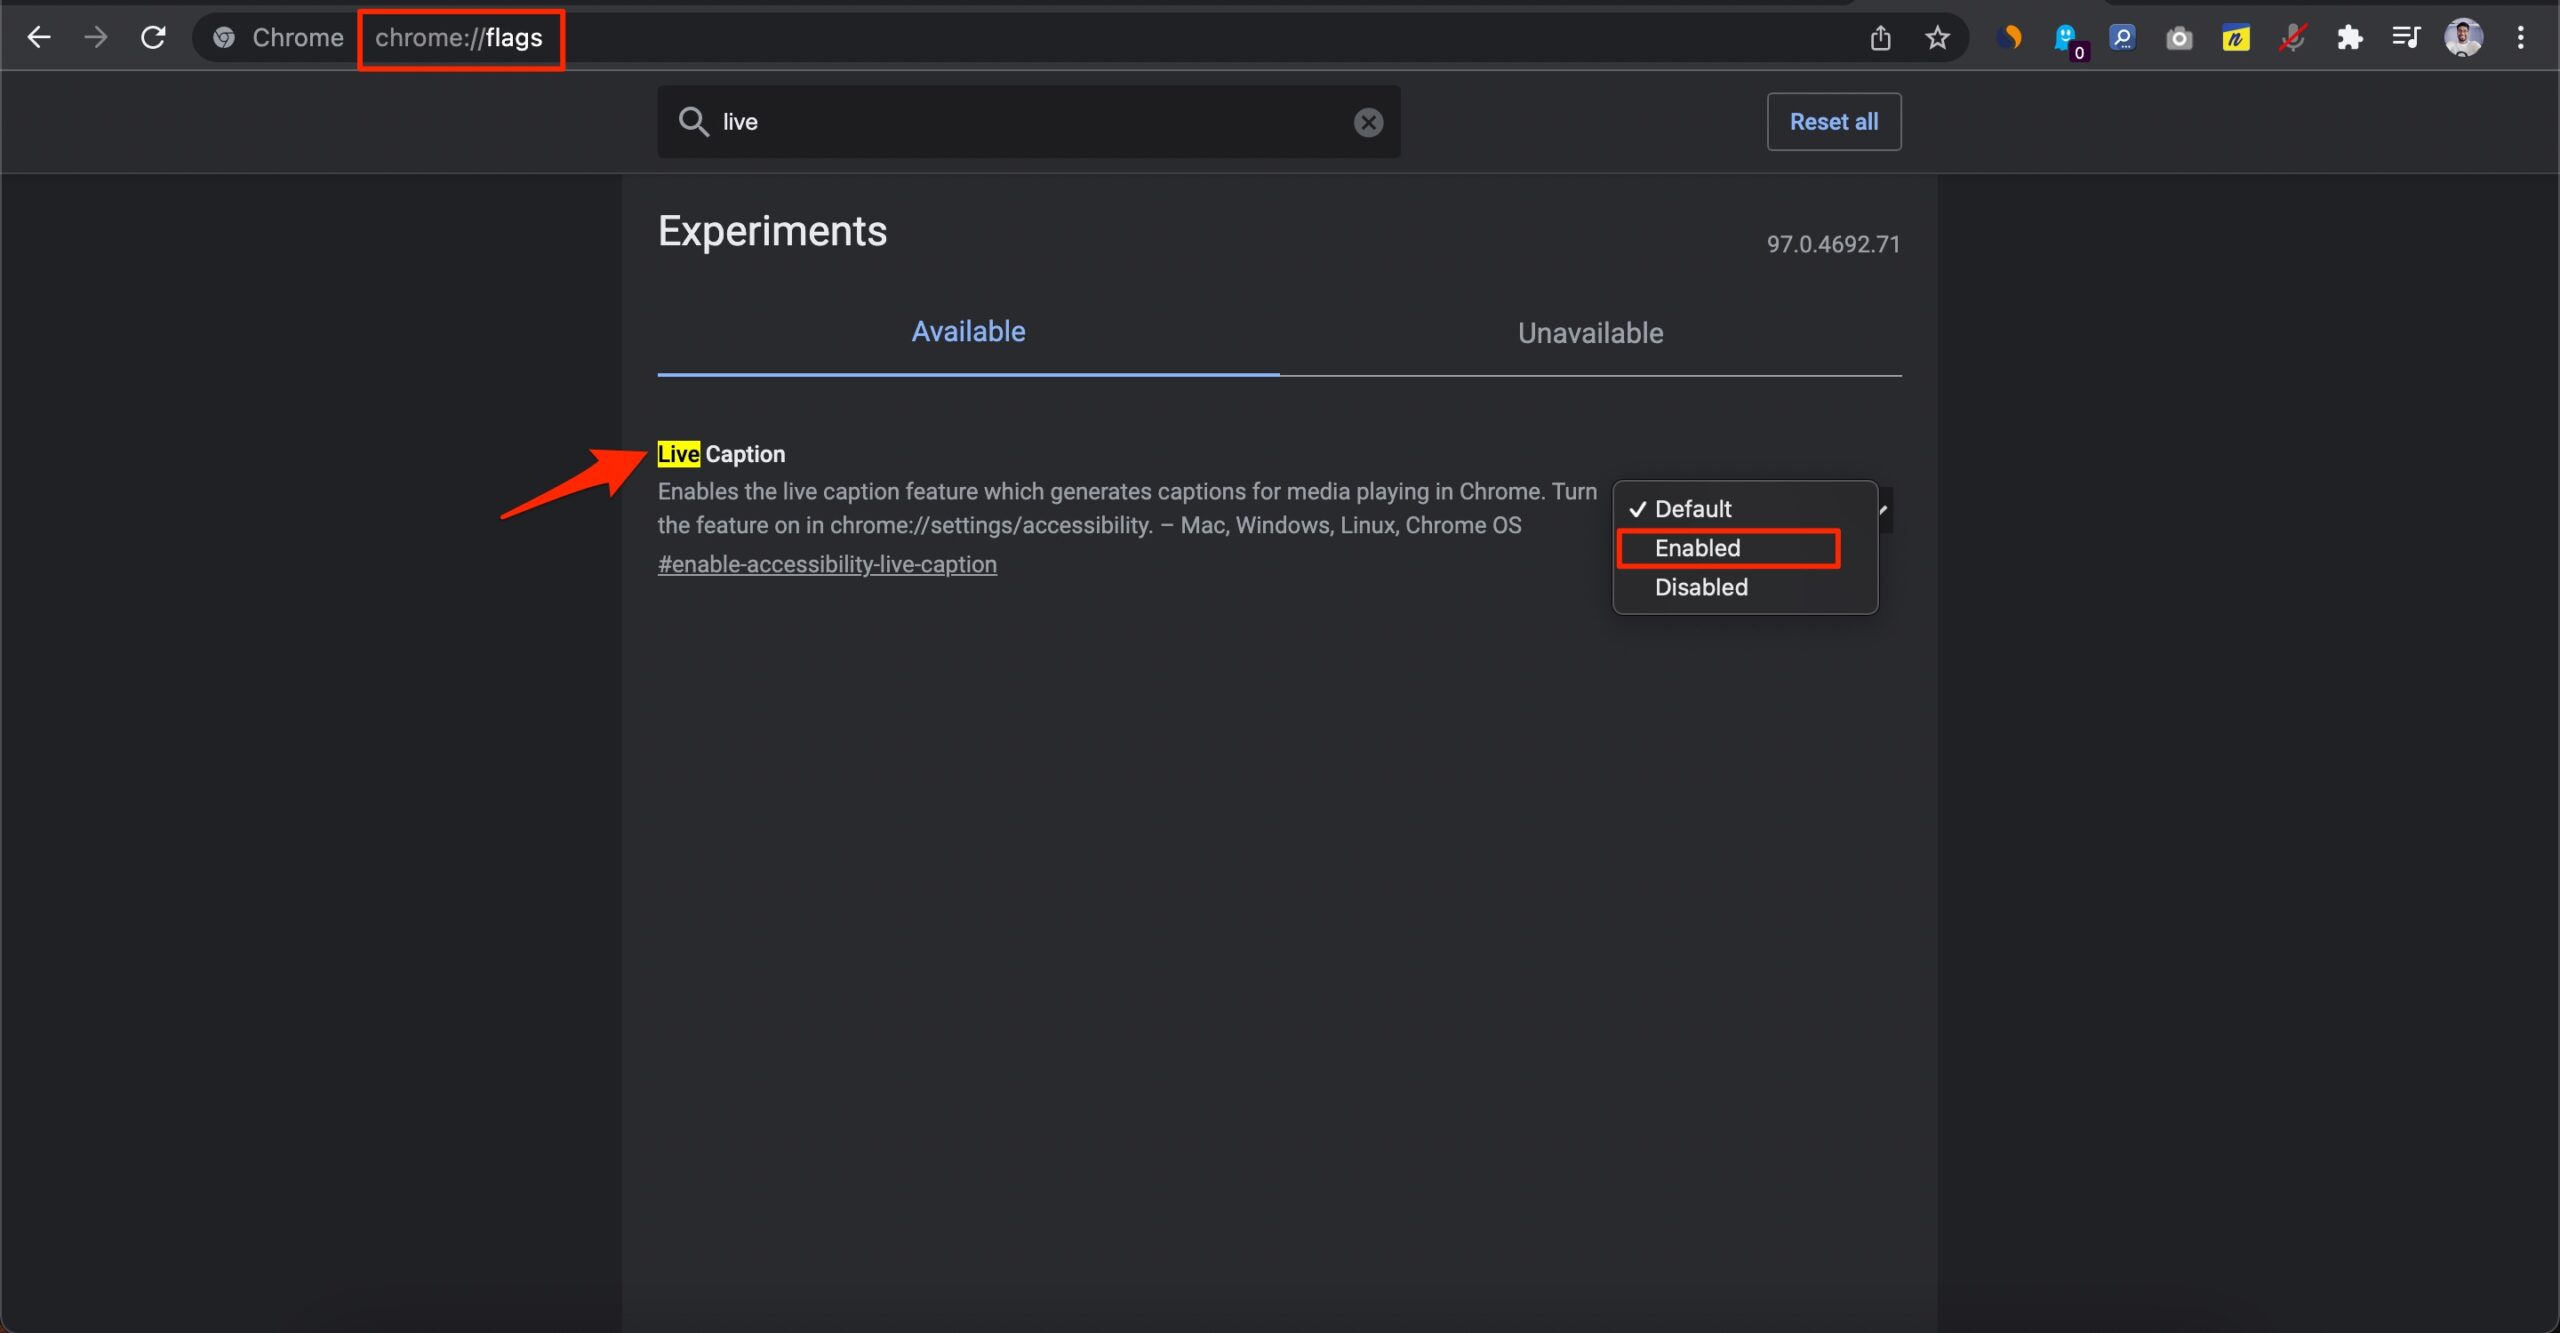
- Restart the browser
2. Remove Chrome Extension
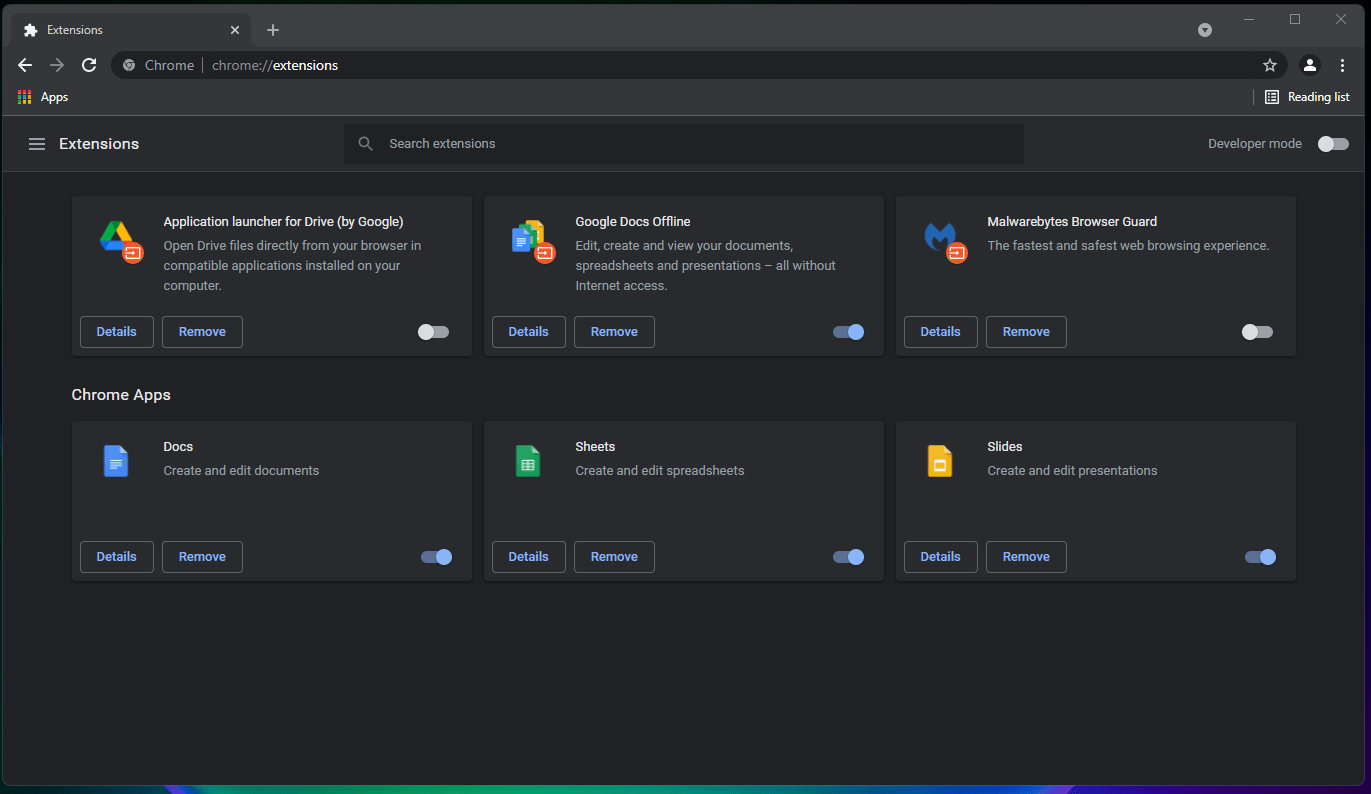
Chrome extensions are an excellent Utility tool that helps boost the performance of a Browser. These extensions work by scanning the webpage to check if they need to perform any function. If you are using any content blocker or script blocker/modifying extensions, then such addon may block the live caption feature. Therefore, it is good to remove the extensions that you believe inject scripts or block some codes on the webpage and then check if the Chrome browser is able to show live captions.
- Go to chrome://extensions
- Remove the extensions
3. Clear Browser Cache
Clearing the cache of the Chrome browser will disperse off the junk files, thus clearing up a lot of memory.
- While the Chrome browser type in chrome://settings/clearBrowserData in the URL Box.
- Clear Browsing Data dialog box will show up.
- Click on the Advanced tab.
- By default, cookies and other site data, cached images & files will bear a checkmark. If not, manually select these two options.
- There is no need to select the Password/Sign-in Data; otherwise, the passwords you have saved to Chrome will be removed.
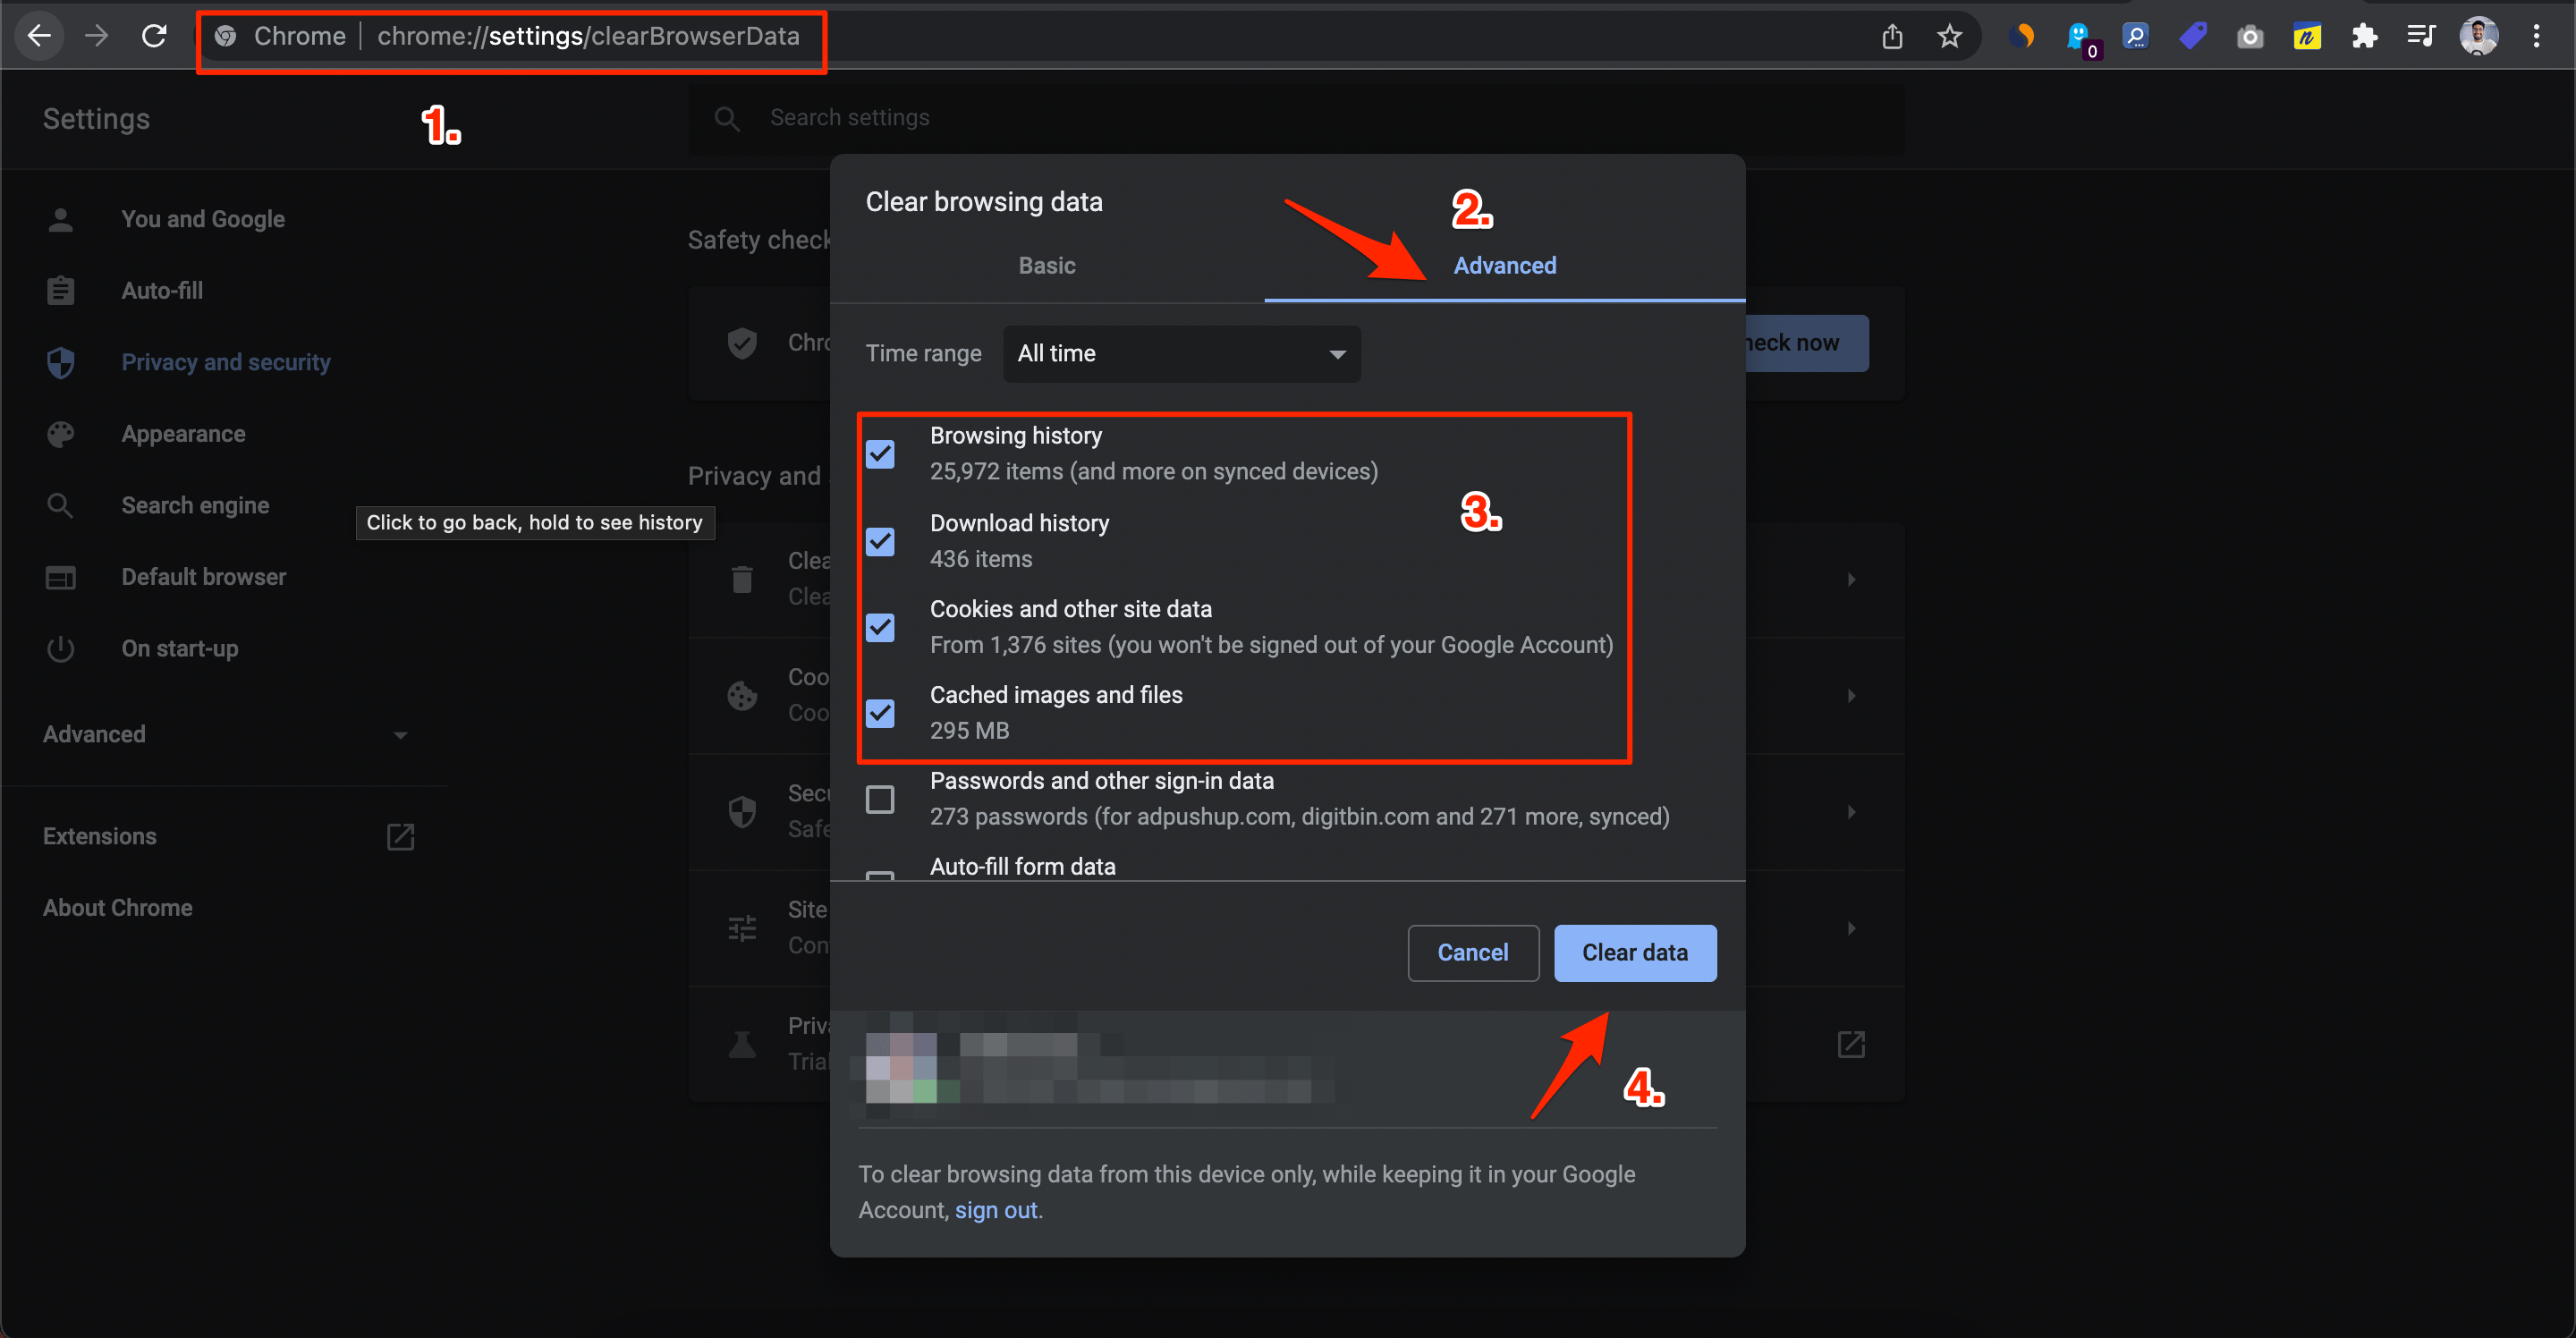
- Once done, click on Clear Data.
4. Close Google Chrome Processes
Clearing the Chrome browser processes in the task manager will give the browser a fresh start stopping all the background processes that are working. You can do this by using the Windows Task Manager tool. Here are the steps that you need to follow.
- On your Windows 11 home screen, press the Ctrl+Alt+Del buttons together.
- Select Task Manager from the list of options that appear. Alternatively, you can also right-click on the Windows Start menu on the taskbar and select Task Manager from the list of options that appear.
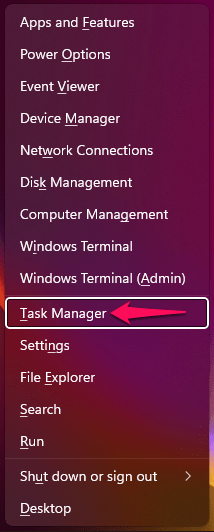
- Then in Task Manager, end all the Google Chrome processes.
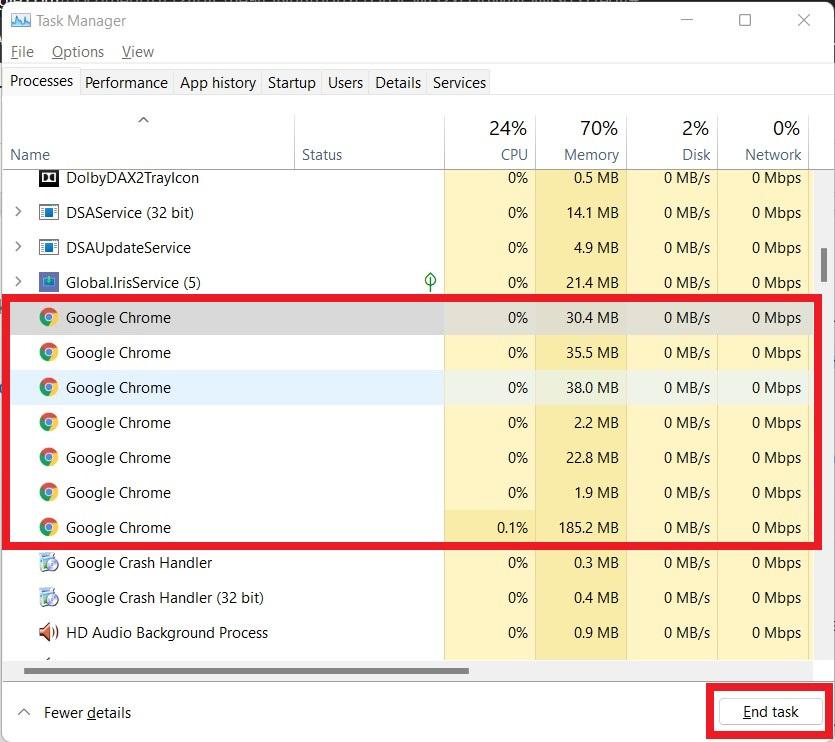
- After ending all Chrome tasks, again try opening the Google Chrome browser and see if this fixes the issue or not.
5. Delete Temporary Files
Clearing temporary files may not seem a lucrative solution for fixing such problems, but sometimes these easy solutions do wonders. If you haven’t cleared temporary files on your PC for a good amount of time, then it is advised that you go ahead and clear those. For that, simply follow the steps below.
- Open the RUN command by pressing Win+R keys together.
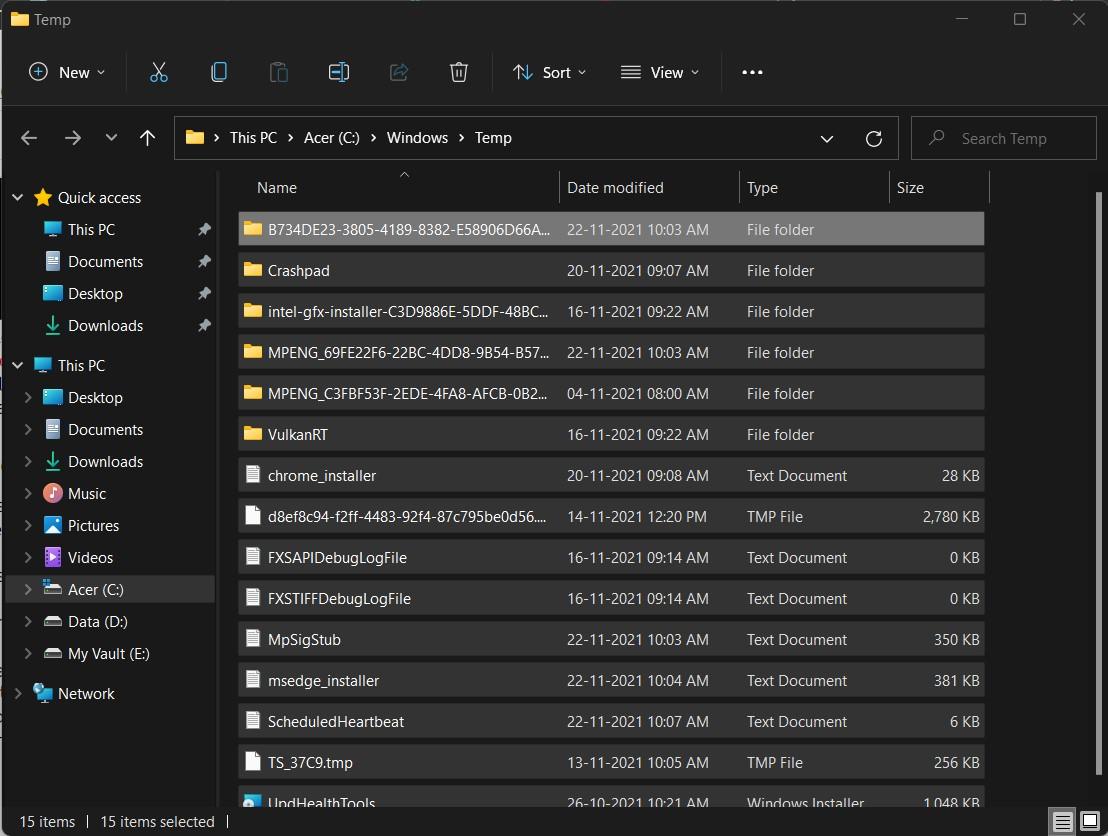
- Type in temp and hit Enter.
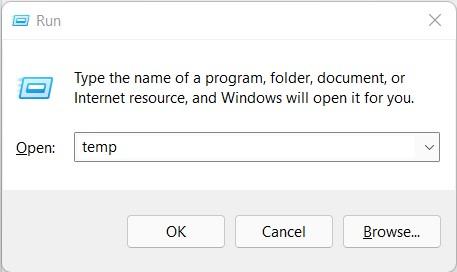
- Clear the temp files and close the window.
- Then again, open the RUN command and type in %temp%, and press Enter.
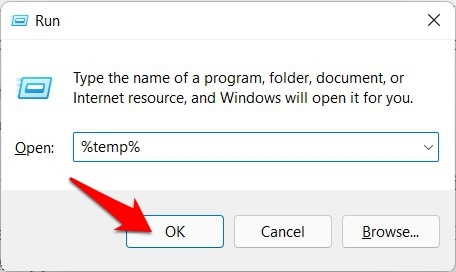
- Clear the temporary files here as well and close the window.
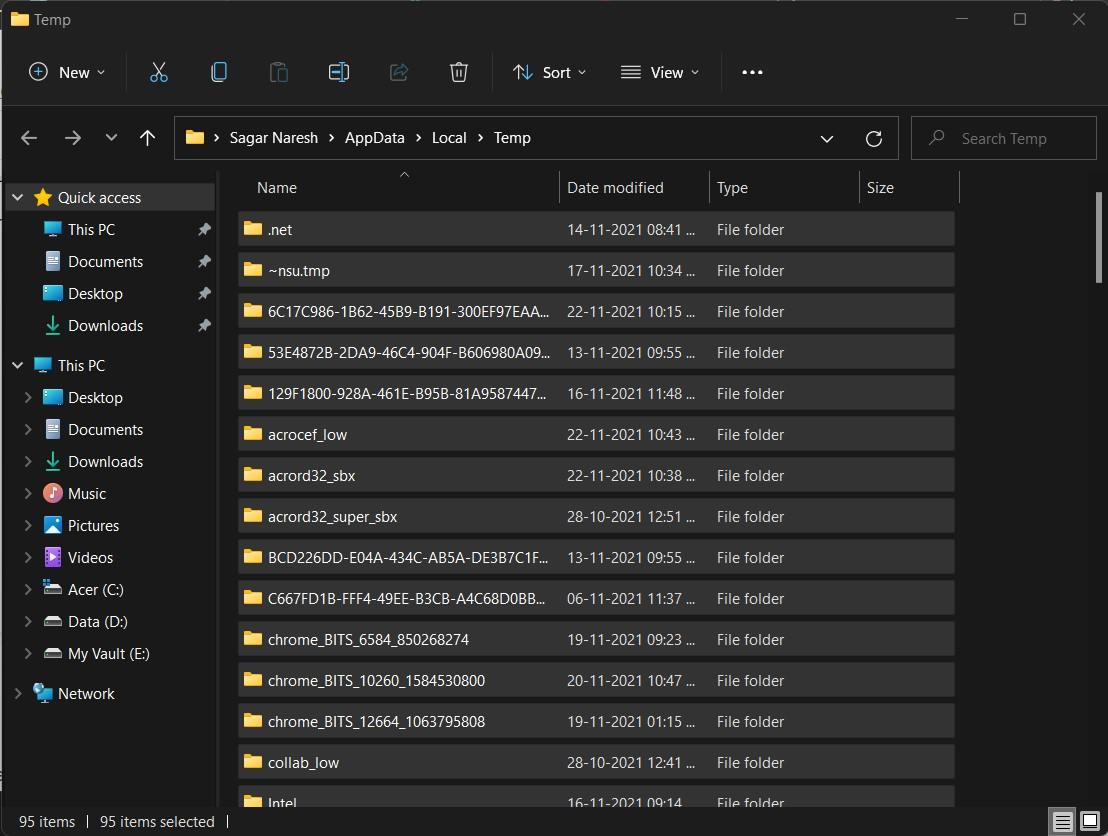
- Once done, restart your PC and see if this fixes the issue or not.
So, these are the best solution to fix Live Caption not working on a Chrome browser for Windows or Mac PC.
If you've any thoughts on How to Fix Live Captions Not Working on Chrome Browser?, then feel free to drop in below comment box. Also, please subscribe to our DigitBin YouTube channel for videos tutorials. Cheers!
