Google Assistant is a mobile-specific product that allows you to access the web and perform daily activities at your voice commands. It an artificial intelligence-based virtual assistant developed by Google, allows you to search the web, make calls, keep notes, add reminders, and perform tasks. But can you use Google Assistant on your Mac computer? Yes!
If you’re looking to install and set up Google Assistant on your Mac PC, then here is a simple guide that allows you to run and use Google Assistant virtual assistant on your Macbook Computer.
Steps to Setup Google Assistant on MacBook PC
There is no official way to get Google Assistant working on your Mac PC. However, there is an unofficial workaround that you can follow to install Google Assistant on Mac PC. It is advised that you follow all the steps very carefully to avoid any errors.
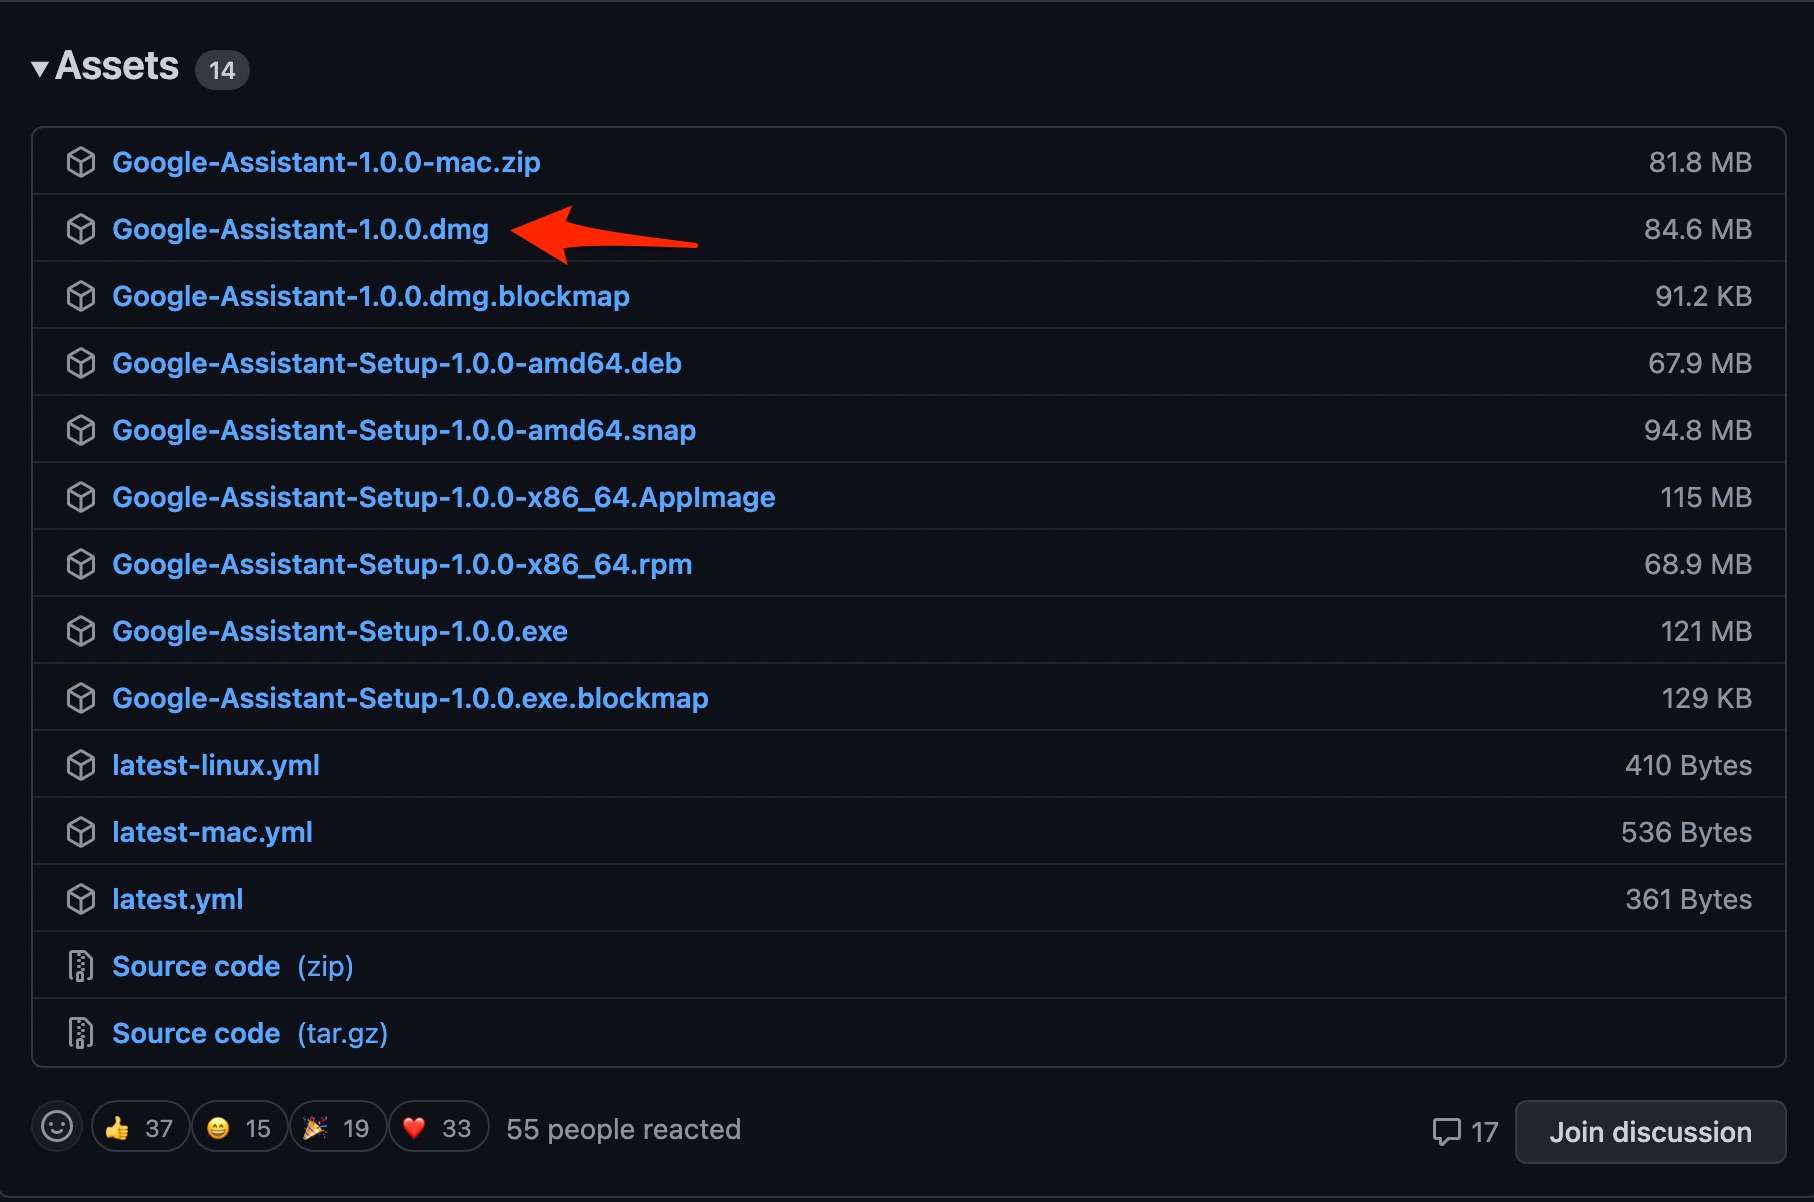
- Download the unofficial Google Assistant client from the GitHub page. Ensure to download the *.dmg file for mac

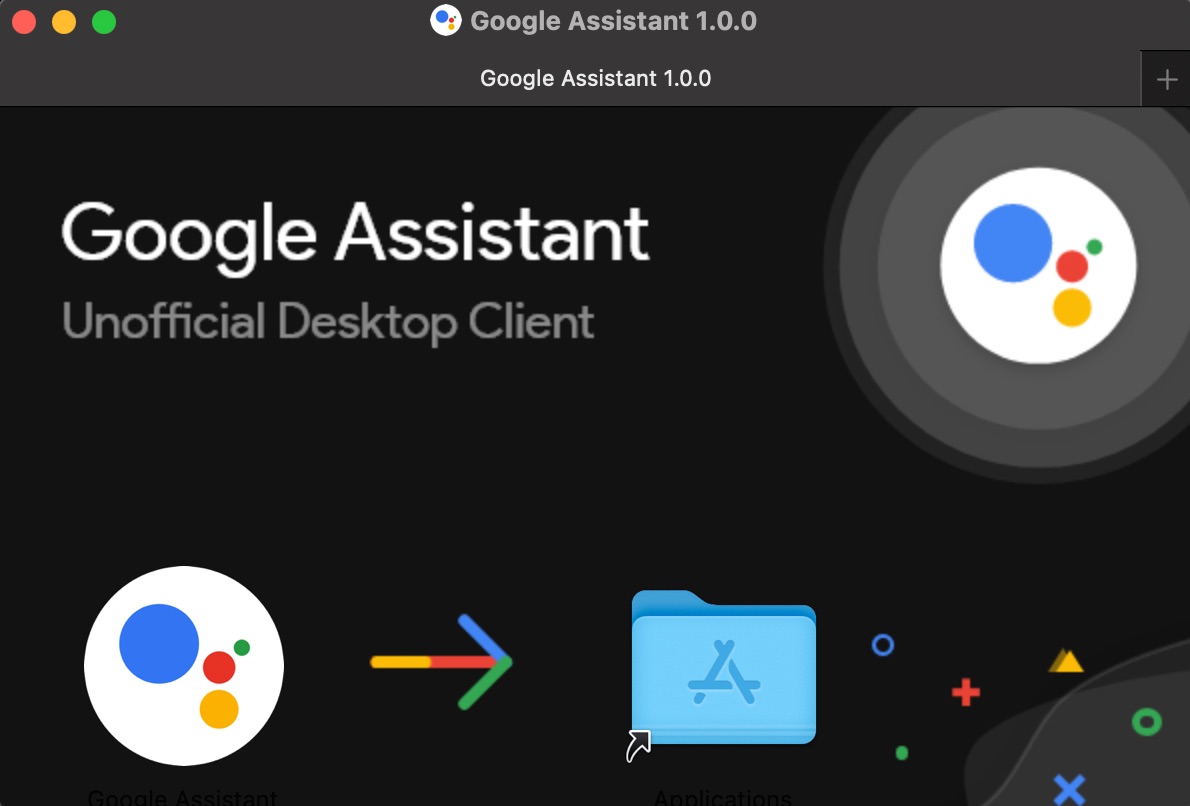
- After the download is complete, install the file.

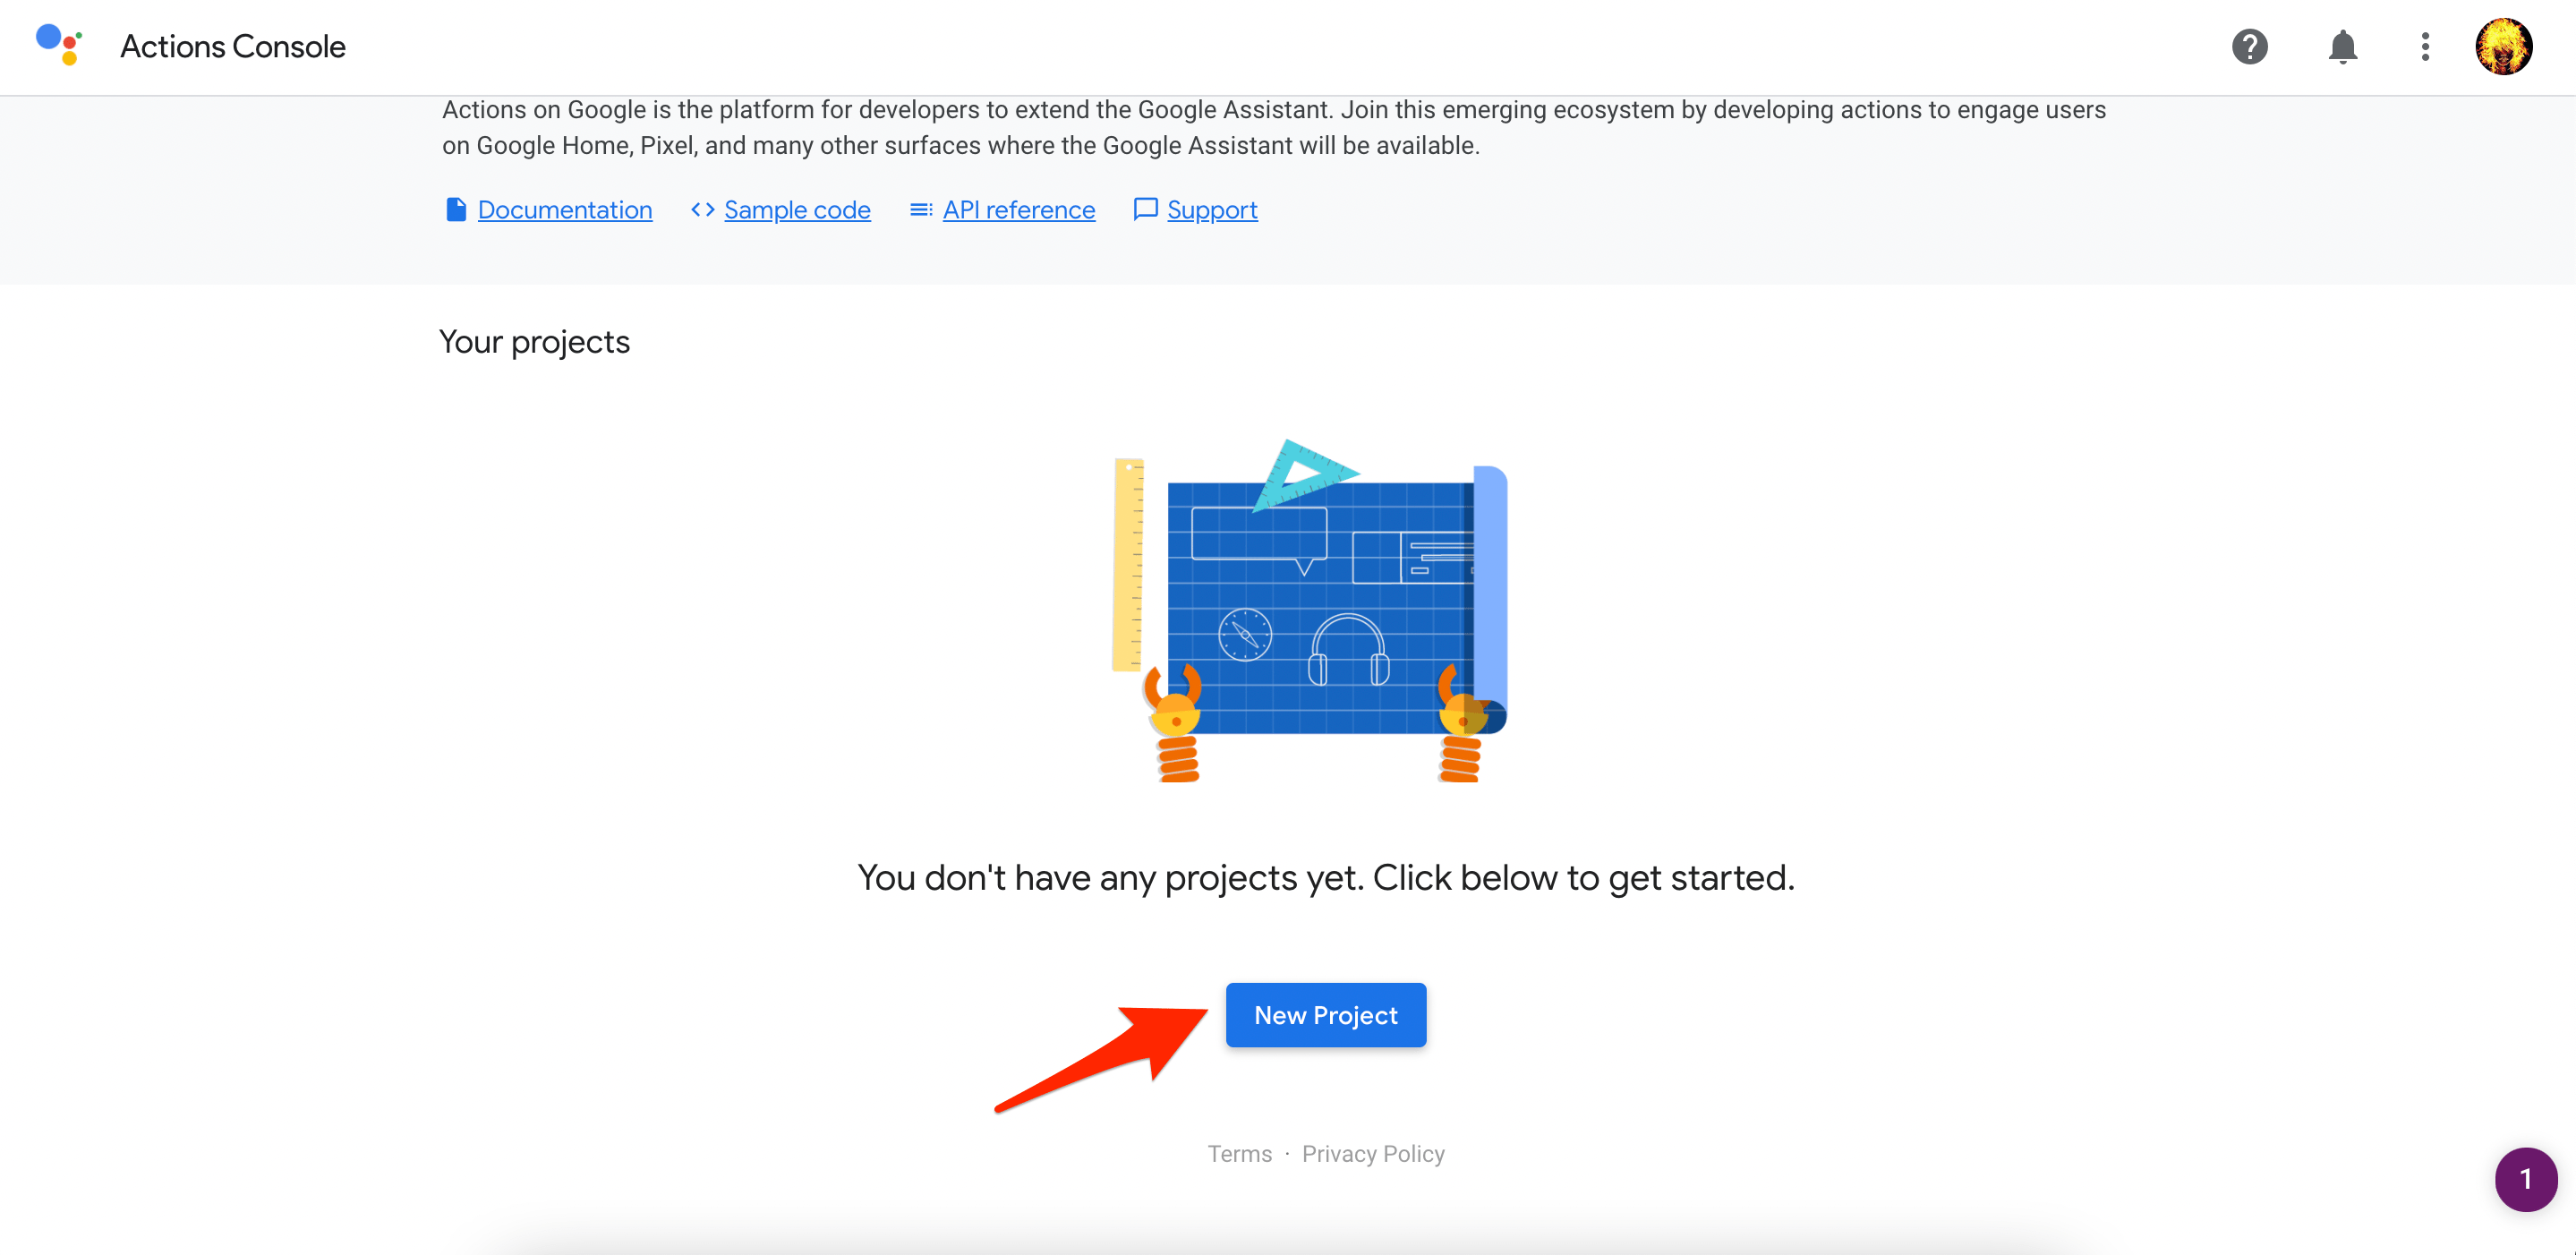
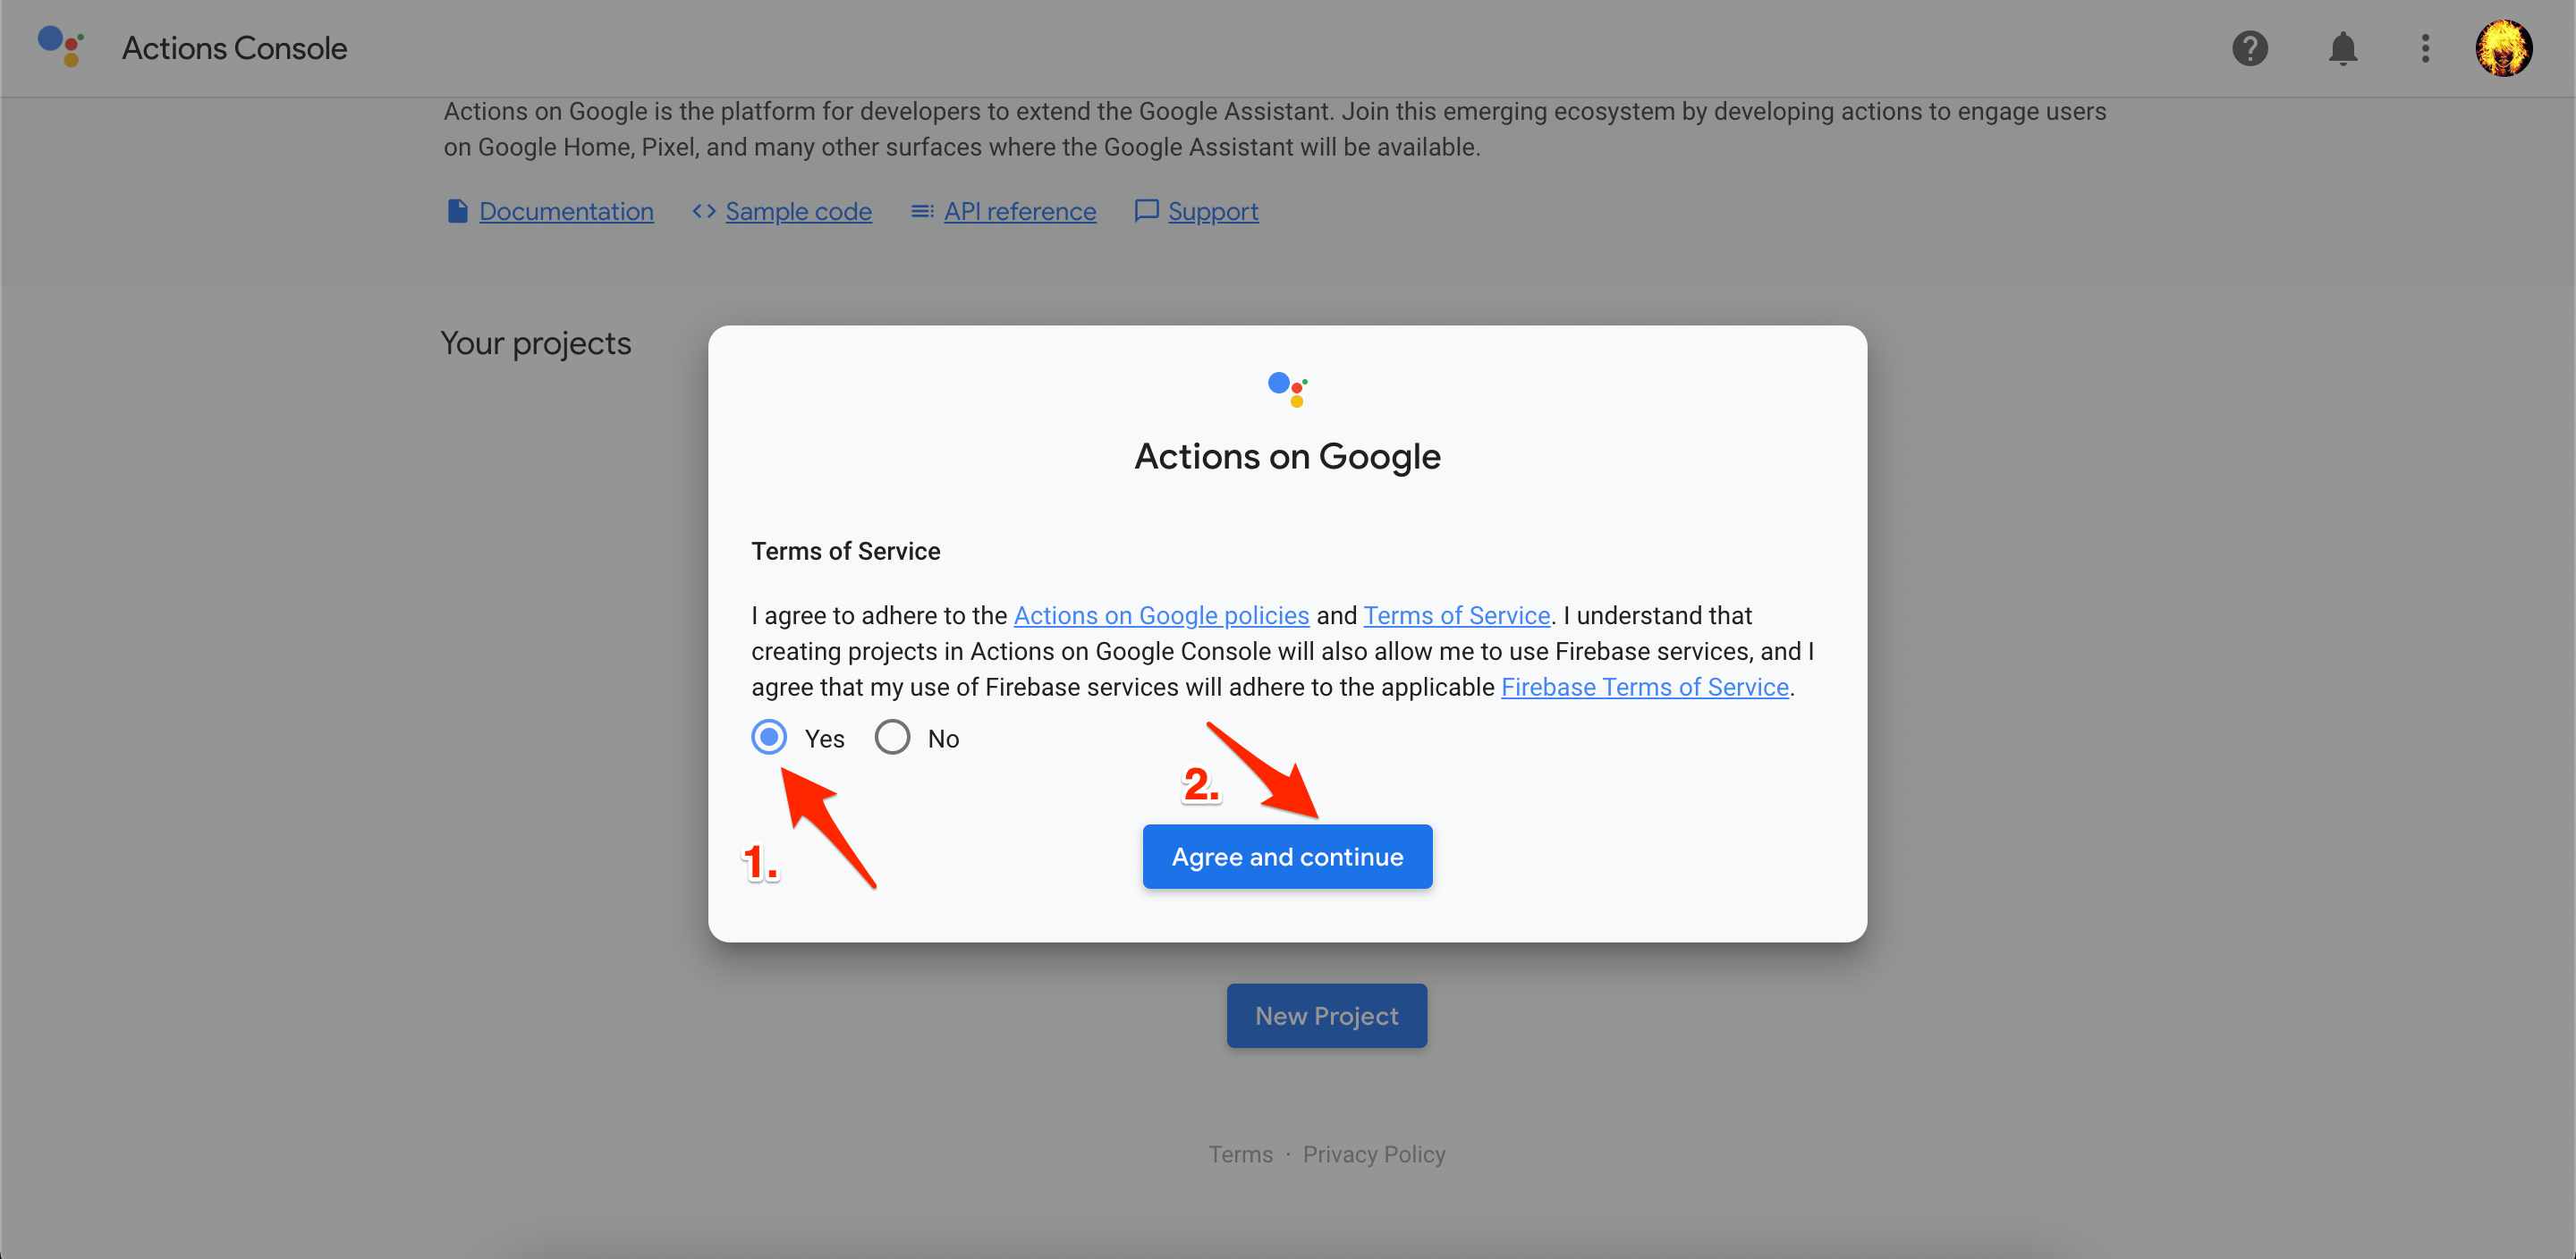
- Now, you need to open the Actions Console on your Browser and click create a New Project.

- Accept Terms and Conditions.

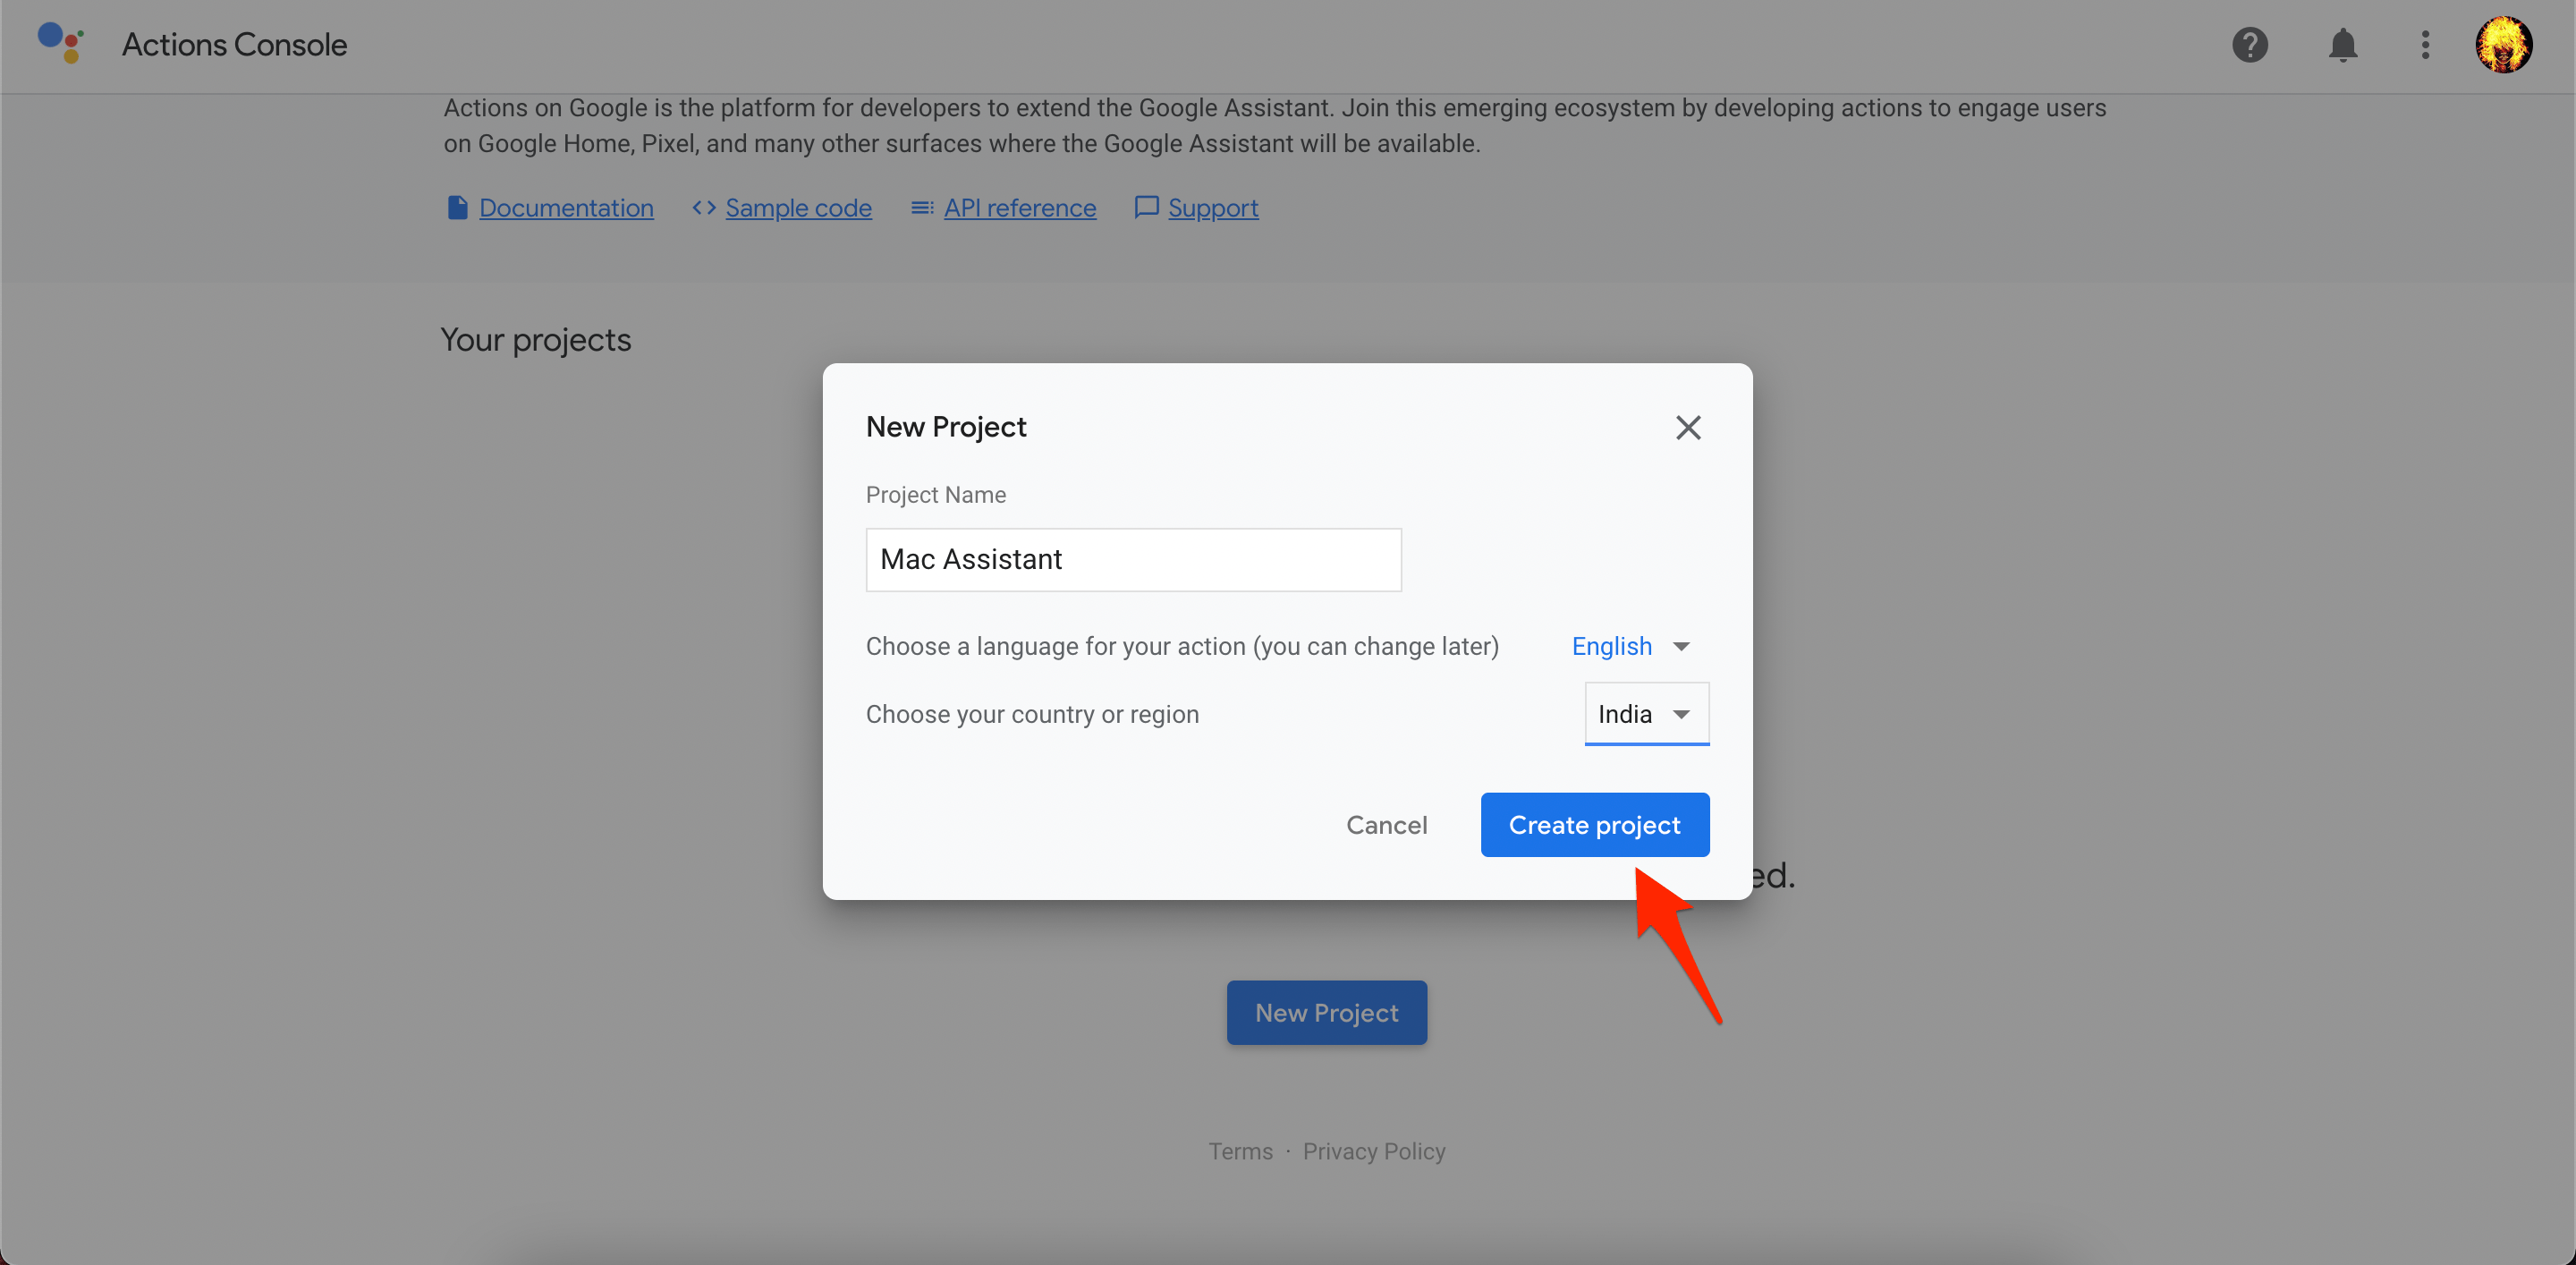
- Add the project’s name, select your country and language, and finally hit the Create Project button.

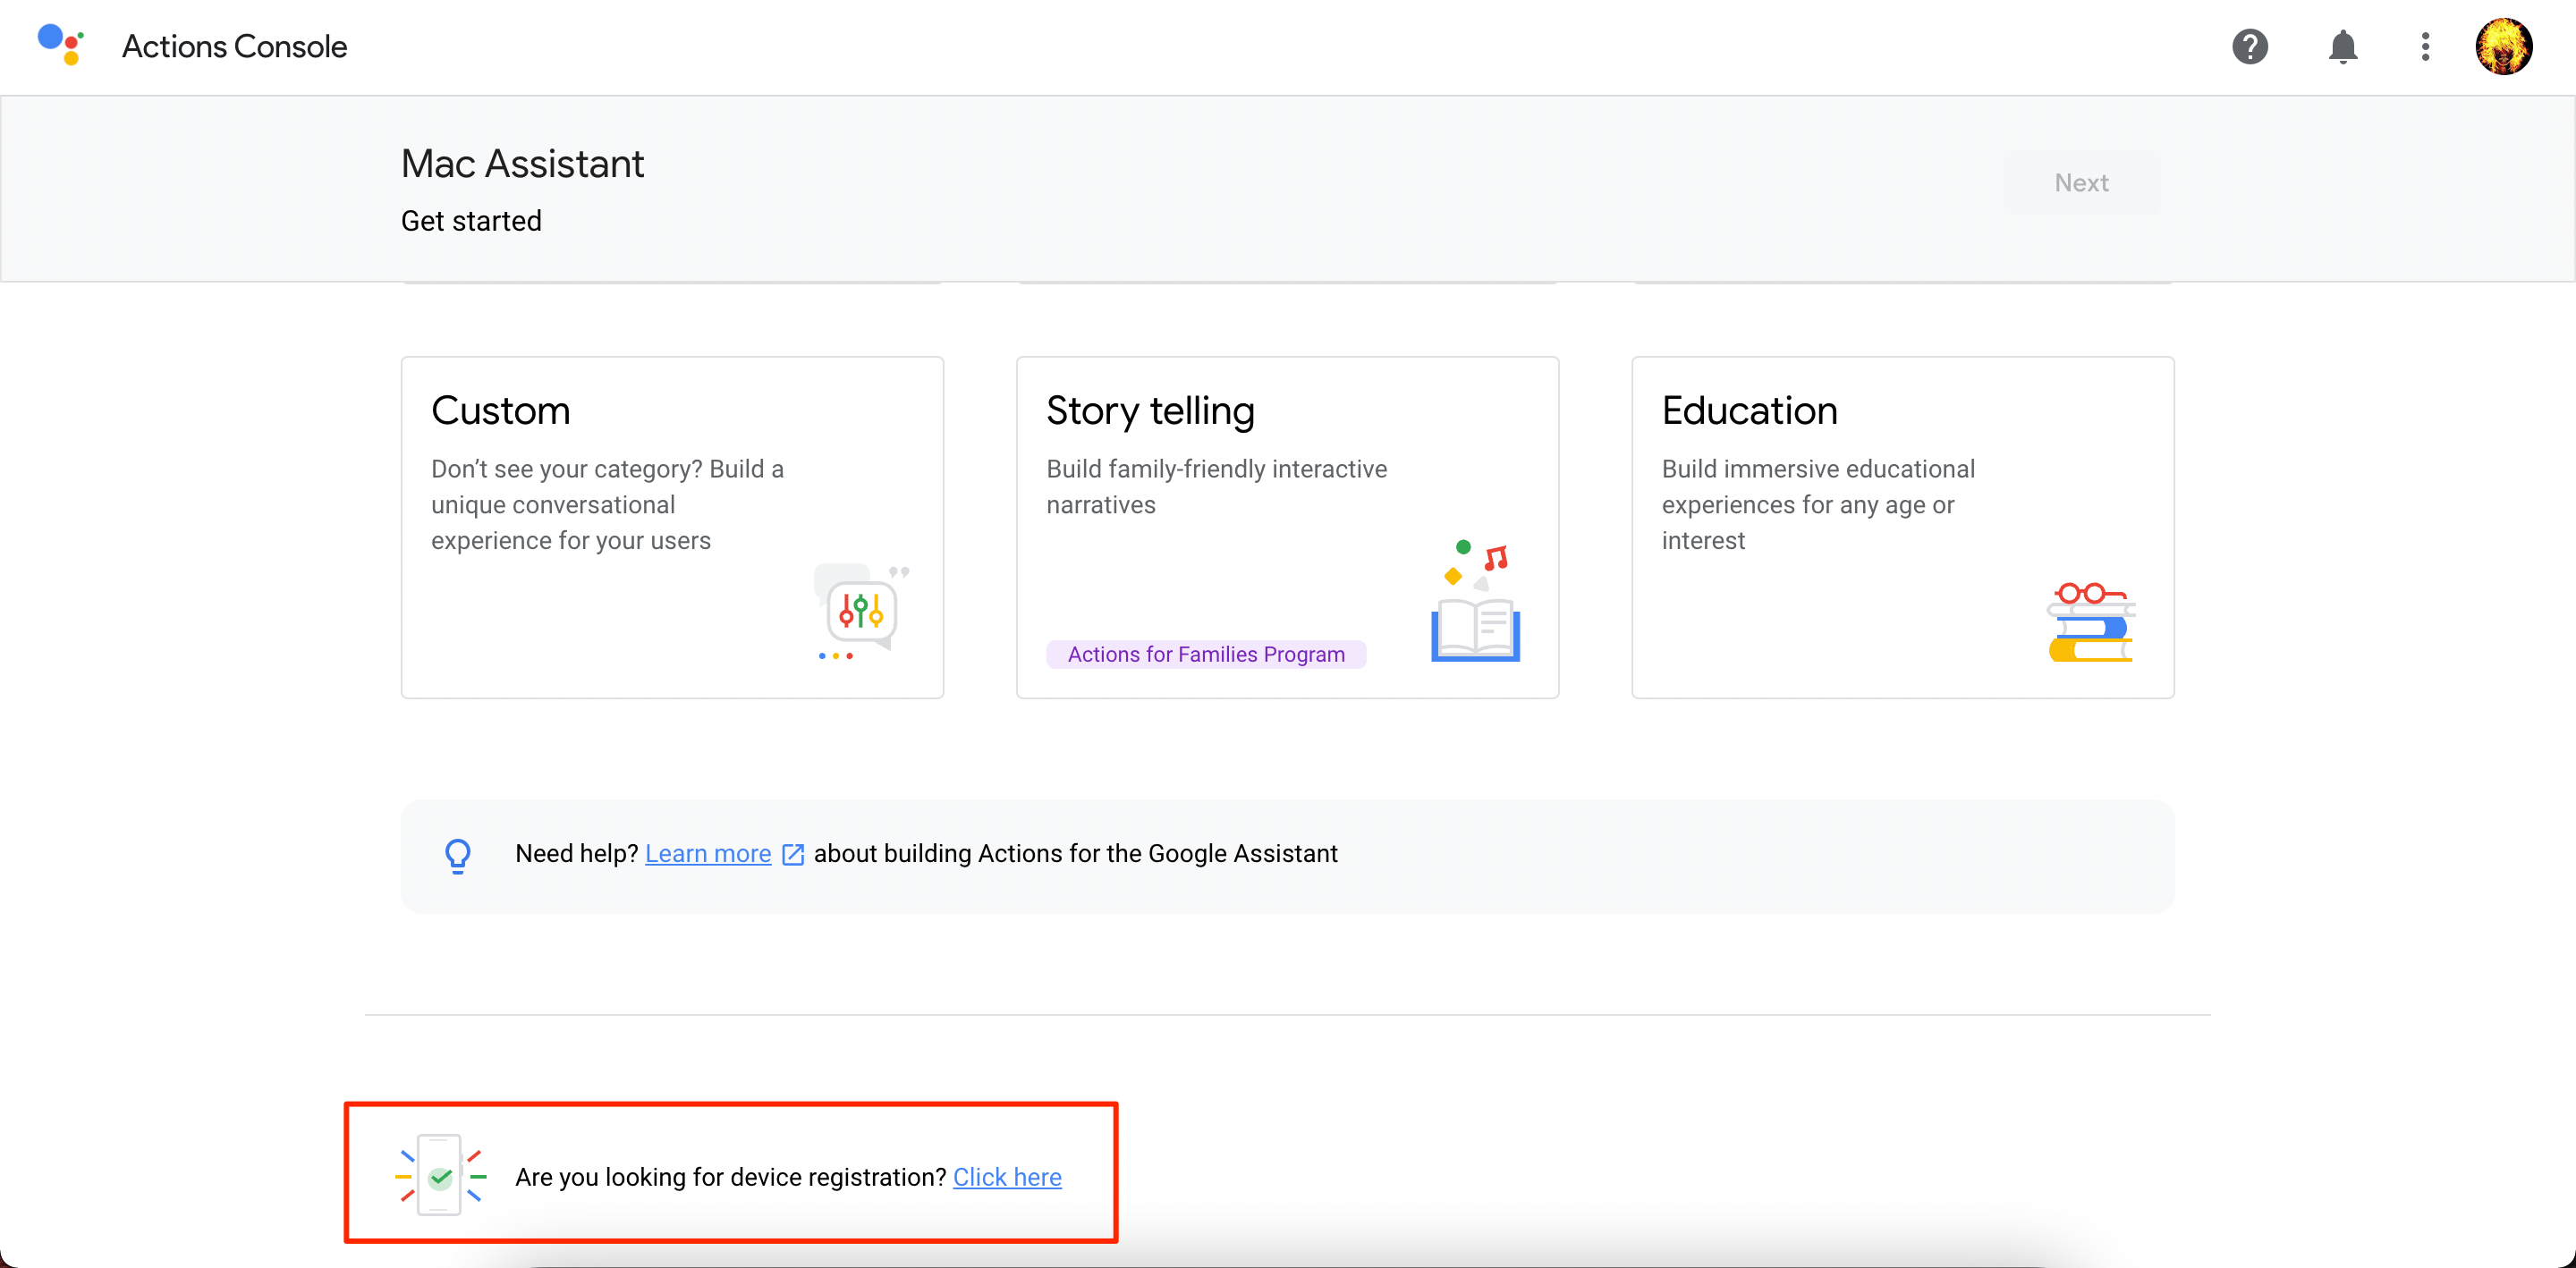
- When the new page loads, scroll down and select the “Are you looking for device registration? Click here” option.

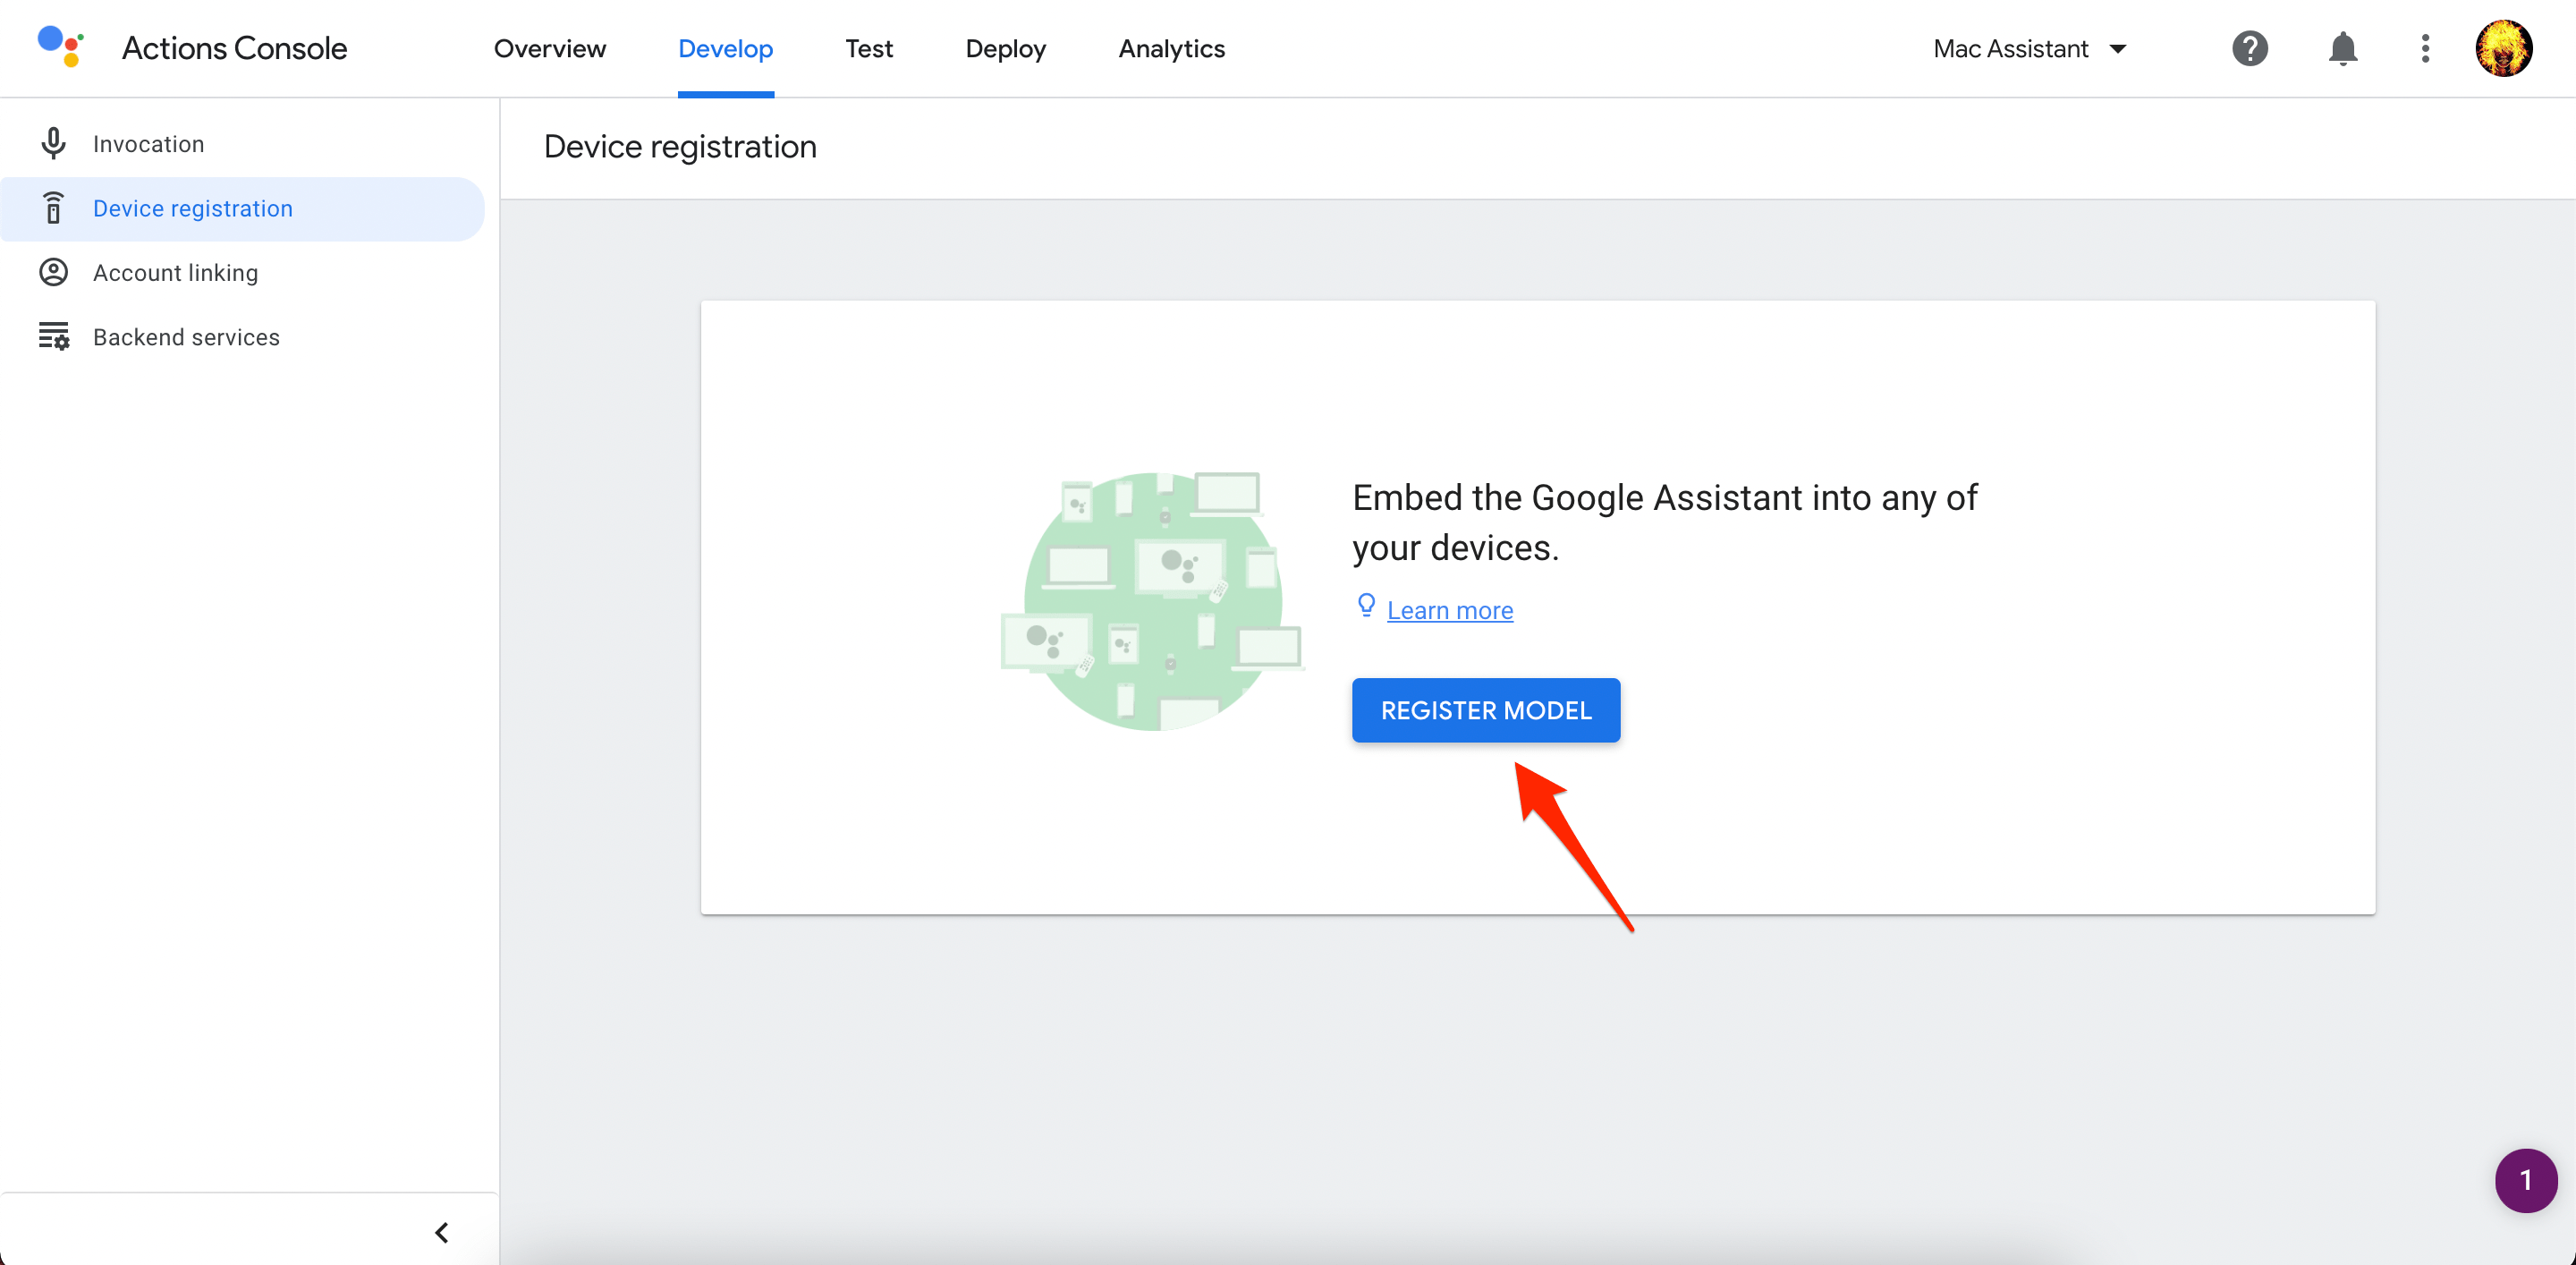
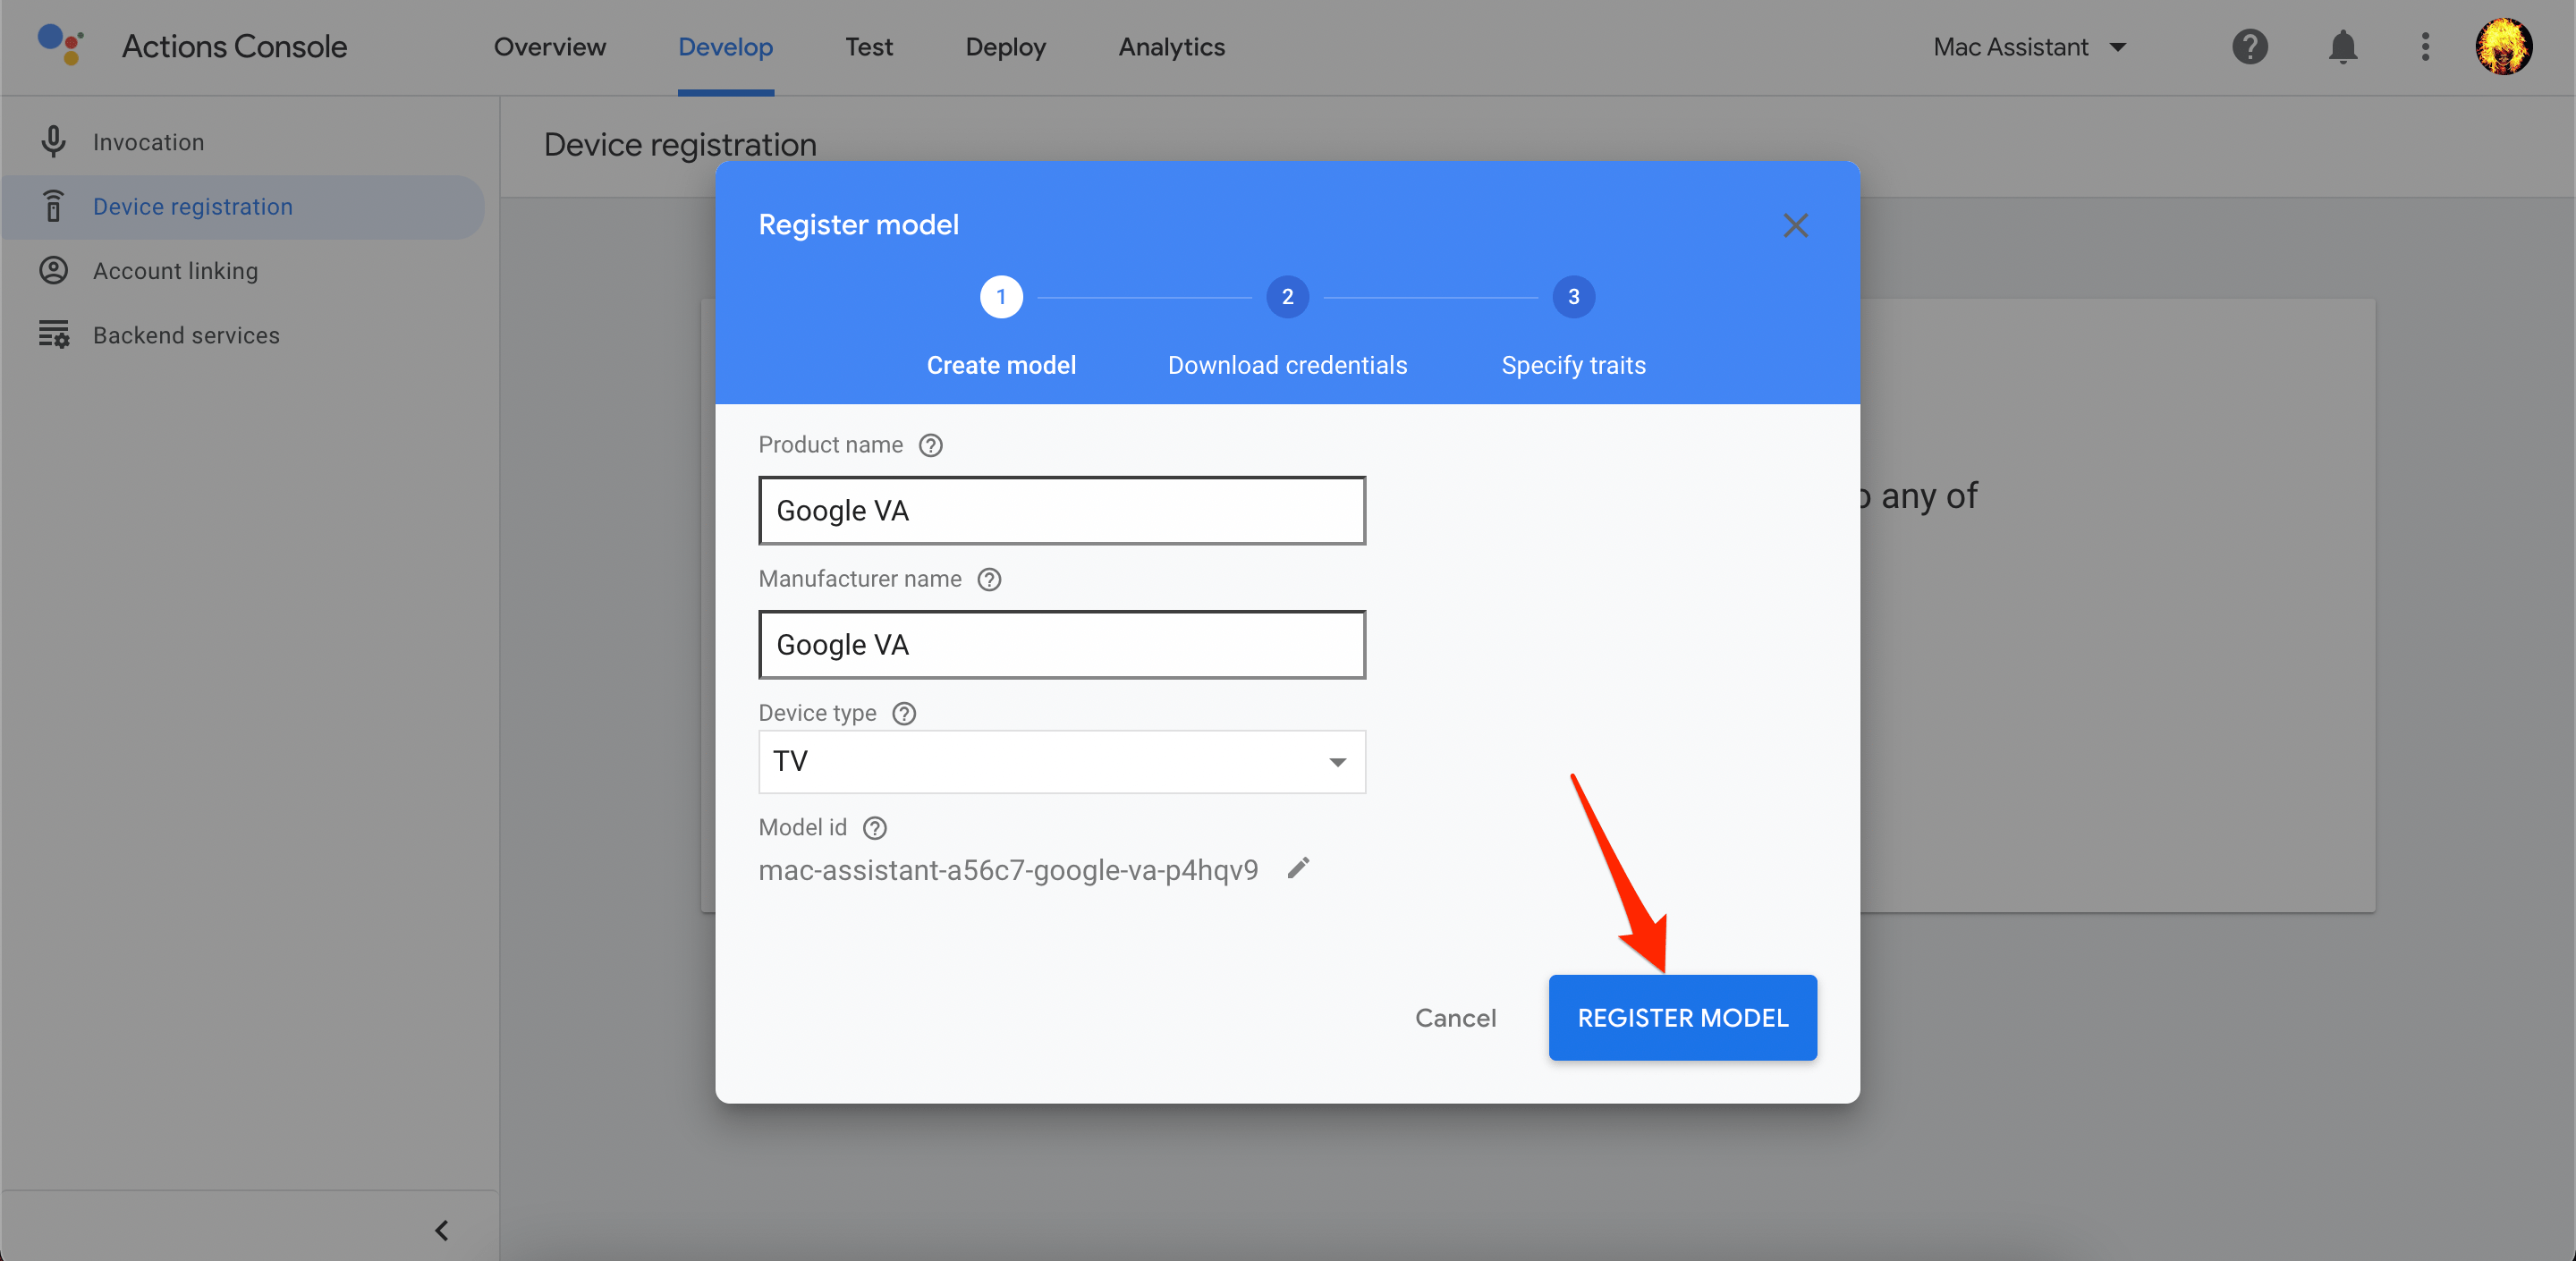
- Click on the REGISTER MODEL button.

- Fill in any random detail in the product name, manufacturer name, device type, etc., and click on the REGISTER MODEL button.

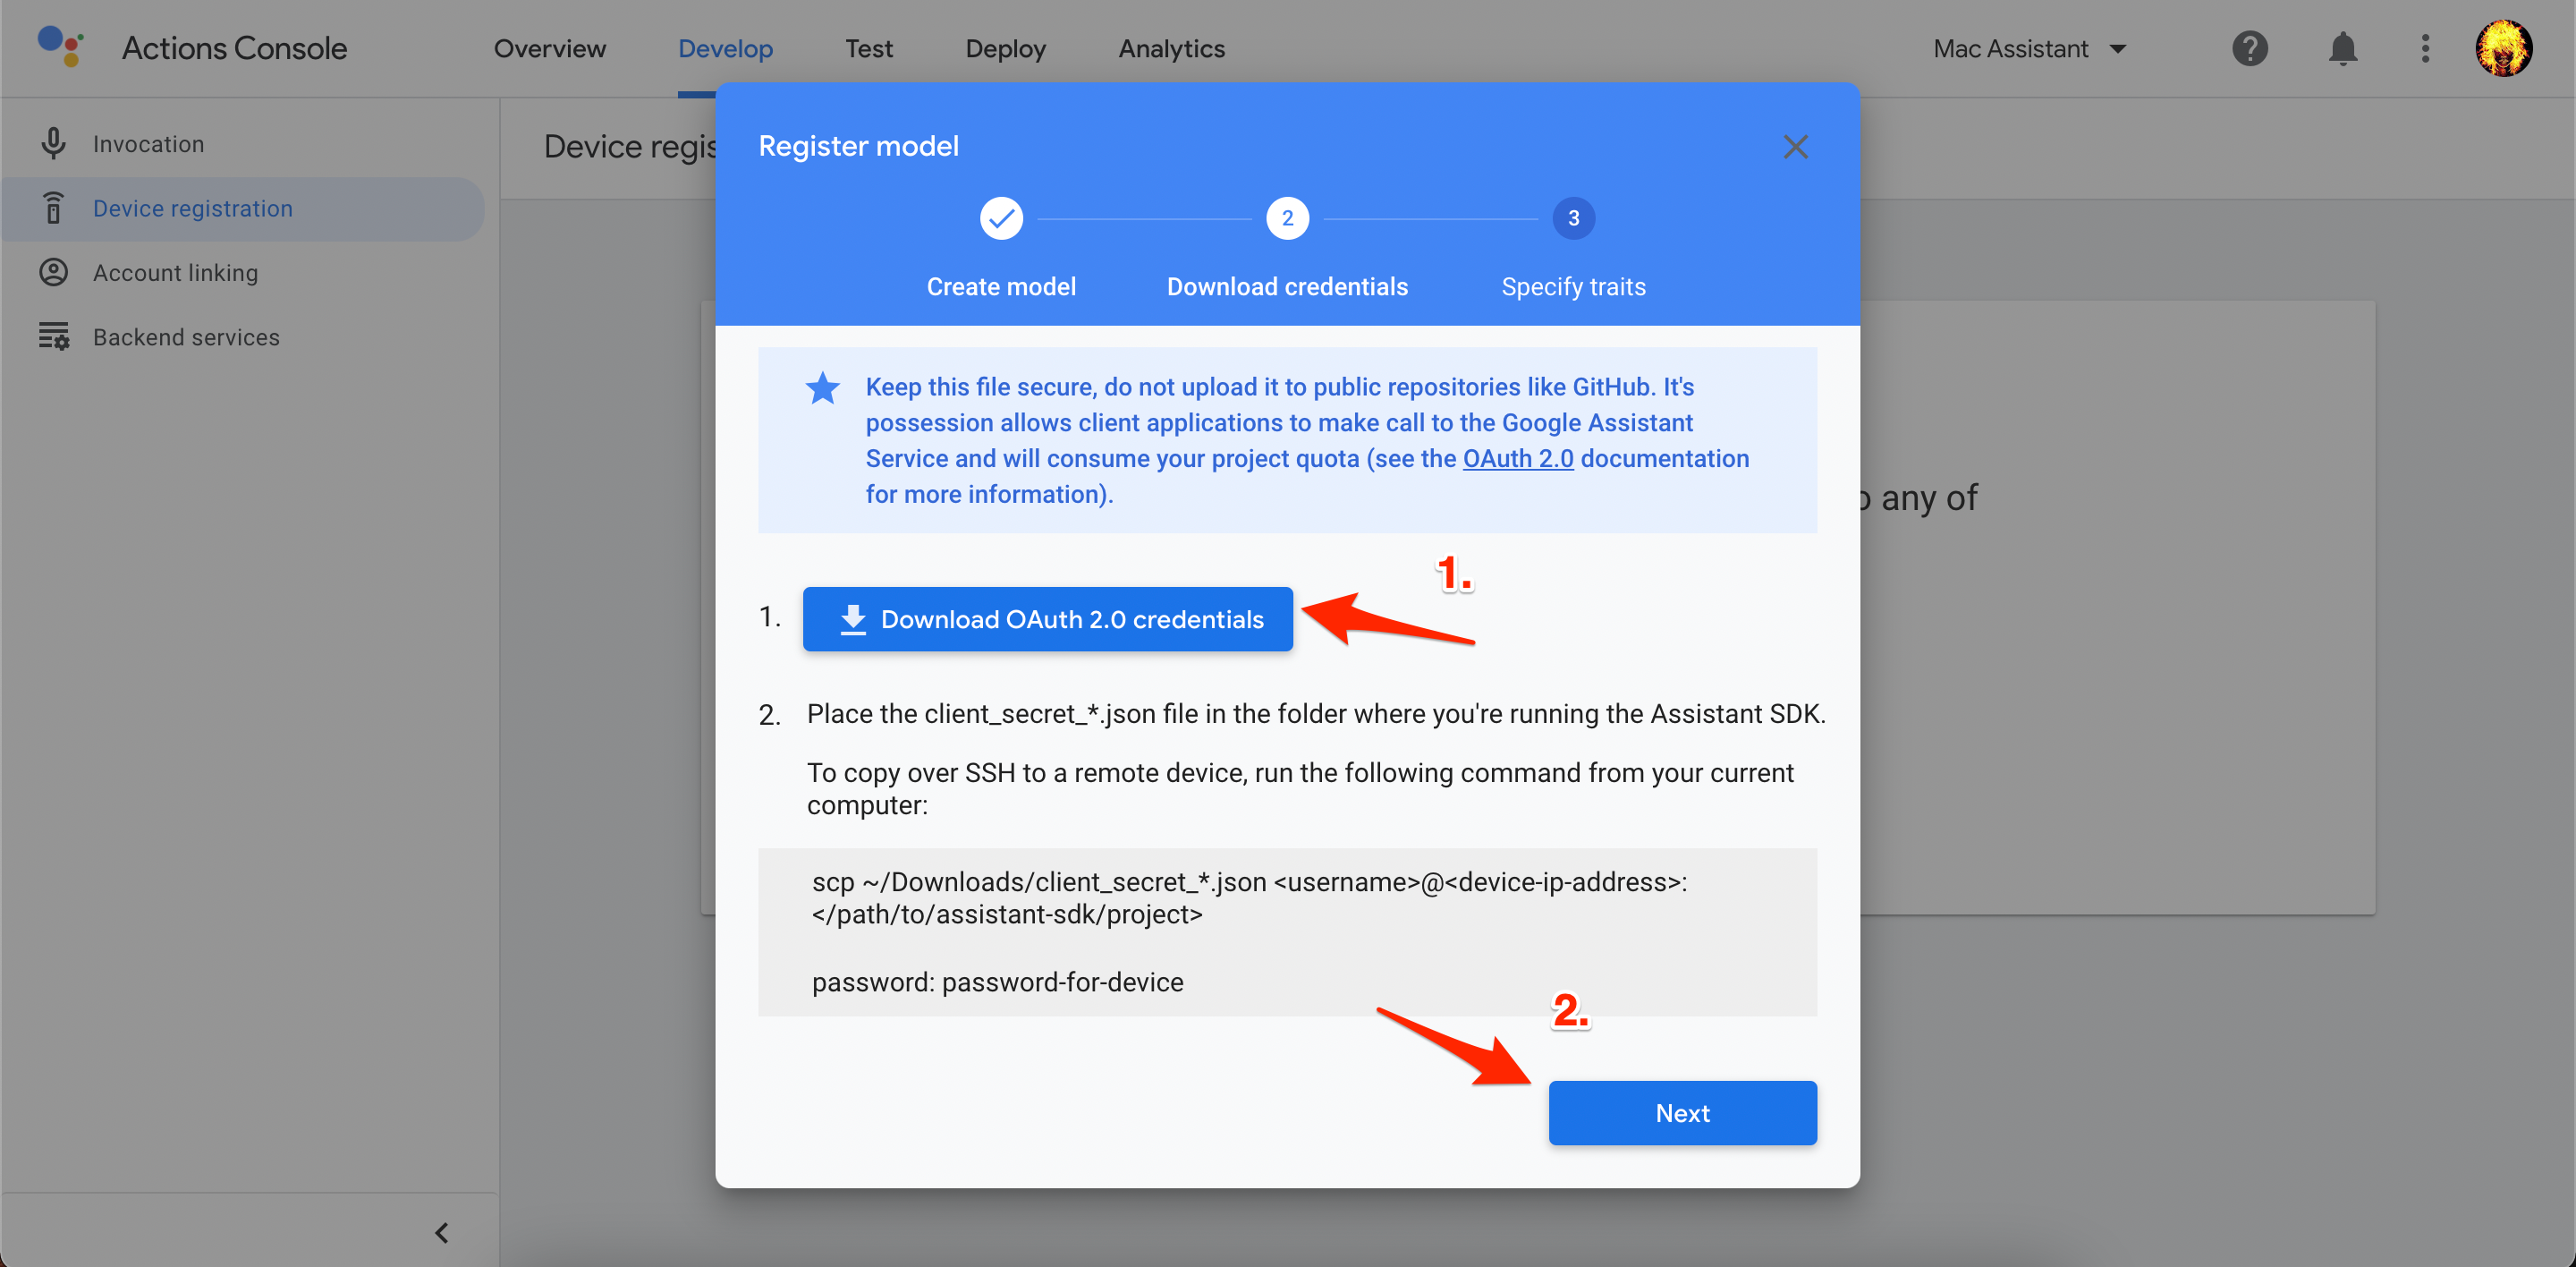
- Hit the Download OAuth 2.0 Credentials (*.json file), click Next.

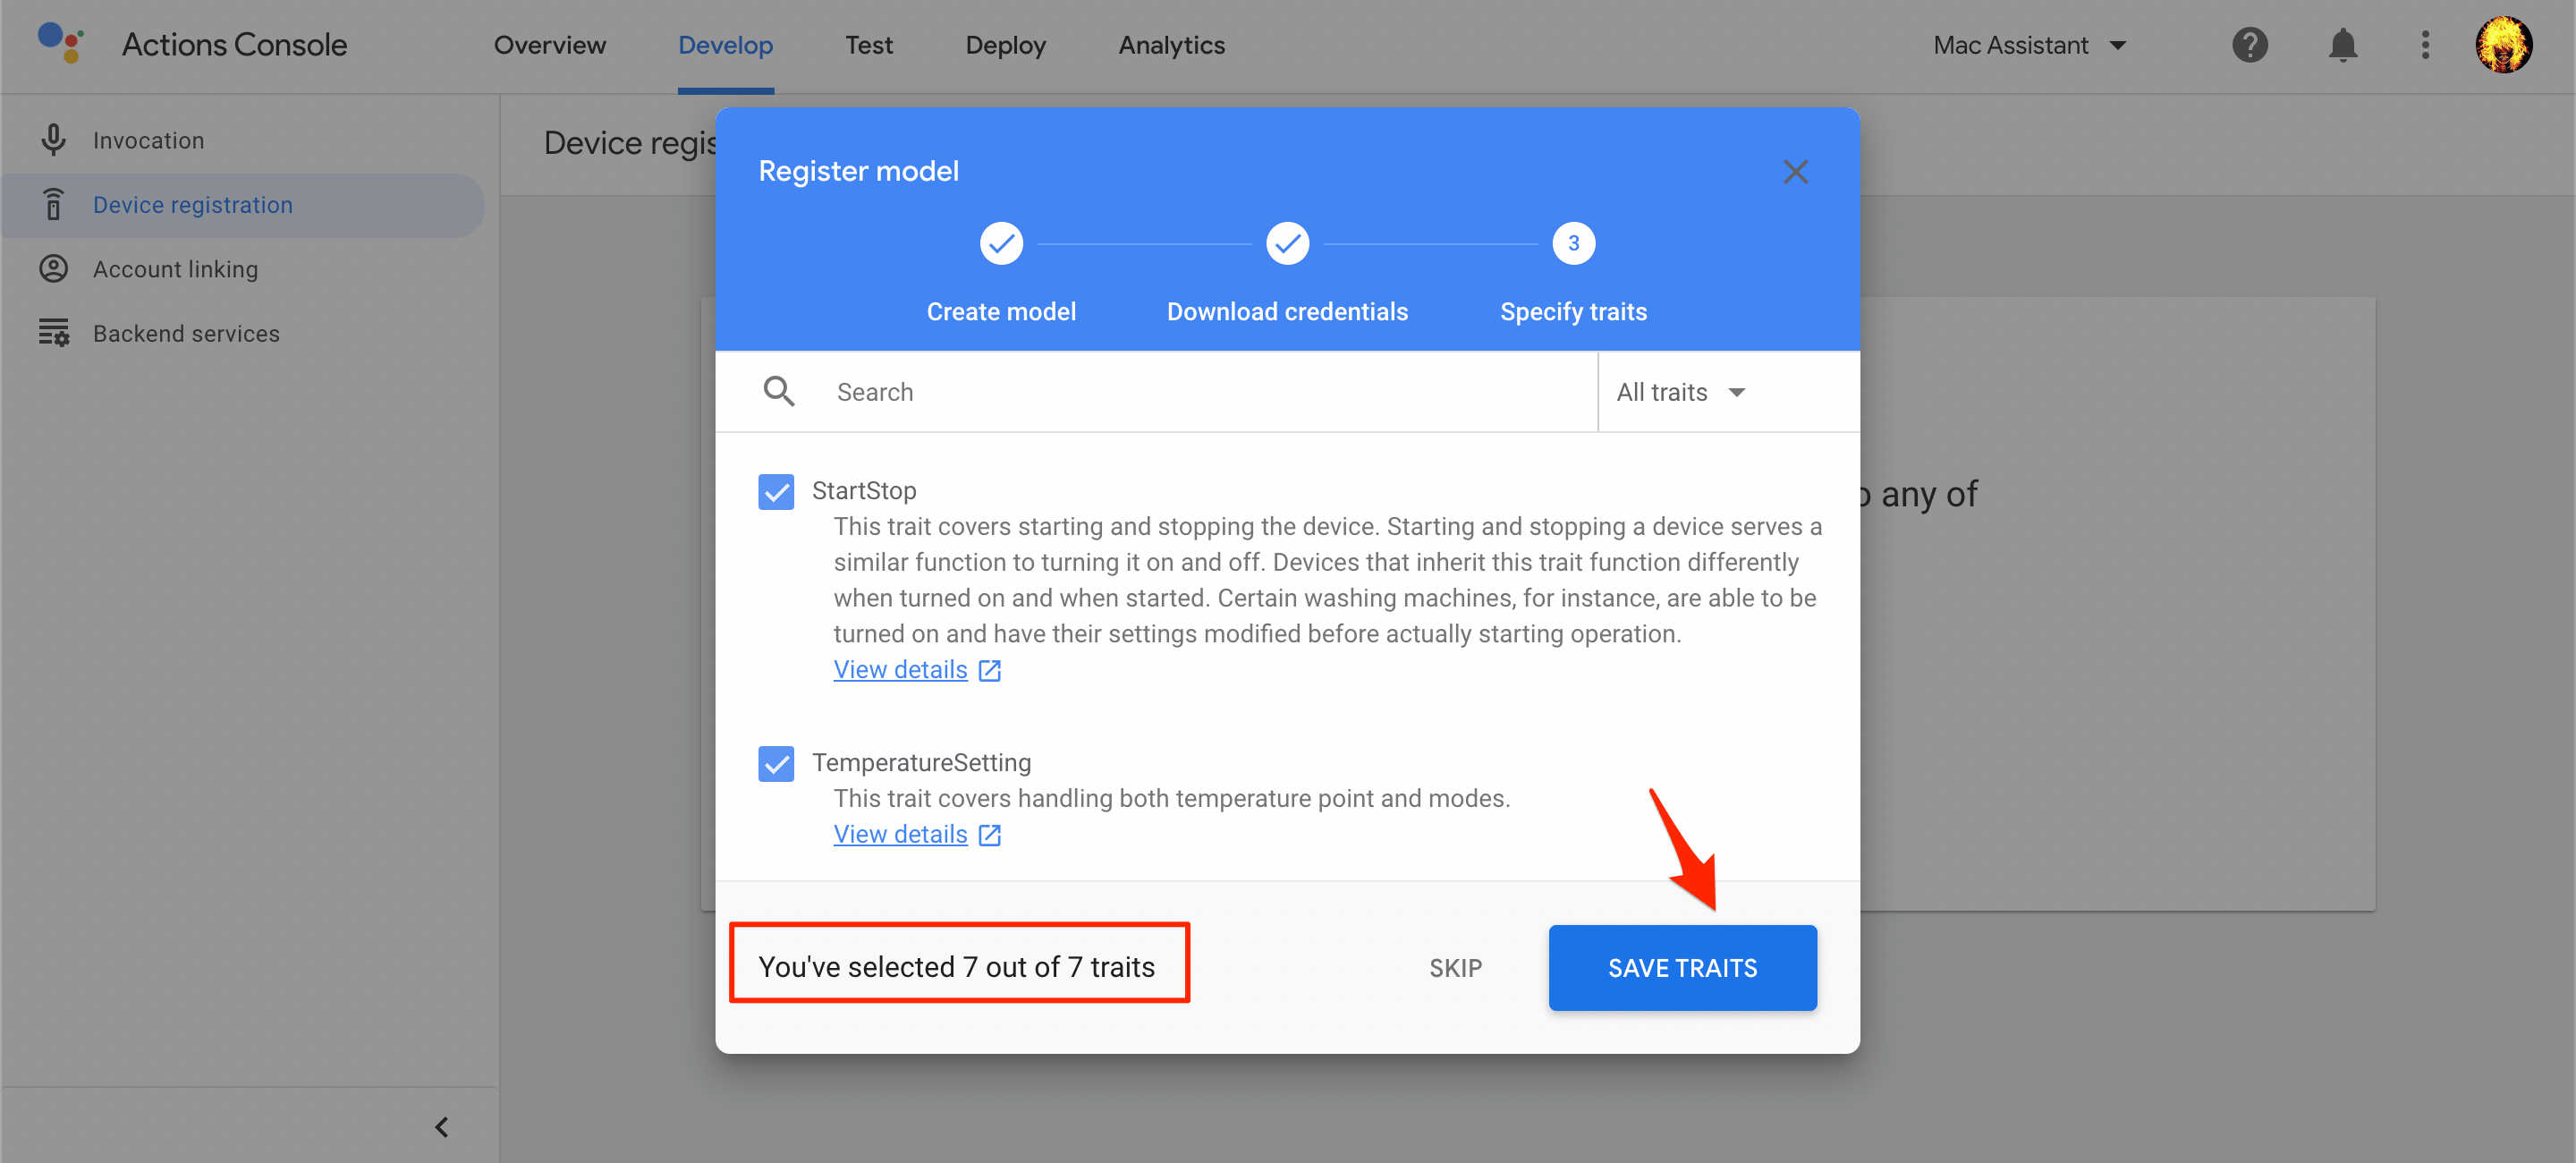
- Select all traits and click on Save Traits.

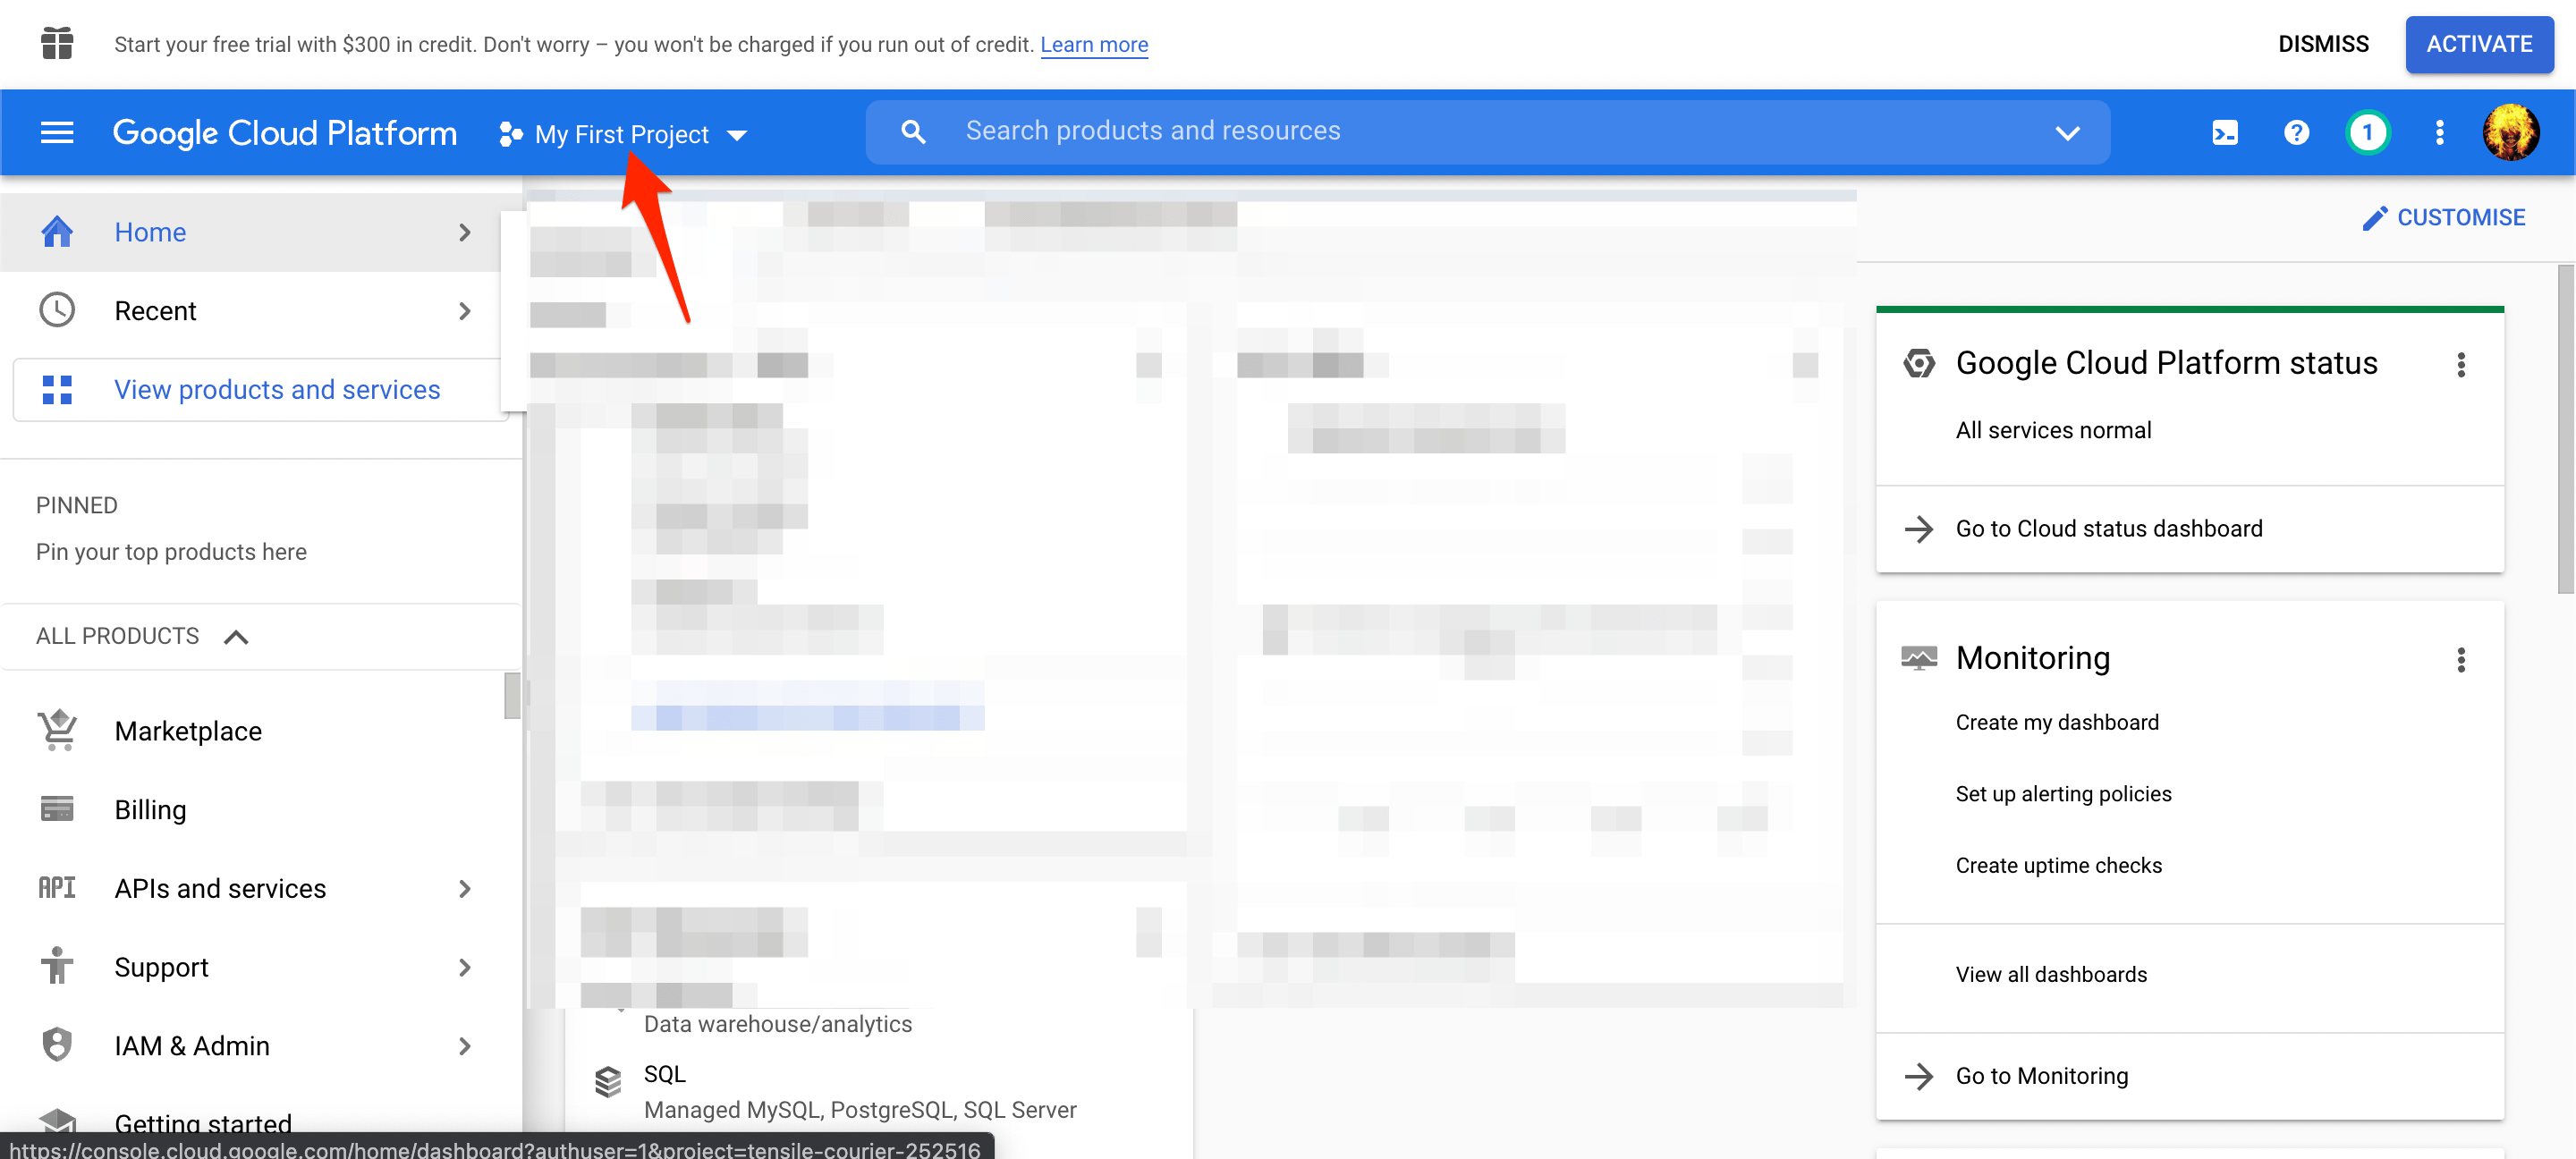
- After this, you need to head over to the Cloud Console page and log in with your G-Account.
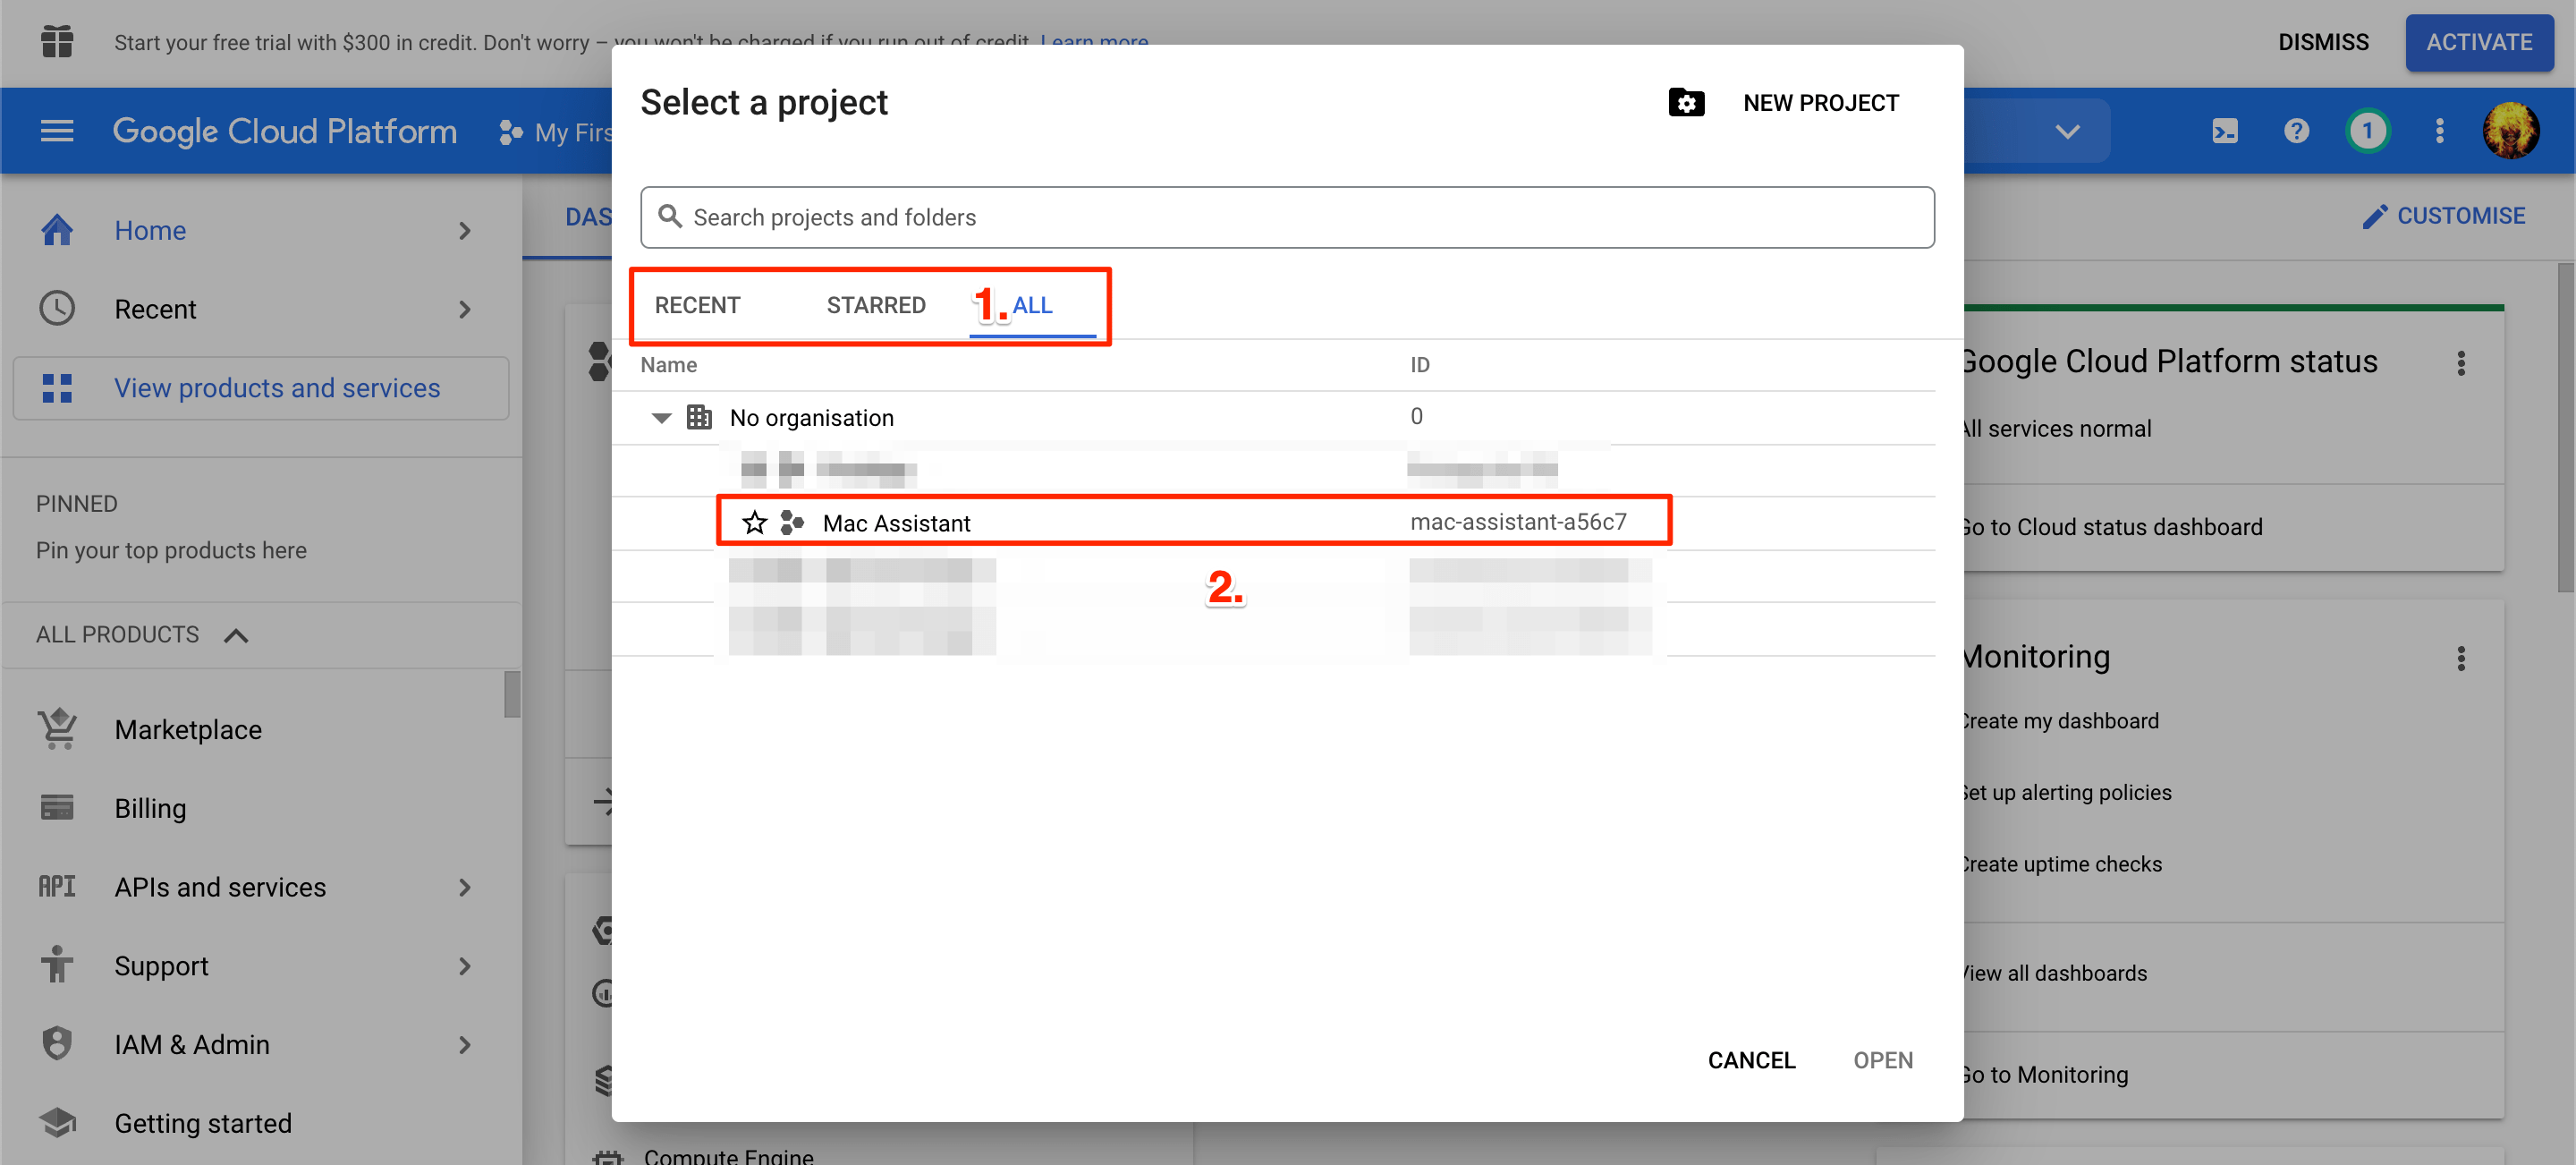
- Click on the Select a Project button at the top.

- Click on the project you just have created.

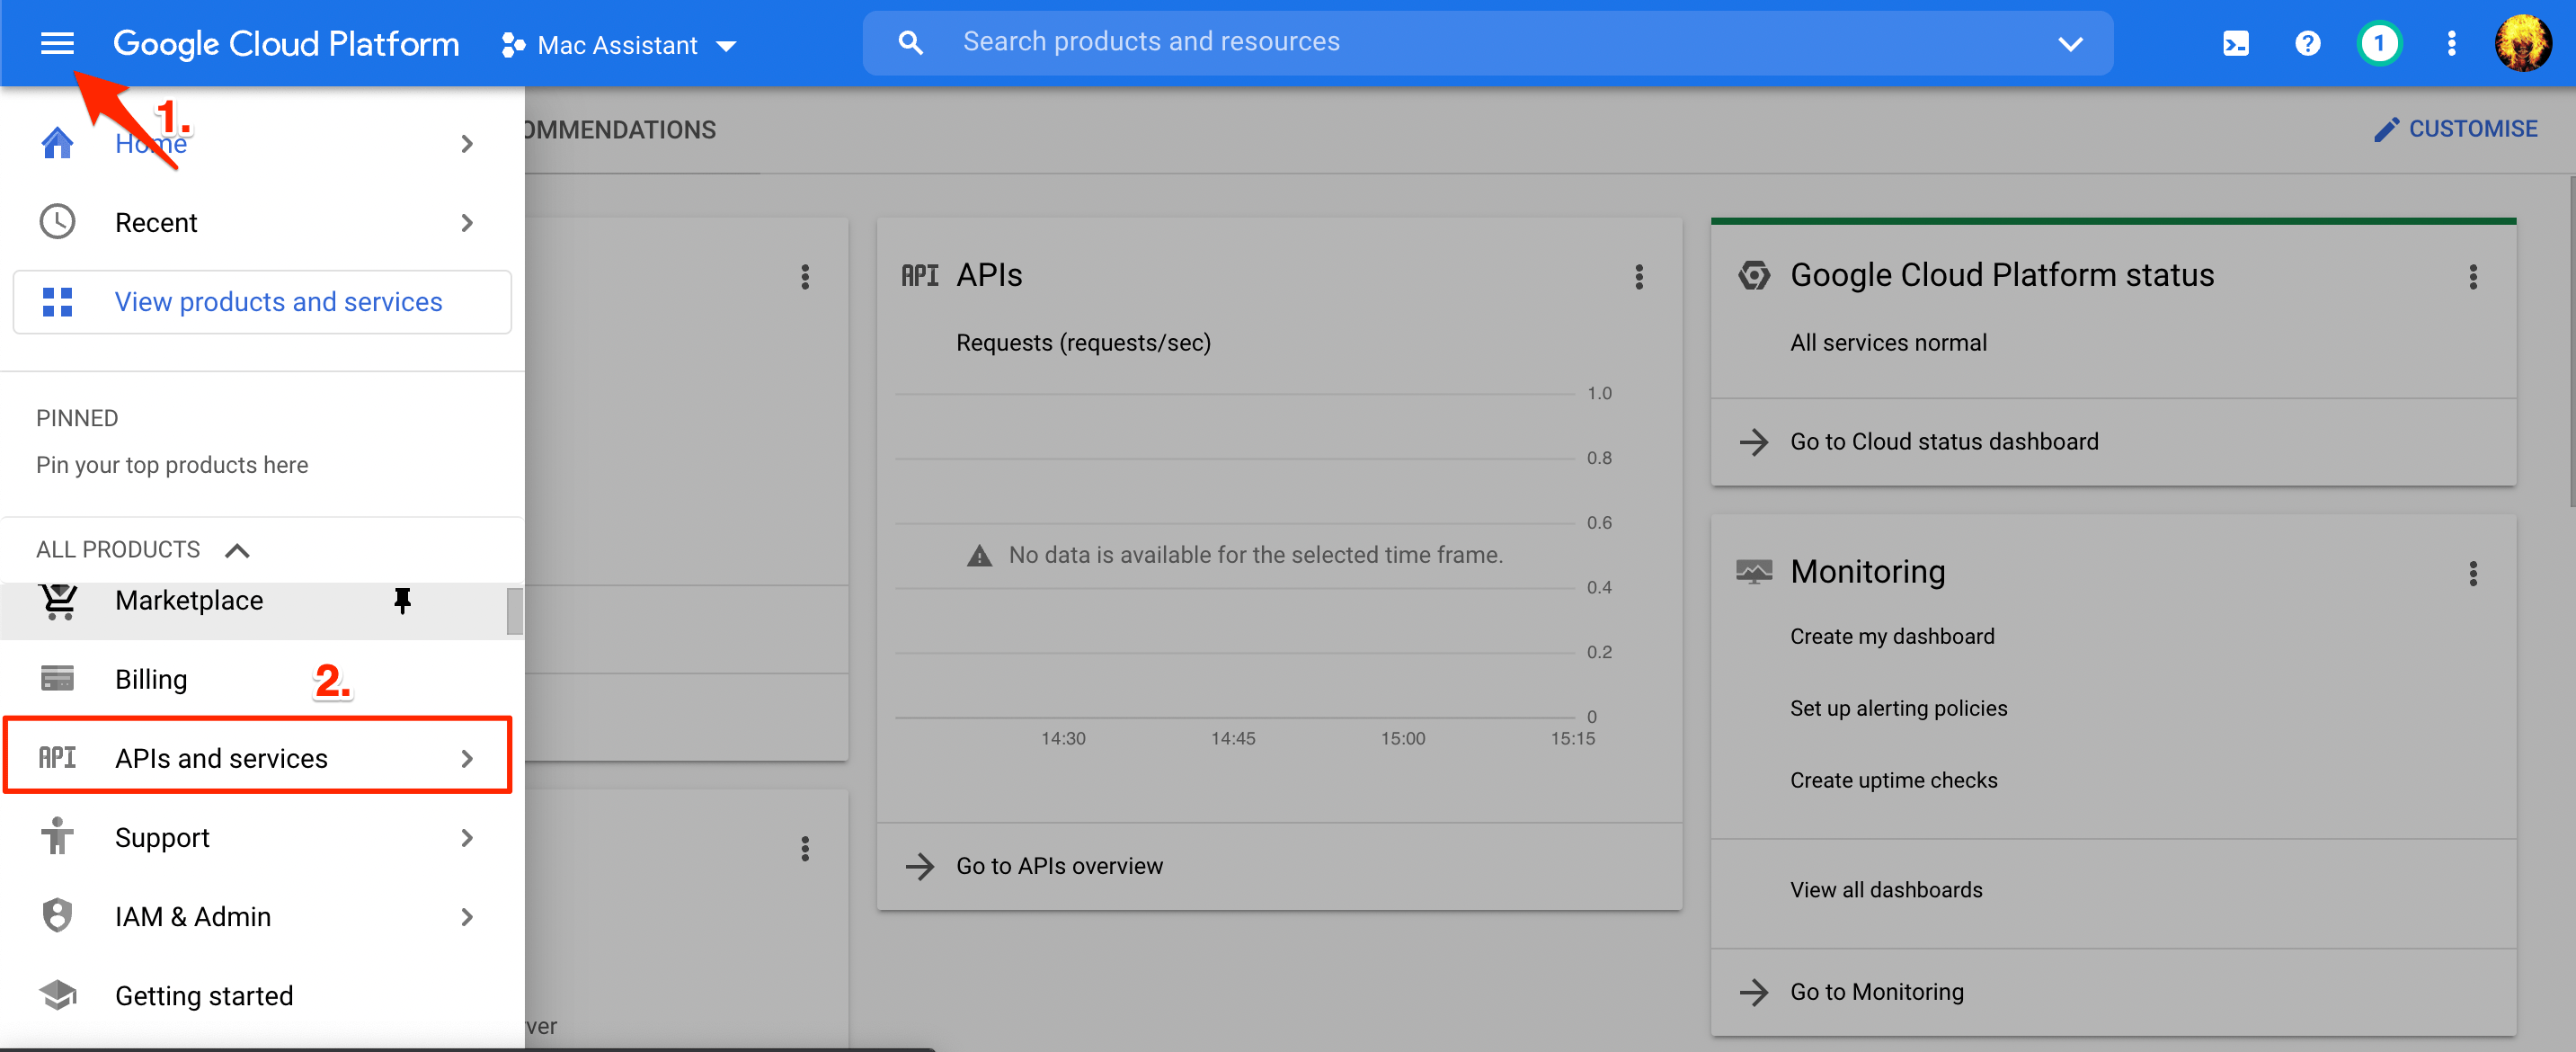
- From the left side menu, select API and Services.

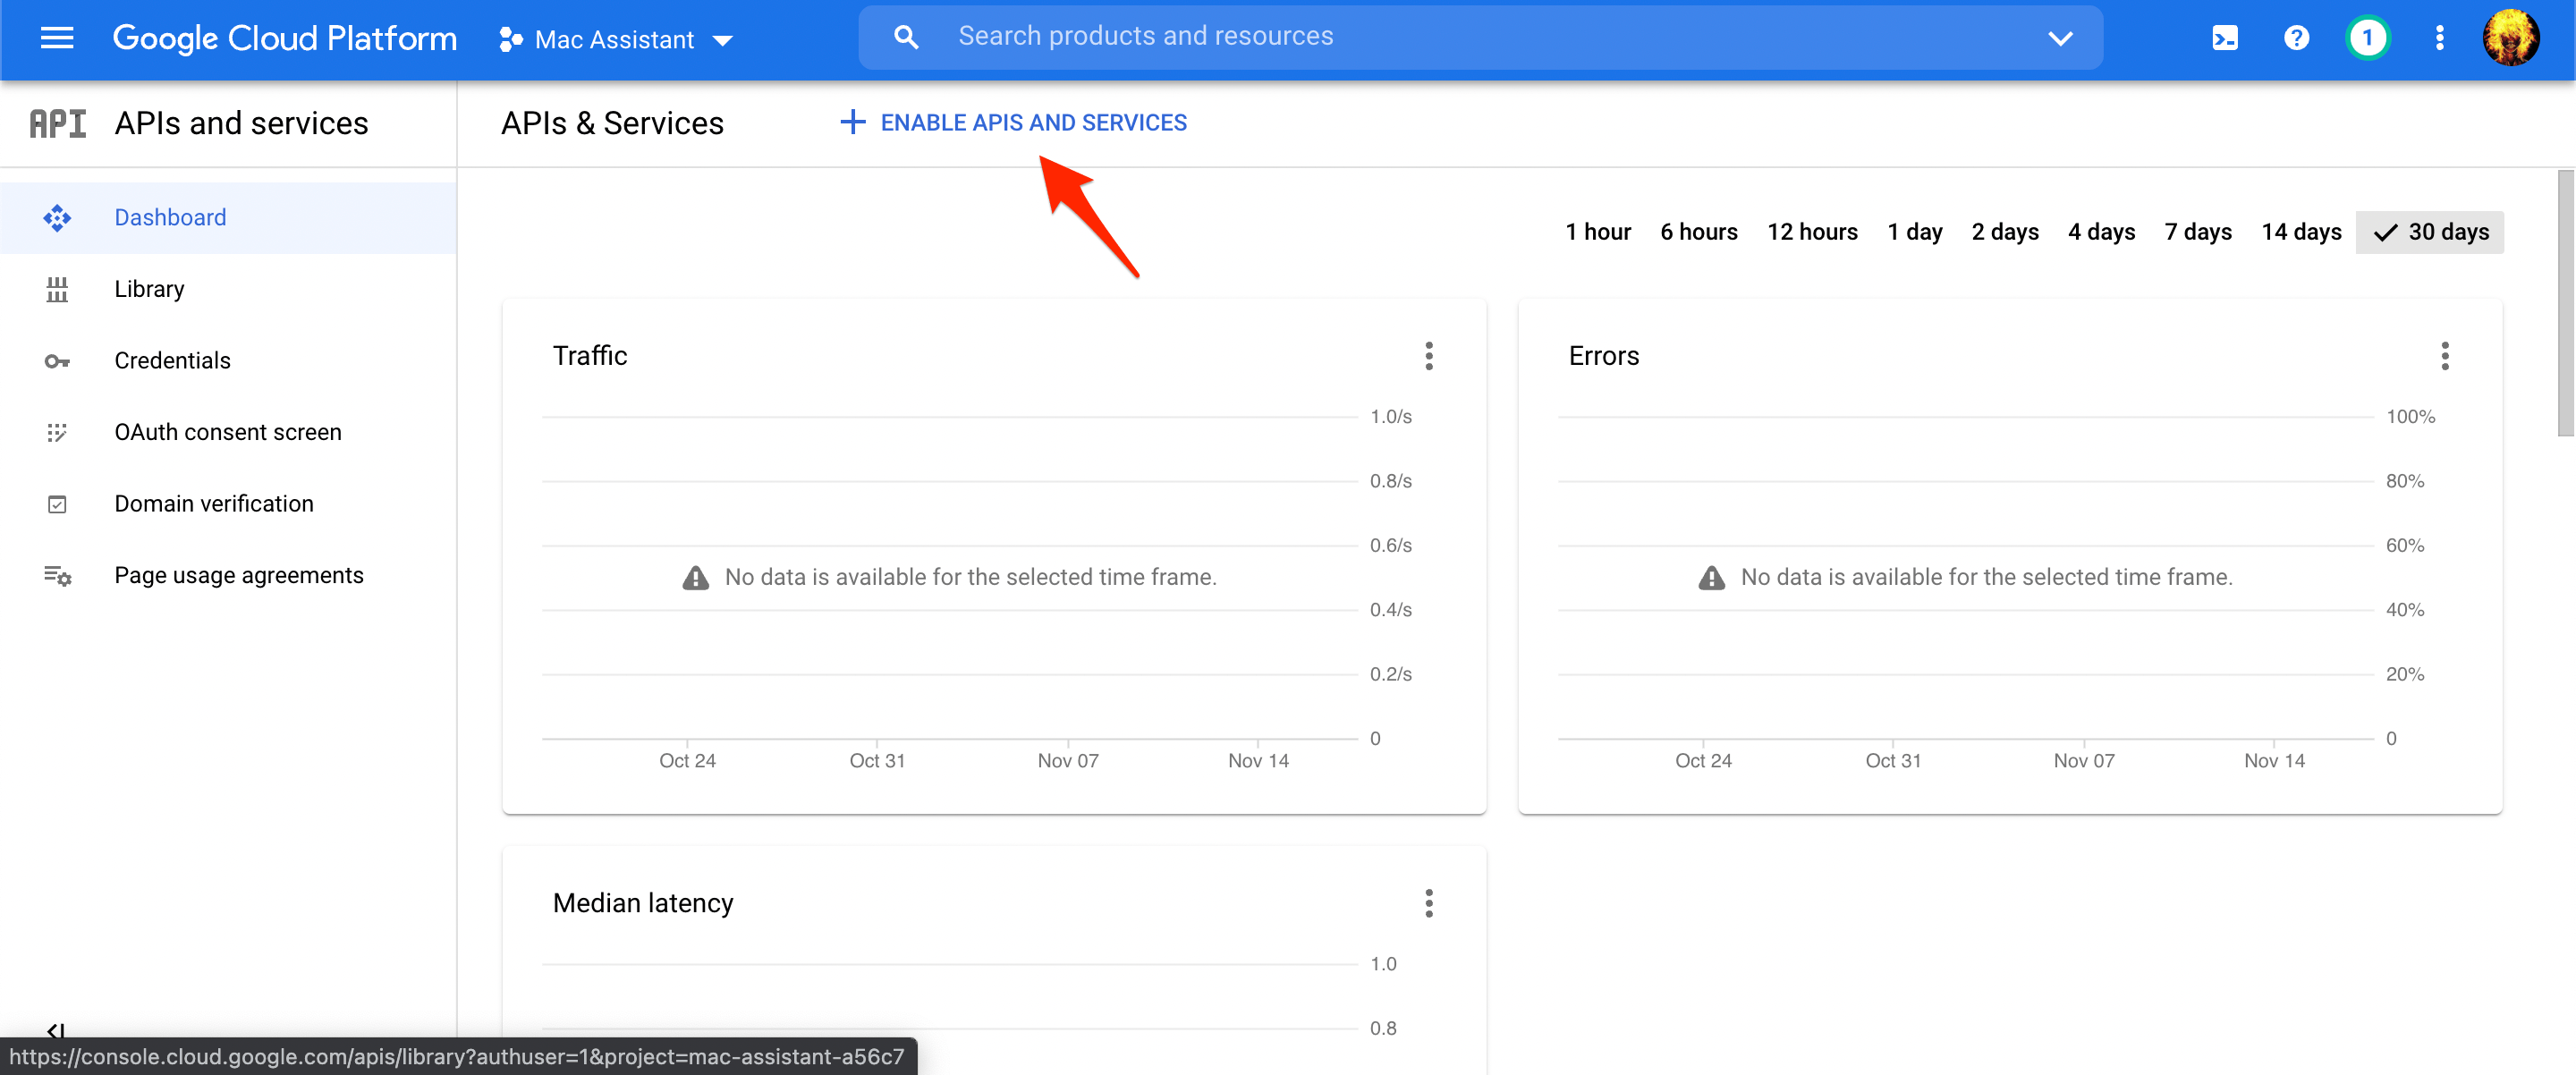
- Now, click on the Enable APIS and Services button at the top.

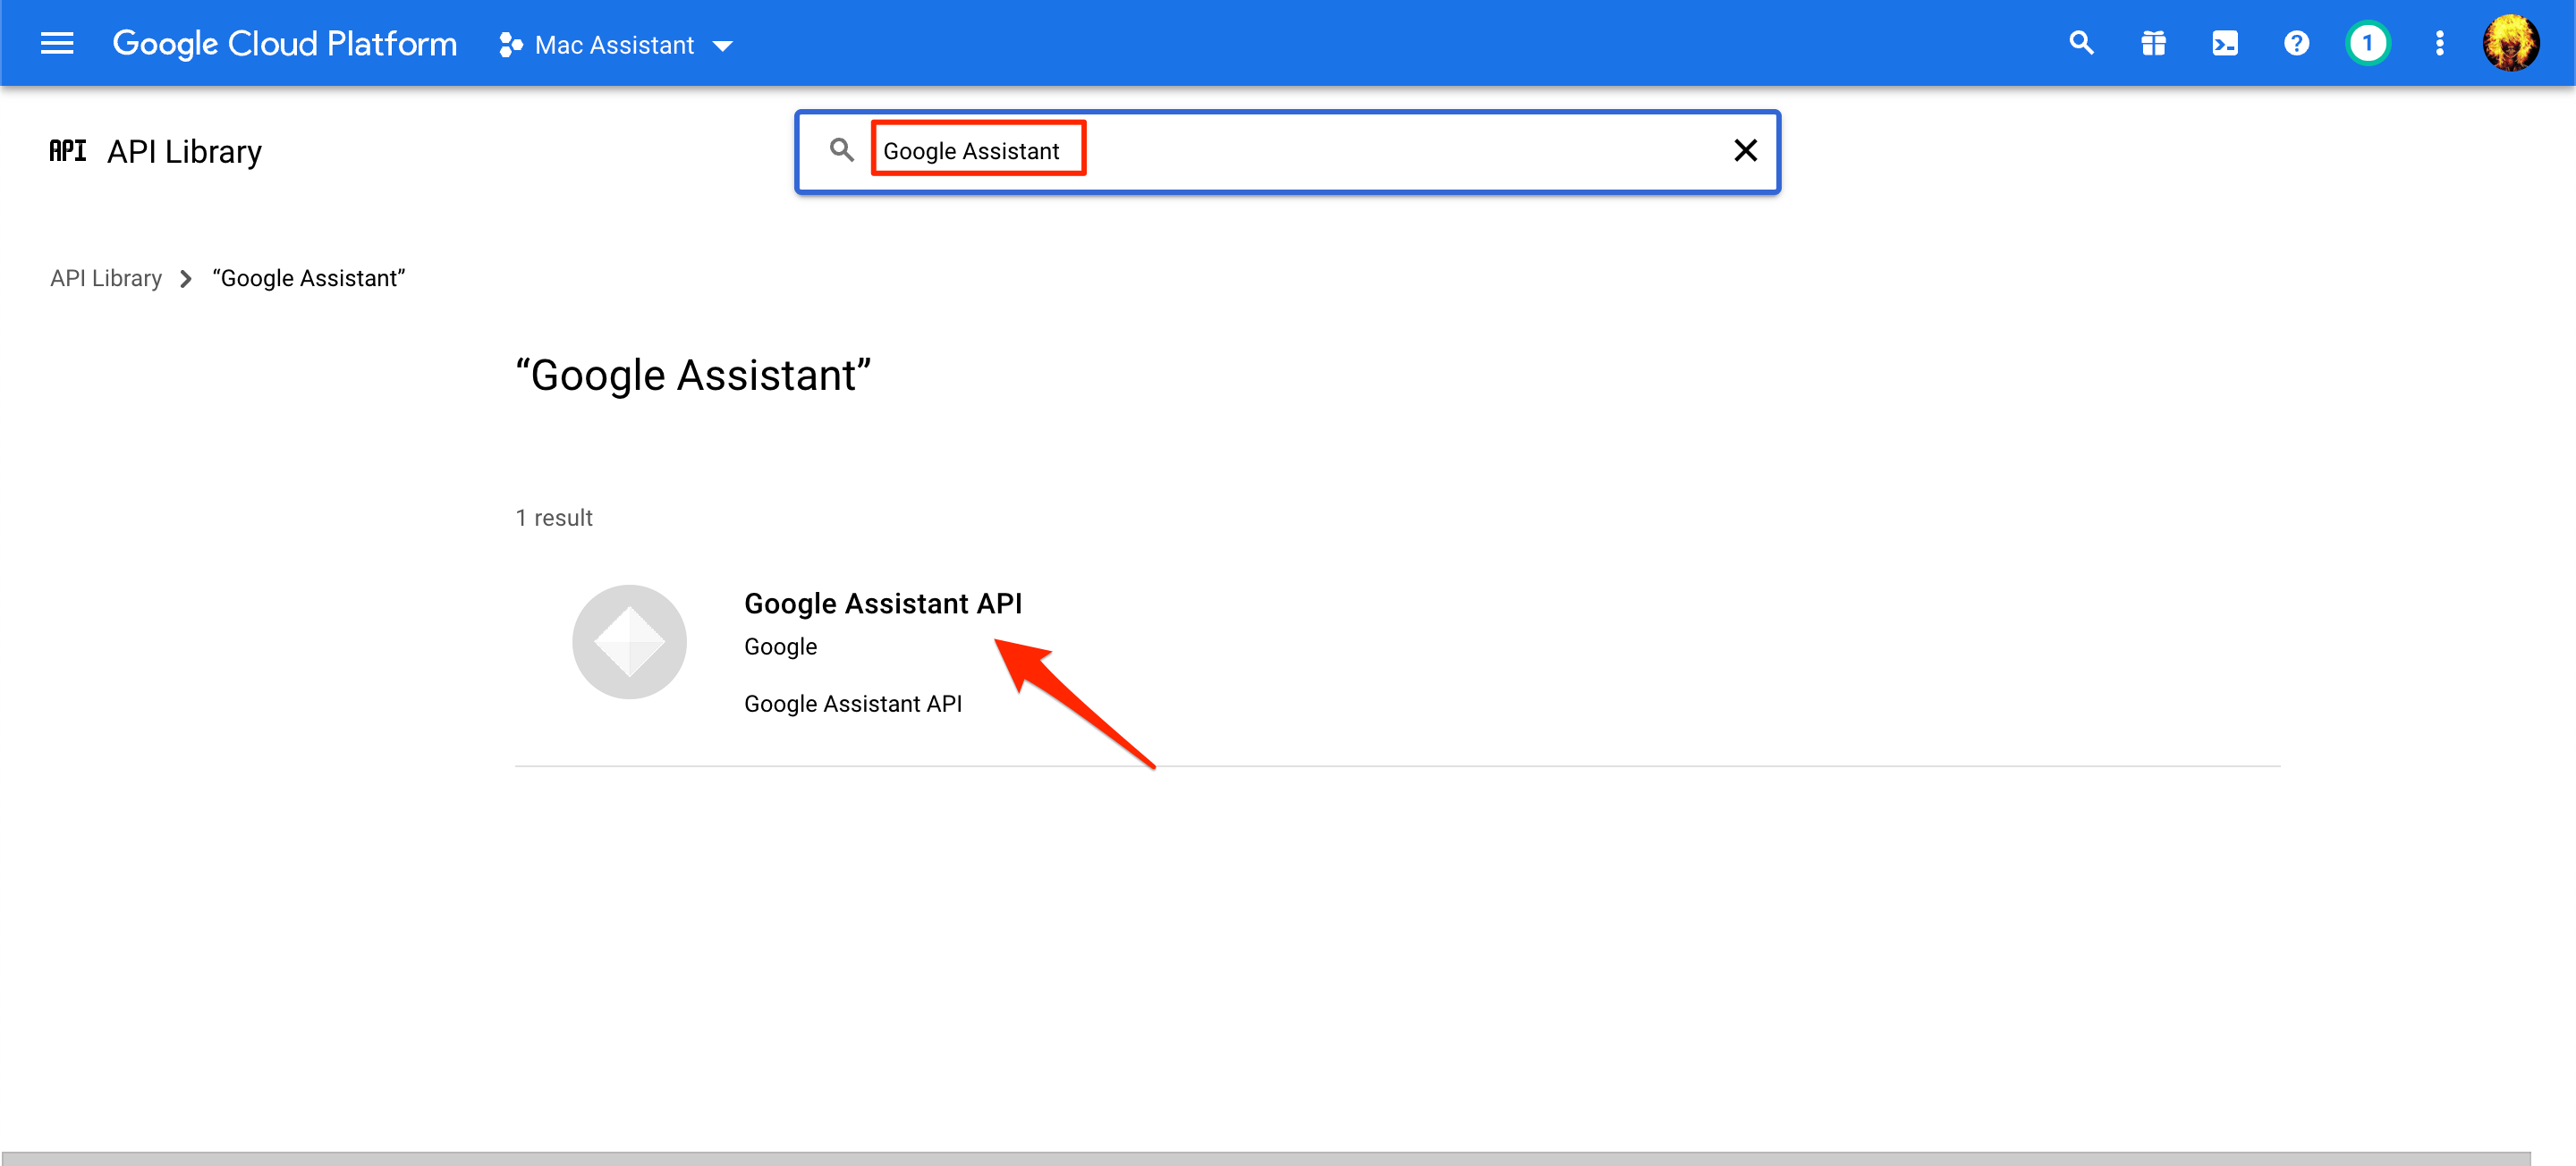
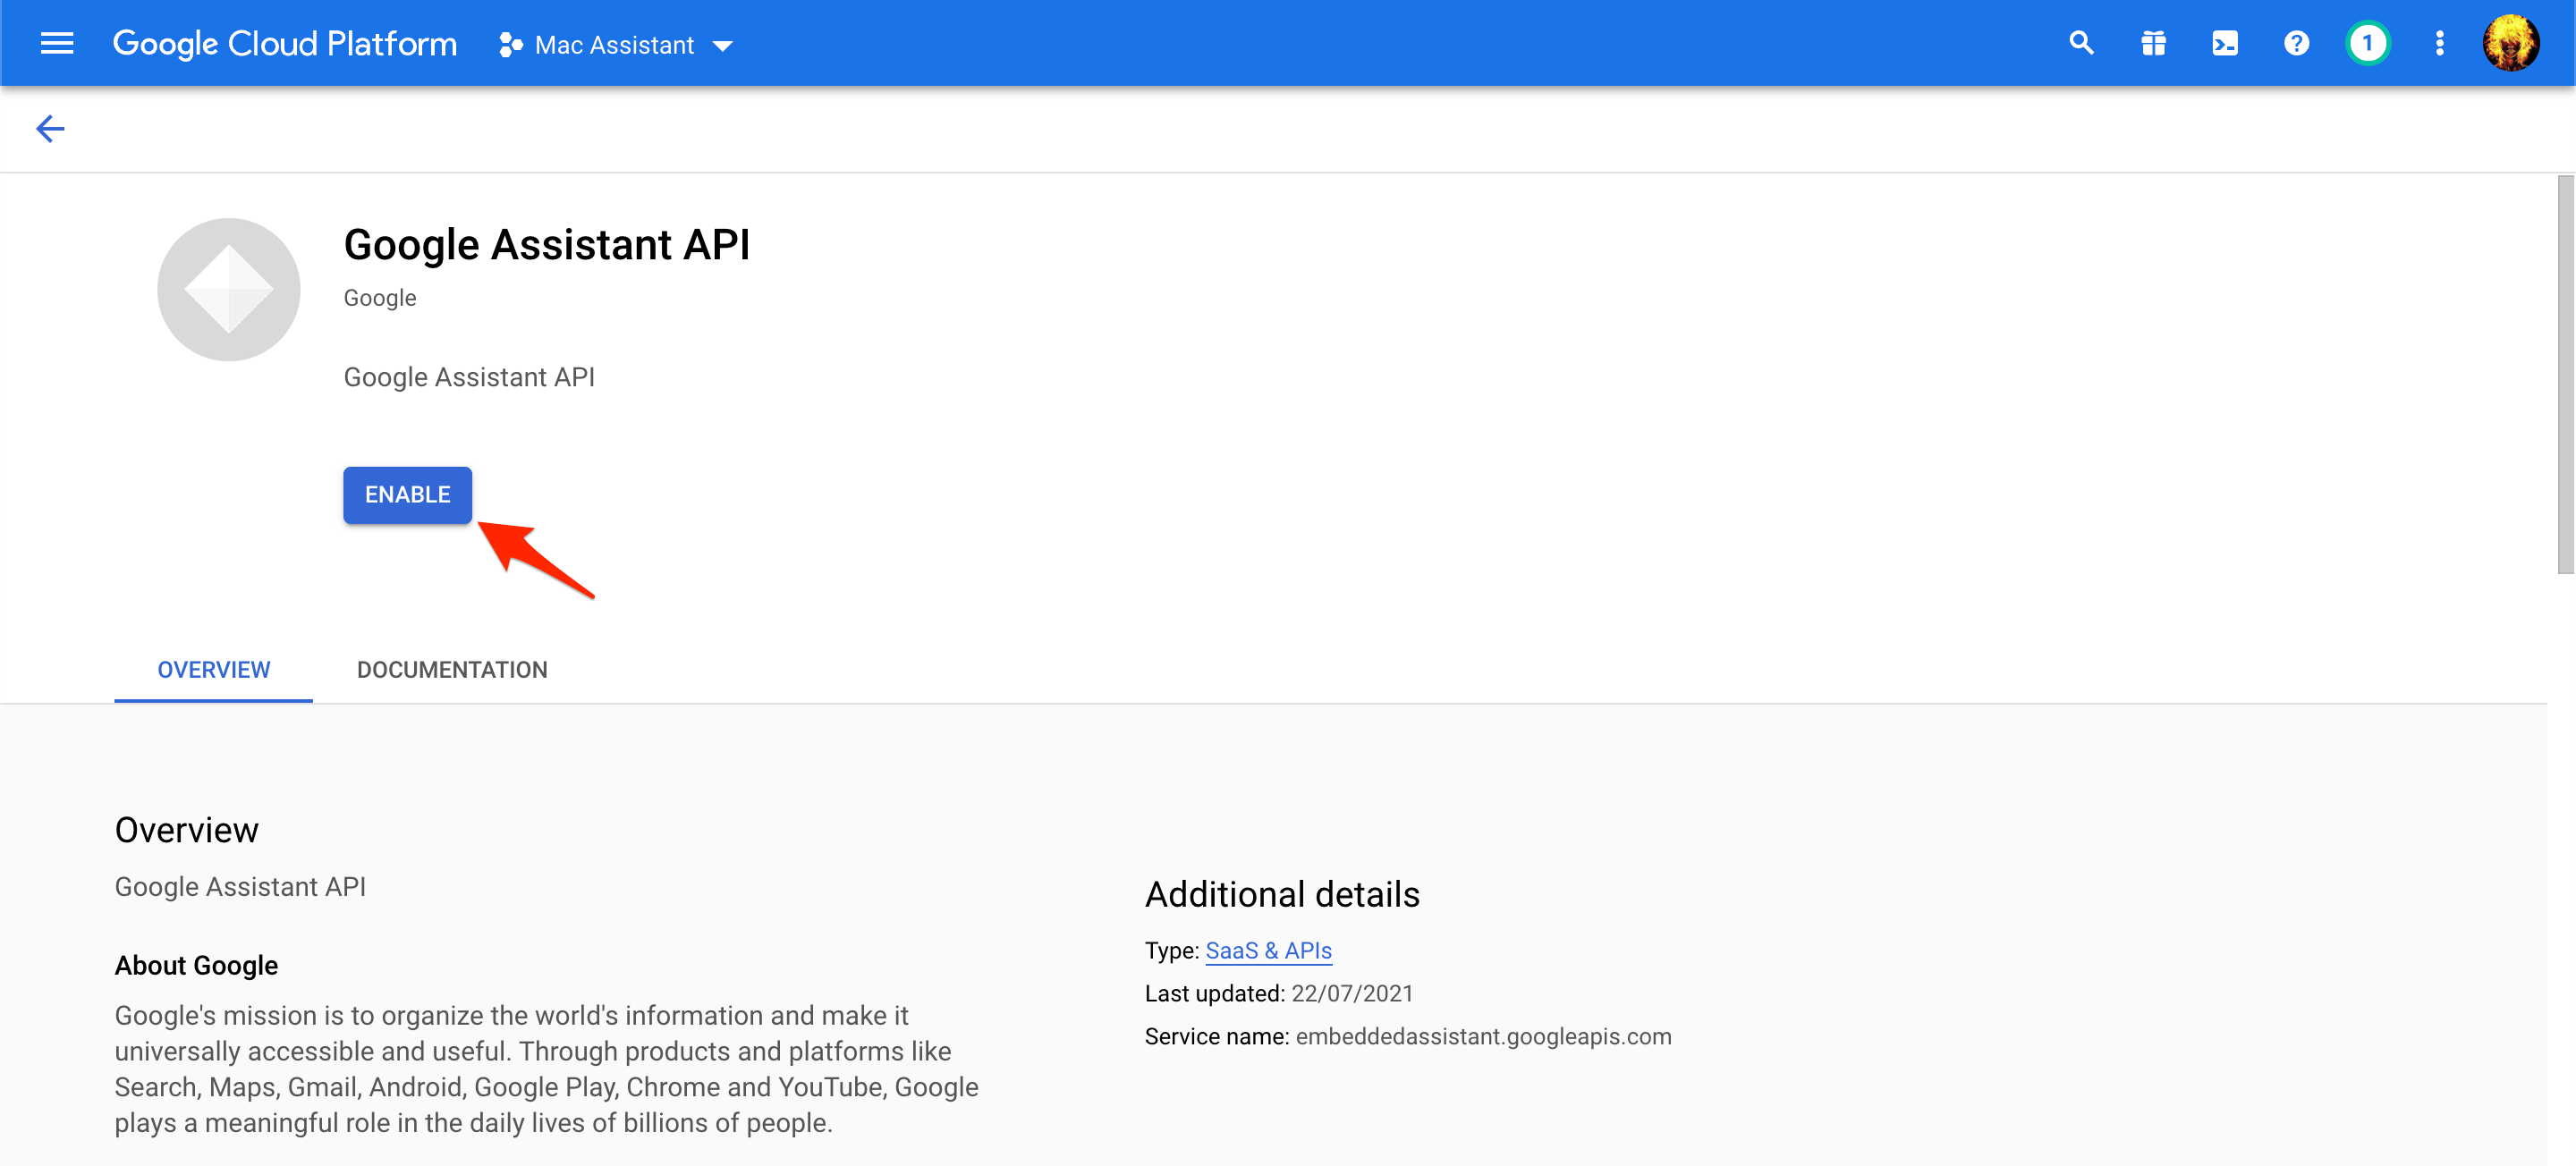
- API Library page will open where you need to search for ‘Google Assistant’ and click on ‘Google Assistant API.’

- Click on Enable.

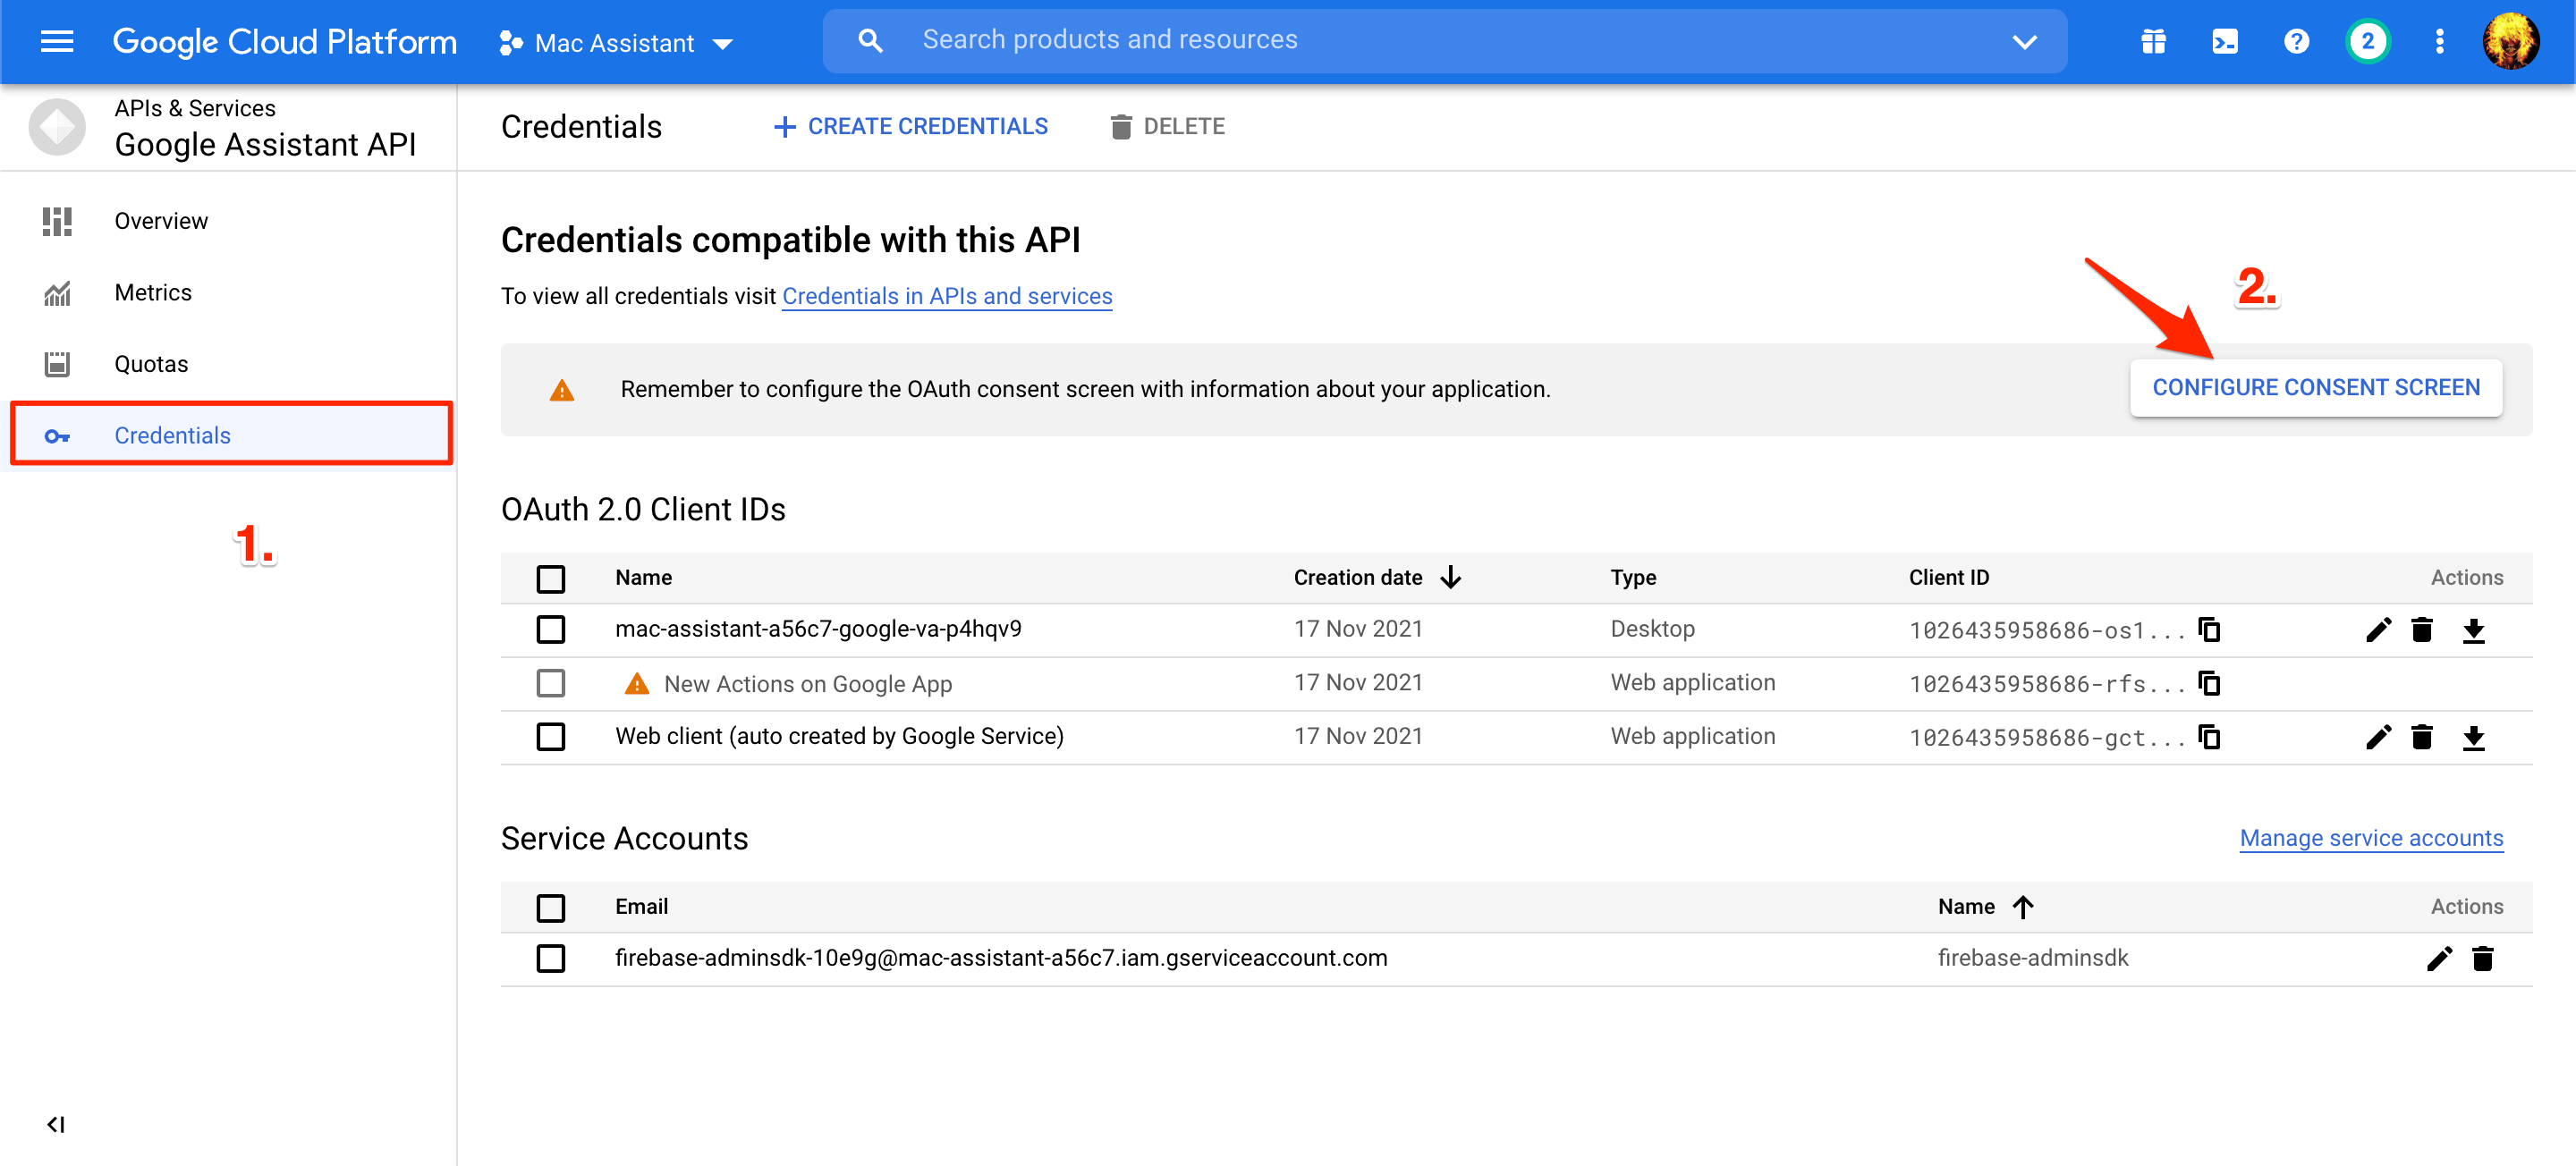
- From the left side, select Credentials, and then select CONFIGURE CREDENTIALS SCREEN.

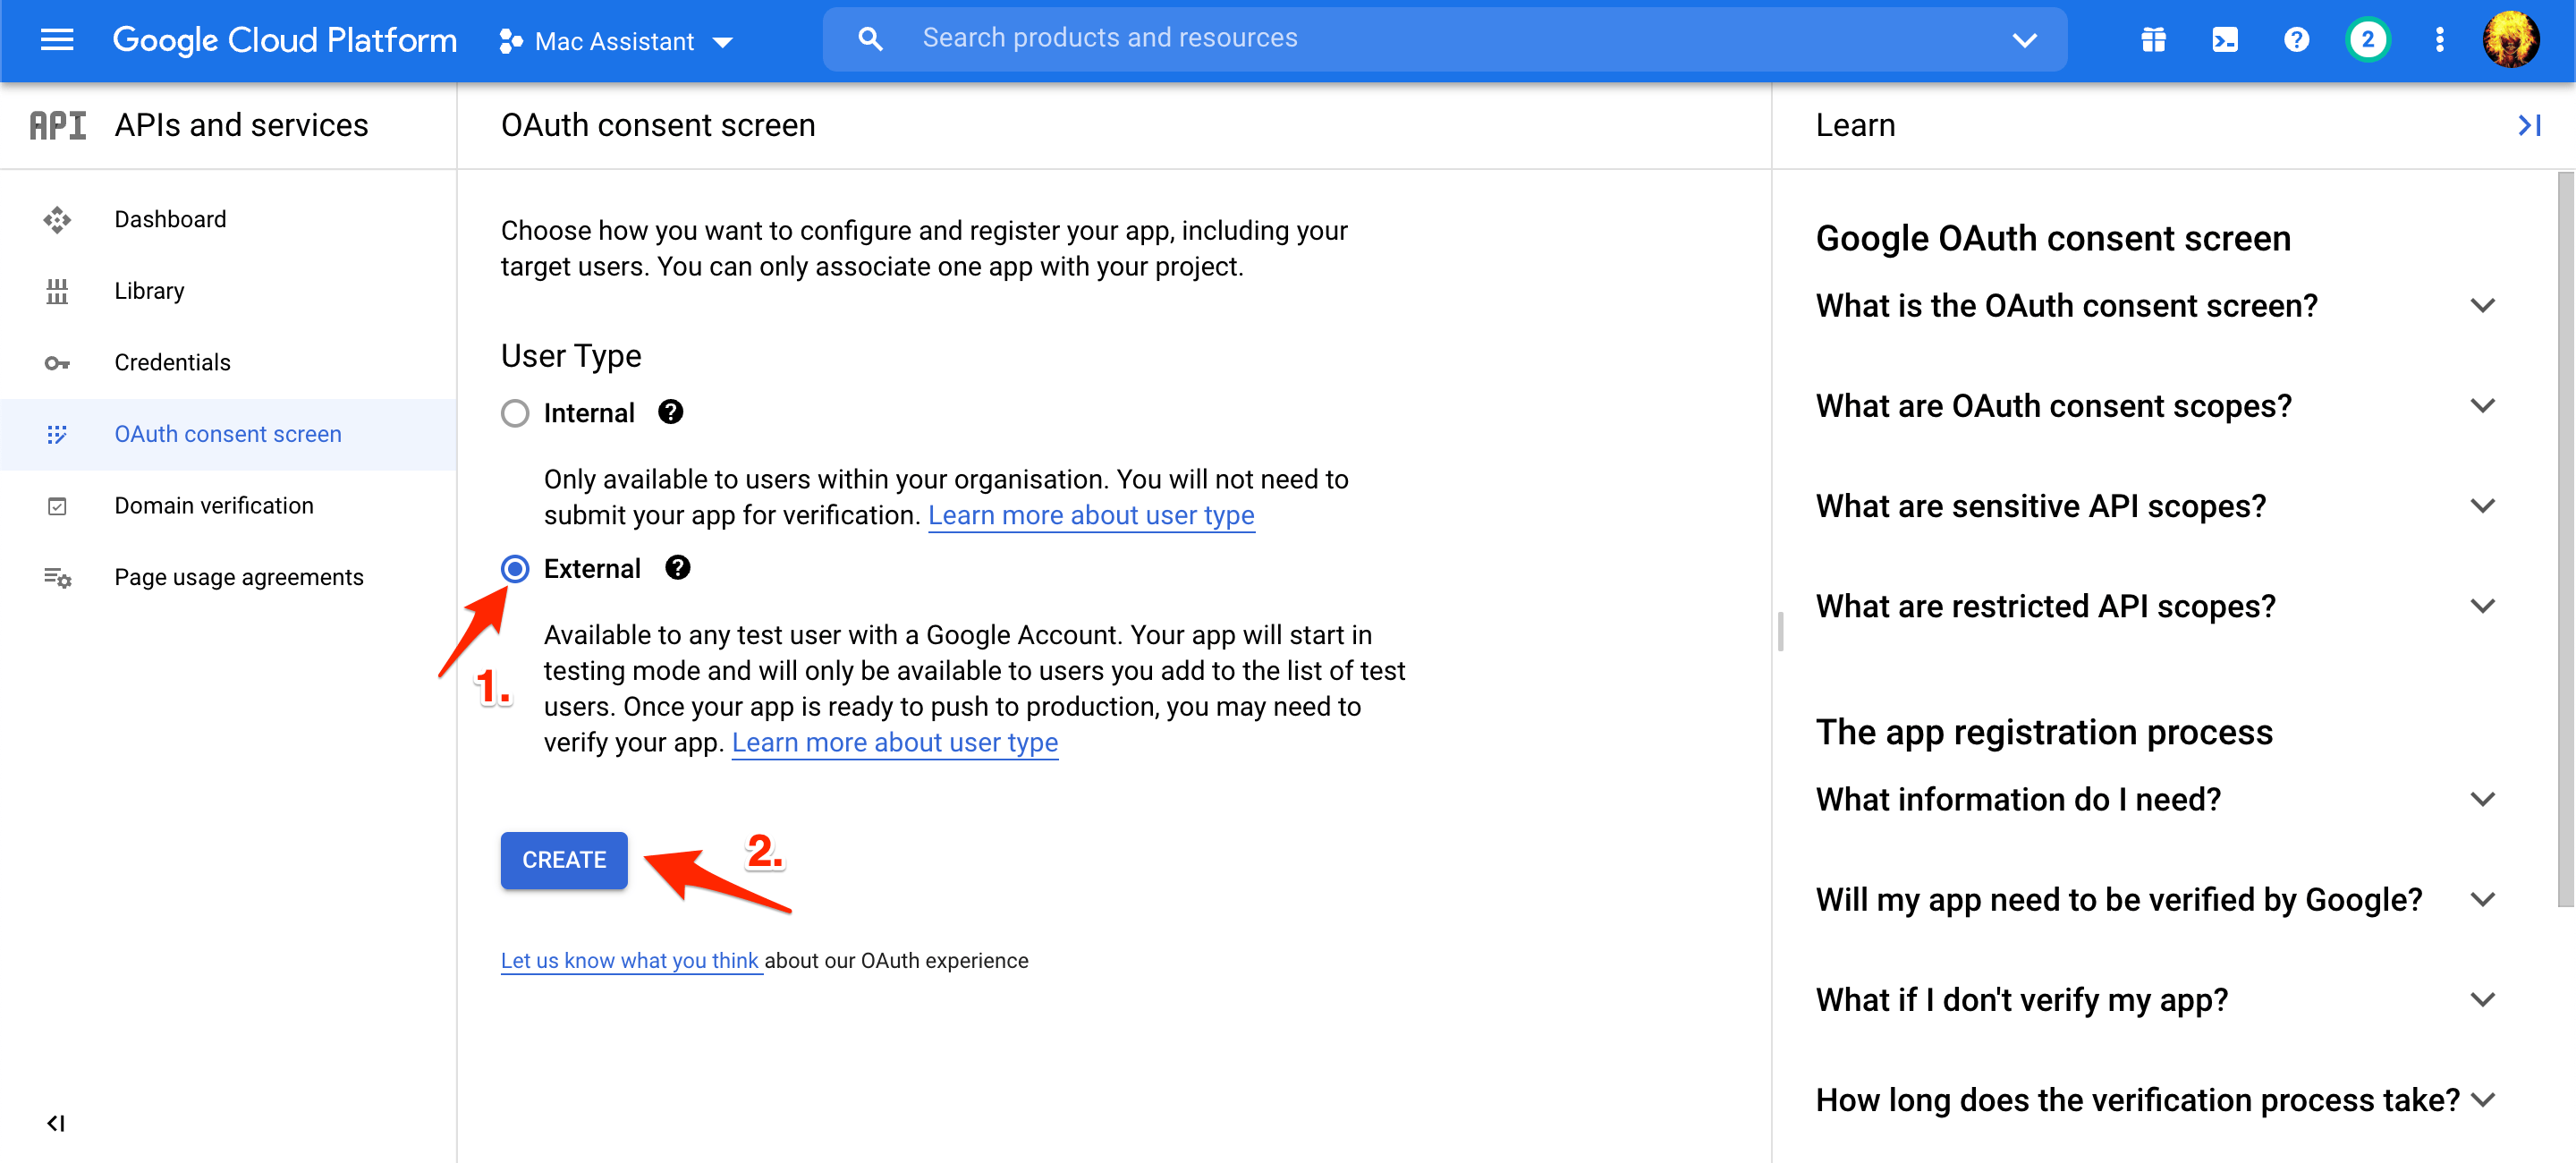
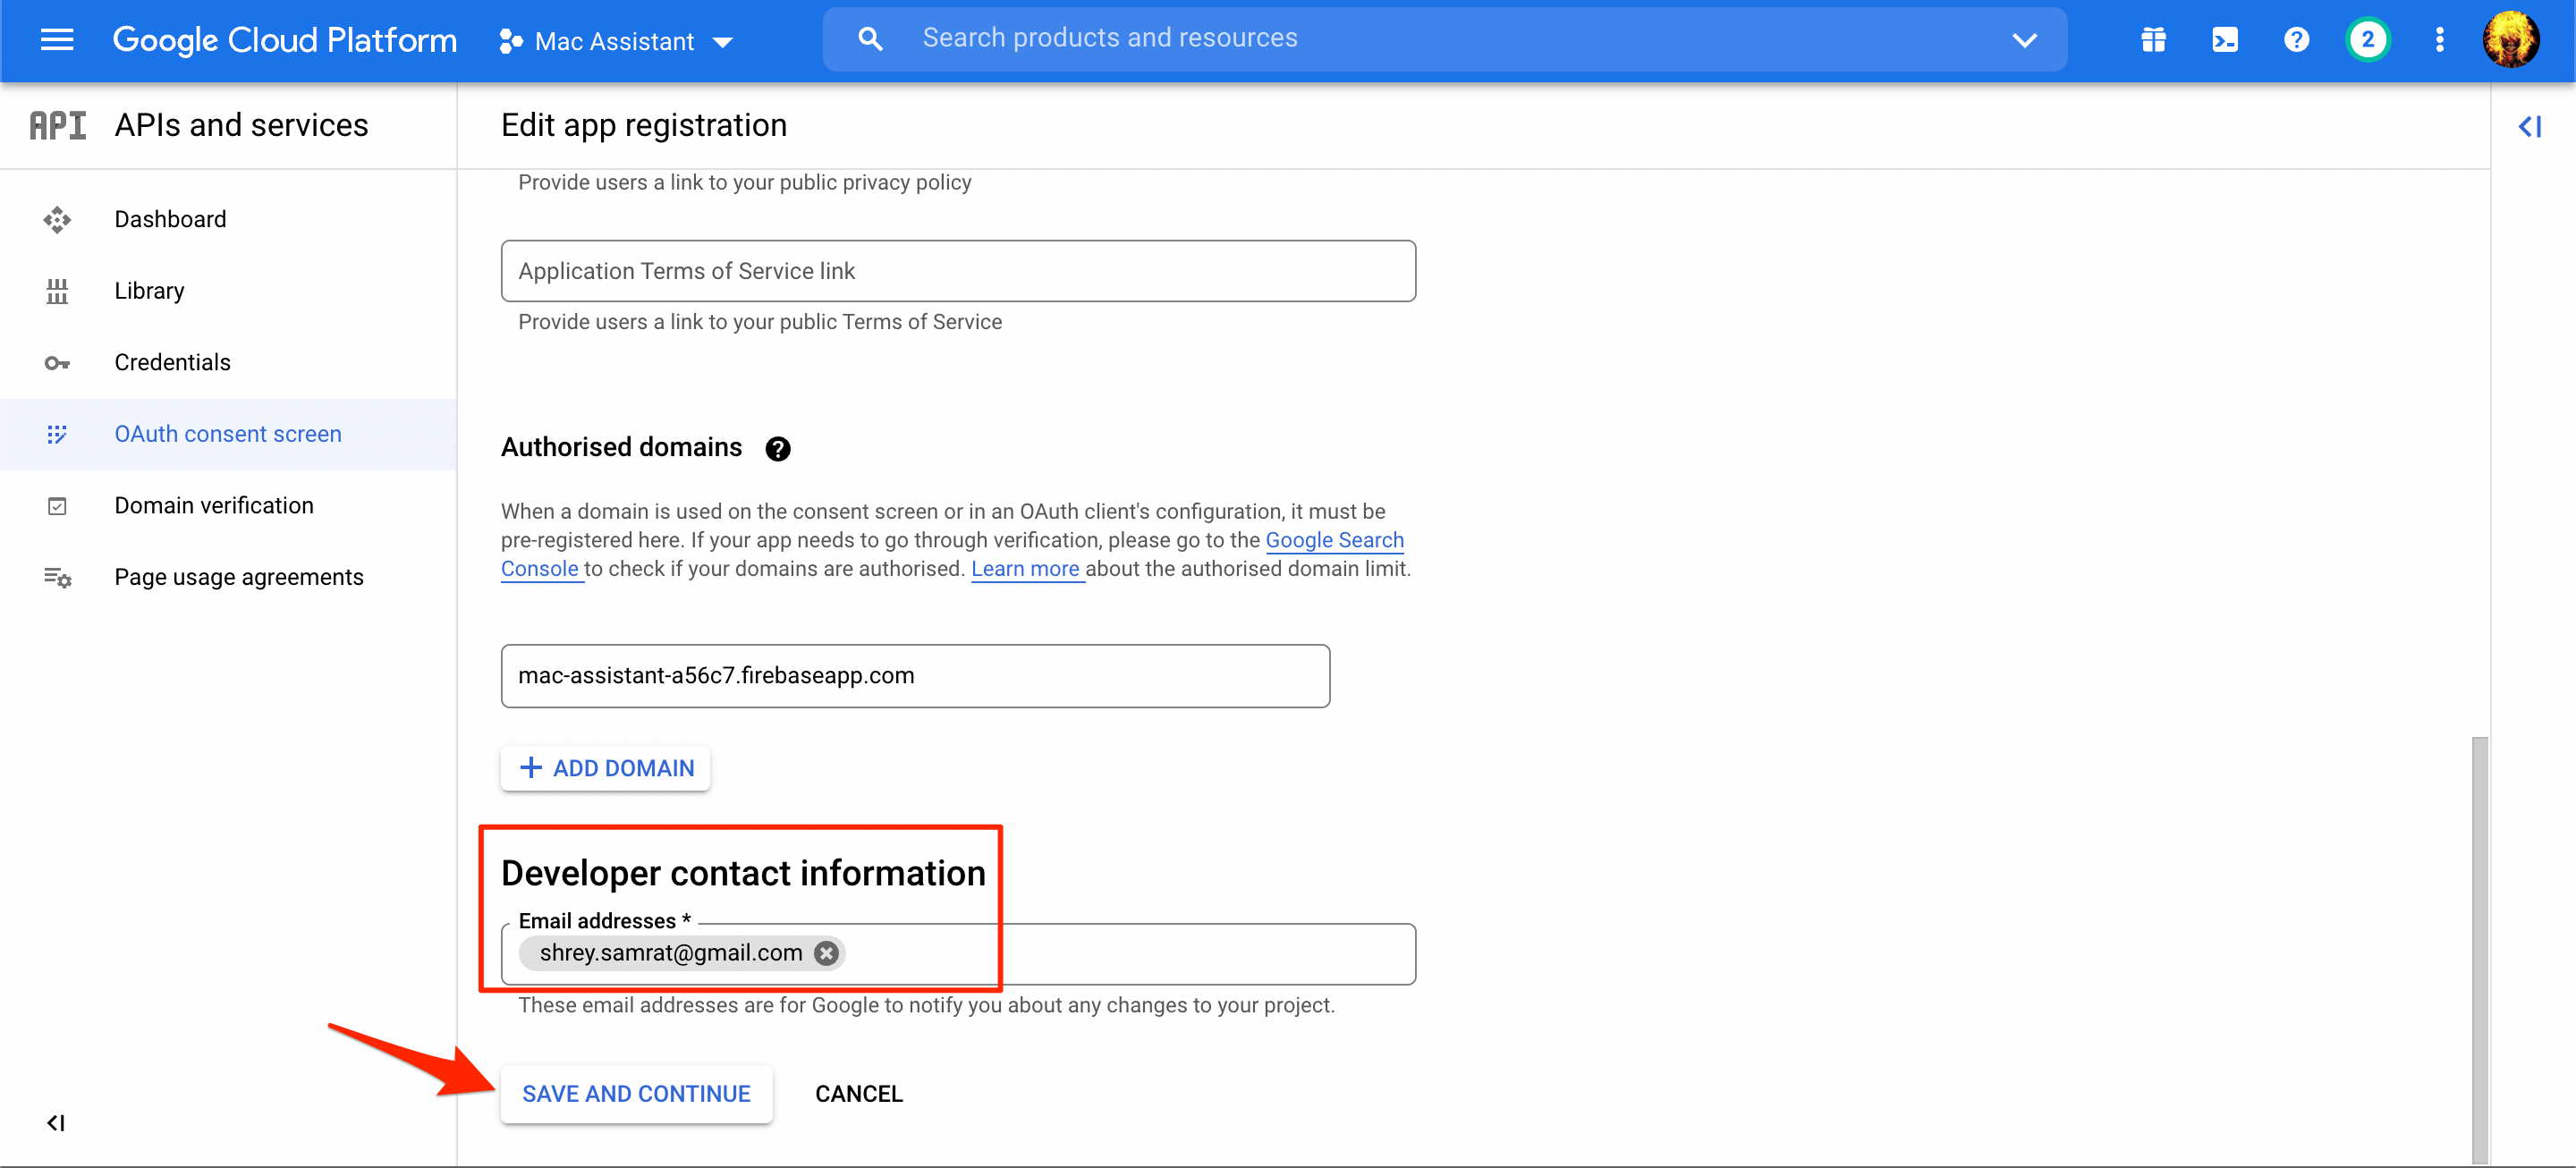
- Under the User Type option, select External and hit the Create button.

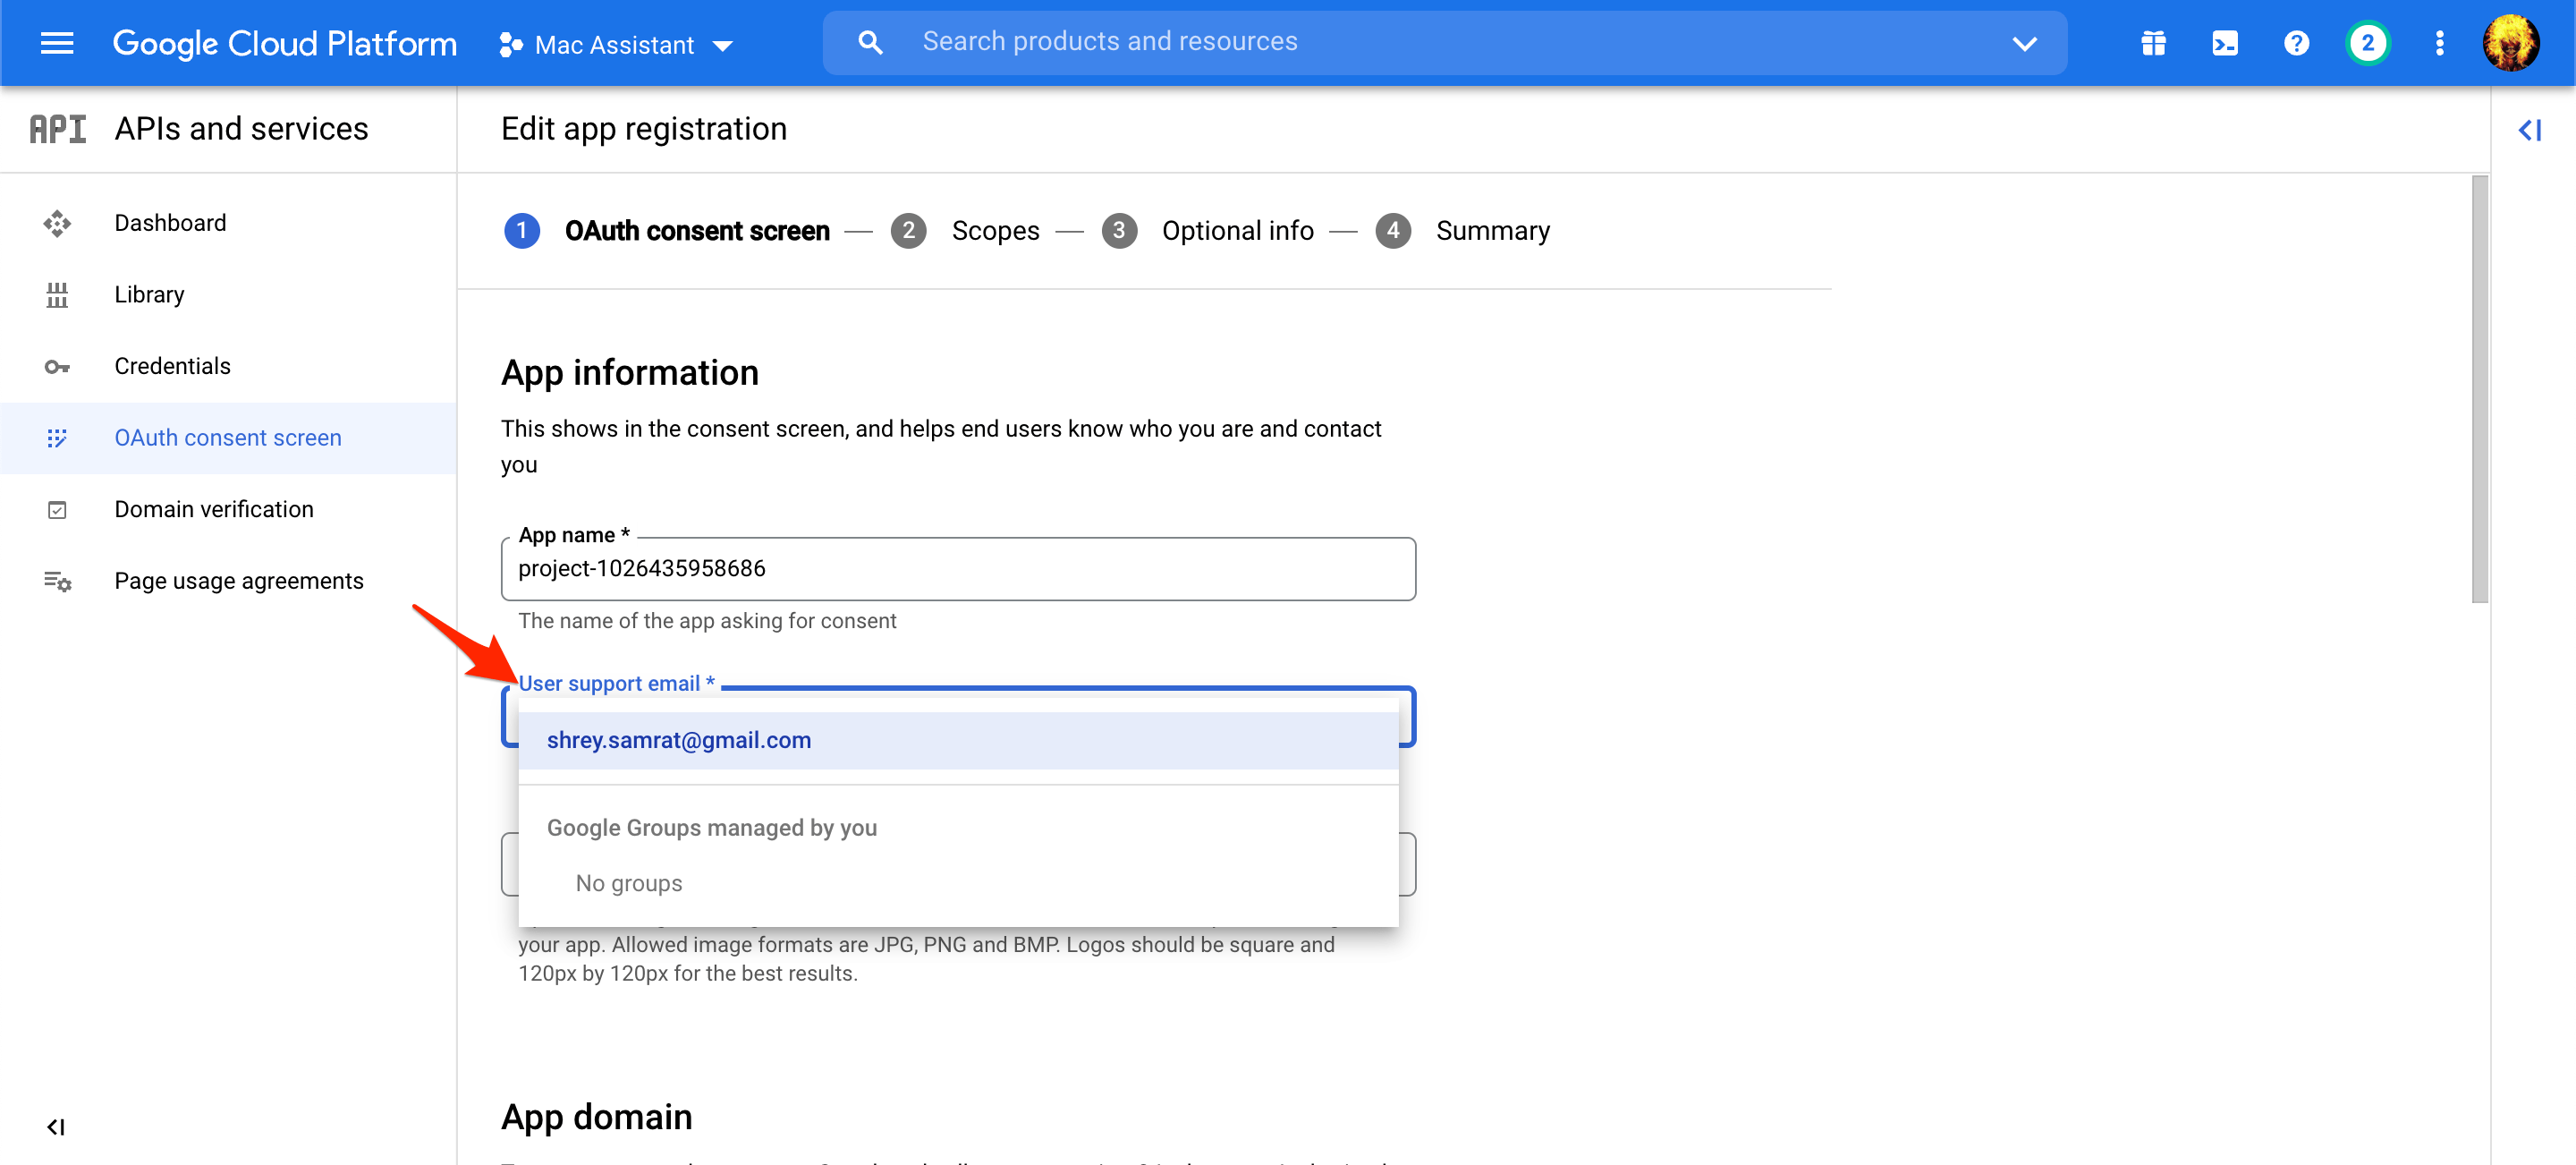
- Choose your listed email for the User Support email.

- You need to enter your email in Developer Contact Information and click on SAVE AND CONTINUE.

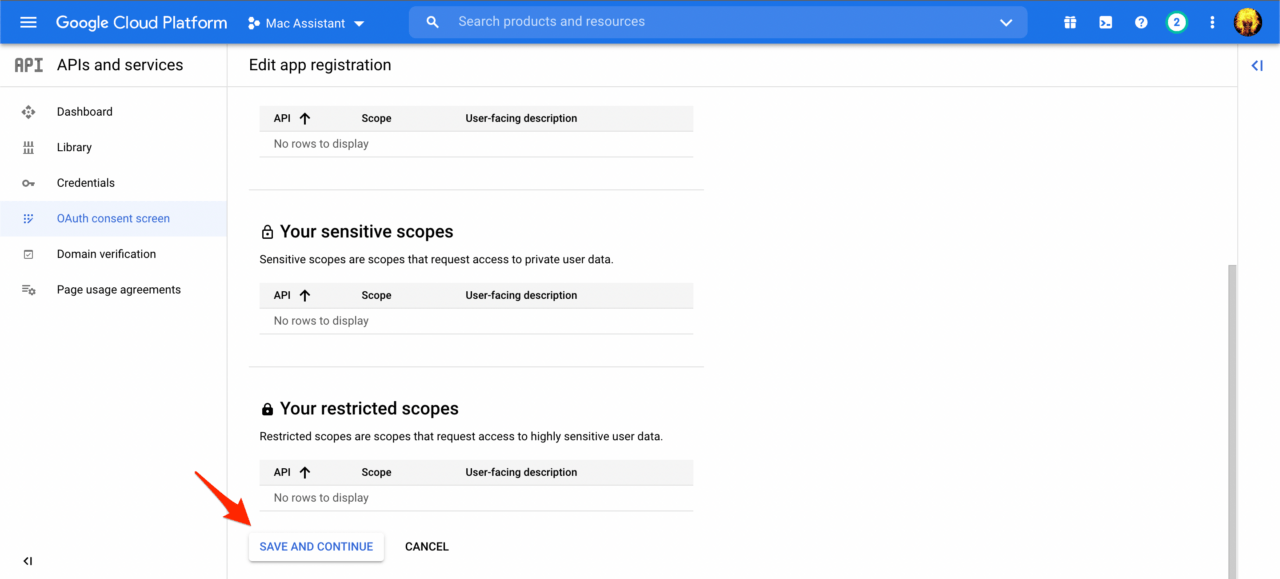
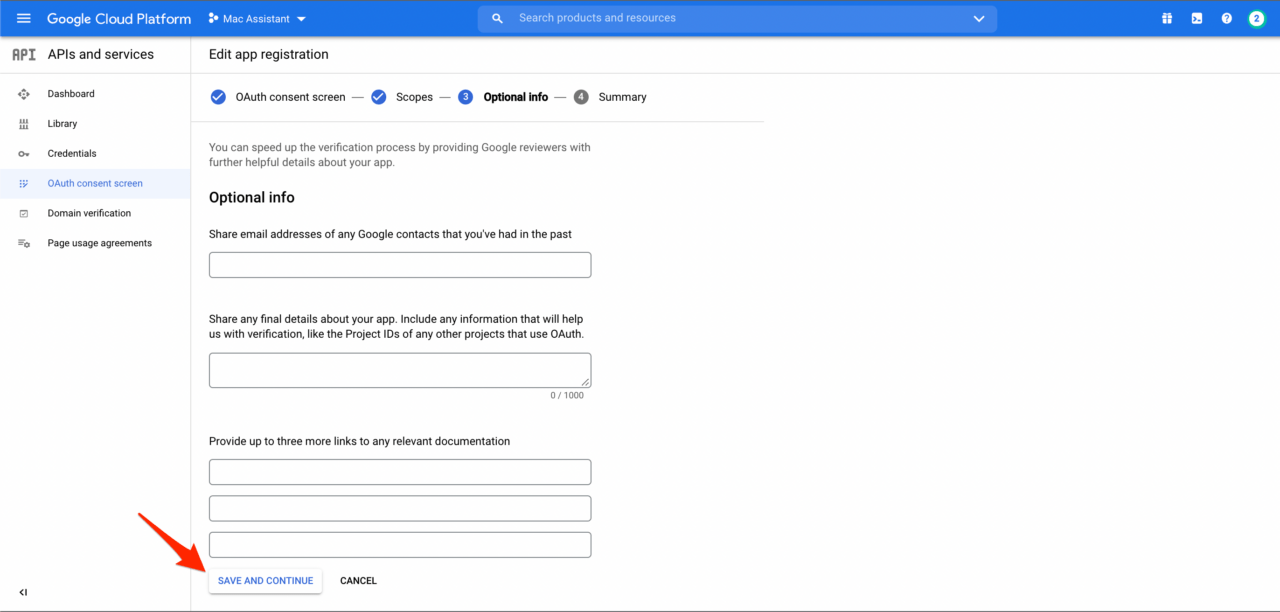
- Do not fill in any details on the following pages and simply scroll download and click SAVE AND CONTINUE.
- Google_Asistant_on_PC_19
- Google_Asistant_on_PC_20
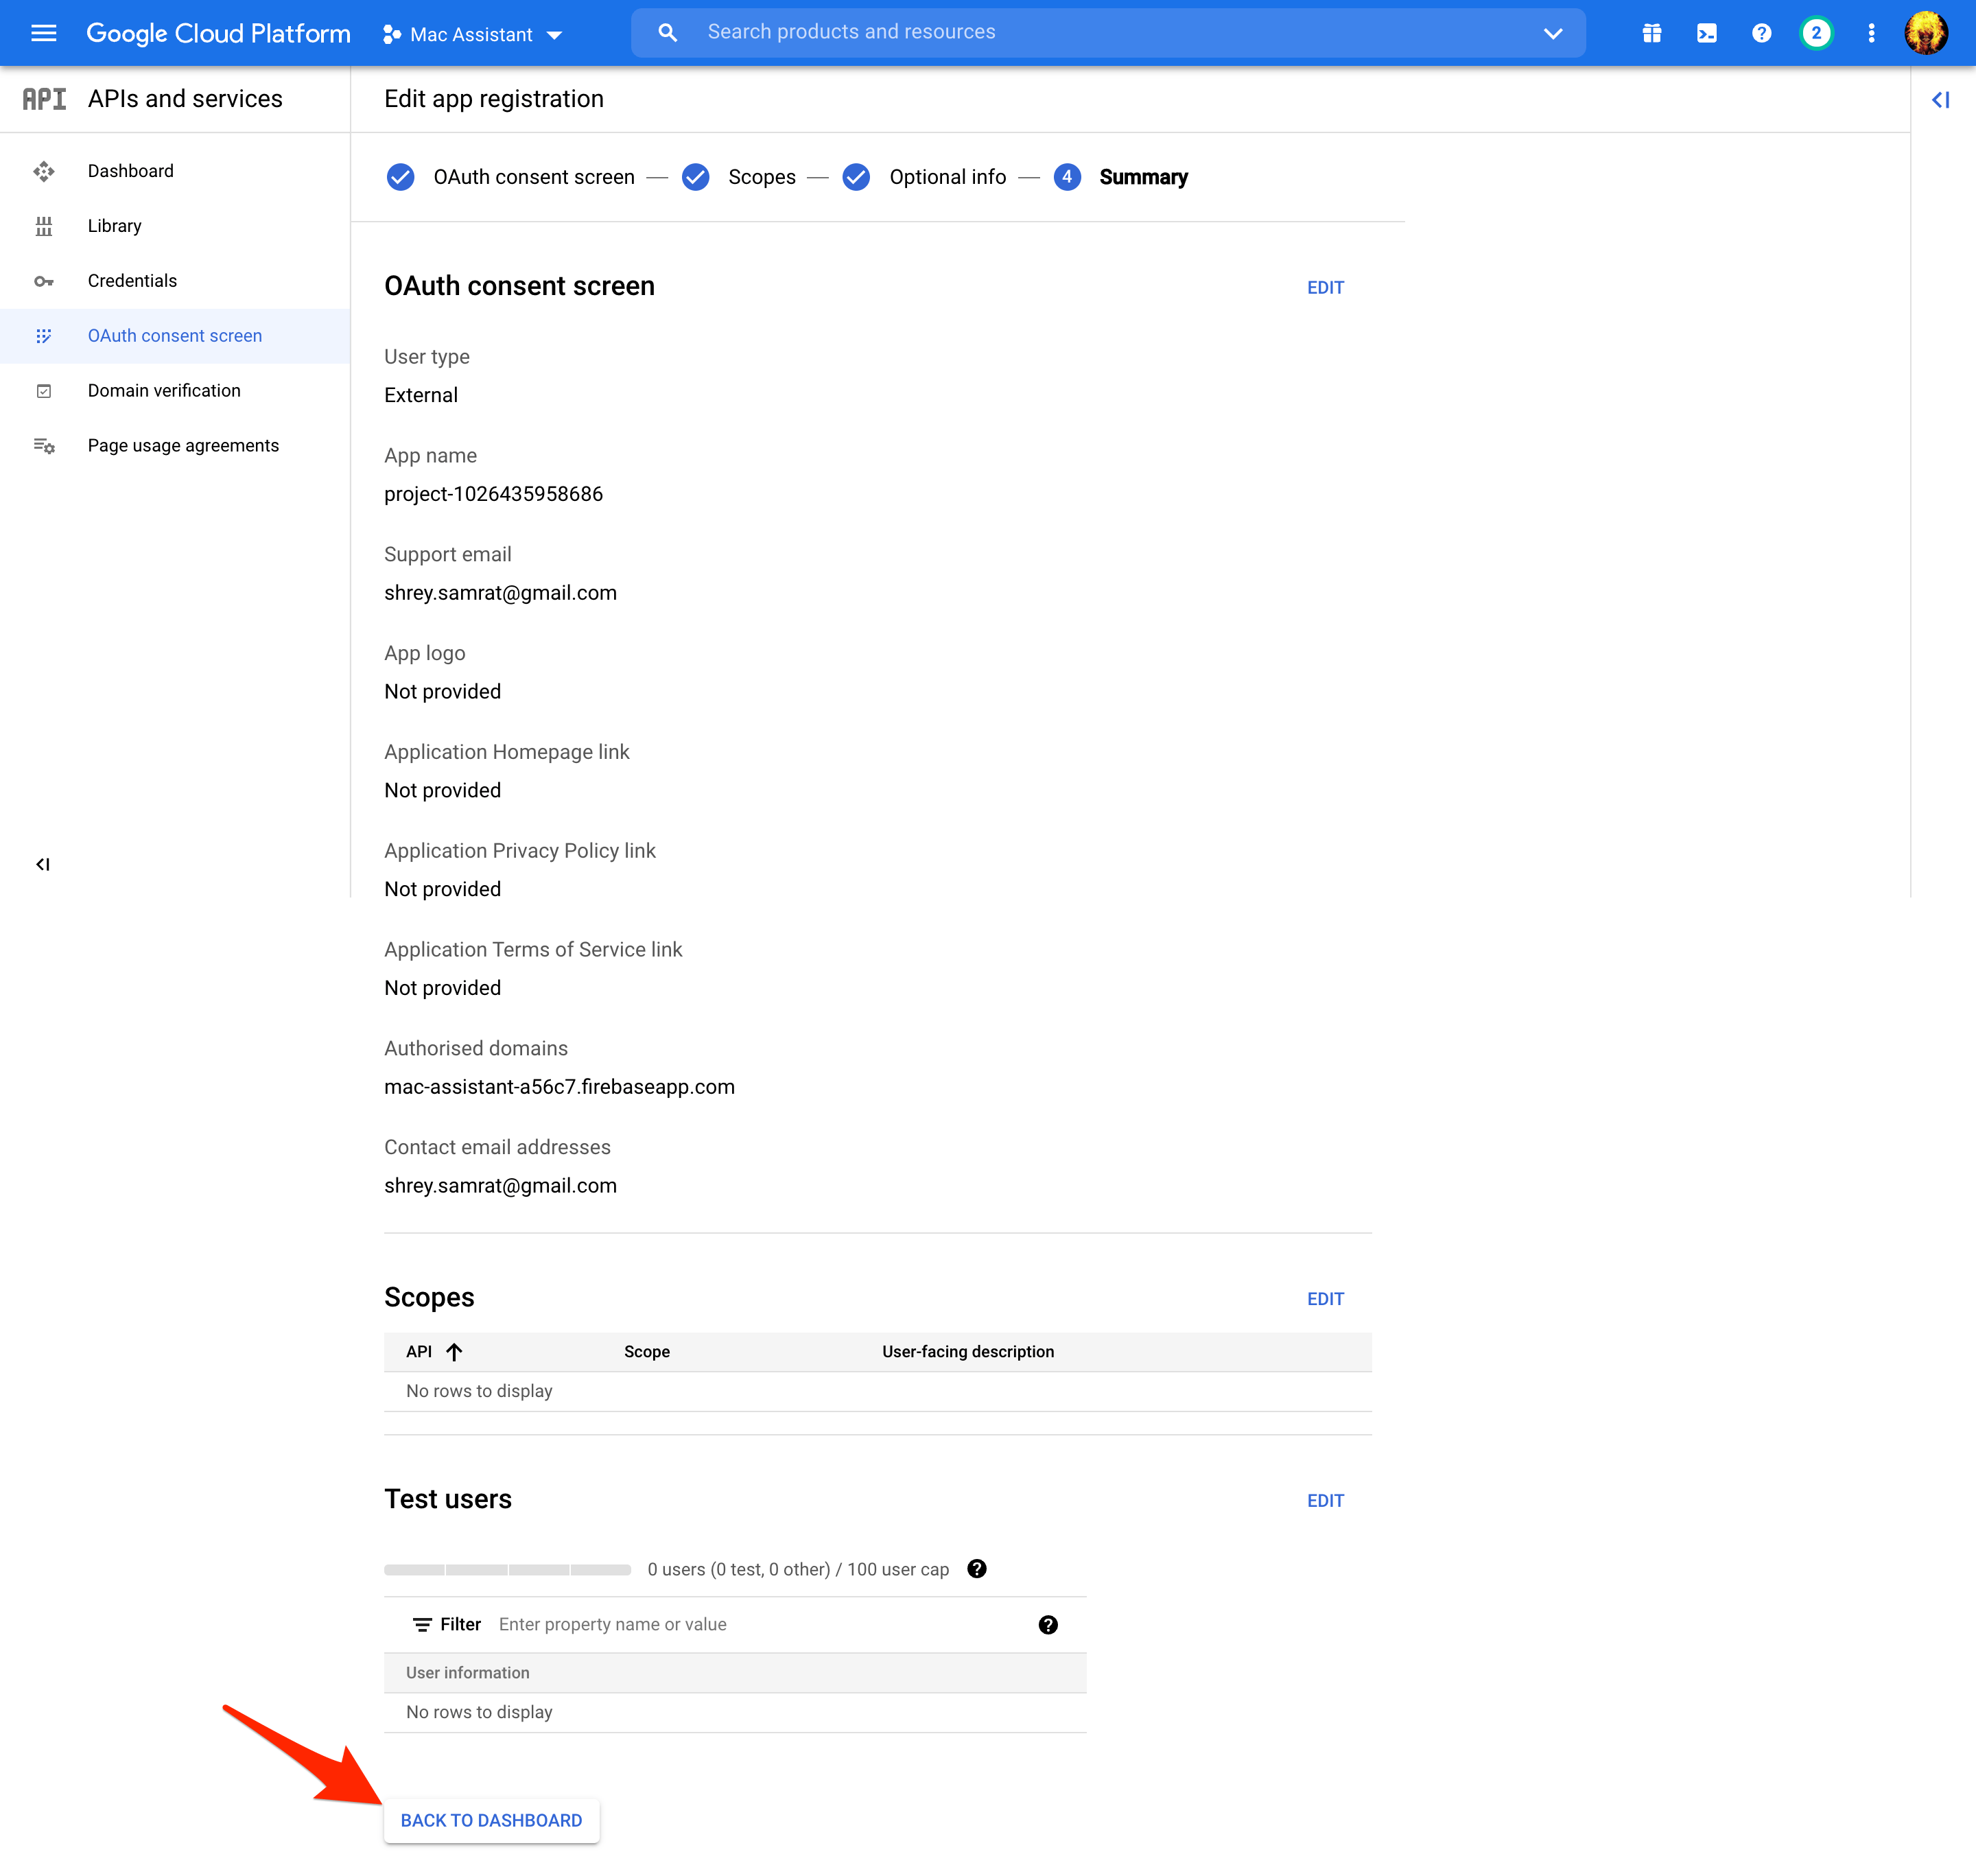
- On the last page click on BACK TO DASHBOARD.

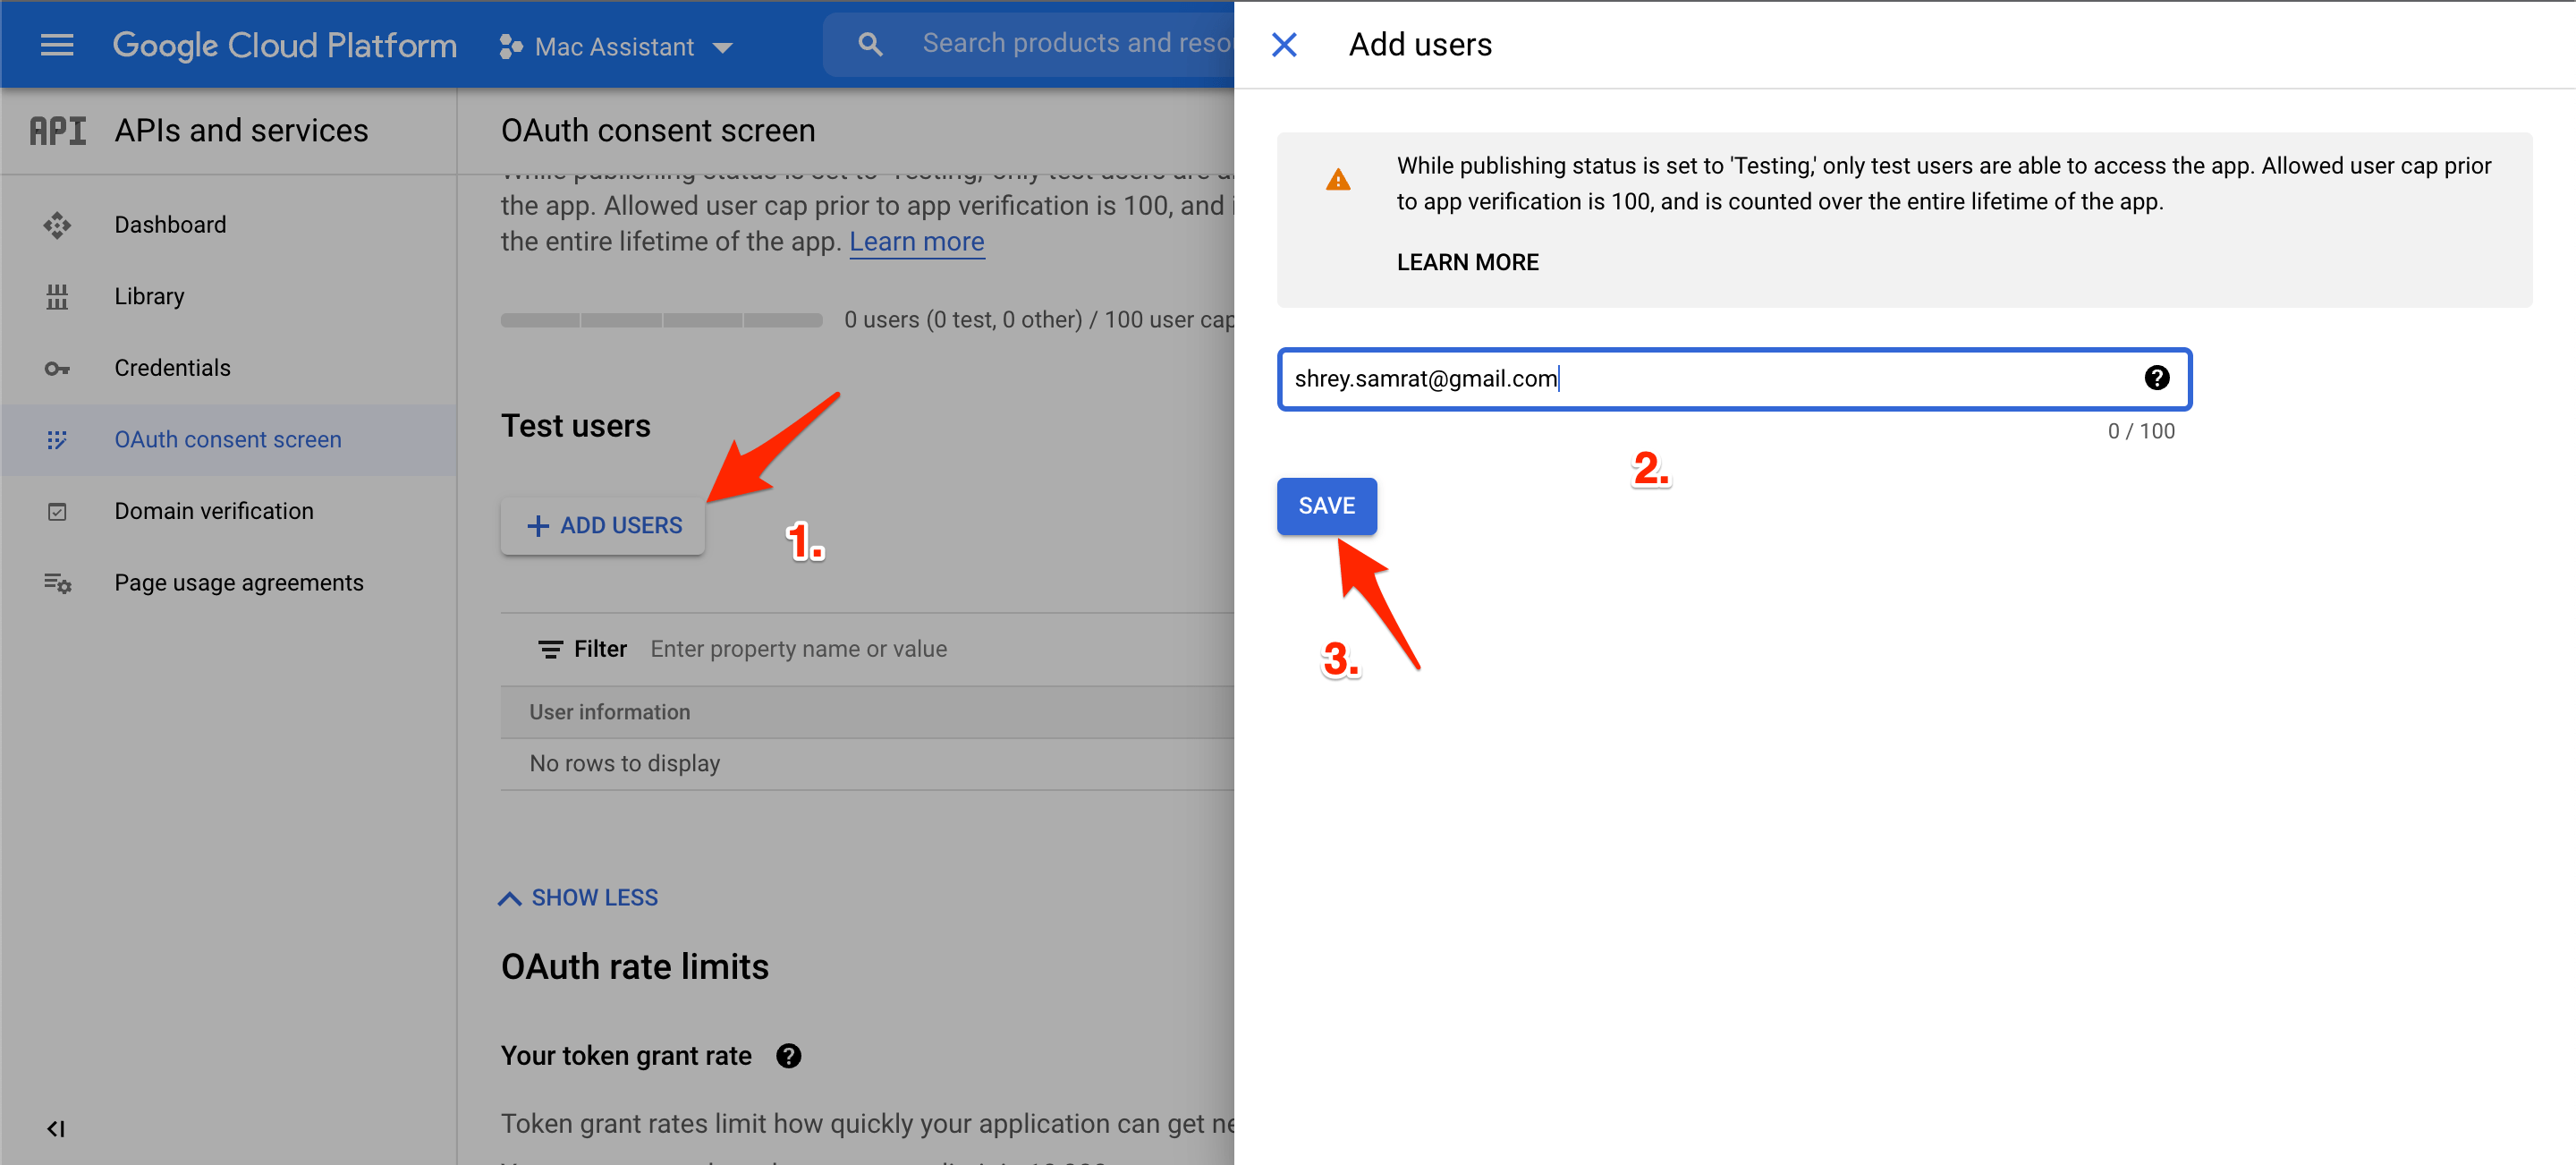
- Now, under Test Users, select Add Users and enter your email. Finally, hit the SAVE button.

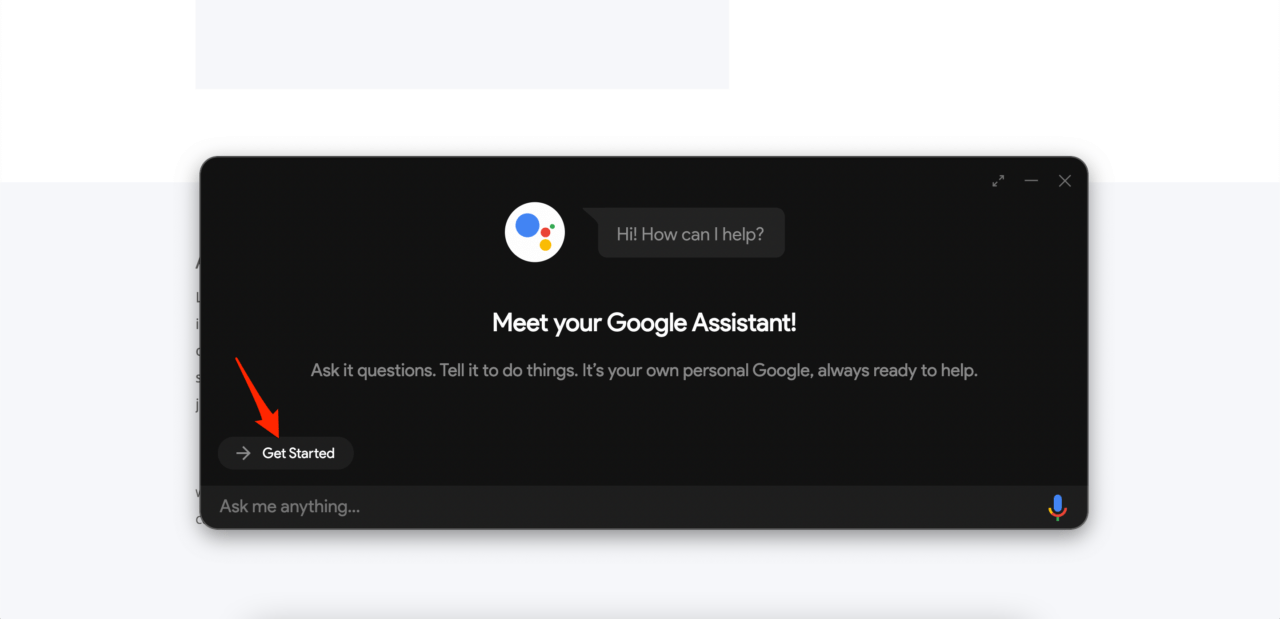
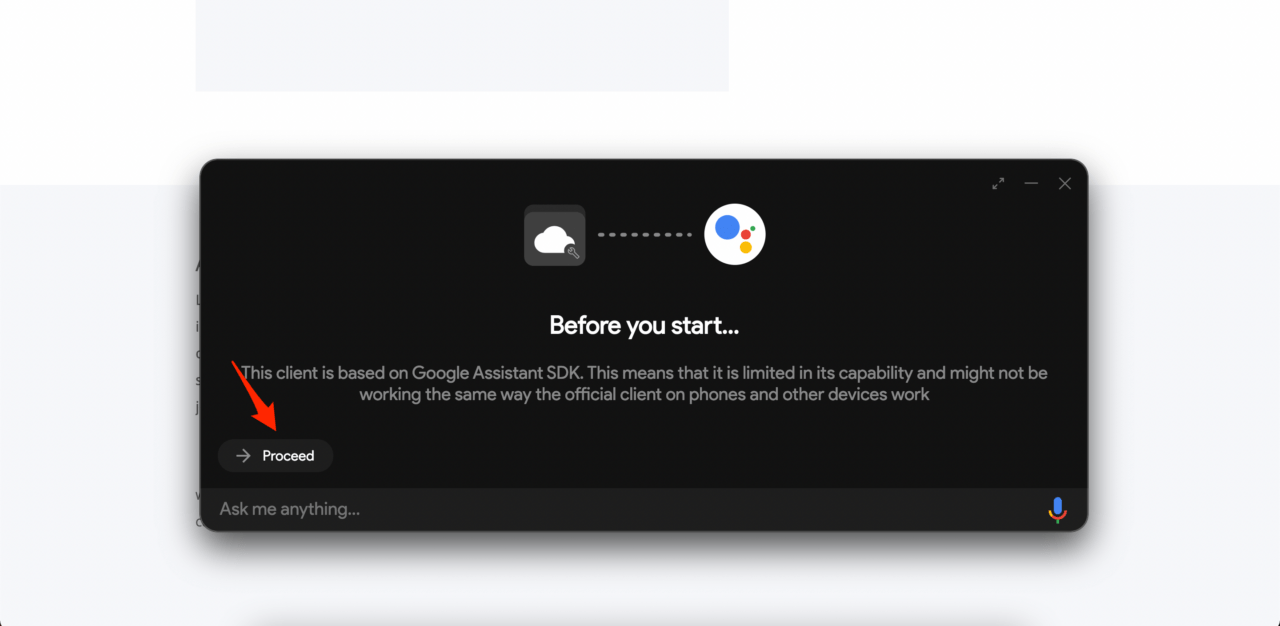
- Open the Google Assistant app on your MacBook system and click on Get Started and then Proceed buttons.
- Google_Asistant_on_PC_25
- Google_Asistant_on_PC_26
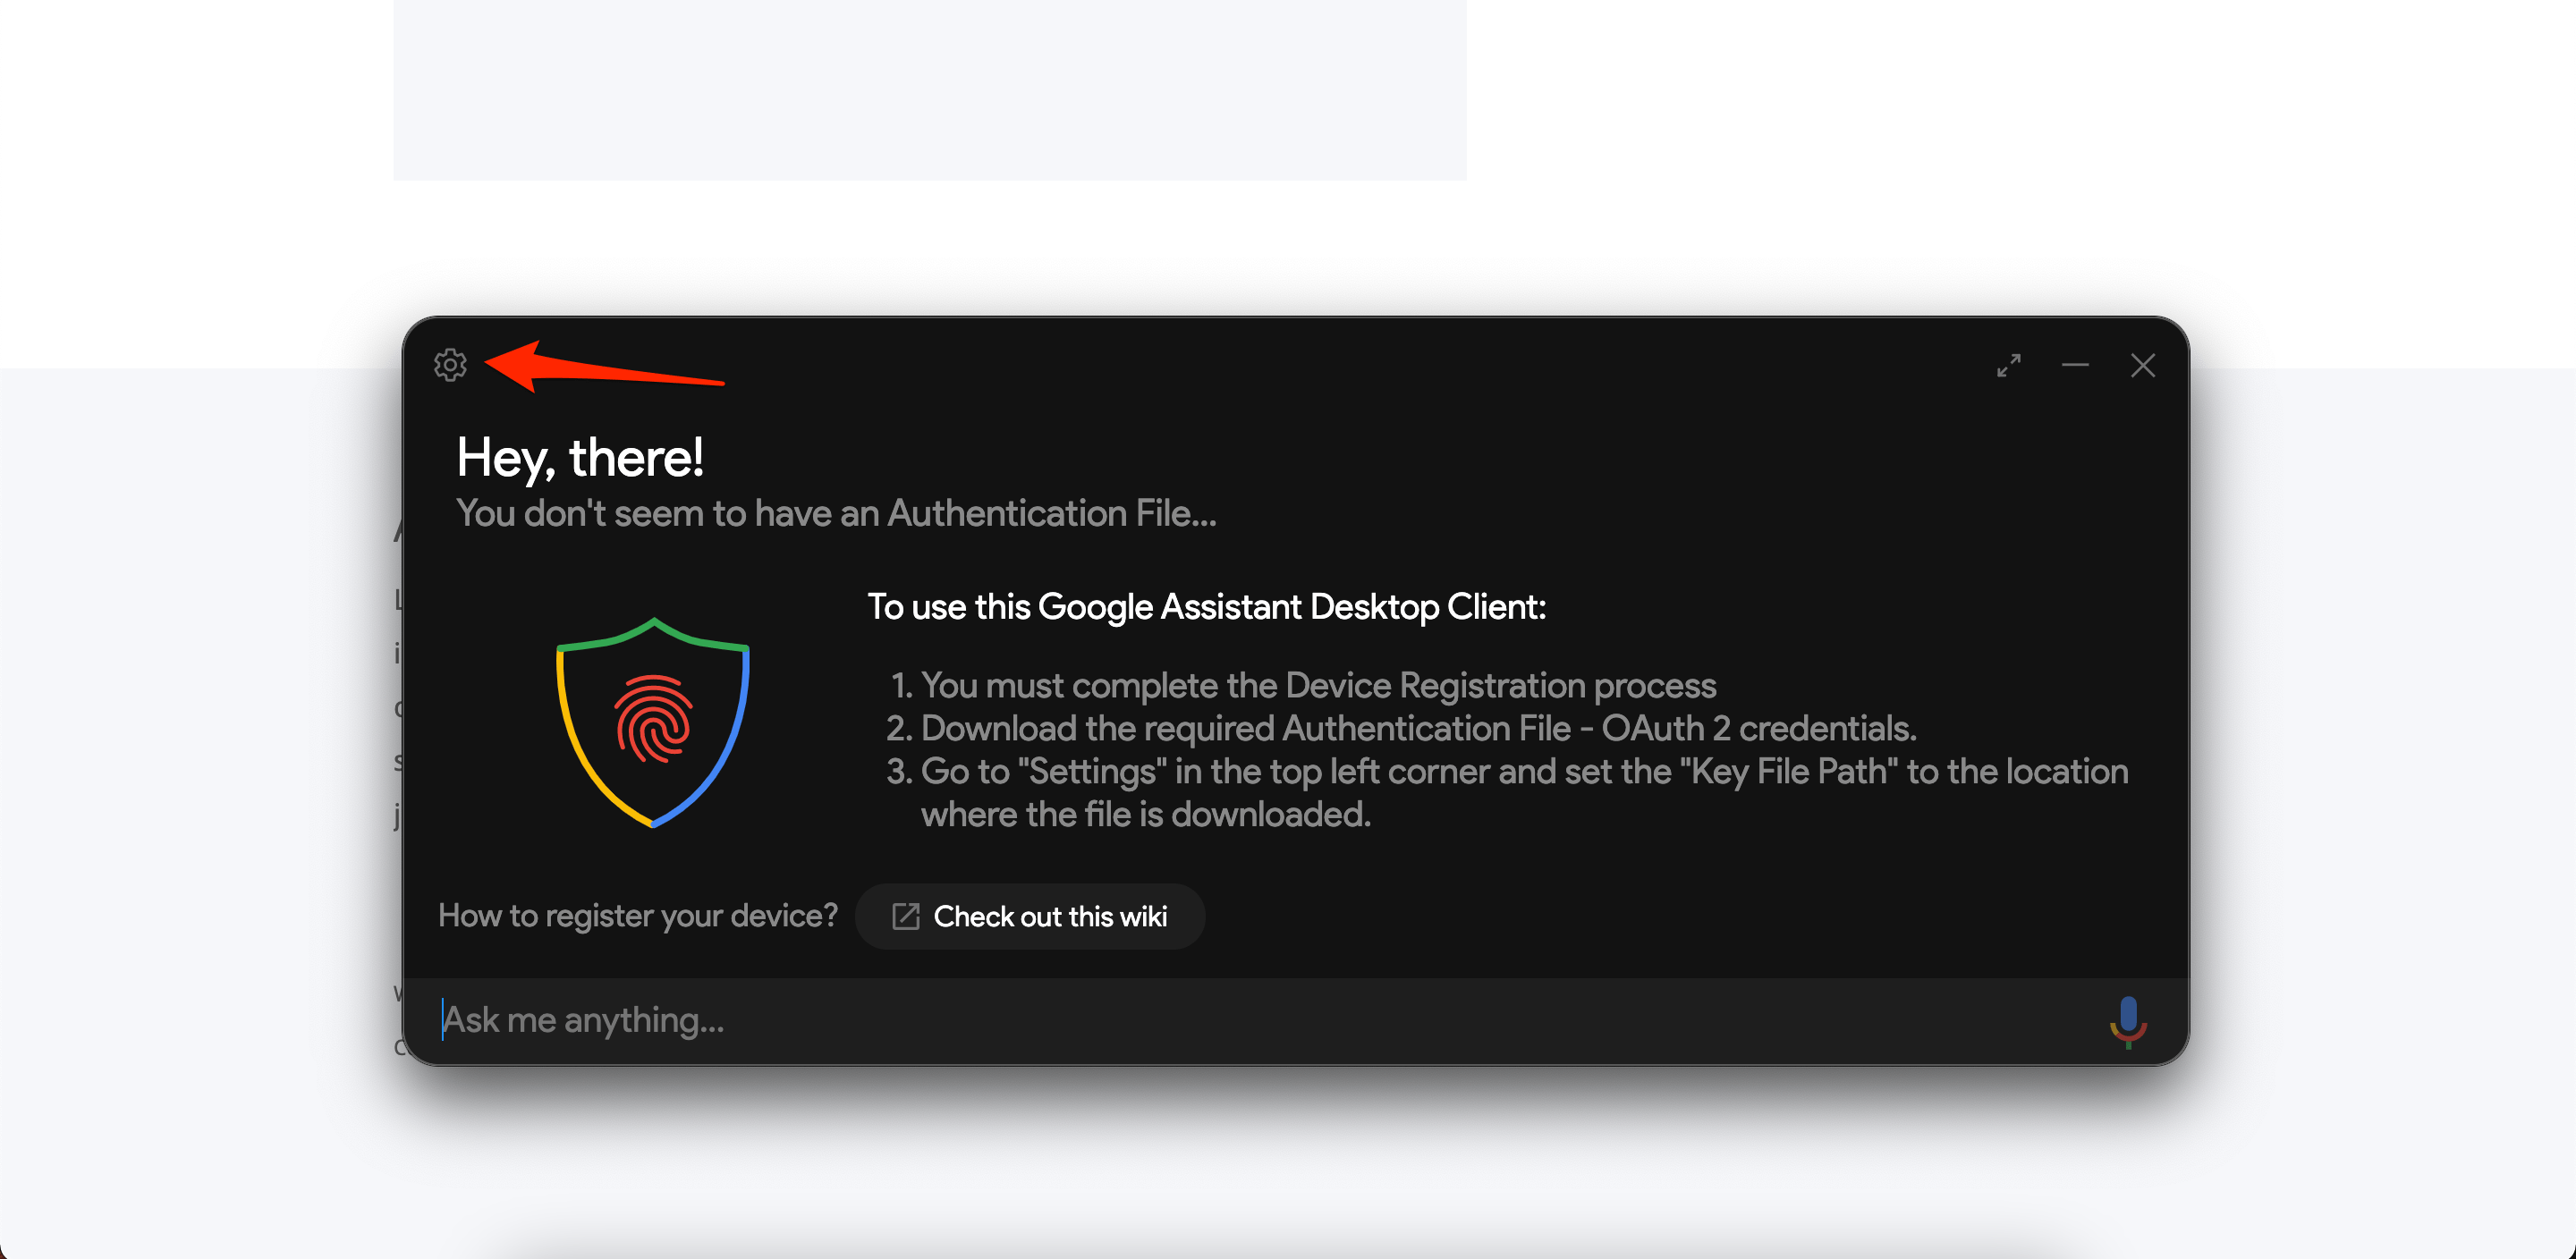
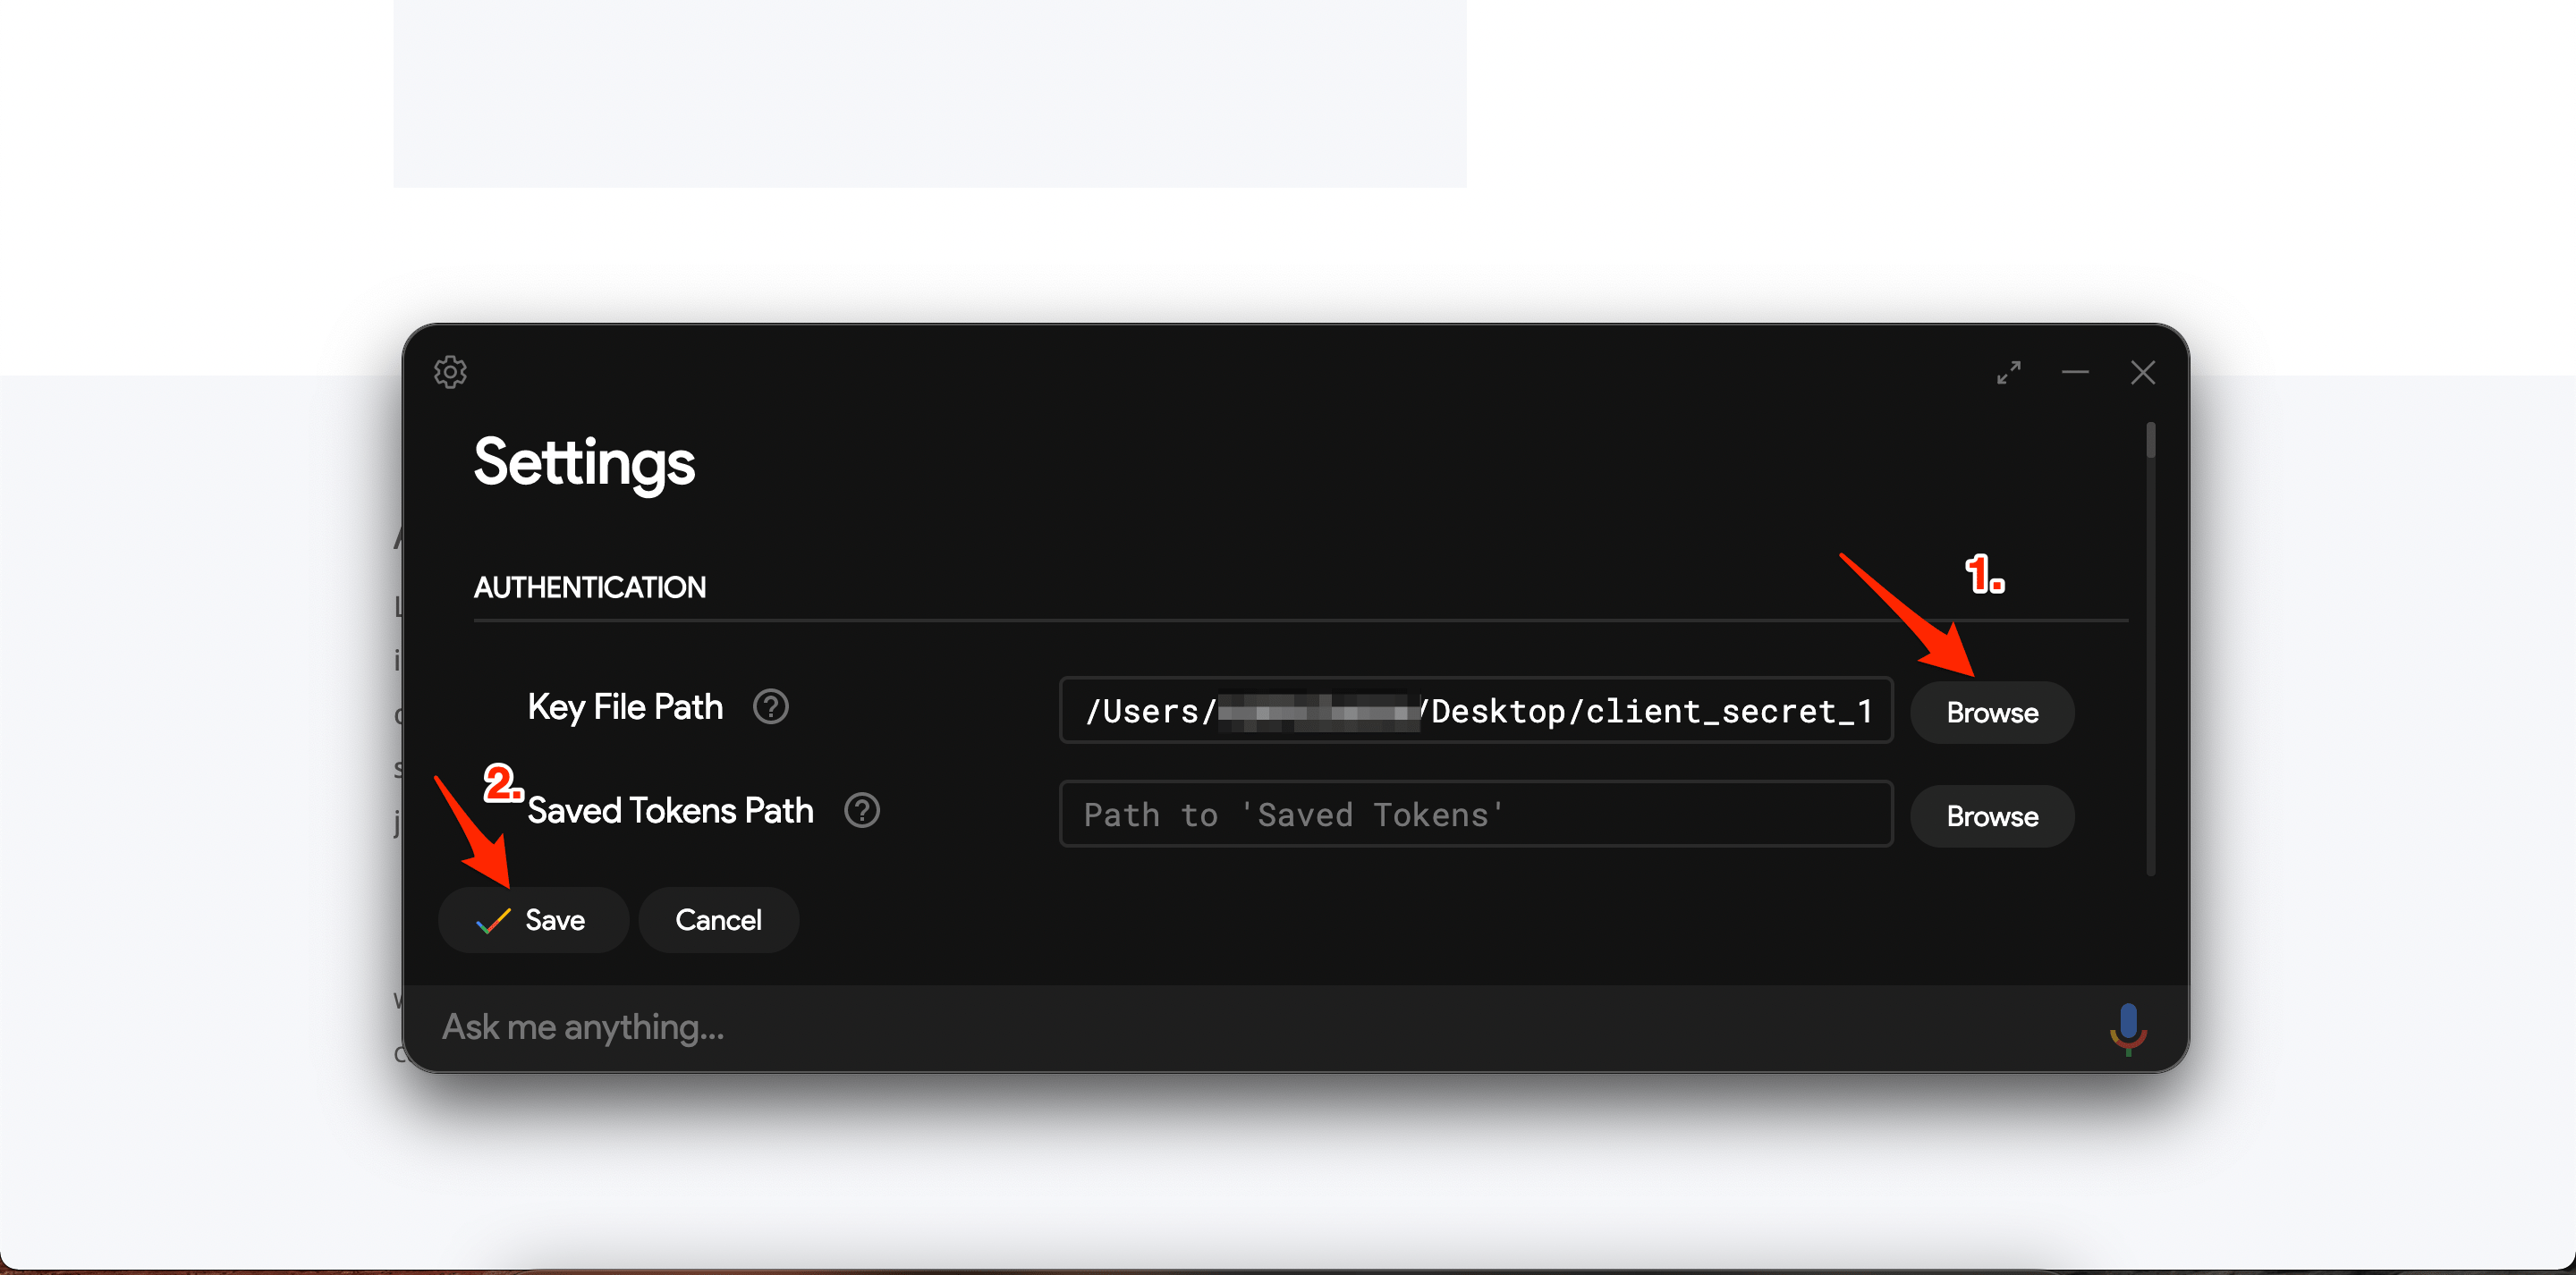
- Click on the Settings button on the top-left corner of the Google Assistant interface.

- Select the Browse button, next to the Key file path and choose the JSON file you have downloaded right at the beginning of the process.
- Hit the Save button and select Automatically set a path.

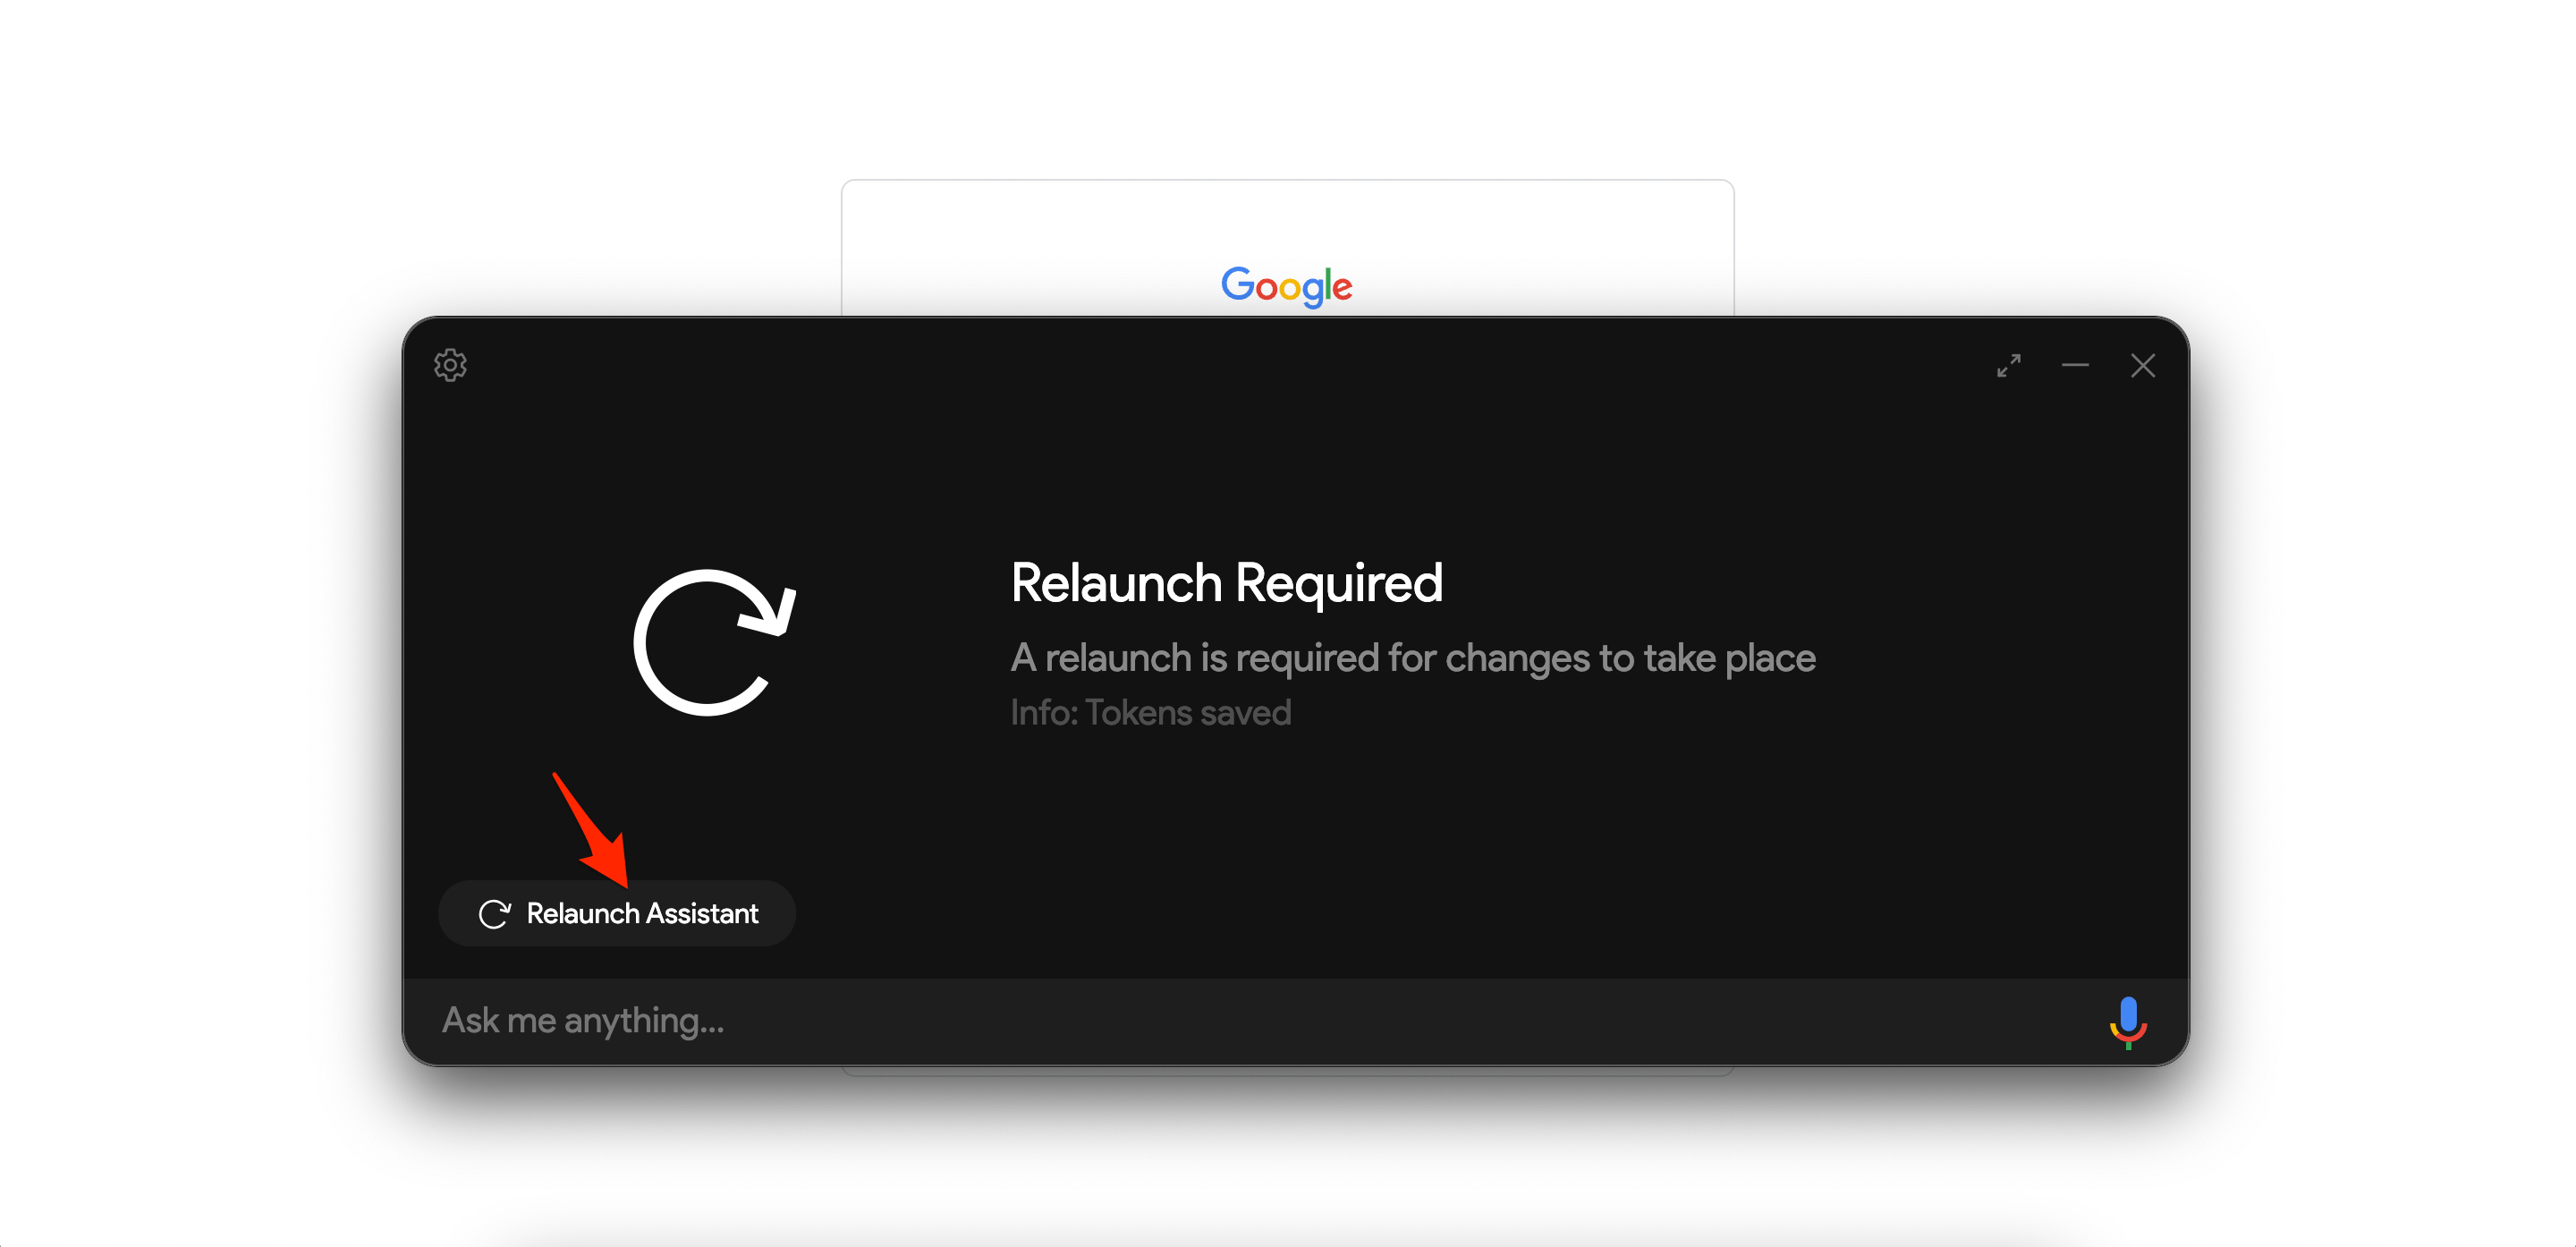
- Relaunch the assistant.

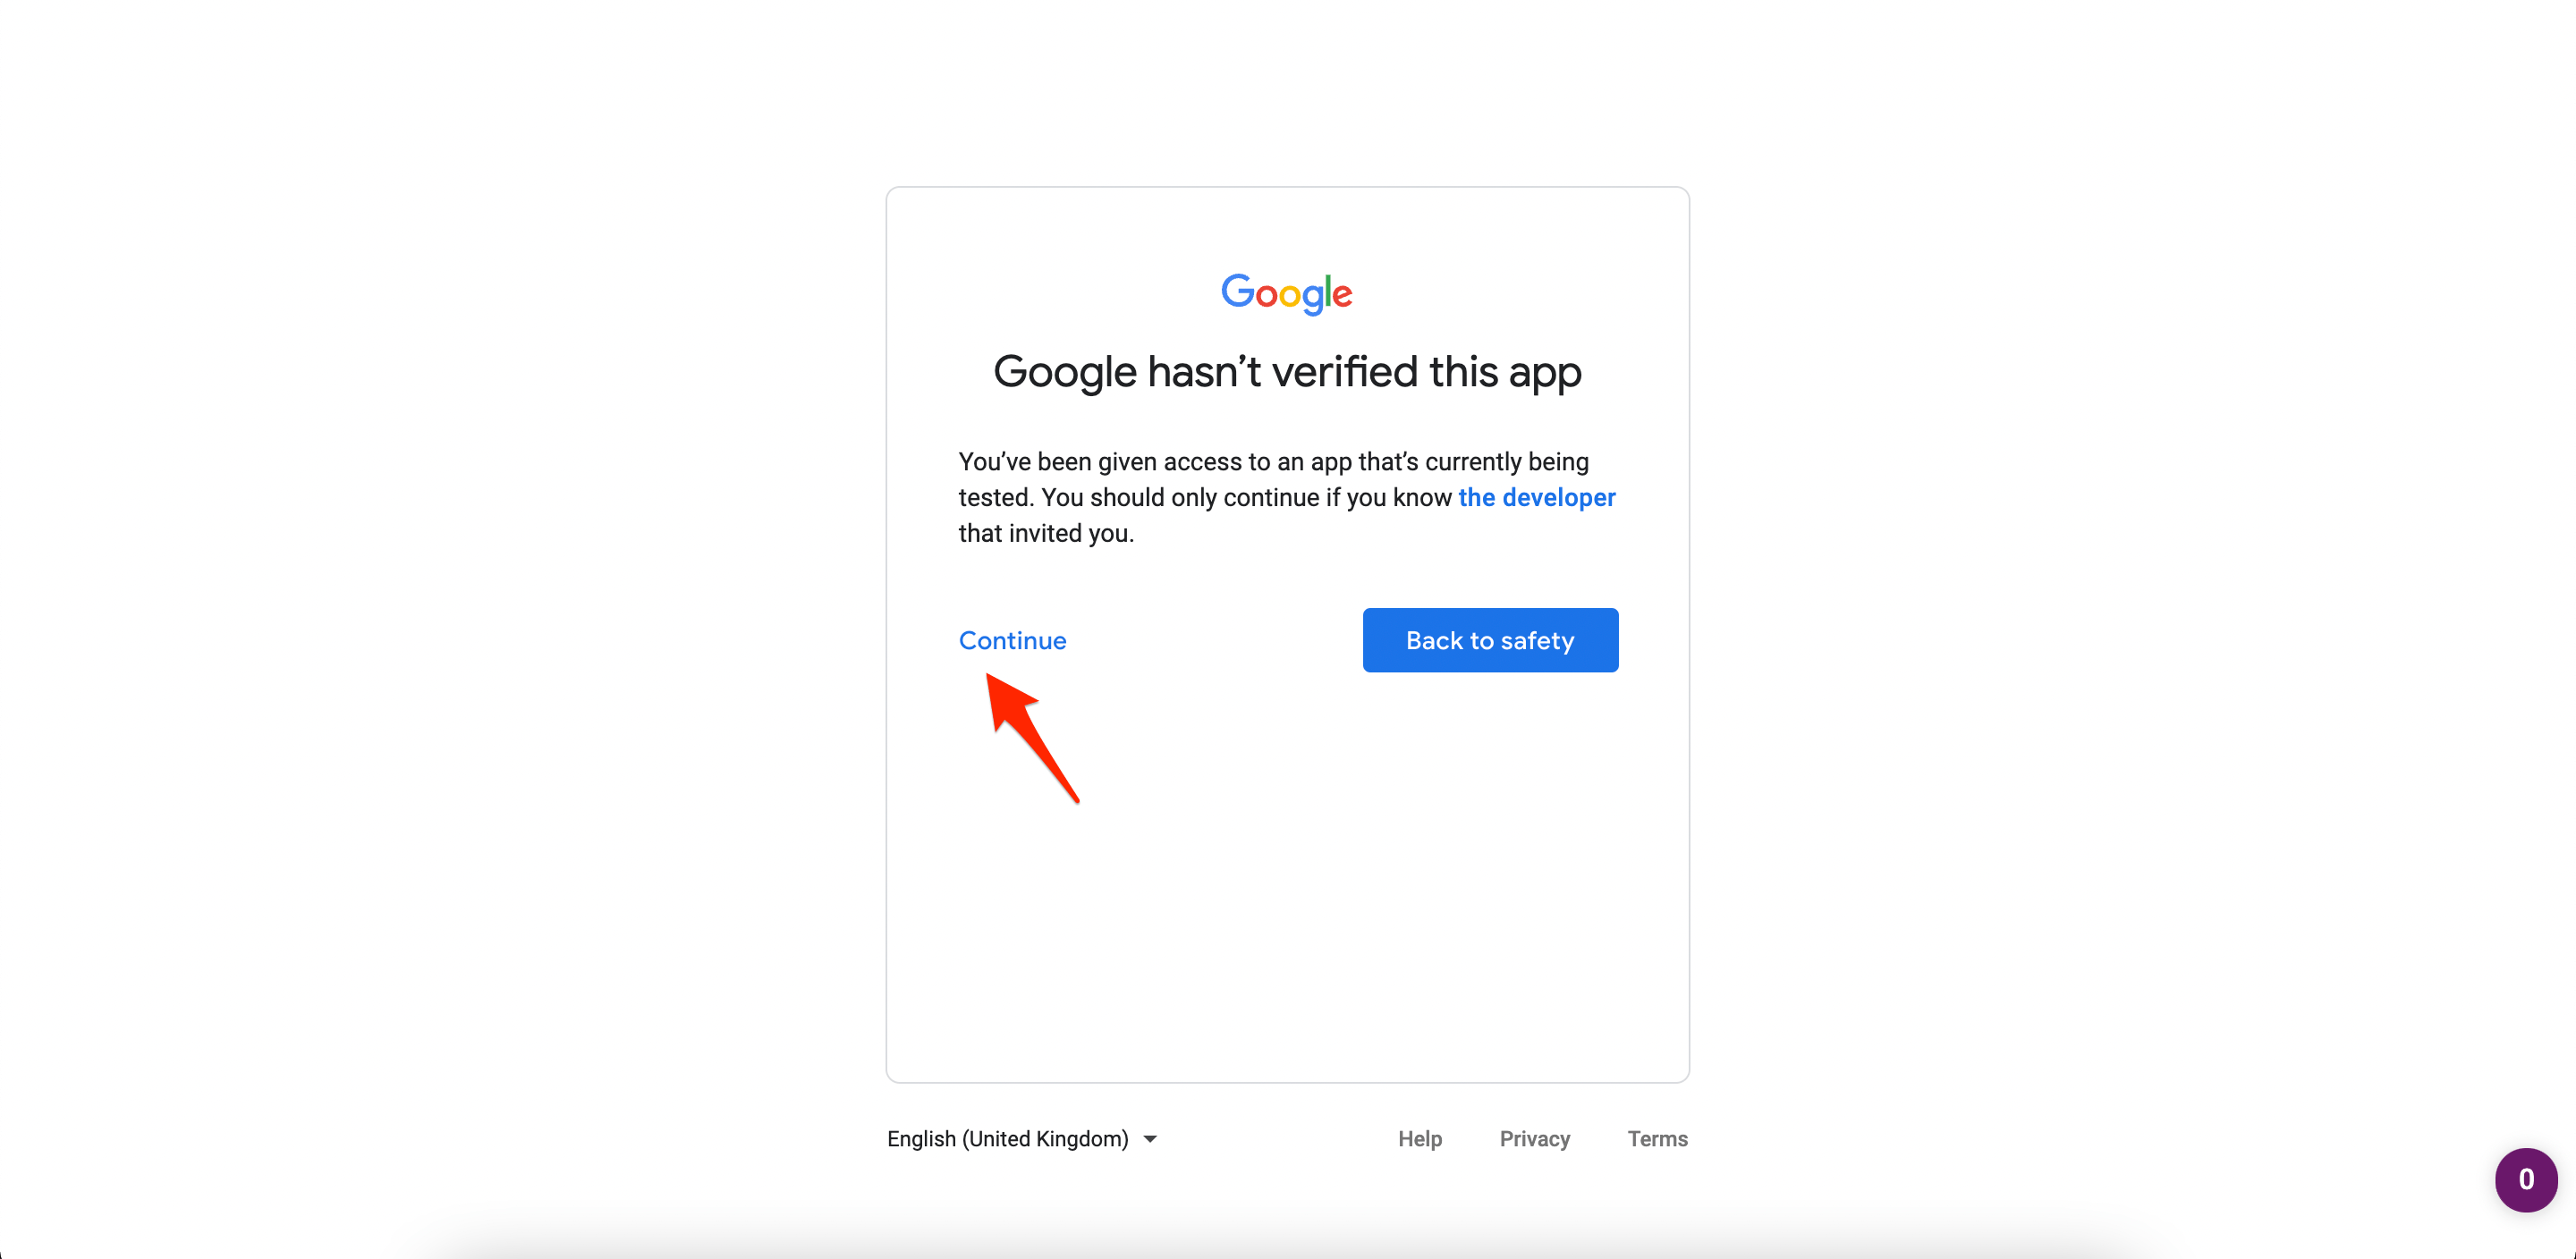
- You will be redirected to a new web page to verify the app. Select your Google account and click Continue.

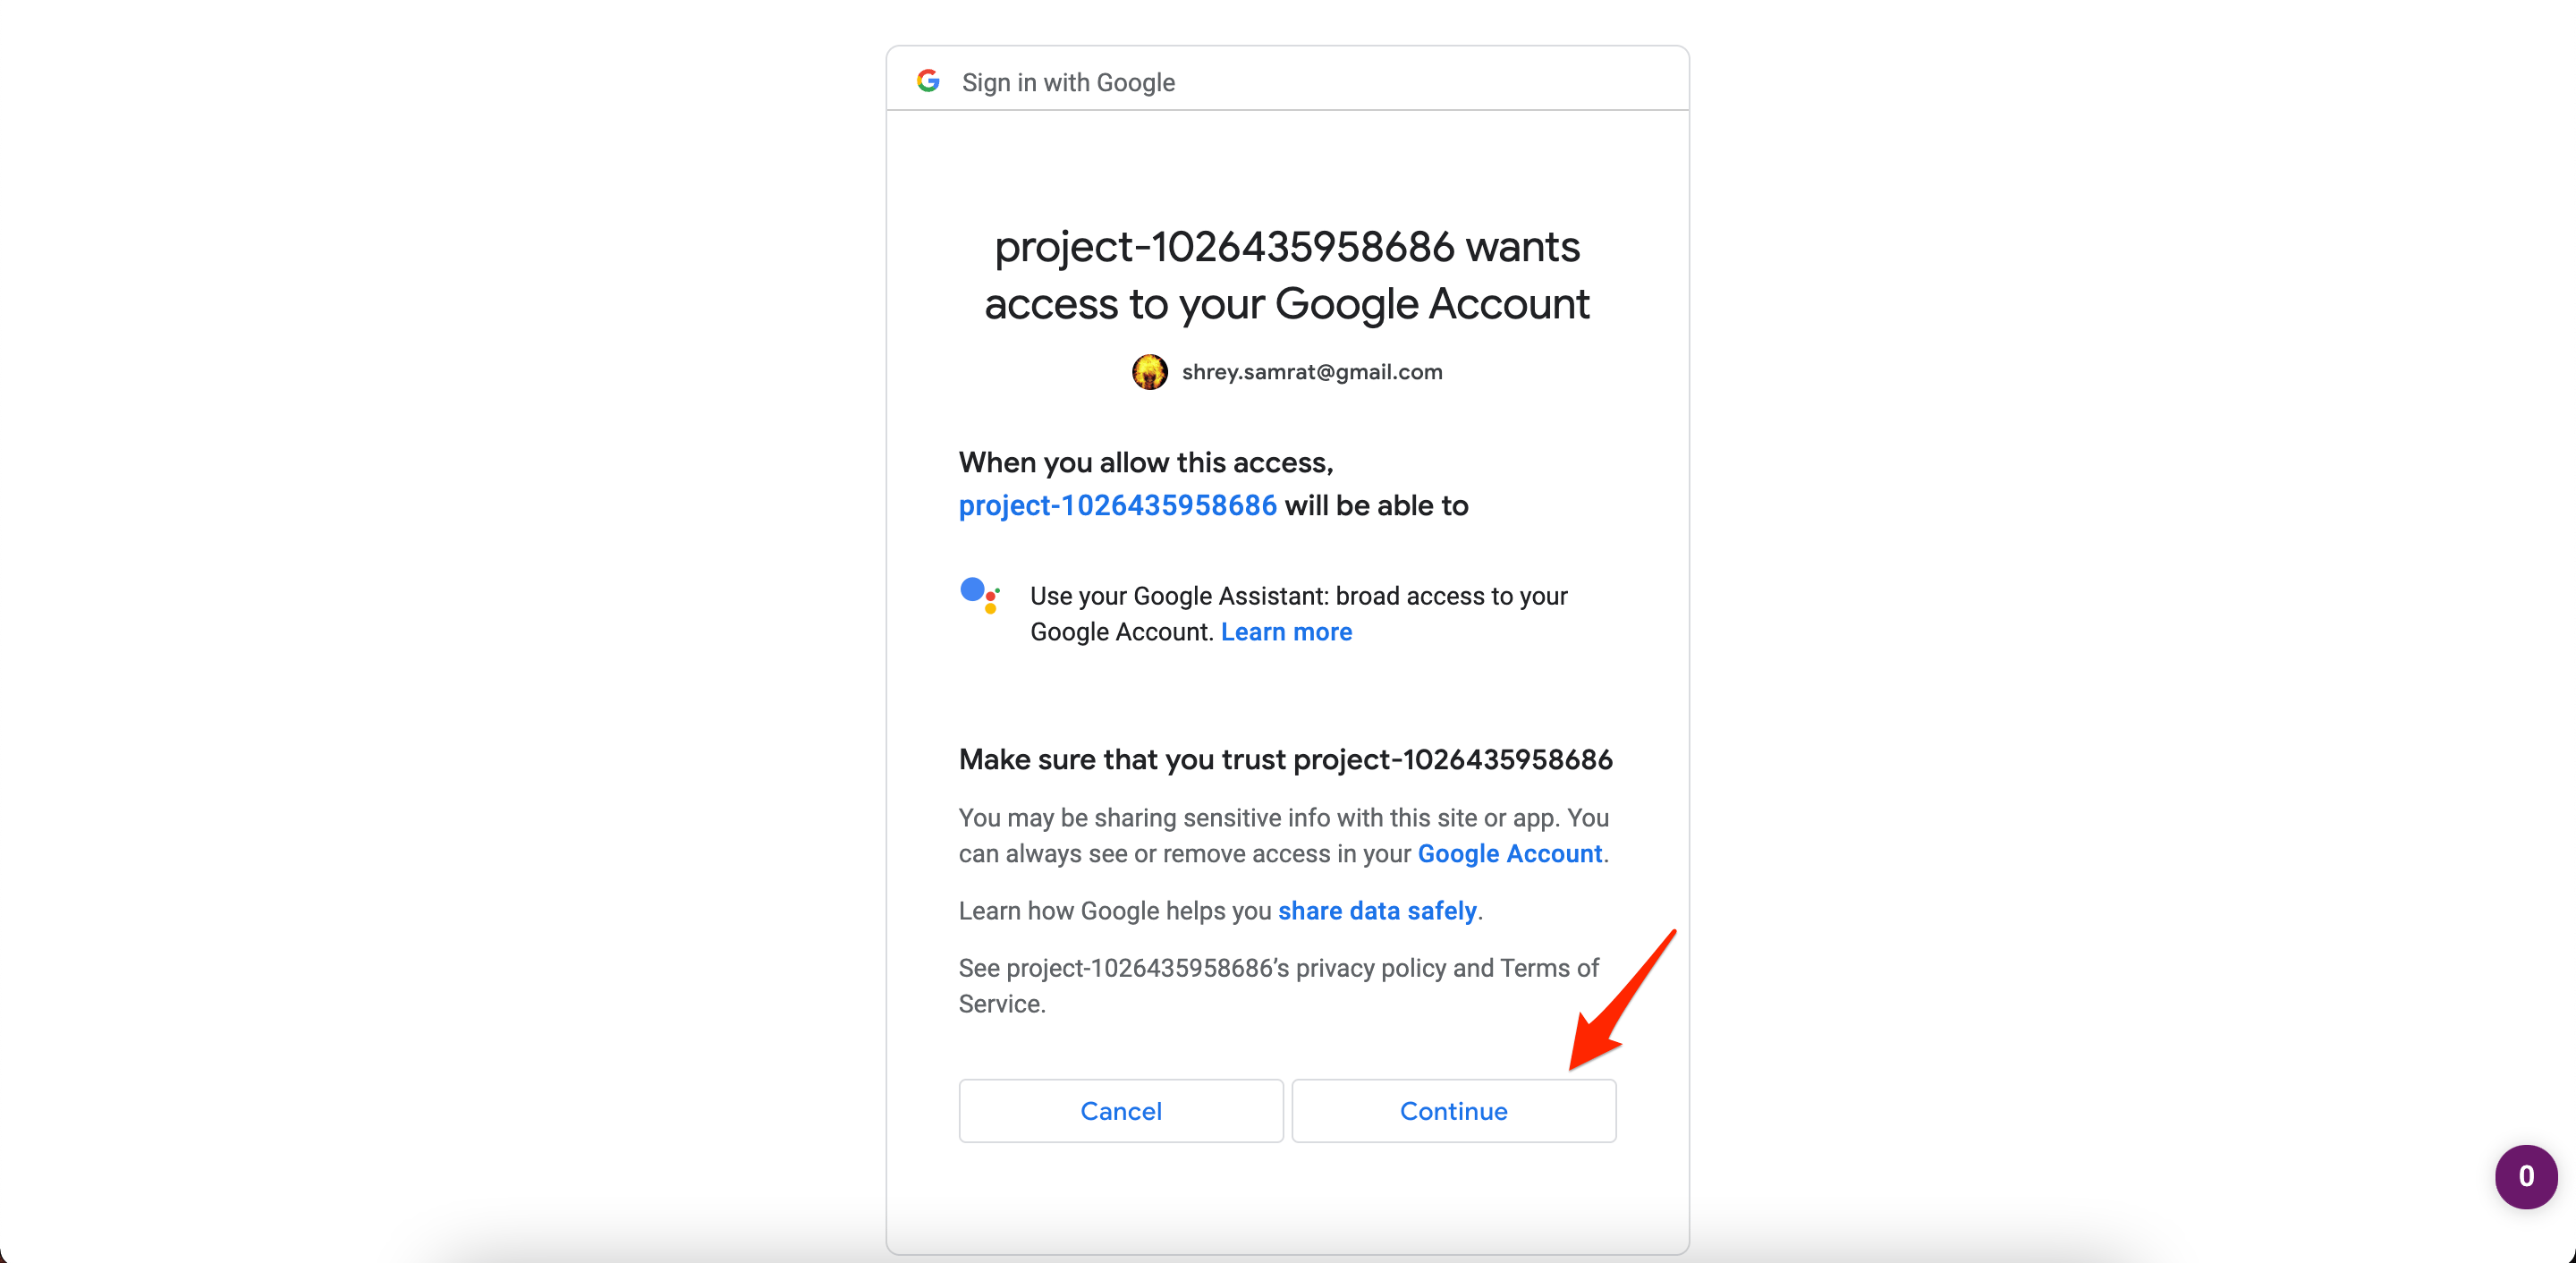
- Select Allow on the new pop-up project that appears.

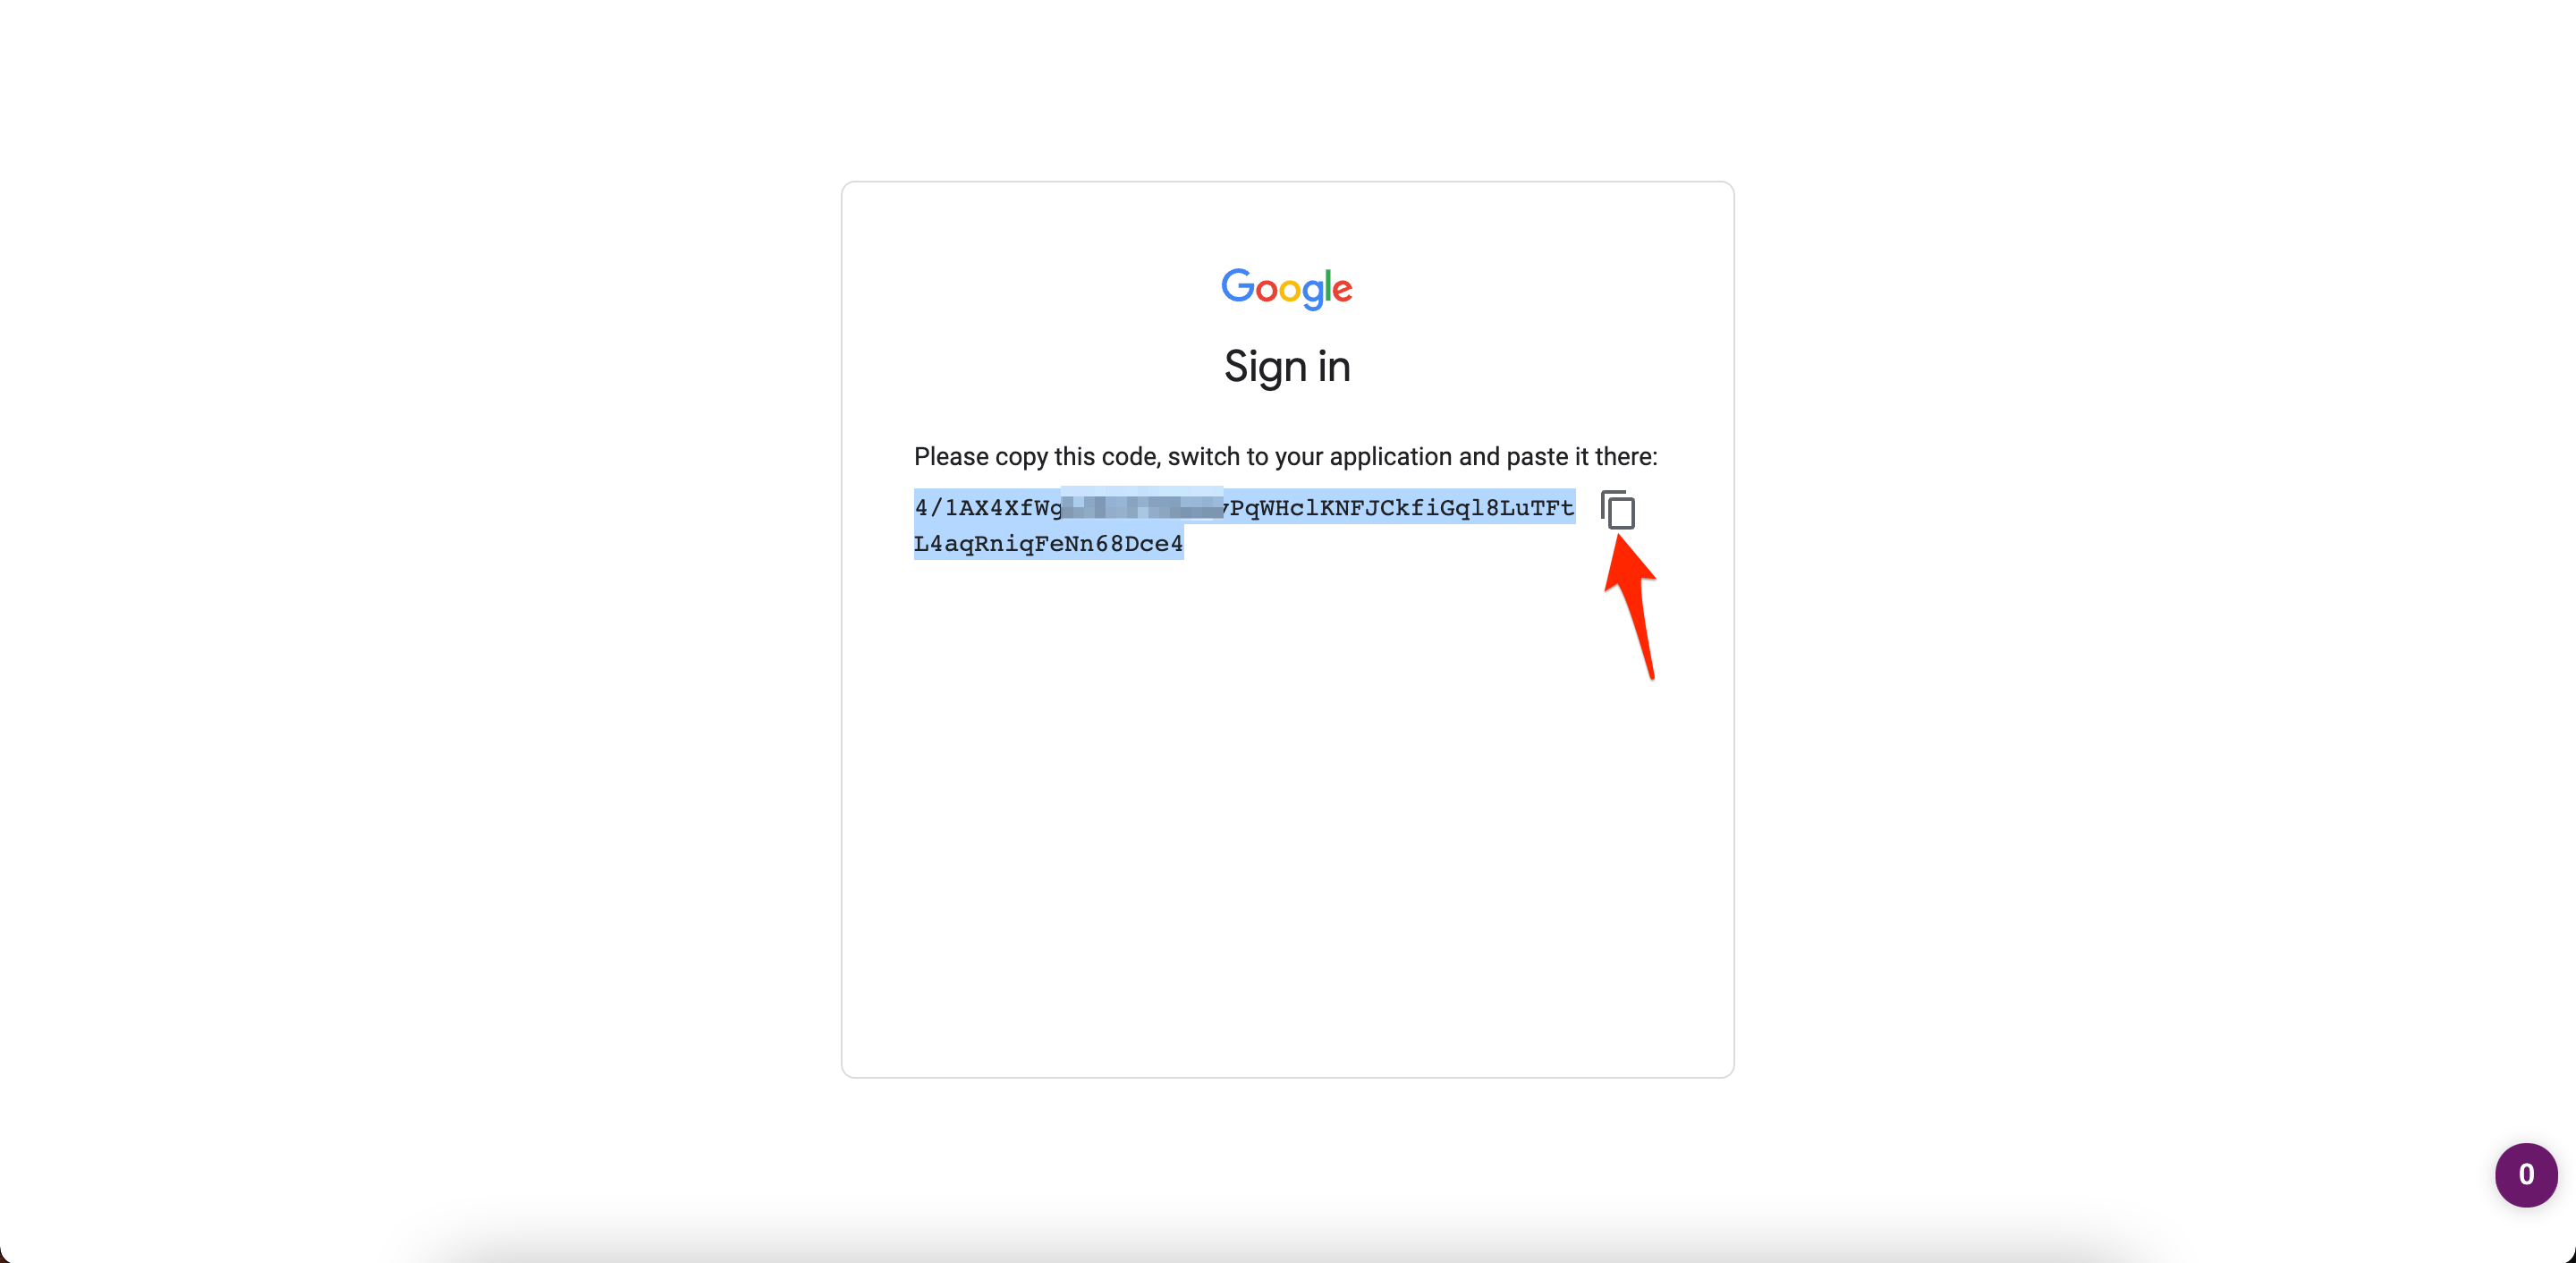
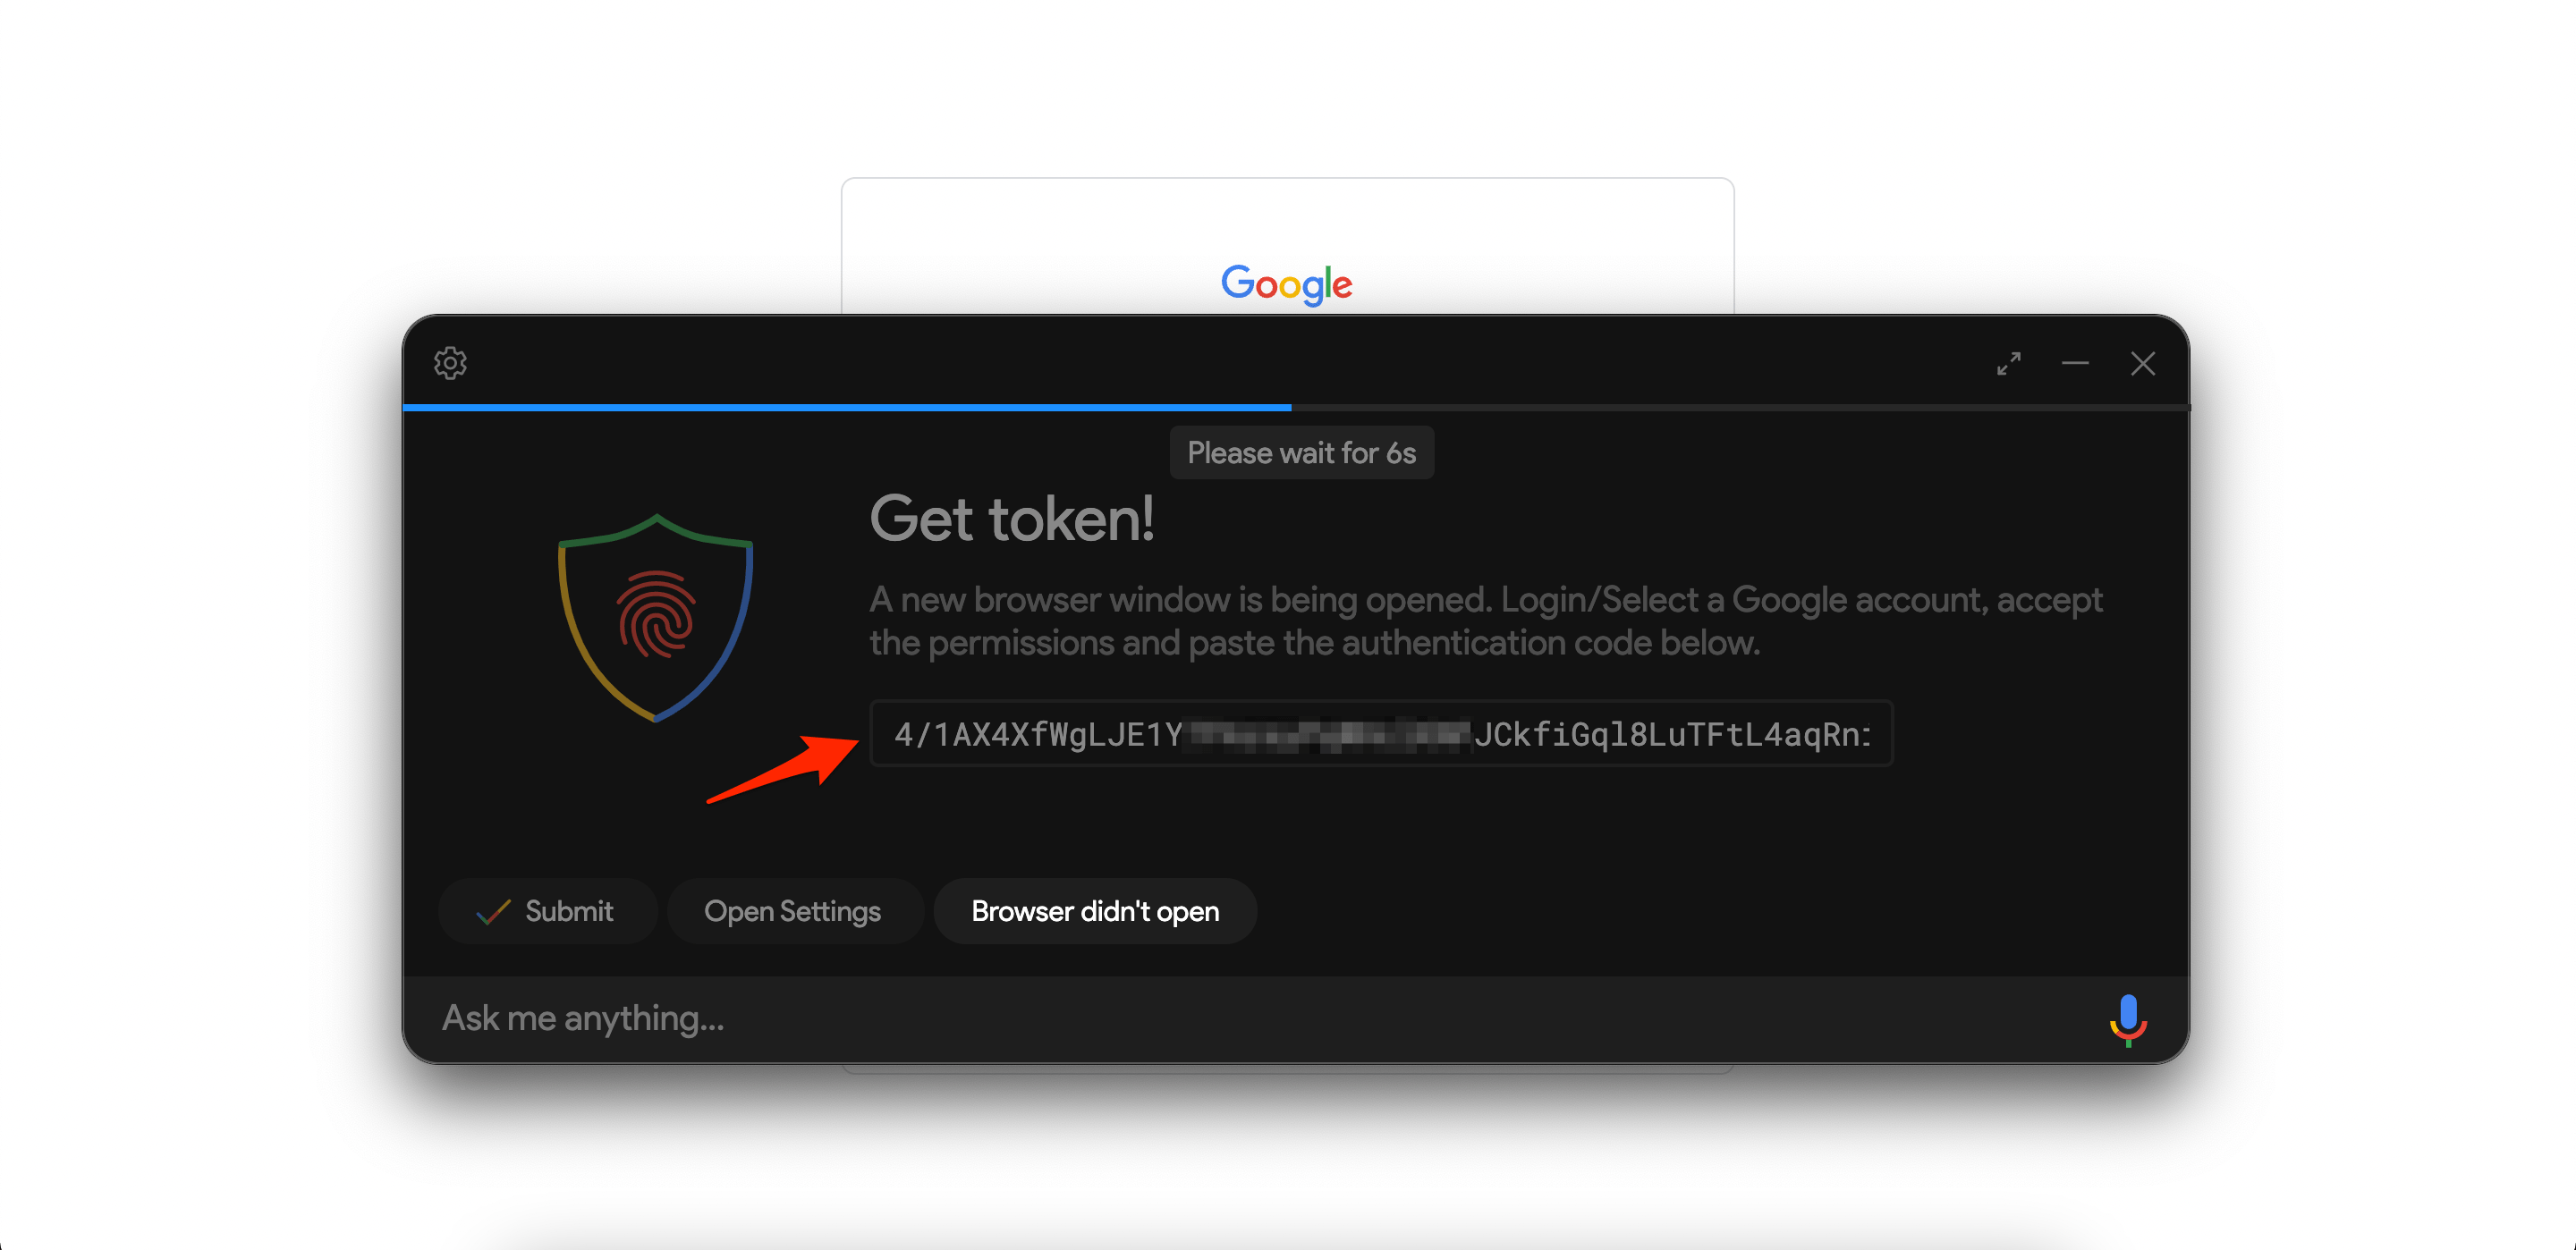
- Copy the token link.

- The Assistant app will ask for Token, paste the token link in the Google Assistant app and select Submit.

- Relaunch the assistant again.

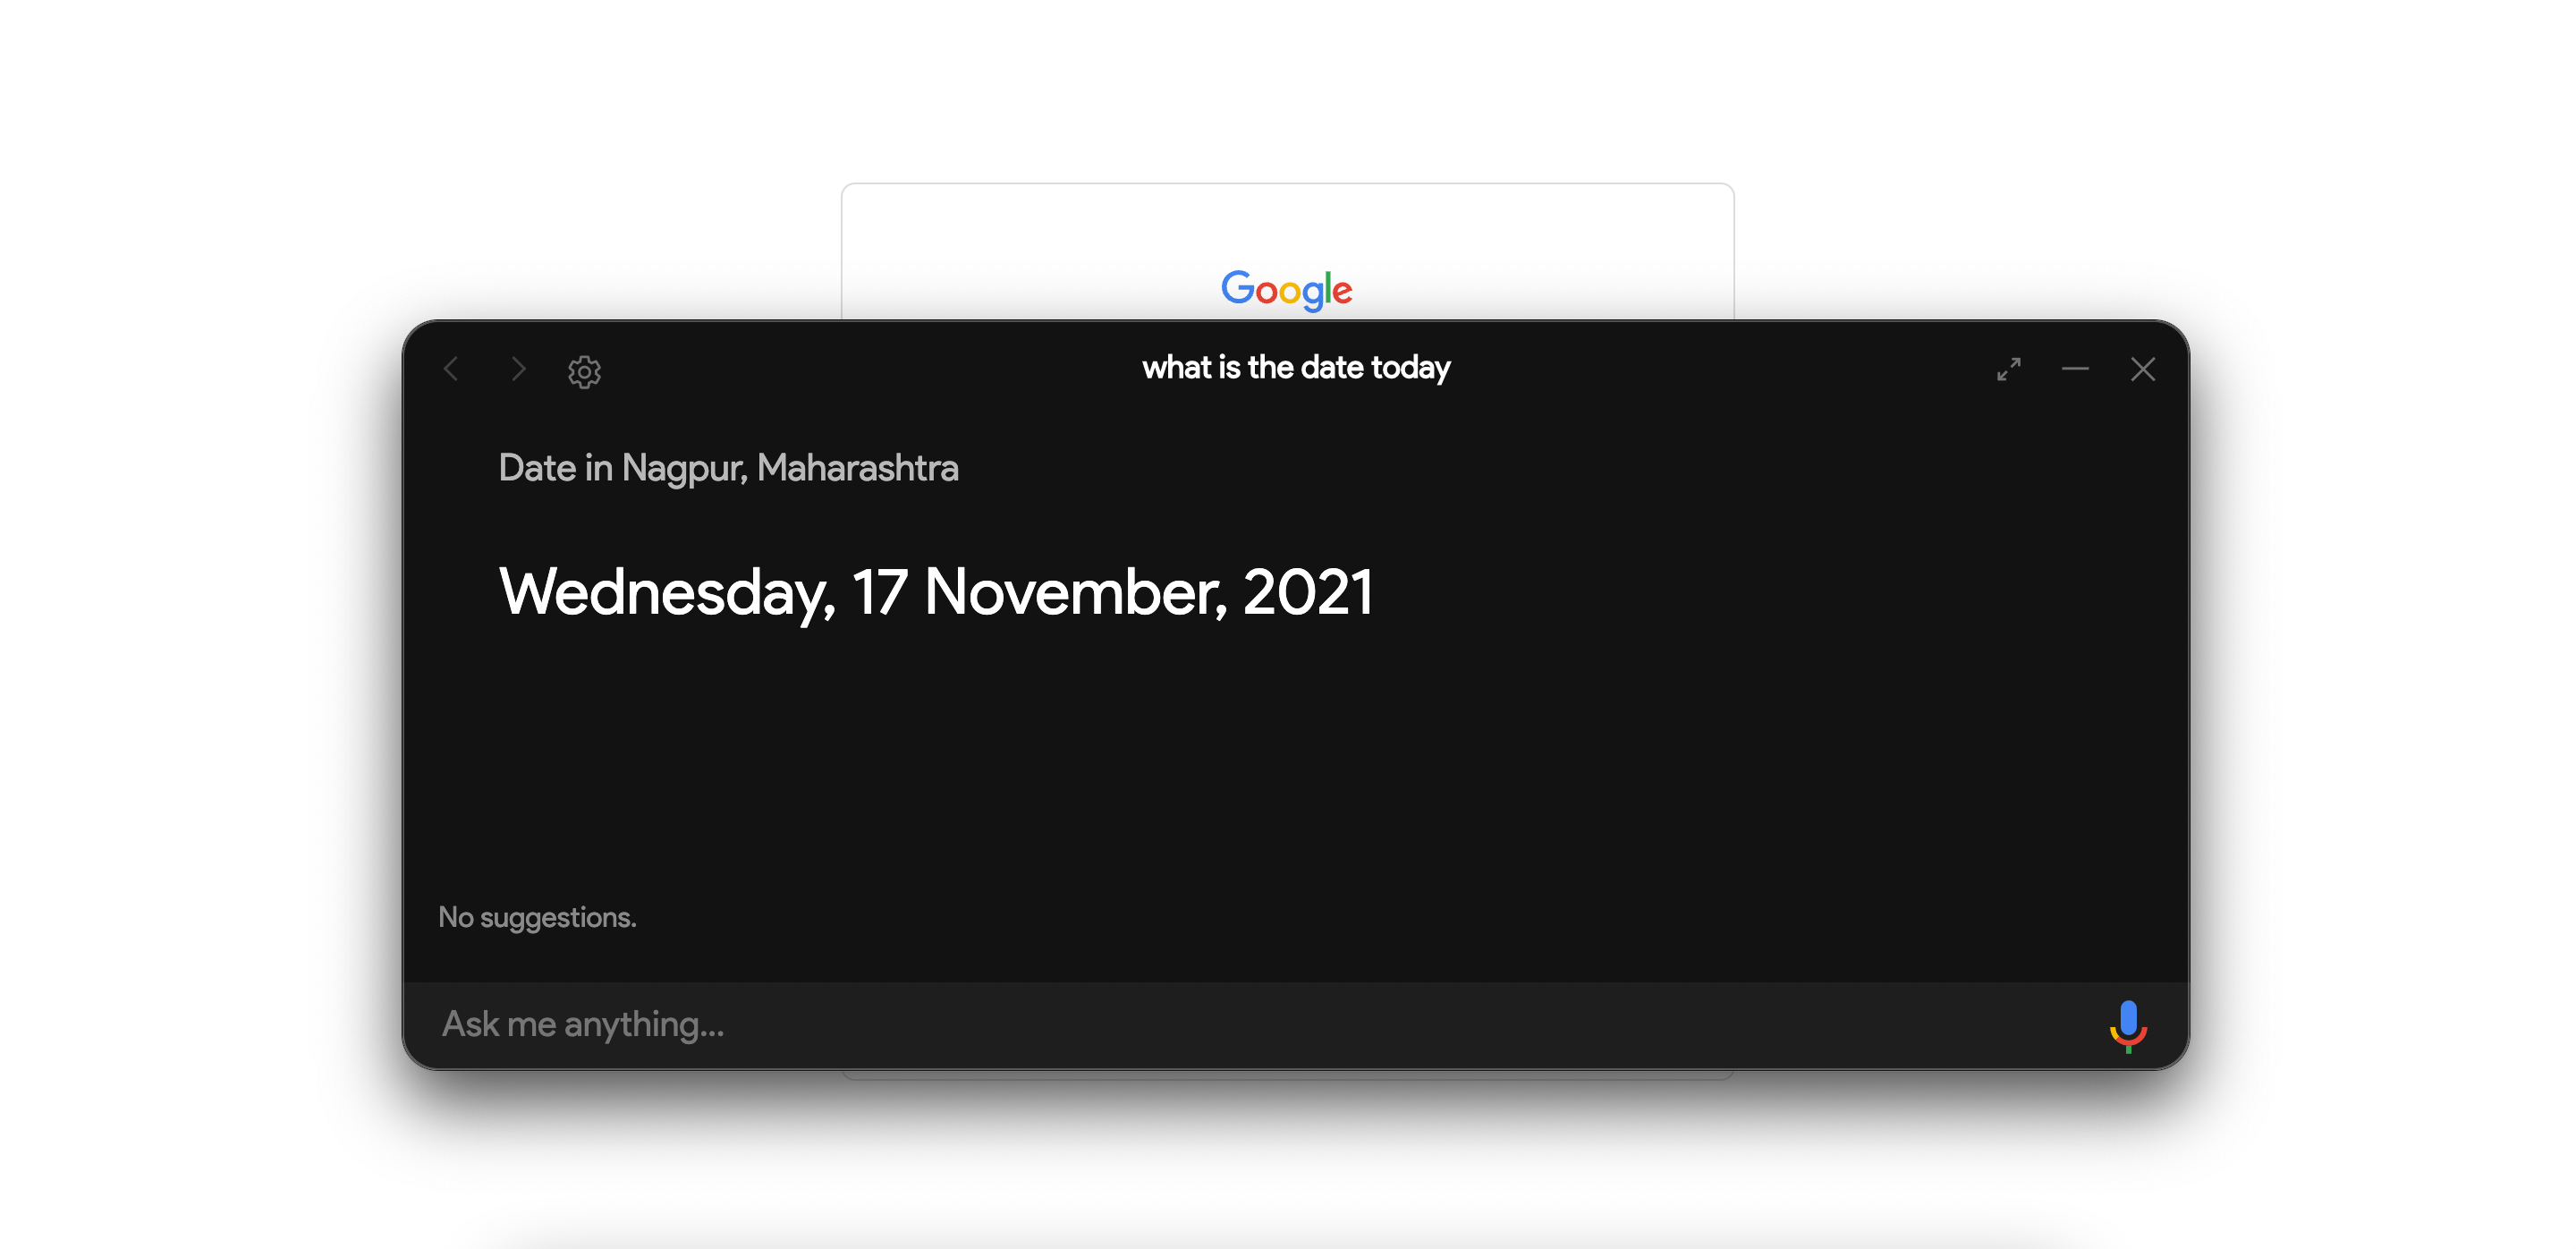
- That’s it! Google Assistant is now ready to use on your Mac PC.

Make sure that you have provided all the necessary permissions, such as a microphone, location, and others, for the Google Assistant to work smoothly.
If you've any thoughts on How to Set Up Google Assistant on MacBook?, then feel free to drop in below comment box. Also, please subscribe to our DigitBin YouTube channel for videos tutorials. Cheers!



I can’t get past step 29.
The Key file provided is not valid. Make sure the file is of the form “client_secret_.apps.googleusercontent.com.json”
Error: Invalid Key file
Any help ?
Same! Find a solution to this?… i tried the process three times and got the same result
Don’t rename the json file that gets downloaded. Go back to the Credentials screen and on the right side of first one that starts with your project name, click the download arrow and download the JSON file and leave the name alone
I manage to open the auth link but when I try to verify with my google acount it says that the app i’m trying to access hasn’t been verified by Google and trying to continue despite that warning leads me to a “site can’t be reached” error page.
Any fixes?
Its not working tried everything..followed all steps it says key is invalid.