Secure Boot is a vital criterion that Microsoft has established for Windows 11, which is claimed to improve Windows 11’s security and privacy greatly. Your Windows 11 PC can be saved against numerous malware hazards by enabling Secure Boot. Additionally, it serves as a defense against the startup loading of unauthorized drivers and software.
Now that you know what secure boot is all about, you can learn the instructions in our guide below to activate Secure Boot on Windows 11.
Why should you Enable Secure Boot in Windows 11?
Understanding why Secure Boot matters in the first place is the key before learning how to enable it on Windows 11. Secure boot, as the name suggests, ensures that the security aspects of your device are in place. Secure Boot equips critical privacy and security, which protect against potentially harmful virus attacks, preventing the system from getting vulnerable.
But how does the bootloader manage to do this? When the secure boot feature is enabled, it functions as an extra layer of protection when Windows starts up, stopping malware from taking over your Windows 11 computer as soon as it turns on.
Before the introduction of the secure boot feature, Windows was vulnerable to highly malicious software attacks. This was the reason why bootloaders could easily install any operating system, making the original operating system corrupt. In contrast, Windows 11 does not even allow you to install the Linux operating system, thanks to the secure boot feature.
The secure boot feature, when enabled, forms a trusted link between the
The UEFI (Unified Extensible Firmware Interface) and the Windows 11 operating system. For the uninitiated, UEFI is the fundamental feature of Windows 11 that works in the background to guarantee that your PC boots up successfully.
How to Check if Secure Boot is Already Enabled?
Secure boot is enabled by default on your Windows system unless you haven’t explicitly turned it off. Hence, you should first check whether the secure boot is already activated on your PC. Here is the step-by-step process of it.
- First of all, you need to restart your Windows 11 PC, which is the initial step to ensure Secure Boot is appropriately activated.
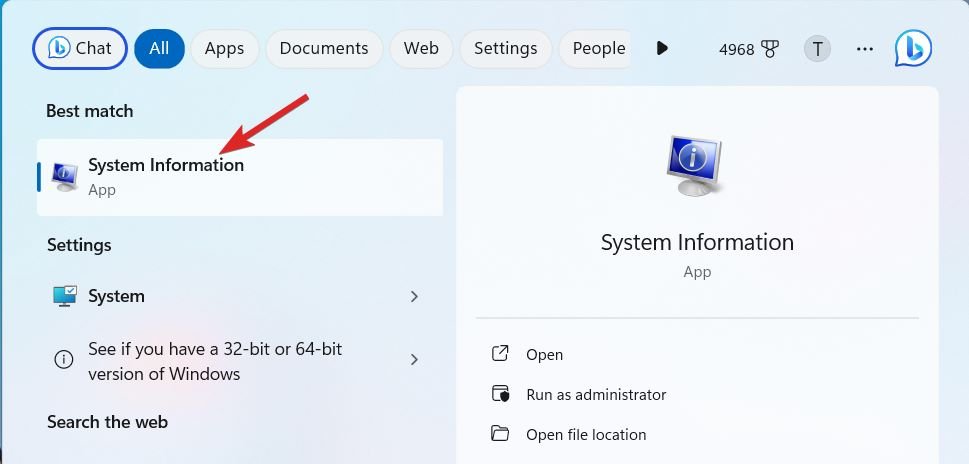
- Now, press the Windows key once to access the Start menu. In the search bar, type System information and select the relevant search result.

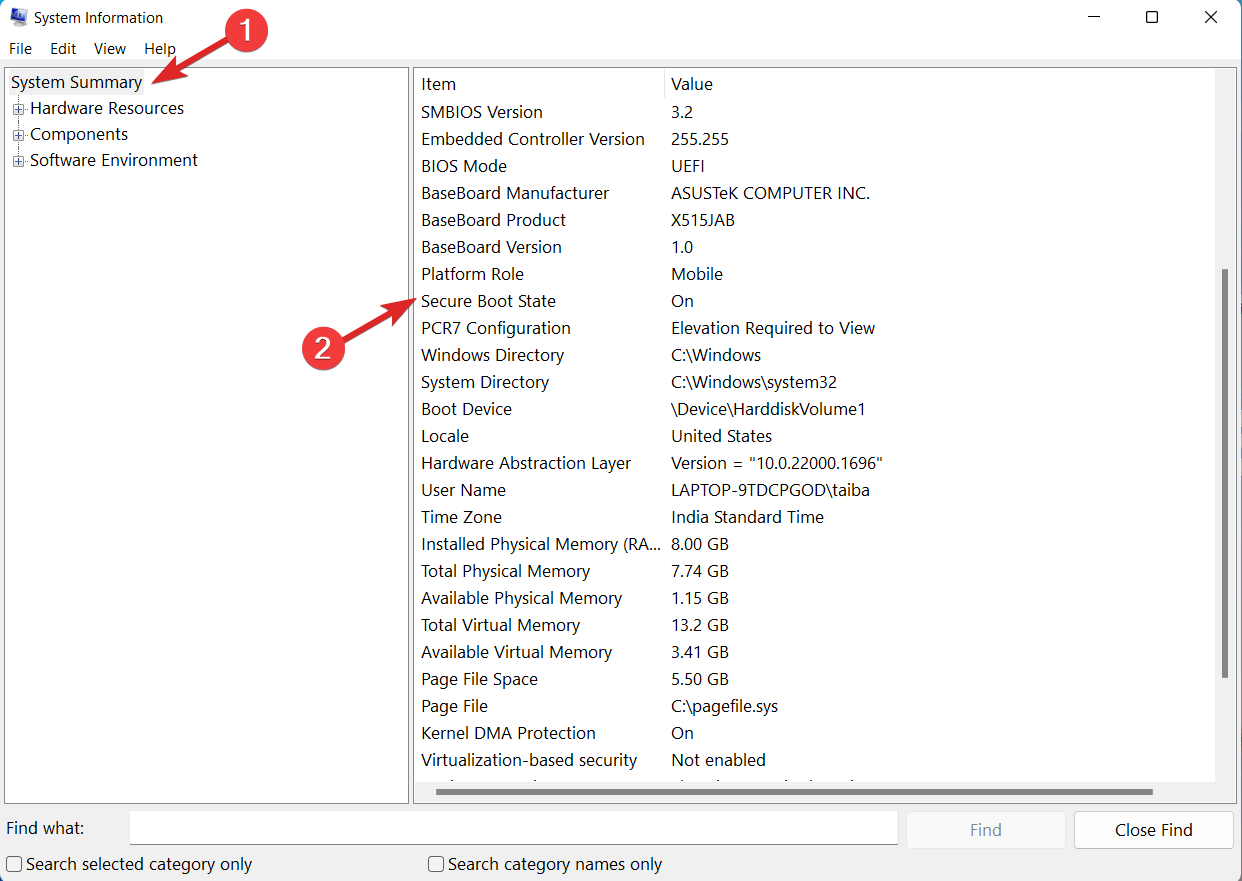
- This will open the System Information window. Choose System Summary from the left navigation panel and scroll down to the right panel. Look for the Secure Boot State entry and check if the feature is on or off.

In case Secure Boot is already enabled, you need not go through the process of enabling the feature manually. However, if the secure boot is disabled on your Windows 11 device, proceed to the next section of the article.
How to Enable Secure Boot of Windows 11?
Enabling secure boot on Windows 11 PCs may seem to be a complicated task for those new to the Windows ecosystem. However, you can follow the step-by-step procedure mentioned below to enable Secure Boot on Windows 11:
1. Access the BIOS settings on Windows 11 PC
First of all, you need to access the BIOS/ UEFI on your computer. The process is described below.
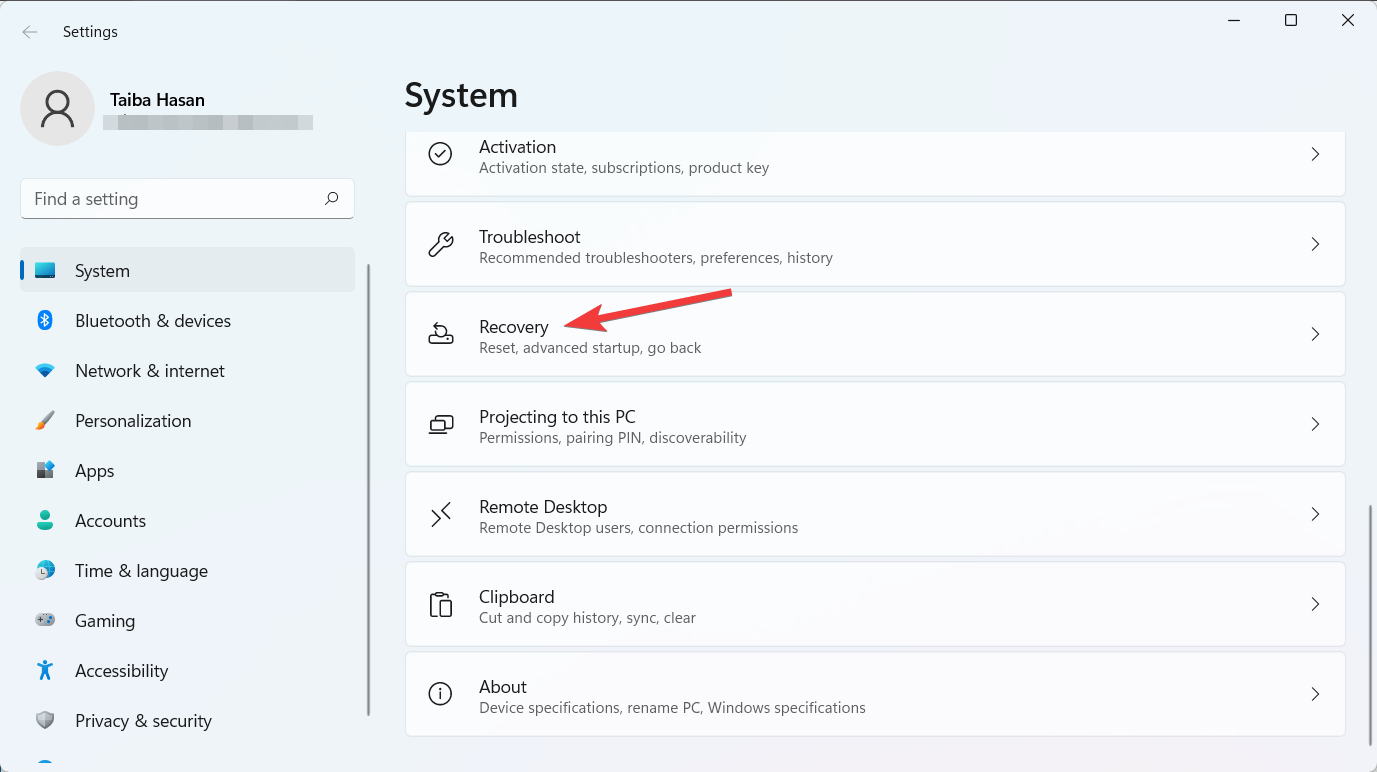
- To access the Settings window, use the Windows + I shortcut combination.
- Scroll down the system settings and select the Recovery option from the right section.

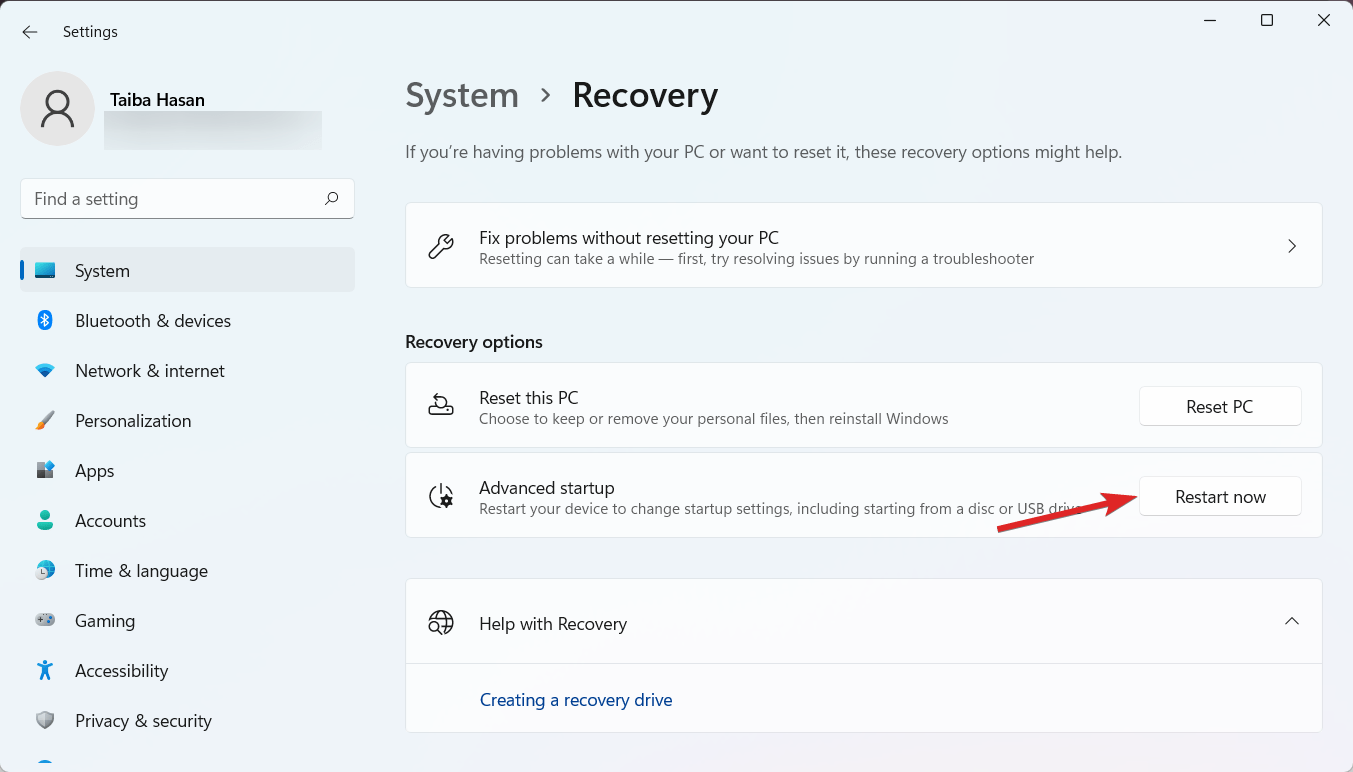
- Look for the Advanced startup option under the Recovery options section and press the Restart Now button.

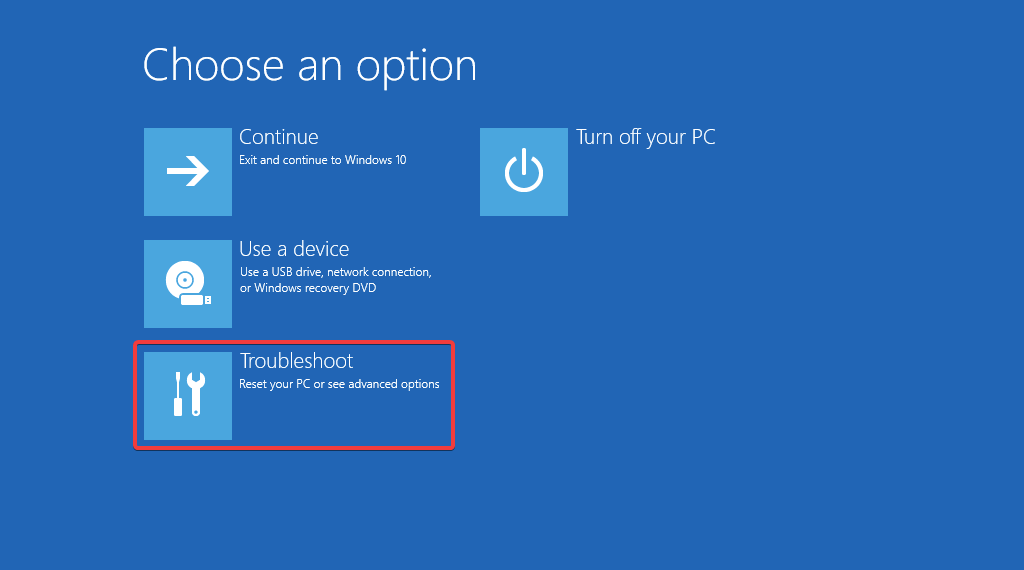
- Upon restart, you will access the blue screen that asks you to Choose an option. From the list, click on Troubleshoot.

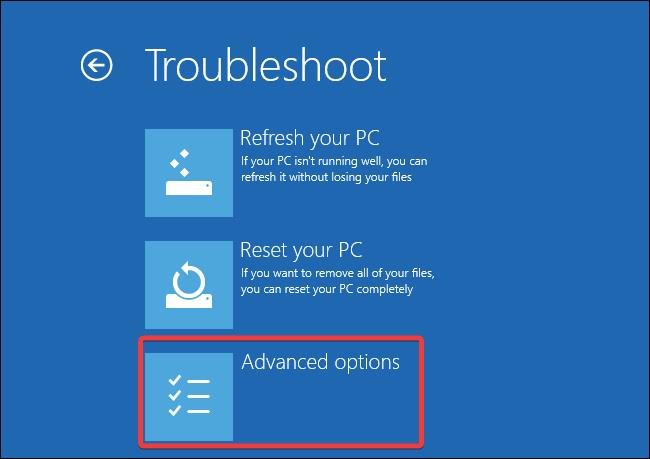
- Select Advanced options from the next window.

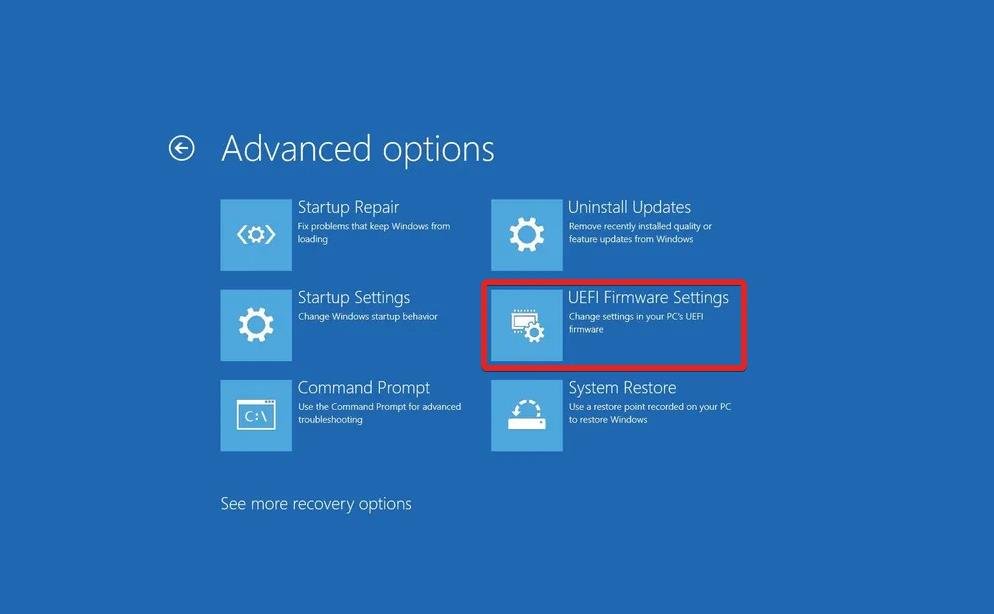
- Click on UEFI Firmware Settings to access the BIOS or UEFI Settings window of your Windows 11 PC.

2. Enable Secure Boot on Windows 11
- Navigate to the Security settings once you access the BIOS/UEFI settings. Depending on your computer’s manufacturer, it may be referred to as Security, System Configuration, or Boot in the settings menu.
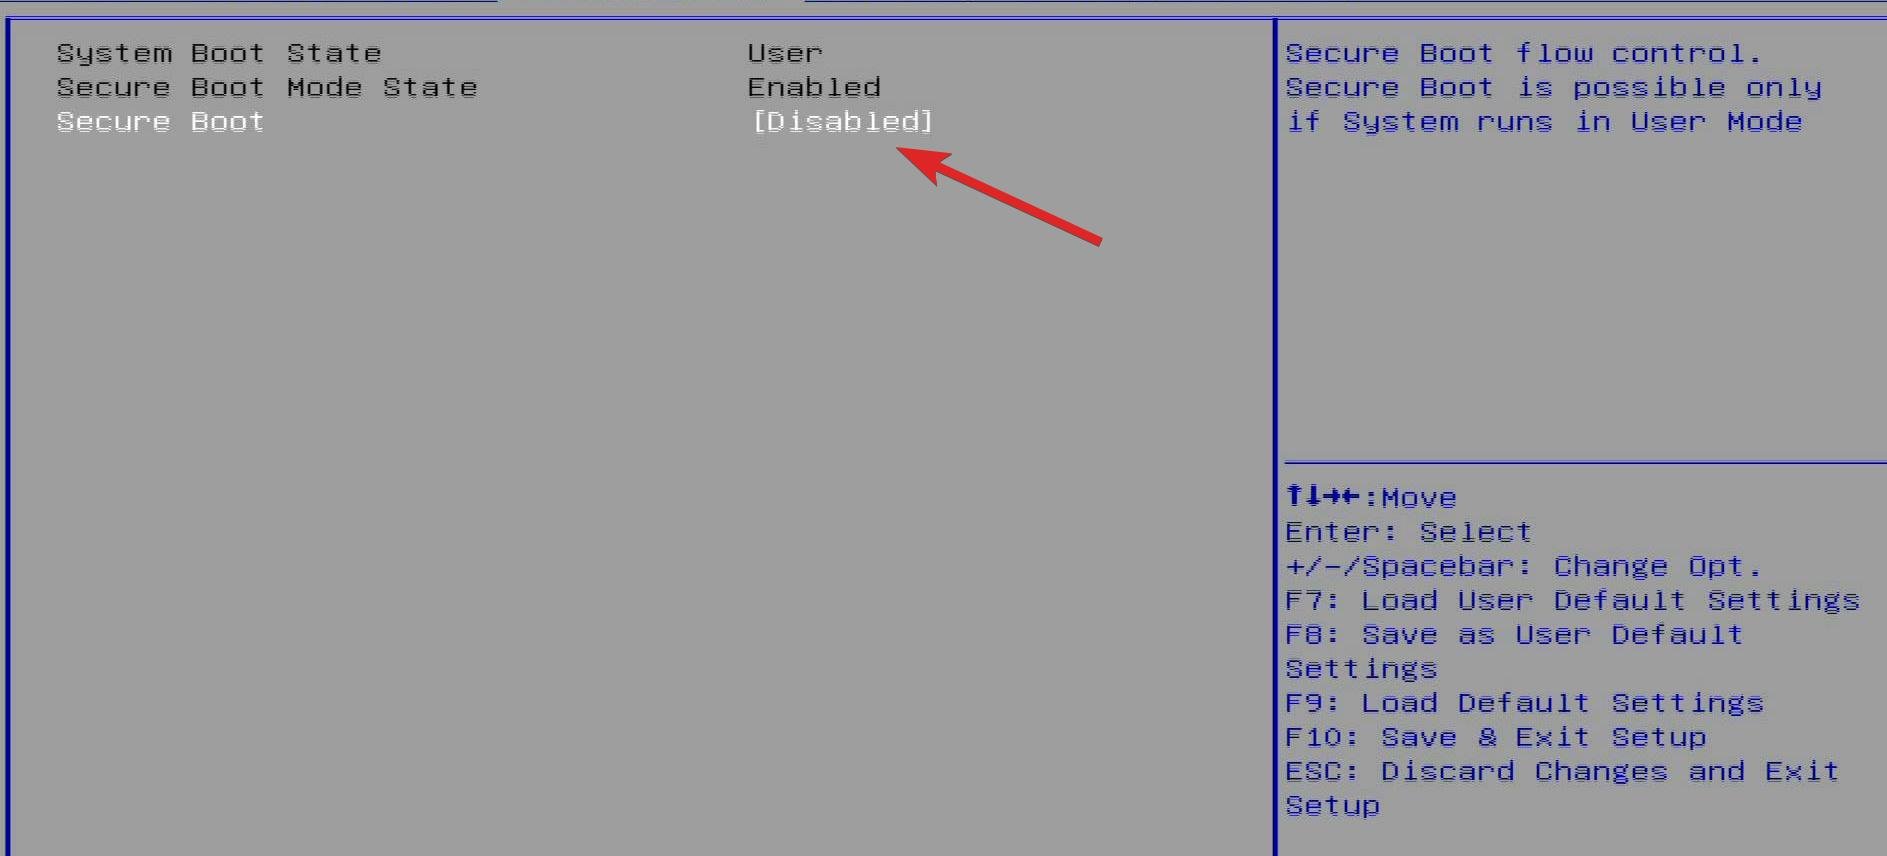
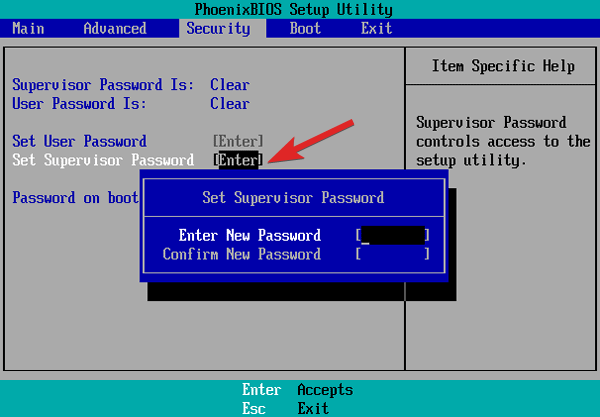
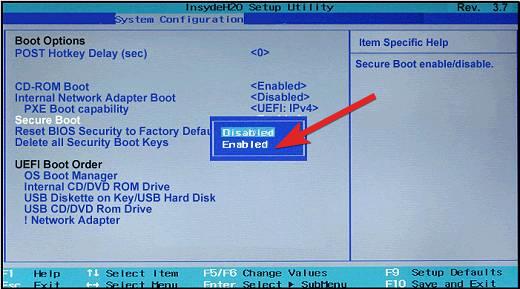
- Once you are there, look for the Secure Boot option within these settings. Press the Enter button to enable the Secure boot option. If the option is grayed out, you must create an administrator password first.

- Now go back to the Security, System Configuration, or Boot settings and assign the Supervisor password. Create a new password and enter it again to confirm it. Also known as the Supervisor password, this password is required for security purposes to access the BIOS settings. For this reason, you are required to note down this password somewhere safe.

- With the administrator password set, you can head to the Boot settings and access the Secure Boot option using the arrow keys.

- Simply press the Enter key to turn it on. This time, you should be able to turn it on. After doing so, save your changes by pressing F10 and hitting Enter to exit the settings.
Let Windows 11 boot up and follow the steps described in the above section to ensure that the Secure Boot is now active.
Conclusion
So that’s how Windows 11 users may enable secure boot. Ensure secure boot is always on if you’re serious about safeguarding your computer from unauthorized bootloader modifications and unapproved ROMs.
Consider turning on TPM (Trusted Platform Module) on your Windows 11 PC if you expect to apply another vital security safeguard. This will dramatically improve your privacy and security while operating Windows 11 by adding an extra layer of protection for all the confidential data saved on your computer.
If you've any thoughts on How to Enable Secure Boot in Windows 11?, then feel free to drop in below comment box. Also, please subscribe to our DigitBin YouTube channel for videos tutorials. Cheers!

