If your laptop or mobile device is running Windows 11, you may frequently encounter the issue of the stretched screen. The stretched display results from an application requesting more space than the currently available screen.
Both vertically and horizontally stretched texts, photos, and movies are displayed. Watching a slideshow, looking through pictures in a photo editor, or viewing videos in full-screen mode can all cause the problem.
Reading the text on the desktop becomes more challenging because the image or video is stretched to fit the PC screen. So, what’s causing the distorted visuals and fonts?
Your desktop’s uneven pixels appear to cause the image’s eventual straight-up or parallel expansion. The broken pixels may be from old or malfunctioning graphic drivers or result from arbitrarily hitting keys that reset the screen resolution erroneously.
The good news is that a few fixes are available to address the stretched screen issue on your Windows 11 computer. Let’s examine how.
Top Ways to Fix Stretched Screen Windows 11
If you’re experiencing a stretched screen issue on Windows 11, here are some of the valuable troubleshooting steps you can take:
1. Try a Different Port or Cable
Replace the cable that links your PC to the monitor if you are experiencing stretched screen issues.
You may only be able to change the settings on your PC if your existing cable is compatible with it. This can cause problems with scaling and resolution. Try using an alternative cable to exclude cable incompatibility as the primary cause of the issue. Another option is to use a different PC display port. Occasionally, the issue could be caused by incompatible features with your monitor. This problem can be found and resolved by changing ports.
Connect to an additional HDMI port or switch to a Display or VGA port, depending on your available ports.
2. Modify the Display Resolution
Modifying the display resolution of your Windows 11 PC can help fix the stretched screen problem that you have been facing for a long time. Here is what you need to do.
- Using your keyboard, simultaneously press the Win and I keys to launch the Settings app.
- Click the System option located on the pane’s left side in the Settings box.
- Go to the right side of the settings app and choose Display.
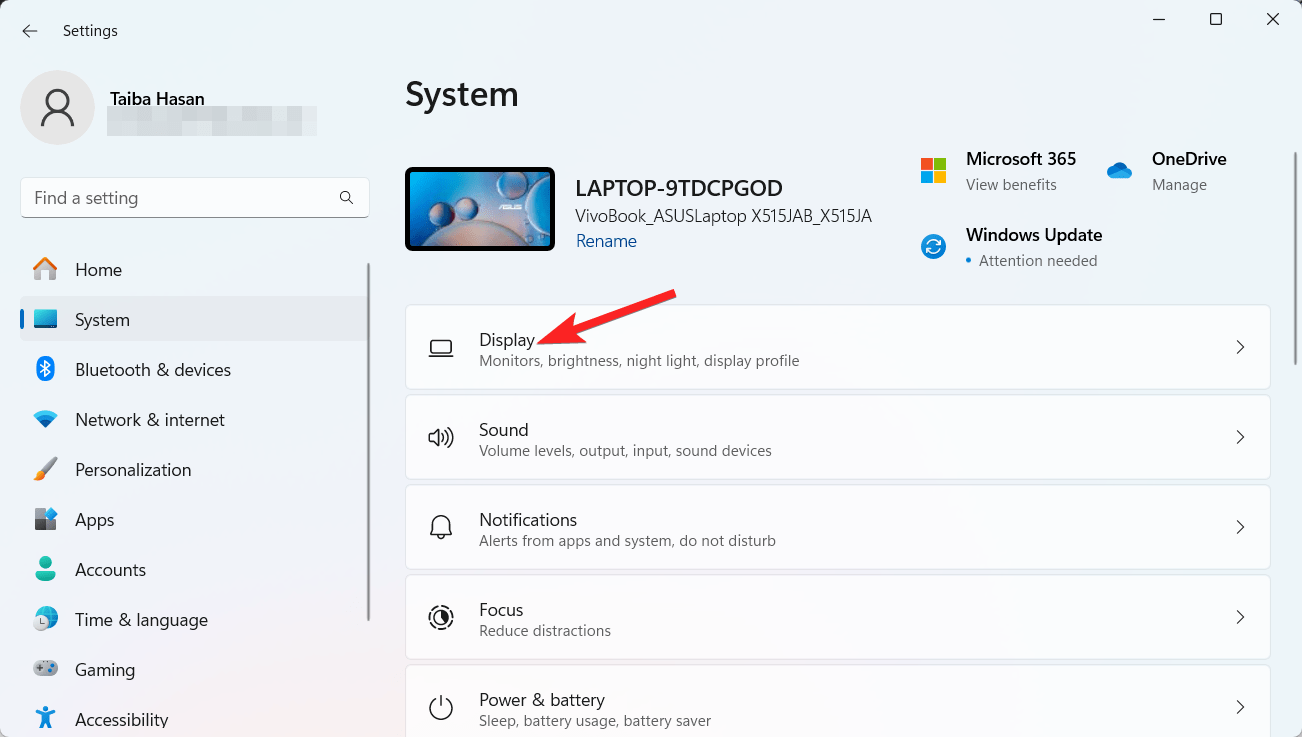
- Next. scroll down to reach the Scale & Layout section in the Display Settings window and choose Display resolution.
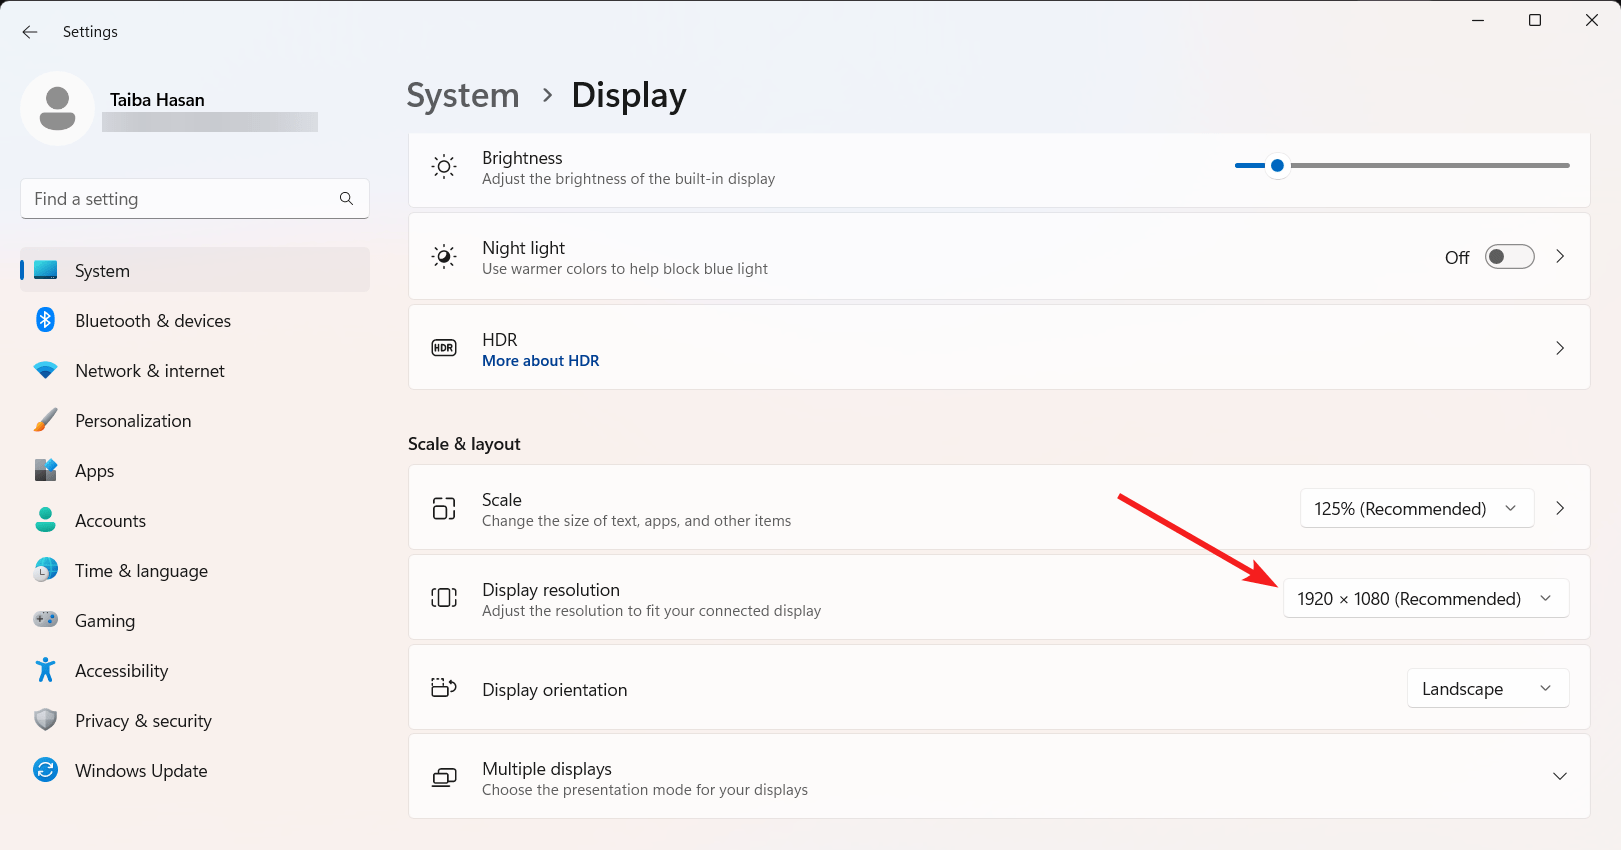
- Here, choose a resolution that works best for you, or use the drop-down menu to select the Recommended option just to be safe.
- Check back now; the stretched screen issue should be resolved.
3. Update your Graphic Driver
A stretched screen issue is often triggered due to an outdated version of the graphic driver installed on your Windows 11 PC. You can easily update the graphic driver by following the steps outlined below.
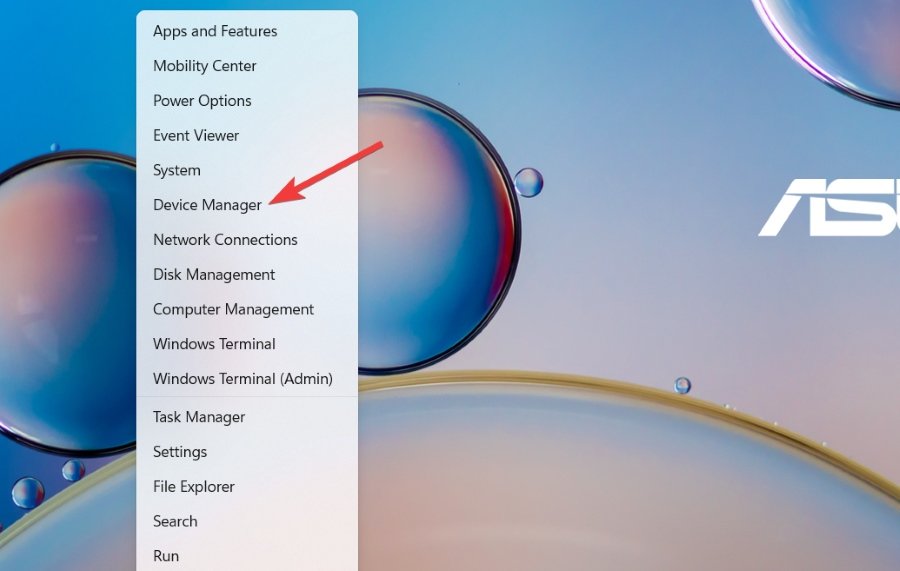
- Right-click the Start icon on the Taskbar and choose Device Manager from the context menu.
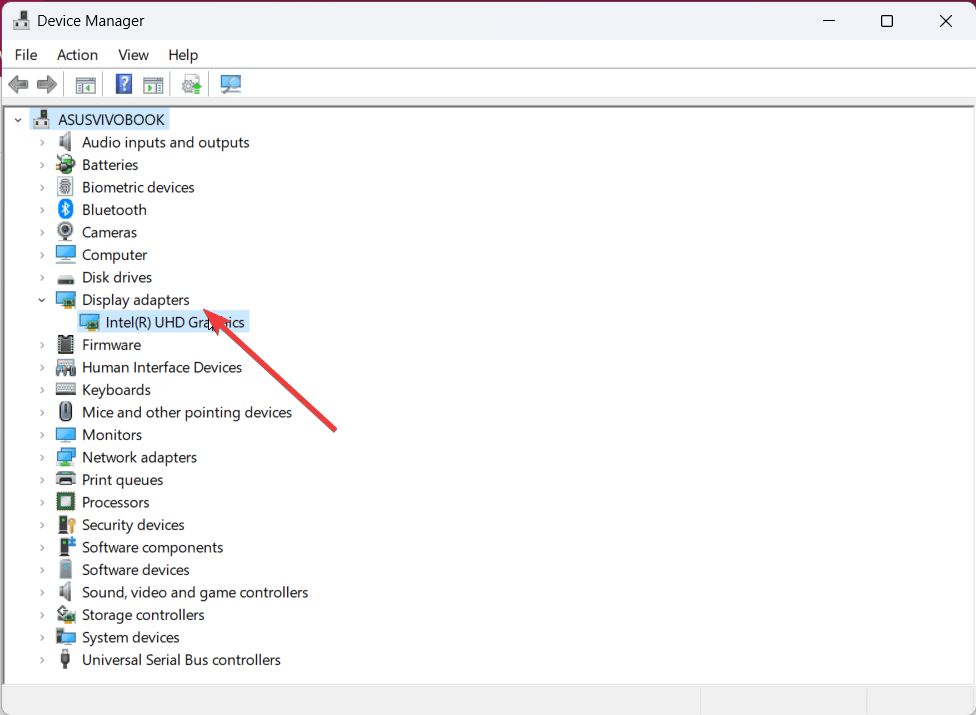
- Navigate to the Device Manager window and click the Display Adapters section to view the list of available graphic drivers.
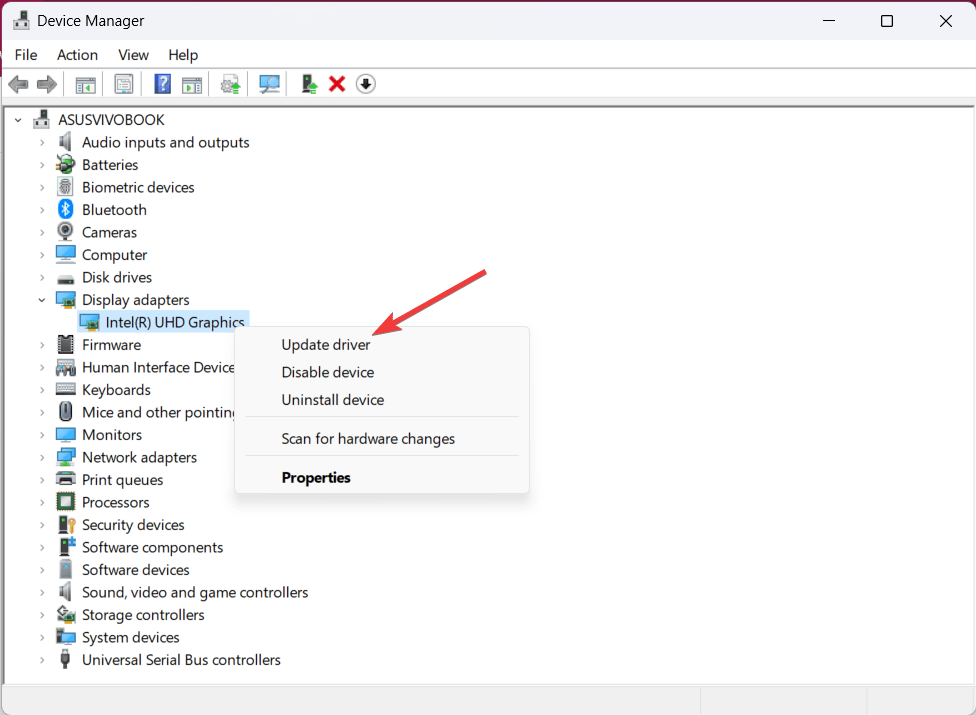
- Now you need to right-click on the graphics driver and choose the Update driver option from the context menu.
- The Update Drivers dialog box will appear. Choose Browse my computer for drivers.
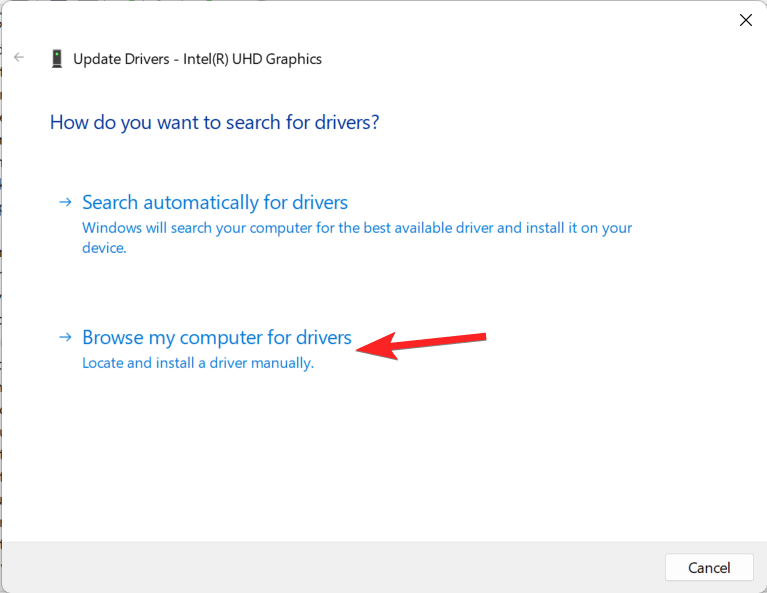
- To choose from a list of available drivers on your computer, click the Let me pick option in the subsequent box.
- After that, pick an older driver version from the list in the Model field and tick the box next to Show supported devices.
- When the installation is finished, press Next.
- After that, close the Device Manager window and turn on your computer again. Your Windows 11 PC should now display a standard screen rather than a stretched screen.
4. Roll Back the Driver Updates
- Launch the Run command window using the keyboard shortcut keys Windows + R.
- Enter devmgmt.msc into the Run command search bar, then hit Enter to get up the Device Manager window.
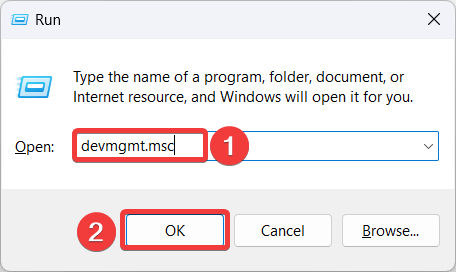
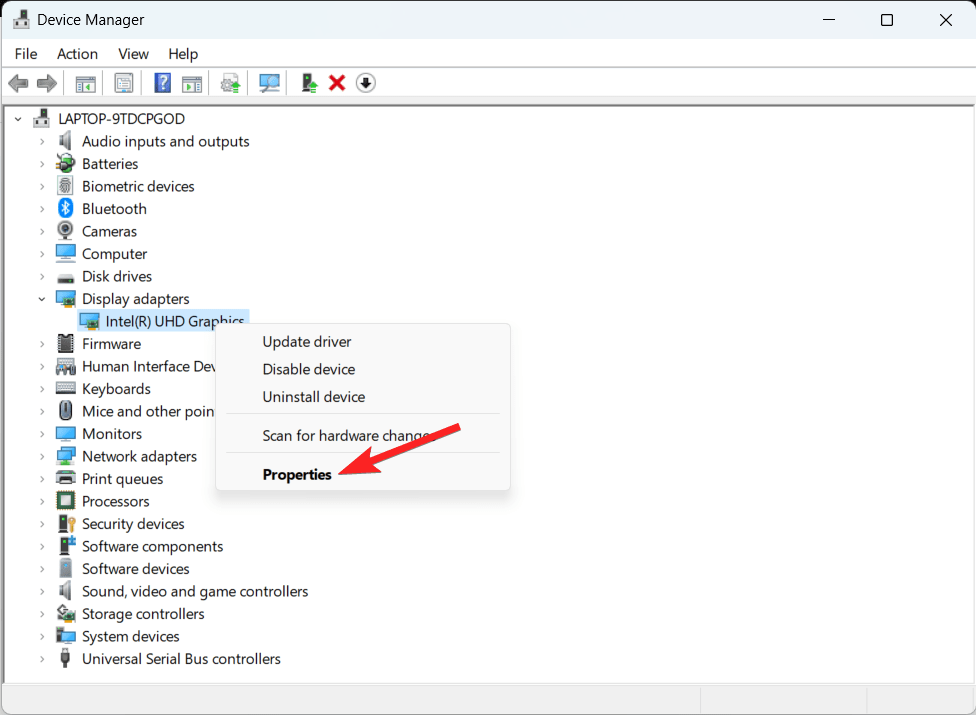
- When in the Display adapters area of the Device Manager window, right-click on the graphics driver and choose Properties.
- The Driver tab can be selected in the Properties dialogue box.
- Click on Roll Back Driver here.
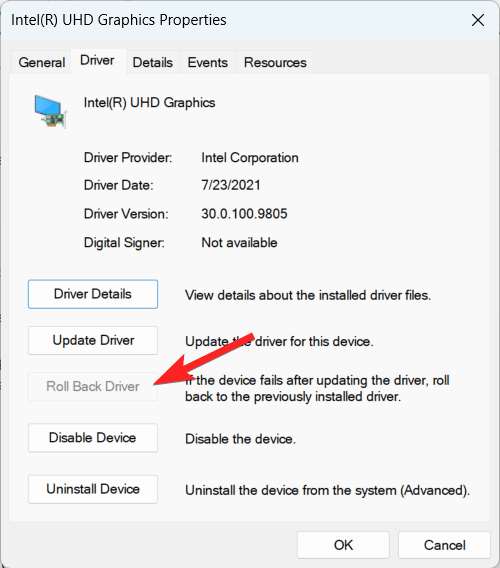
- By doing this, you can restore your graphics driver to a stable version from earlier.
- To save the changes and go, click OK.
- After that, exit the Device Manager window and restart your computer.
Your Windows 11 computer should now be free of the stretched screen issue.
5. Uninstall the Graphic Driver
- You can launch the Run command window using the keyboard shortcut Win + R.
- Enter devmgmt.msc in the search field of the Run command window, then click OK.
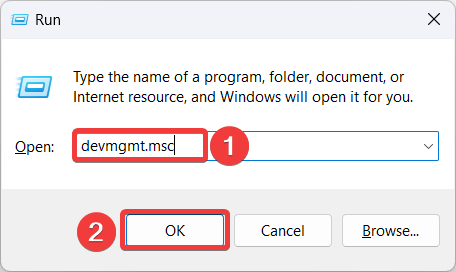
- By doing this, the Device Manager window will open.
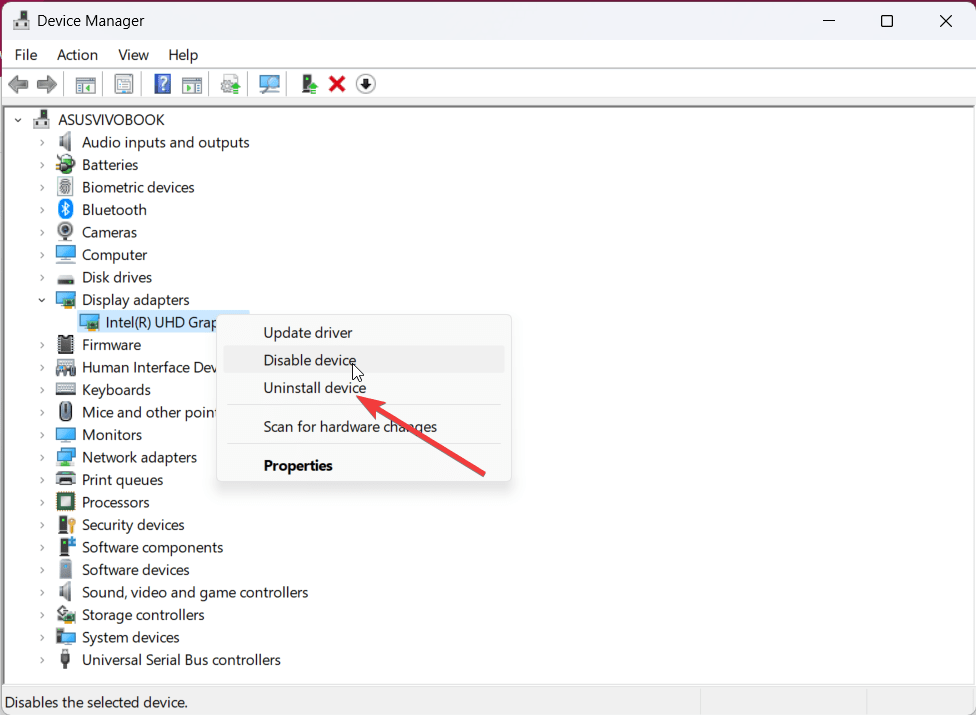
- Now expand the Display adapters section and right-click the graphics driver to bring up the context menu. From there, choose Uninstall device.
- The Uninstall Device popup will now appear; choose the checkbox next to Try to delete the driver for this device.
- Select the Uninstall option.
- Shut off the Device Manager window and restart your computer when the uninstallation is complete. It should become apparent as soon as the machine starts up.
6. Change the Refresh Rate Settings
Checking your device’s refresh rate settings is the next troubleshooting step you should undertake if there is a stretched screen issue on Windows 11.
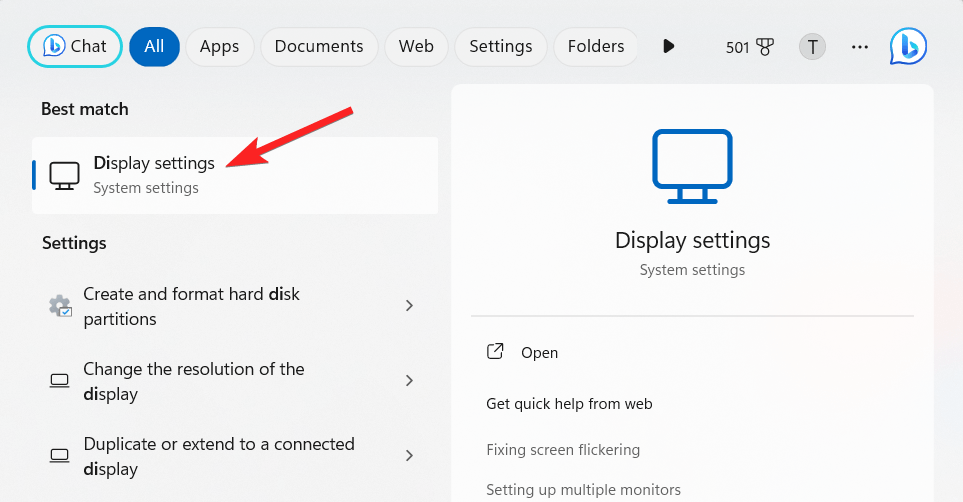
- Press the Windows key, type Display into the search field, and then choose Display Settings from the list of options.
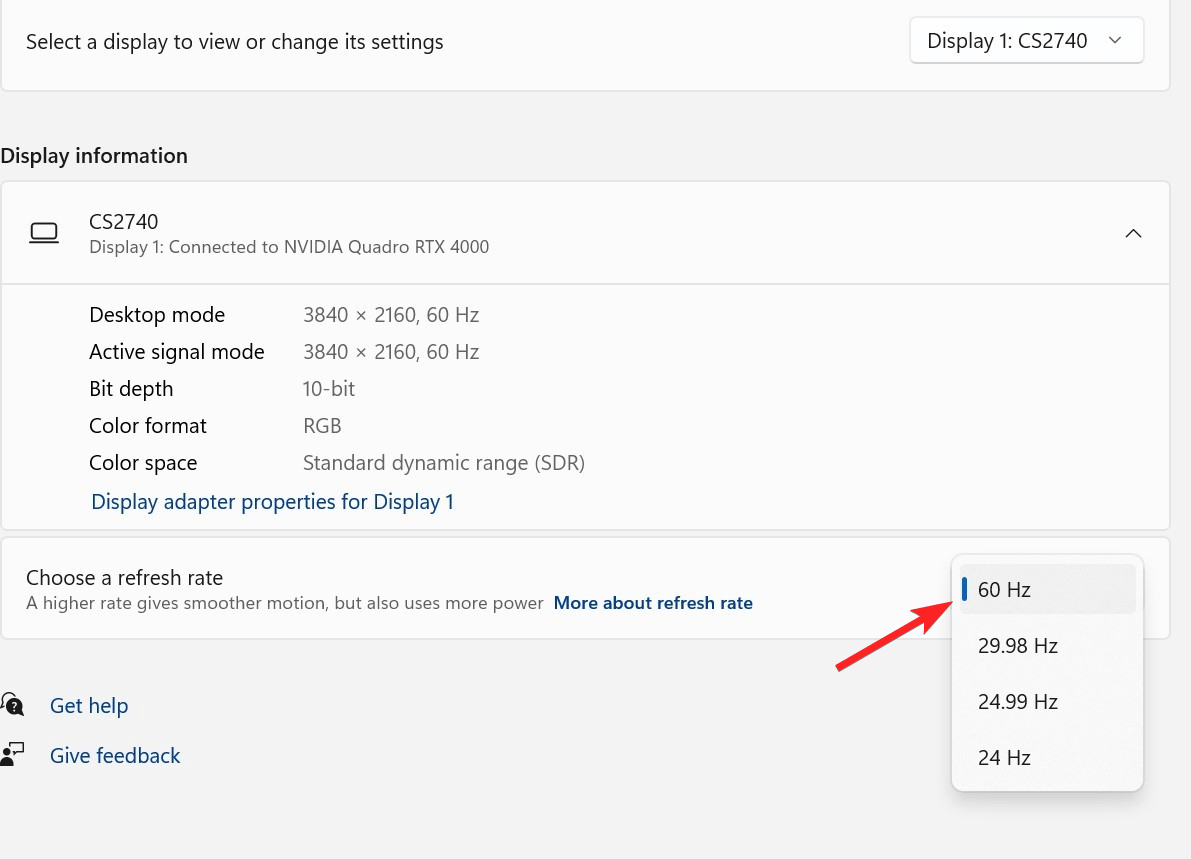
- Verify that the refresh rate setting in the Advanced monitor Settings window is set to the appropriate value for your PC monitor. You should set the refresh rate to the recommended value if it exceeds that amount.
7. Check Scale Settings
Checking your device’s scaling settings is the next step. Ensure that they are set to the correct setting, and then, if not, use the correct scaling.
- Press the Windows key, type Display into the search field, and then choose Display Settings from the list of options.
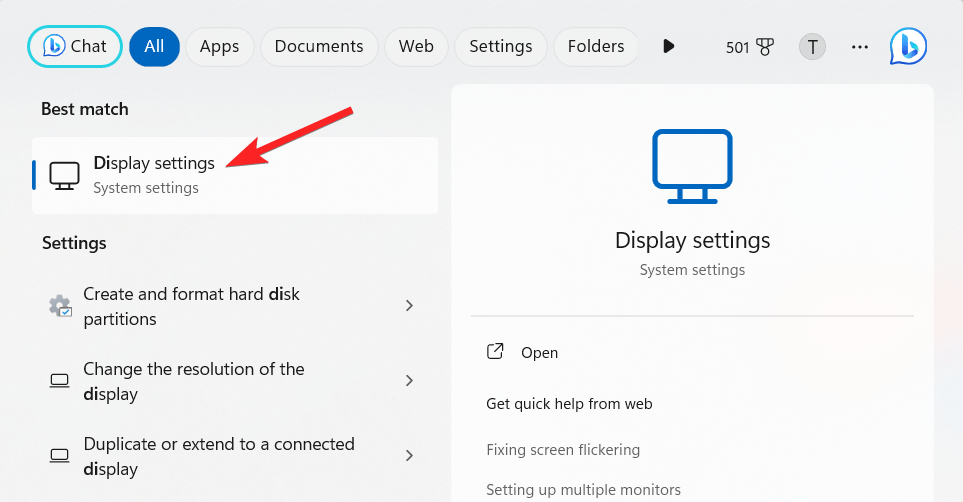
- Verify that the scale value in the monitor Settings window is set to the appropriate amount for your monitor.
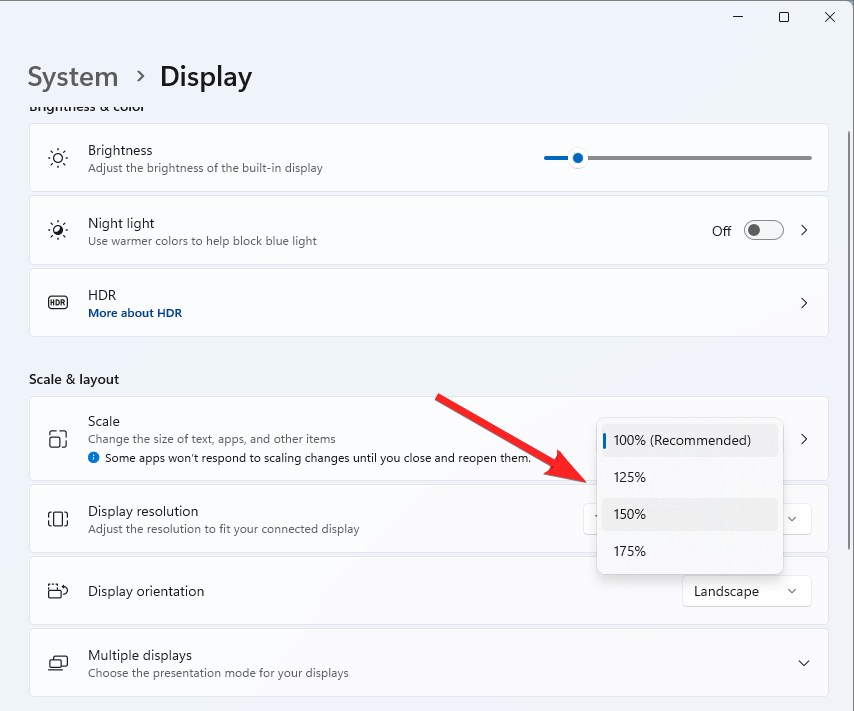
- You should set the scale to the suggested value if it exceeds the recommended setting.
Conclusion
In summary, resolving a stretched screen in Windows 11 can be a challenging task. But, it is possible to do with the correct procedures and a little perseverance. Following the instructions, your screen can quickly return to its original size. Remember to get assistance from a professional if you still need help. You may enjoy using Windows 11 without any more problems and restore your screen to standard with the correct assistance.
If you've any thoughts on How to Fix Stretched Screen Issue in Windows 11, then feel free to drop in below comment box. Also, please subscribe to our DigitBin YouTube channel for videos tutorials. Cheers!
