Is the File Explorer left pane missing in your Windows 11 PC? In this guide, we will know what could cause this problem and the various troubleshooting tips you can follow to resolve the issue easily.
Normally, when you open File Explore, on the left-hand panel, you will see all the important locations on your PC. It includes the hard drives and the folder that you have frequently accessed. Also, you can access the Downloads, Pictures, Music, Videos, and OneDrive from the File Explorer left pane.
The File Explorer left pane is also known as the navigation pane. There are a few common reasons why the File Explorer navigation pane may be invisible. You may have unknowingly disabled it, or it could be a glitch with the Windows OS. The problem may be caused due to some corrupt system file.
Tips to Fix File Explorer Left Pane Missing in Windows 11
Try these troubleshooting tips to enable the navigation panel on the left side of the File Explorer for easy access to libraries and drives on your PC. On the other hand, if you have trouble accessing File Explorer in Windows 11, then check this guide out.
1. Enable the Left-hand Navigation Panel of File Explorer
Start by enabling the navigation panel on the File Explorer. The most common mistake anyone can make is to disable the left navigation pane and then wonder why it is not visible.
To enable the navigation pane,
- Press Windows + E to open the File Explorer.
- On the toolbar at the top, click on View.
- From the menu click on Show > click on Navigation Pane.
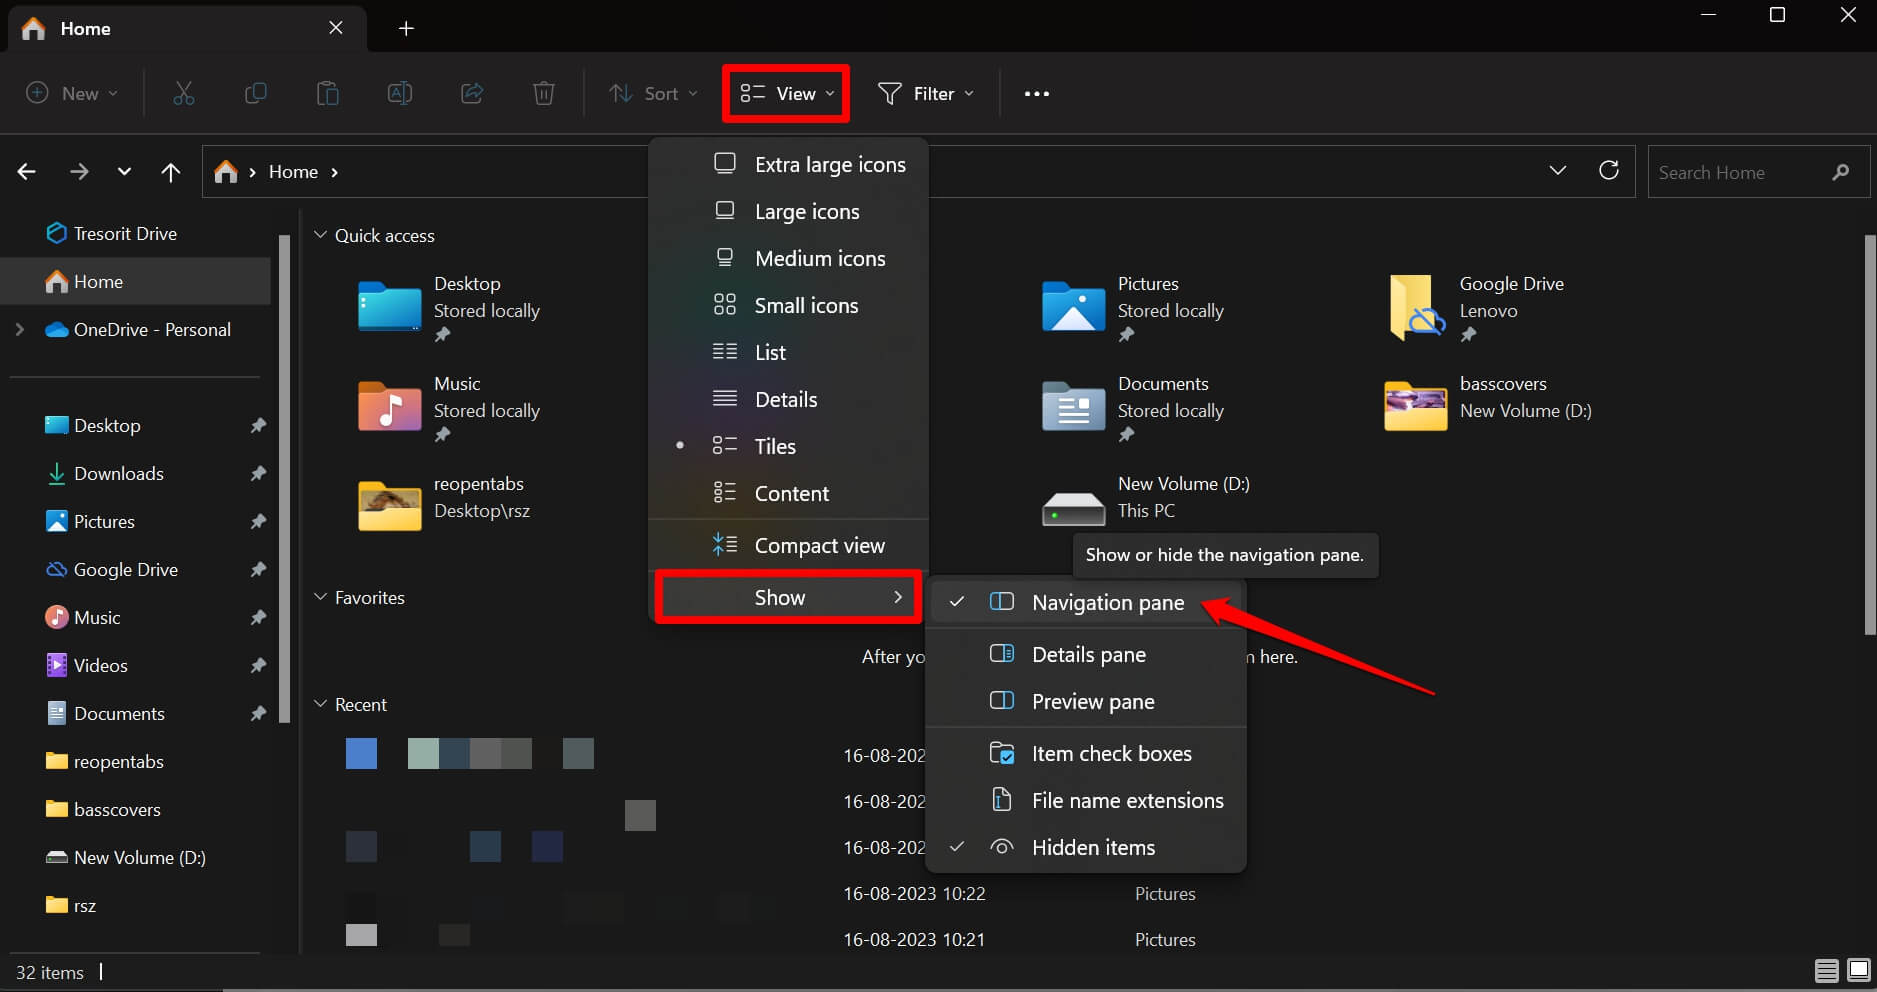
You will see a tick beside Navigation Pane which means it is enabled in File Explorer.
2. Restart Windows Explorer
This fix involves restarting the File Explorer from the Task Manager.
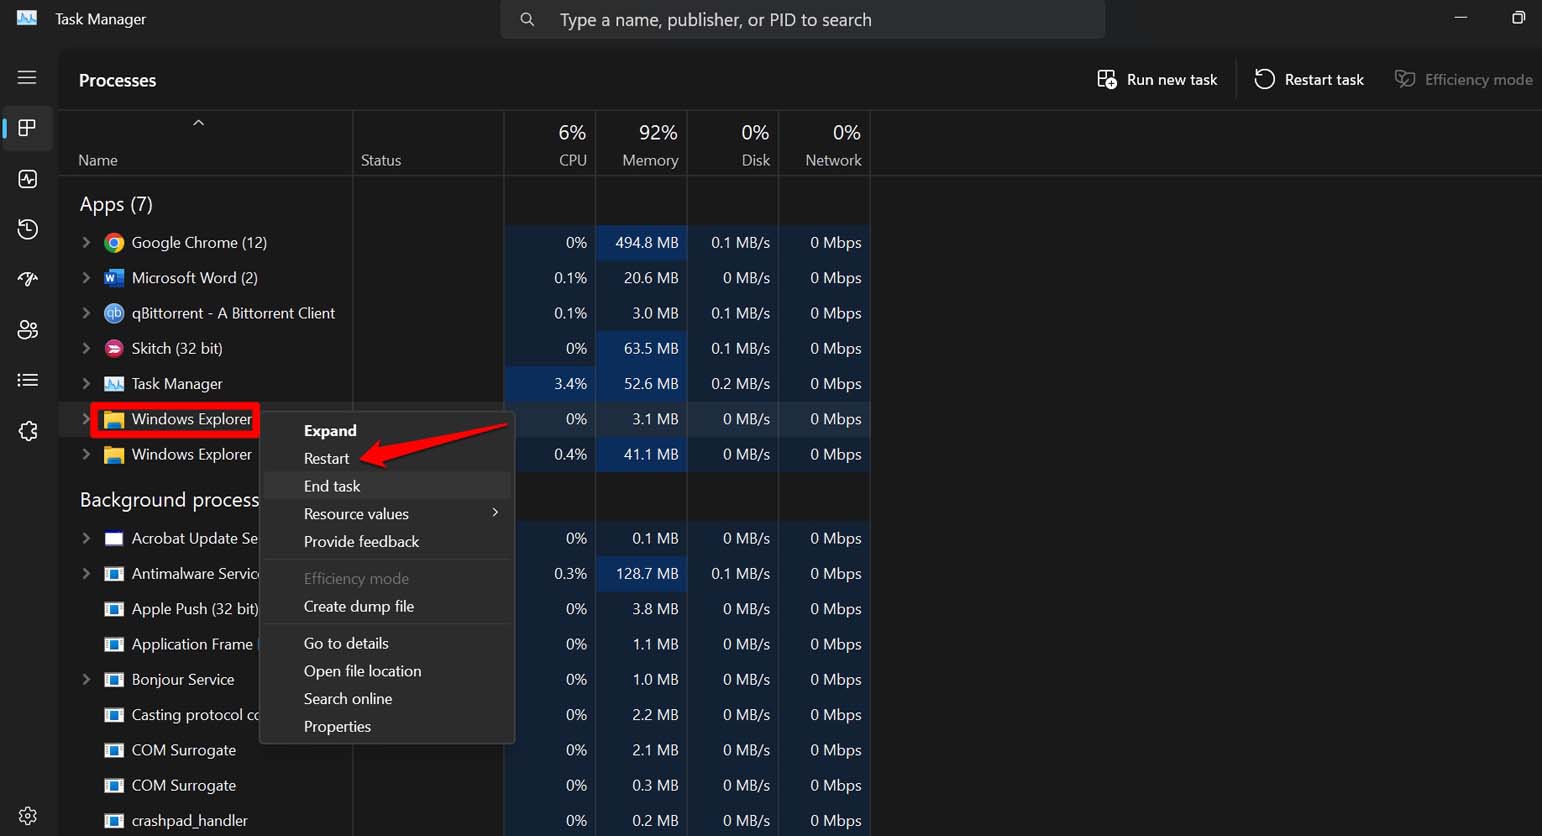
- Press the hotkeys Ctrl +Shift +Esc to open the Task Manager.
- Under Apps, scroll to Windows Explorer and right-click on it.
- From the menu, click on Restart.
- Close the Task Manager and access File Explorer.
3. Clear the File Explorer History
To clear the File Explorer history, you have to access the folder options dialog box.
- Open File Explorer by clicking the hotkeys Windows + E.
- Click the 3-dot icon at the far right end of the toolbar.
- From the menu, click on Options.
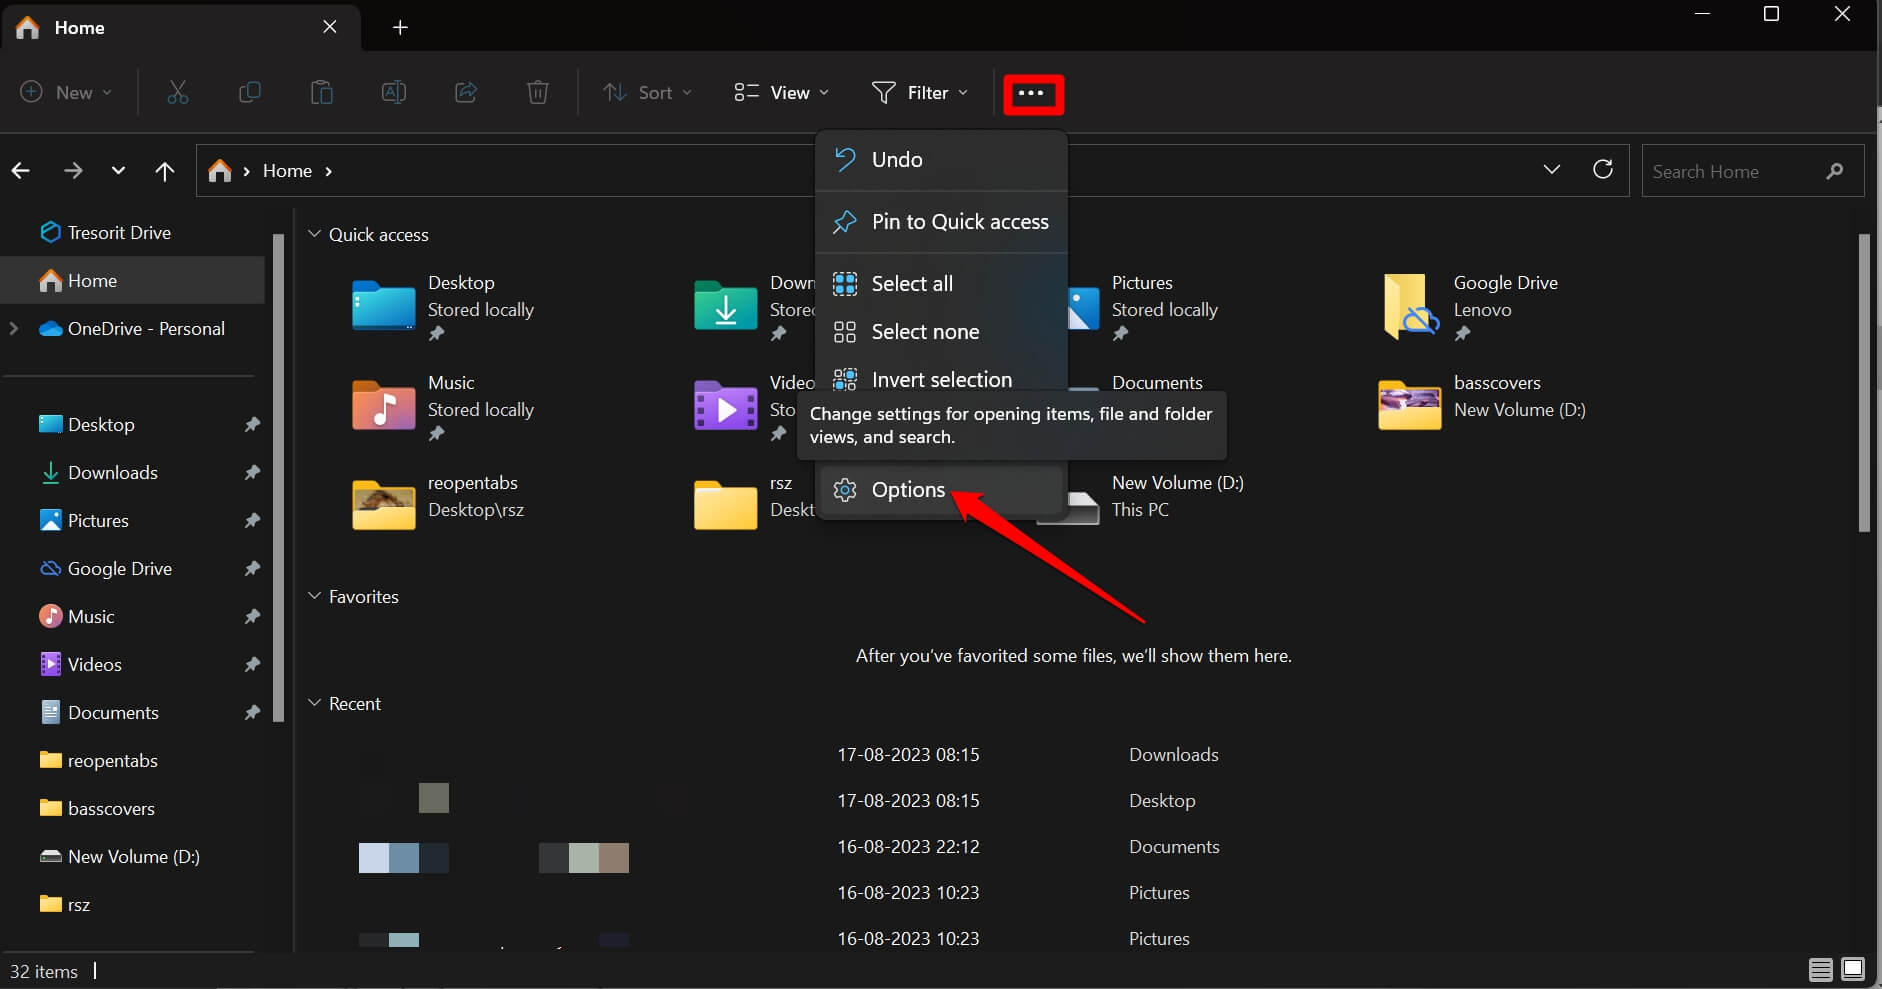
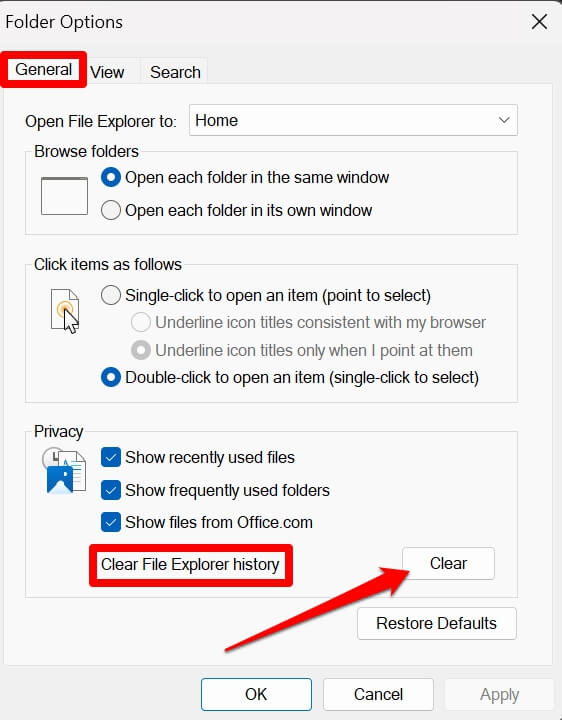
- In the Folder Options dialog box, click on the General tab.
- Within that, scroll to Clear File Explorer History under the Privacy tab and click on the button Clear.
- Close the dialog box and launch File Explorer again.
4. Restart the PC
At times, it has been observed that random glitches on the Windows OS can be dealt with by simply restarting the PC. To restart your Windows 11 system,
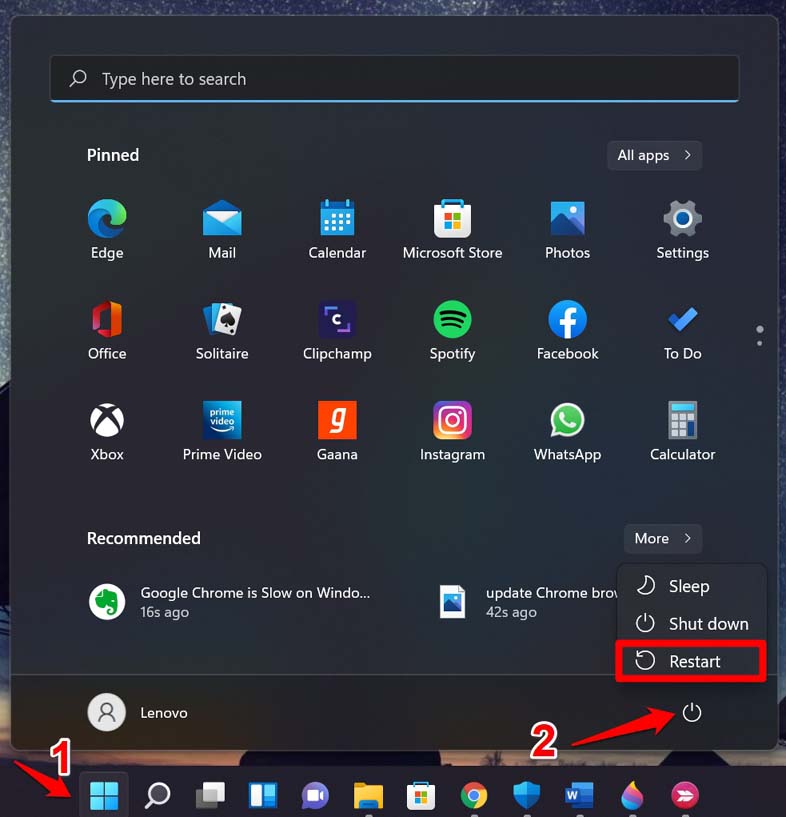
- Press the Windows key to bring up the search console.
- Then click the Power icon at the bottom right corner of the search box.
- From the small menu that pops up, click on the button Restart.
5. Install Windows 11 Update
To fix any bugs on the current version of Windows OS installed on your PC, look for new software updates that are available for download. Here are the steps for you.
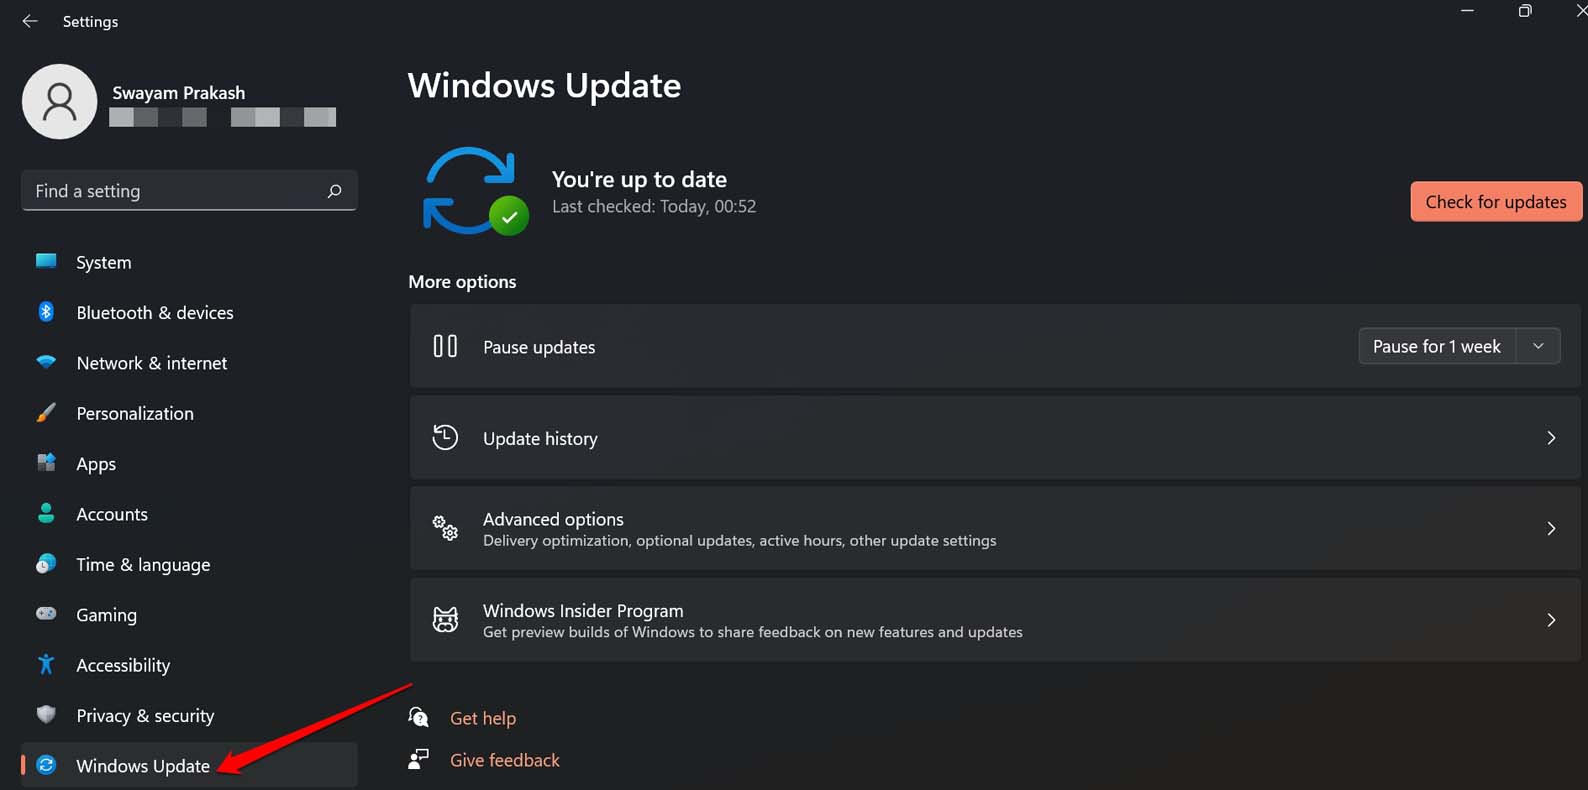
- Press Windows + I to open the settings.
- Click on Windows Update on the left side panel.
- Then click on Check for Updates.
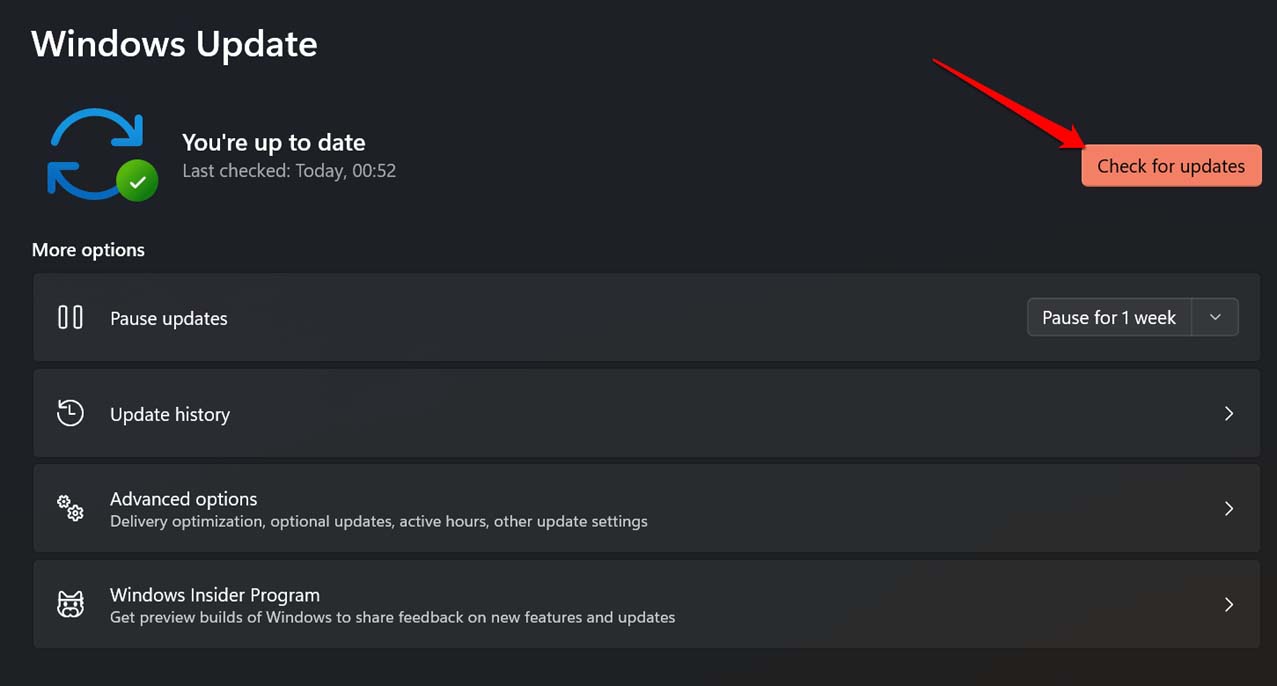
- If an update is available, then click on Download Now to start the installation.
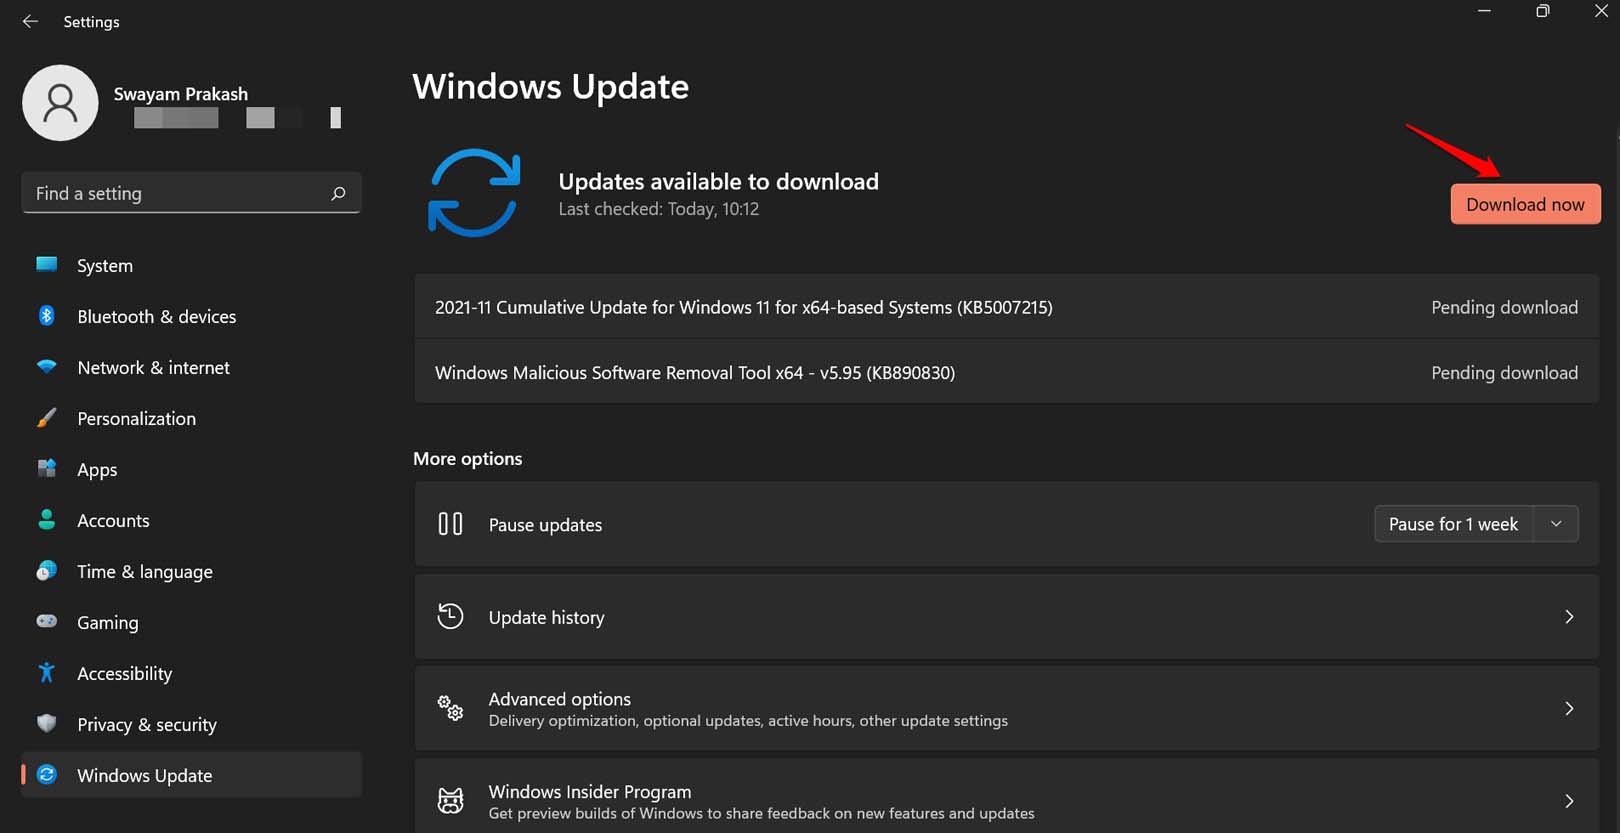
To complete the update installation, follow the instructions on the screen. After finishing the update, the PC will restart. Then open the File Explorer and check if the left pane is now visible.
6. Search for Corrupt System Files and Fix Them
You can implement the SFC and DISM scans on Windows 11 to search for possibly corrupt system files and replace/fix them. These commands can be issued using the Command Prompt. Let’s check out the steps.
- Open the Command Prompt using the Windows search with Administrator permissions.
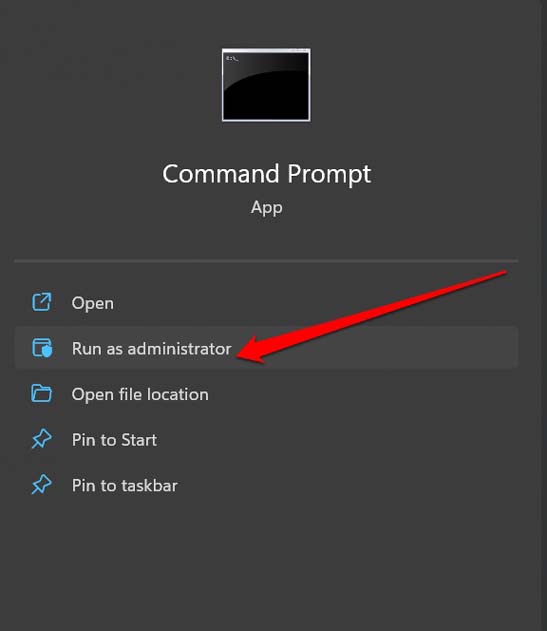
- Enter the command
sfc/scannow
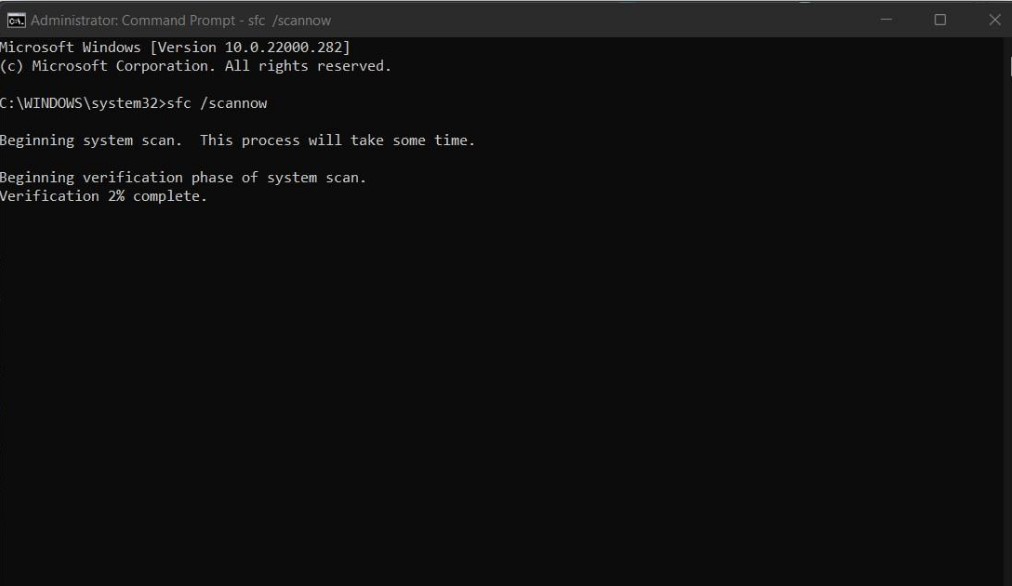
- Press enter
- To perform a DISM scan enter the following commands.
DISM.exe /Online /Cleanup-image /CheckHealth

DISM.exe /Online /Cleanup-image /ScanHealth

DISM.exe /Online /Cleanup-image /RestoreHealth
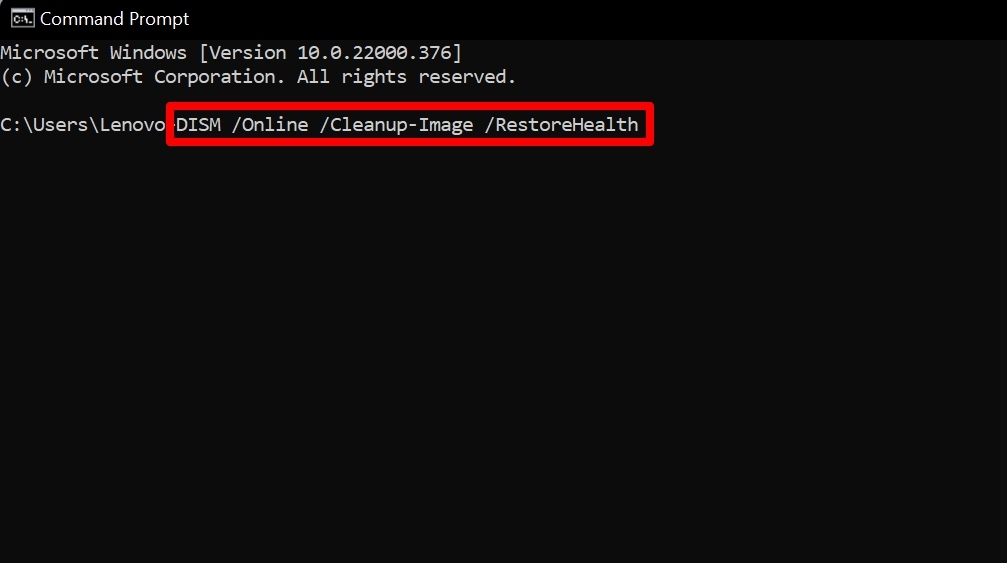
While these commands are executed, and the search for corrupt system files is going on, you have to wait a bit and not interrupt the process by any means.
7. Re-Register System Apps
As File Explorer is a system app, you can re-register it using Windows PowerShell.
- Launch Windows PowerShell using the native search function.
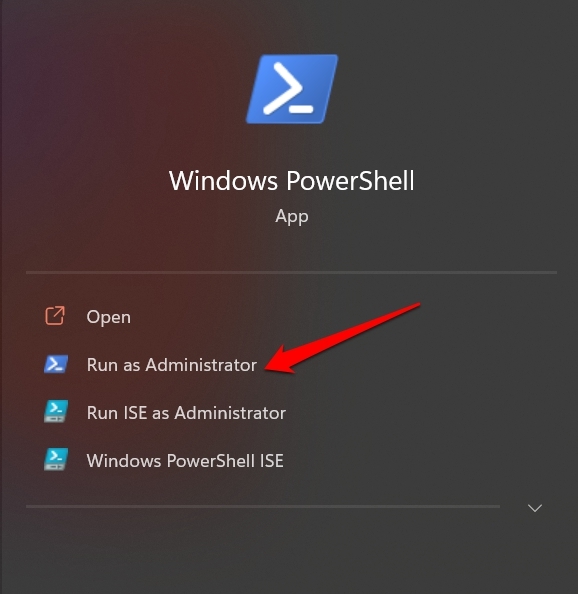
- Click on Yes when the prompt appears.
- Now, enter this command
Get-AppXPackage -AllUsers |Where-Object {$_.InstallLocation -like "SystemApps"} | Foreach {Add-AppxPackage -DisableDevelopmentMode -Register "$($_.InstallLocation)\AppXManifest.xml"}
- Press enter and wait until the re-registration is complete. It may take a few seconds.
After completing the steps, press Windows + E to open File Explorer and check if the left pane is now showing up.
8. Rollback Windows Update
It may happen that a recent Windows Update that you installed may have brought some bug into the system, causing it to showcase this glitch where the navigation panel of the file explorer goes missing. To fix that you can roll back or uninstall the most recent software update that you installed on your computer.
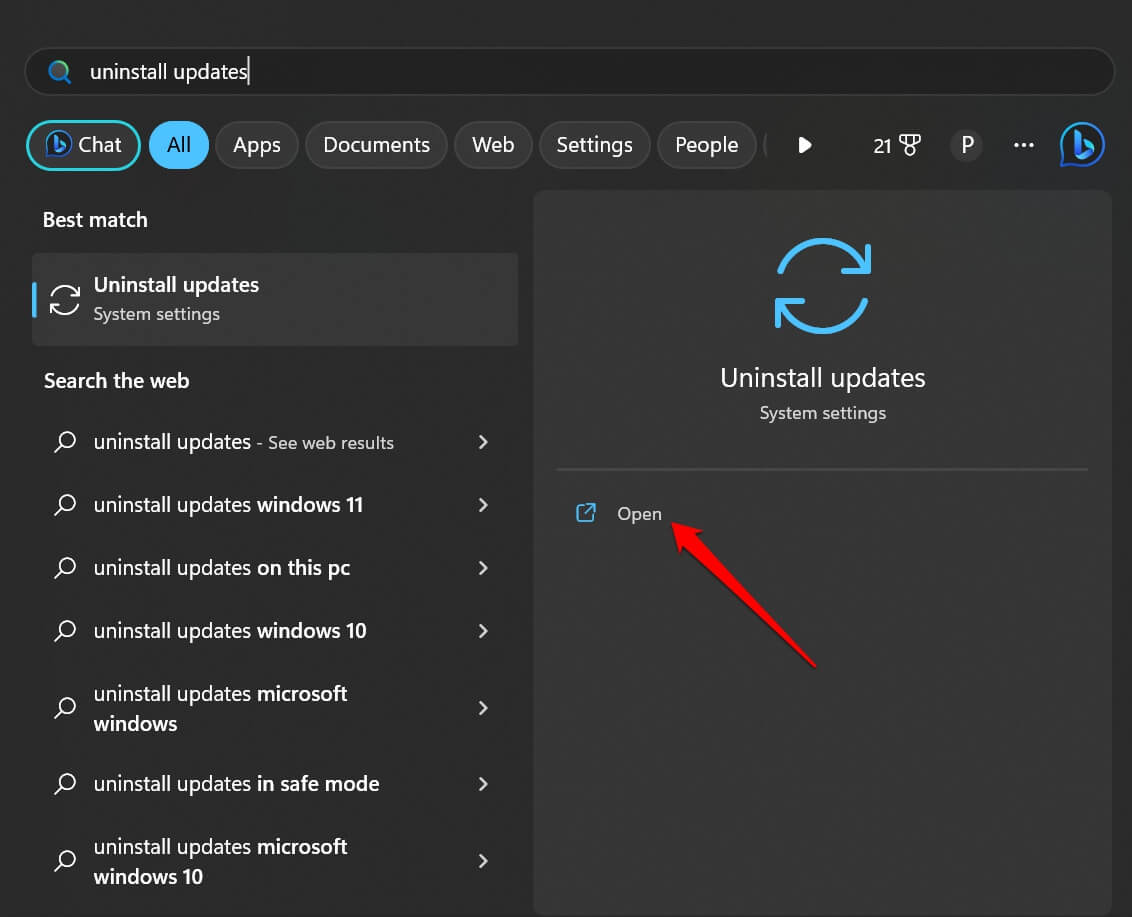
- Press Windows + S to open the Search.
- Type Uninstall Updates and click Open.
- Scroll to the most recently installed update build and click on Uninstall.
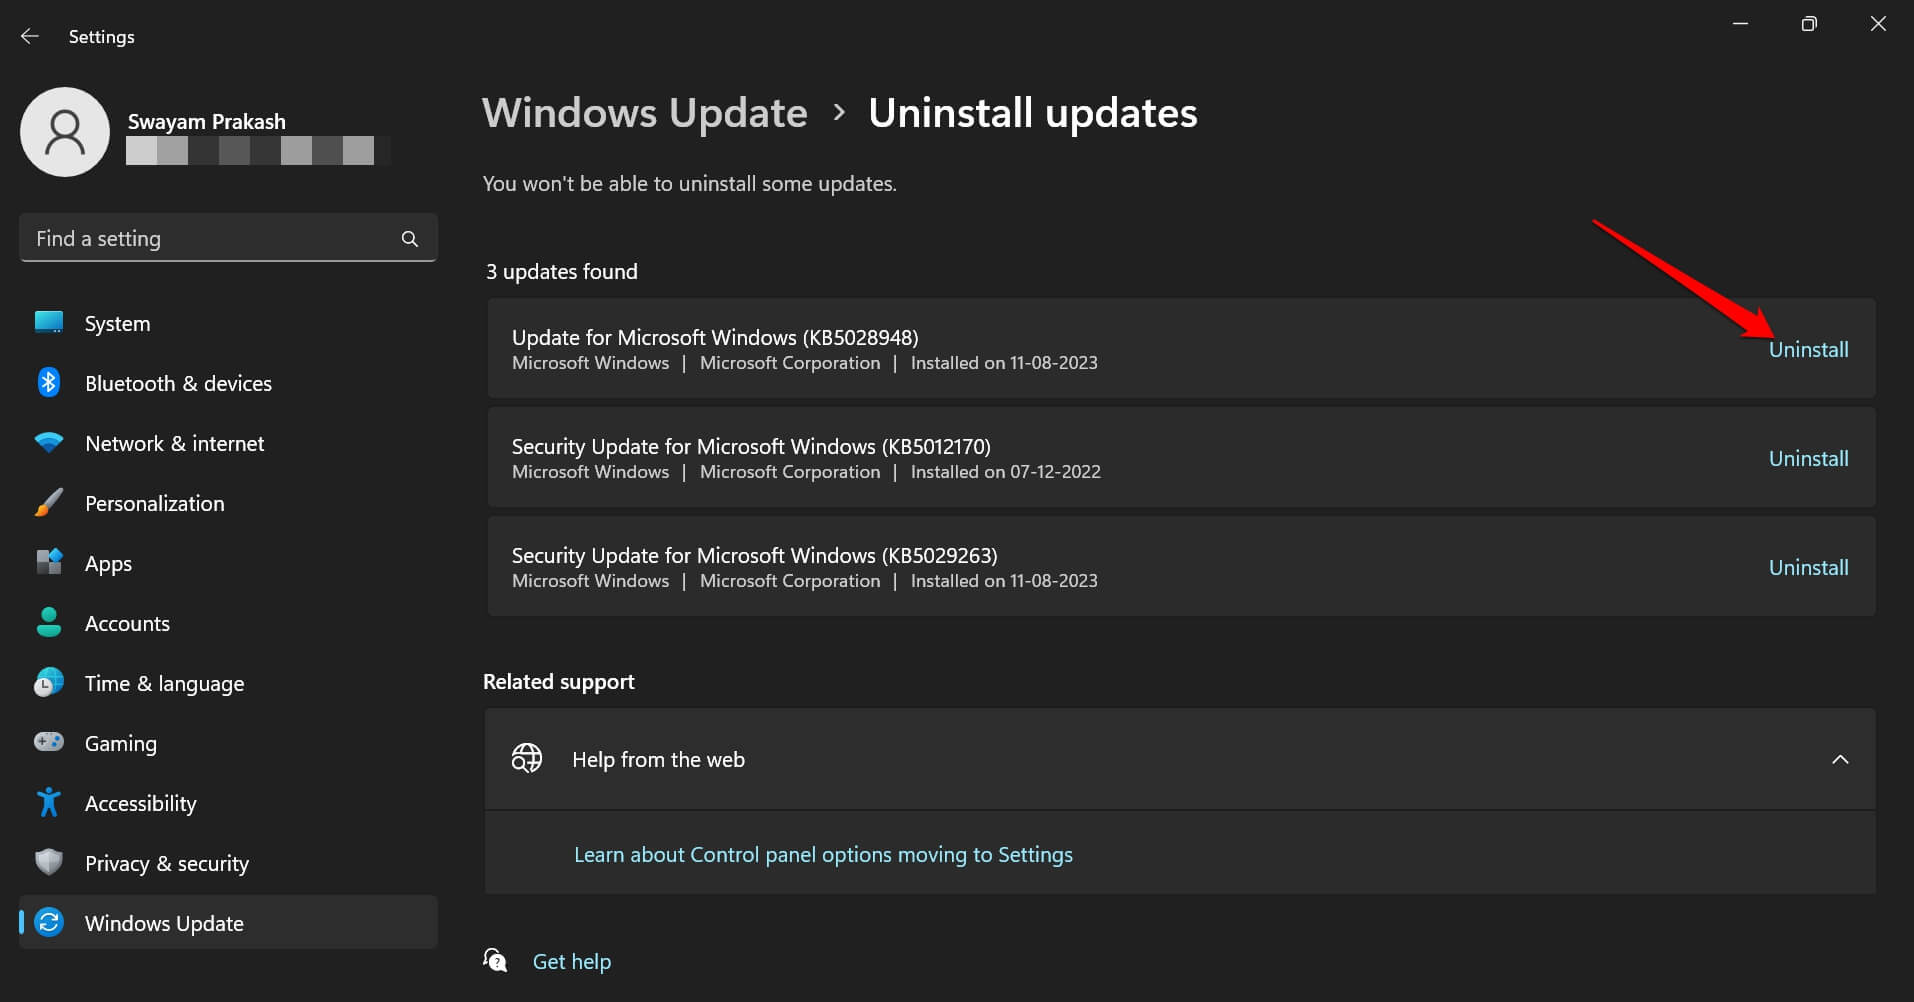
- When the confirmation pop-up appears again, click on Uninstall to proceed.
- Close the Settings and restart the PC.
9. Re-register Shdocvw.DLL File
This important DLL file may have been deregistered for some reason, and it may have happened due to a corrupt system file. You have to re-register this file using the command prompt.
- Launch the Command Prompt by pressing Windows + S and typing cmd in the search box.

- Now enter this command and press enter.
regsvr32 /i shdocvw
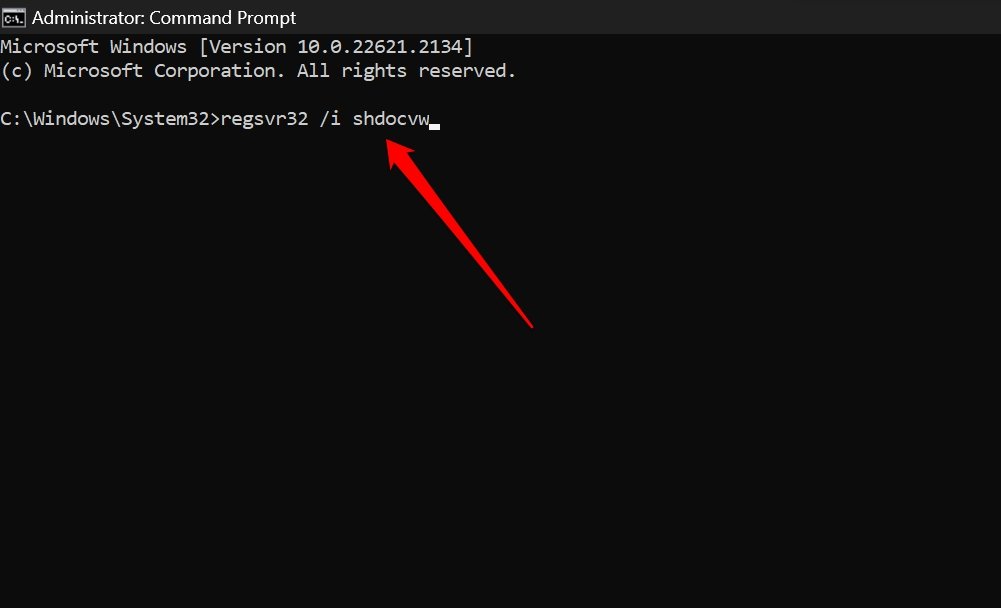
- Close the command prompt after executing the above command.
Now, open the File Explorer and check for the missing left pane.
10. Perform a System Restore
Performing a system restore will take your PC back to a timeline where there was no error with the File Explorer. This means the left pane on the File Explorer was showing up. Here are the step to restore the Windows 11 system.
- Press the Windows key.
- Type in restore in the search console.
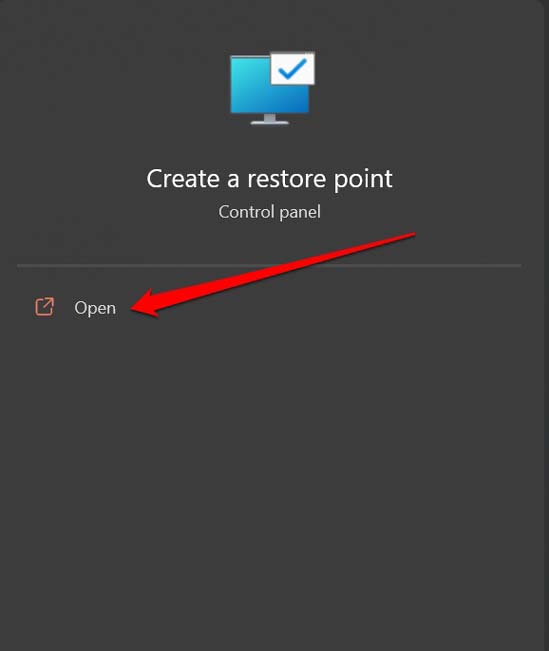
- When Create A Restore Point appears, click on Open.
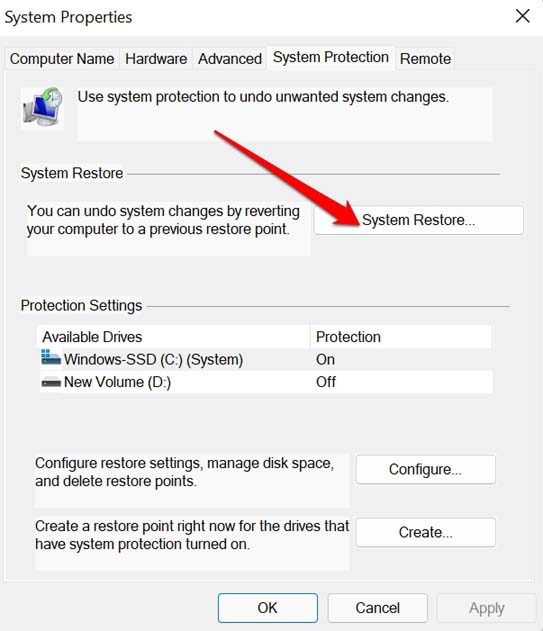
- On the System Properties dialog box, under System Protection, click on the button System Restore.
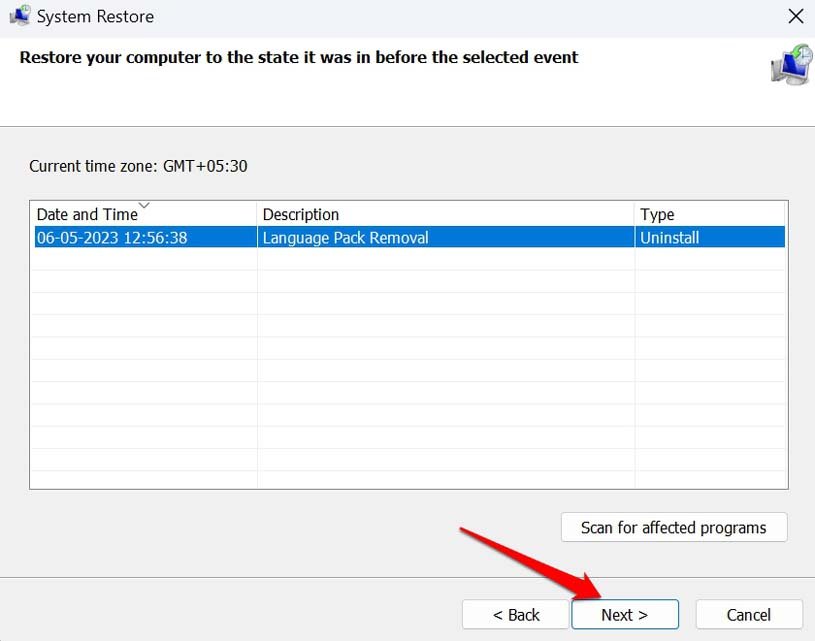
- Click the Next button to proceed.
- Select a restore point and click Next.
- For a list of the programs and services that will be removed during the process, click Scan for Affected Programs.
- Once the restore point has been verified, click Finish to proceed.
11. Reset the Computer
As a final fix, when other troubleshooting methods did not yield any result in making the navigation pane visible in File Explorer, it is time to reset the PC. It is a factory reset that will wipe out every data present on the computer and uninstall all the apps on it.
Before beginning the reset process, back up your important files and folders on a USB drive or an external hard drive. Here are the steps to reset Windows 11 PC.
- Press Windows + S to go to search.
- Type Reset This PC and click Open.
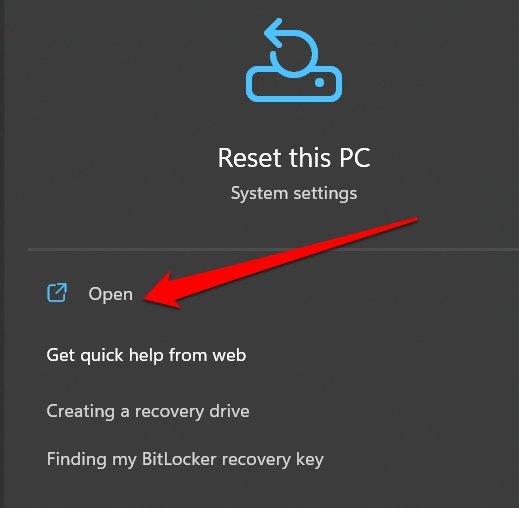
- Then scroll to the button Reset PC and click on it.
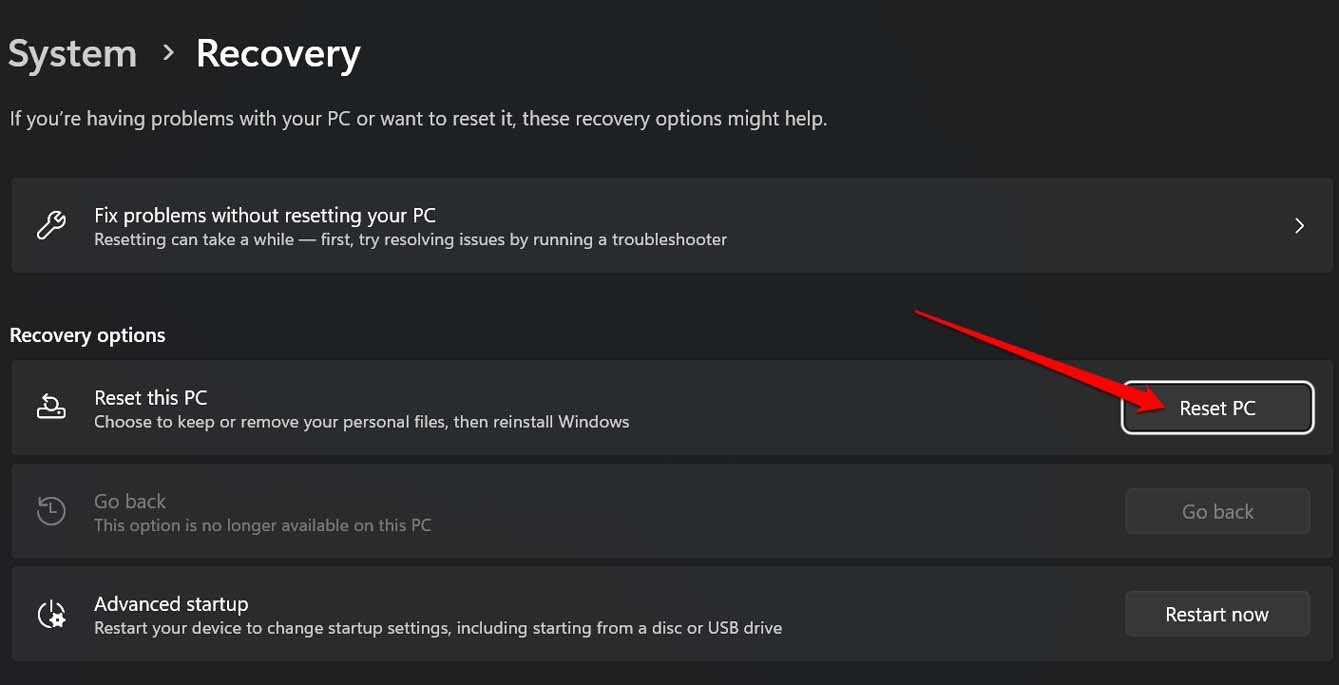
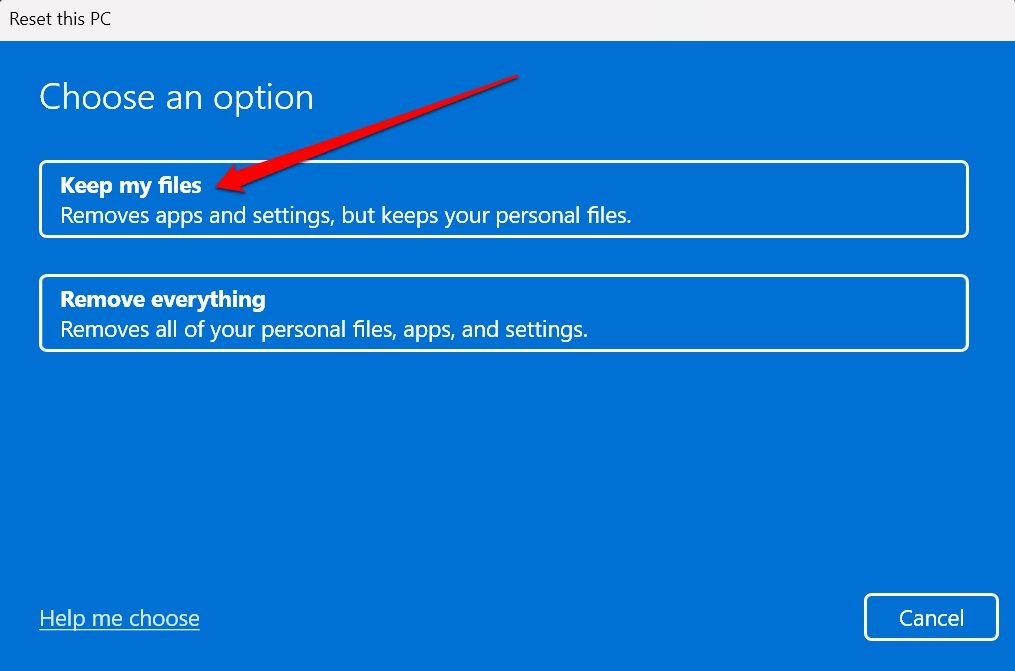
- Click on Keep My Files to safeguard the files on the C drive, and you can have them again after the computer starts after the completion of the Reset process.
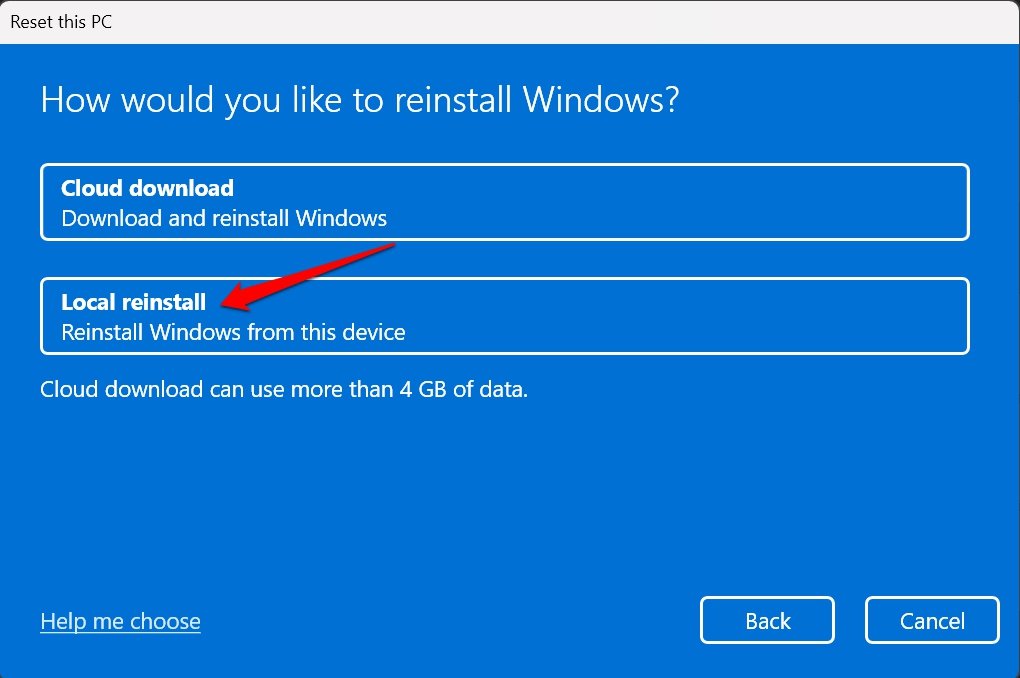
- Select whether you want to do Cloud Installation (requires internet connection)or Local Installation (installing Windows OS doesn’t require internet connection) of Windows 11 after resetting.
- Click Next until you see the Resetting Will bullet listing. Click on View Apps that will be removed.
- Take a screengrab of these apps list so that you can install them post-reset from the web.
- Click on Back and click on Reset.
Your PC will restart a couple of times during the reset. Do not interrupt any process while the resetting is going on actively. After the reset, install new software updates and install the necessary apps on the computer that you were using previously.
Then check if the navigation pane on the left of the screen is showing when opening the File Explorer.
Navigate Through the Drives and Folders Using the File Explorer Left Pane
The navigation panel on the left hand of the File Explorer makes it easier for you to access your data spread across various drives, directories, and folders. If you are not seeing the left pane of the File Explorer, you must immediately follow the tips I have shared in this guide to re-enable the feature or fix any other issues that are causing the navigation pane to disappear.
If you've any thoughts on How to Fix File Explorer Left Pane Missing in Windows 11?, then feel free to drop in below comment box. Also, please subscribe to our DigitBin YouTube channel for videos tutorials. Cheers!


