Windows 11 is equipped with powerful energy-efficient features that ensure your battery life is preserved to a large extent. One such interesting feature is power throttling, which is a convenient way to increase the battery life of laptops by slowing down background processes. With the power throttling feature enabled, you can easily manage the CPU power consumption and prioritize energy, performance & user experience. The power throttling feature can be helpful when you are on the go away from the charging ports.
The choice to turn Power on or off throttling in Windows 11 depends on individual computing preferences and requirements.
In case you are interested in using the power throttling feature, you are in the right place. In this guide, we will explore three straightforward methods, providing step-by-step instructions on how to activate or deactivate the power throttling feature in Windows 11. This will help you tailor your Windows 11 experience to your specific needs while ensuring a seamless user experience.
What is Power Throttling in Windows 11?
Windows 11 includes a function called power throttling that is intended to increase energy economy and lengthen the battery life of laptops and other portable electronics. It operates by judiciously controlling background programs’ CPU utilization to ensure that they use the least amount of resources when not in use. With the power throttling feature enabled, Microsoft ensures that you can save up to 11% more battery on every charge with negligible impact on the performance of the app.
This makes it an invaluable tool for customers trying to optimize the energy efficiency of their devices because it can result in significant power savings, especially on laptops.
How to Check if Power Throttling is Enabled?
If you do not know which apps are using the power throttling feature in the background, you can easily find out from the Task Manager window. Here is the complete procedure for the same.
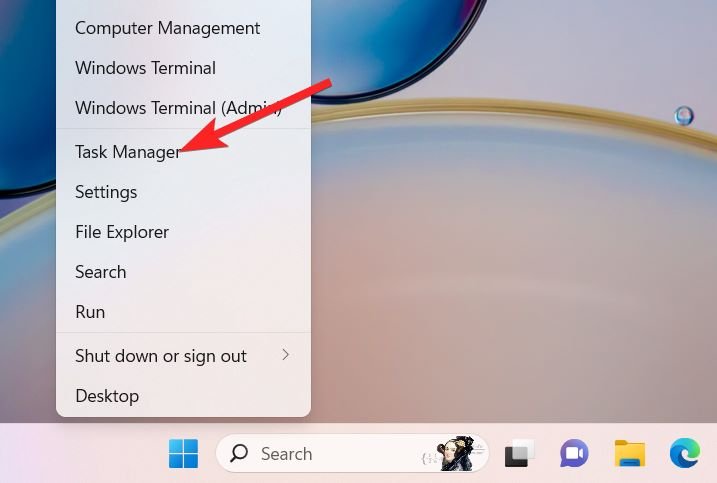
- Right-click the Start button and choose Task Manager from the flyout menu.
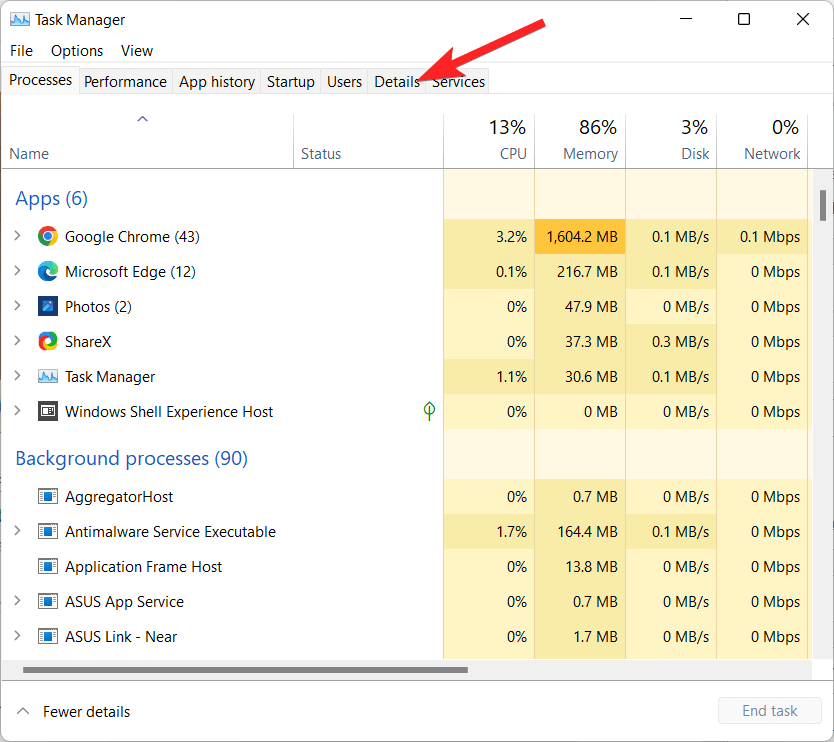
- Switch to the Details tab of the Task Manager window.
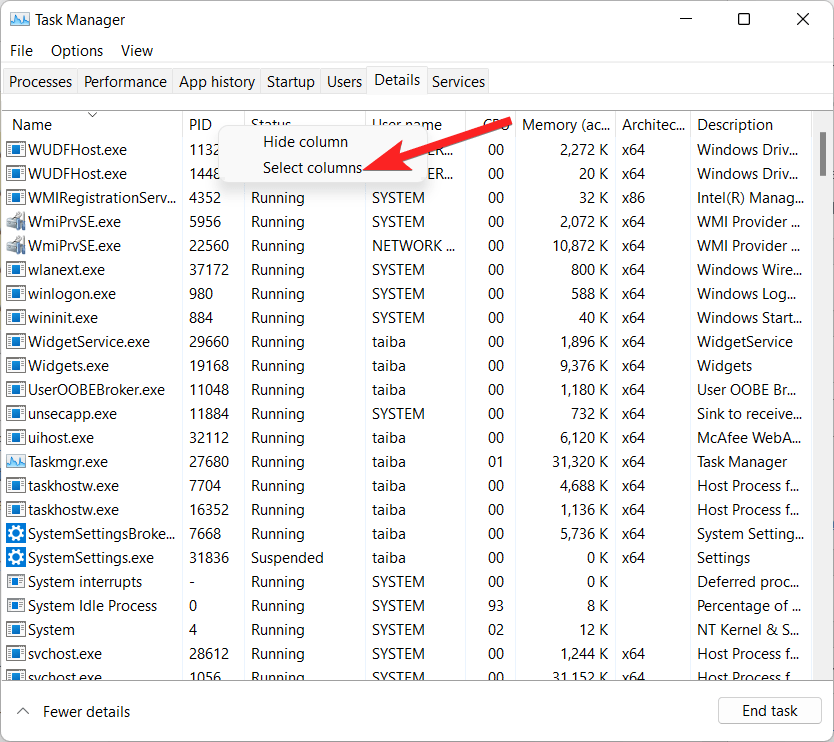
- Now right-click any of the column headings and choose Select Columns from the context menu.
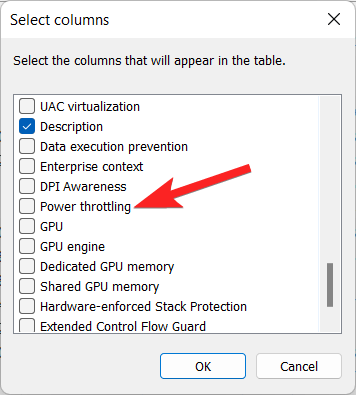
- Scroll down and look for Power throttling in the list of columns. Enable the checkbox preceding it and press the OK button.
- Doing so will add a new column named Power throttling in the Details tab. You can easily check the enabled and disabled status in the power throttling column. Just look for the app you are concerned about and see if Enabled and Disabled are mentioned next to it.
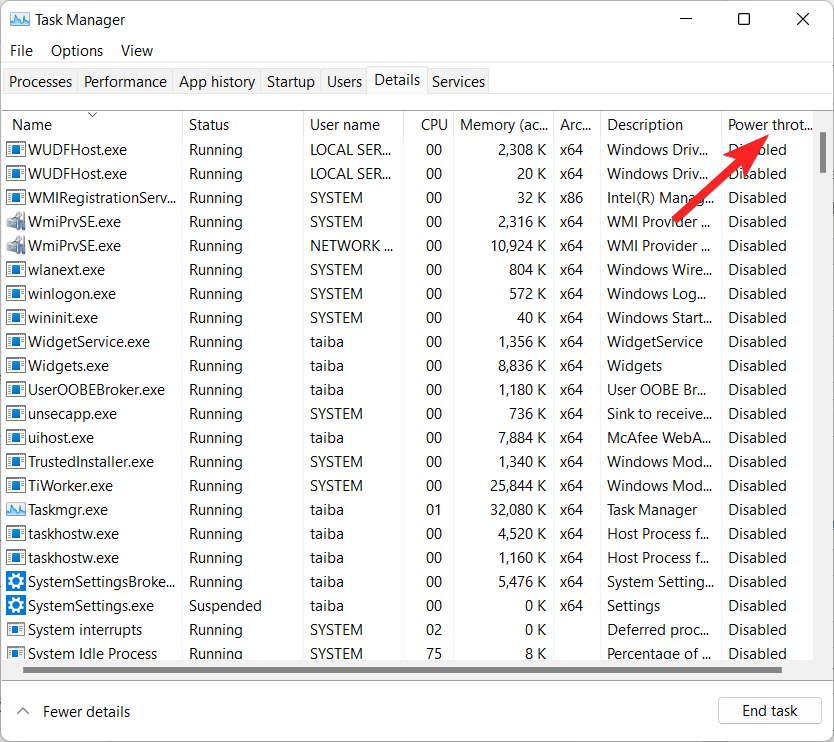
- If you want to test whether the feature is working for the app, simply minimize and maximize the application. The power throttling status will change concerning it.
How to Enable Power Throttling in Windows 11?
There are different ways by which you can enable the power throttling feature in Windows 11. Some of the most popular ones are explained below.
1. Via Power Settings
You can easily change the power throttling feature from the Power & battery section of the Settings app. The complete step-by-step procedure is described below.
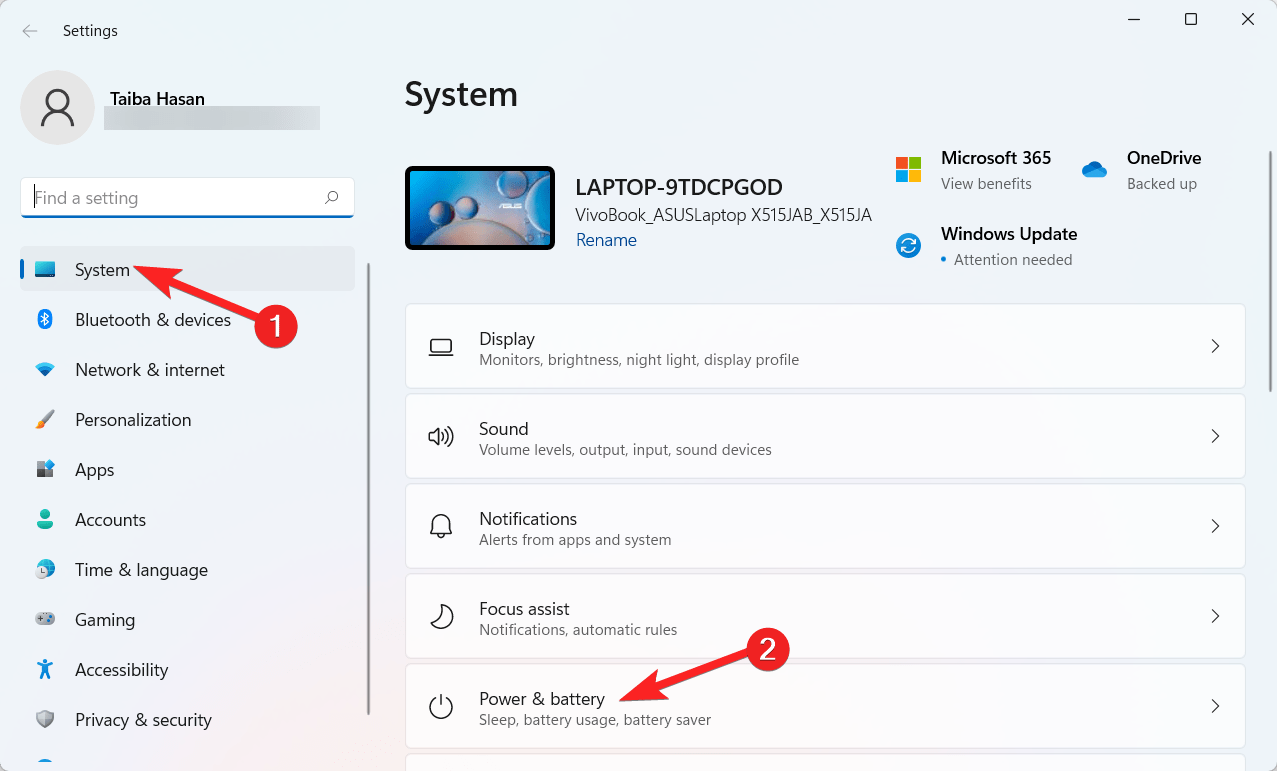
- Press the Windows key along with I to access the Settings app in Windows 11.
- While staying in the System settings, scroll down and click the Power & battery option in the right section.
- Scroll down and click the Power Mode option in the right section to access the following three choices – Best power efficiency: When you choose this option, the power throttling feature will be enabled. Balanced: The power throttling feature is also enabled in the balanced mode. Best Performance: When you choose the best performance feature, the power throttling feature is turned off.
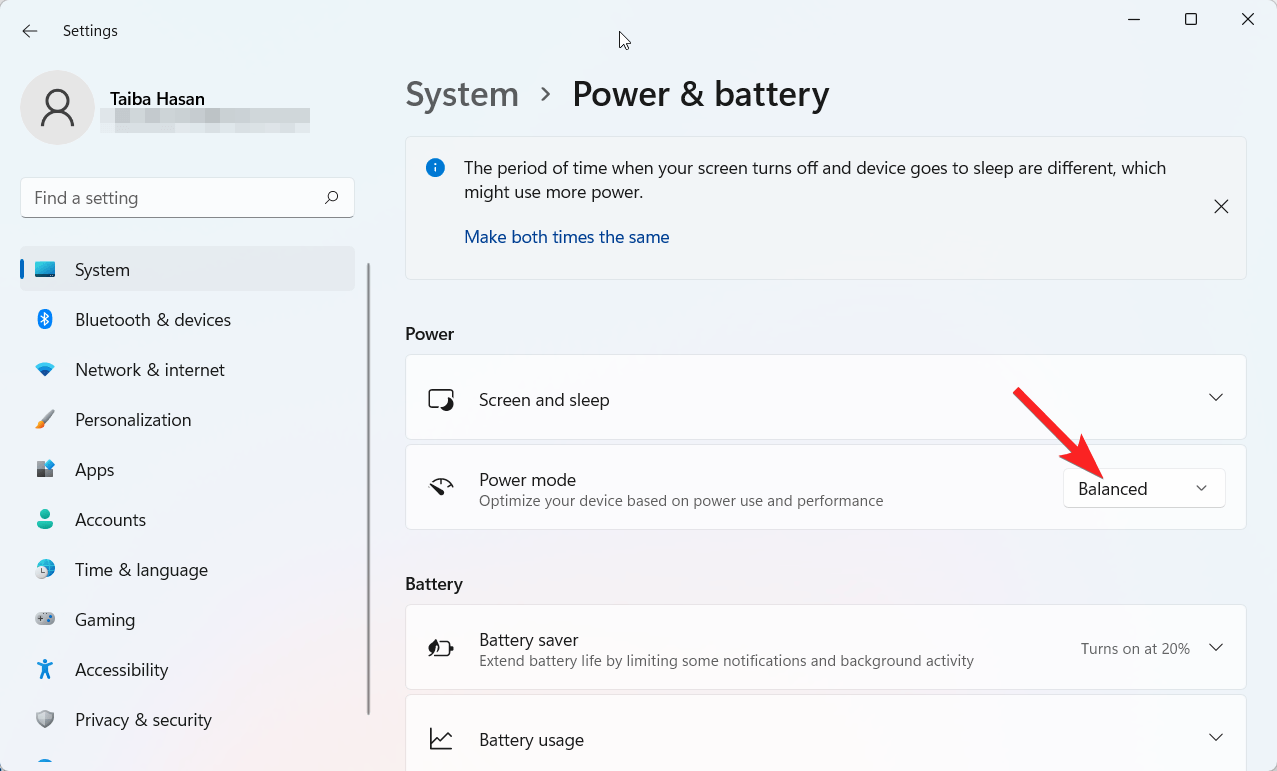
- To enable the power throttling feature in Windows 11, you need to either choose the best power efficiency or balanced option from the drop-down.
While the power throttling feature limits the power consumption, you need to use the CPU throttling feature judiciously if you want your PC to achieve the highest level of performance while safeguarding against overheating and potential damage.
2. Via Group Policy Editor
You can also edit the Group Policy Editor to enable or disable the Power Throttling on your Windows 11. Below is the complete procedure for doing so.
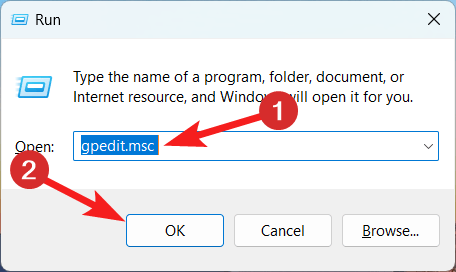
- Use the Windows + R shortcut to launch the Run dialog box. Type gpedit.msc and press OK to launch the Group Policy Editor on Windows 11 PC.
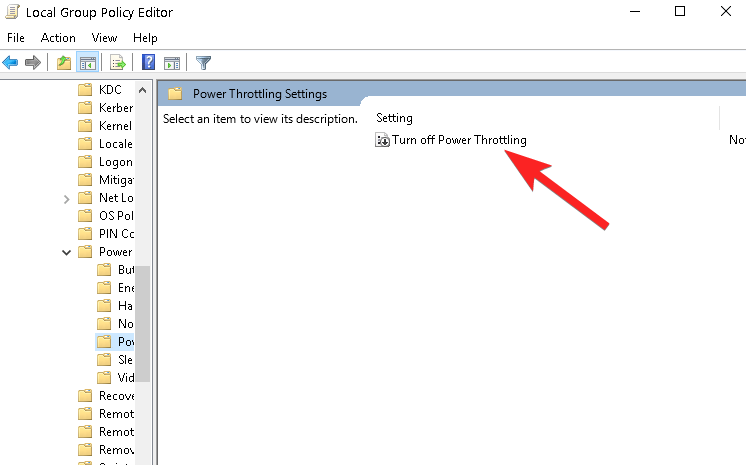
- In the Group Policy Editor, navigate to the following path using the left navigation panel: Computer Configuration\Administrative Templates\System\Power Management\Power Throttling Settings
- When the above location is accessible, access the Turnoff Power Throttling option in the right-hand pane.
- Double-click the Turnoff Power Throttling option to open its settings window.
- Enable the radio button next to the Disabled option in the window.
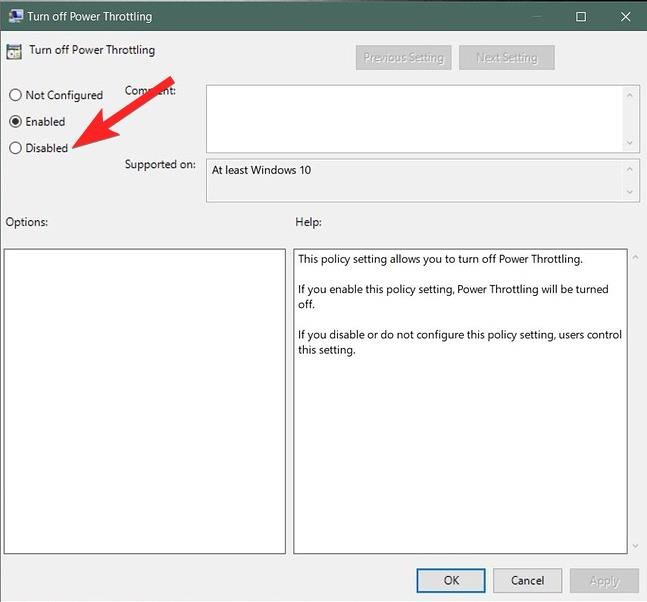
- Press the Apply button to save the changes and OK to close the window.
- To apply the following changes, restart your PC.
3. Via Registry Editor
You can also modify the registry editor to ensure that the power throttling feature gets enabled.
Note: When modifying the registry, you should be careful to avoid messing up your Windows 11 system. Also, before making any changes, it’s a good practice to create a backup of your registry entries.
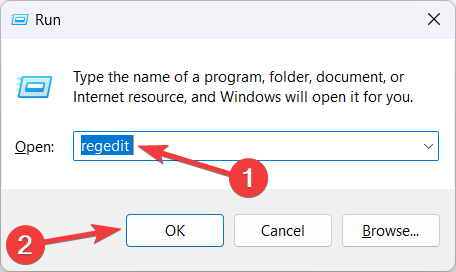
- To open the Run dialog box on a Windows 11 PC, press the Windows + R shortcut key combination. Type regedit in the run dialog box and press the OK button to launch the registry editor.
- When the registry editor window opens, go to the following location:
Computer\HKEY_LOCAL_MACHINE\SYSTEM\CurrentControlSet\Control\Power
- Right-click the Power folder choose New from the context menu and then select Key from the sub menu.
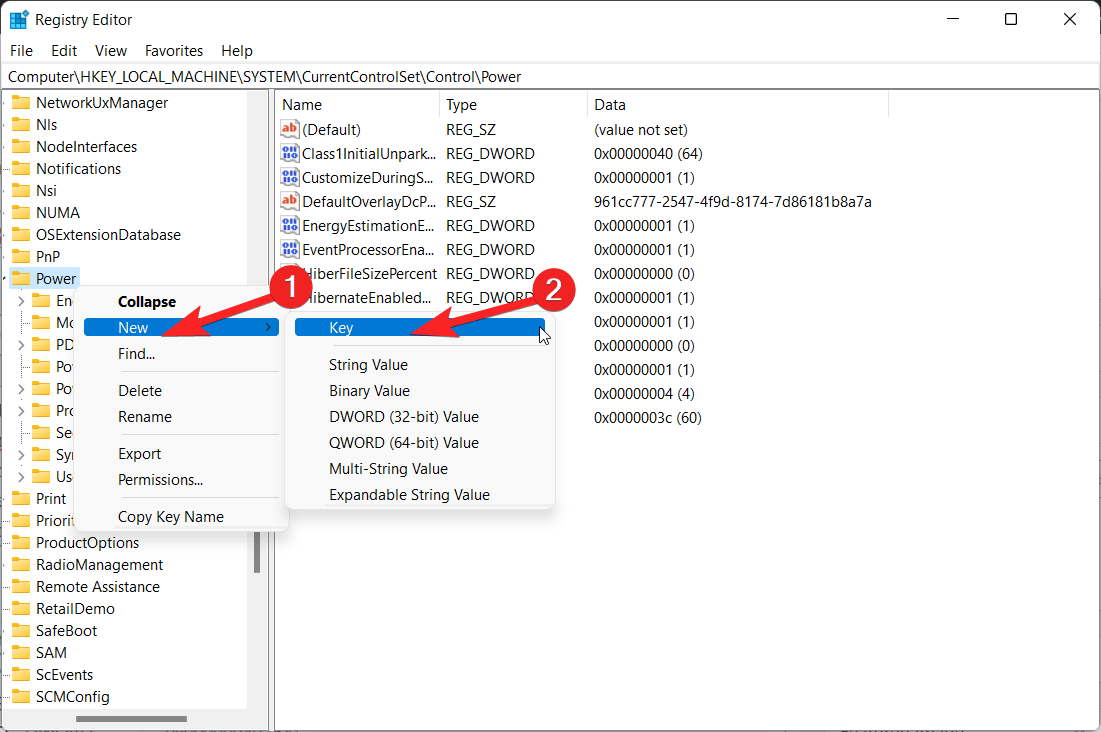
- Assign this key the name PowerThrottling and press the Enter key.
- Select the newly created PowerThrottling key, right-click it, and choose New, then select DWORD (32-bit) value.
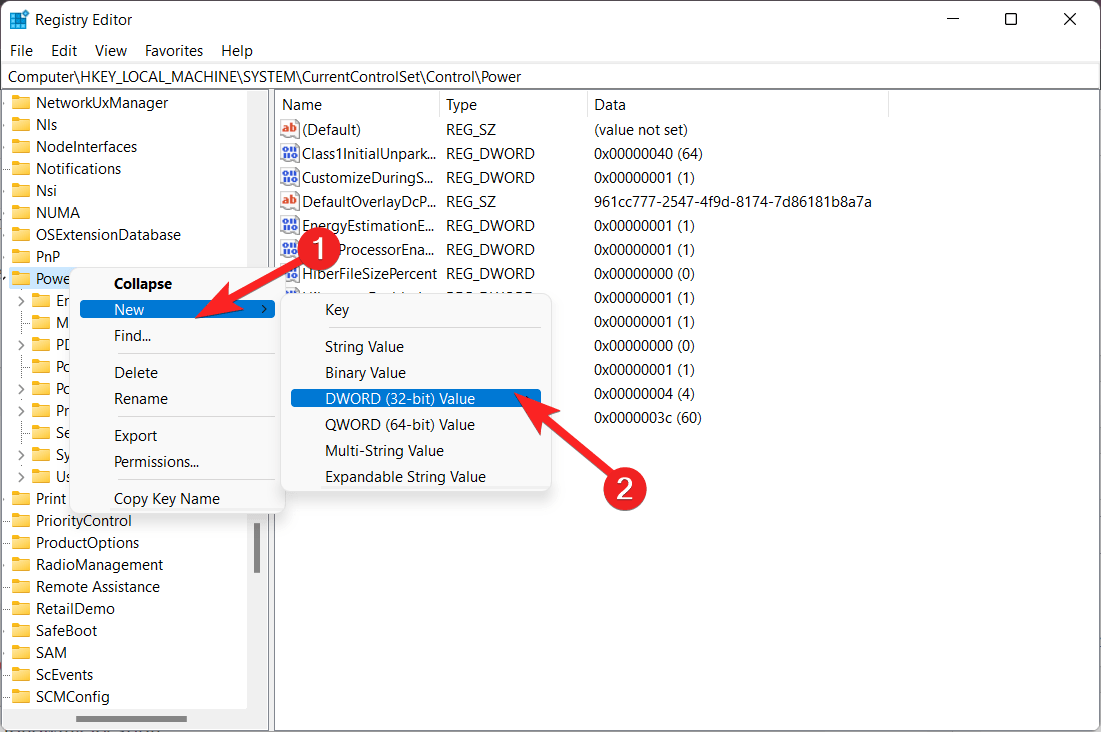
- Rename the new DWORD (32-bit) value as PowerThrottlingOff and press Enter.
- Double-click on the PowerThrottlingOff key change the Value data to 0 to enable Power Throttling, and then click OK to save the changes.
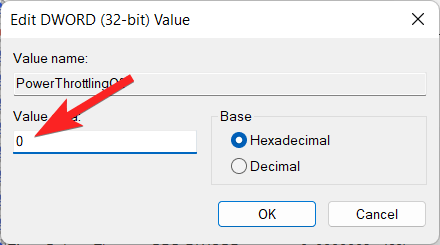
- Restart your computer to apply the changes.
- To disable Power Throttling on Windows 11, follow step 7 again, but change the Value data to 1 instead of 0, and then click the OK button.
Conclusion
As discussed in this guide. The approach of configuring and operating Power Throttling in Windows 11 is straightforward. Through the Windows Power Options menu or by adjusting the settings for certain apps in the Battery Saver settings, you may access and customize Power Throttling settings. Windows 11 provides you the option to do either, whether you like to give power savings priority or fine-tune the functionality of certain apps.
If you've any thoughts on How to Setup and Use Power Throttling in Windows 11? , then feel free to drop in below comment box. Also, please subscribe to our DigitBin YouTube channel for videos tutorials. Cheers!


