Are you experiencing slow mounting of ISO image files on Windows 11? In this guide, I have explained some tips and tricks to fix it for you. First, we need to understand what mounting ISO image files means. Mounting allows you to create a virtual CD/DVD-ROM drive on your computer and access the contents of the ISO file as if you had inserted a physical CD or DVD into that drive.
An ISO file is a disk image that contains all the files and folders of an optical disc. It is the same as that of a CD or DVD. Mounting an ISO file allows you to access the files and folders on the disc without actually having to insert the physical disc into your computer’s optical drive.
To mount an ISO file, you can use a program that creates a virtual drive, such as Windows Explorer, or third-party software like Virtual CloneDrive, WinCDEmu, or Daemon Tools. Once the virtual drive is created, you can open the mounted ISO file in the same way you would access files on regular CDs. Simply navigate through folders and launch the necessary programs.
Why Mounting of ISO Image Files is Slow on Windows 11?
Sometimes, the users complain that the ISO image file is not mounting or the process is way too slow. Let us know the common reasons why this may happen.
If the ISO image file is very large, completing the mounting process may take some time. When you mount an ISO file and your PC is already running many resource-intensive tasks or has limited resources, mounting the ISO image file slows down significantly.
Keep in mind that if you are trying to mount an ISO image file from a hard disk drive (HDD), the process may be slower compared to mounting it from a faster solid-state drive (SSD). If there are driver issues on your computer, it could result in slow performance when mounting ISO image files.
Top Ways to Fix Speed Up Mounting of ISO Image Files on Windows 11
Now, let us go through the troubleshooting part to ensure that ISO image files are mounted without any hassles.
1. Close other Applications While Mounting an ISO File
This tip is a no-brainer. When you are mounting large ISO files, close the other resource-intensive tasks on your computer. Not every task is urgent at all times. When the system resources get free, they can be directed in efficiently mounting the ISO image files.
2. Restart the Computer
Sometimes, randomly the ISO image file stops mounting or becomes very slow. Restarting the PC can fix the issue.
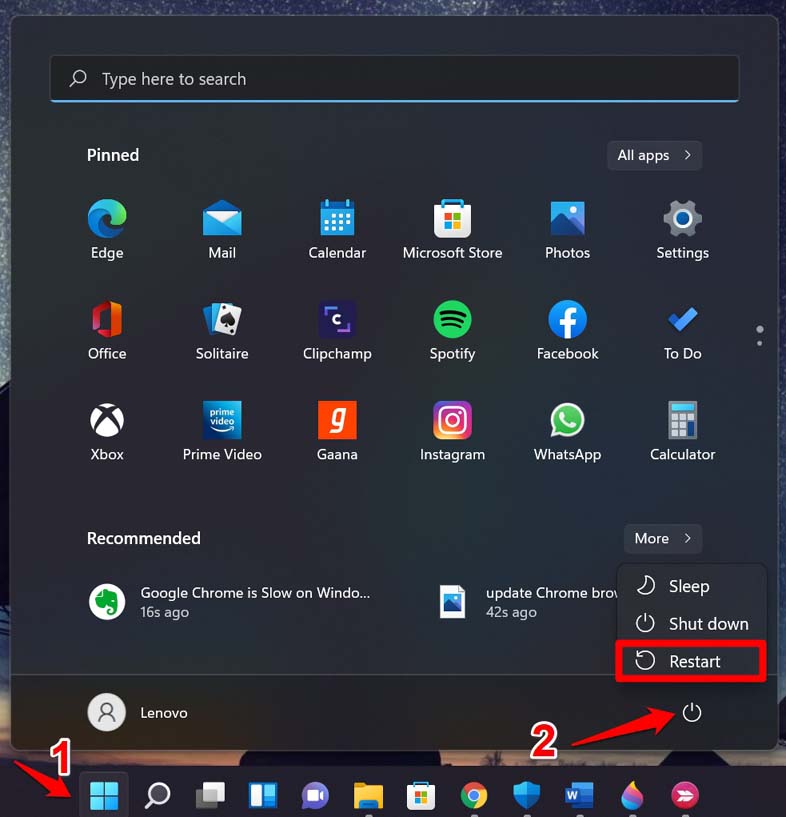
- Press the Windows key. It will bring up the search console.
- Click the power icon and from the menu, select the option Restart.

- Now, select the ISO image file and start mounting it.
Try the next troubleshooting tips if restarting the computer did not work.
3. Upgrade from HDD to SSD
Solid-state State Drive storage is far better and faster than HDD [Hard Disk Drives] in today’s date. SSD uses flash memory to store data, as opposed to traditional hard disk drives (HDD) that use spinning disks and magnetic storage.
That makes SSDs faster, more efficient, and more reliable than HDDs because they have no moving parts. This means that they are less prone to mechanical failures. They are also quieter, lighter, and use less power than HDDs.
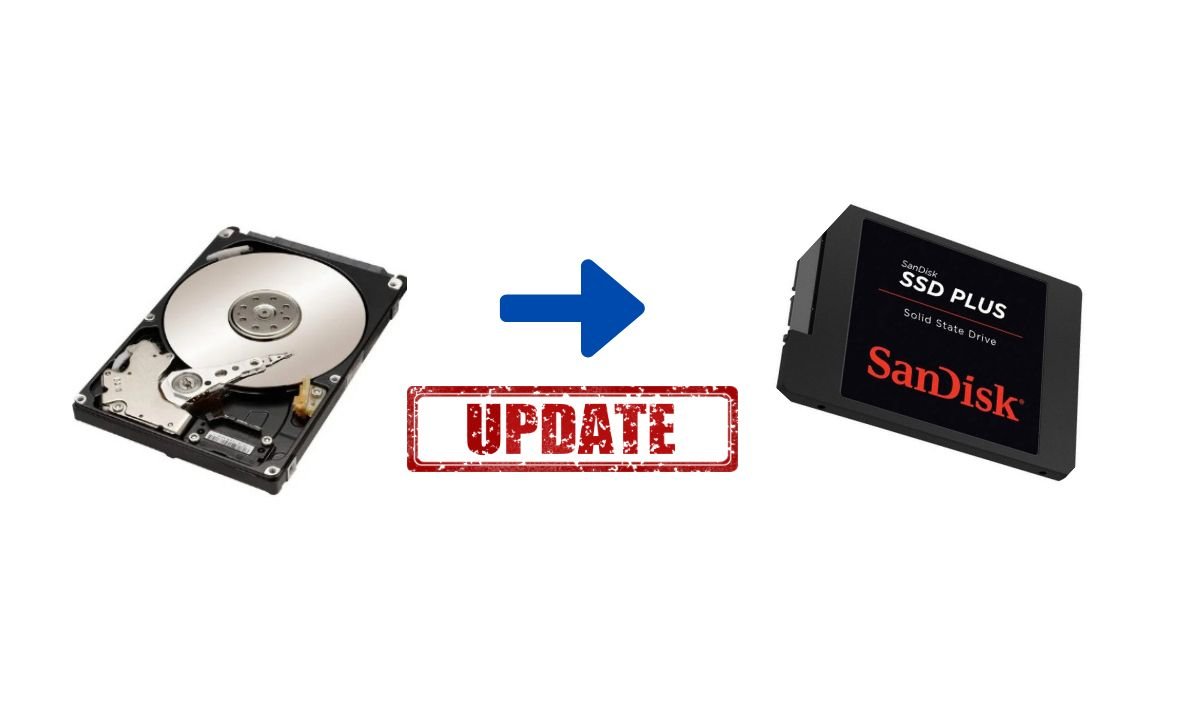
So, upgrade to a new PC with an SSD, or you may check with your nearest computer repair point if it is possible to replace the existing HDD on your PC with an SSD.
4. Disable the Microsoft Defender SmartScreen Temporarily
Defender SmartScreen is a feature on Windows OS that protects your PC from malware present on untrusted sites or files that you may download on your computer. Before downloading the ISO file you may temporarily disable this feature. Here are the steps for that.
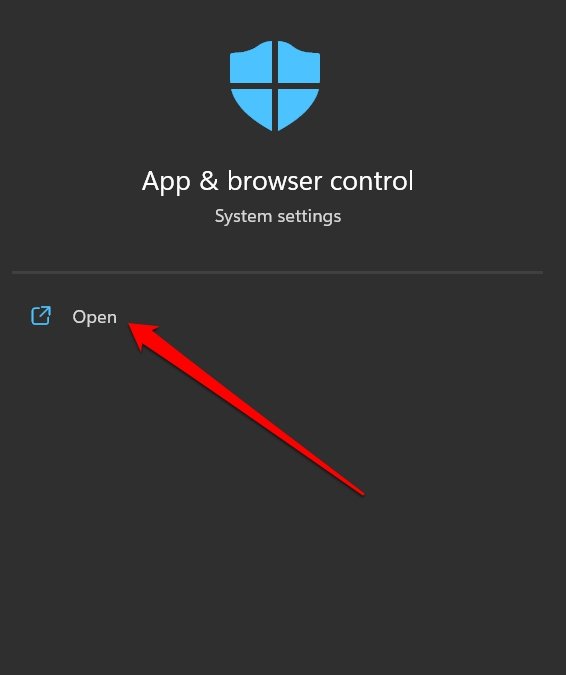
- Using Windows Search launch App & browser control.

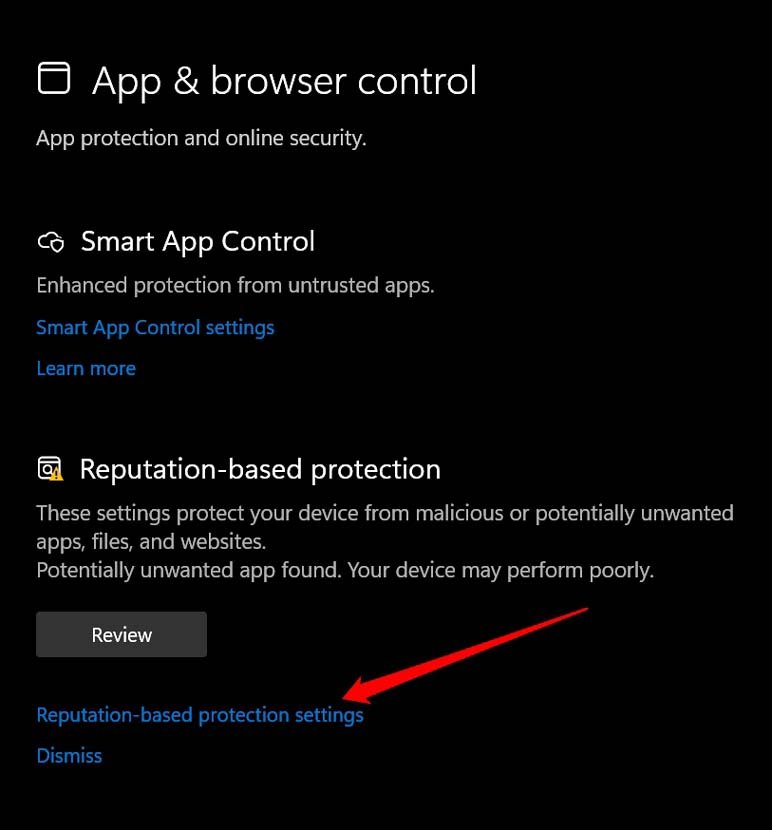
- Under that, click on Reputation-based Protection Settings.

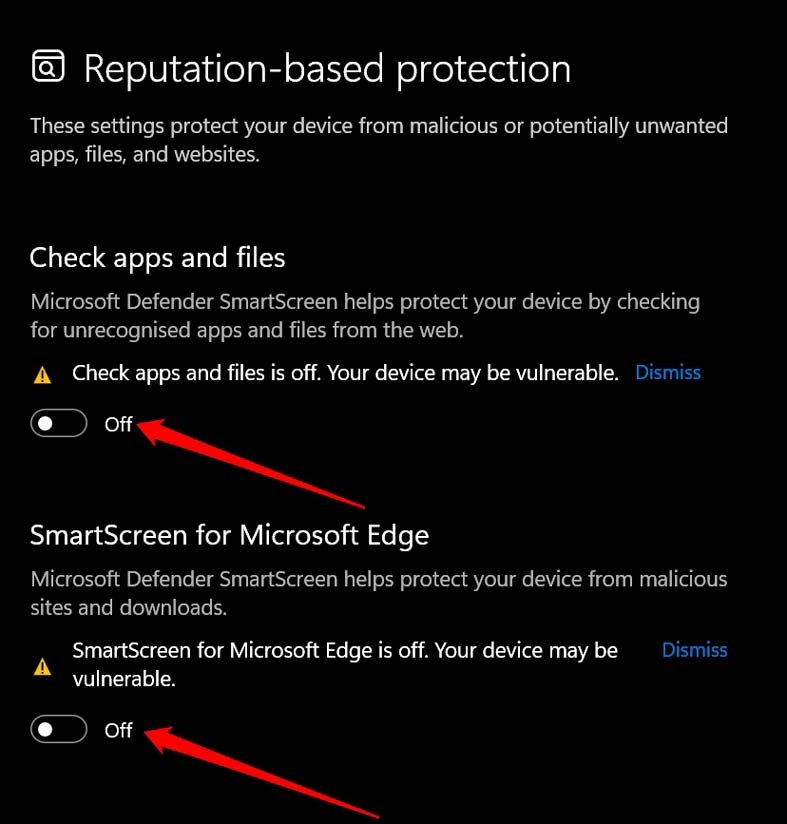
- Within its settings, disable the feature Check Apps and Files.
- Also, disable the SmartScreen for Microsoft Edge.

Make sure to follow the steps above and re-enable the Microsoft defender SmartScreen once you have finished downloading the ISO file. It is important for the safety of your PC.
NOTE: DigitBin will not be responsible for any malware issues on your PC if you download any files using this trick. We are simply sharing the knowledge with our readers. Follow the trick at your discretion.
5. Re-Download the ISO Image File
The ISO image file you have downloaded may be corrupt. Often people download ISO files from torrent sites. These are quite untrusted platforms. If the ISO file is corrupt, it won’t mount or work. So, check if you can download the same ISO file from some other trusted website. If the ISO file is not corrupt, the download may have been interrupted which can cause the ISO file to malfunction.

6. Scan for Malware
It is important to check for the presence of malware on your PC. There may be malware in the folder containing the ISO file you downloaded. Usually, users disable Windows Defender while downloading and installing files from untrusted sources. Sometimes, the process may be completed safely without any malware downloading to your PC.
However, at times some malware may attach itself to the files being downloaded. It is important to search for malware on your PC and remove it if malware is present indeed.
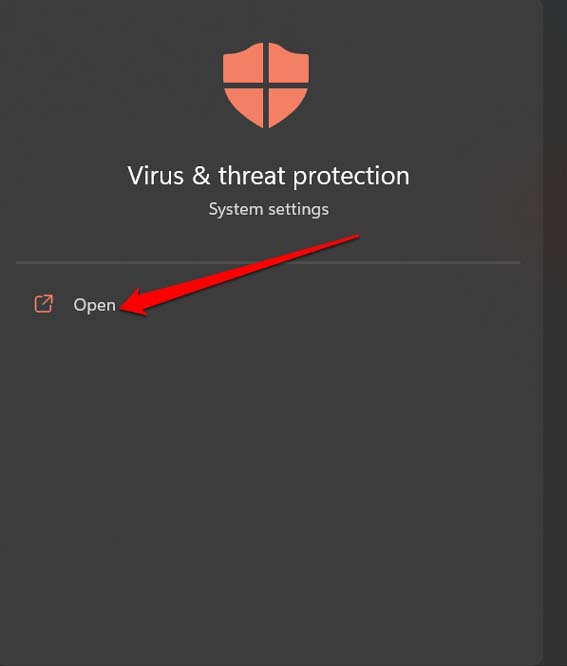
- Launch the Windows Virus and Threat Protection.

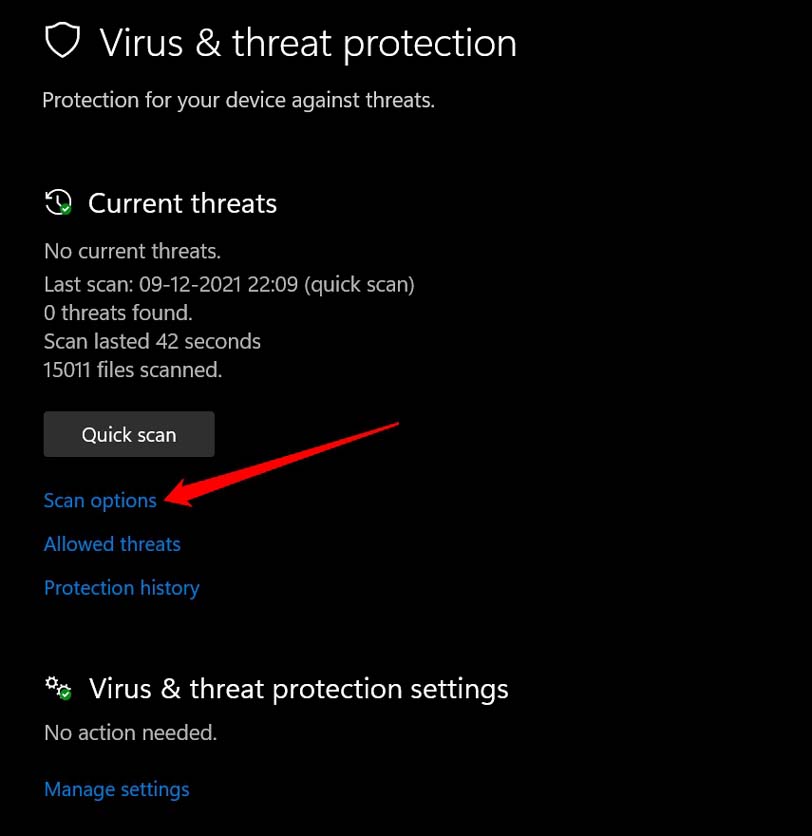
- Click on Scan Options.

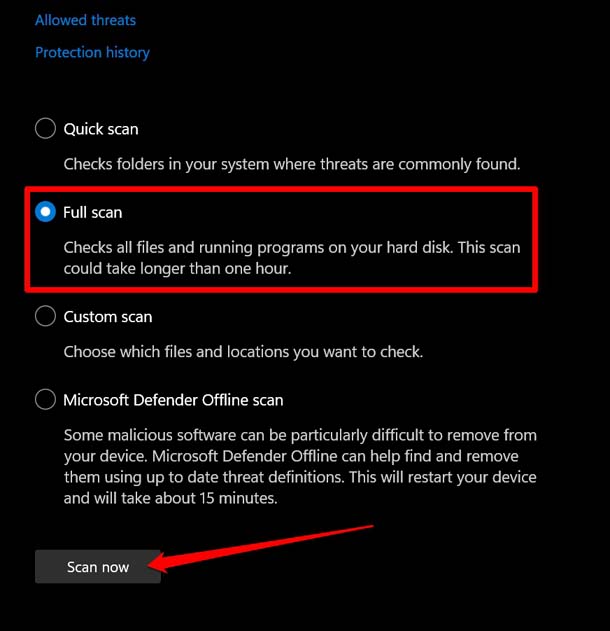
- Select Full Scan and click on Scan Now.

If any malware is found, follow the instructions to remove it.
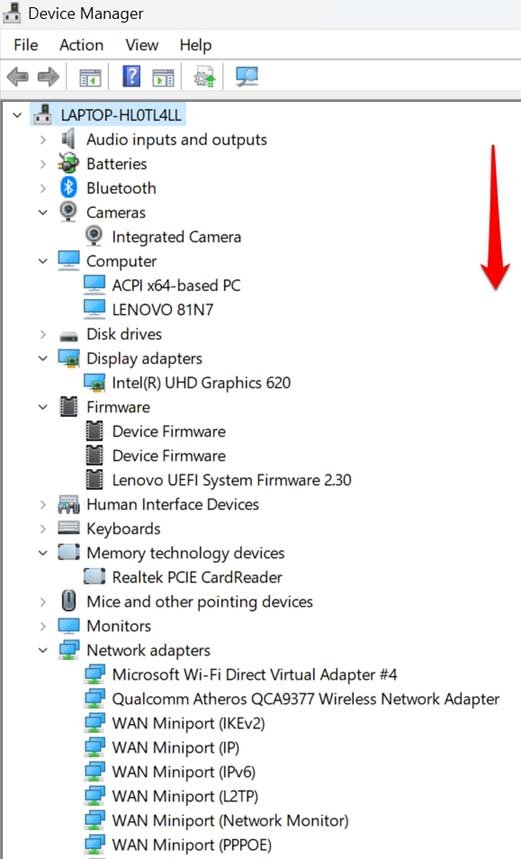
7. Update All the Necessary Device Drivers
Visit the device manager and try to manually update several device drivers.
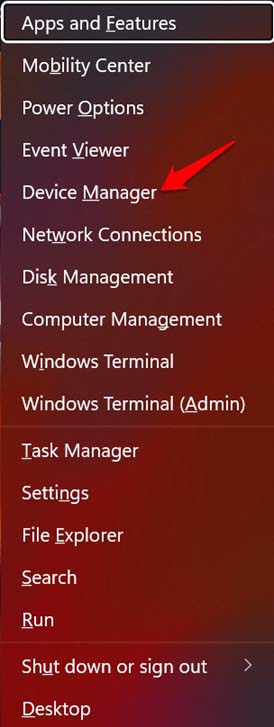
- Press Windows + X to bring up the power user menu.
- Click on Device Manager.

- Now, go through the primary devices attached to your PC.

- Right-click on the drivers and select Update Driver.
Conclusion
So, these are the various troubleshooting tips you can undertake to fix the issue of slow Mounting of ISO image files on Windows 11. Mounting ISO files is an easy and useful way to run applications on a virtual drive. If important applications are not getting installed via ISO, fix the problem immediately.
If you've any thoughts on How to Fix Slow Mounting of ISO Image Files on Windows 11?, then feel free to drop in below comment box. Also, please subscribe to our DigitBin YouTube channel for videos tutorials. Cheers!

