Is the shutdown box keeps popping up on Windows 11 randomly? I know it can be very distracting when you are focusing on your work. In this guide, I have compiled a few troubleshooting tips that you can use to fix the problem easily.
The shutdown box will keep popping up on Windows 11 if there are one or more corrupt system files present on your PC. Also, the usual culprit can be bugs on the current iteration of Windows 11 installed on your PC. Often a newly installed third-party app can also cause these system disturbances.
Best Ways to Fix Windows 11 Shutdown Box Keeps Popping Up Randomly
Let us begin with the troubleshooting tips to stop the Windows 11 shutdown box from appearing now and then.
1. Restart the PC
Interestingly, many users have reported that a simple restart has often fixed various random bugs on their Windows OS. So, try it out before moving on to other elaborate troubleshooting tips to fix the issue of the shutdown box that keeps popping up on Windows 11.
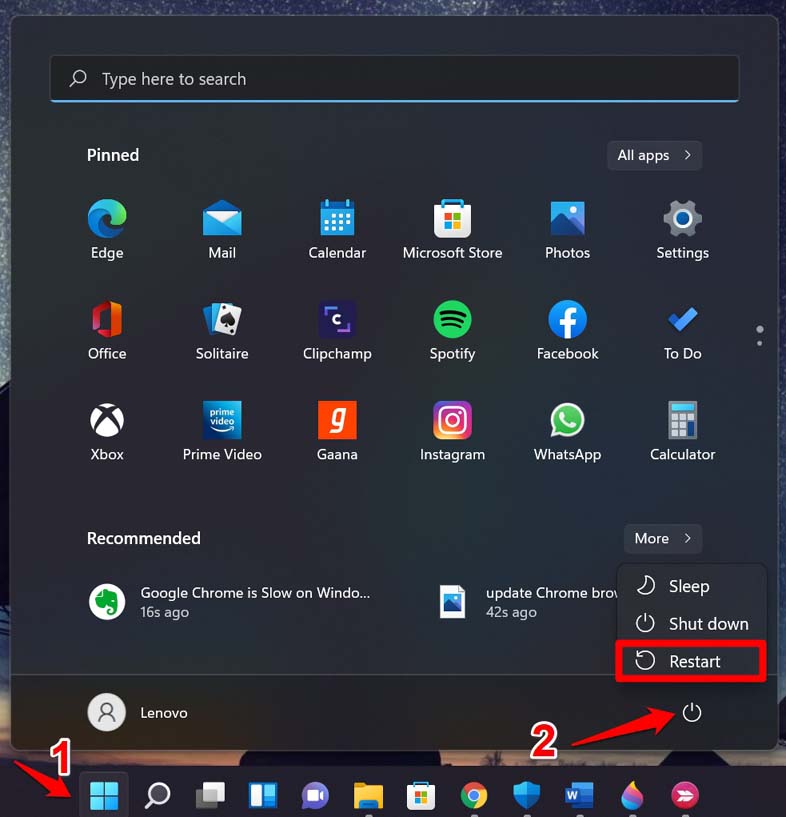
- Press the Windows key to bring up the search section.
- At the bottom right corner, click on the Power icon.
- From the menu, click on Restart and wait for a few seconds until the computer restarts automatically.

2. Update the Windows OS
Remove the bugs on the current version of Windows 11 installed on your PC by installing a newer version that may have been rolled out by Microsoft. To check for that, follow the steps below.
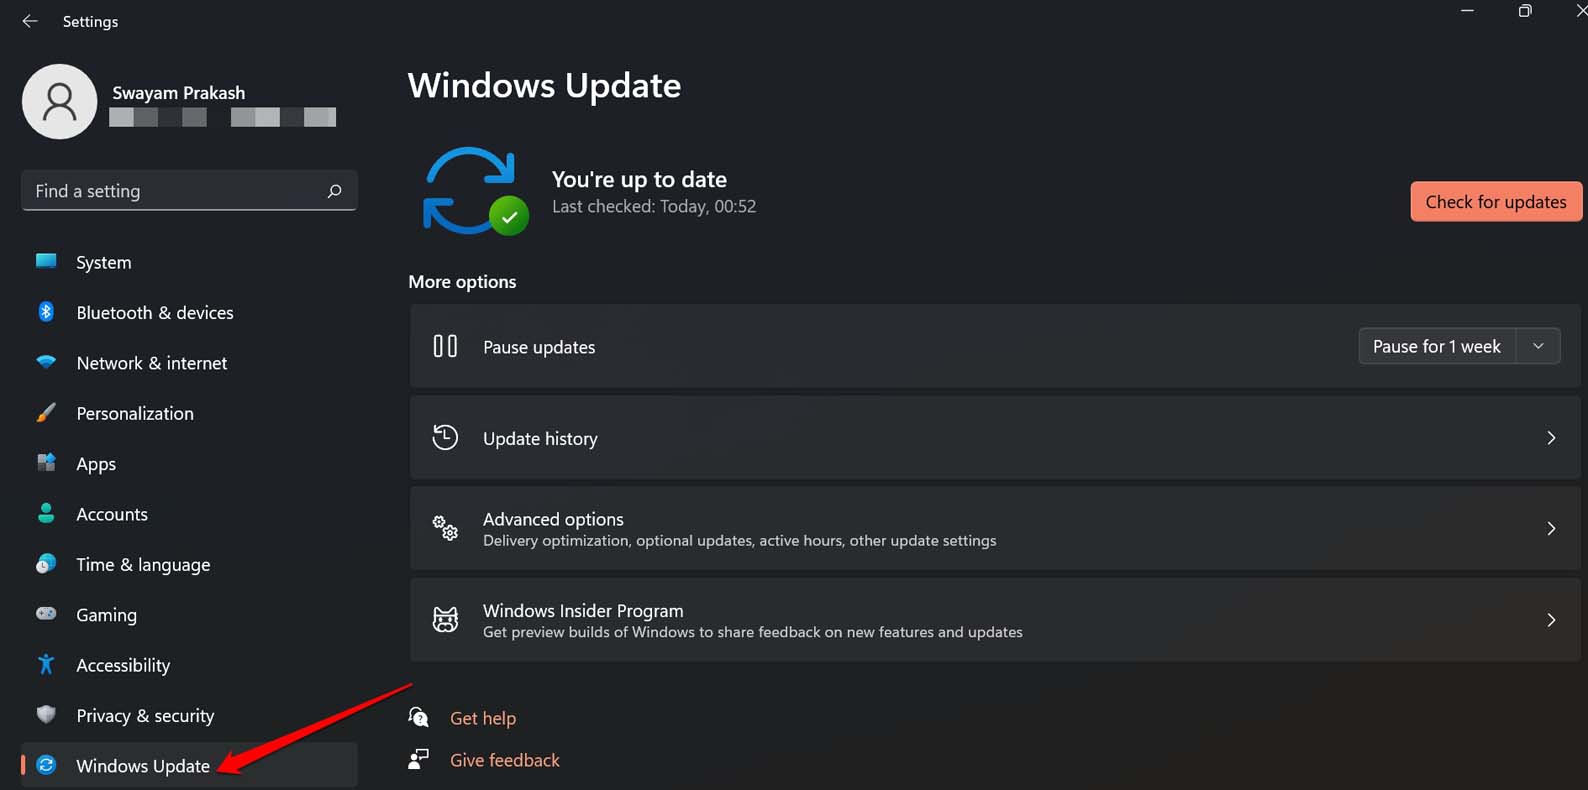
- Press Windows +I to go to Settings.
- Click on the Windows Update tab on the left-hand side.

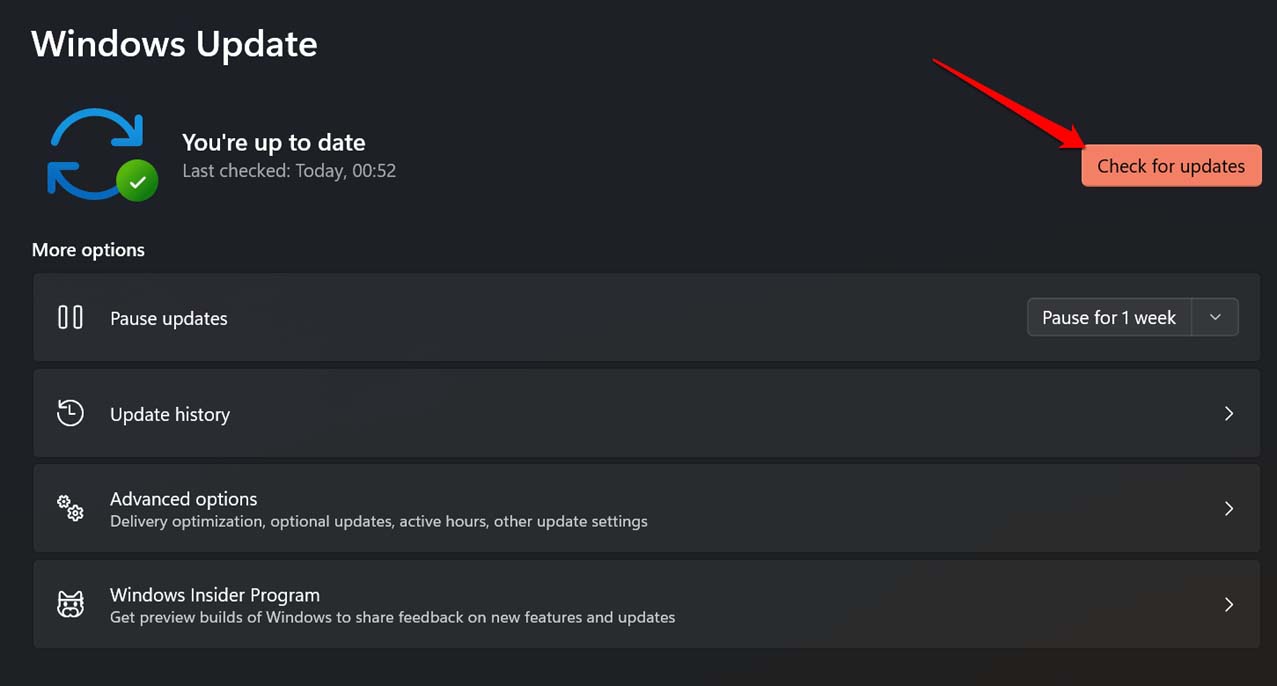
- Click on Check for Updates at the top of the screen.

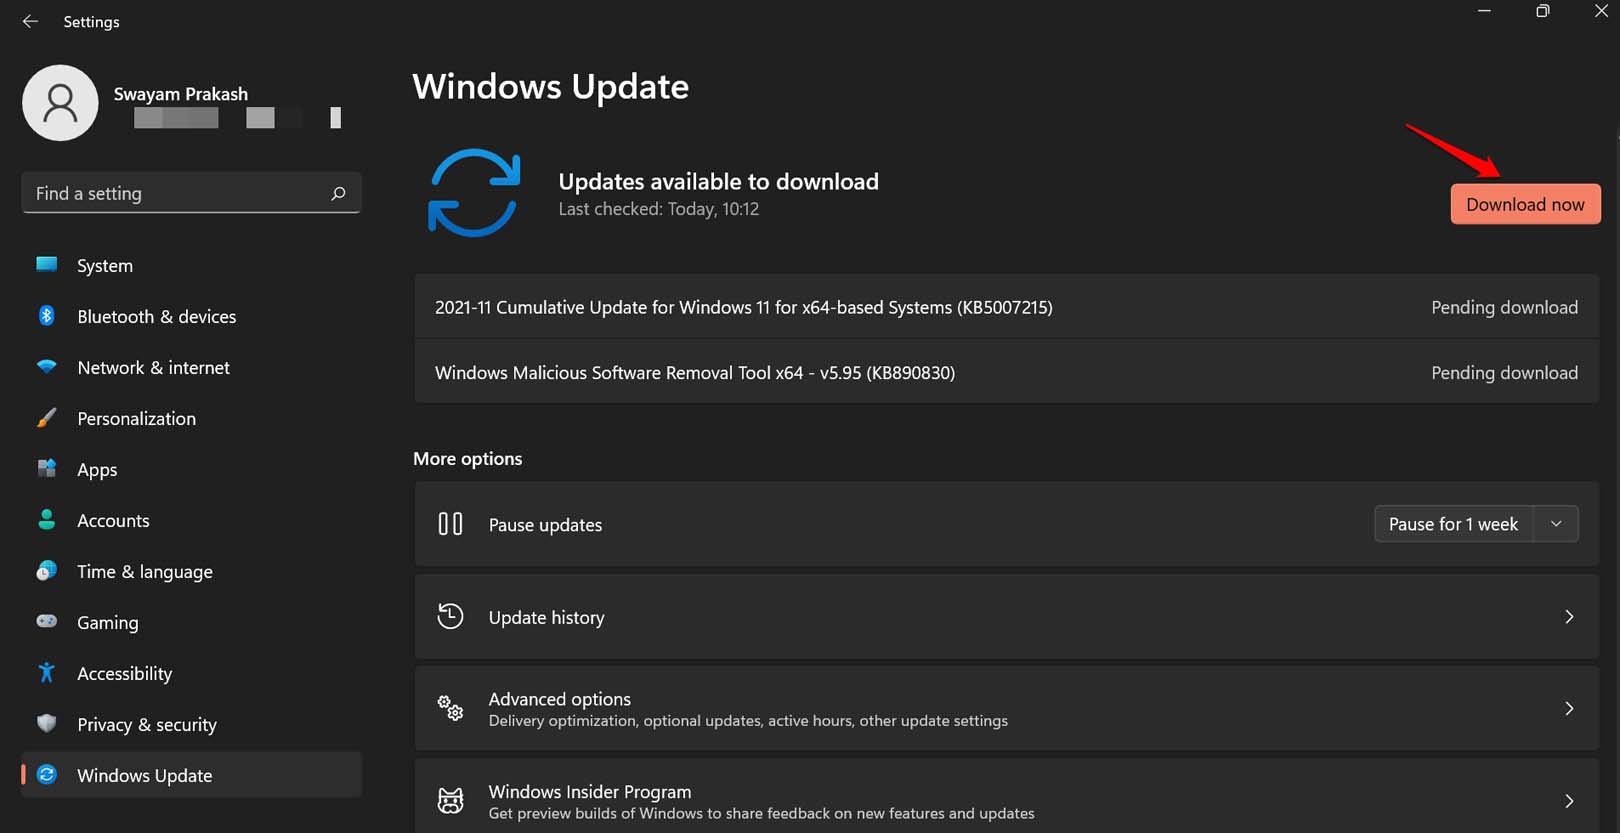
- If a new build of Windows OS shows up after the search, click on Download Now to start the download and installation.

3. Scan the System for Corrupt Files and DISM tools
You can use the familiar command-line tool Command Prippmt to execute a command to look for corrupt system files.
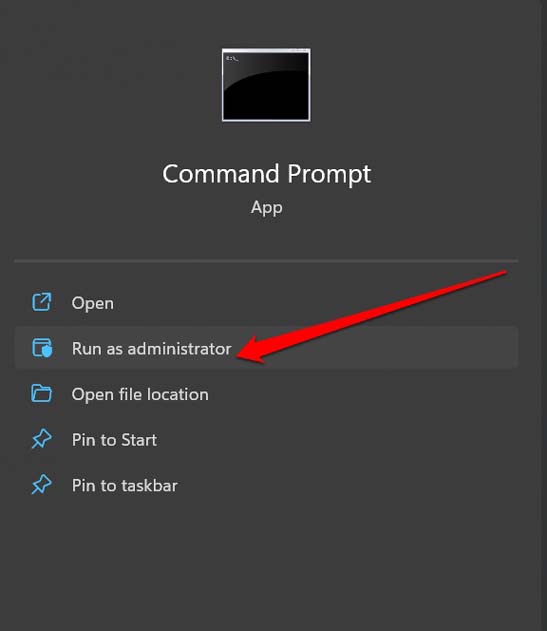
- Launch the Command Prompt with Administrator permission.

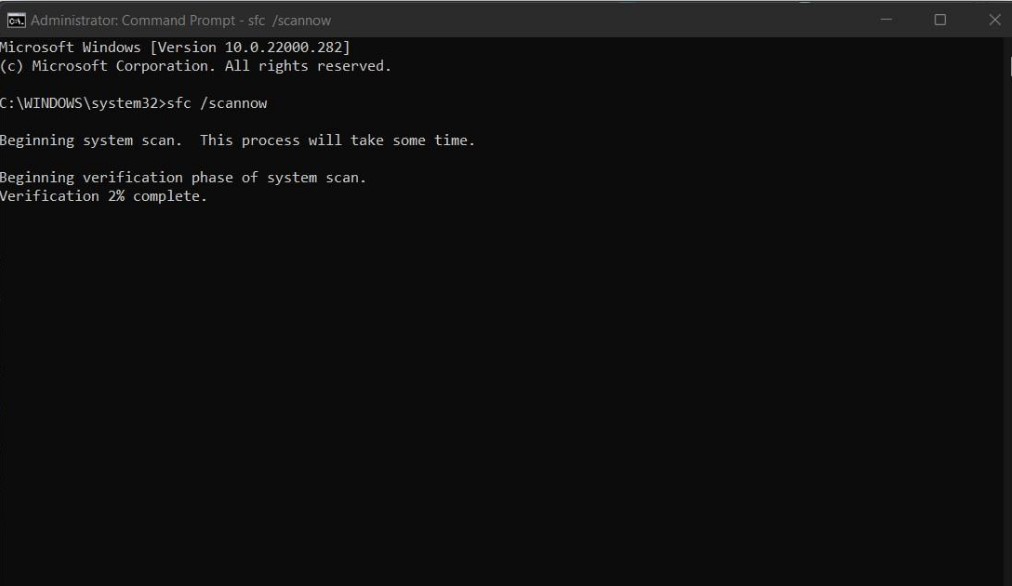
- Type the following command
sfc/scannow

- Hit the enter key and let the system take over from there. Do not interrupt the file scanning process.
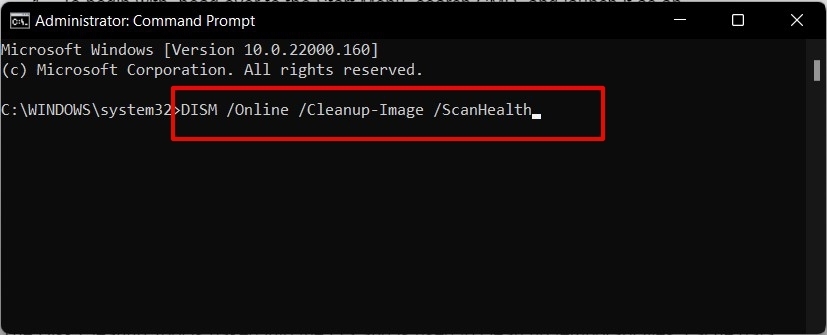
- Once done, execute the below command:
DISM.exe /Online /Cleanup-image /CheckHealth
DISM.exe /Online /Cleanup-image /Restorehealth
DISM.exe /Online /Cleanup-image /Restorehealth

The whole process may take some time, depending on the volume of files on your PC.
4. Engage the System Maintenance Troubleshooter
It is a native tool from Microsoft OS to look for possible problems within the system files of Windows OS and resolve them.
- Press Windows + S shortcut to bring up the search console.
- Now, type System Maintenance in the search field.
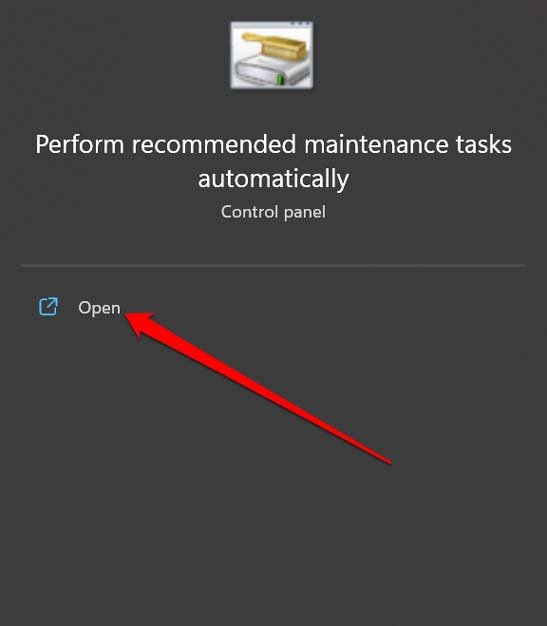
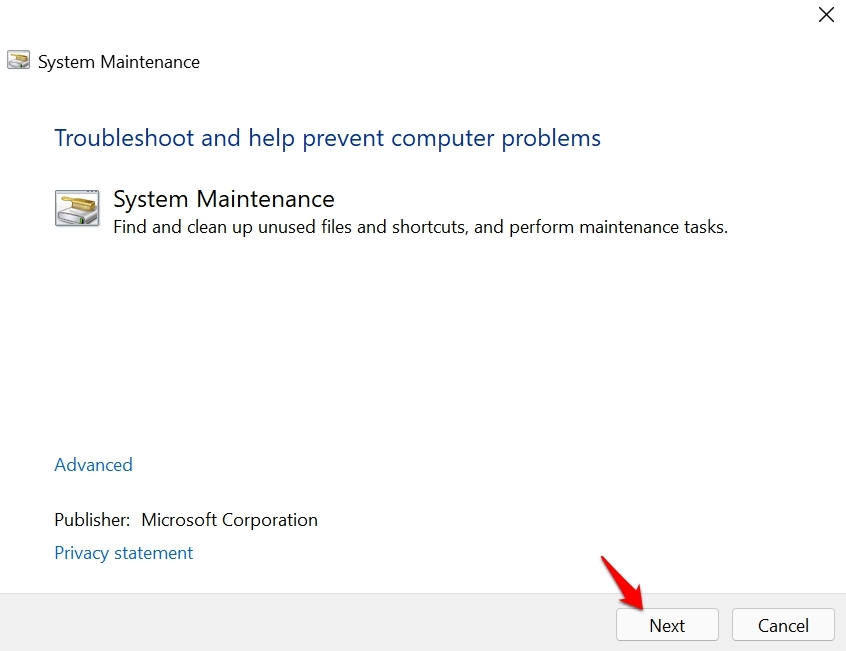
- In the search result, you will see an option “Perform Recommended Maintenance Tasks Periodically”. Click Open.

- Click on Next, and the tool will start to look for possible issues.

- Follow the on-screen instructions on the screen to fix any errors that the tool may discover.
5. Eliminate Malware Threat
Often it could any malware issue that is looming in the background, causing random issues to show up on the Windows 11 system. One of that may be the shutdown box showing up randomly and repeatedly while your session is active. So, search for malware on your PC manually and remove them as soon as possible.
- Go to Windows search by pressing Windows + S hotkeys.
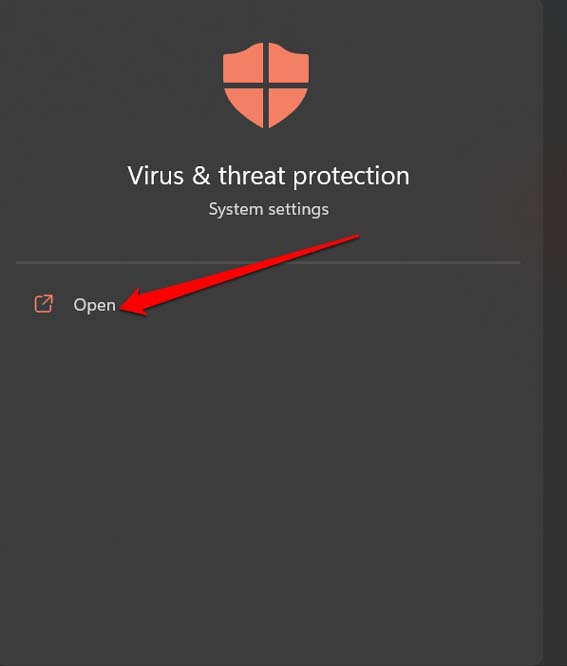
- Type Virus and Threat Protection in the search field.
- Click Open when the desired option shows up in the search result.

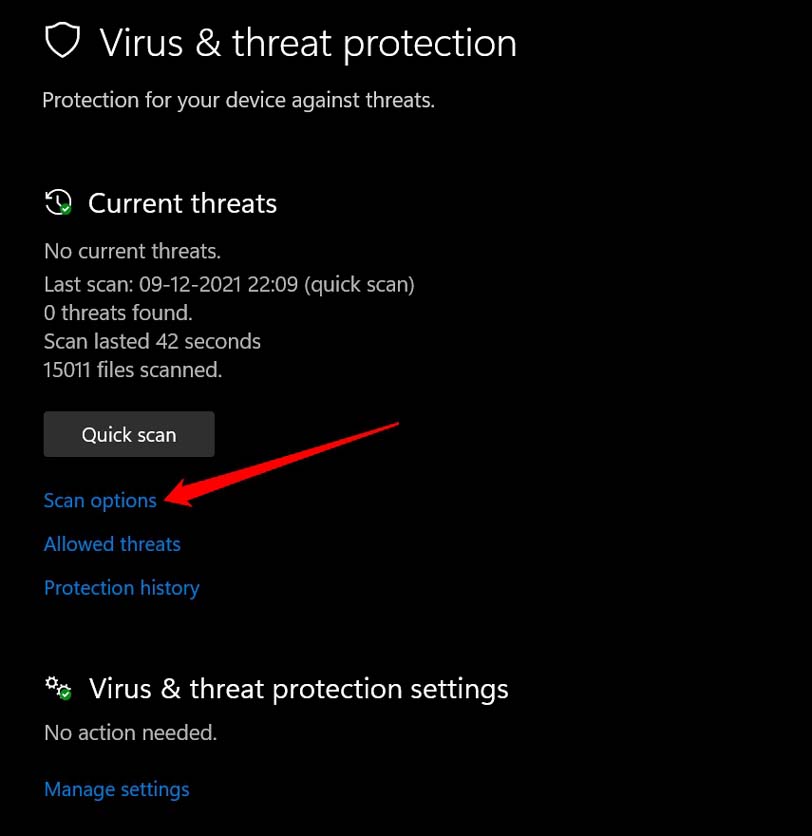
- Click on Scan options.

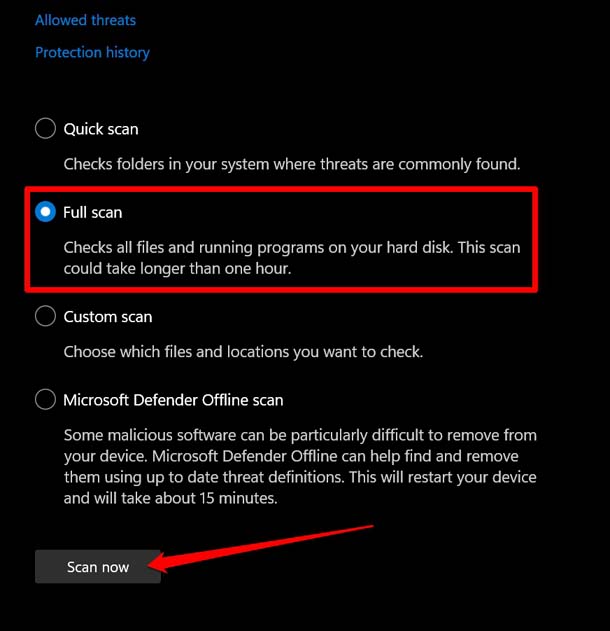
- Select the option Full Scan and click on Scan Now to begin scanning for malware.

6. Perform a System Restore
This troubleshooting method will take your Windows OS back to a previous timeline where there was no bug on the system.
- Press Windows + S to bring up the Search box.
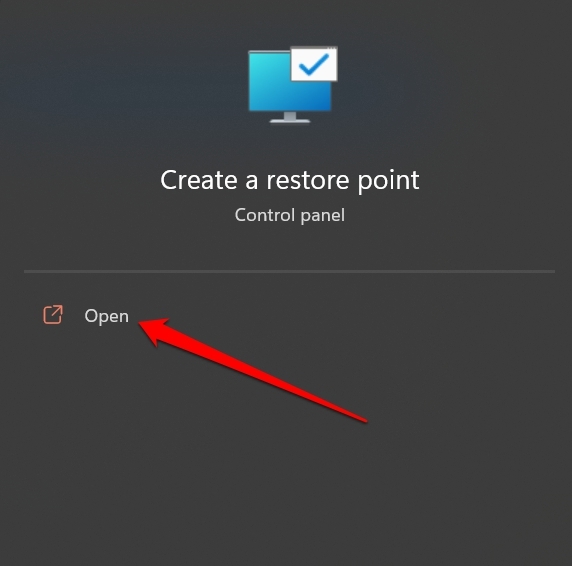
- Type create a restore point. Click Open when the search result appears.

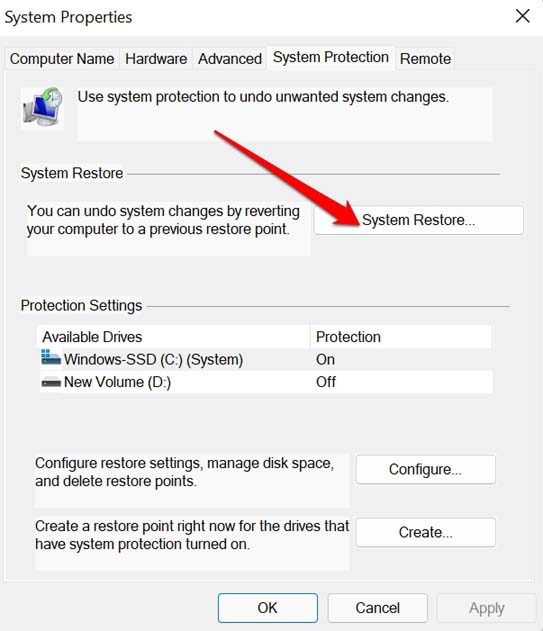
- Click on the System Protection tab.
- Under that click on System Restore.

- Click on Next.
- Then select a restore point. (the timeline where there was no issue with Windows OS)
- Click on Next to continue rolling back Windows OS to that timeline.
- Finally, click on Finish to complete the process of system restoration.
7. Clean Boot your PC
A clean boot means only the essential Windows services and apps will run at the startup, and no other third-party apps will run. This will enable you to know whether any third-party apps were causing the technical issues[shutdown box showing up in this case]. Accordingly, you can remove the apps and fix the issue.
Here are the steps to perform a clean boot on your Windows 11 PC.
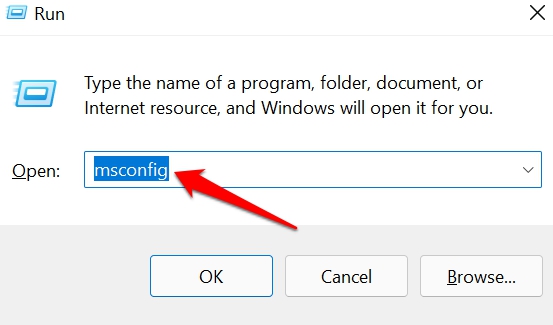
- Press the Windows key + R to open the Run box.
- Type msconfig into the Run box and press enter.

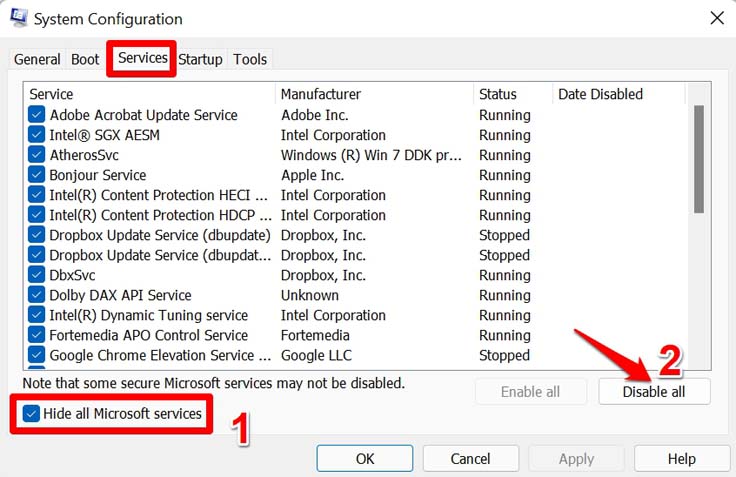
- In the System Configuration window, click on the Services tab.
- Check the box next to Hide all Microsoft services at the bottom of the window.
- Next, click on the Disable All button to disable all non-Microsoft services.

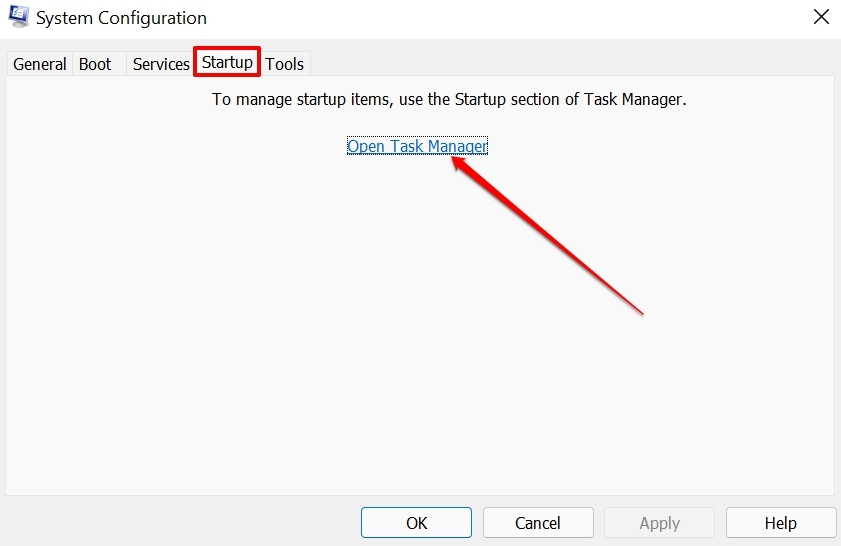
- Click on the Startup tab.
- Click on the Open Task Manager link.

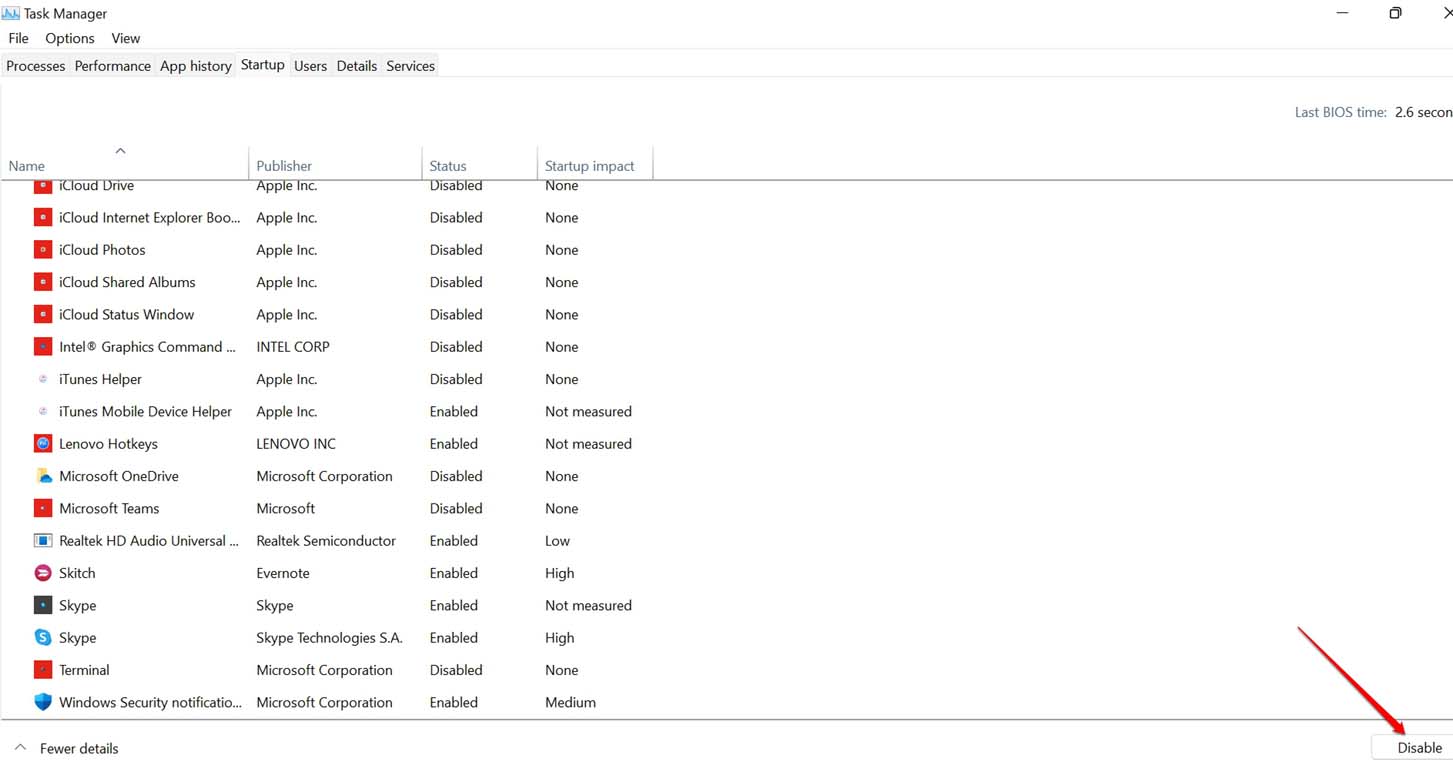
- In the Task Manager window, select each startup item and click the Disable button.

- Close the Task Manager window.
- Click on the OK button in the System Configuration window and Restart your PC.
Conclusion
This wraps up the troubleshooting guide on “How to Fix Shutdown Box Keeps Popping Up on Windows 11?”. I’m sure one or more of these fixes will help you stop the shutdown box from popping whenever you sit to work on your PC. Let me know in the comments which tips and tricks worked the best for you in solving this issue with Windows 11.
If you've any thoughts on How to Fix Windows 11 Shutdown Box Keeps Popping Up?, then feel free to drop in below comment box. Also, please subscribe to our DigitBin YouTube channel for videos tutorials. Cheers!



Thanks for this article. I was struggling with this random “Slide to Shutdown” popup issue for several days on my Dell XPS 9750 (Windows 10), and none of the fixes I found online worked.
BUT, I had been having issues with the fingerprint reader, so I tried unplugging the fingerprint reader cable. I can happily report that the “Slide to Shutdown” issue immediately disappeared, and has not occurred again (it has been about 5 days now, and it was happening multiple times a day before). Perhaps there was something short circuiting in that cable. Anyway, this may or may not help anyone, but I wanted to put it out there just in case it could be of use to anyone else.