Voice assistants are there to help ease our tasks when using a smart device. While Google Assistant is the most competent voice assistant to use, Microsoft’s Cortana was always way behind Google Assistant. Instead of finding Cortana helpful, many users termed Cortana as annoying, as it failed to smoothly carry out the tasks it was developed for.
This cloud-based digital assistant arrived alongside the launch of Windows 8.1 and has been an integral part of the Windows operating system ever since. Using Cortana, you could easily set reminders, open a calendar, search the web, configure your PC settings, and more. But most of the time, it failed to understand the command or returned invalid results.
So, if you are also having a hard time using Cortana and want to Turn Off it on your Windows 11 PC, then you have landed in the right place. In this post, we will give you possibly all methods that you can follow to disable or uninstall Cortana in Windows 11. Having said that, let us jump straight into the post.
1. Disable via Windows 11 Settings
Cortana voice assistant will startup, as soon as your system boots up. That is pretty annoying and if you don’t want that to happen, you can simply disable Cortana from Windows 11 settings. Here are the steps to do it.
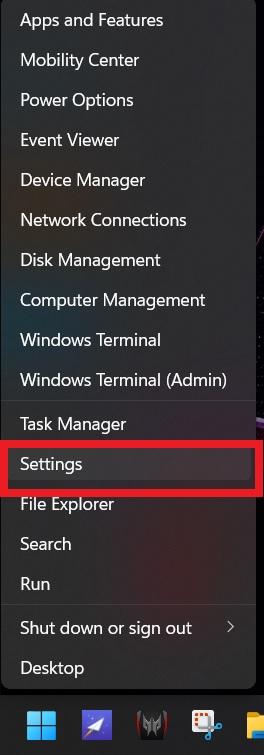
- Right-click on the Windows logo or Start menu button located at the bottom taskbar.
- Select Settings.

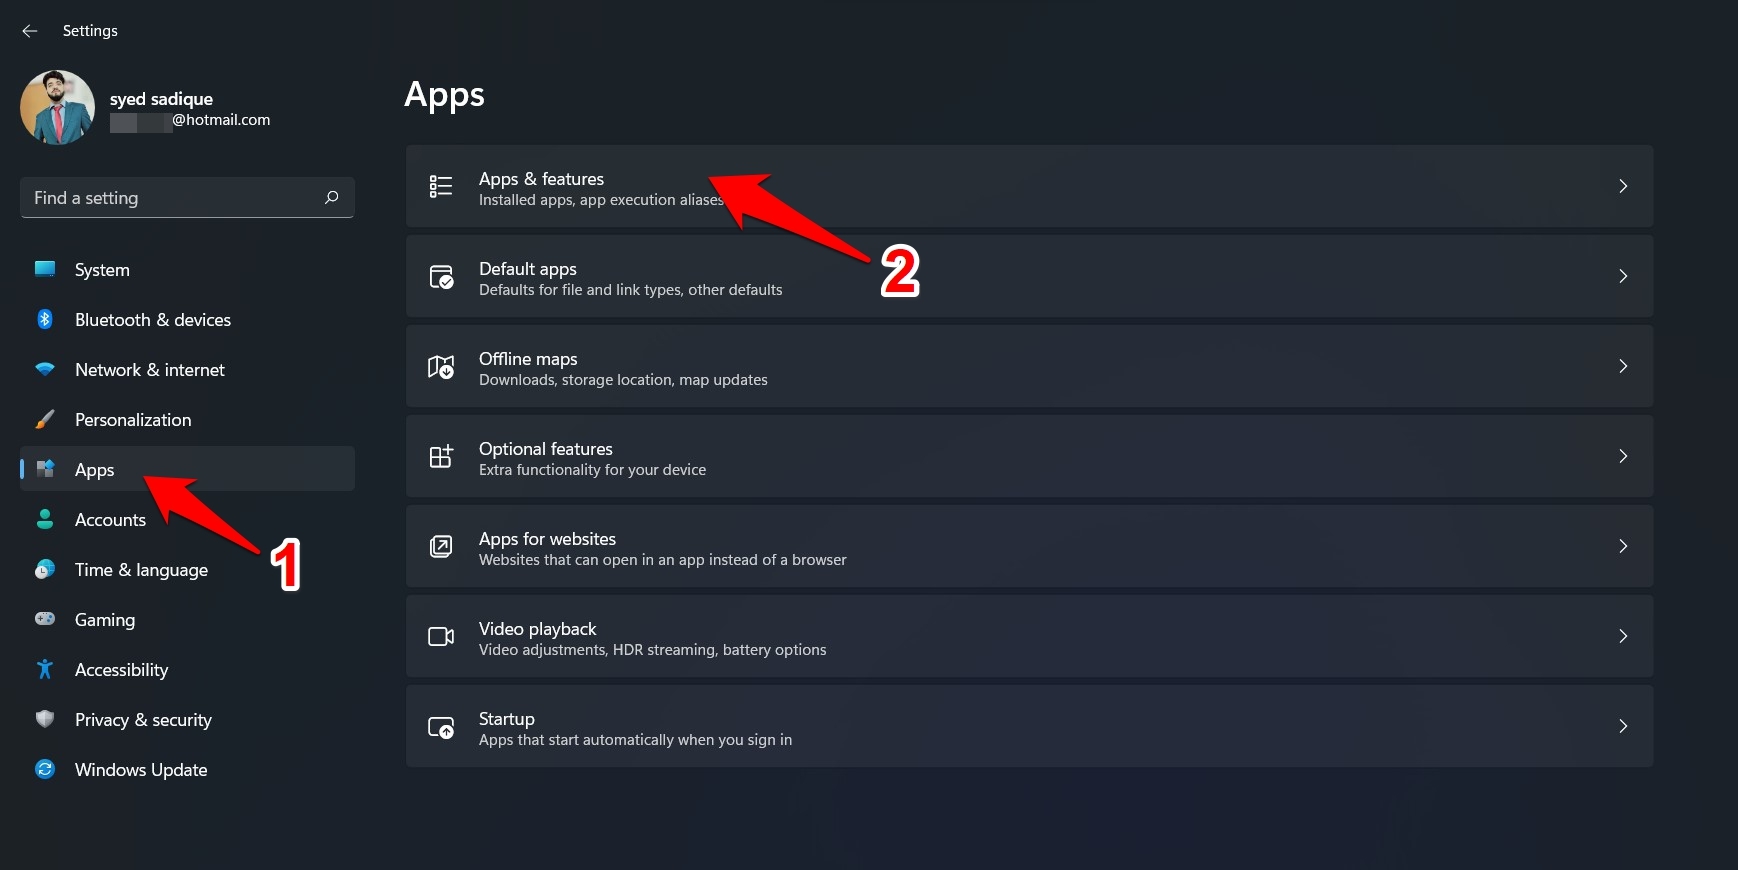
- In the Settings windows, select Apps from the left pane. Then select Apps & Features from the right-side pane.

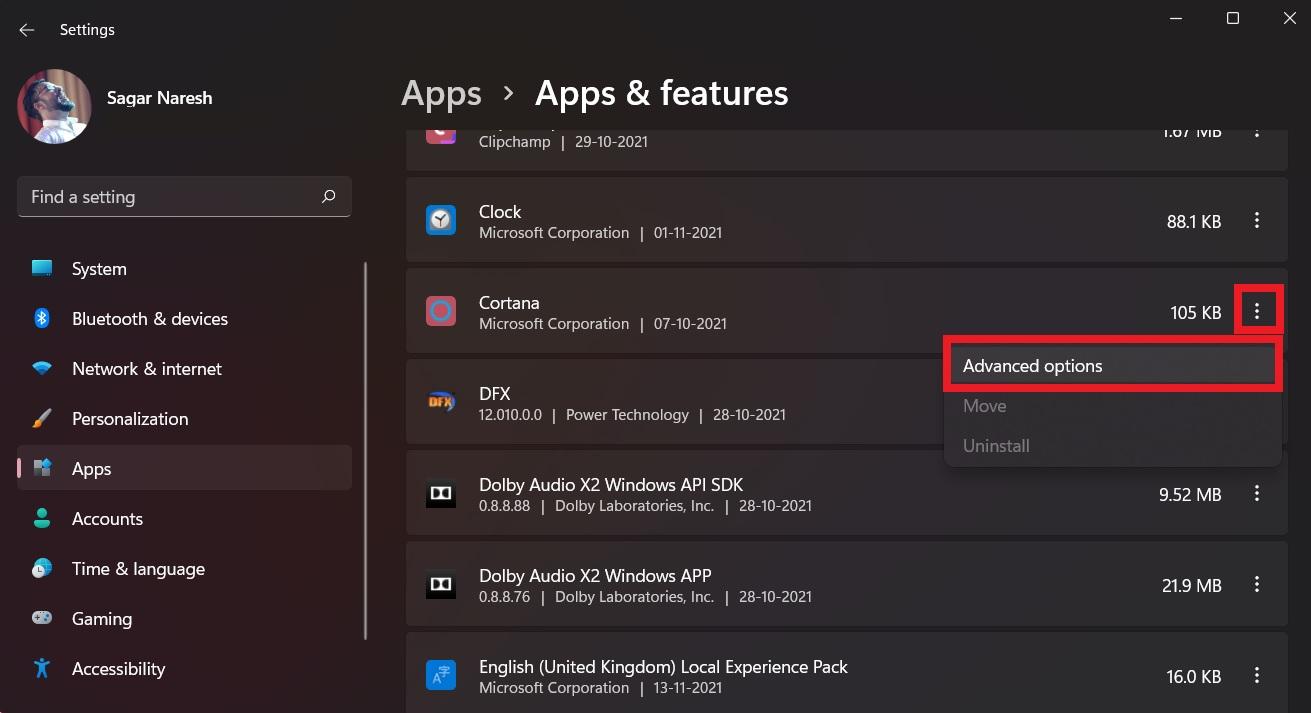
- Scroll down on the list of apps and click on the 3-dot icon next to Cortana and select Advanced options.

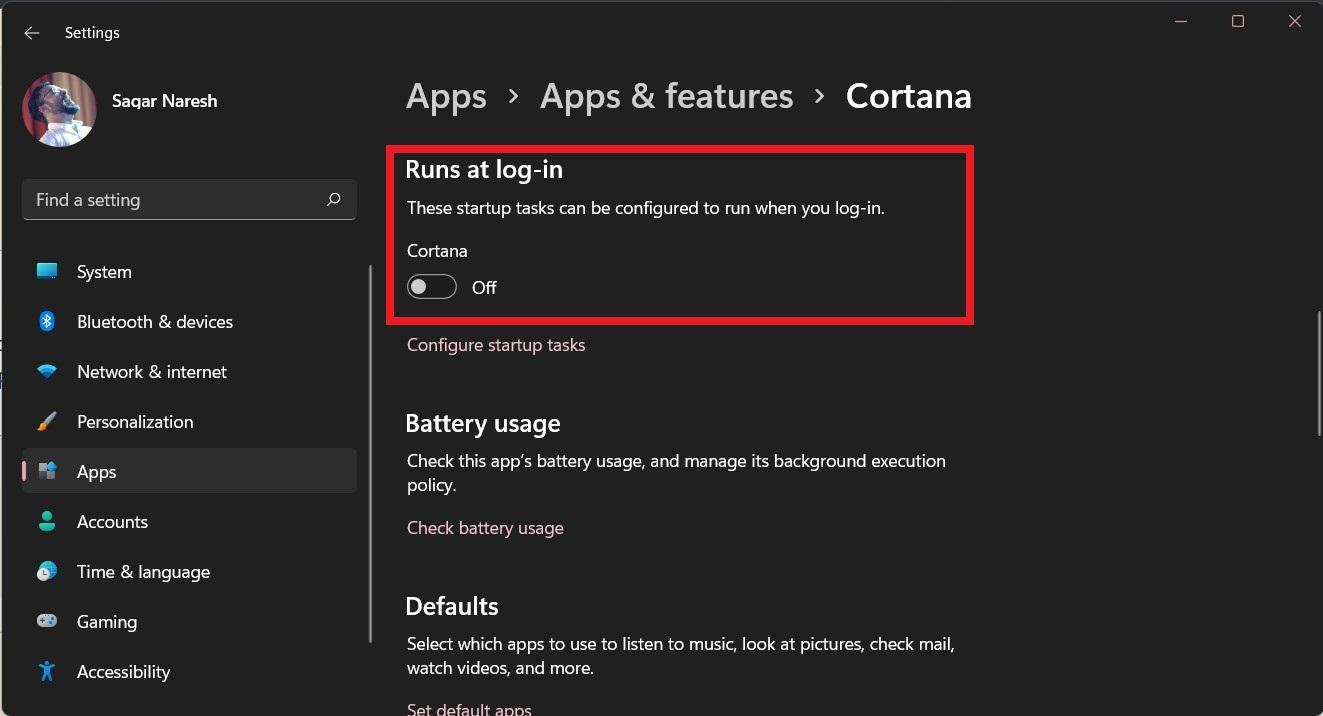
- A new Cortana app page will open. Scroll down and toggle off the Runs at the log-in option.

- Now, simply restart your PC to apply the changes.
2. Disable via Registry Editor
Using the registry editor, you can disable Cortana permanently for your Windows 11 PC. This will be the best-case scenario for many users, as not many use Cortana on their systems. You won’t be able to use Cortana even if you try to run it manually. So, we would recommend you create a restore point before you go ahead and edit Windows Registry. This will help you revert to default settings if anything goes wrong. Here are the steps that you need to follow:
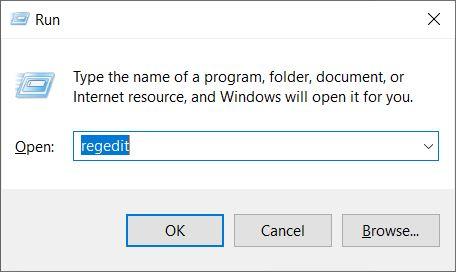
- Press Win+R keys together to open the RUN command.
- Type regedit and hit the Enter button.

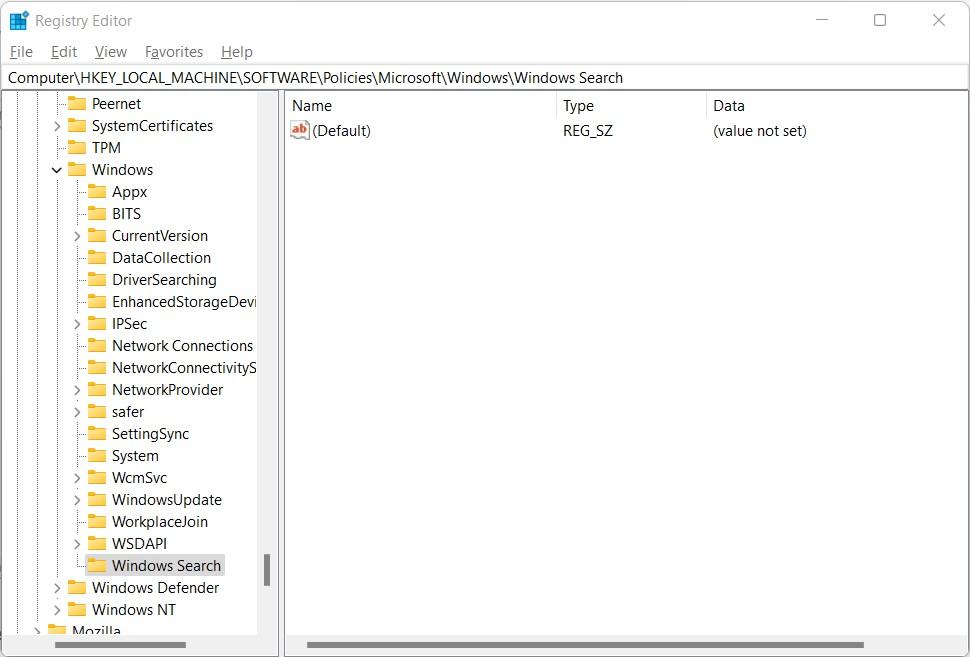
- Copy and paste the below address into the search bar of the Registry and press Enter.
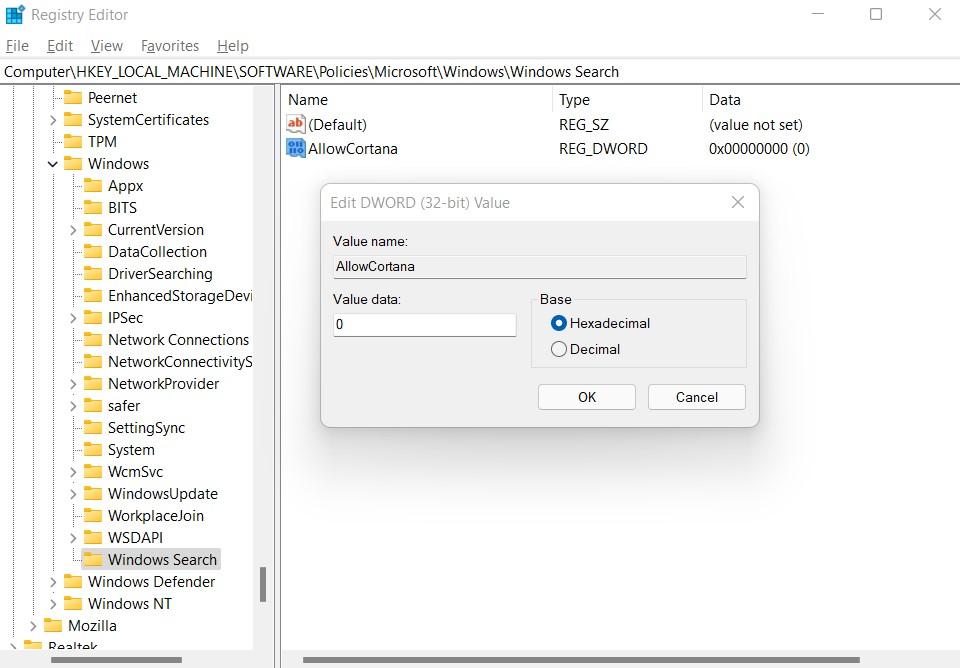
Computer\HKEY_LOCAL_MACHINE\SOFTWARE\Policies\Microsoft\Windows\Windows Search
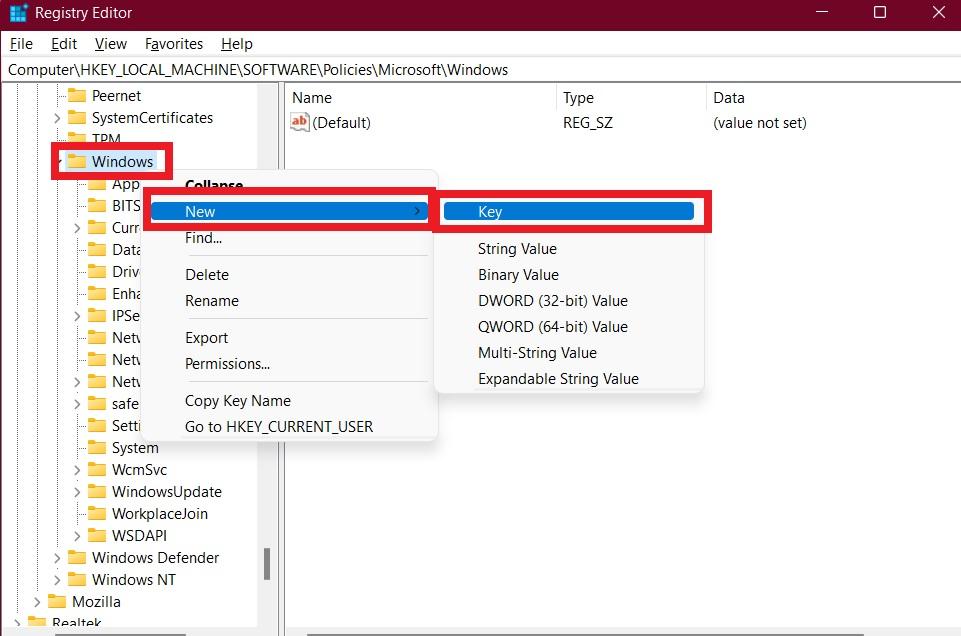
- If the Windows Search folder is not available, right-click on it under the Windows directory and select the New > Key option.

- Rename this new key as Windows Search.

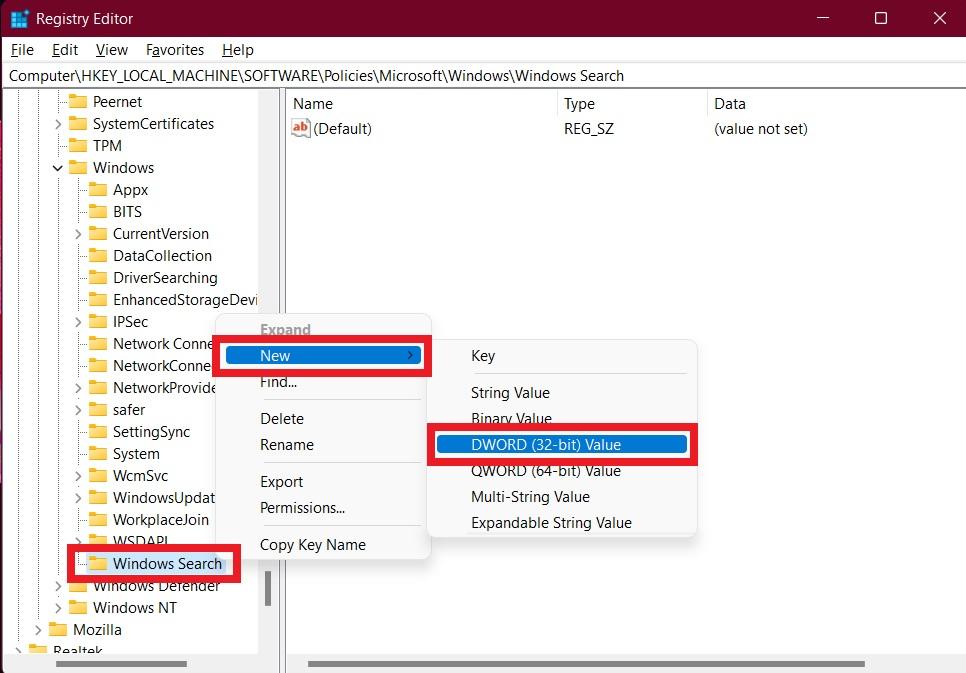
- Right-click on the Windows Search folder and select New > DWORD (32-bit) Value.

- Rename it to AllowCortana.
- Double click on AllowCortana and set the Base to Hexadecimal and Value data is set to 0. Tap on OK.

- Restart your PC to apply changes. That’s it!
Now, even if you try to open the Cortana assistant, it will show you that it is disabled.
3. Disable via Group Policy Editor
You can also disable Cortana using the Group Policy Editor. You can check out our guide on the different ways to open the Group Policy Editor in Windows 11. This is a long process as compared to another, but that is what you need to do if you wish to disable Cortana via Group Policy Editor. Follow the steps below:
- Open the RUN command by pressing the Win+R buttons.
- Type in gpedit.msc and hit the Enter button to launch Group Policy Editor.

- Now, you need to navigate to the following location from the left pane.
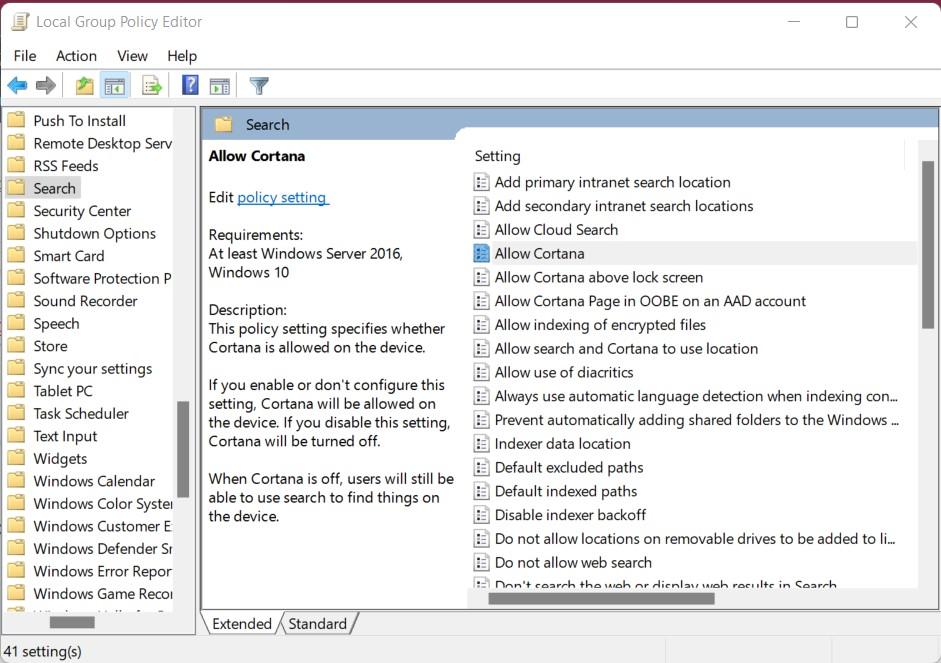
Computer Configuration > Administrative Templates > Windows Components > Search - Once you land on the Search folder, you will see an Allow Cortana setting on the right. Double click on it to open.

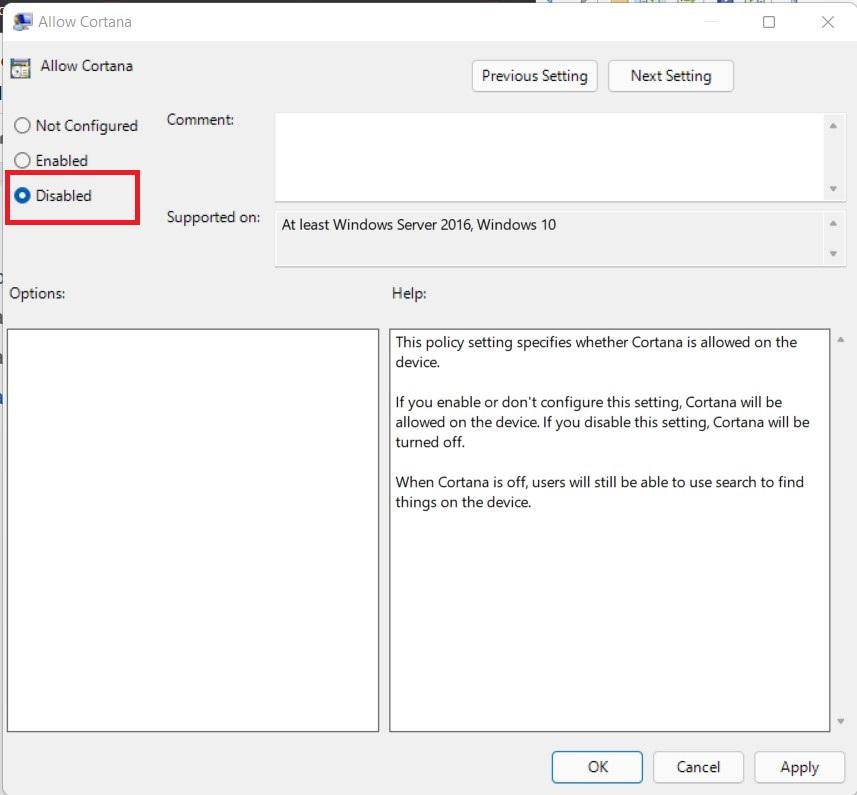
- Simply click the Disable option from the top left of your screen and press the OK button to save changes.

4. Uninstall Cortana from Windows 11
While the above methods help you disable Cortana on your Windows 11 PC or laptop, this section deals with completely removing it from your PC. You need to follow exactly all the steps mentioned below in order to successfully uninstall Cortana from Windows 11.
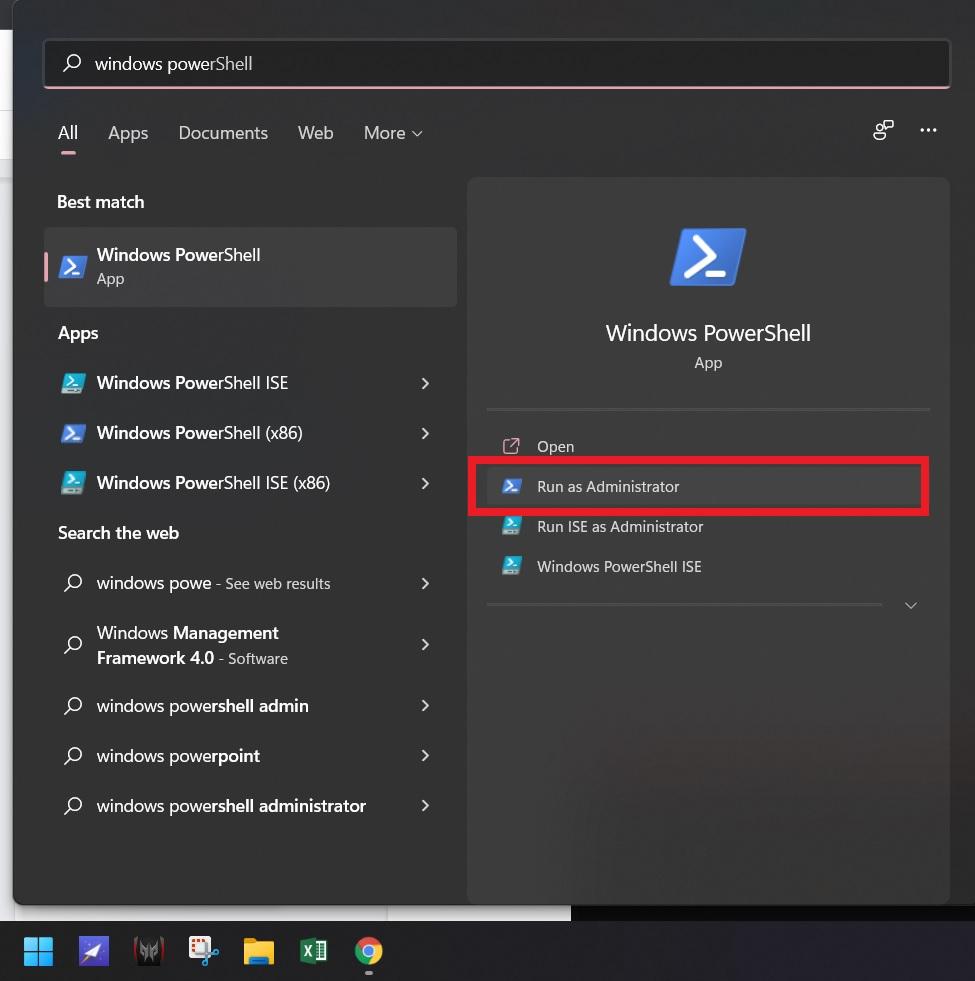
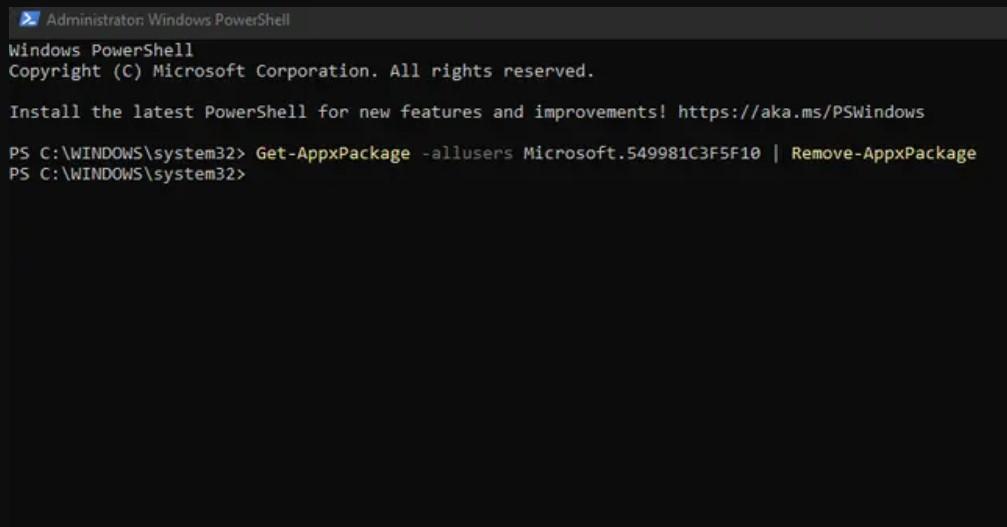
- Open the Start menu and search Windows Powershell. Open it as an administrator.

- Now, paste the below command in the Powershell window and press the Enter key.
Get-AppxPackage -allusers Microsoft.549981C3F5F10 | Remove-AppxPackage

- The uninstallation process will begin and you do not have to do anything now.
- That’s it.
In case you change your mind and want Cortana back in your Windows 11 machine, then you can download it from the Microsoft Store. Moreover, we would advise you to create a System Restore Point on your PC in order to avoid any critical data loss if things go wrong while you try to disable Cortana from your Windows 11 PC.
If you've any thoughts on How to Disable or Uninstall Cortana in Windows 11, then feel free to drop in below comment box. Also, please subscribe to our DigitBin YouTube channel for videos tutorials. Cheers!

