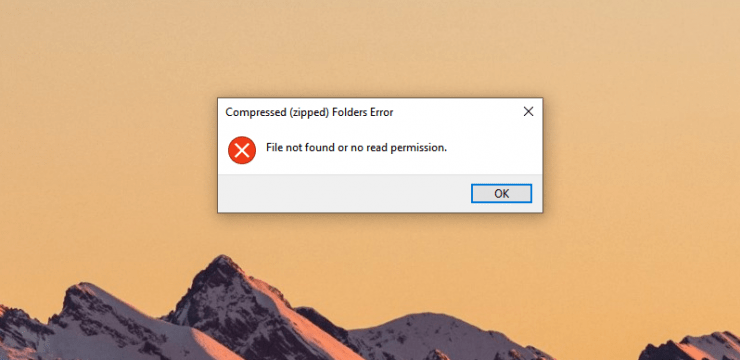
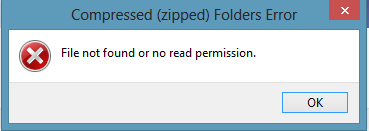
Did you get “file not found or no read permission” on Windows 10 PC? It is a common error that has nothing to do with the file format, and it’s the other way around. Of course, there is a connection between Windows and archive file format but in most cases, you can solve it depending on the circumstances. Windows is not able to read the contents inside of it doesn’t have permission to read the folder or file.
Why am I getting a ‘File not found or no read permission’ Error?
I tried to archive the folder containing folders, DOCX files, and PNG format images. Windows has an inbuilt compressor, where you can archive the folder into a file and send it via email or carry it in the removable drive. However, I keep getting “file not found or no read permission” error no matter which solution I applied. I was able to archive the file into a compressed format, and you can do the same without errors by following the solutions.
Ways to Fix File Not Found or No Read Permission in PC
Here are the Best Solutions to Fix Compressed Zip Folder Error File Not Found or No Read Permission for Windows Computer
Shut Down PC
Do not apply any solutions until you shut down the PC and turn it back on after five minutes cool down.
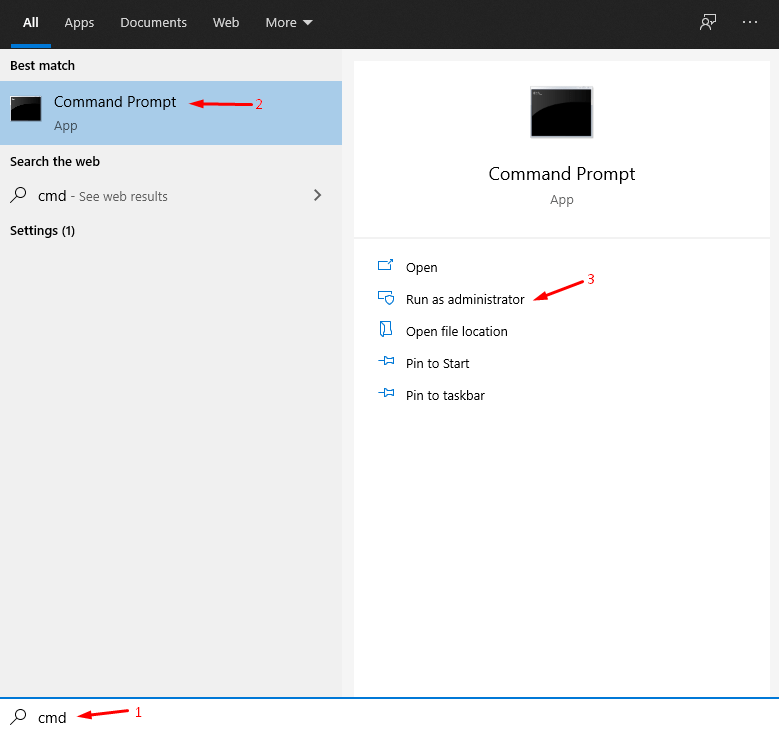
Step 1: Press Windows Key + S and then open CMD as administrator.
Step 2: Type shutdown /sq command and press enter.
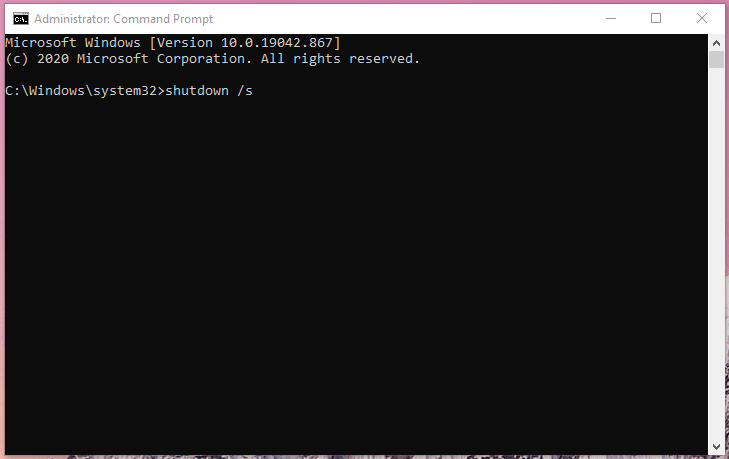
Step 3: Your PC will shut down in a couple of moments.
Let the machine cool down for five minutes and then turn the PC back on.
Use RAR File Format
I have always considered RAR the advanced file format to compress a file because it does not meddle with Windows and works flawlessly on Windows, Linux, and macOS machines.
Here’s your opportunity to try the WinRAR in your machine and get the best out of the free program. You do get a pop-up prompting to purchase the license after 40 days, but you can continue using it without purchasing the license. Users will get the purchase pop-up, only, when they are using the program.
Step 1: Download WinRAR and install it.
Step 2: Open the folder containing the target and right-mouse click to view more options.
Step 3: Now, choose (Add to “Sample.rar”) to create a compressed file.
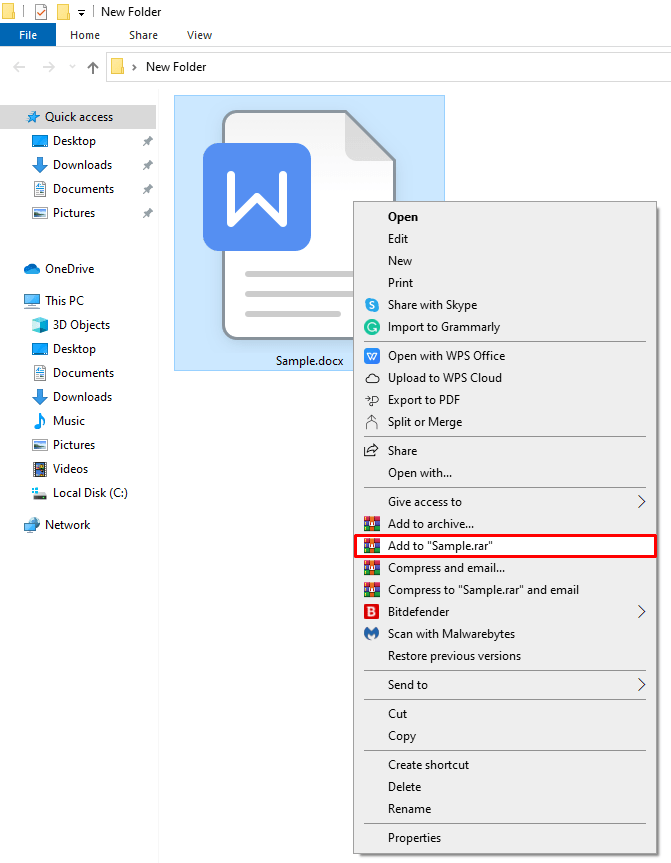
Step 4: A new compressed file is created containing the contents.
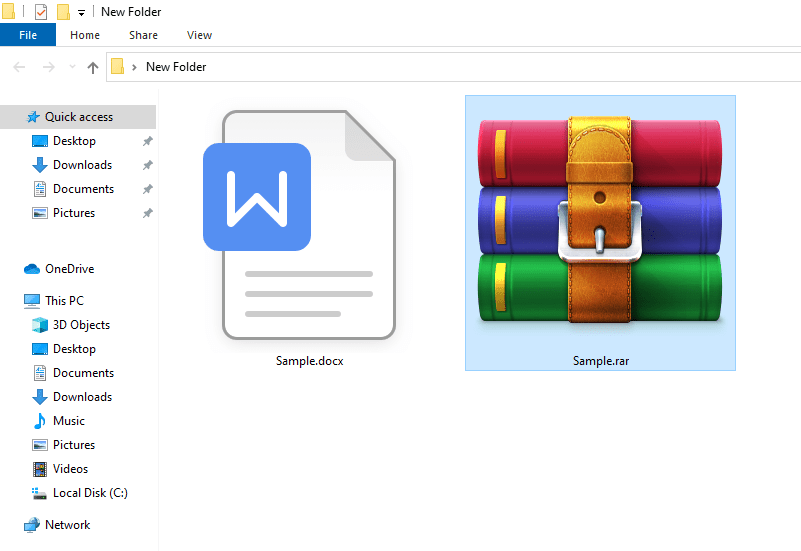
WinRAR does not mess around with the original folder or its contents and creates a new file instead. You don’t have to worry about file corruption and data loss because the source file or folder remains untouched.
Use ZIP File Format
The ZIP file format is extremely popular among business people, and if you don’t have an option to use WinRAR then 7-Zip is a savior. Readers don’t have to spend a dime as there are open-source projects 7-Zip, which have come forward to provide advanced compression programs under freeware license.
Step 1: Download 7-Zip (FREE) and install it.
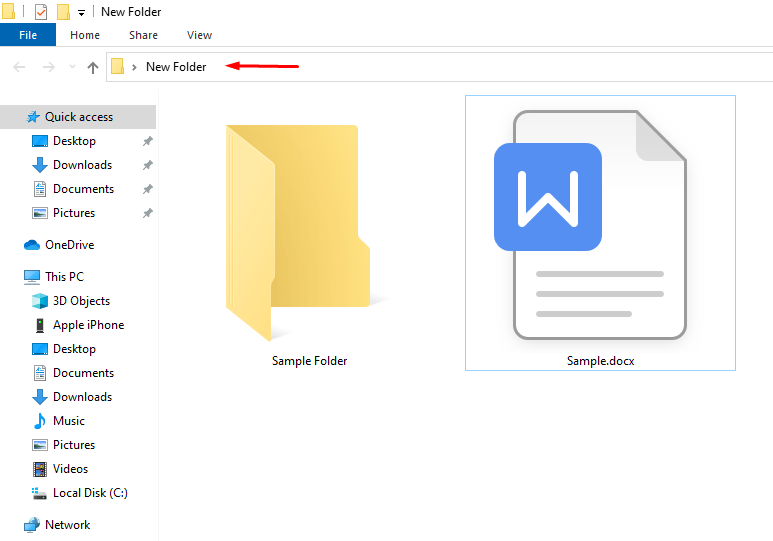
Step 2: Copy the source location from the clipboard.
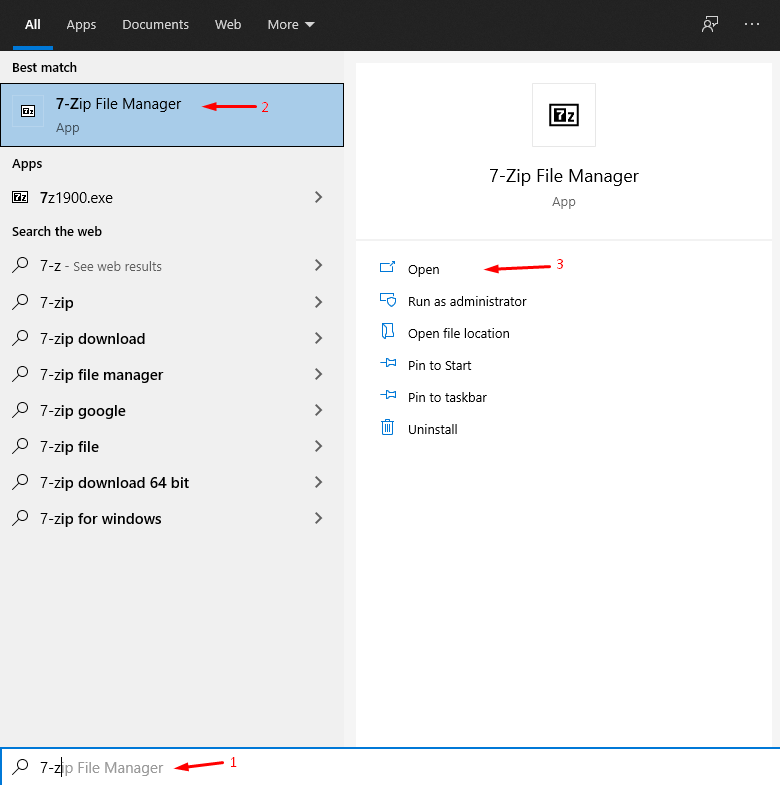
Step 3: Press Windows Key + S and open 7-Zip.
Step 4: Paste the copied location in the 7-Zip program.
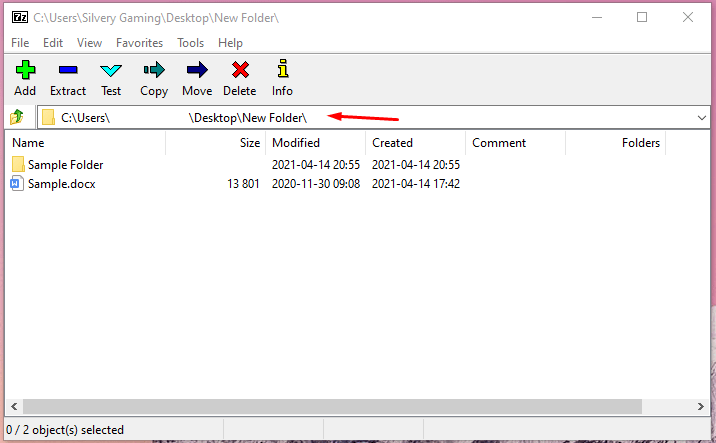
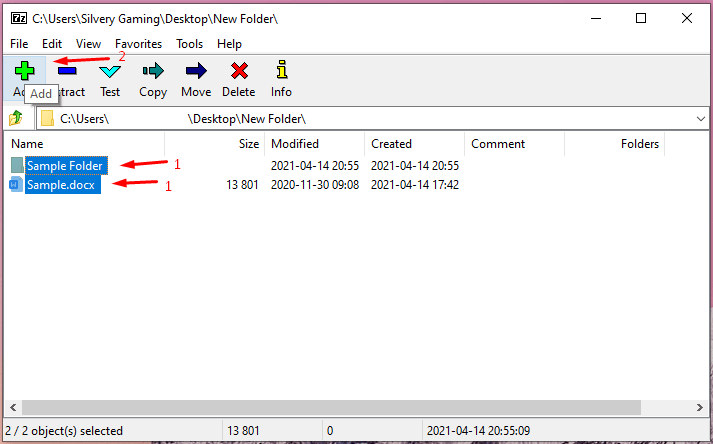
Step 5: Select the files and then click on “Add” to continue.
Step 6: Give the new ZIP file a name, then choose archive format “ZIP” and then click on “OK” to finish the process.

Step 7: The ZIP file is created successfully without any problem.
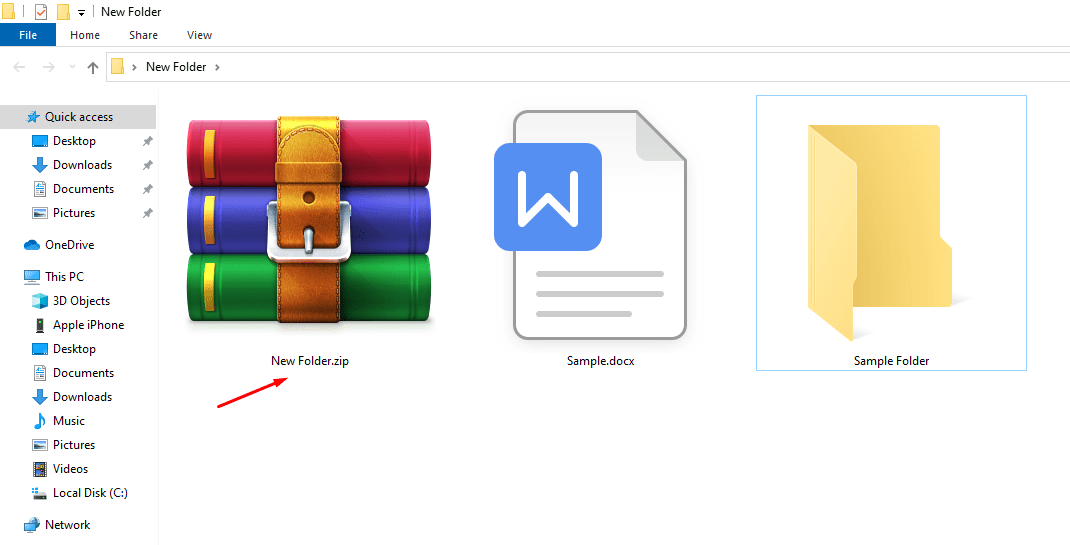
Remember, you can use the same program to unzip a file, if you are having a “file not found or no read permission” error. 7-Zip is an open-source project that does not have bloatware whatsoever, so the persisting chances are minimal.
Create or Open the Archive on Linux PC
Do not underestimate the power of Linux, and that’s how I want to describe Linux software. I was able to create the ZIP file out of the source without errors, and that’s how I come to know that this is a Windows-specific problem. Learn how to run Linux on a USB and get the job done without re-installing Windows OS.
Step 1: Open the source folder, then select the files.
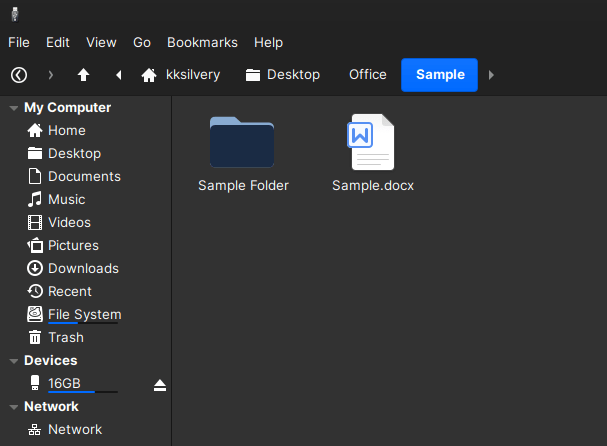
Step 2: Right-mouse click to view more options and then click on “Compress” from the options.
Step 3: Customize the location, name, archive format, and more. Click on “OK” once you are done with customizations.
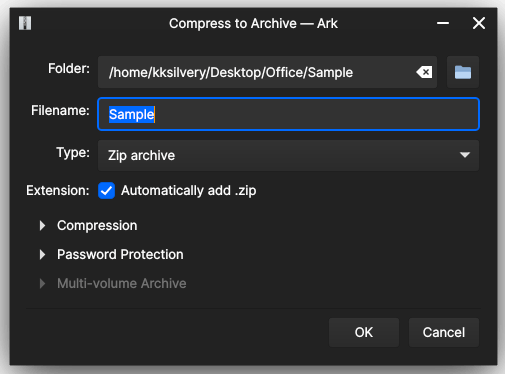
Step 4: The ZIP file is created successfully without errors.
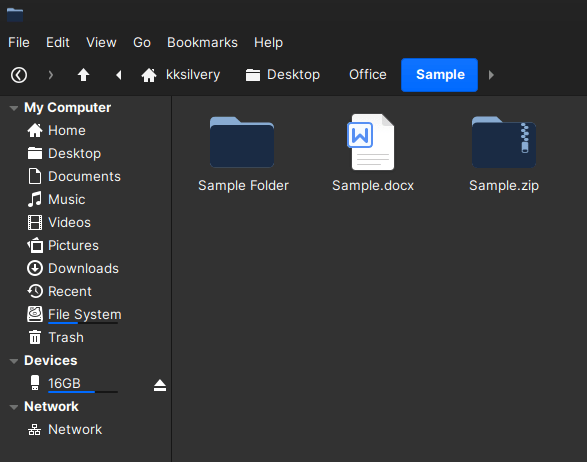
You don’t have to install Linux on a PC to use the features, and it will run smoothly in USB Flash Drive. Don’t worry about cross-platform compatibility because I have done this over one hundred times and never faced any problem.
Give Permission to the Folder
Windows default archive tool is not able to read the folder, so give the program special permission. Allow the folder to let the third-party programs read it, and it will solve the “file not found or no read permission” error.
Step 1: Create a copy of the file or folder, in case, if anything goes wrong, you will have a backup file.
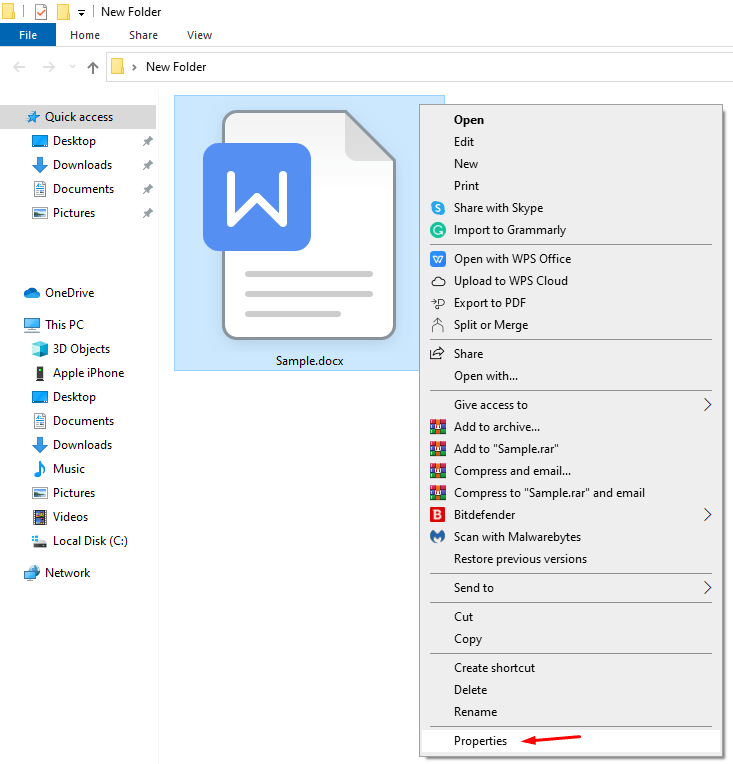
Step 2: Select the copied source and right-mouse click to view more options and choose “Properties” to continue.
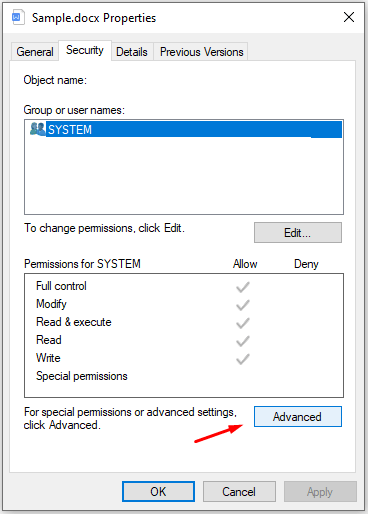
Step 3: Choose “Security” and click on “Advanced” to continue.
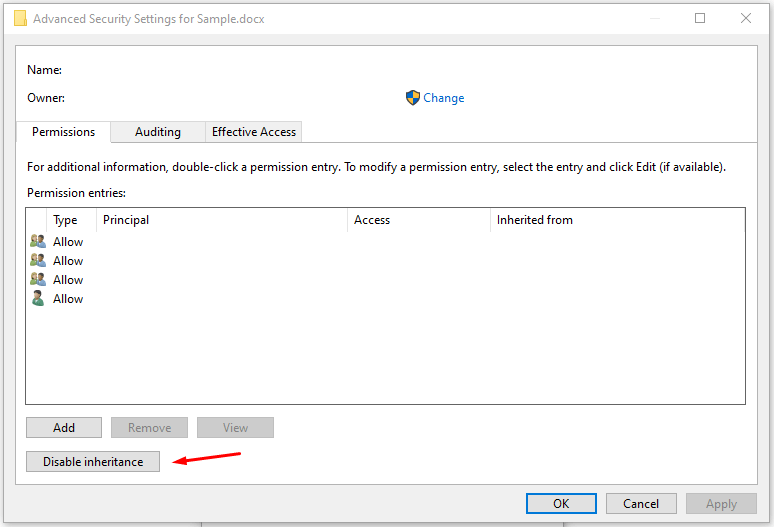
Step 4: Click on “Disable inheritance” to continue.
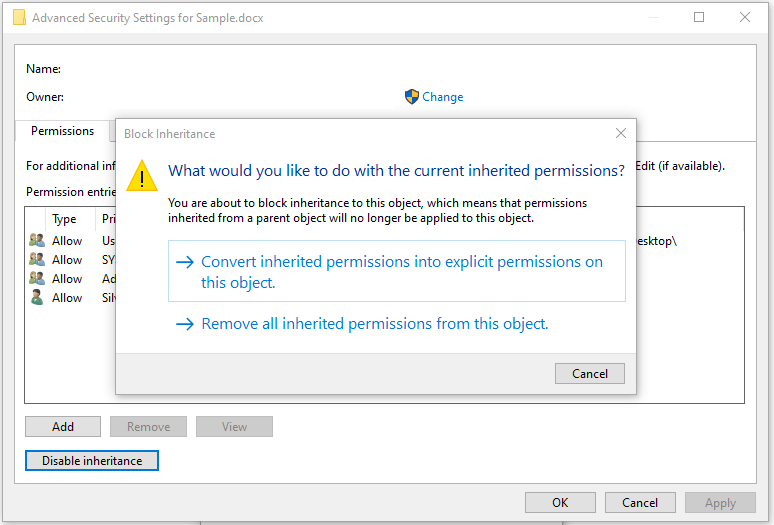
Step 5: Choose “Remove all inherited permissions from this object” to continue.
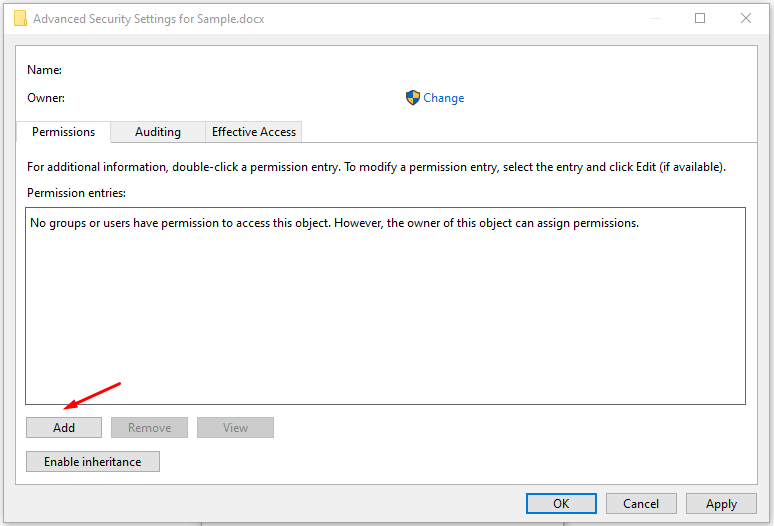
Step 6: Click on “Add” to add permissions.
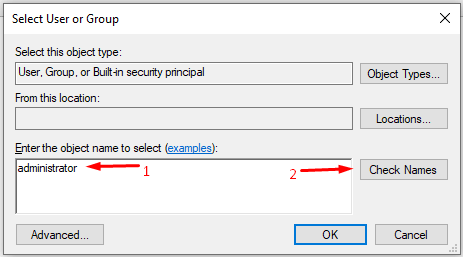
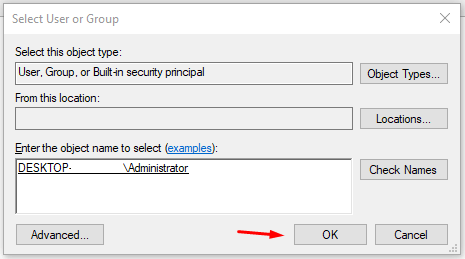
Step 7: Type “administrator” and then click “Check Names” to add the administrator account.
Step 8: Click on “OK” to save it.
Step 9: Choose all permissions and then click on “OK” to save the changes.
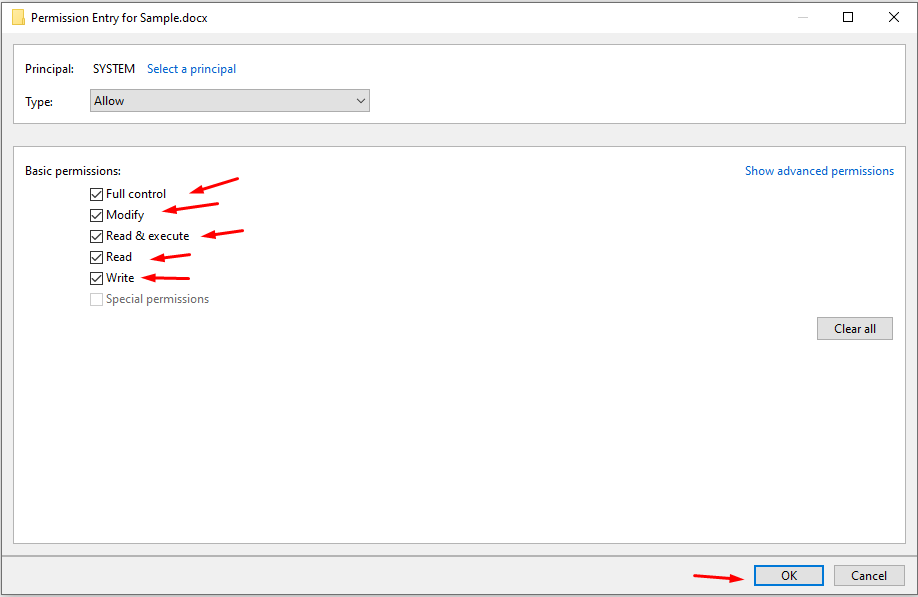
Try to archive the folder or file, and you won’t get a “file not found or no read permission” error. Readers can show the file way to the trash can If something goes wrong.
Bottom Line
I solved the “file not found or no read permission” error using the WinRAR solution, and it worked like charm. Readers don’t have to worry about paying a dime to solve the problem and don’t have to consider installing Windows again. You have 7-Zip freeware to stick with ZIP file format and don’t have to concern the receiver to install the WinRAR program. Let us know which solution worked for you to solve the “file not found or no read permission” error in the comment section below.
If you've any thoughts on Fix Zip Error – File Not Found or No Read Permission on Windows PC, then feel free to drop in below comment box. Also, please subscribe to our DigitBin YouTube channel for videos tutorials. Cheers!
