Windows 11 is equipped with plenty of efficient methods to ensure your Windows 11 PC remains secured against unauthorized access. One of the basic methods is to set a PIN or password to restrict the computer’s access. Apart from this, simultaneously pressing the Windows key and L will quickly bring forward the lock screen.
While the above methods have been there for a long time, the latest addition is the very interesting dynamic lock feature. The dynamic lock feature comes in handy in a situation when you are looking for a more secure option to lock your PC when you are not around. In a nutshell, as soon as you walk away from your computer, the dynamic lock feature, if enabled, locks the device automatically.
If you are curious about the dynamic lock feature, follow the instructions in this guide to learn about the Dynamic Lock feature and how to enable it in Windows 11.
What is the Dynamic Lock Feature in Windows 11?
A dynamic Lock is a helpful tool that automatically secures your computer when you leave it unattended. This feature relies on Bluetooth technology to operate.
You need to connect your Windows PC with your smartphone or any other wearable device using Bluetooth technology. When you leave Bluetooth range for at least 30 seconds, the connection between your PC and phone weakens and ultimately breaks. At that time, Dynamic Lock automatically locks your PC without having to use the Windows + L shortcut key, guaranteeing that no one else can access it while you are away.
Now that you have a basic idea about the dynamic lock feature in Windows 11. Let’s check out the detailed procedure to enable and use the dynamic lock feature.
Steps to Enable and Use Dynamic Lock Feature in Windows 11
Dynamic lock is a feature that automatically locks a Windows device when a Bluetooth-paired phone signal falls below the maximum RSSI value.
1. Turn on Bluetooth in Windows
First of all, we need to enable the Bluetooth services on your Windows 11 device. Here are the steps for it:
- You may hit Windows + I on your keyboard to launch the Settings menu.
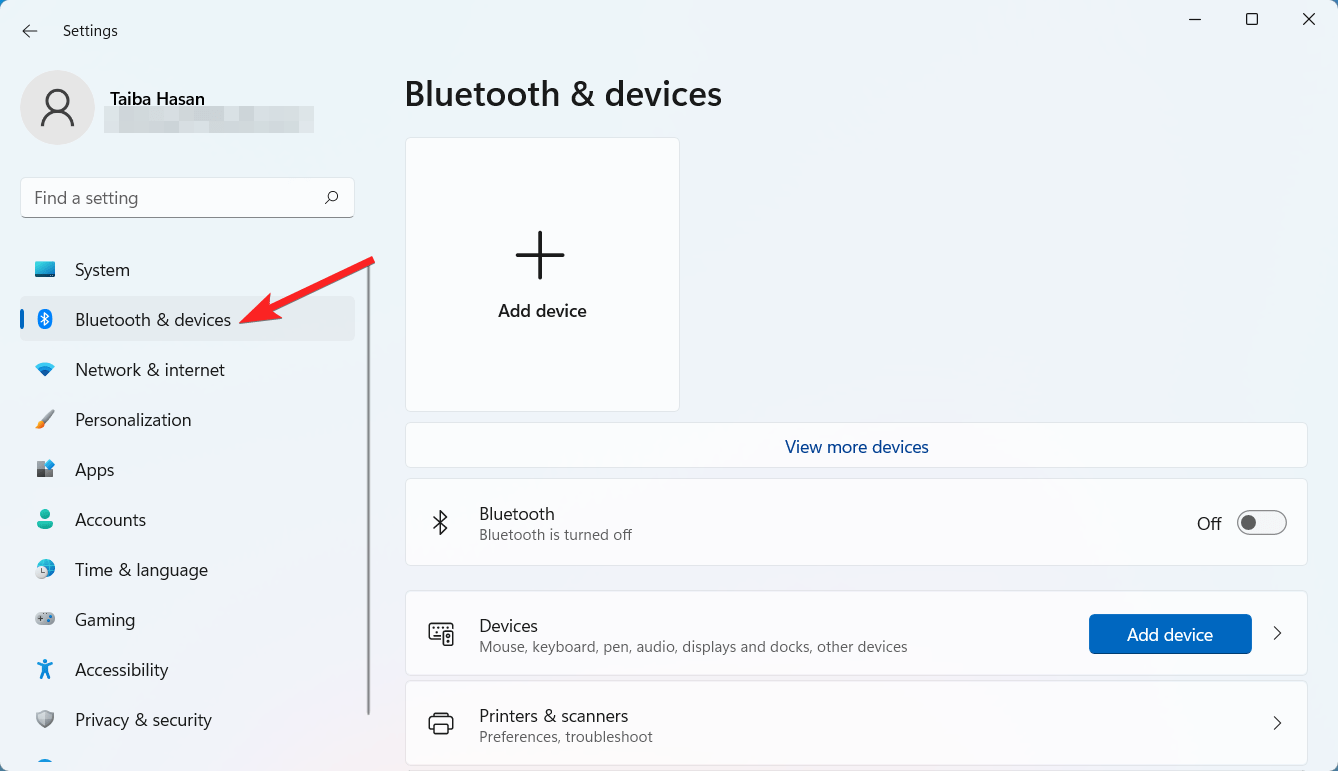
- Select the Bluetooth & devices from the options on the left.

- You’ll see a toggle switch on the right-hand side under Bluetooth. Click the switch to turn Bluetooth on if it’s currently off. The switch should turn blue when enabled.
2. Enable Bluetooth on your smartphone
After the Bluetooth service is active on your Windows 11 PC, it’s time to pair your smartphone. Here is how you can go about it:
On iPhone:
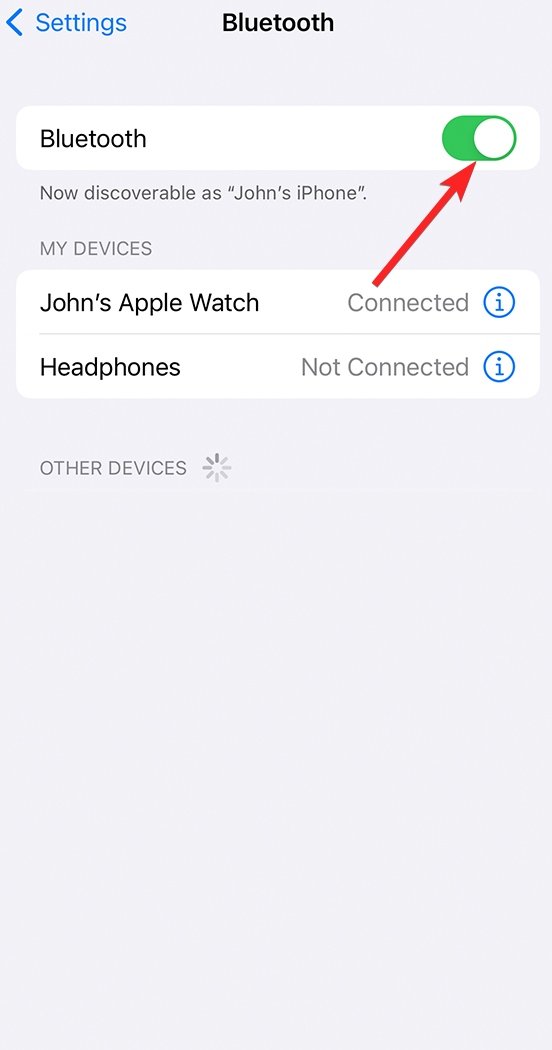
- Go to the Settings app on your iPhone.
- Tap the Bluetooth option in the Settings app.
- Toggle on the switch next to Bluetooth.

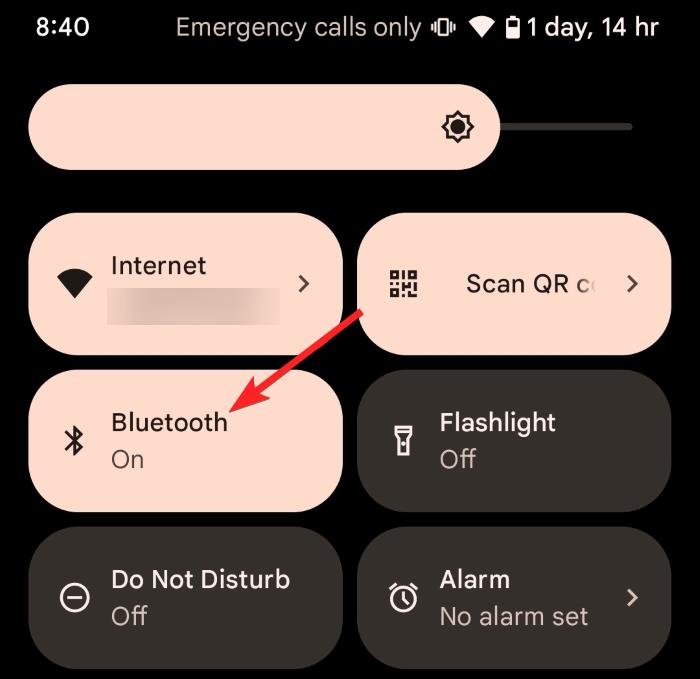
On Android smartphone:
- Swipe down from the top of the screen to reveal the Quick Settings menu on your Windows PC.
- Tap the Bluetooth icon once so that the icon turns grey and the feature is enabled.

3. Pair your smartphone and Windows 11 PC
Here is the step-by-step process to pair your smartphone with your Windows PC.
iPhone:
- Open Settings on your Windows 11 computer using the Windows + I shortcut.
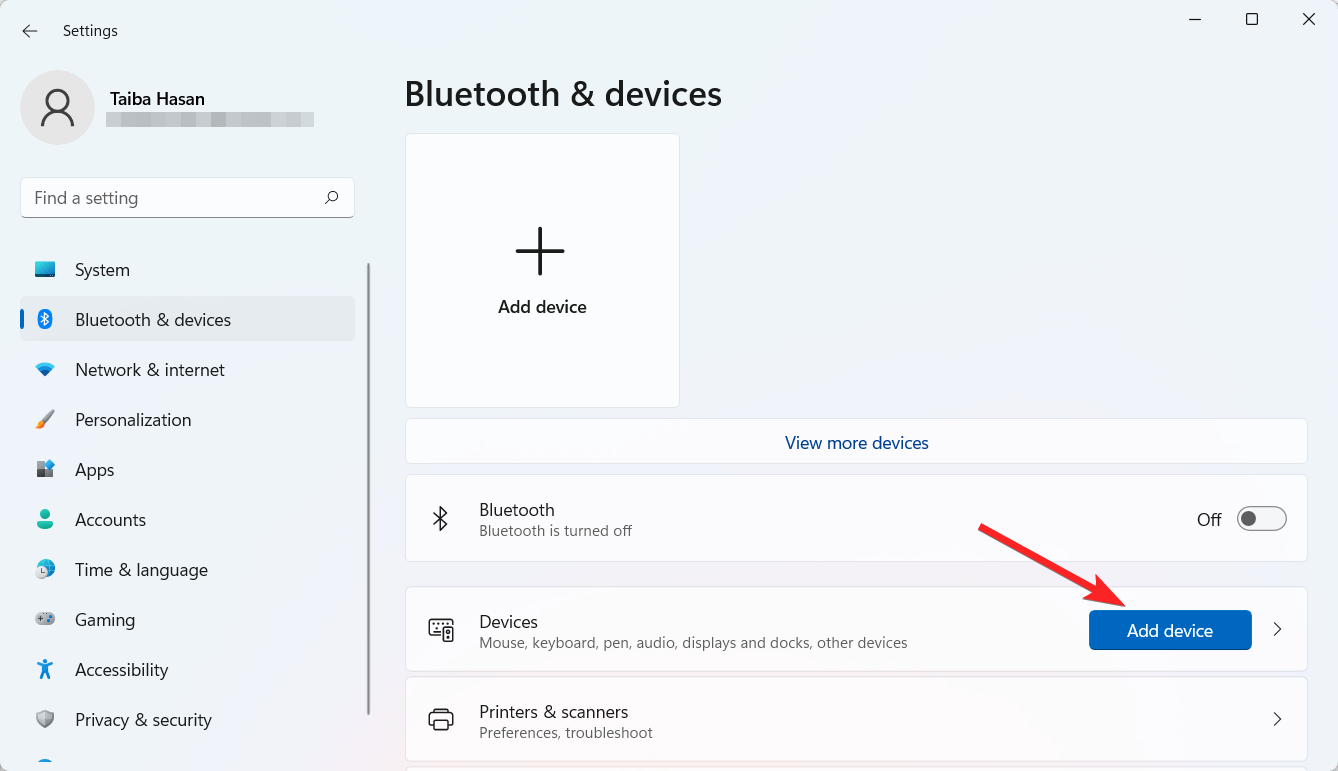
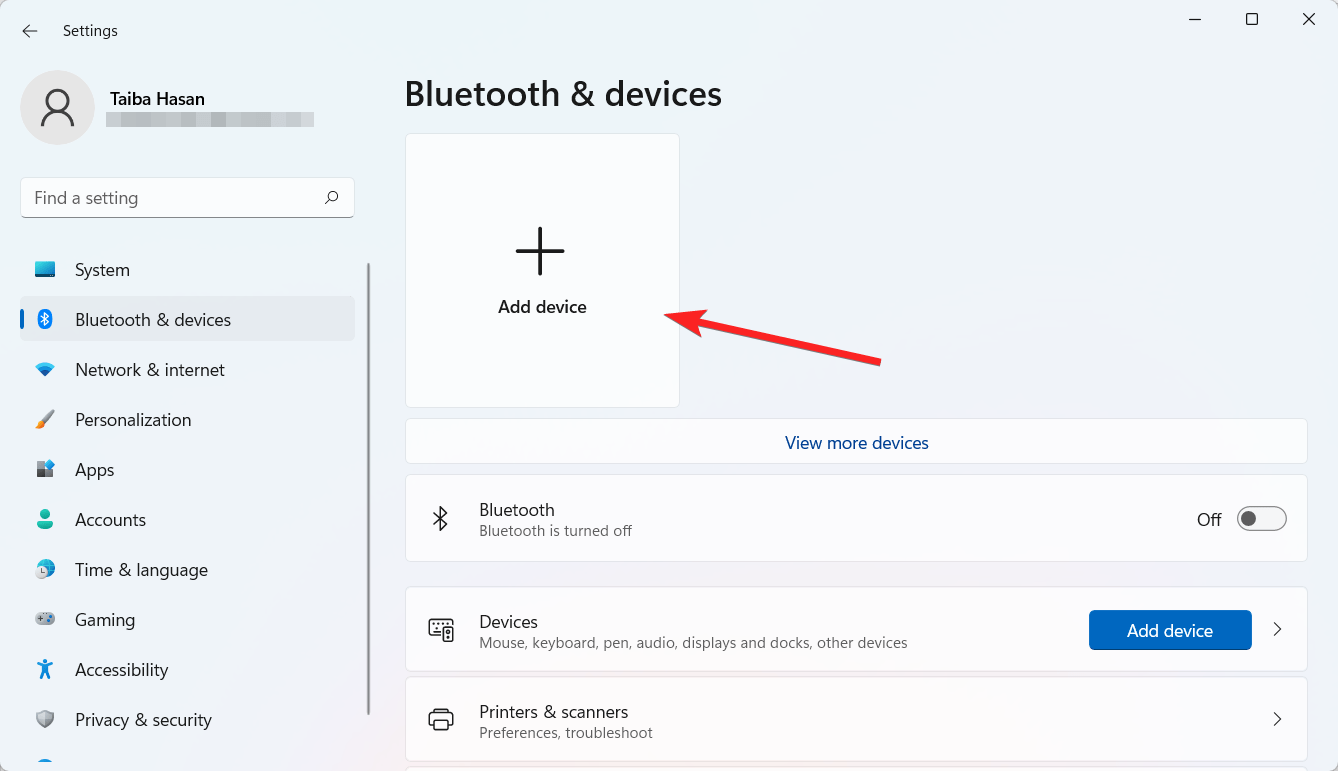
- Go to Bluetooth & devices from the left sidebar.
- Click the Add Device button.

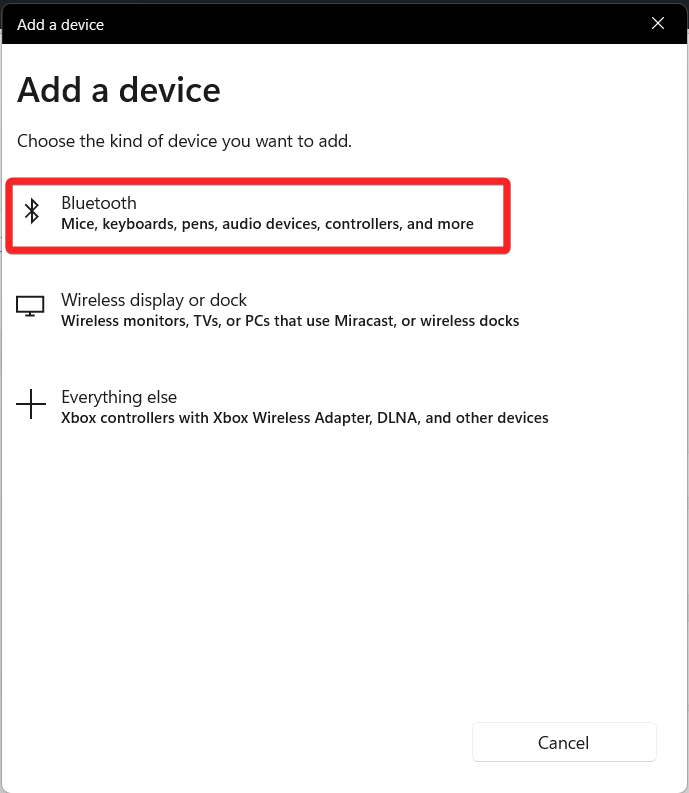
- Select Bluetooth from the popup window.
Android:
- Open Settings and navigate to Bluetooth & devices.
- Click the Add Device button.

- Choose Bluetooth from Add a device popup that appears on the screen.

- Pick your Android smartphone from the list to link your Android phone to your PC.
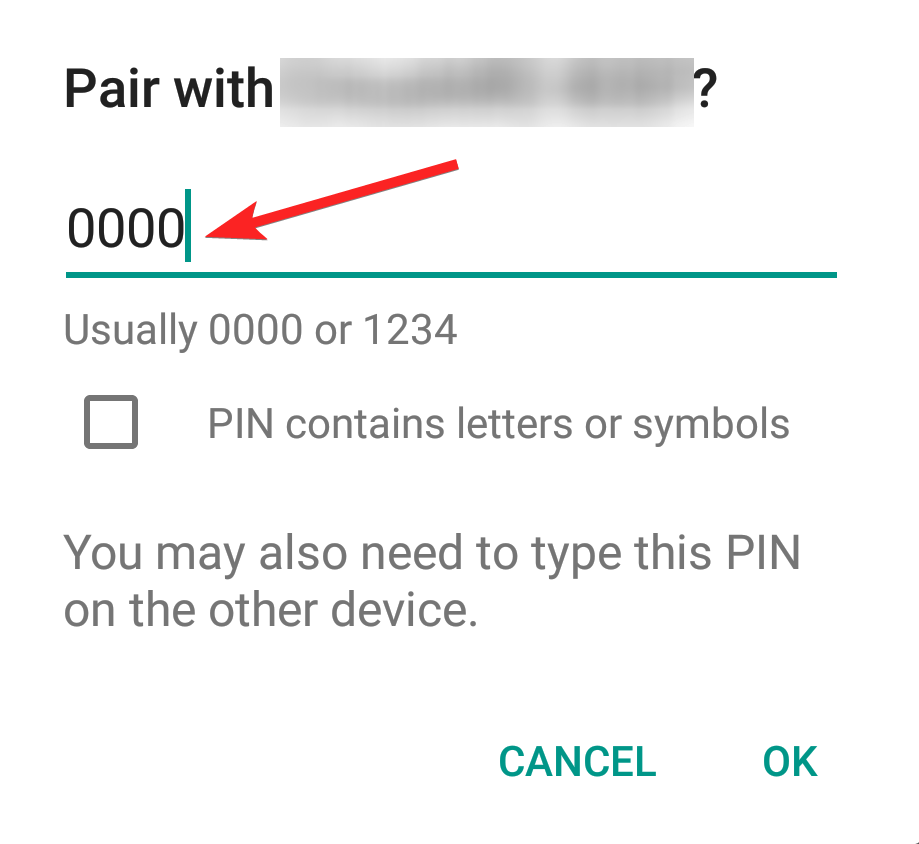
- After the PIN appears, tap OK on your phone and Connect on your PC to complete the pairing process. Your phone and computer ought to now be connected.
4. Confirm the PIN
Now you need to confirm the new PIN on your Windows PC. Here are the steps for it:
- Access the Bluetooth settings screen on your smartphone and choose your Windows PC under Other Devices.
- Your smartphone appears in the Bluetooth list on your PC. Choose it to pair it with your Windows device.
- As soon as the PIN appears on the screen, Tap Pair on your Android device screen and choose the Connect option on your PC.

- Next, press the Done button, and your smartphone shows up in the list of items connected to your device.
5. Turn on Dynamic Lock
After your Windows 11 PC and smartphone are paired successfully. You can enable the dynamic lock feature on your device. Here is what you need to do:
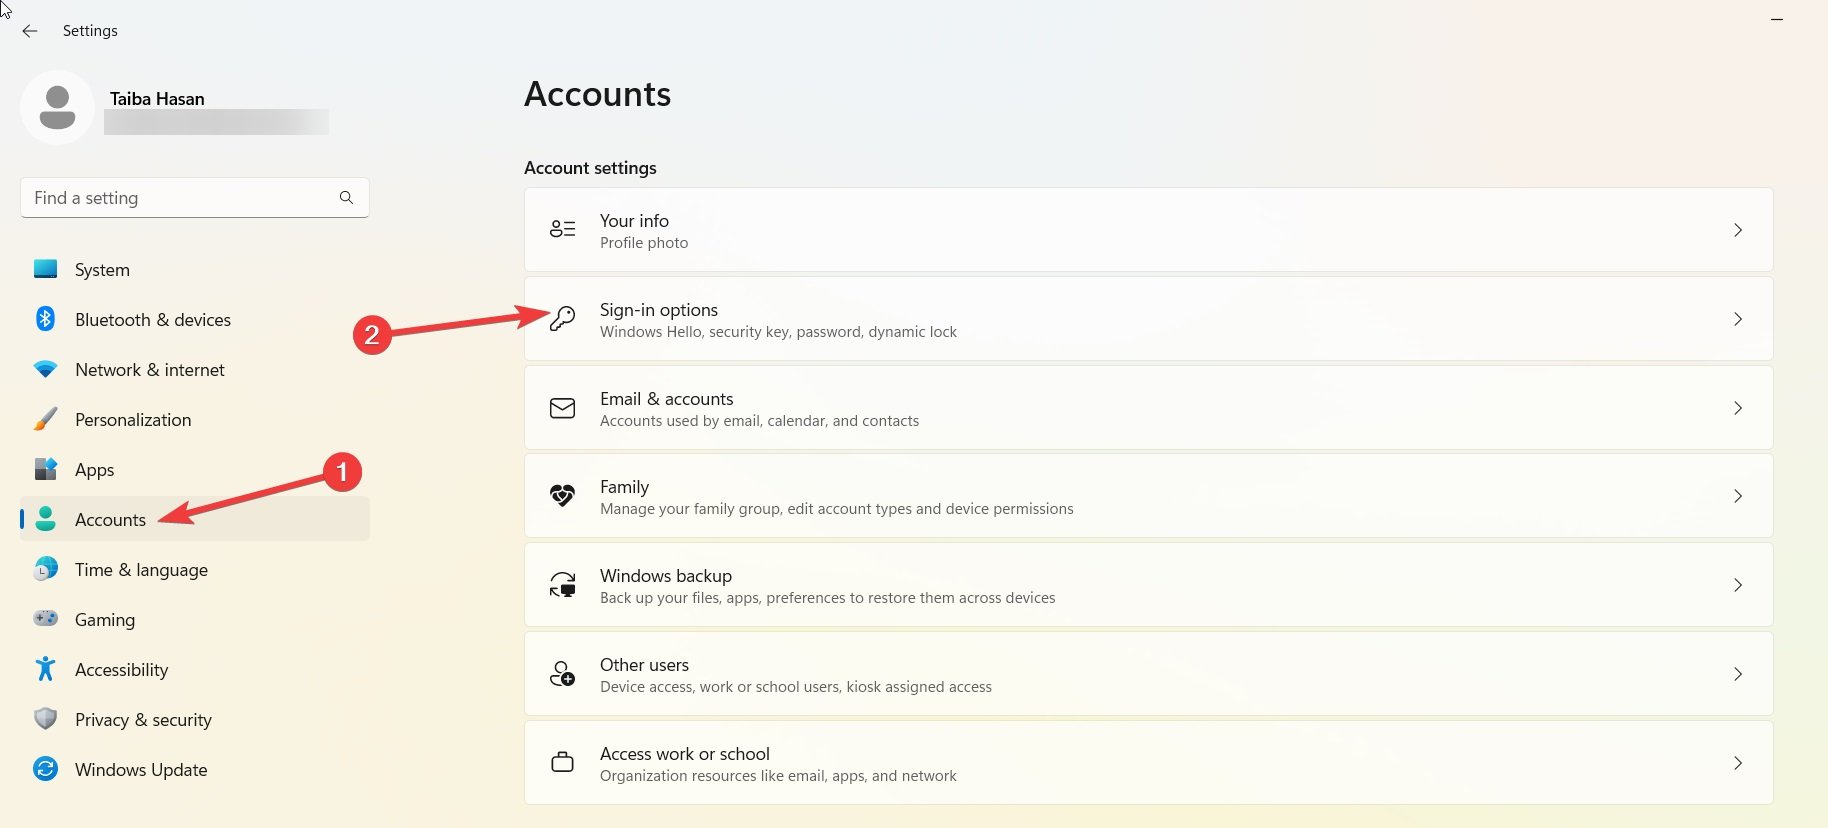
- Use the Windows + I shortcut to launch the Settings app.
- Go to Accounts from the left sidebar.
- Choose the Sign-in options from the right section.

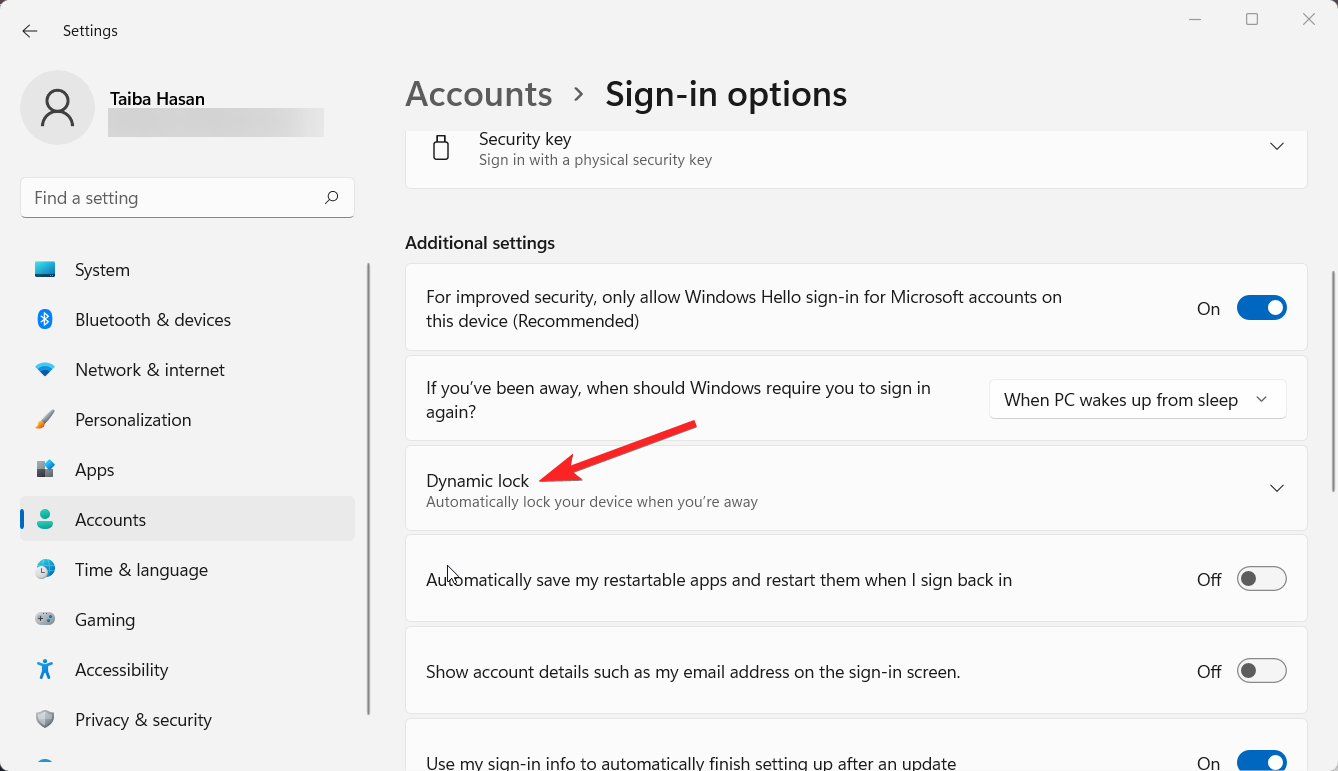
- Scroll down to the Additional Settings section and click the Dynamic Lock area to view the related settings.

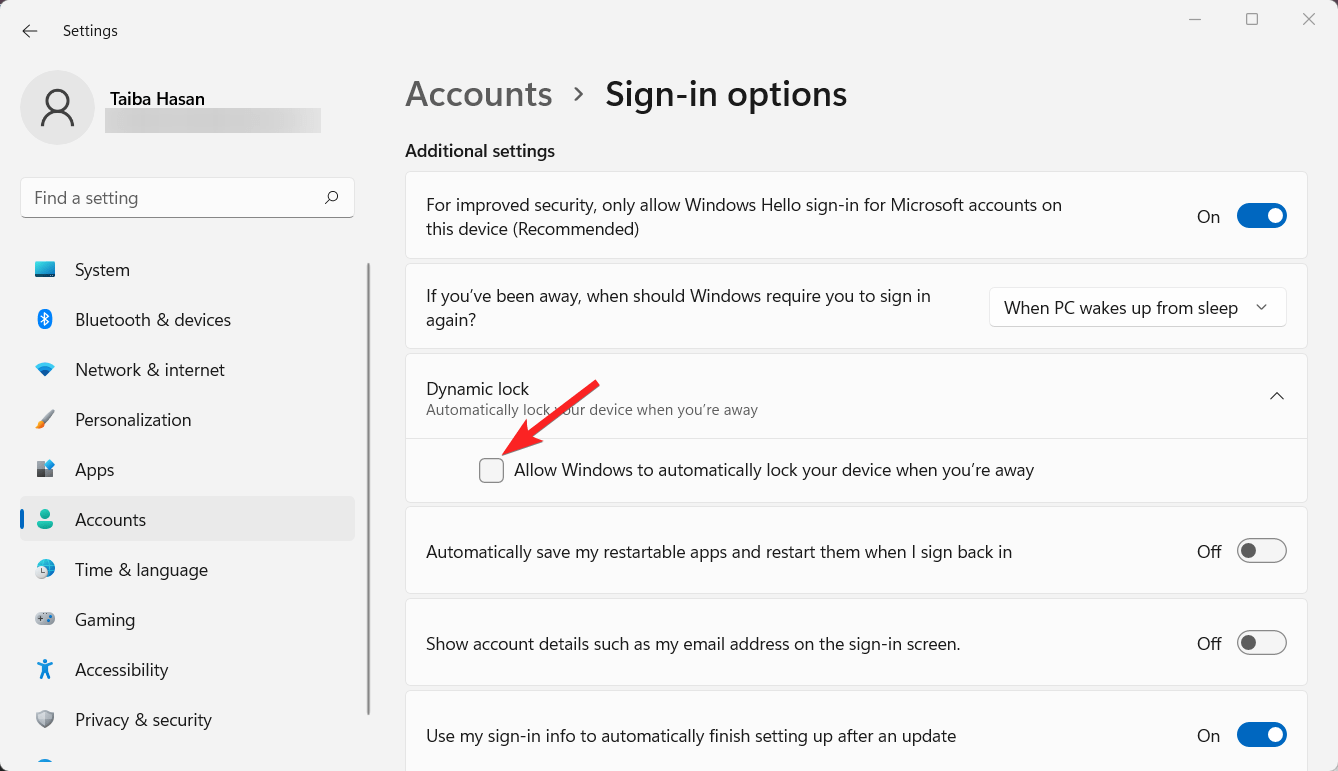
- Now enable the checkbox preceding the option Allow Windows to automatically lock your device when you’re away.

As soon as you do it, the associated device’s name should display under this choice, indicating that Dynamic Lock is operational.
6. Test Dynamic Lock
Now that the dynamic lock feature is enabled, it’s recommended to check if the feature is working properly. Here is what you need to do.
First of all, make sure your Windows PC is unlocked before testing Dynamic Lock. Take your connected device and step away from your computer. How far are you going to have to go? The signal strength of Bluetooth varies depending on the version. You can go 200 to 800 feet away from your Windows PC.
After you’ve made it this far, return to your computer and see if Windows is in Lock mode. Ignore the Lock screen to sign back in, then enter your PIN, face, or fingerprint if one of the Windows Hello methods is enabled.
We tested the feature and discovered that all the PCs running on Windows 11 automatically got locked when we moved the smartphone far enough.
Conclusion
That’s pretty much it! Windows 11 has a fantastic Dynamic Lock feature that automatically locks your PC. To make this work, connect your smartphone to your Windows PC. Then, all you have to do is step away with your phone in your hand or pocket.
Once your PC realizes your phone is no longer nearby, it will switch to lock mode and stay that way until you come back and sign in again.
What is your take on their feature? Do let us know in the comments section.
If you've any thoughts on How to Use Dynamic Lock in Windows 11?, then feel free to drop in below comment box. Also, please subscribe to our DigitBin YouTube channel for videos tutorials. Cheers!

![Omegle Not Working | Server Error on Chrome PC [Fixed] 1](https://cdn.digitbin.com/wp-content/uploads/How_to_Fix_Omegle_Not_Working_on_Chrome_Browser-520x292.jpg)


