Motorola Smartphones are always a piece of excitement. So is the Android OS, which lets you customise the phone with lots of Xposed firmwares and forked ROMS. Today we will learn to unlock the bootloader of all Motorola mobiles.
The process given below can be used for all released phones or the one which is to be released in future. The devices include Moto C Plus, Moto C, Moto G5 Plus,G5, Moto M, Moto E3, Power, Moto Z Play, Force, Moto Z, Moto G4, Plus, Turbo, Moto X, Play, Force, Style, Moto G4, G3, G etc. (Some devices may not be listed)
Note: DigitBin is not liable for any damage . Perform the following operation at your own risk. Readers discretion is advised.
Prerequisites:
- Battery filed up to 60%
- Take the backup of your device as unlocking bootloader will wipe your device data.
- Computer and USB cable
Steps to unlock the bootloader of Moto Phones:
Step 1: Download and Run Minimal ADB and Fastboot tool on your PC.
Step 2: Install the USB drivers if not automatically installed when USB is connected.
Step 3: Open your Moto settings and open developer options (Setting → About phone → Build Number, tap 5-8 times till the developer’s options appear under settings)
Step 4: In the developer’s settings right check on ‘Allow OEM unlock’ and ‘USB Debugging’.
Step 5: Now boot into Fastboot mode by powering OFF the device and turning it ON by pressing power key + volume down key simultaneously until fastboot mode appears on the screen.
Step 6: Connect your device to PC using USB cable.
Step 7: Open the command prompt by using SHIFT and Right Click in the folder where files ADB and Fastboot is saved.
Step 8: Now in Cmd type fastboot devices.
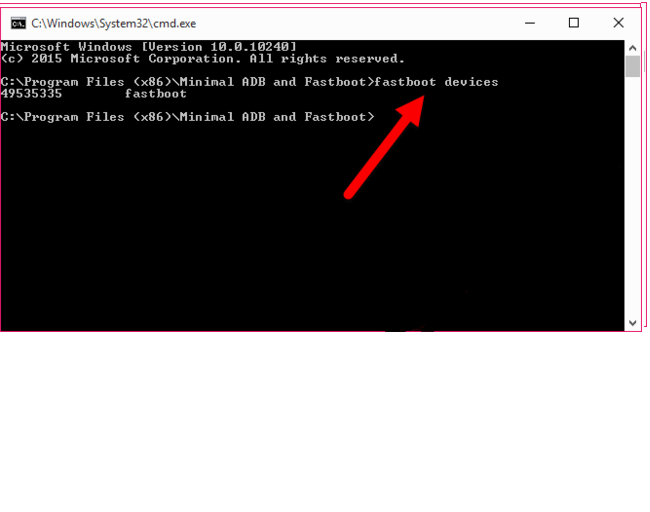
‘fastboot devices’ command
Step 9: Now give another cmd fastboot oem get_unlock_data.
Step 10: You will get unlock data string, copy it by right click in the command window and selecting mark.
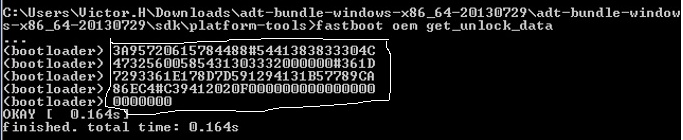
Unlock data String
Step 11: Copy and paste it in Notepad, remove all the spaces.
Step 12: Open Moto’s official unlock bootloader website.
Step 13: Register and complete all the formalities on the website.
Step 14: Now paste the unlock data string in the box and check if your device can be unlocked by clicking “Can my device be unlocked ?”
Step 15: If your device is unlockable, agree all the permissions and ‘Request for unlock key’.
Step 16: Now Motorola will send you the unlock code on your registered Email ID. Open the mail and just copy the unlock code.
Step 17: Open the Command prompt and enter the command fastboot oem unlock followed by pasting the unlock code and press enter.
Step 18: The bootloader is unlocked and your Moto will reboot automatically.
Steps to flash TWRP in your Motorola Moto:
- Again reboot your device in fastboot mode.
- Download the twrp.img and save it in fastboot folder. Name the file as twrp.img. (Google search to find the recovery img for your device)
- Open the cmd window.
- Type the following command fastboot flash recovery twrp.img
fastboot flash recovery twrp.img
- TWRP is installed in your Moto Mobile.
- Just reboot the device and you are done.
Note and conclusion: DigitBin is not liable for any damage what so ever. Comment below for any assistance required.
If you've any thoughts on Unlock the Bootloader of any Motorola Smartphone, then feel free to drop in below comment box. Also, please subscribe to our DigitBin YouTube channel for videos tutorials. Cheers!


IF AFTER ENTERING THE BOOTLOADER INFORMATION THE SITE DOES NOT GIVE BOOTLOADER KEY THEN WHAT IS THE OPTION ?
Which device are you trying for.
are there any cmd commands to achieve steps 3 & 4. since I cannot access the UI