Are you a customization freak but many good mods are not working on your Android device due to lack of root access? Gaining root access means you will have administrative access to all system files as well as boot files. If you wish to root your Android without much complication then there is nothing to worry about, Magisk will help you to gain root access to your Android device, in quite straightforward steps, and additionally, it will not harm your device too.
Note: At any stage, you must not perform any additional steps about which you have no idea. We at DigitBin cannot be held responsible for anything that goes wrong.
What is Magisk?
Magisk is one of the best and widely used root methods in the rooting environment available in the market. Magisk roots the Android system “Systemlessly”, in simpler words, Magisk copies the system files and stores them in the boot partition after modifying it. In this way, a user gets the root access to the system, and also at the same time, it is undetectable by Google SafetyNet as the original system files are untouched.
The Systemless root is the reason that users are switching to Magisk as the primary root method from SuperSU, as in this way, user can take advantage of the root as well as the applications that uses Google’s SafetyNet algorithm, like the banking applications, Google Play Store, and many more.
Features of Magisk
Systemless Root: As we have already mentioned about this in the above section, the Systemless root method modifies the system files without actually modifying it, it copies the system files, makes the necessary changes for root, and then stores it in the boot partition so that OS can make changes.
Constant Updates: SafetyNet API is designed by Google to detect, root, custom ROM, any tempered settings, etc. As Magisk is a Systemless root method, it defies the SafetyNet API and passes the CTS, i.e., Compatibility Test Suite.
Defies SafetyNet API: SafetyNet API is designed by Google to detect, root, custom ROM, any tempered settings, etc. As Magisk is a Systemless root method, it defies the SafetyNet API and passes the CTS, i.e., Compatibility Test Suite.
Magisk Modules: One of the most exciting things about Magisk is its modules, we have discussed this in the next sections.
Magisk Hide: Magisk Hide is the most important and crucial factor contributing to its success. As it defies the SafetyNet API, so you don’t need to worry about the application compatibility, nevertheless, if it still faces any issue with any application then by using this feature, you can hide Magisk or root from that particular application.
Prerequisites
- An Android device running Android JellyBean or later.
- An unlocked boot loader.
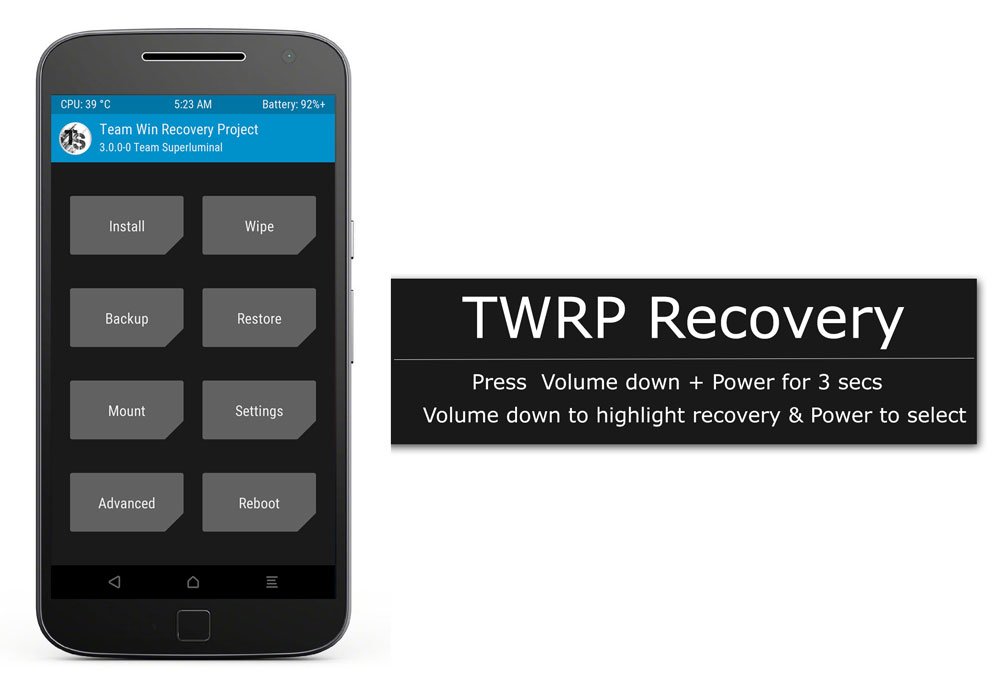
- A custom recovery (we’ll using TWRP).
- The Magisk installer zip.
Unlock Bootloader & Flash TWRP
Here is the process for ADB and Fastboot driver installation. They are important for unlocking the bootloader.
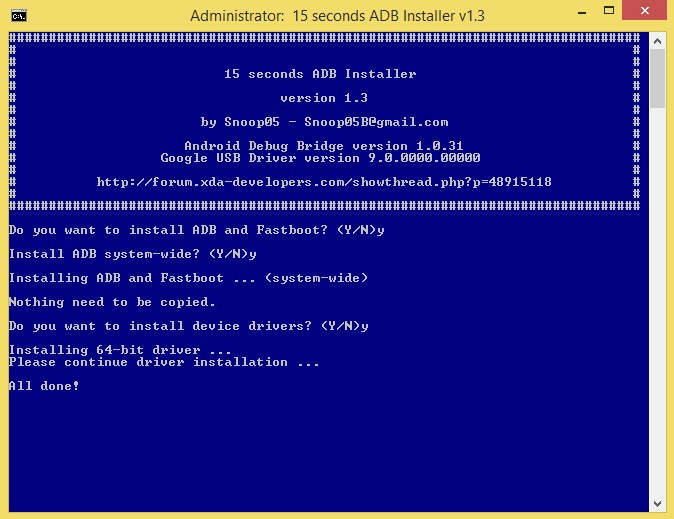
- the Platforms Tool (Compressed ADB & Fastboot Zip File) on your PC.
- Run the adb.exe file.
- You will see a command prompt, Say YES to all commands by typing Y and hitting enter.
- After the correct installation of drivers, ADB, and fastboot the window closes automatically. Confirming the working of ADB and fastboot.
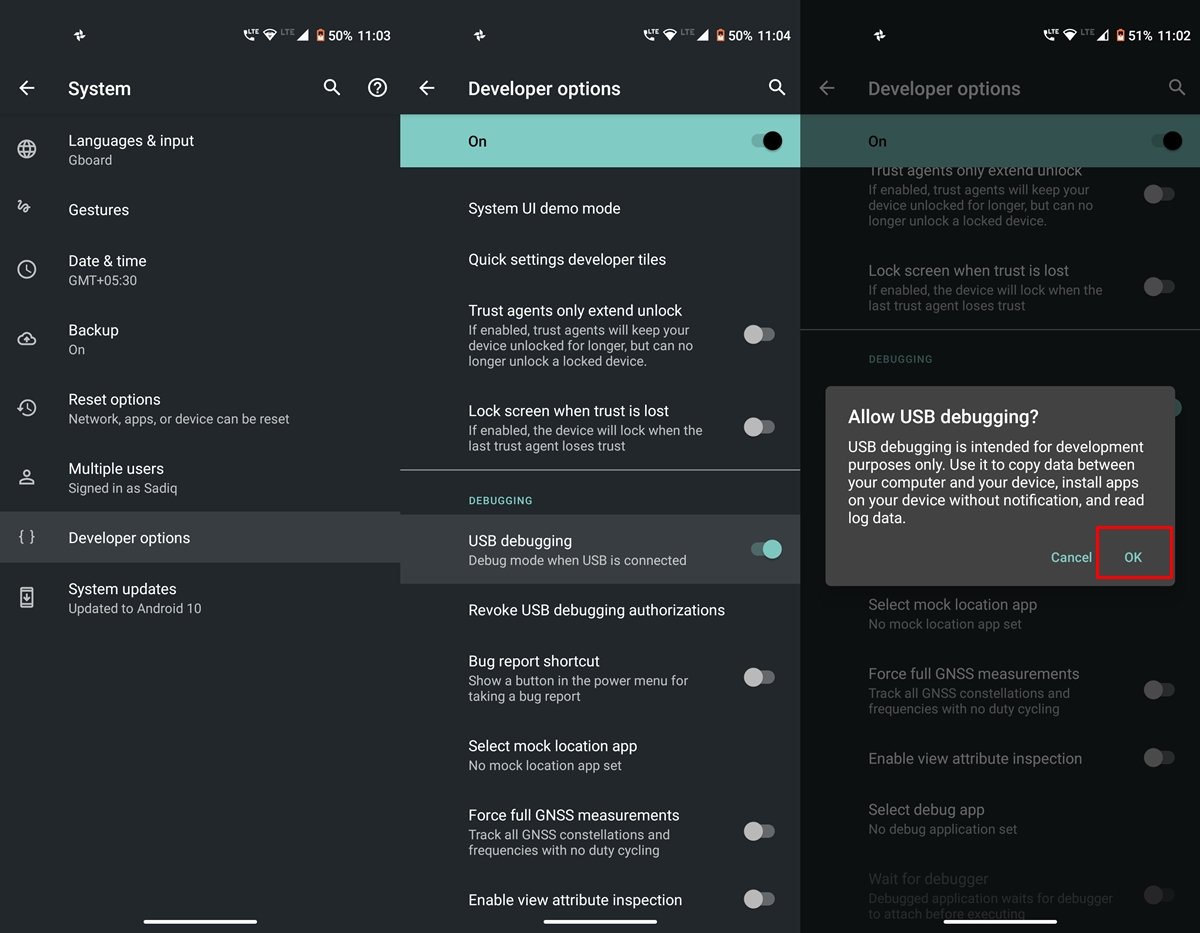
- Now Enable USB debugging and OEM unlock in your Android
- In Android, Go to Settings > About phone, and then tap ‘Build number’ 7 – 8 times for Developers options to appear. Under setting choose developers option and enable USB debugging and OEM unlock
- Connect your Android to PC using a USB cable. Right tick on the ‘Always allow from this computer’ checkbox and then tap on the OK button if asked on mobile.

- Let device drivers be installed on your PC
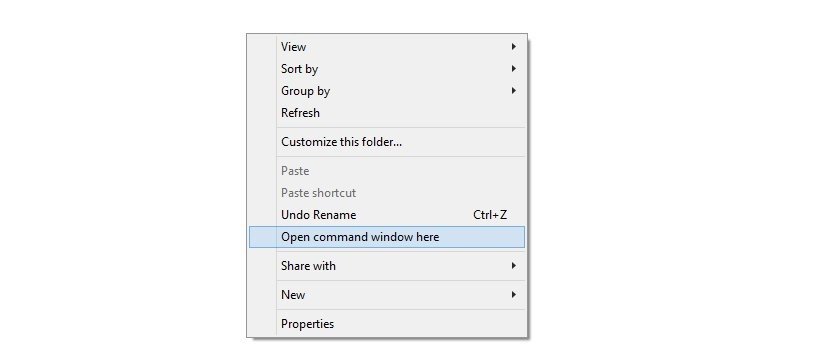
- Open the command window on your PC by opening any folder and left click on empty space inside the folder. Hold the shift key, and right-click on the empty space to get a pop-up, here choose the ‘Open command window here’ option.
- Now boot your mobile in fastboot mode by switching off the device and booting it by using the Power + Volume Up button until you see fastboot text or logo on the screen.
- Now run the following command: fastboot devices and hit ENTER
fastboot devices
- You will see the serial number of your device. It means Fastboot and ADB are installed properly. If it doesn’t appear again install the drivers properly.
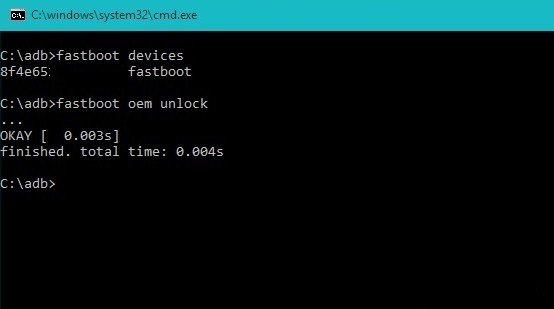
- Once the fast boot connection is confirmed use command: fastboot oem unlock
fastboot oem unlock
- Now on your device, a message appears, confirm it by YES.
- The device will reboot automatically and the bootloader is unlocked.
You can confirm unlock status by rebooting into fastboot mode to see the message ‘unlocked now‘.
How Flash TWRP Recovery?
- Download the recovery.img file in your PC (rename the file as twrp.img).
- Enable USB debugging in your Android
- Again connect the device to the PC using a USB cable
- Open the command window in the folder where the recovery file is stored
- Make sure the fastboot is working by trying the command ‘fastboot devices’.
- Flash TWRP recovery by running the following command fastboot flash recovery twrp.img
fastboot flash recovery twrp.img
- Reboot the device with the command
fastboot reboot
Download and Install Magisk
As a Magisk installer can be different for different devices, so make sure to cross-check with your device’s XDA thread. But this is not always the case, so we are going to download the Magisk installer zip from the official website:
- Open your browser and go magisk zip.
- You can also download the Magisk Uninstaller zip, in case you change your mind.
Installing the Magisk
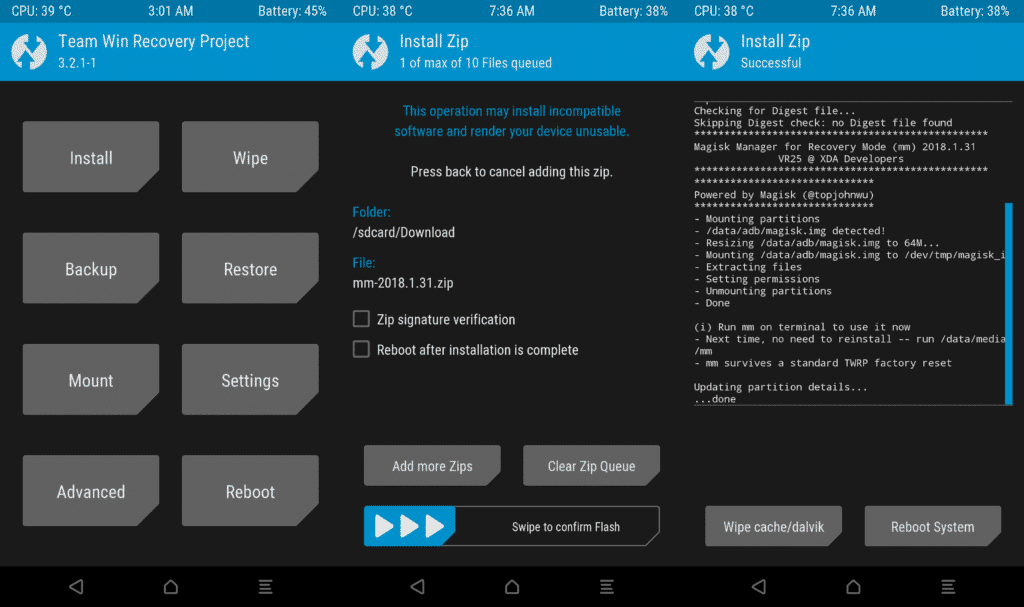
We are going to use the TWRP as our custom recovery, but the process is similar for every other recovery but there may be a little tweak in the interface.
- Boot into the custom recovery by using the key combinations, in our case Power Key + Volume Up, but this can be different for your device, make sure to cross-check with your manufacturer.

- As soon as the custom recovery is opened, you will see an ‘Install’ button.
- Tap on it and navigate to the folder where you download the zip file.
- Now, select the zip and slide the bar to install it.

- After the completion, you will see a ‘Reboot to System’ button.
- Use that button to go back to your system.
How to Use it? (Other than rooting)
Magisk isn’t just made for rooting, it can be used for various things. Basically, Magisk is a full package when it comes to Android Customizations. From rooting to modding an Android device, everything is possible with Magisk.
The ability to defy SafetyNet API itself opens a big door to play with the Android system. As the Systemless root method modifies the system files without actually modifying it, so we as a developer can also play and modify that system file from the boot partition to implement our mods to the device.
Talking of modding the Android device, Magisk Manager and Magisk Modules are the two most contributing elements for the whole process.
Magisk Manager APK
Magisk Manager APK is an Android application that manages every modification which is being done using the Magisk, from rooting to modding. The only requirement for the Magisk Manager is that the device should have Magisk installed for obvious reasons.
Magisk Manager isn’t available in the Google Play store due to straightforward reasons, but you can download it from Magisk’s official website and sideload it to your Android device.
Using Magisk Manager
- You can check your device’s Root status,
- You can install Magisk Modules,
- You can update the previously installed modules,
- You can use the Magisk Hide feature to revoke root permissions from any certain app,
- You can provide SuperUser permission to any app,
- etc.
Magisk Modules
Magisk Modules are basically a custom-developed file by third-party developers to add more functionality to your Android device. Technically speaking, Root zip is also a module to gain root access to an Android device. We are going to take a few examples, after that we are sure, you will be able to understand what a Magisk module is.
First, YouTube Vanced is a modded YouTube application that has all the premium features like background play, picture-in-picture mode, etc, all these for free of cost. This is made possible with the help of the Magisk Module of YouTube Vanced. A bunch of developers worked on a module for YouTube with all the premium functionalities.
Second, Camer2API Enabler is a Magisk module that rewrites the registry to enable Camera2API, so that the camera application support more manual modifications. Although it can be done manually by rewriting the registry by ourselves, it can be hefty work for a non-technical person, so this module does the whole thing in one tap.
I hope you understood, what is a Magisk Module and how does it work.
If you've any thoughts on How to Root Android by Installing Magisk?, then feel free to drop in below comment box. Also, please subscribe to our DigitBin YouTube channel for videos tutorials. Cheers!



Will it work for my Samsung m30 ?
Yes! But you can try Odin to flash a custom recovery on a Samsung phone. It is much easy and safe.