Windows Modules Installer Worker is a vital system process of the Windows OS. It manages installing system updates, patching bugs, and backing up older data during an update. It comes into action when a new system update is ready for installation on the system.
You can locate the Windows Modules Installer Worker within the Task Manager. It is also known as TiWorker.exe. When Windows Modules Installer Worker gets into action it requires substantial processing power to get things done.
Problem with Windows Modules Installer Worker
When the TiWorker executable is busy installing the new update, its CPU usage gets very high. You can view that within the Task Manager. The problem arises when Windows Modules Installer Worker displays a high CPU Usage even when no system update is active in the background.
You will notice the fan in the CPU moving to the fullest of its capacity to eliminate the heat generated in the PC/laptop. This heating occurs when the CPU is used intensively by any process. (Windows Modules Installer Worker in this case)
Excessive heating can cause damage to the motherboard in the long run. Also, other processes will execute more slowly. The system performance takes a major hit. Most interestingly, the TiWorker process consumes so much memory power when it is not managing any system update.
Reasons Why TiWorker.Exe Shows High CPU Usage in Windows
Here are some common reasons causing the Windows Modules Installer Worker to show abnormally high CPU usage.
- Presence of corrupt system files in Windows OS.
- Unknown hardware problems in the PC.
- Technical issues with the Windows Modules Installer Worker.
- Hidden applications running in the background and consuming the memory.
Fix Windows Modules Installer Worker High CPU Usage
Go through the following troubleshooting tips and fix the high CPU usage by the TiWorker process.
1. Wait and Observe
Normally, when you start installing a system update on your PC, the CPU usage of the process handling that task (TiWorker.exe) increases.
The high CPU usage makes sense if the Windows Modules Installer Worker is busy installing the latest system update on your PC.
You must observe whether the TiWorker’s CPU usage is increasing even though no update is being made. This is noticeable because the CPU fans are running at a faster speed to dissipate the heat.
When this happens continuously, and your PC gets heated and slows down other processes, you should consider troubleshooting the problem.
2. Restart the Computer
It may happen randomly that the TiWorker.exe is consuming an intense processing power even though it has finished updating the system. Make sure to restart the PC once the installation of a pending software update is complete.
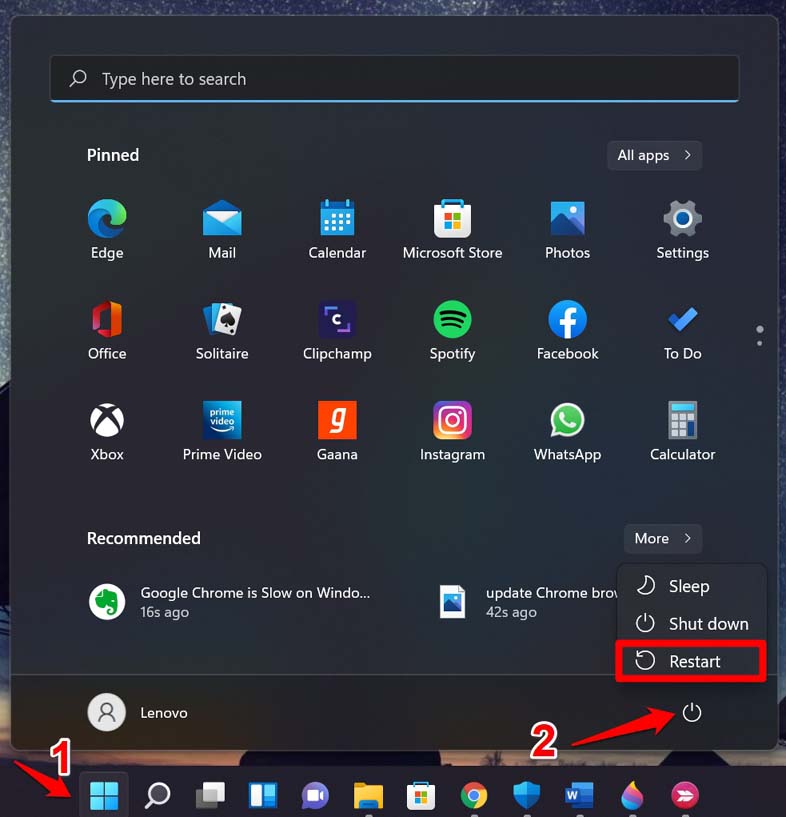
- Press the Windows key.
- In the search console, click the power icon.
- Select Restart from the menu.

After the computer reboots, use it for a while. Open Task Manager and check if TiWorker.exe is showing a high CPU usage. If you don’t see a spike in the processing allocated to the Windows Module Installer Worker, the problem has likely been solved. However, if the issue persists move on to the next fixes.
3. Use Windows Update Troubleshooter
Launch the built-in troubleshooting tool from Microsoft to repair problems with the Windows module installer worker. Here is how to use it.
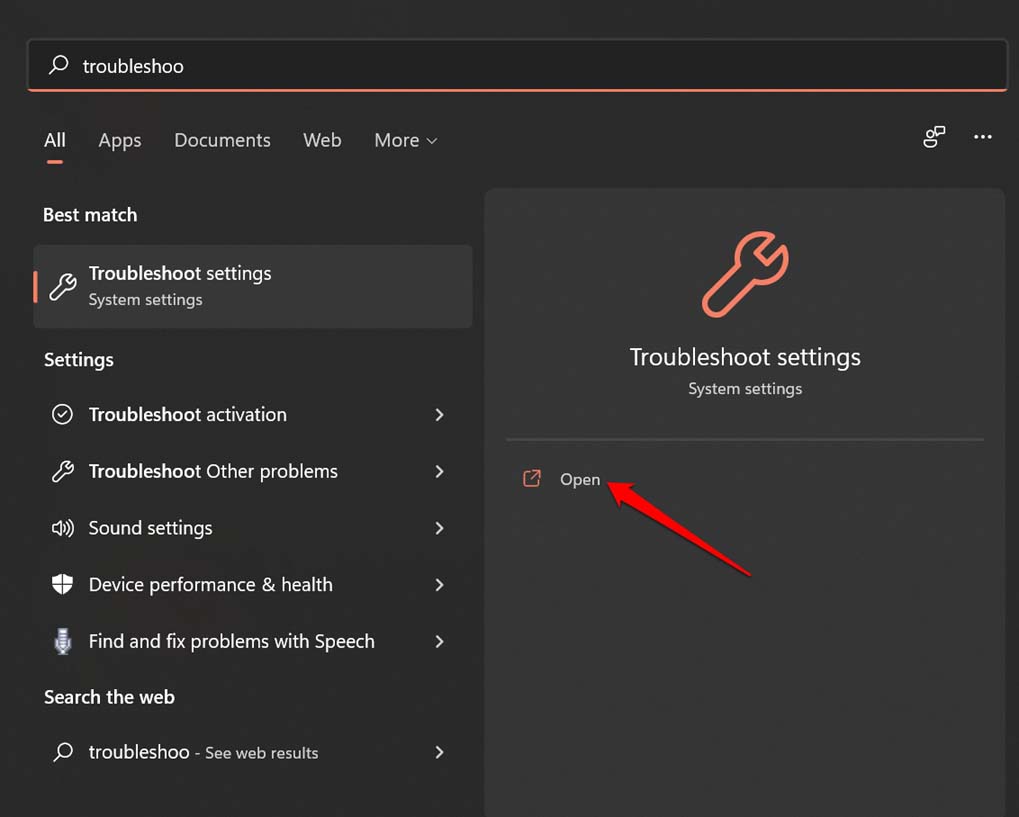
- Press Windows + S to launch the Windows search.
- Type Troubleshoot settings.
- Click Open when the relevant result shows up in the search.

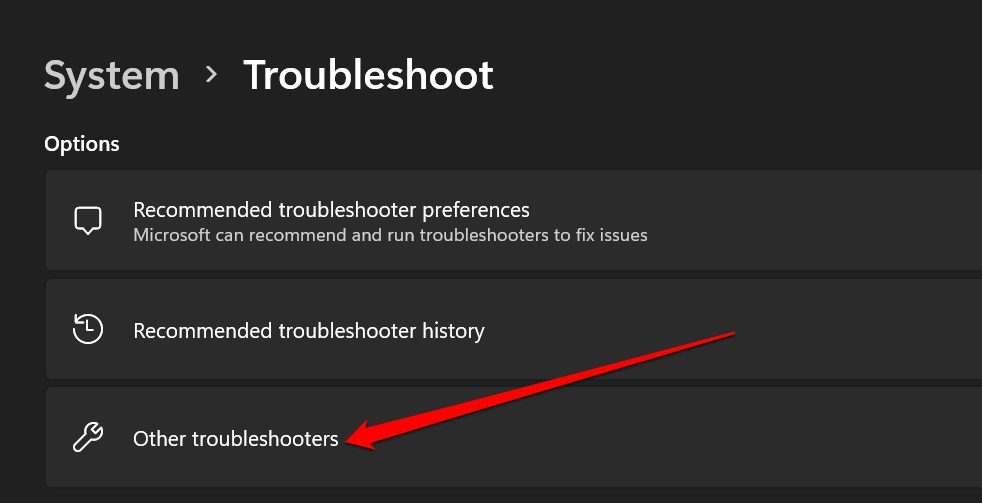
- Go to Other Troubleshooters.

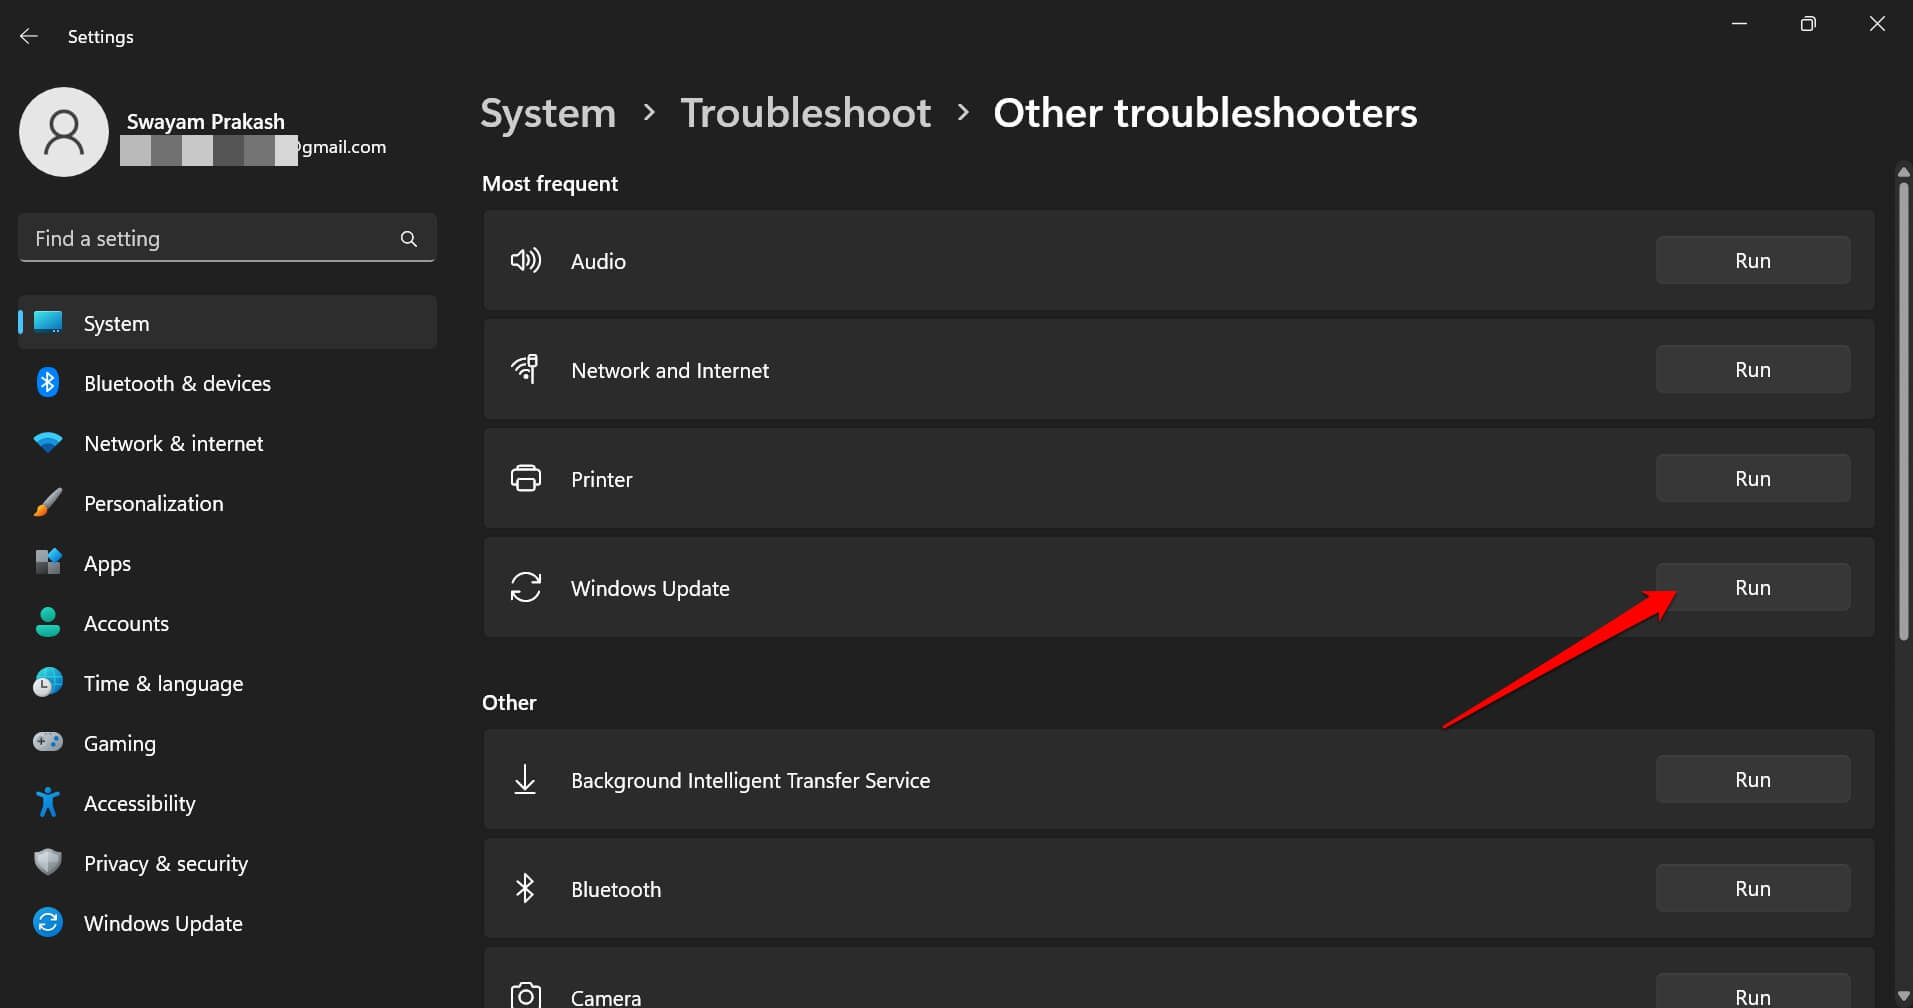
- Scroll to Windows Update Troubleshooter and click the Run button next to it.

Follow the instructions issued by the tool to complete the debugging. After that, restart your PC, use it, and observe any rise in the CPU usage by the TiWorker.exe process.
4. Change Windows Installer Startup to Manual
Changing the startup type for Windows Installer is helpful in avoiding sudden update installations. It is normally set to Automatic, but you can configure it to Manual.
When you are gaming or using a video editing app on a PC, you need most of the computing power for that. A sudden update installation will cause the CPU to allocate the power to the respective process handling the system update for the device.
It will then cause TiWorker.exe to consume intense CPU resources. However, by running the process manually, you can continue installing system updates when no other apps are running on the system.
Thus, you can have all the CPU resources for the Windows Module Installer Worker to complete the system update installation.
To change the startup type of the Windows Module Installer,
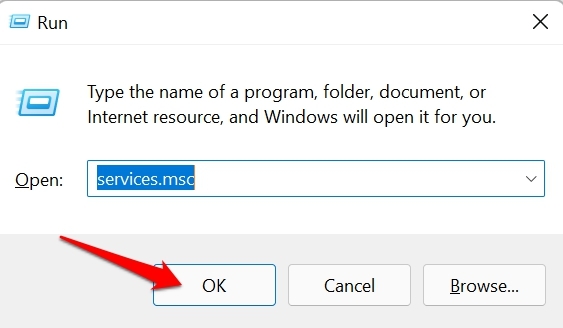
- Press Windows + R to launch the Run box.
- Type services.msc and press enter.

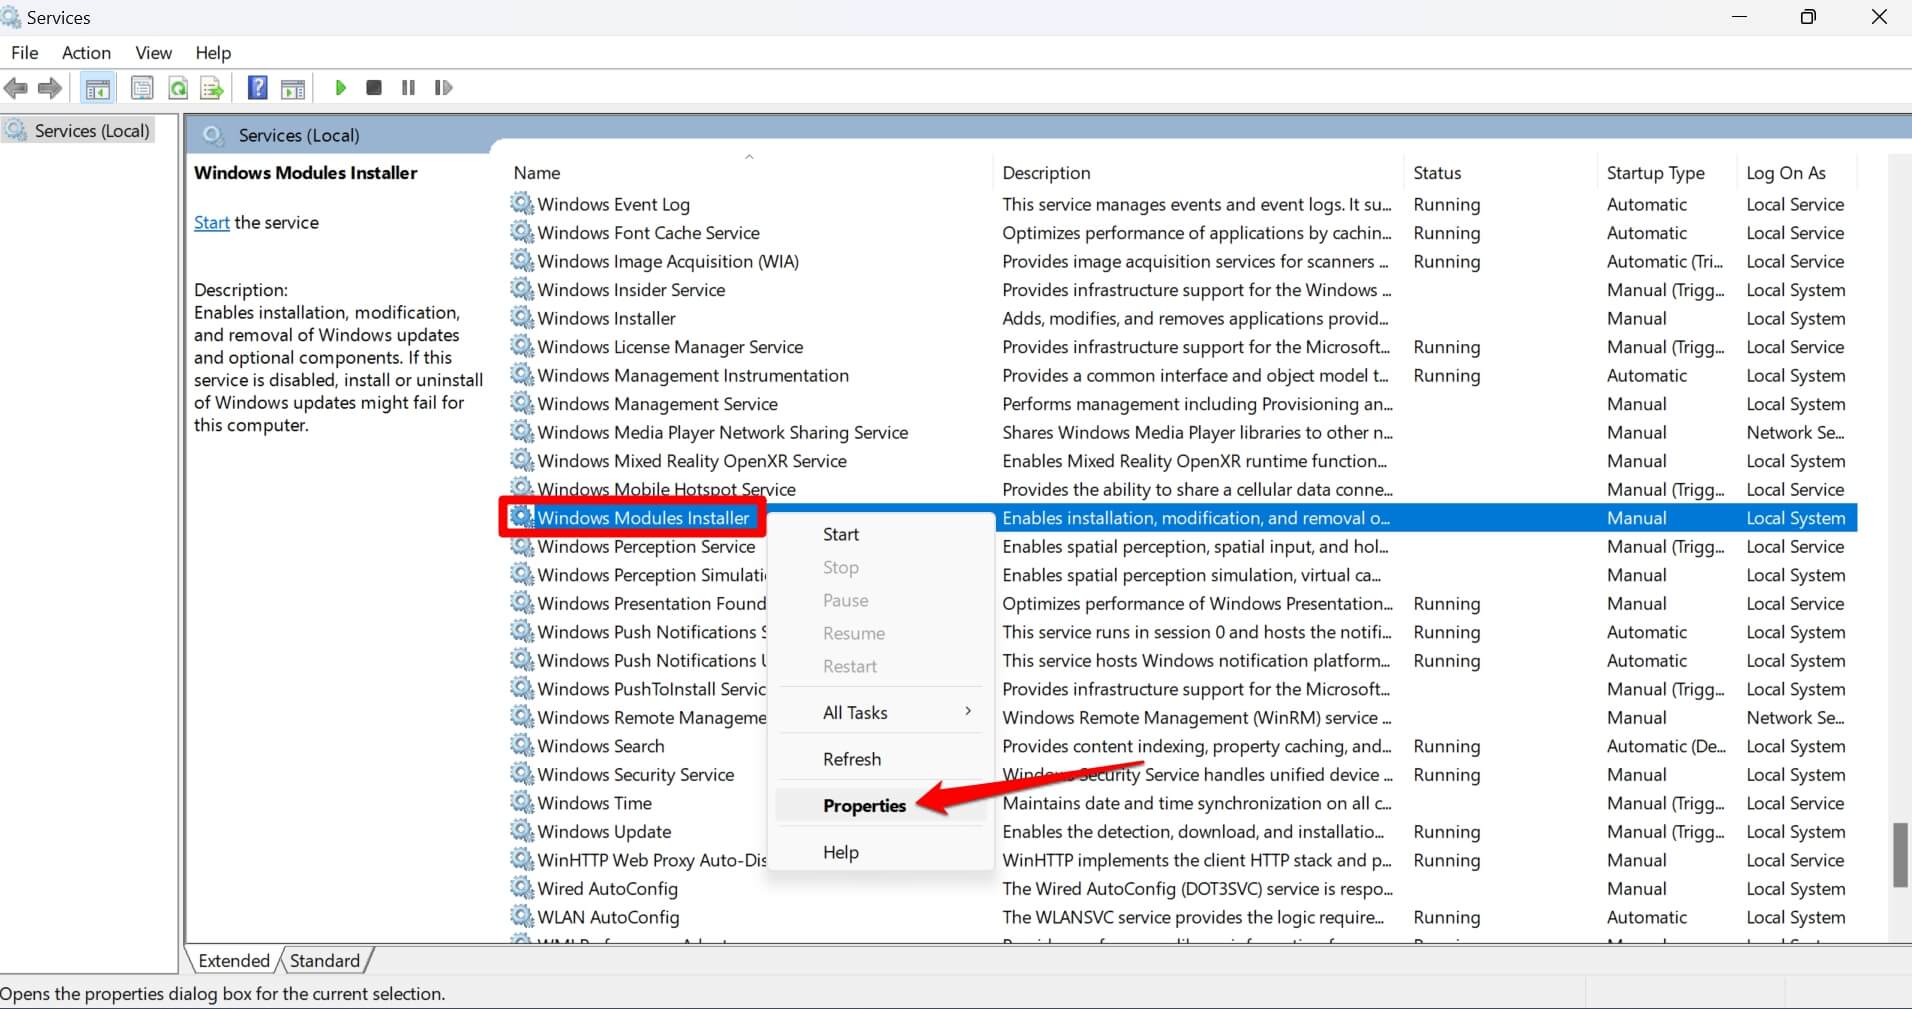
- Go to Windows Module Installer and right-click on it. Select Properties.

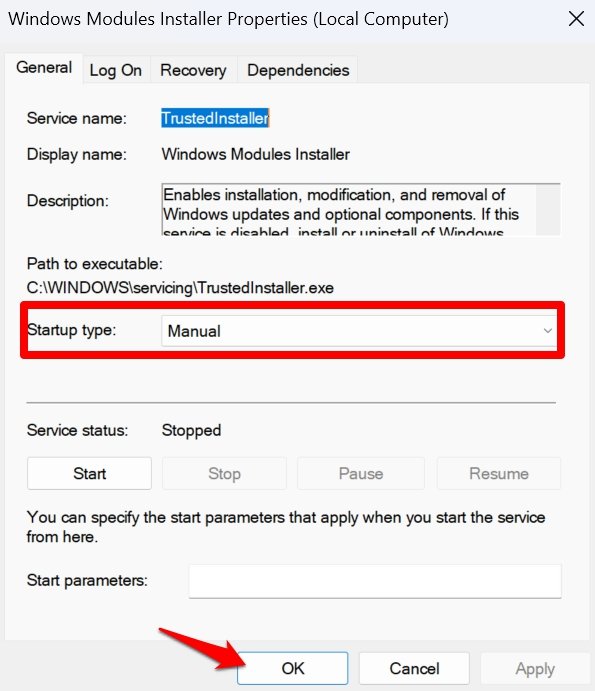
- In the Startup Type dropdown list, select Manual.

5. End the TiWorker.exe Process
If you constantly observe a spike in CPU usage by the TiWorker executable process, try terminating it. Access the Task Manager and end the task. It will stop the CPU resource allocated to the process.
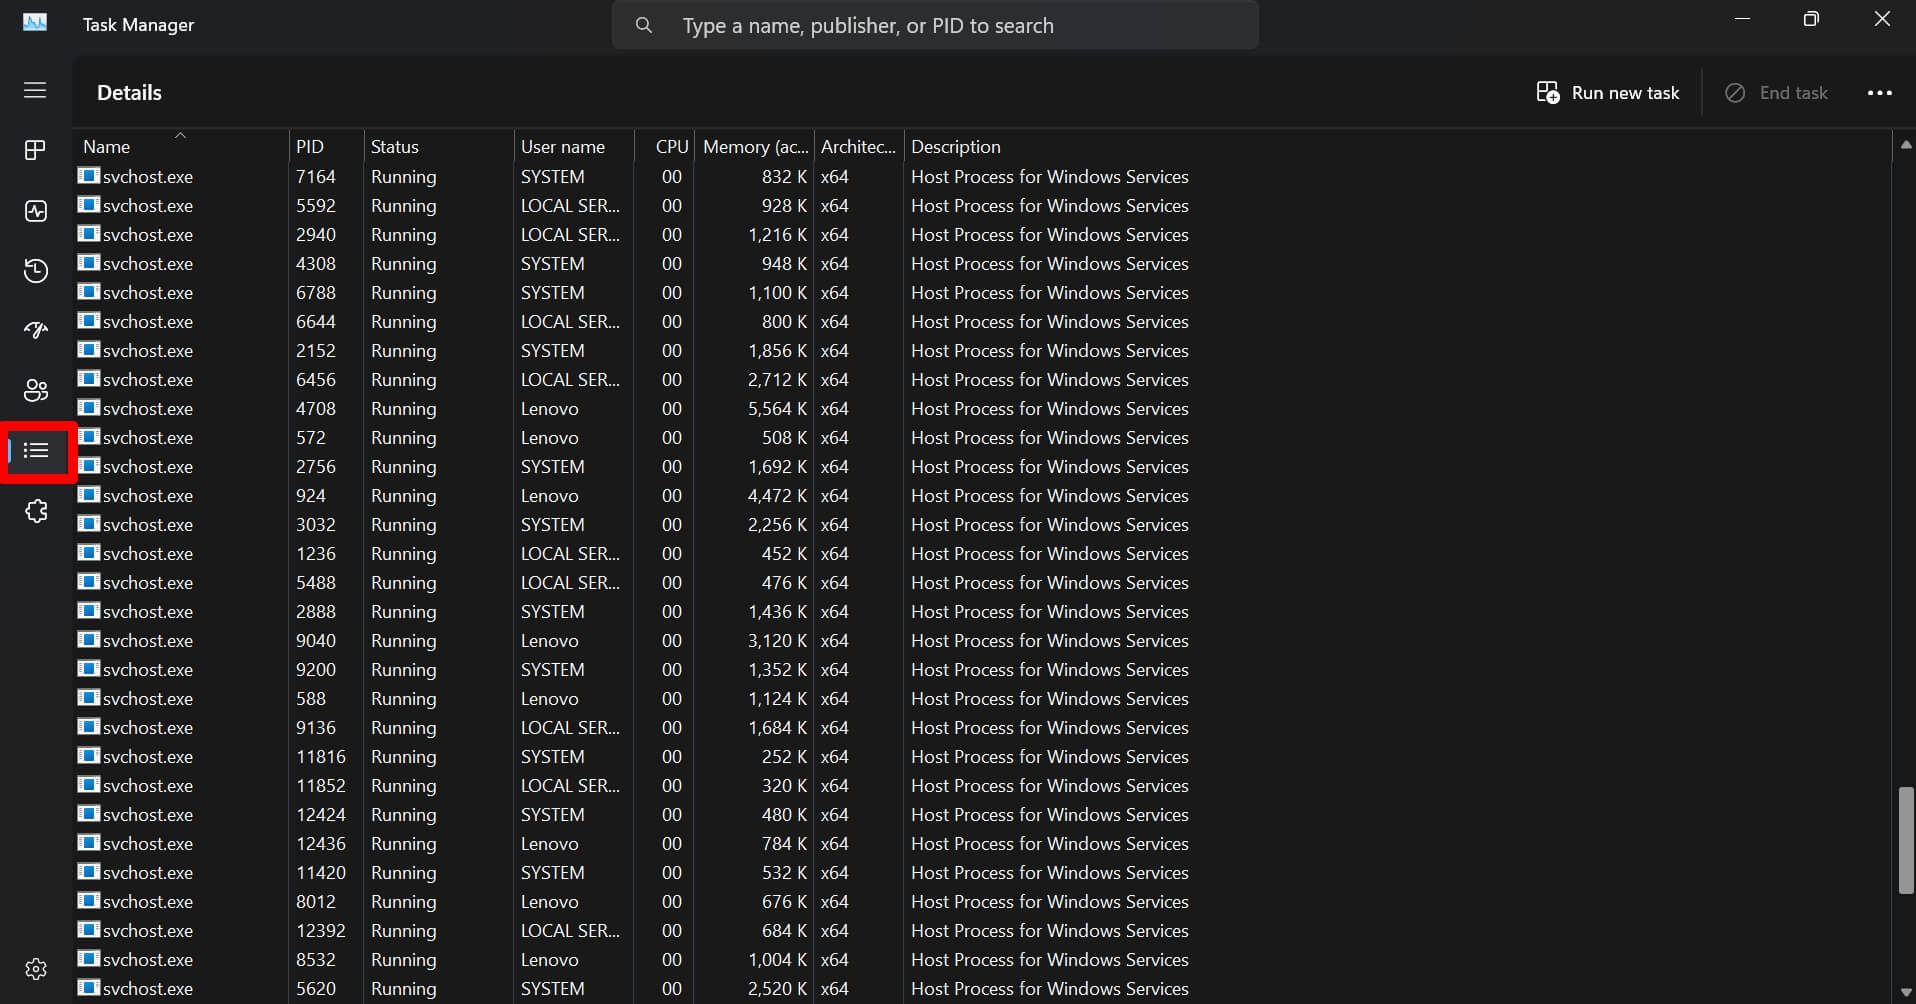
- Press Ctrl +Shift +Esc to launch the Task Manager.
- Click the Details tab on the left side.

- Scroll to TiWorker.exe.
- Right-click on it to highlight the process and select End Task.
- Restart the computer.
6. Delete the Windows Software Distribution Folder
All the data related to Windows Updates are stored in the SoftwareDistribution folder. Some data in it may have become corrupt. It will cause the TiWorker.exe process, which manages the system update, to consume a high amount of CPU. Delete the Software Distribution folder to fix the issue.
- Press Windows + R hotkeys to open the Run box.
- Access the Windows services by typing services.msc and press enter key.

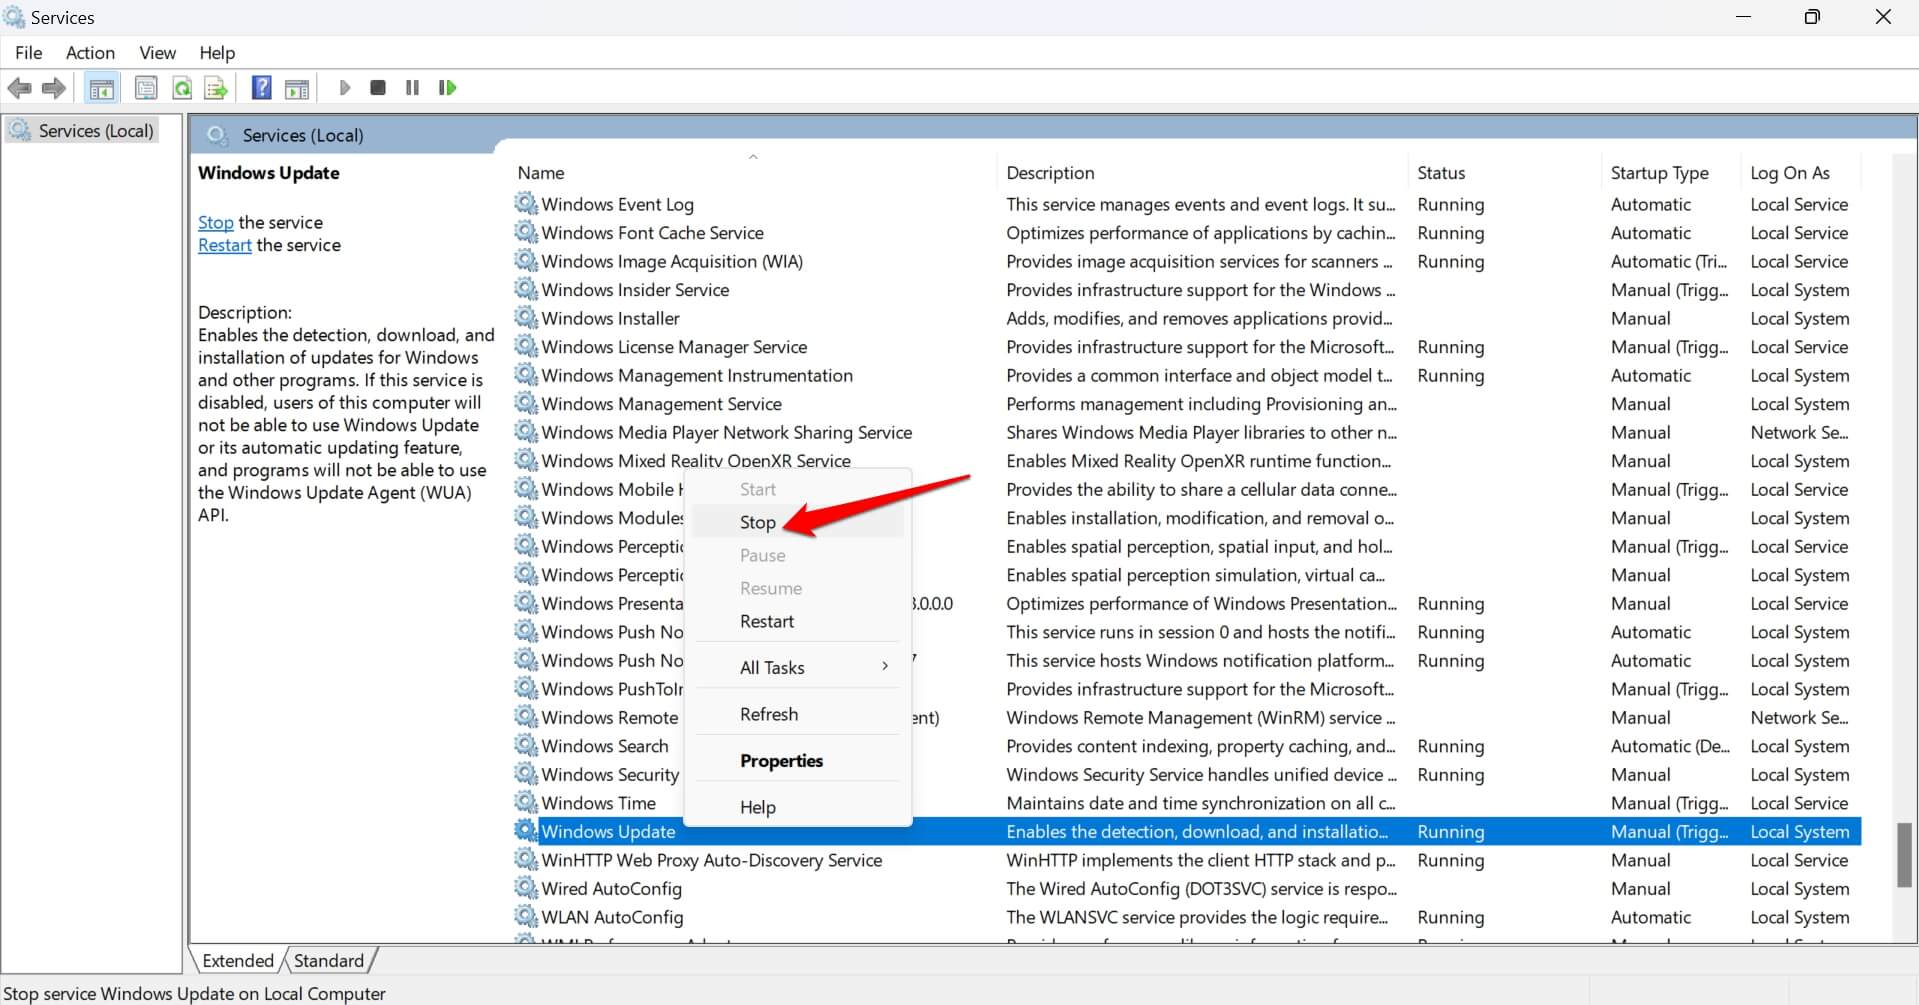
- Go to Windows Update, right-click on it, and select Stop from the menu.

- Press Windows + R to launch the Run box.
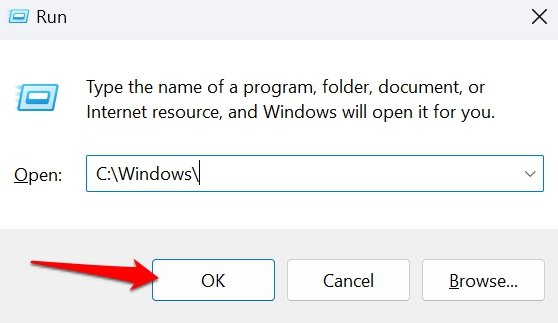
- Type C:\Windows\ and hit the enter. You will access the Windows directory.

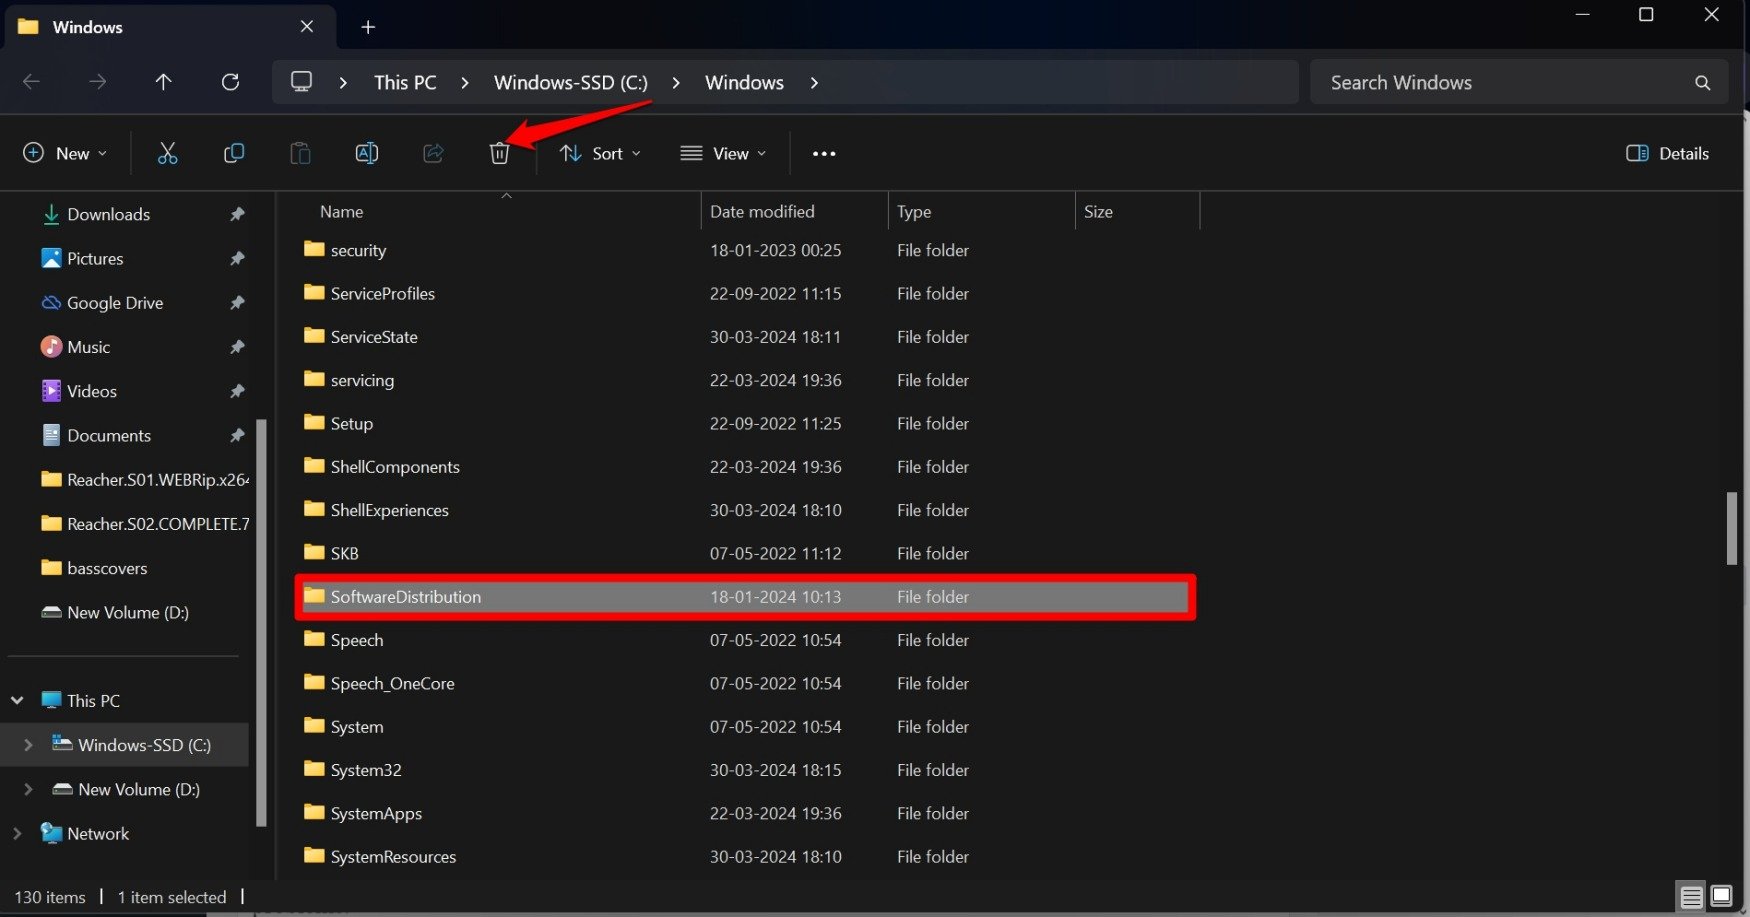
- Go to the SoftwareDistribution folder, select it, and press Shift +Delete to remove the folder from the directory.

Do not worry, as this troubleshooting tip won’t affect the system build of your PC. This folder will be created again when you install the Windows software update next time.
7. Scan and Fix Corrupt System Files
Some system files may have become corrupt on your PC. Use the SFC and DISM cans to find and fix these files. Corrupt system files may often interfere with system processes, causing several other problems.
To run the SFC scan,
- Press Windows + R to open the Run box.
- Type cmd and press enter.
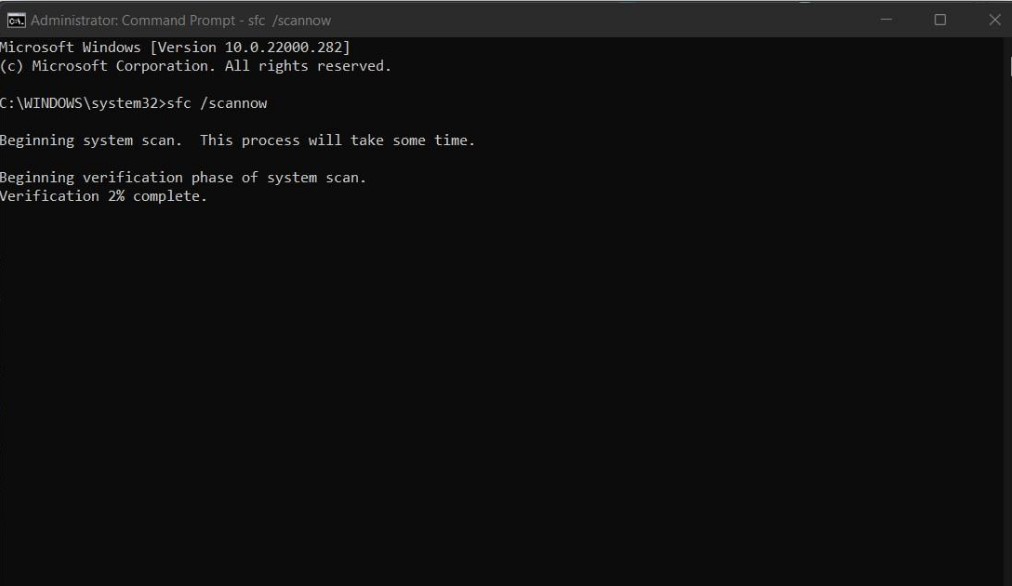
- In the command prompt, enter the command.
sfc/scannow

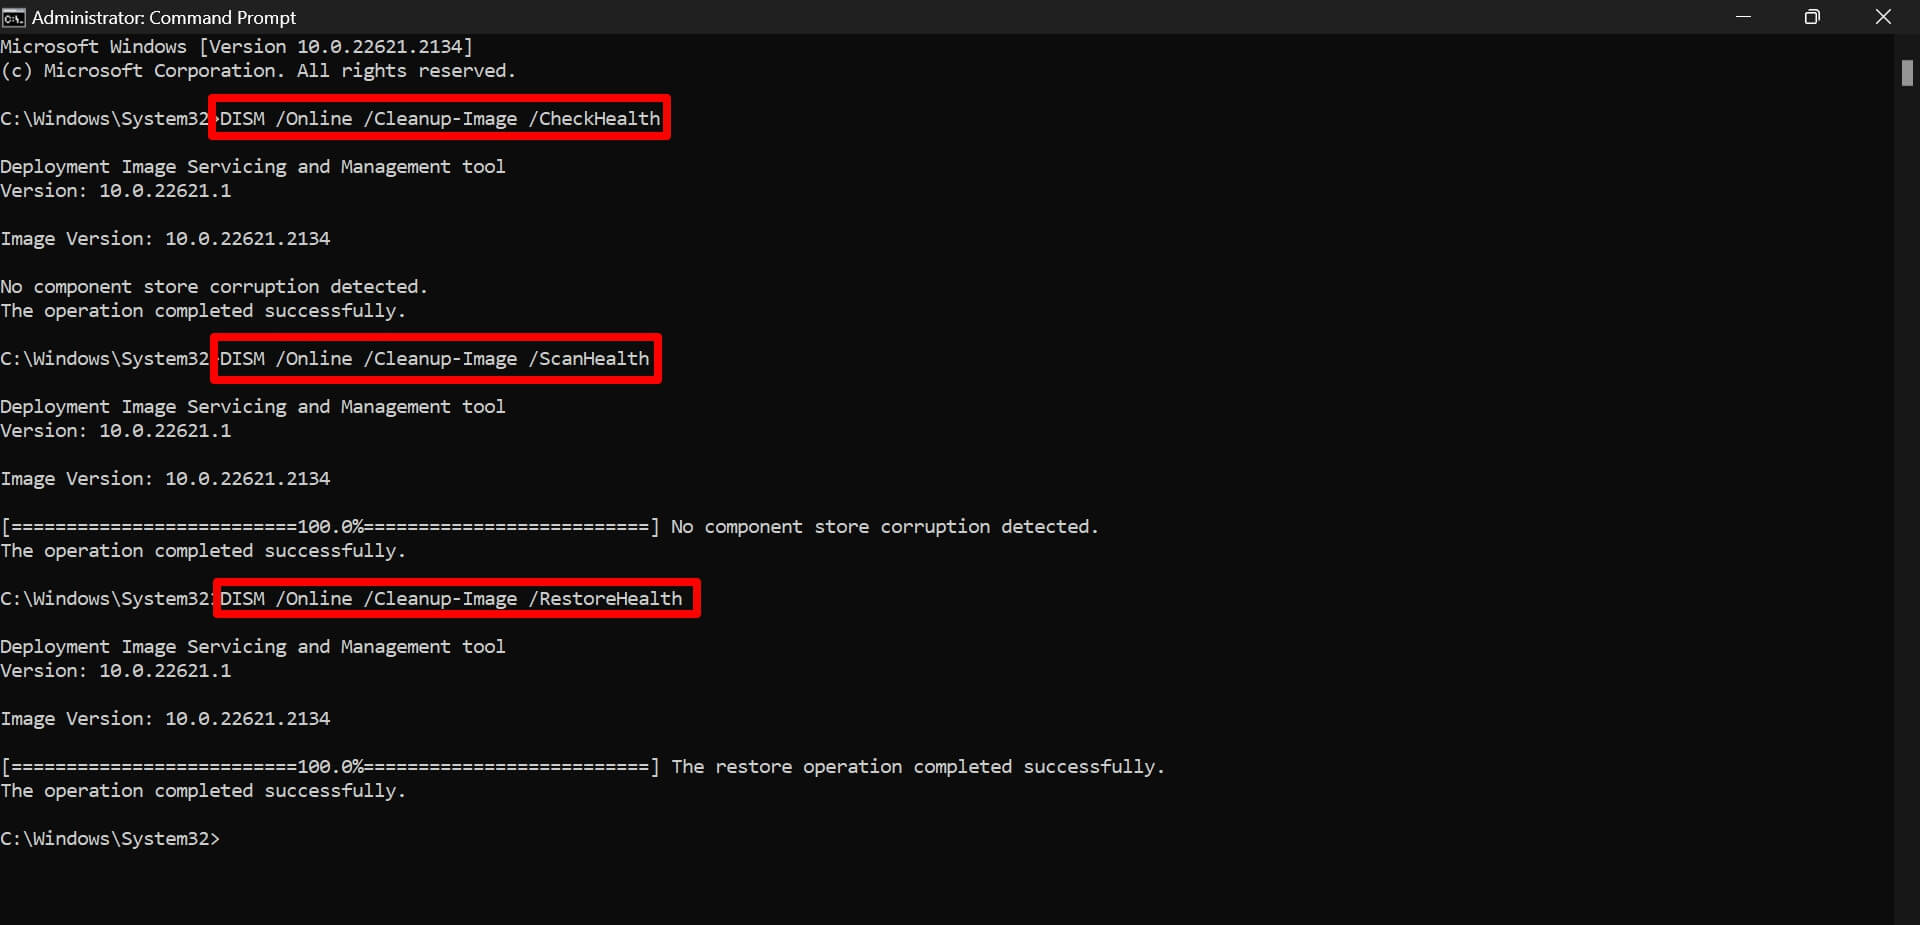
To run the DISM check,
- Launch Command Prompt from Windows search. (Win +S)
- Enter these commands one after the other.
DISM /Online /Cleanup-Image /CheckHealth

DISM /Online /Cleanup-Image /ScanHealth

DISM /Online /Cleanup-Image /RestoreHealth

Do not interrupt the process when the commands are scanning for corrupt files. It may take some time to complete. Use your PC after fixing the problematic system files. Observe if the Windows Module Installer Worker is consuming excessive CPU resources.
8. Check for Hidden Apps Running in the Background
There may be apps running in the background on your PC, but you won’t know. These apps have nothing to do with the TiWorker.exe but will keep the CPU resources busy. Thus, the processor fan remains active most of the time, expelling the heat.
Check the system tray for hidden apps running in the background. For instance, when I launch my PC and connect to the web, a few apps, such as Steam, Discord, iCloud, and Torrent, start running in the background.
Access the system tray to see the icons of the hidden apps running in the background. Right-click on them and select Exit. With the background apps closed, the CPU resources should be free.

Bottom Line
Constantly experiencing a spike in CPU usage for a particular process when it is not doing anything is problematic. If you notice such an anomaly on your computer, fix it immediately. I hope the tips and tricks in this article have helped you fix the problem of high CPU consumption by the Windows Module Installer Worker.
If you've any thoughts on How to Fix Windows Modules Installer Worker High CPU Usage, then feel free to drop in below comment box. Also, please subscribe to our DigitBin YouTube channel for videos tutorials. Cheers!
