Macs are amazing devices that offer the unique capability of running both macOS and Windows operating systems through Boot Camp.
However, sometimes Boot Camp fails at the startup, displaying the error “Could not load the macOS boot volume.” Other times, it may say “Could not load the OS X boot volume” or “Could not load the Mac OS X boot volume.”
In either case, there are several troubleshooting methods you can try to fix the issue. Stick till the end as here we will discover all the solutions to fix a failed startup at Boot Camp.
What Causes macOS boot volume issues on Boot Camp?
The “Could not load the macOS boot volume” error often happens when attempting to switch from Windows to macOS via Boot Camp.
Signs of this issue include macOS not appearing in the Boot Camp Control Panel’s partitions, with only the Windows partition visible.
The error is caused by the following reasons:
- Outdated Boot Camp Version: If your Boot Camp software is outdated, it may struggle to properly recognize and switch to the macOS partition.
- FileVault Encryption on macOS: When FileVault encryption is enabled on your macOS partition, Boot Camp may have difficulty accessing it, leading to the error.
- BitLocker Encryption on Windows: Encryption of the Windows partition with BitLocker can sometimes interfere with Boot Camp’s ability to detect and load the macOS partition, resulting in an error message.
Method 1: Update Boot Camp on Your Device
When you face the “Could Not Load the macOS Boot Volume” issue on Boot Camp, your go-to solution should be to update Boot Camp on your device.
An update fixes all the glitches and bugs that might be responsible for a failed startup and helps Boot Camp recognize the macOS partition.
Let’s see how to update Boot Camp on Windows below. Boot Camp updates are typically managed through the Windows operating system.
- Click on the Windows icon located at the bottom-left of your screen.
- Type “Apple Software Update” in the search field.
- Select “Apple Software Update” from the search results.
- Allow Apple Software Update to scan for available updates.
- Check the box next to available updates and click “Install items.”
- Once the updates are installed, restart your Mac.
Method 2: Switch from Windows to Mac on startup
If your Mac fails to load the macOS Boot Volume, try switching from Windows to macOS during startup. Here’s how to do it:
- Restart your Mac.
- As the Mac restarts, press and hold the Option/Alt key on the keyboard.
- Release the key when the available startup volumes appear on the screen.
- Select your Mac startup volume (usually named “Macintosh HD”) and click the up arrow to confirm.
- Wait as the system boots into macOS.
After successfully switching to macOS, you should make your preferred operating system the default startup disk. To do this:
- Click the Apple icon on the top-left corner.
- Click “System Settings” from the drop-down menu.
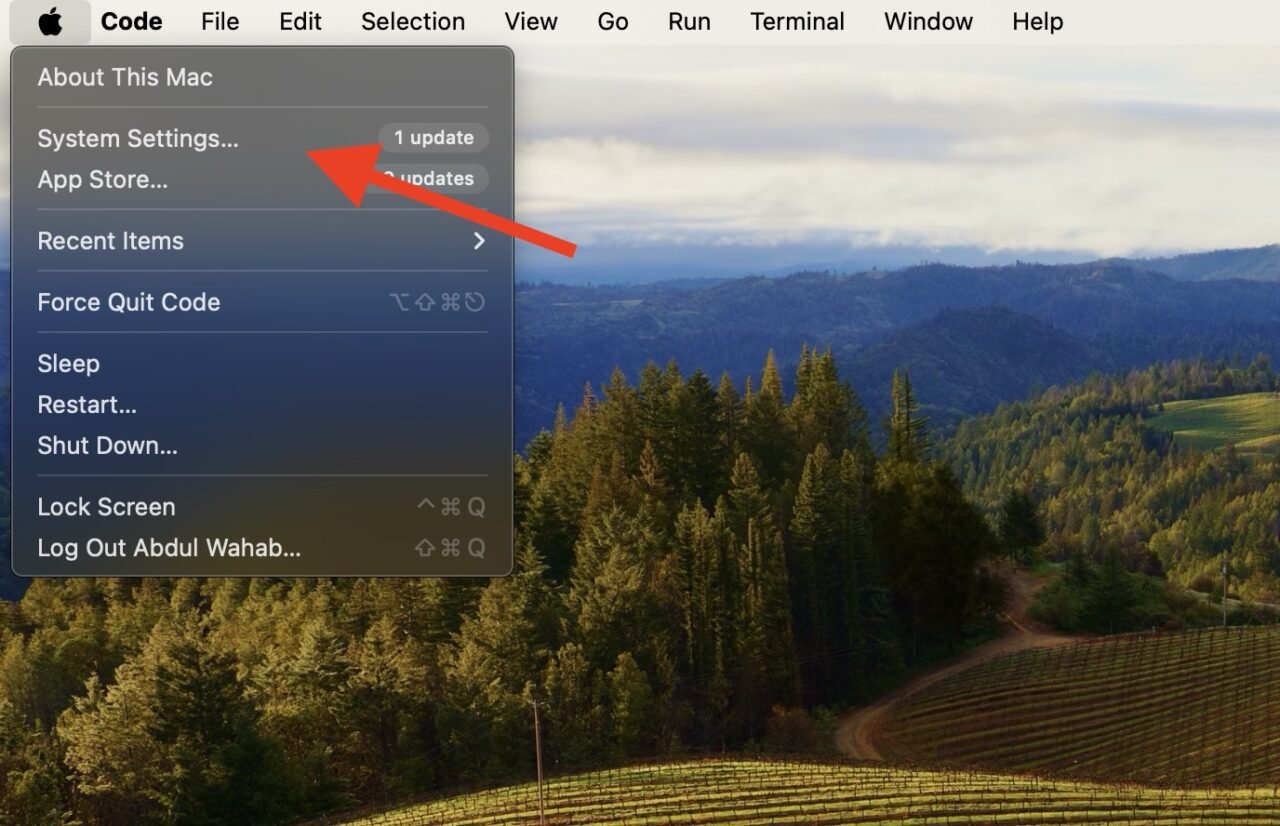
- In the System Settings window, select “Startup Disk.”
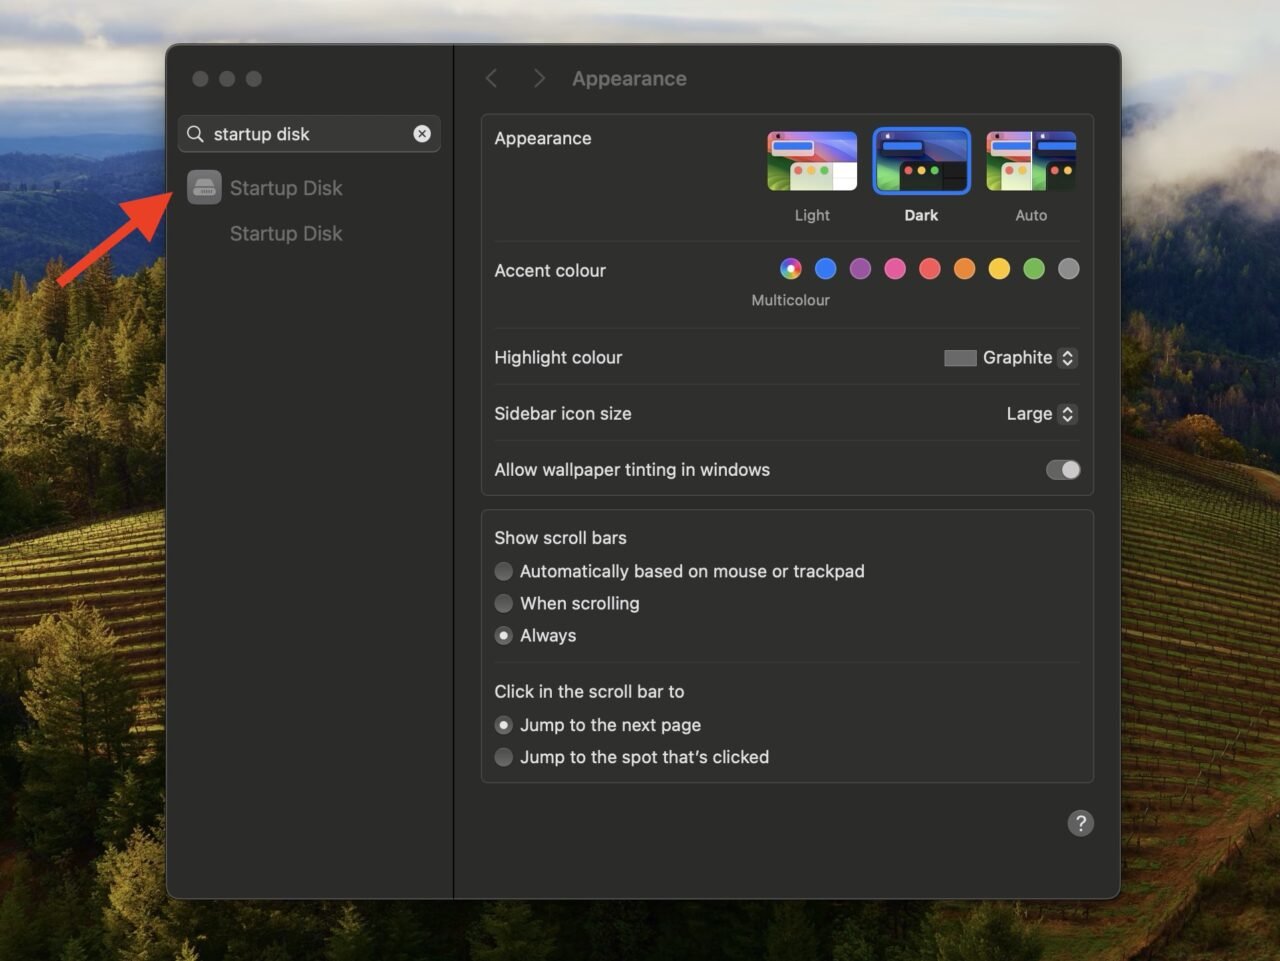
- Choose the OS you use more frequently as the default startup disk.
Method 3: Disable FileVault
FileVault is a security feature provided by macOS that encrypts the contents of your startup disk. However, when Boot Camp is used to dual-boot macOS and Windows on the same device, FileVault encryption can sometimes interfere with the boot process.
This interference occurs because Boot Camp may struggle to recognize the macOS partition when it is encrypted by FileVault, leading to errors such as “Could Not Load the macOS Boot Volume” during startup. An easy way to fix this is to disable FileVault.
Here’s how to do that.
- Press and hold Option + Command + R simultaneously during startup to boot into Internet Recovery.
- Click on “Disk Utility” and then click “Continue”.
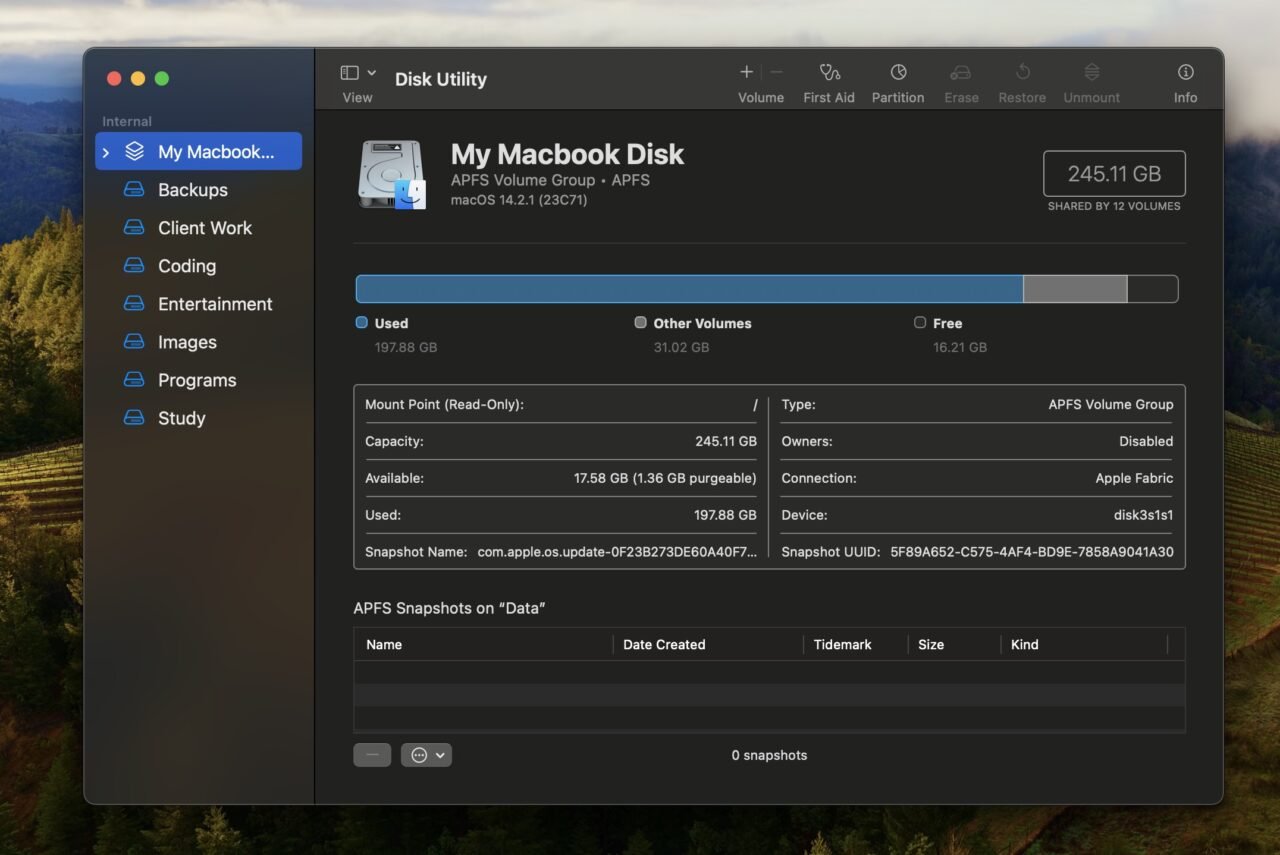
- Choose your startup volume from the left sidebar and click on “Mount.”
- If prompted, enter your password to unlock the drive.
- Restart your Mac to disable FileVault.
Method 4: Modify the Mac partition type
BitLocker is a security feature in Windows; it encrypts your disk to protect your data. However, if enabled, BitLocker can also modify the code of your macOS partition, leading to errors like “Could not locate the macOS boot volume.”
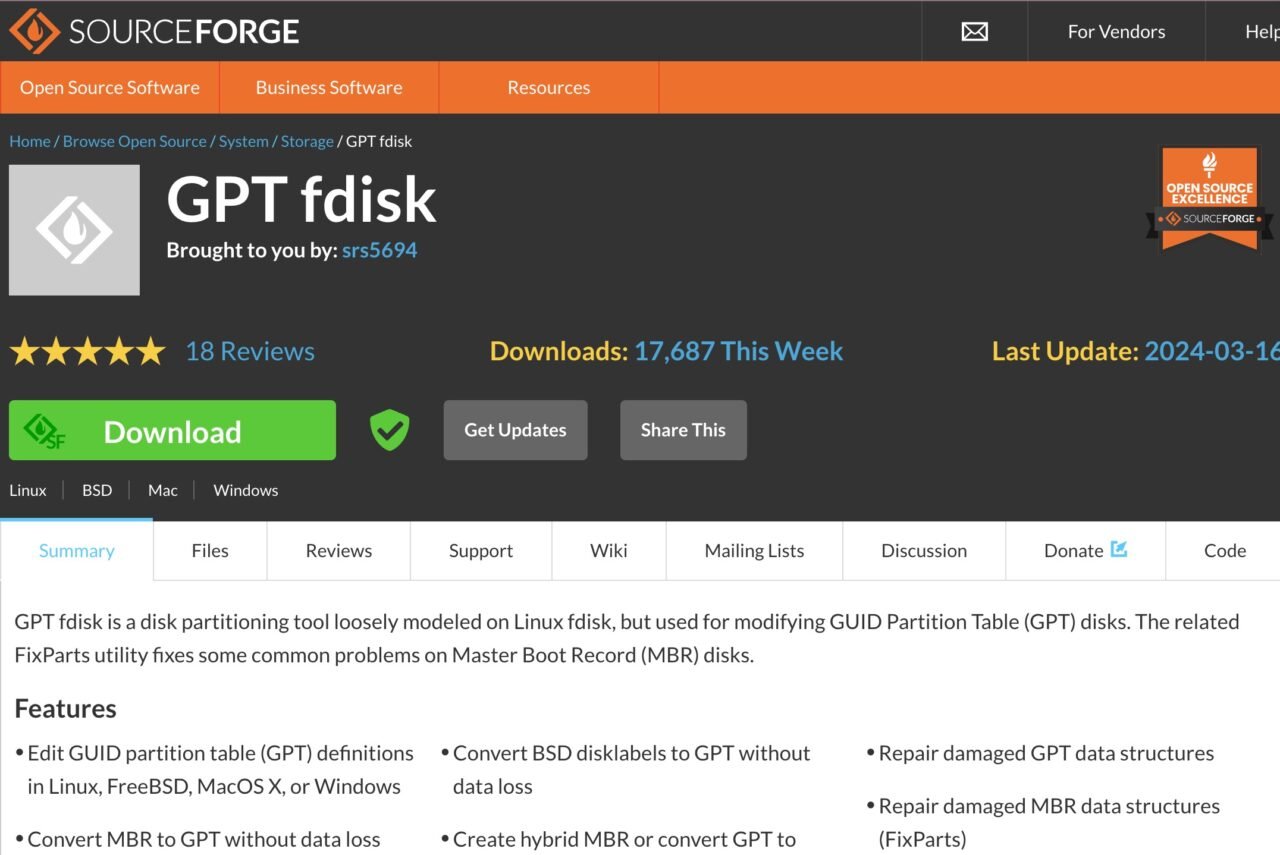
To fix this issue, you can use a free utility called GPT fdisk. Also known as “gdisk,” GPT fdisk is a command-line utility used for partitioning hard drives. It’s primarily designed for working with GUID Partition Table (GPT) disks, which are used on Macs.
Basically, GPT fdisk allows users to create, modify, and delete partitions on GPT disks. Here’s how you can use it to fix the failed startup issue at Boot Camp:
- Unzip the GPT fdisk files on your Windows system.
- Right-click on gdisk64.exe and select “Run as Administrator.”
- Type “0:” and press Enter.
- Type “p” and press Enter to view your macOS partition’s details. Check if the code is correct (should be AF00 for HFS/HFS+ partitions or AF0A for APFS).
- If the code is incorrect, continue with the following steps.
- Type “t” and press Enter.
- Type the partition number of your macOS partition and press Enter (e.g., “2” if your macOS partition’s number is 2).
- Type the correct code for your macOS partition (e.g., “AF0A” for APFS) and press Enter.
- Run the commands “v” and “w” to finalize the modification of your macOS partition.
Final Words
In the end, there are several reasons that can cause the “Could not load the macOS boot volume” error on Boot Camp. It can be encryption conflicts like FileVault on macOS, or BitLocker encryption on Windows. In either case, you should start by updating Boot Camp and disabling security features like FileVault and BitLocker, as these can hinder the booting process.
If you've any thoughts on How to Fix “Could Not Load the macOS Boot Volume” on Boot Camp, then feel free to drop in below comment box. Also, please subscribe to our DigitBin YouTube channel for videos tutorials. Cheers!