Windows stands out prominently, commanding nearly 70% of desktop computers with valuable features and options. Windows 11 notably offers a dedicated Mouse Settings section, allowing users to fine-tune various aspects of their Mouse’s performance. This includes adjusting pointer speed, displaying pointer trails, and concealing the pointer while typing.
One gaming-related feature often used in discussions is Enhance Pointer Precision. This comprehensive article demystifies it and provides instructions on enabling and disabling it, in case you have ever been puzzled about its purpose. Let’s examine the specifics.
What is Pointer Precision?
Understanding Enhance Pointer Precision, commonly known as Mouse Acceleration in Windows 11, can be challenging. It is similar to having an intelligent feature that detects the speed at which you move your Mouse and modifies itself automatically.
Consider this: as you move your Mouse quickly, the dots per inch (DPI) increases, allowing your pointer to cover a larger area. On the other hand, the DPI drops, and the cursor moves less as you move the Mouse more slowly. It functions similarly to an integrated responsiveness system, adjusting your mouse movements according to speed.
Top Ways to Enable or Disable the Pointer Precision
Now that it has been enabled let’s look at how to turn on or off Windows 11 Enhance pointer precision feature.
1. Via Control Panel
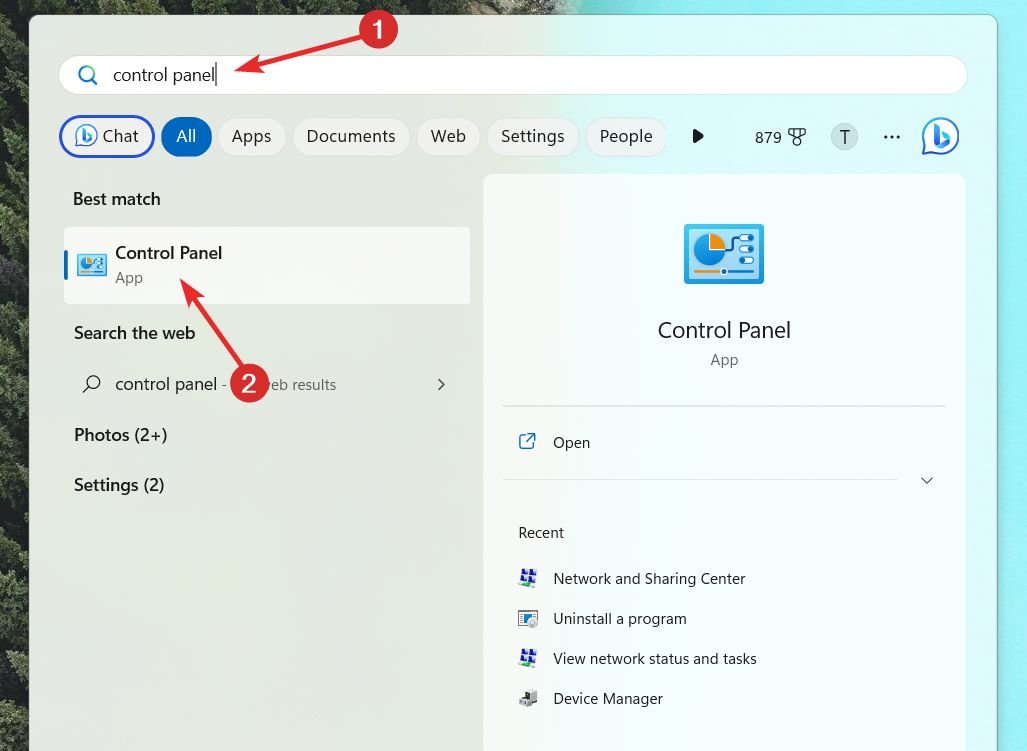
- Press the Windows key to launch the Start menu. Type Control Panel in the search bar and select the appropriate search result.

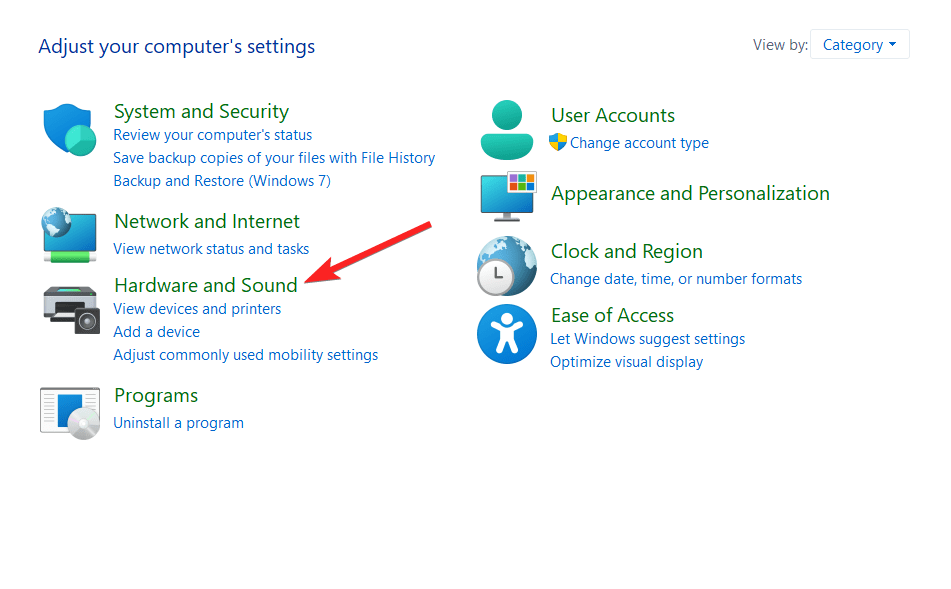
- Select the Category option in the View by drop-down.
- Click the Hardware and Sound option in the control panel window.

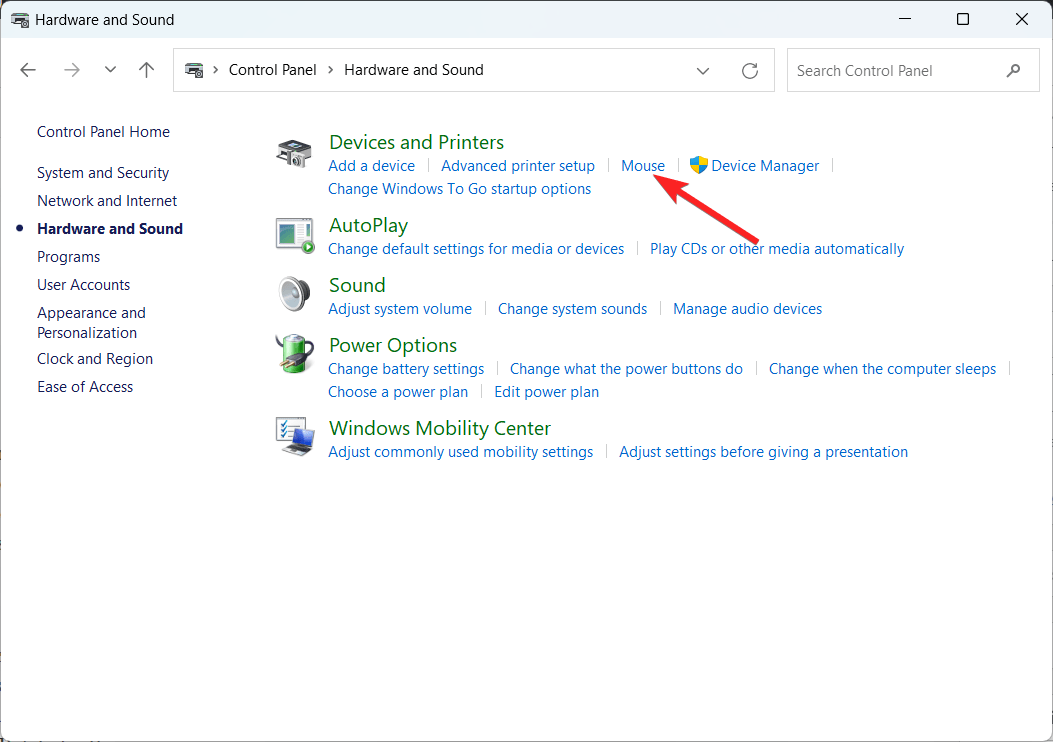
- Select Mouse located under the Devices and Printers section.

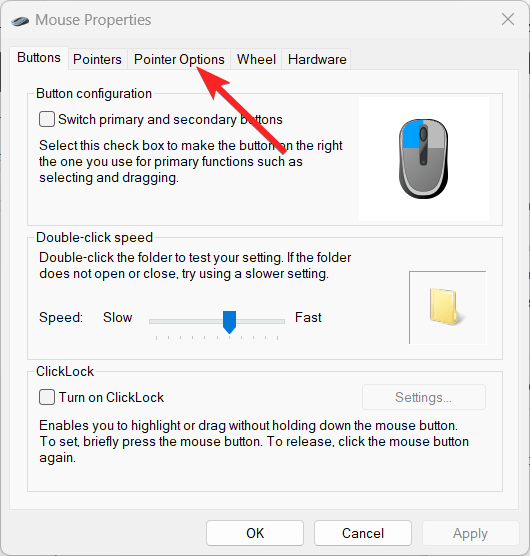
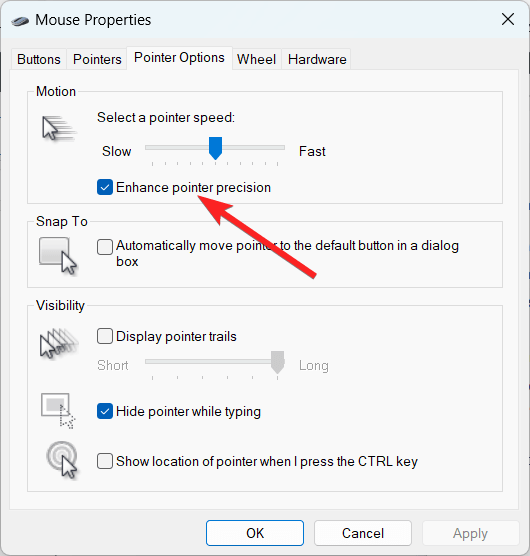
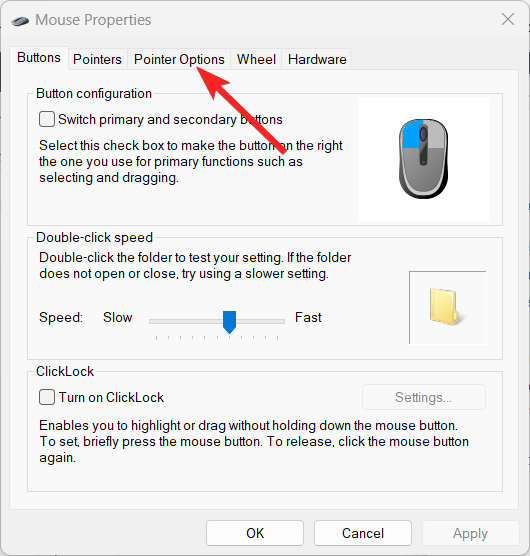
- Switch to the Pointer Options in the Mouse Properties window.

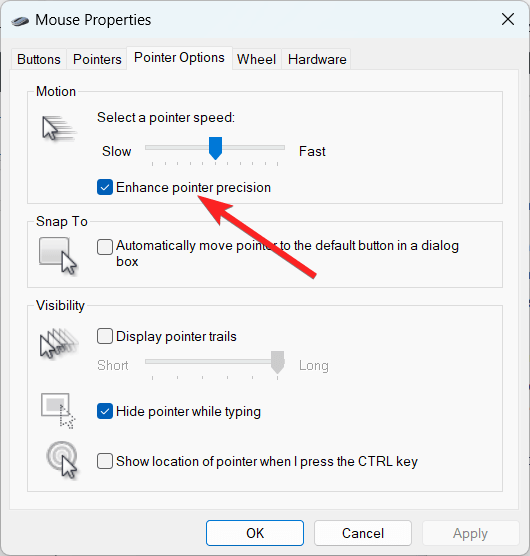
- Enable the Pointer Precision feature by checking the box in the Motions settings section.

- Press the Apply button followed by OK to save the settings.
2. Via Settings
- Use the Windows + I shortcut key to launch the Settings app in Windows 11.
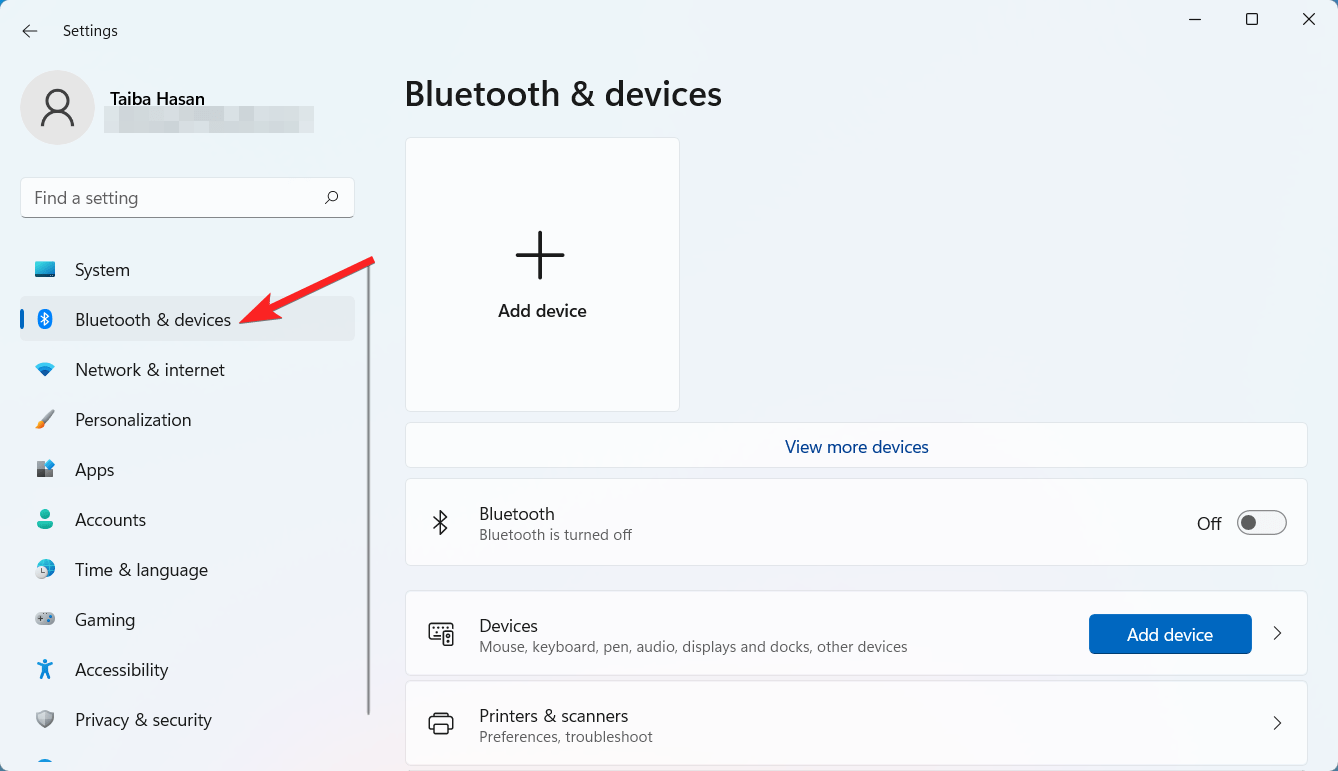
- Choose Bluetooth & devices from the left sidebar.

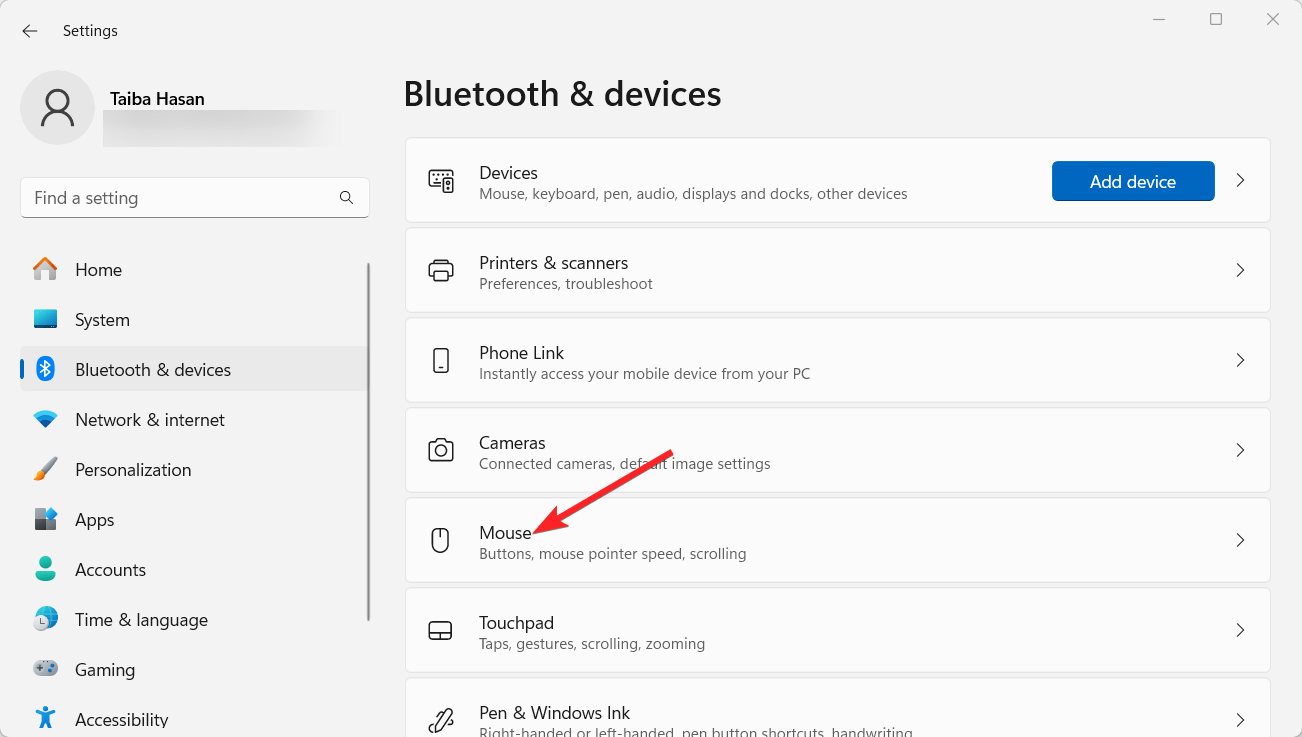
- Scroll down and choose Mouse from the right sidebar.

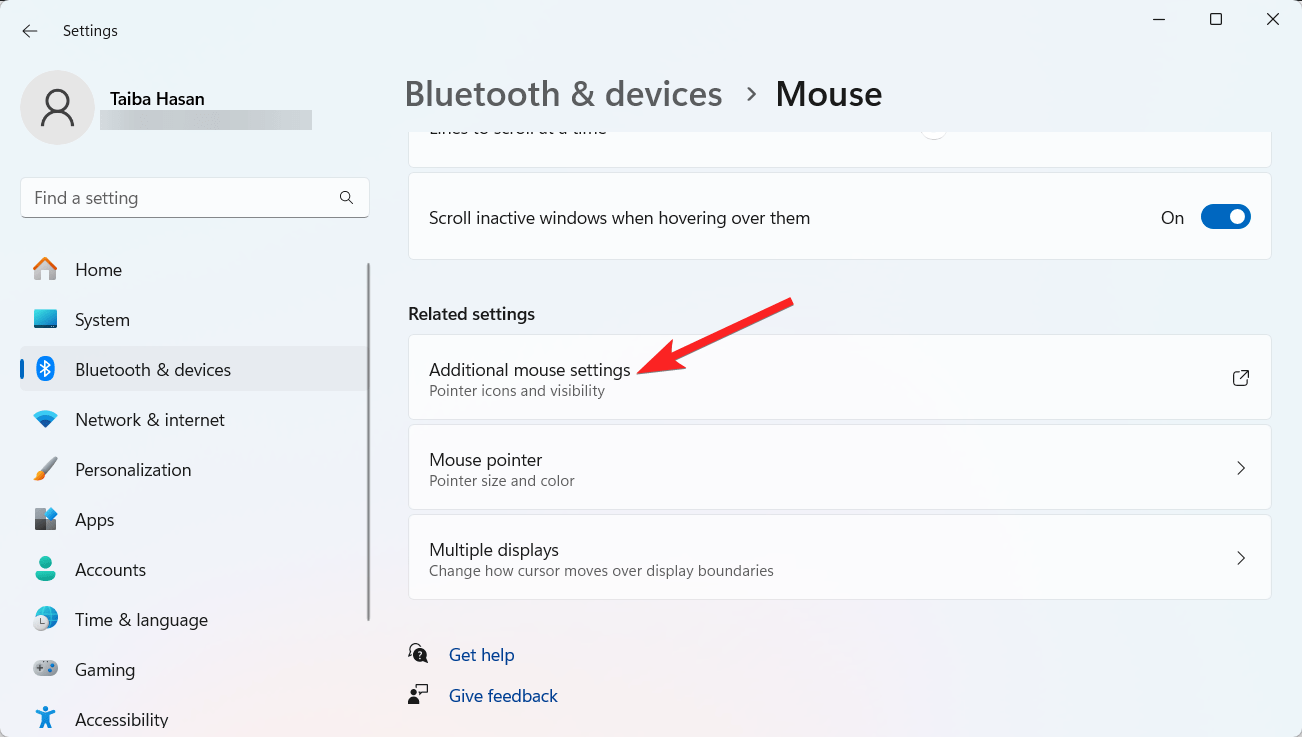
- Click on Additional mouse settings under Related settings.

- Switch to the Pointer Options tab in the Mouse Properties window.

- Enable or tick the checkbox next to the Enhance pointer precision.

- Press the Apply button to save the changes and OK to close the window.
If you want to disable pointer precision in Windows 11, simply disable the tick next to the Enhance Pointer Precision setting in the mouse properties window.
3. Via Windows registry
Use these steps to activate Windows’ Enhance Pointer Precision in the Windows registry editor.
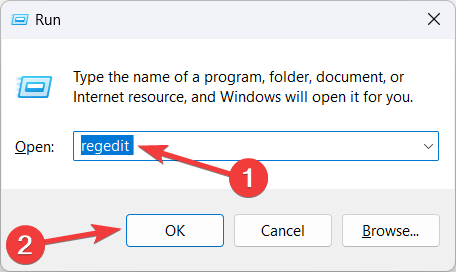
- Use the Windows + R shortcut to launch the Run dialog box. Type regedit in the search bar and press the Enter key to option the Windows Registry.

- Click the Yes button on the User Action Control prompt to launch the Windows Registry with administrative privileges.
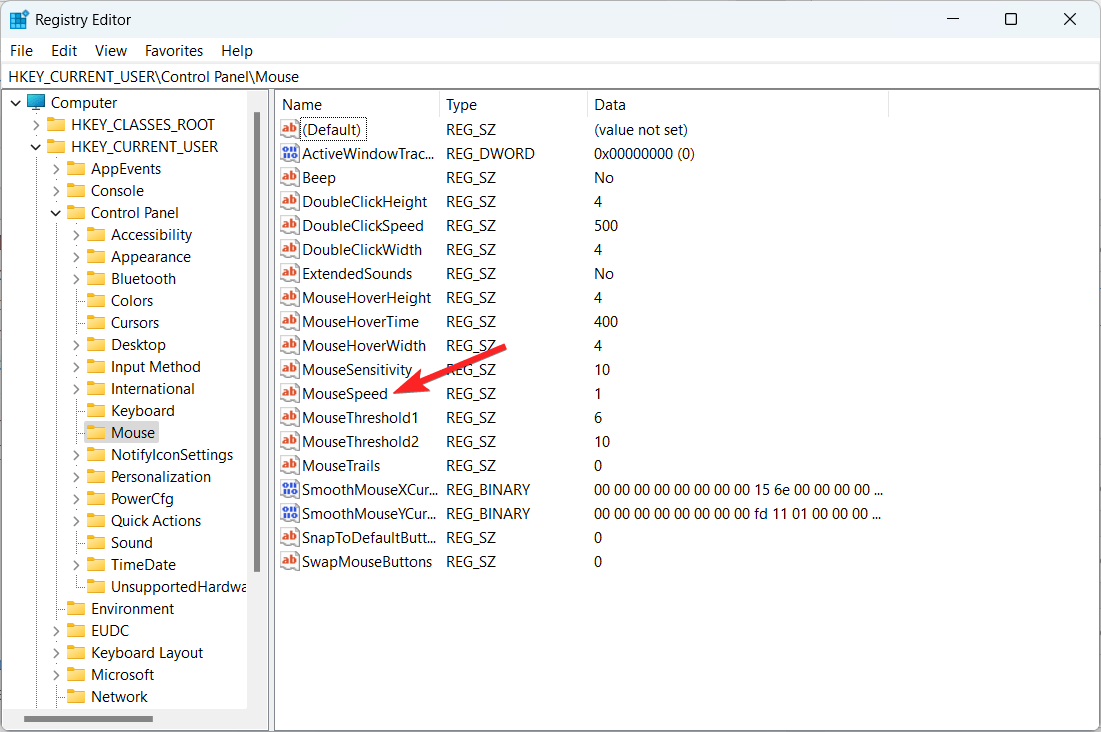
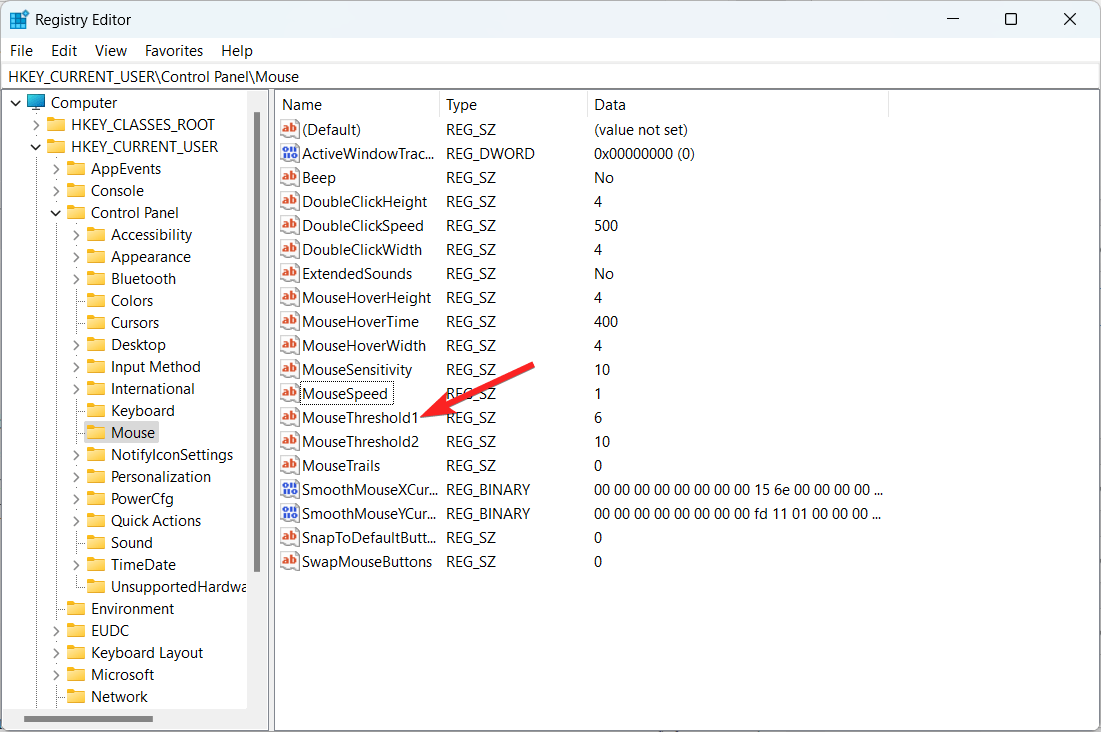
- Utilize the navigation pane or the address bar to navigate to the following path: HKEY_CURRENT_USER\Control Panel\Mouse
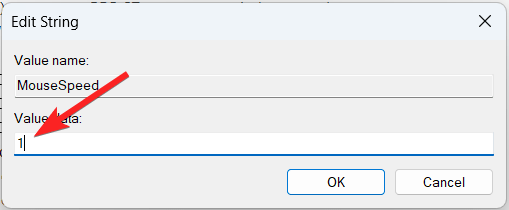
- Look for MouseSpeed DWord on the right section of the window and double-click to modify the settings.

- Assign 1 in the Value data field and click OK to activate Enhance Pointer Precision.

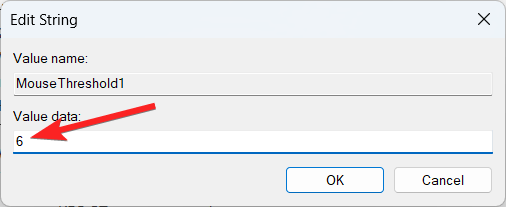
- Now look for the MouseThreshold1 DWord 32-bit and double-click to select the Edit string window.

- Assign value 6 in the Value data field and press OK to close the window.
- Next, right-click the MouseThreshold2 string and choose the Modify option.

- Assign 10 in the Value data field and press OK to save the changes.
If you want to disable Enhance Pointer Precision in Windows 11, use the following values:
- MouseSpeed: 0
- MouseThreshold1: 0
- MouseThreshold2: 0
Note: Modifications in the Windows Registry should only be done in extreme cases or when Windows resets the mouse cursor. To avoid any problems, creating a restore point before making any modifications is suggested.
How does Pointer Precision Impact the Gaming Experience?
Pointer precision is a type of mouse acceleration that modifies the Mouse’s sensitivity by speed. This feature will dynamically alter the DPI and compute the Mouse’s velocity. Your cursor will travel farther, and the DPI will rise with increased velocity.
Disabling the option generally enhances the gaming experience, according to comments from ardent players of all genres. Additionally, it is a major adjustment when discussing the ideal gaming mouse settings.
Should you Keep Pointer Precision Enabled?
It is never intended for the Enhance Pointer Precision to assist with gaming. Try as you might, but the outcome will likely not be favorable.
This is because using Enhance Pointer Precision will cause more harm than benefit because it will not allow the Mouse to move linearly.
Therefore, keeping the Enhance Pointer Precision turned off during gaming is recommended if you are using a gaming mouse. It will undoubtedly do more good and enhance your gameplay.
Conclusion
That’s all about the pointer precision feature in Windows 11 and how can you enable or disable it. Now that you know about the pointer precision feature, how it works, and what adjustments it brings, enabling it will bring you comparatively smoother gameplay and more accurate movement.
What are your thoughts on the pointer precision feature? Do let us know in the comments section.
If you've any thoughts on How to Enable or Disable Pointer Precision in Windows 11, then feel free to drop in below comment box. Also, please subscribe to our DigitBin YouTube channel for videos tutorials. Cheers!

