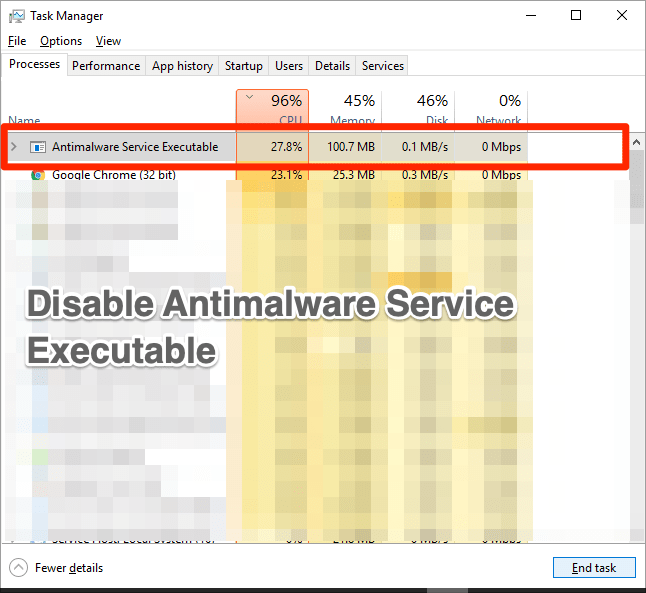
When buying a PC or a laptop, everyone would give you one common suggestion, i.e. to get antivirus software installed on it. However, if you are a Windows veteran and have been using the Windows operating system for quite some time, then you should know that the built-in Windows Defender service is one of the best antivirus tools for PC.
Microsoft rolls out regular updates for Windows Defender keeping it up to date. However, there is an issue that many of Windows users are facing this built-in antivirus tool uses several real-time background-running processes. One of which is the “Anti-malware Service Executable” to protect your PC.
Though this is an essential Windows Defender service running in the background, in many instances users have reported high CPU usage due to this background service. And high CPU, GPU, RAM, and HDD or SSD usage by this Anti-malware Service Executable service, drastically slows down the performance of your PC.
Thankfully, it is quite a common problem in Windows operating systems and there are a bunch of fixes that you can try out to disable Antimalware Service Executable high usage. With that said, let us get straight into the article itself:
What is ‘Antimalware Service Executable’?
Before we go ahead and check out the solutions to disable the Anti-malware Service Executable service on your Windows PC, let us first understand what it actually is.
Anti-malware Service Executable is MsMpEng.exe, and as already mentioned, is a part of the in-built Windows Defender. This is a service that runs as a background service in order to continuously keep track of Virus, Malware, and other harmful threats.
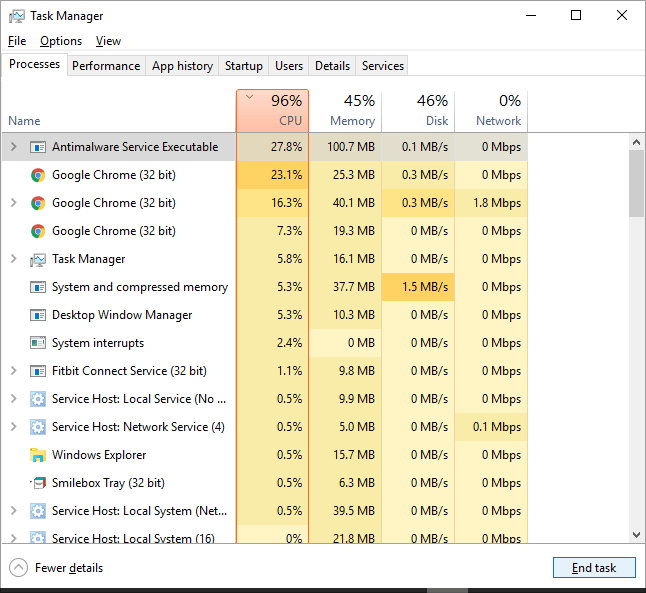
Sometimes, this service also looks around the root files of your PC, thus causing high CPU usage in the process. As the scanning relies on your CPU’s performance, it will eat up 90% or more of your CPU resources.
If you are also experiencing this issue, then you should follow the below methods to disable the Anti-malware Service Executable service.
Why does Antimalware Service Executable consume high memory?
Below are some of the striking reasons why Antimalware Service Executable leads to high memory usage:
- Constant background activity: Since Windows Defender continuously runs in the background and monitors the files and programs in real time, memory usage is bound to increase.
- Scheduled Scans: Windows Defender performs periodic scans to ensure that no malicious software that can damage the system security has crept in somehow. These scheduled scans run simultaneously with other apps, consuming a high amount of memory.
Disable Antimalware Service Executable High Usage
Now that you have a pretty clear idea why the Antimalware Service Executable process consumes high memory on your Windows 11 PC, below are some of the effective measures to minimize memory usage thus improving the device’s performance.
Add anti-malware to the list of exclusions.
There is an option in the Windows Defender tool, that you utilize to exclude certain programs from the list of scans. Meaning that you can exclude some of the programs from scanning in the background. You can make use of this list of exclusions and add this Anti-malware Service Executable service and prevent it from high CPU, GPU, RAM, and HDD or SSD usage.
- Press the Win button on your keyboard or the bottom Taskbar and search for Task Manager.
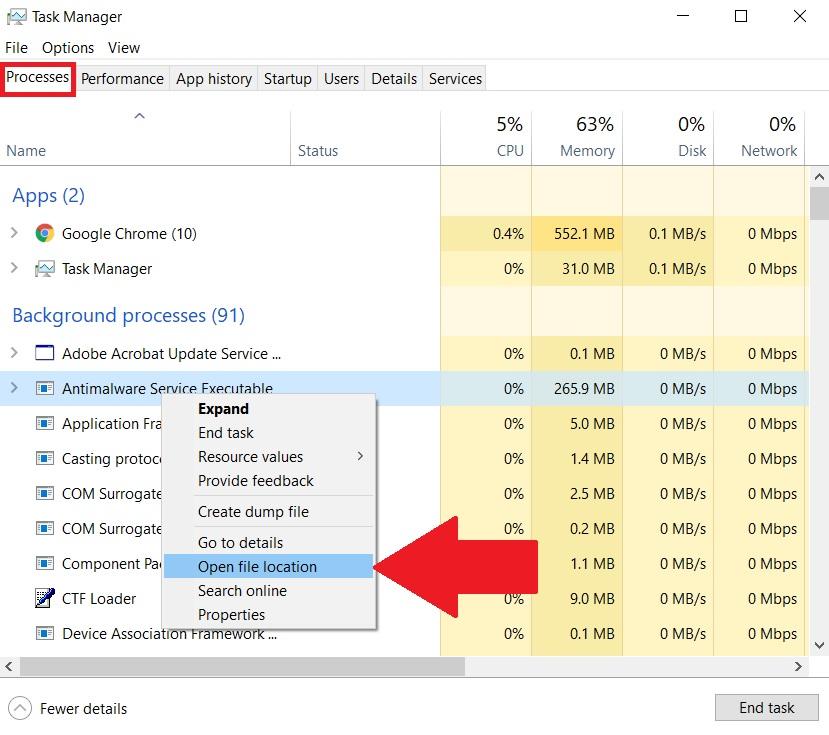
- A process list will open and you need to look for the Antimalware Service Executable process.
- Right-click on this service and click on the Open File Location option.
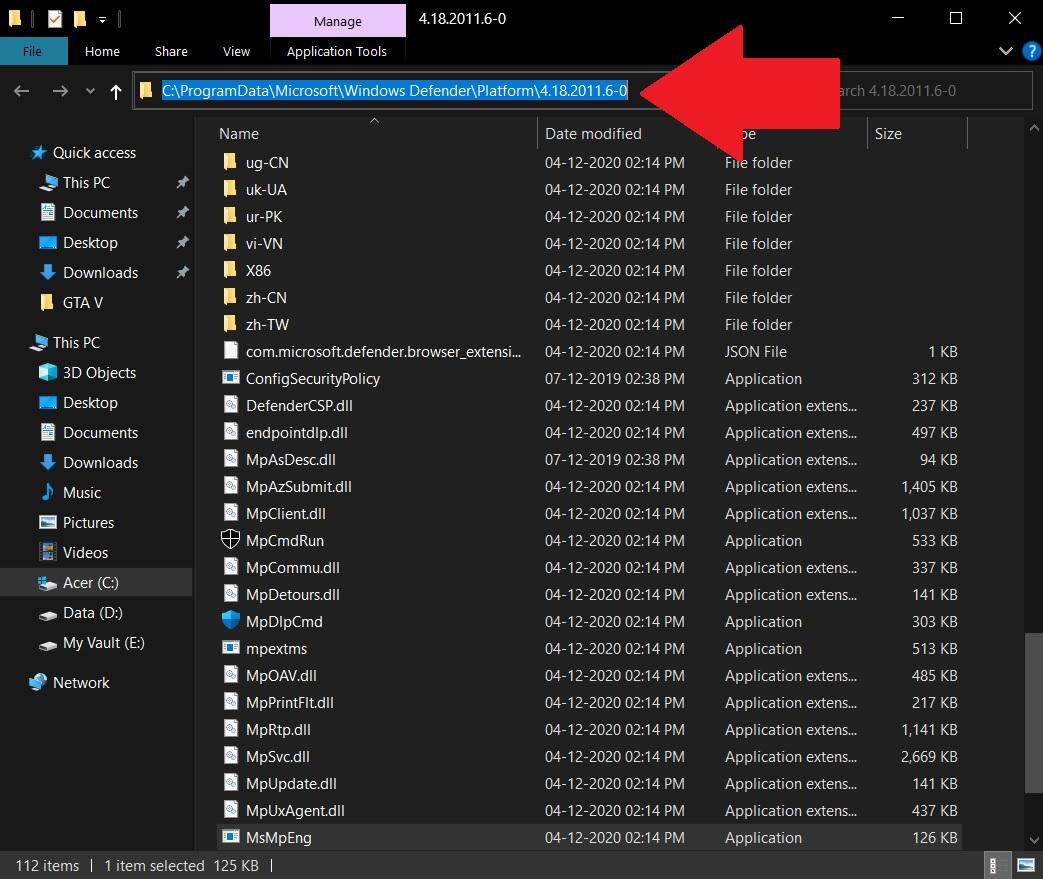
- Once the file location opens, you will find the entire path of the Anti-malware Service Executable file in the address bar. Click on the Address bar and copy the entire path.
- Now, again press the Win key on your keyboard or the Taskbar and search for Windows Security.
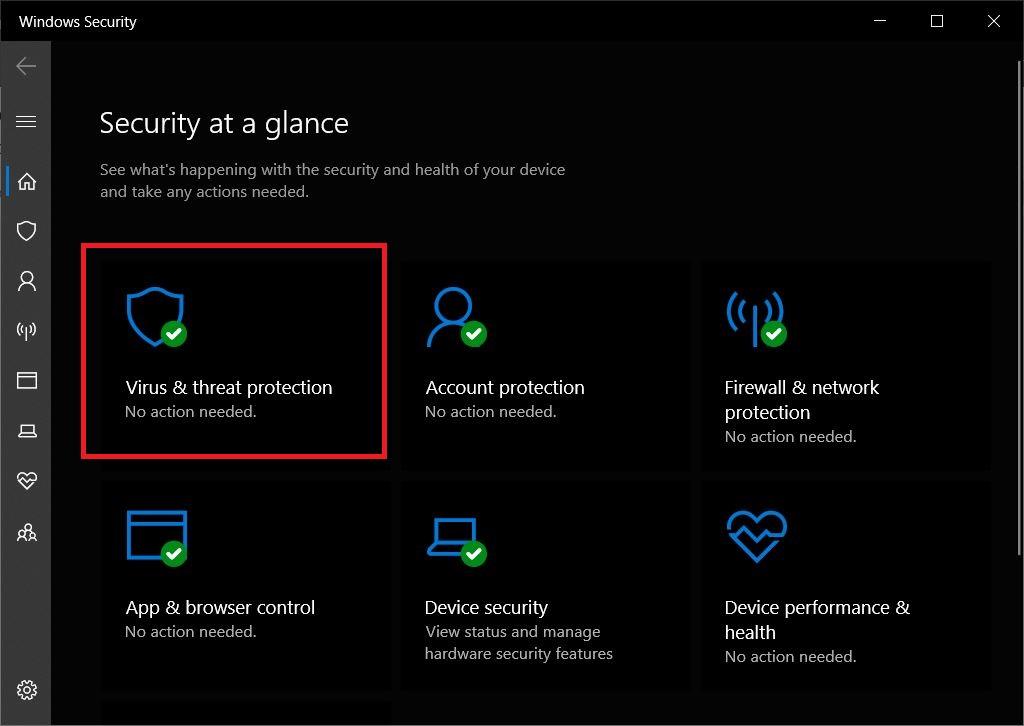
- Head to the Virus & Threat Protection option.
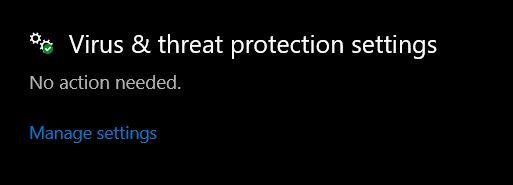
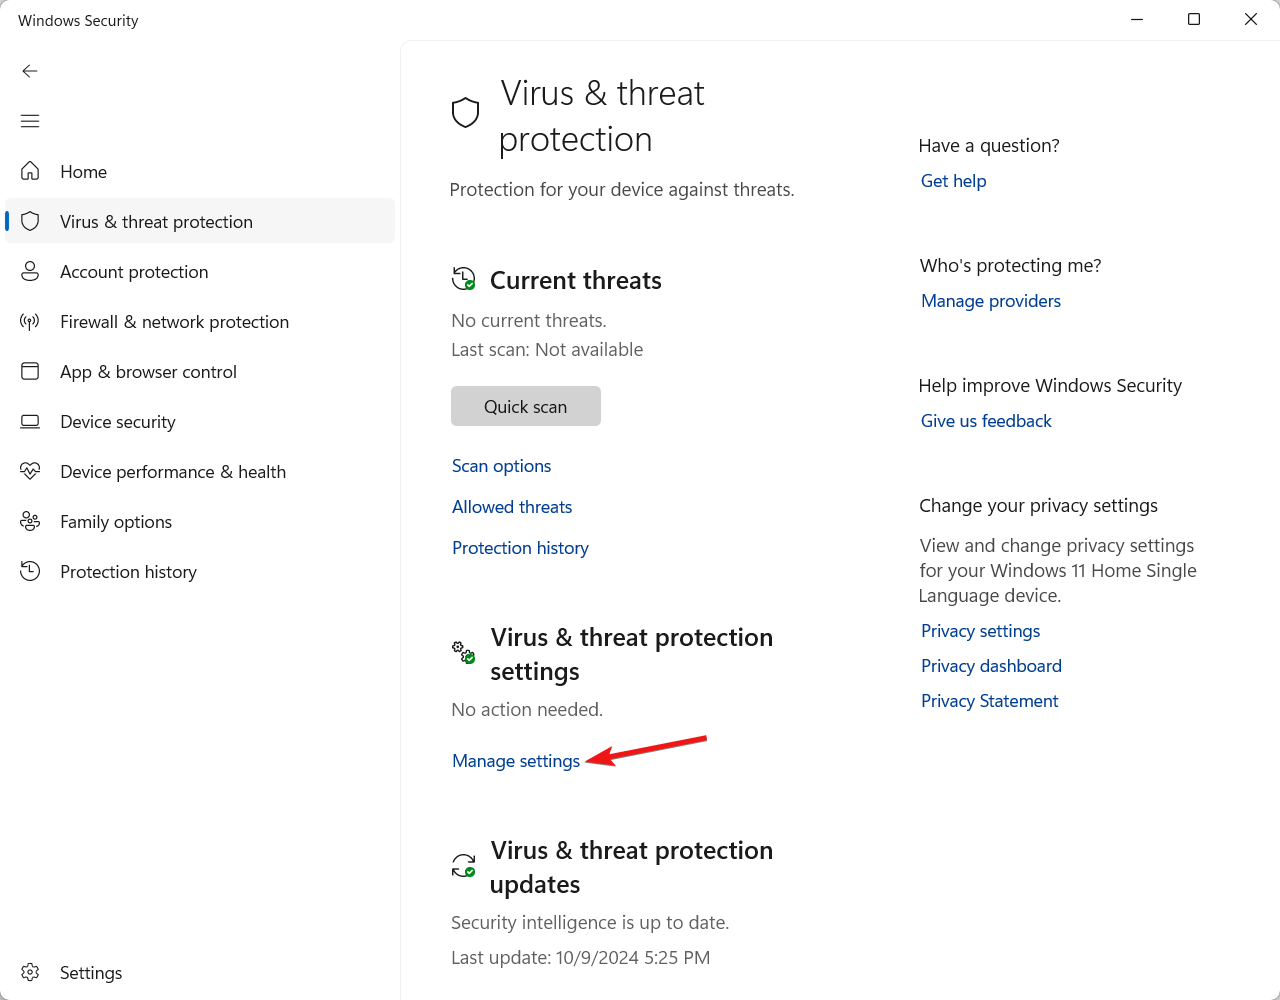
- Select the Manage Settings button to enter Virus & Threat Protection settings menu.
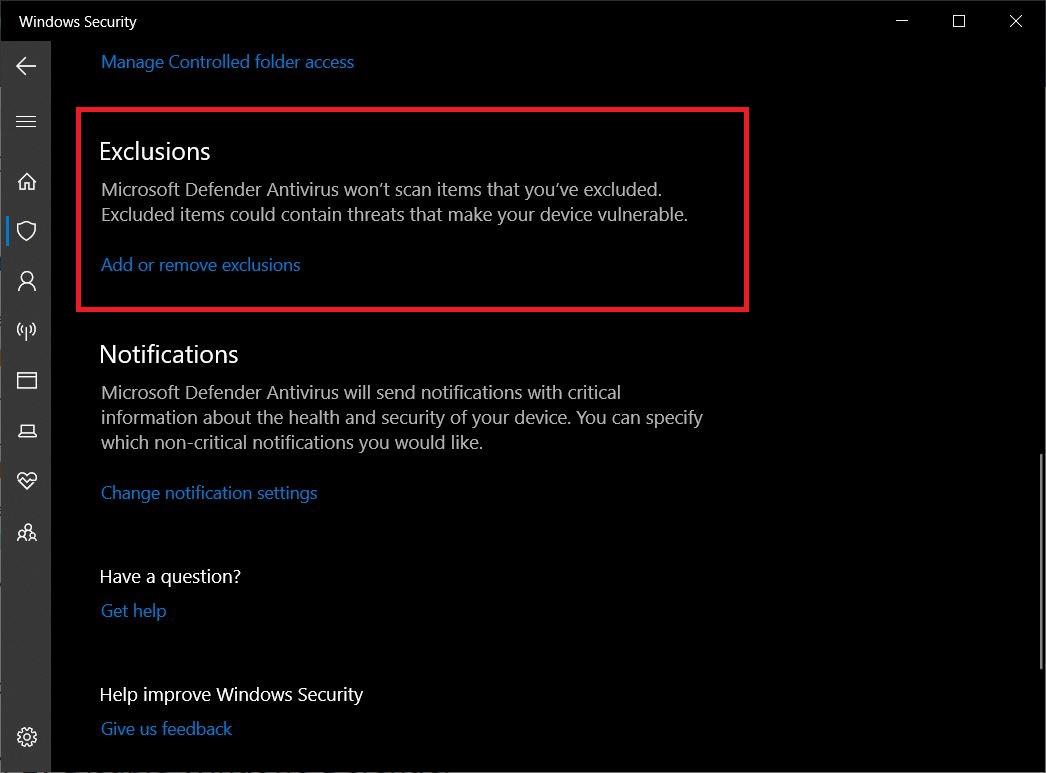
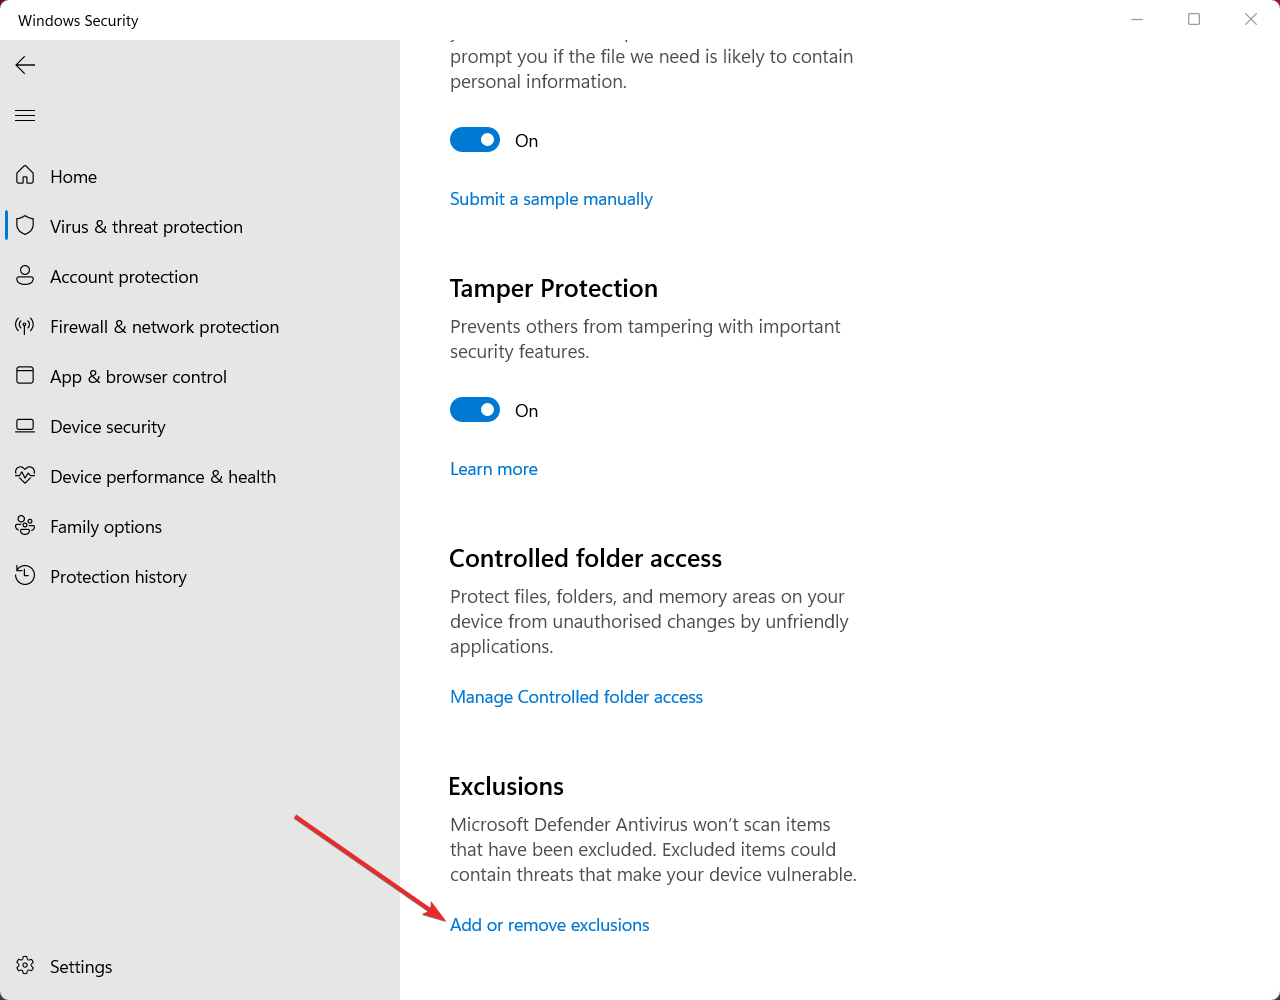
- Scroll down to the Exclusions.
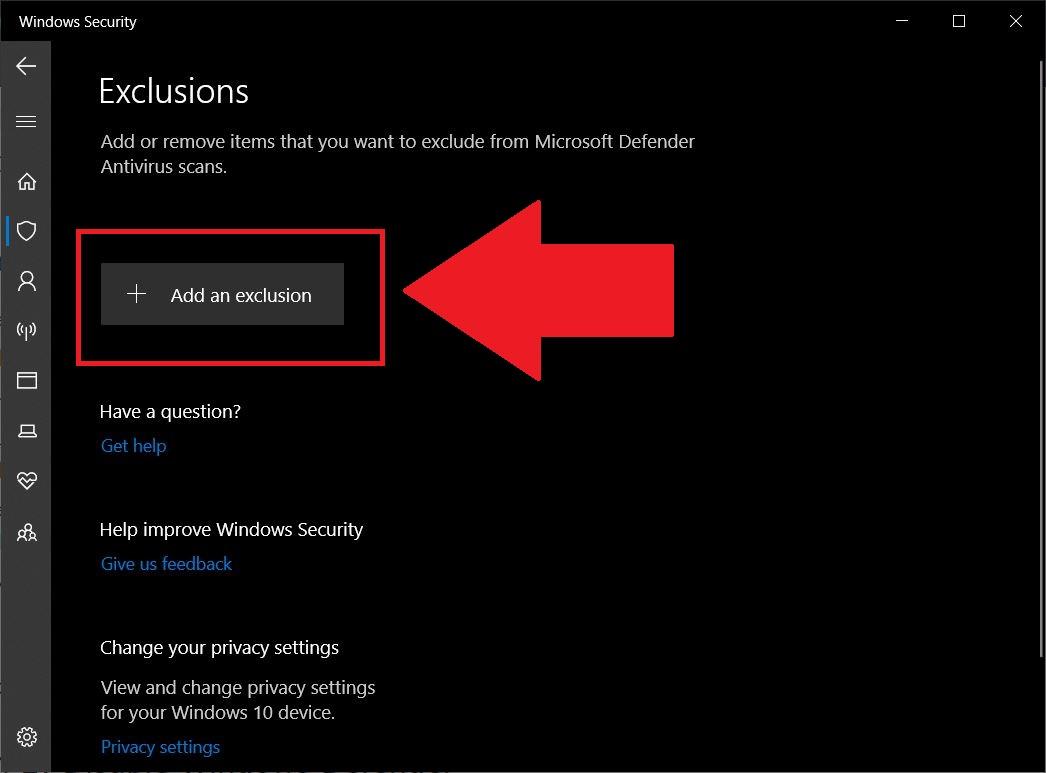
- Open Exclusions and tap the Add an Exclusion button.
- Select File from the drop-down menu and paste the path which you copied in step 4.
- It will automatically add it to the list of exclusions.
- That’s it!
Disable Real-Time Protection
You can also disable this antimalware service’s executable high usage by disabling the real-time protection. Besides, the high usage is because of the fact that it is a real-time feature and it continuously scans your Windows PC in the background.
- Press the Win button on your keyboard on the Taskbar and search for Windows Security.
- Now, go to Virus & Threat Protection → Manage Settings, as shown in the above step.
- Here, you need to toggle off the Real-time protection option.
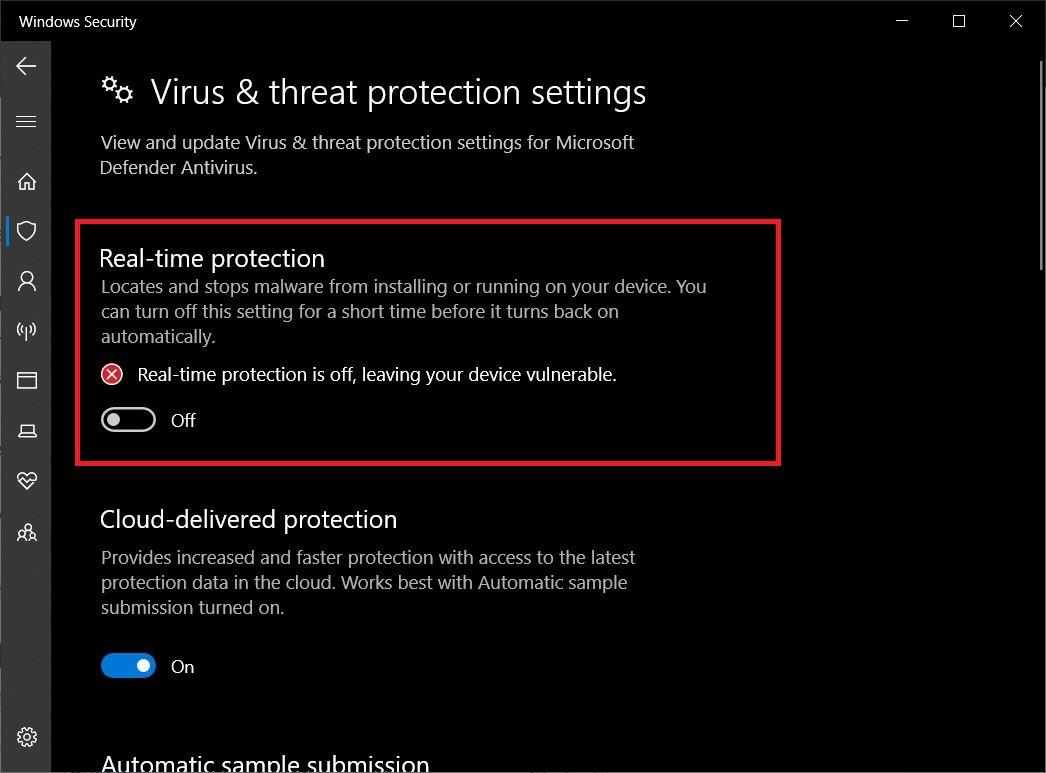
However, this is not advised as Real-time protection keeps a check on various malware, viruses, etc. attacking your PC. But if you are experiencing lag and performance drop in your PC due to this background process, then it is the way to go.
Disable Windows Defender from the Registry Editor
You can disable the entire Windows Defender antivirus service on your Windows PC from the Registry editor. Well, you should perform this step only if you have a third-party antivirus tool or a protection service installed on your PC.
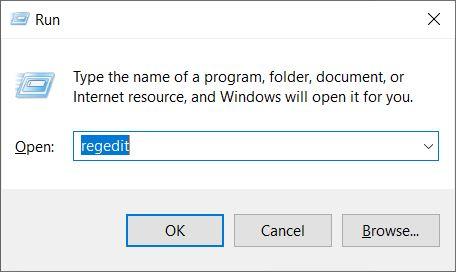
- Press the Win+R keys on your keyboard to open the Run dialog.
- Type regedit and hit the Enter button.
- Expand the HKEY_LOCAL_MACHINE.
- Then expand SOFTWARE.
- Under Policies → Microsoft, you will find Windows Defender.
- Right-click on Windows Defender and click select New > DWORD.
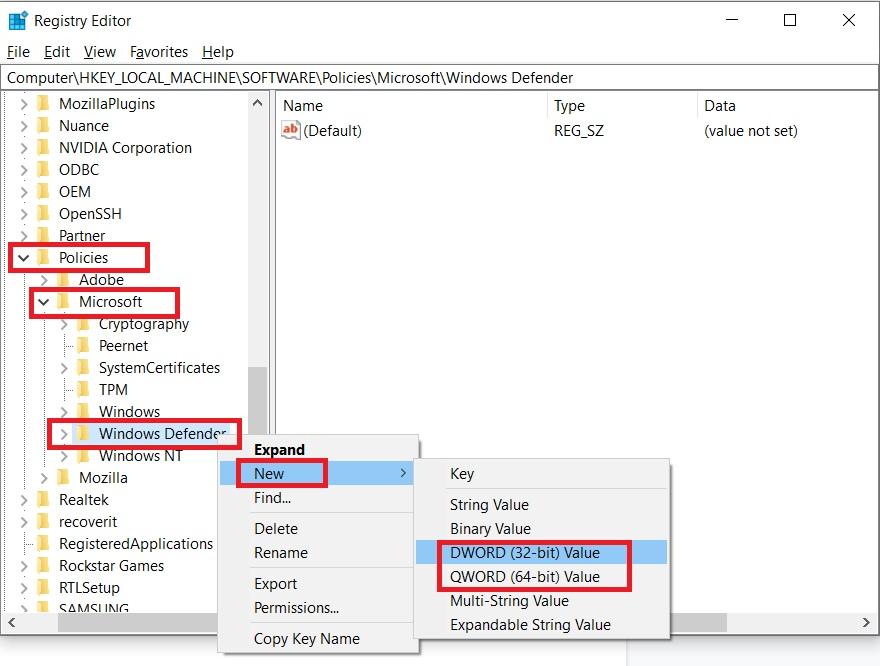
- On the newly created DWORD double-click and rename it DisableAntiSpyware. Now, set the value to 1.
- This will disable the Windows Defender antivirus tool on your Windows 10 PC.
Change Windows Defender’s Schedule
You can tweak the schedule of the Windows Defender antivirus tool and free up the CPU, GPU, RAM, and HDD or SSD for your extensive work. This means that you can allocate a different schedule for the Windows Defender to scan your PC.
- Press the Win+R keys on your keyboard to open the Run dialog.
- Type “taskschd.msc” and hit the Enter button.
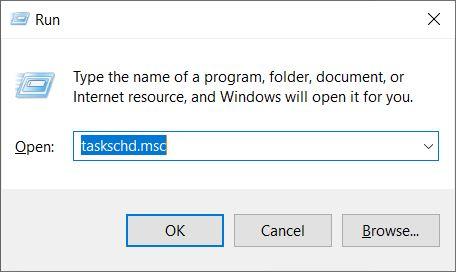
- A new Task Scheduler window will open.
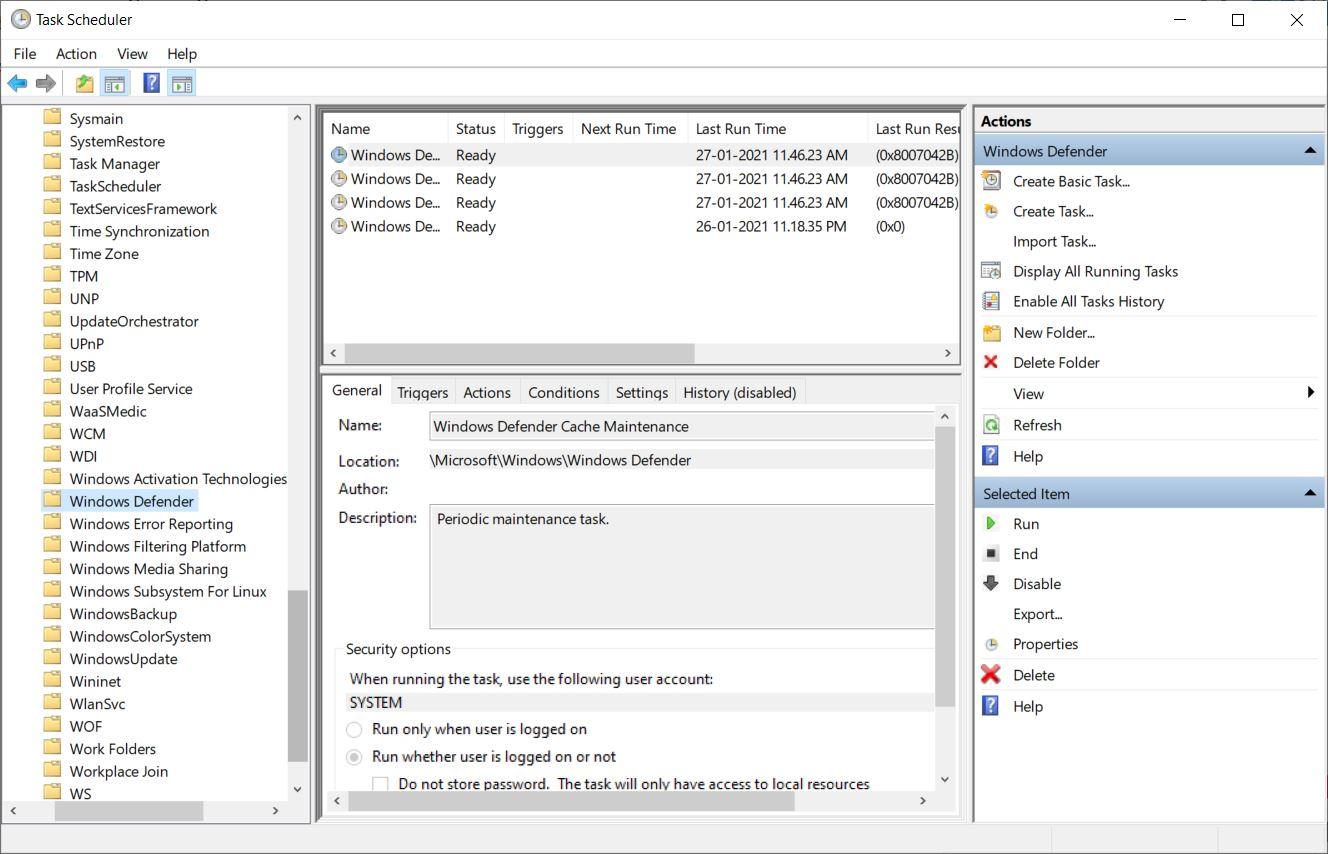
- Double-click on the Task Scheduler Library.
- Now, head over to Microsoft → Windows → Windows Defender.
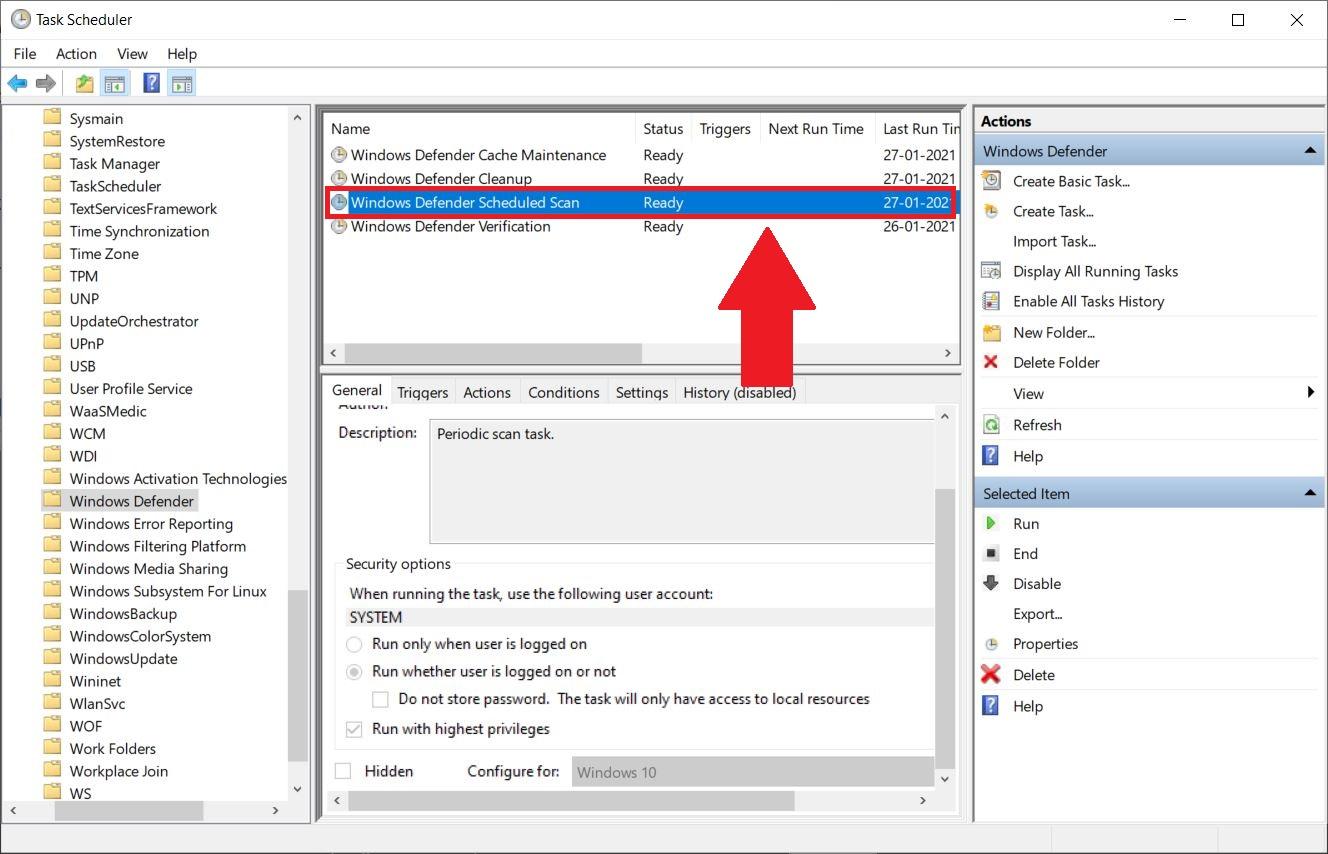
- Find the Windows Defender Scheduled Scan option in the middle pane and open it as shown in the image below:
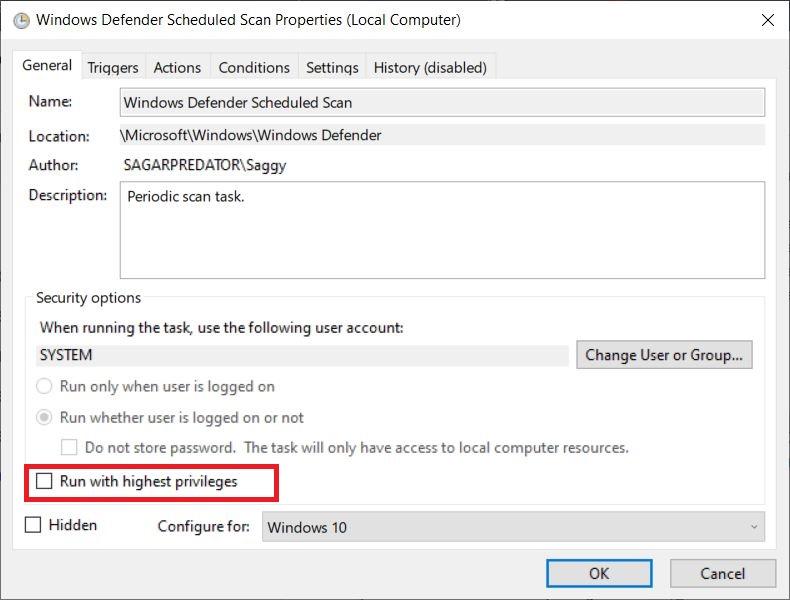
- You need to uncheck the Run with the highest privileges option on the Property window.
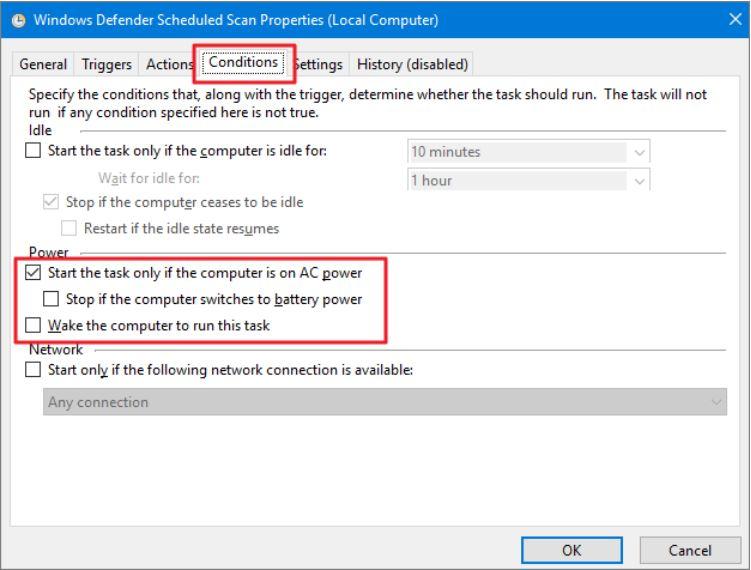
- Under the Conditions tab, uncheck all the options as shown in the image below.
- That’s it!
Temporarily Disable the Process
If Antimalware Service Executable suddenly consumes a lot of computer resources, you can terminate the process right away from the Task Manager. This is however not a permanent solution and the service will be active again after you reboot the system.
Having said that, here are the detailed steps to disable the Antimalware Service Executable process on Windows 11. Follow the steps mentioned below to terminate or end the process by utilizing Task Manager:
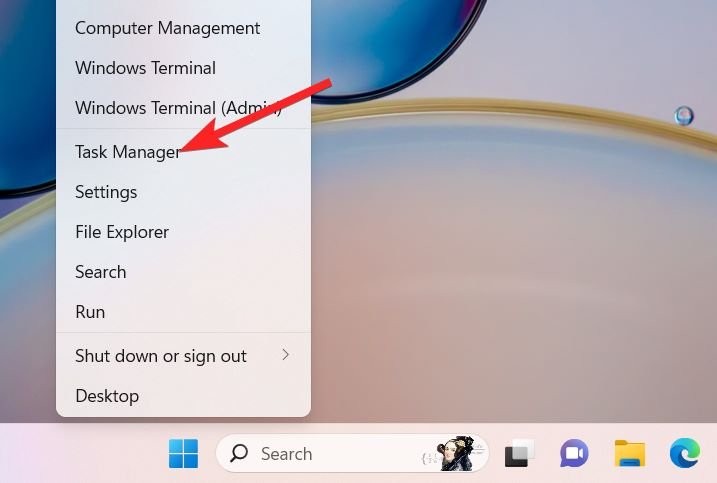
- Right-click the Windows icon and choose Task Manager from the Quick Links menu.
- Switch to the Processes tab in the Task Manager window, select Antimalware Service Executable, and press the End task button on the top.
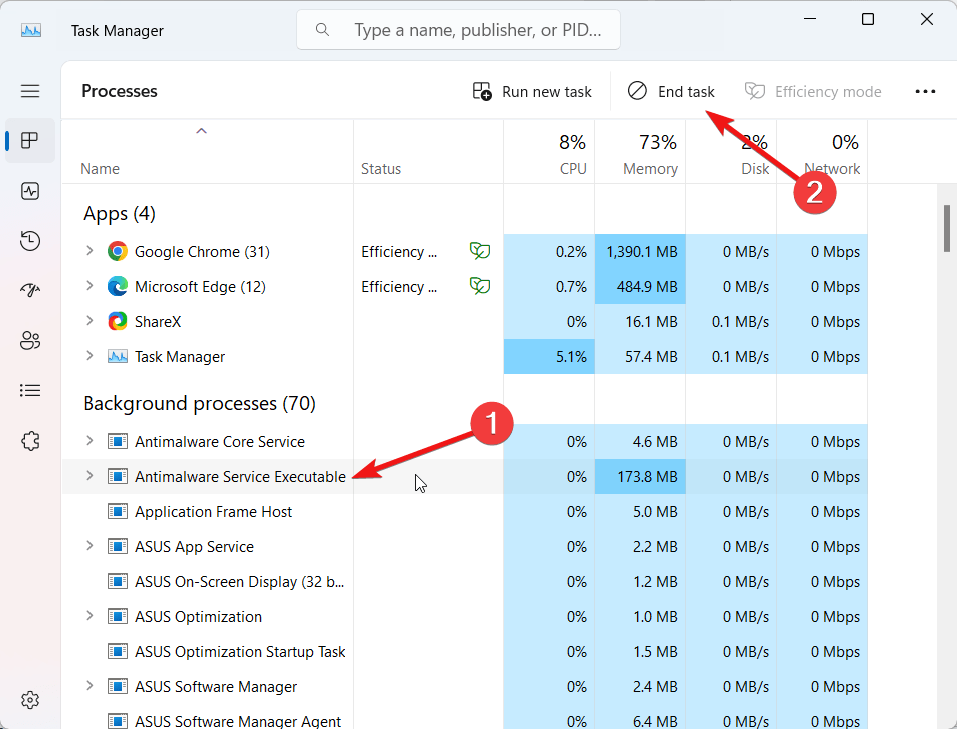
That’s it! The process will be terminated immediately, significantly reducing the memory usage on your Windows 11 PC.
Include MsMpEng.exe in the Exclusion List
Another solution worth trying is adding the problematic service to the list of services that you do not want Windows Defender to include in the routine scans. This will significantly reduce the impact on your system resources particularly, the memory usage. Here’s how you can do the needful.
- Use the Windows + I shortcut key to launch the Settings window.
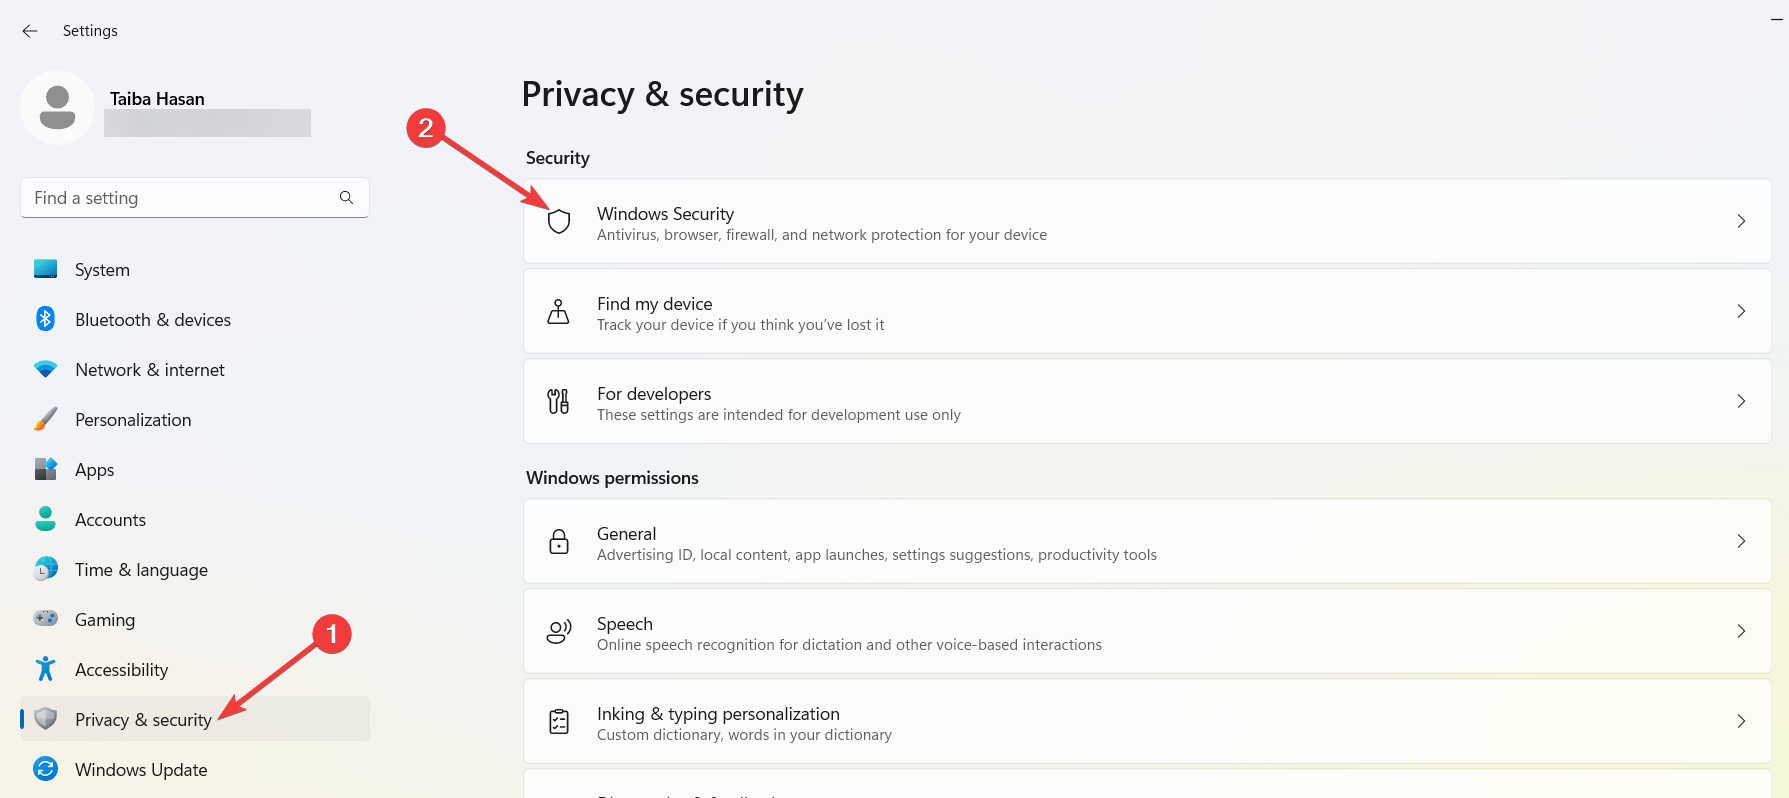
- Go to Privacy & Security from the left sidebar and then choose Windows Security from the right section.
- Next, choose Virus & Threat Protection.
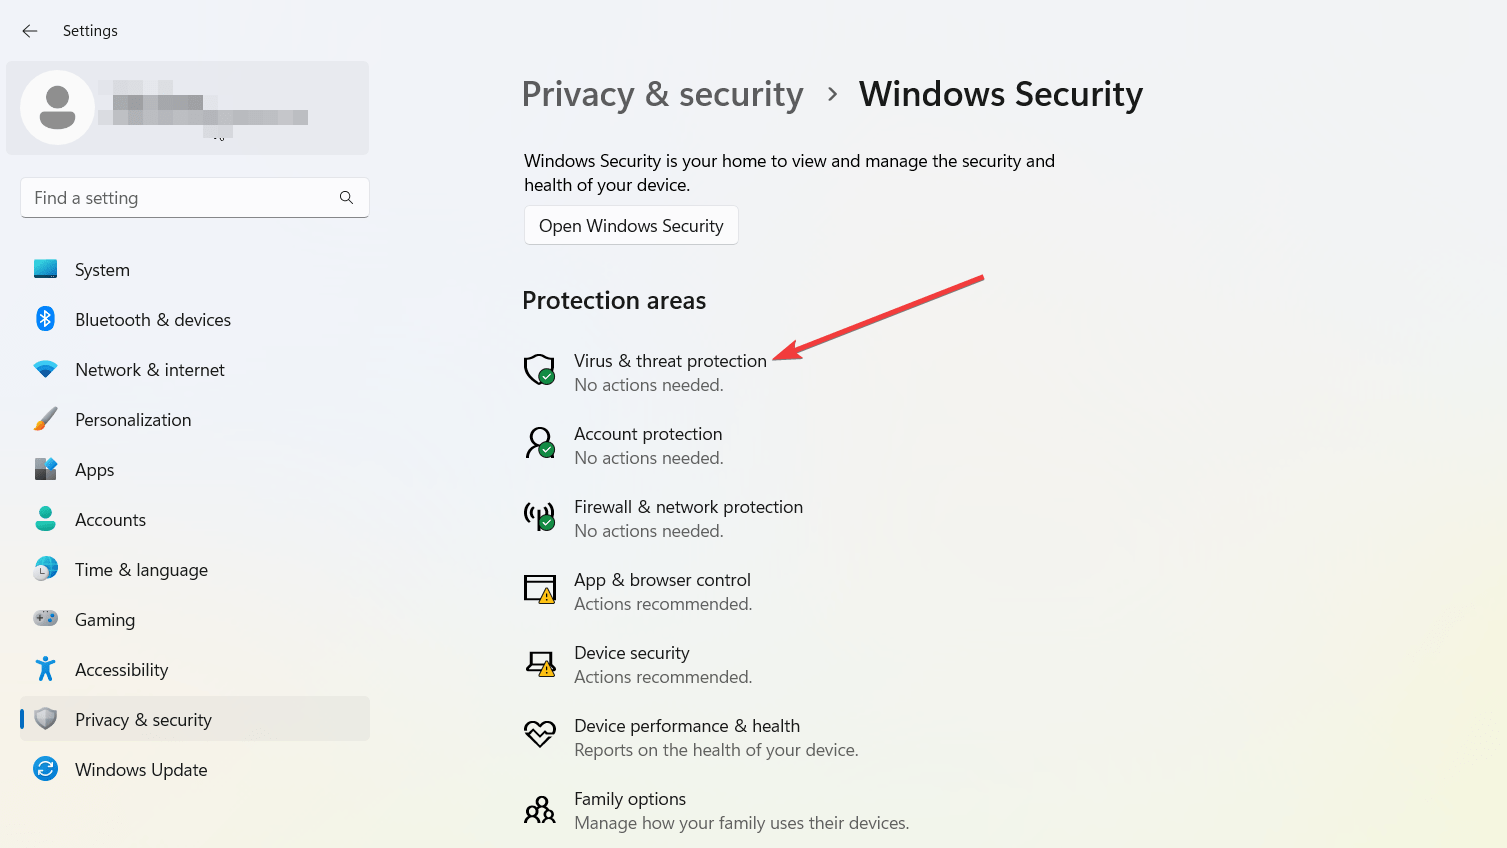
- Now follow the Manage settings link located under the Virus & Threat Protection settings section.
- Scroll down to the Exclusions section and click the Add or Remove Exclusions link.
- Click the Add an Exclusion button and select Process in the dropdown menu.
- Type MsMpEng.exe in the Add an Exclusion text box and hit the Add button.
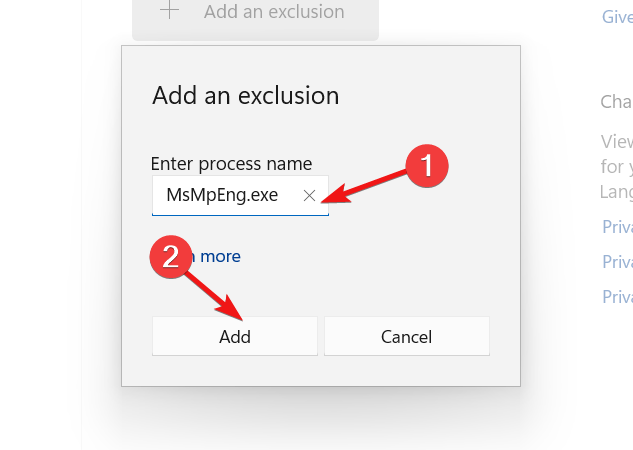
Now reboot your PC and see if the memory usage has been minimized for your Windows 11 PC.
Conclusion
Here we come to the end of our guide addressing the high memory usage issue caused by the Antimalware Service Executable process. While Antimalware Service Executable is an essential component of Windows security, its abnormal behavior drastically affects the system’s performance.
Thankfully, the solutions presented here will come in handy when you need to reduce the amount of memory required by this process. Which of these methods worked in your case? Do let us know in the comments section.
If you've any thoughts on How to Stop ‘Antimalware Service Executable’ High Usage?, then feel free to drop in below comment box. Also, please subscribe to our DigitBin YouTube channel for videos tutorials. Cheers!
