When you install Windows 11 software on unsupported hardware, then Microsoft doesn’t support any methods and reminds the users of an error message that shows the “System requirements not met” watermark. This watermark appears in the bottom right corner of the desktop screen on the computer.
If you see the “System requirements not met” watermark on your computer, you can remove it by modifying a few changes. The error typically appears when the computer hardware isn’t supported. In this guide, we will show how you can solve the “System requirements not met” watermark on the Windows 11 computer. Let’s get started.
Ways to Remove System Requirements Not Met Watermark
We have mentioned two different ways to remove “System requirements not met” on Windows 11. Let’s get straight to it.
1. Using Group Policy Editor
If you’re using Windows Pro or Enterprise, then Group Policy Editor will be a piece of cake for you. Follow the below instructions to remove the “System requirements not met” watermark via Group Policy Editor:
- Press the Windows + R key on the keyboard to launch the Run dialog box.
- In the field box, type in “gpedit.msc” and click OK. This may launch the Group Policy Editor.

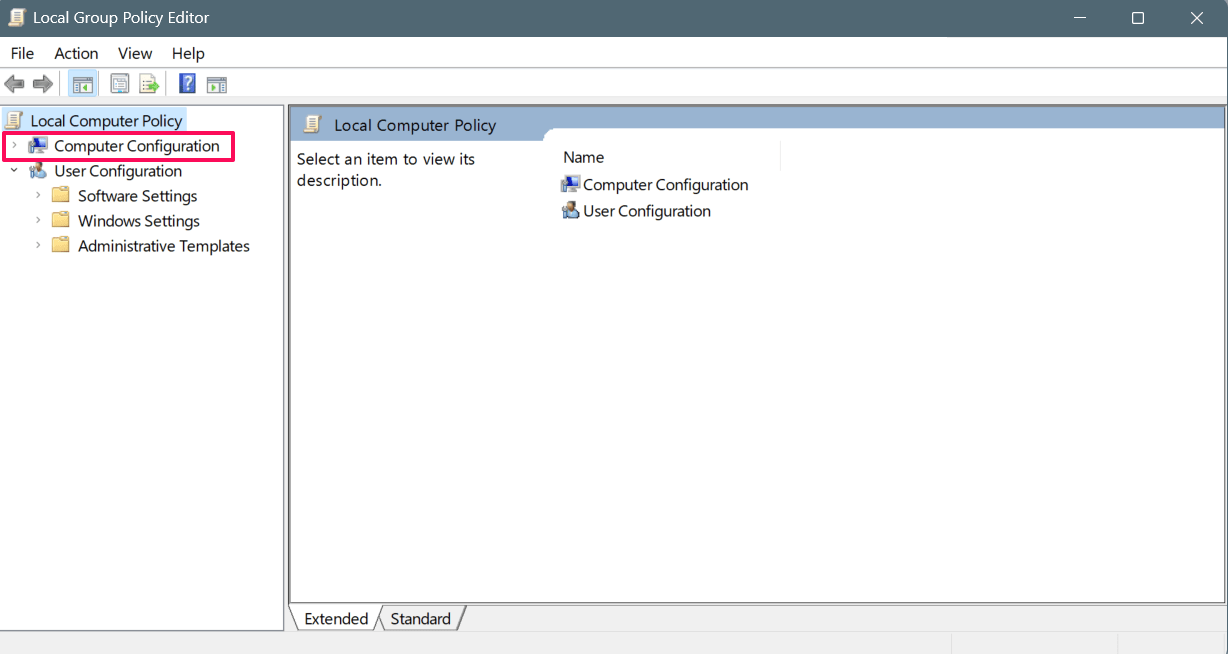
- Under the Local Group Policy Editor, double-click on the “Computer Configurations.”

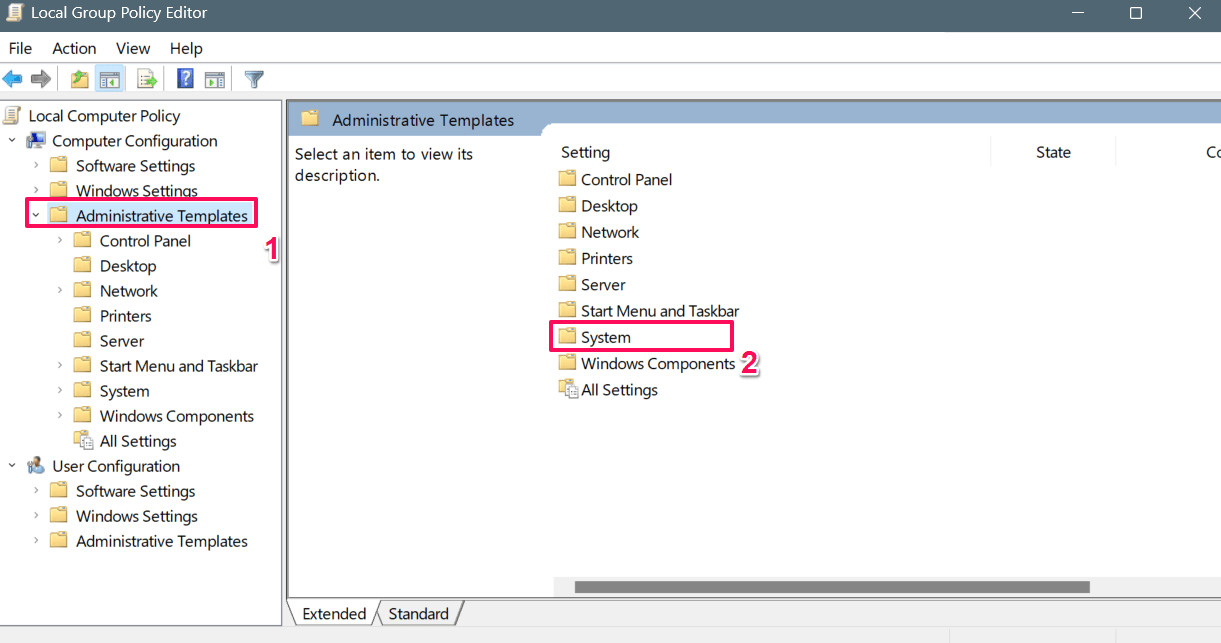
- Then, click on the “Administrative Templates” > “System.”

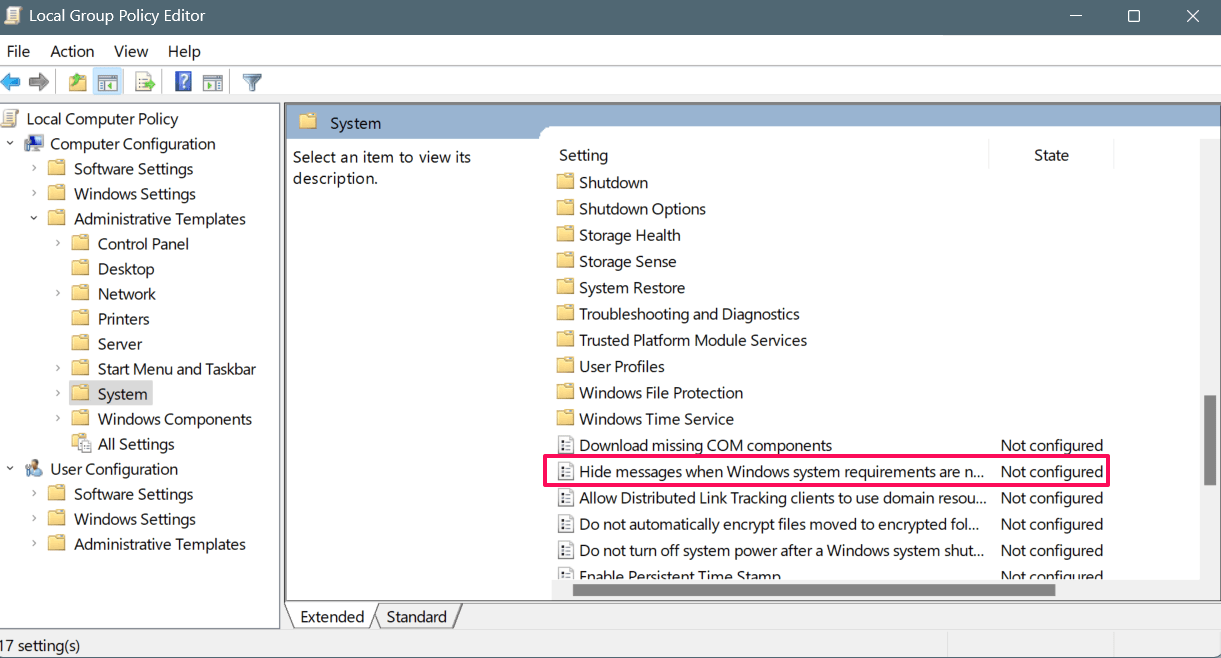
- In the Settings section, scroll down and double-click on the “Hide messages when Windows system requirements are not met.”

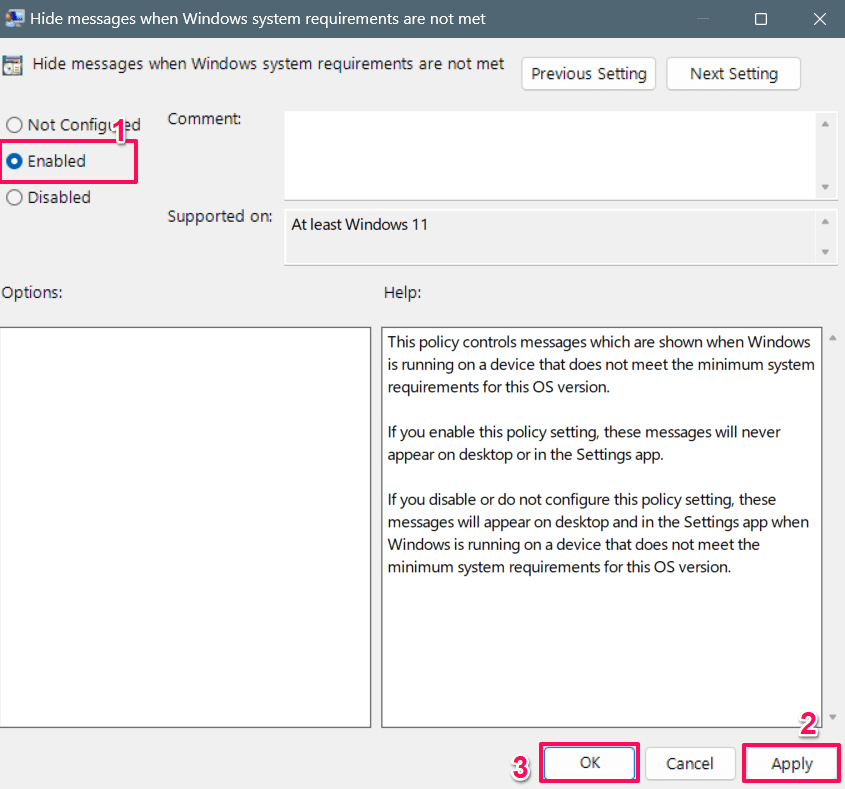
- In the pop-up menu that appears, click the “Enabled” option located on the left side.
- After choosing the option, click on the Apply button followed by OK.

Now you may notice that the “System requirements not met” watermark has been removed from the desktop screen. Kudos!
2. Remove System Requirements Not Met Watermark Using Registry Editor
Another effective solution to remove the “System requirements not met” watermark is by using the Registry Editor. If you don’t have access to Group Policy Editor, you can use this method to remove the watermark. Here’s how to do it.
- Press the Windows icon to launch the start menu on the computer.
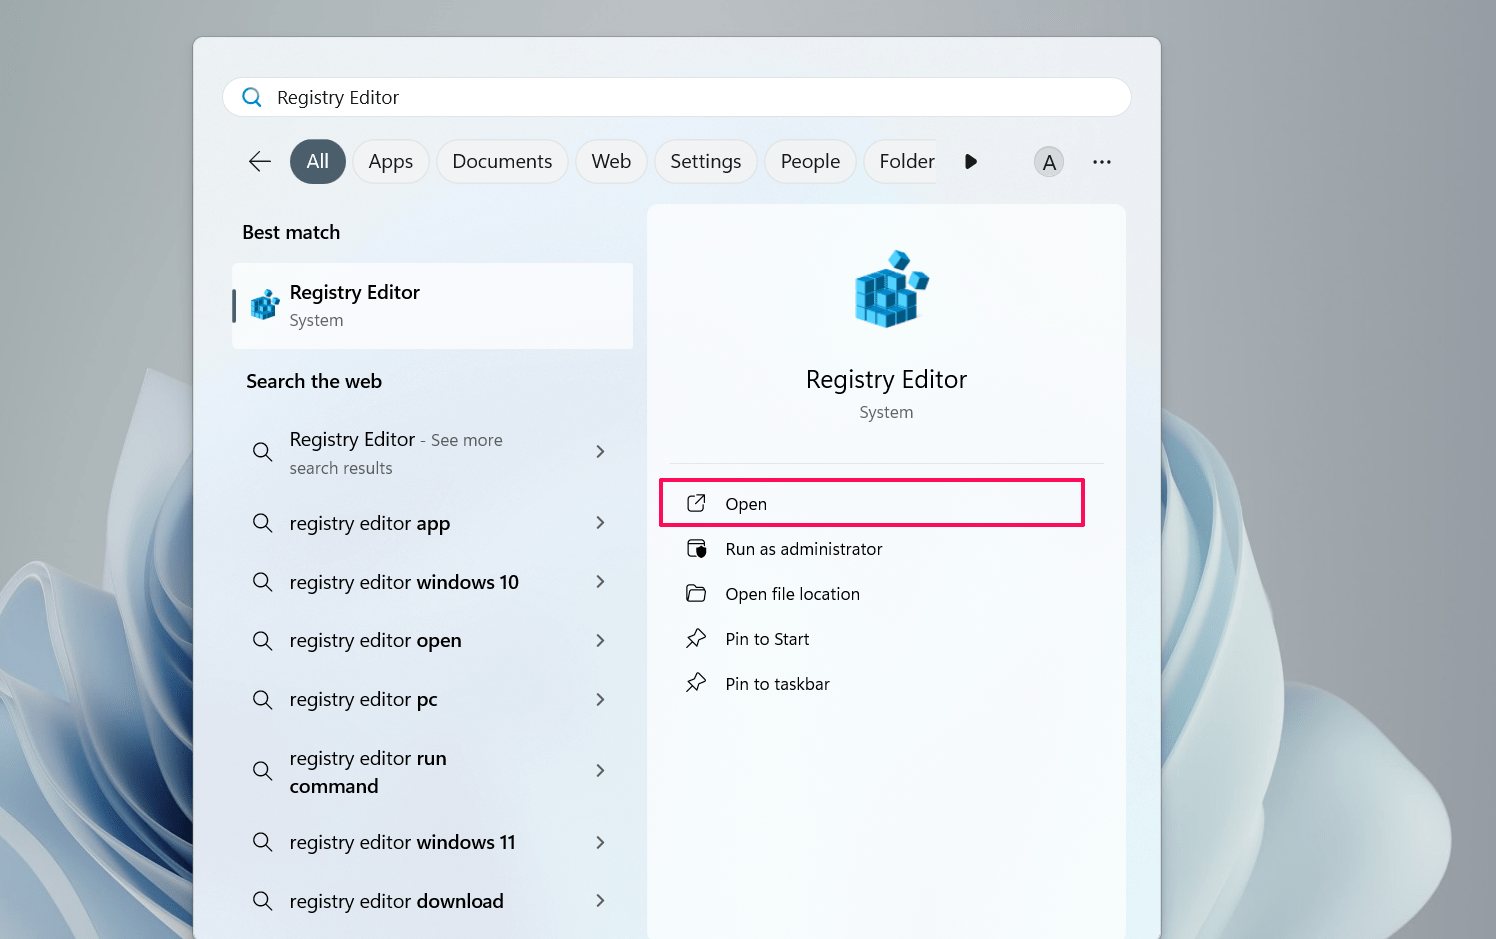
- In the Windows search bar, type in “Registry Editor” and click Open.

- If the User Account Control (UAC) prompt appears on the screen, click Yes to proceed.
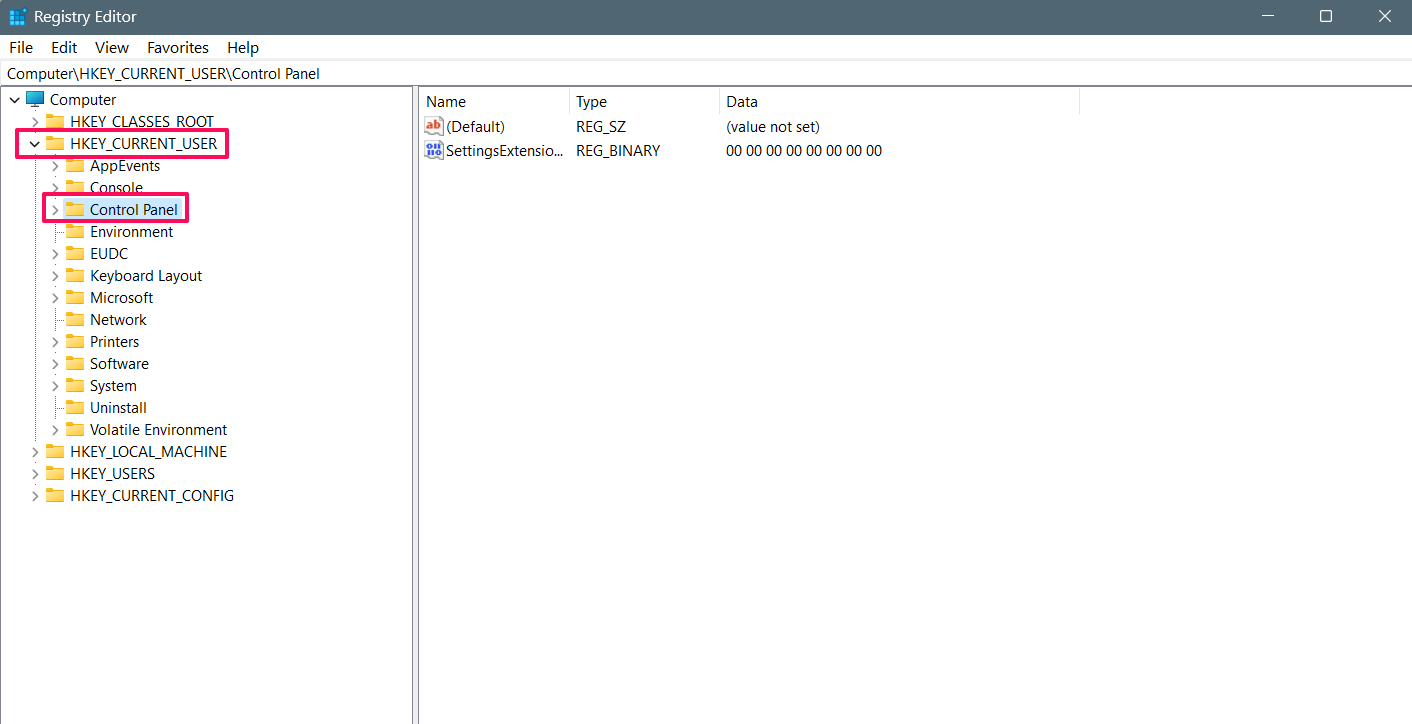
- Double-click on the “HKEY_CURRENT_USER” and select “Control Panel.”

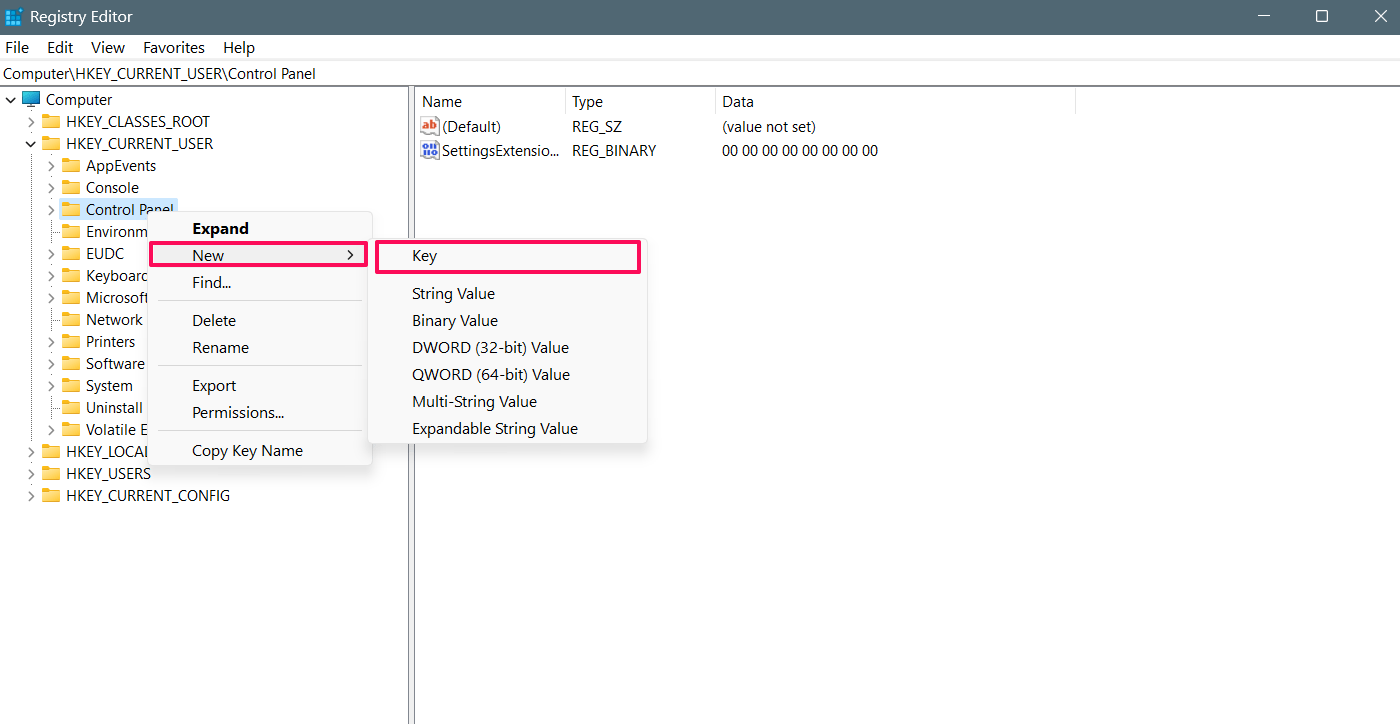
- Right-click on the Control Panel and click on New and select Key.

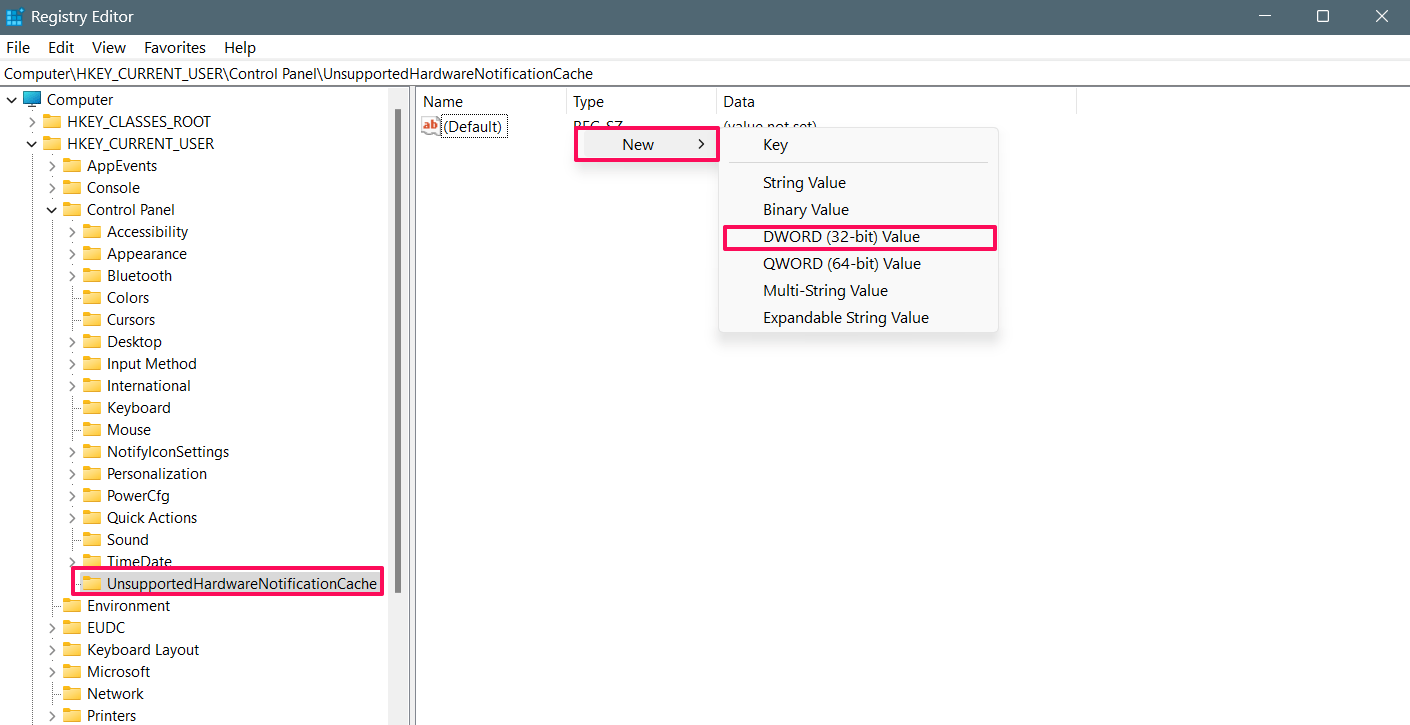
- Here, name this name key as “UnsupportedHardware NotificationCache.” If it’s already existed, then no need to create a new key.
- Select the key and right-click on the Default option on the right pane and choose New > DWORD (32-bit) Value.

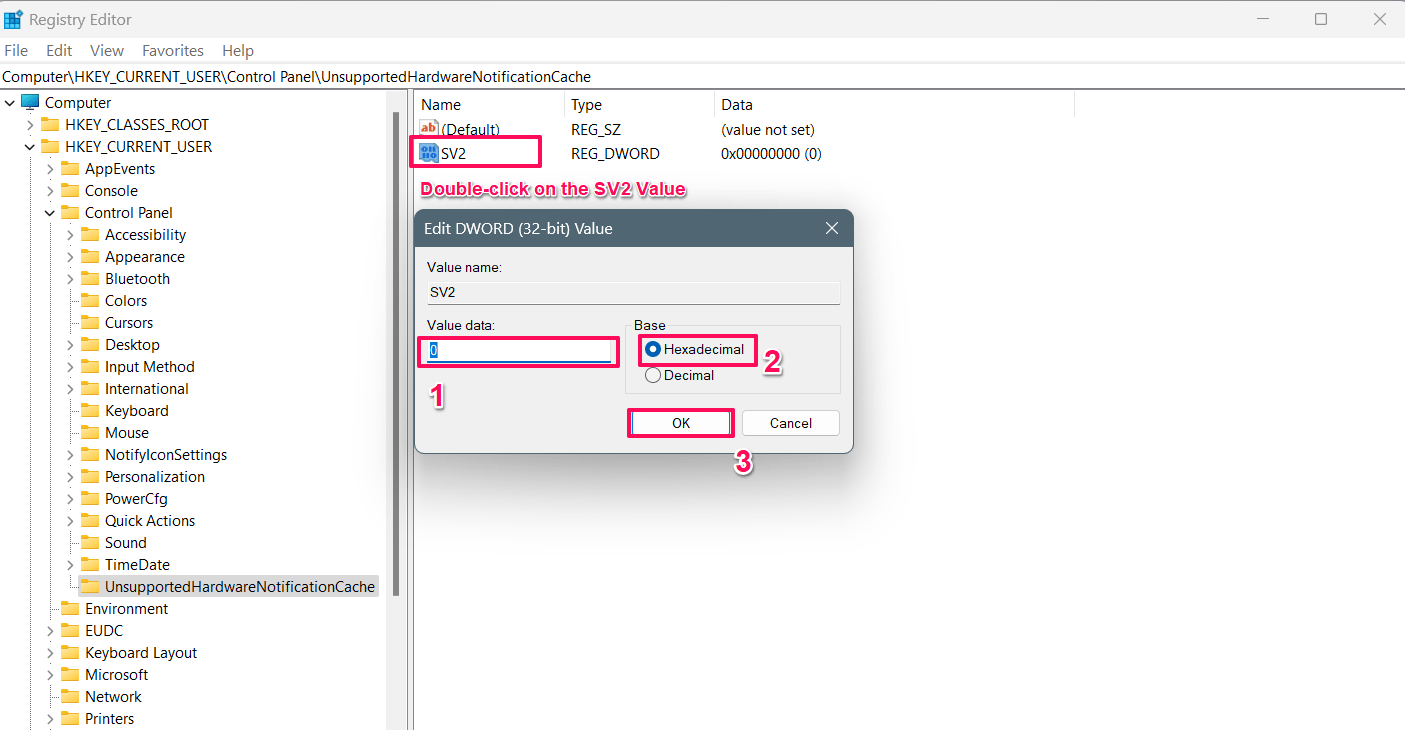
- Name the new value as “SV2” and click Enter. Then, double-click the SV2 value and it will open the menu to edit DWORD (32-bit) Value.
- In the window, type “0” in the value data and ensure “Hexadecimal” is selected. Then, click OK.

- That’s it. Now restart your computer and the “System requirements not met” watermark will be removed.
Note: If your Windows 11 is running on the 21H2 version, then you need to change the entry to “SV1” instead of “SV2” and set the value data to “0.”
Bottom Line
These were the two effective methods that will help you fix the “System requirements not met” watermark located on the desktop’s right-corner side. If you ever encounter this watermark error, then it can be due to unsupported hardware which can be removed with a simple procedure. Follow any of the above methods to remove the “System requirements not met” watermark. I hope you have found this guide helpful.
If you've any thoughts on How to Remove ‘System Requirements Not Met’ Watermark in Windows 11, then feel free to drop in below comment box. Also, please subscribe to our DigitBin YouTube channel for videos tutorials. Cheers!


