If you are preparing data structures or a spreadsheet and want to remove the blank rows in Excel, then you’re in the right place. Microsoft Excel offers a versatile tool that allows individual users to delete the cell that contains no data.
If you are preparing a worksheet, that contains only empty` rows, don’t worry – you can remove the blank rows with a simple step. This guide will show you two effective ways to remove blank rows in Excel. So, without further ado, let’s begin!
Ways to Remove Empty Rows in Microsoft Excel
We have mentioned two ways to remove blank rows from the Excel worksheet. Let’s take a look at them.
1. Remove All Empty Rows in Excel
Does your database contain empty rows in Excel and want to delete them? If so, then you can remove all empty rows effortlessly. This means you don’t need to delete the rows manually. You can remove the rows with just a click. Here’s how to do it.
- Launch Microsoft Excel and open the spreadsheet for which you want to delete empty rows.
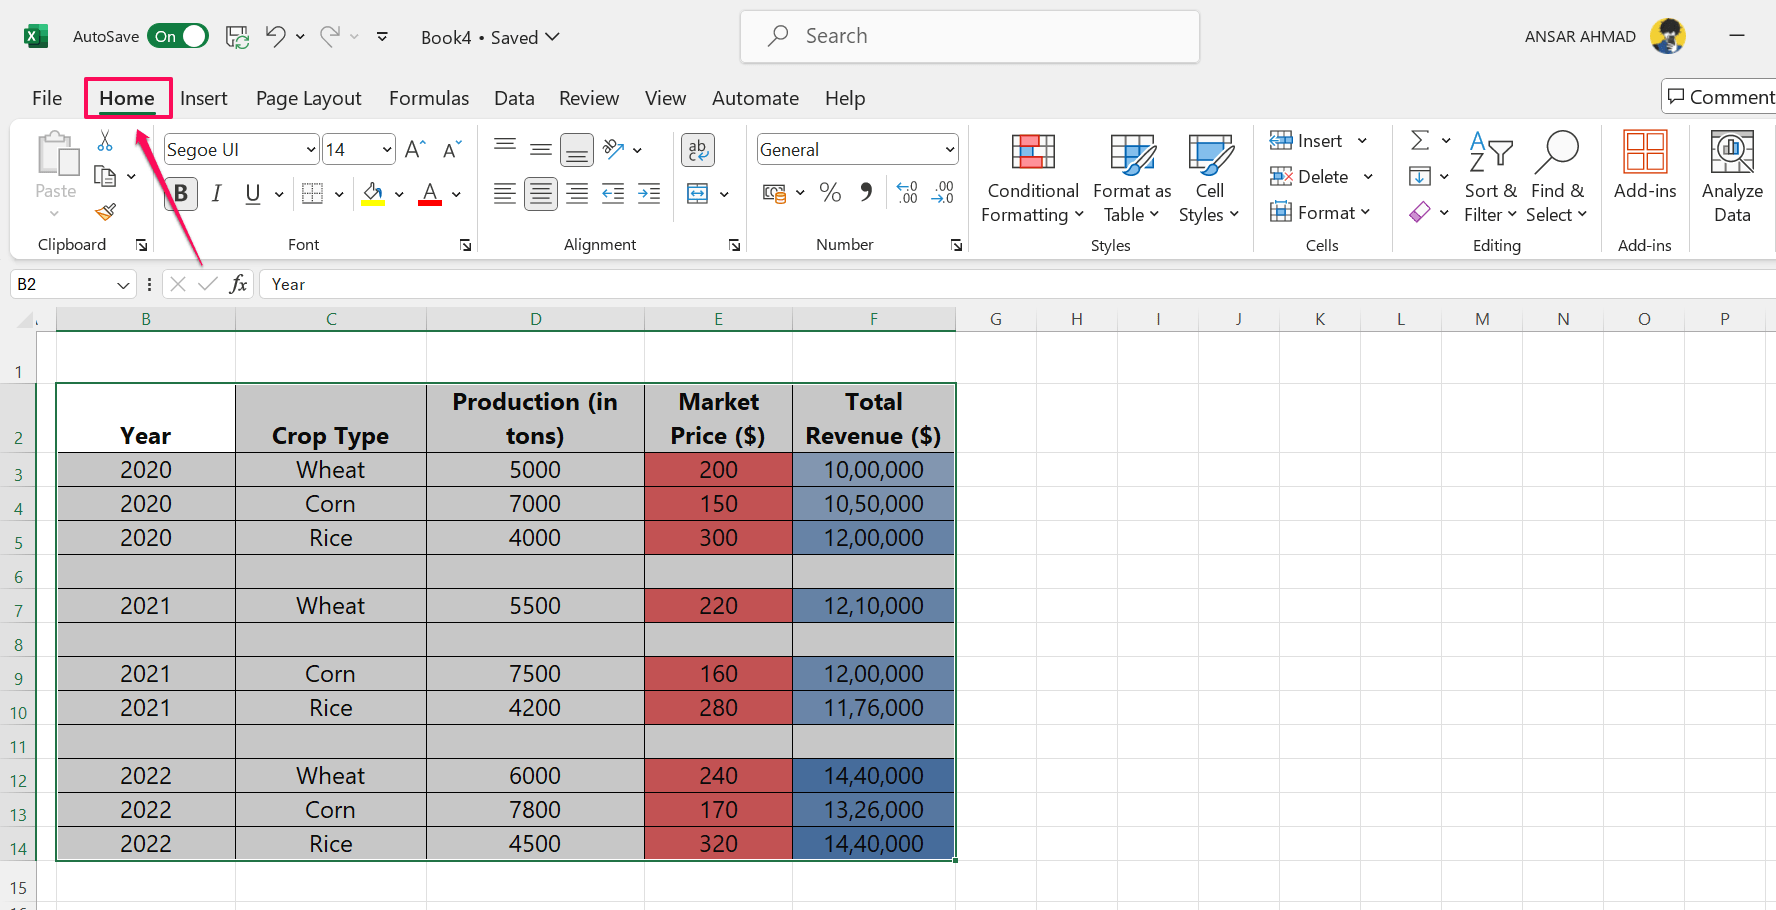
- Select the database by dragging the cursor. Then, click on the “Home” tab in the ribbon.

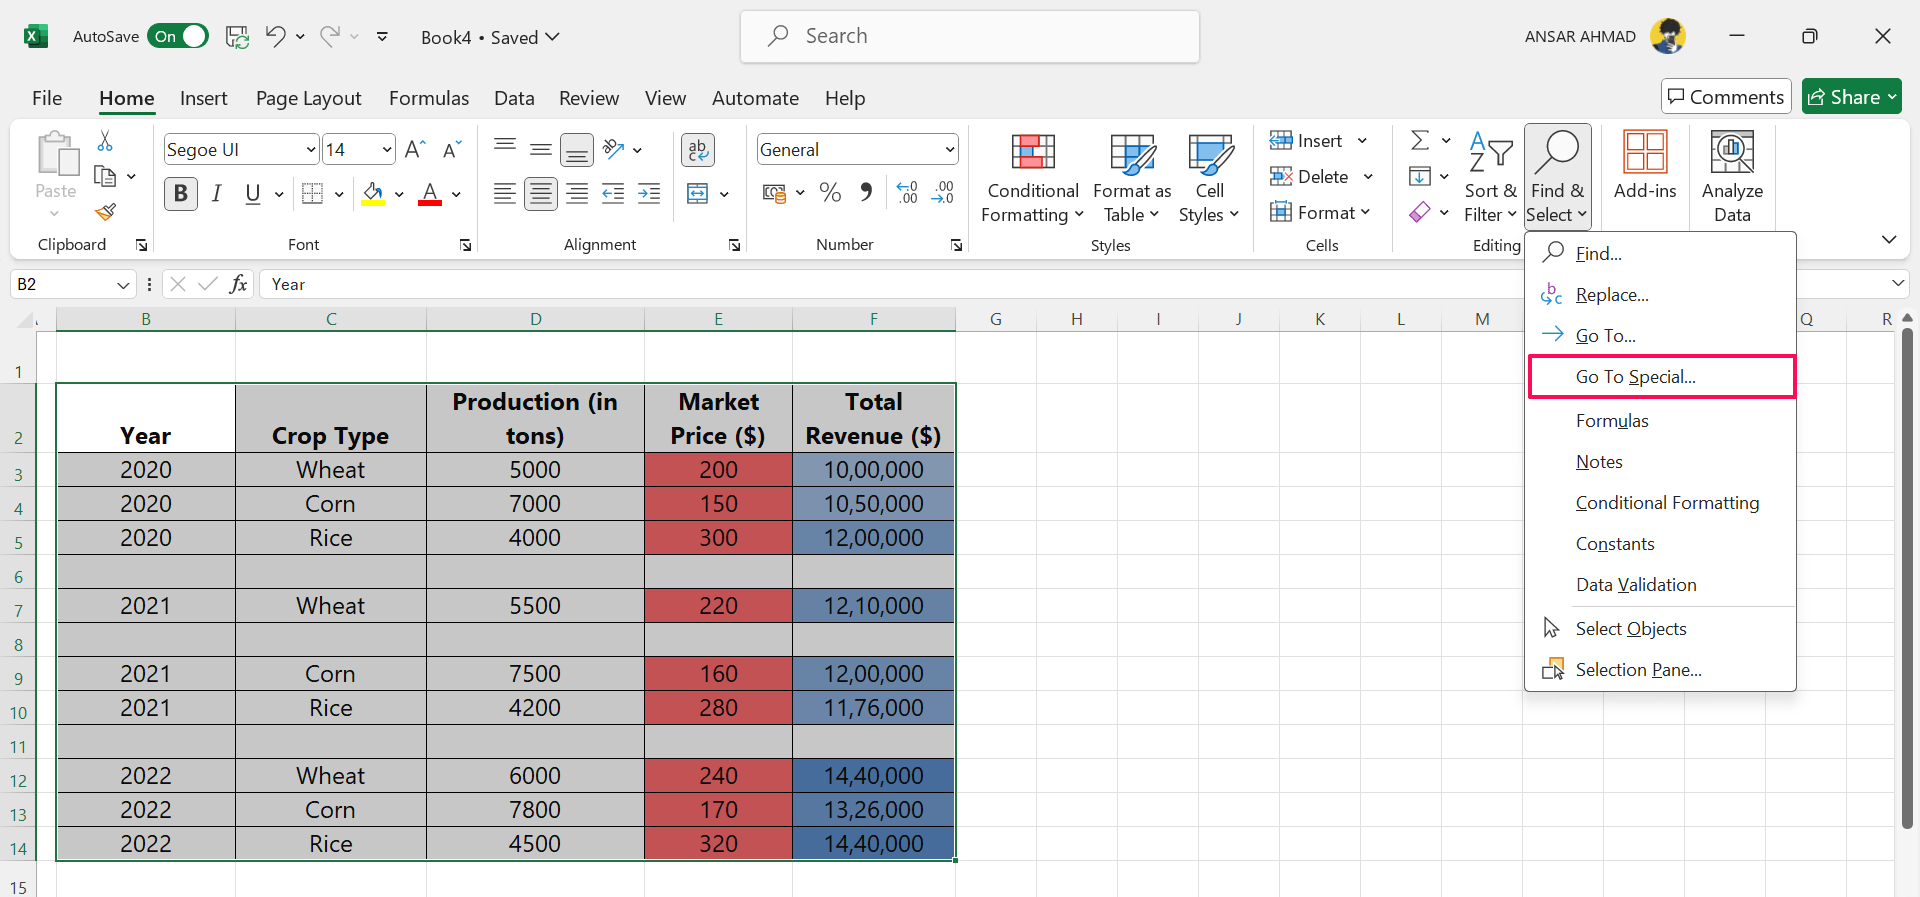
- In the “Editing” section, click on the Find & Select drop-down menu and choose “Go to Special.”

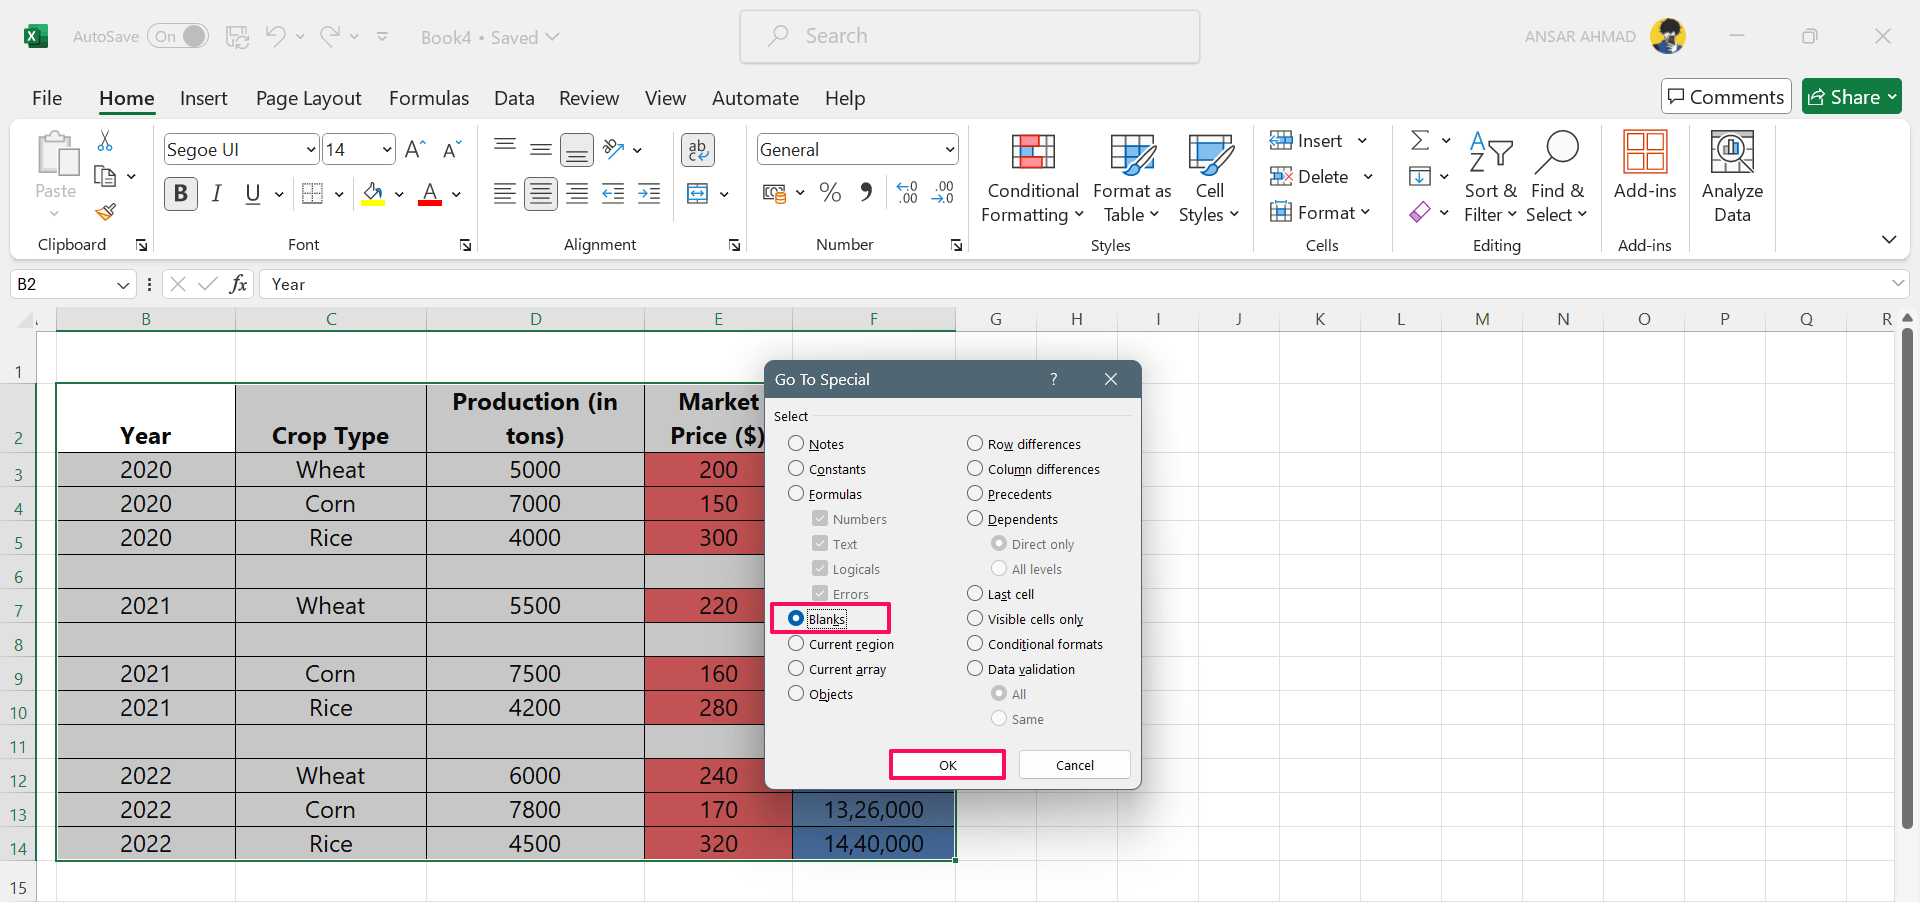
- In the Go To Special window, check the “Blanks” and click OK located at the bottom.

- Here, you will see that all the empty rows are selected and highlighted.
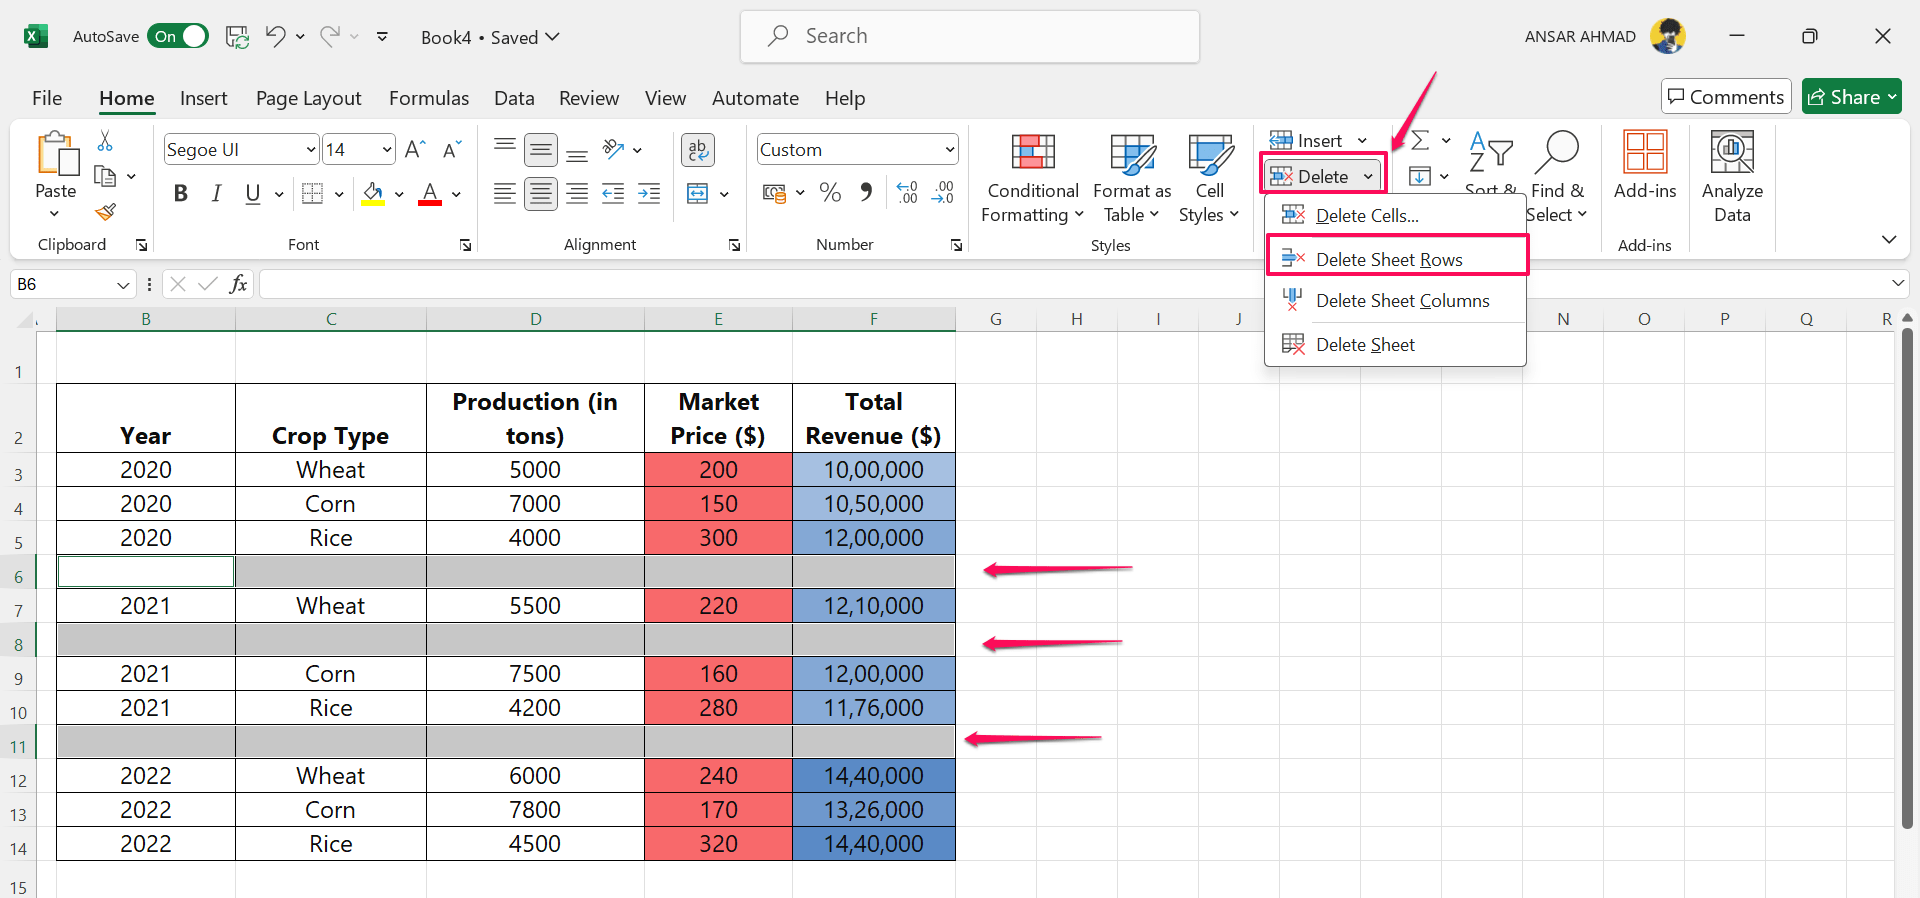
- Click the “Delete” drop-down menu from the Cells section to delete the blank rows.
- Then, select Delete Sheet Rows.

- Now you may see that Excel has removed your blank rows and your data is shifted to upward.
If you accidentally deleted a row containing data, you can bring it back by pressing the Ctrl + Z (Windows) or Command + Z key (Mac). This will recover the deleted cells and rows in the spreadsheet.
2. Remove a Few Blank Cells Manually
If your database is not larger and contains a few empty rows, you can also remove it. You can remove a few blank cells manually. Here’s how to do it.
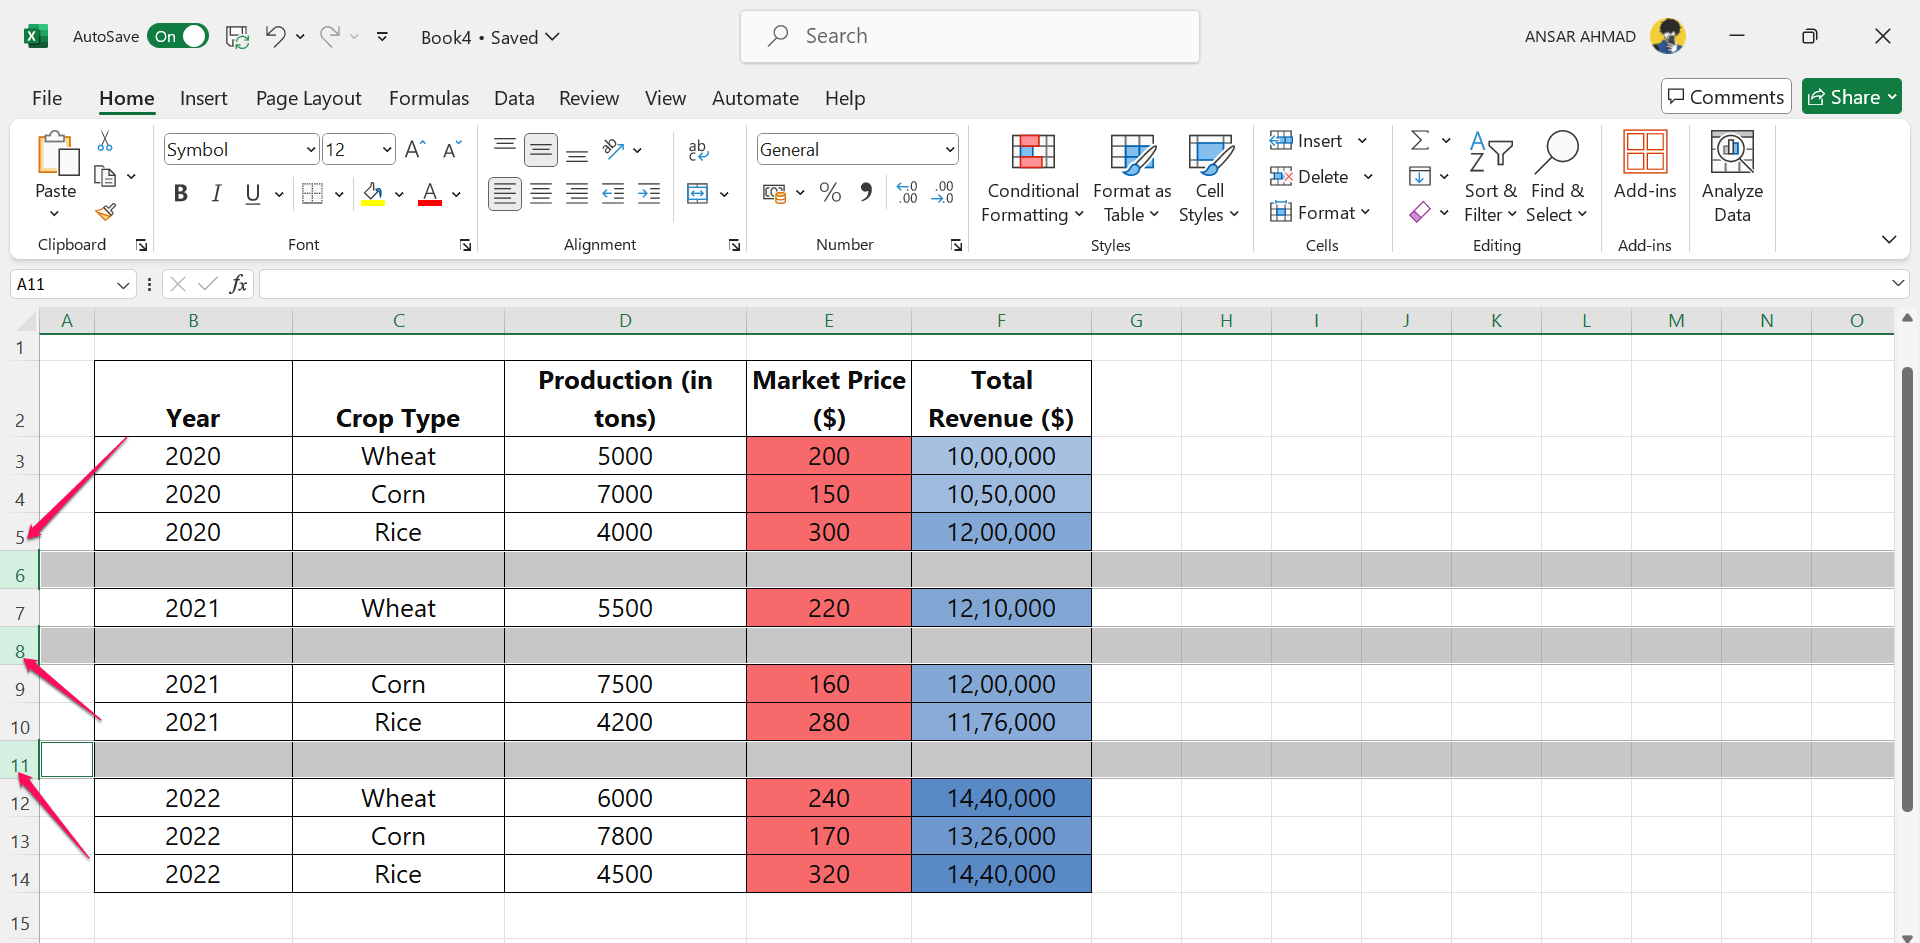
- In the Excel spreadsheet, click on the row numbers located on the left side that contain only empty rows.
- If more rows are empty, select the row by pressing and holding the Ctrl key (for Windows) or Command (Mac). Then click the row numbers you want to select.

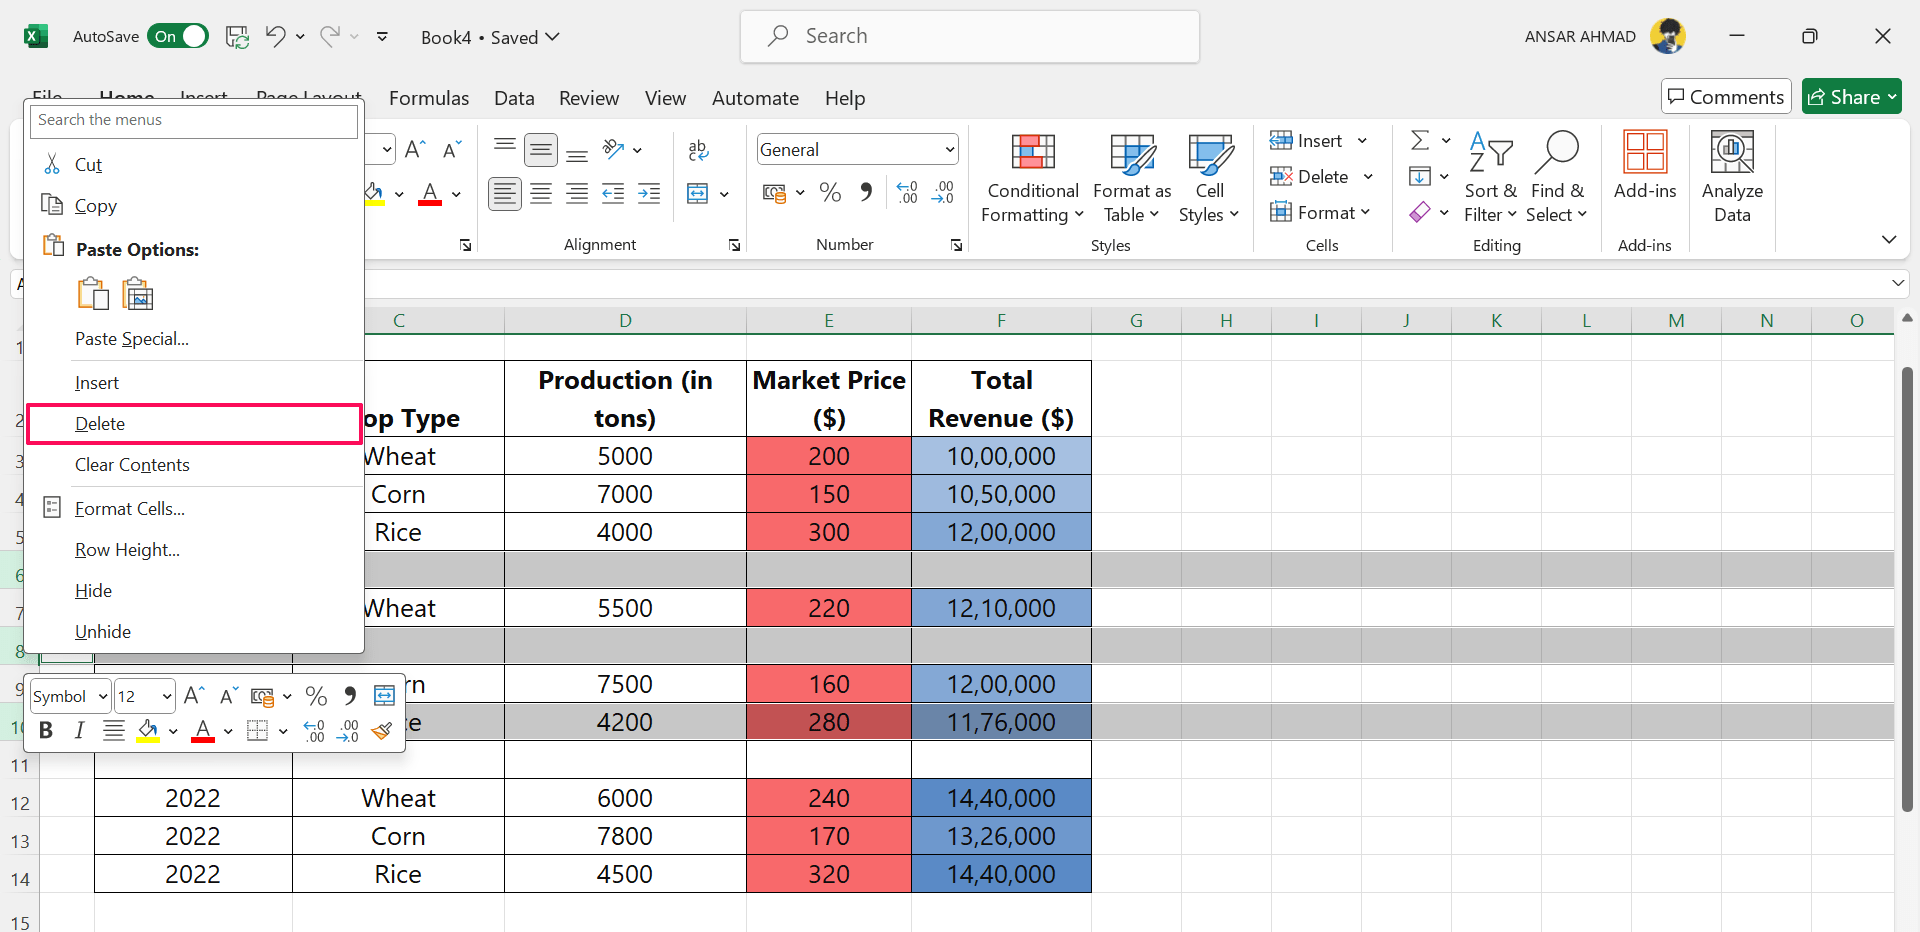
- Once you select the empty rows, then right-click on any blank row number and select the “Delete” button in the menu.

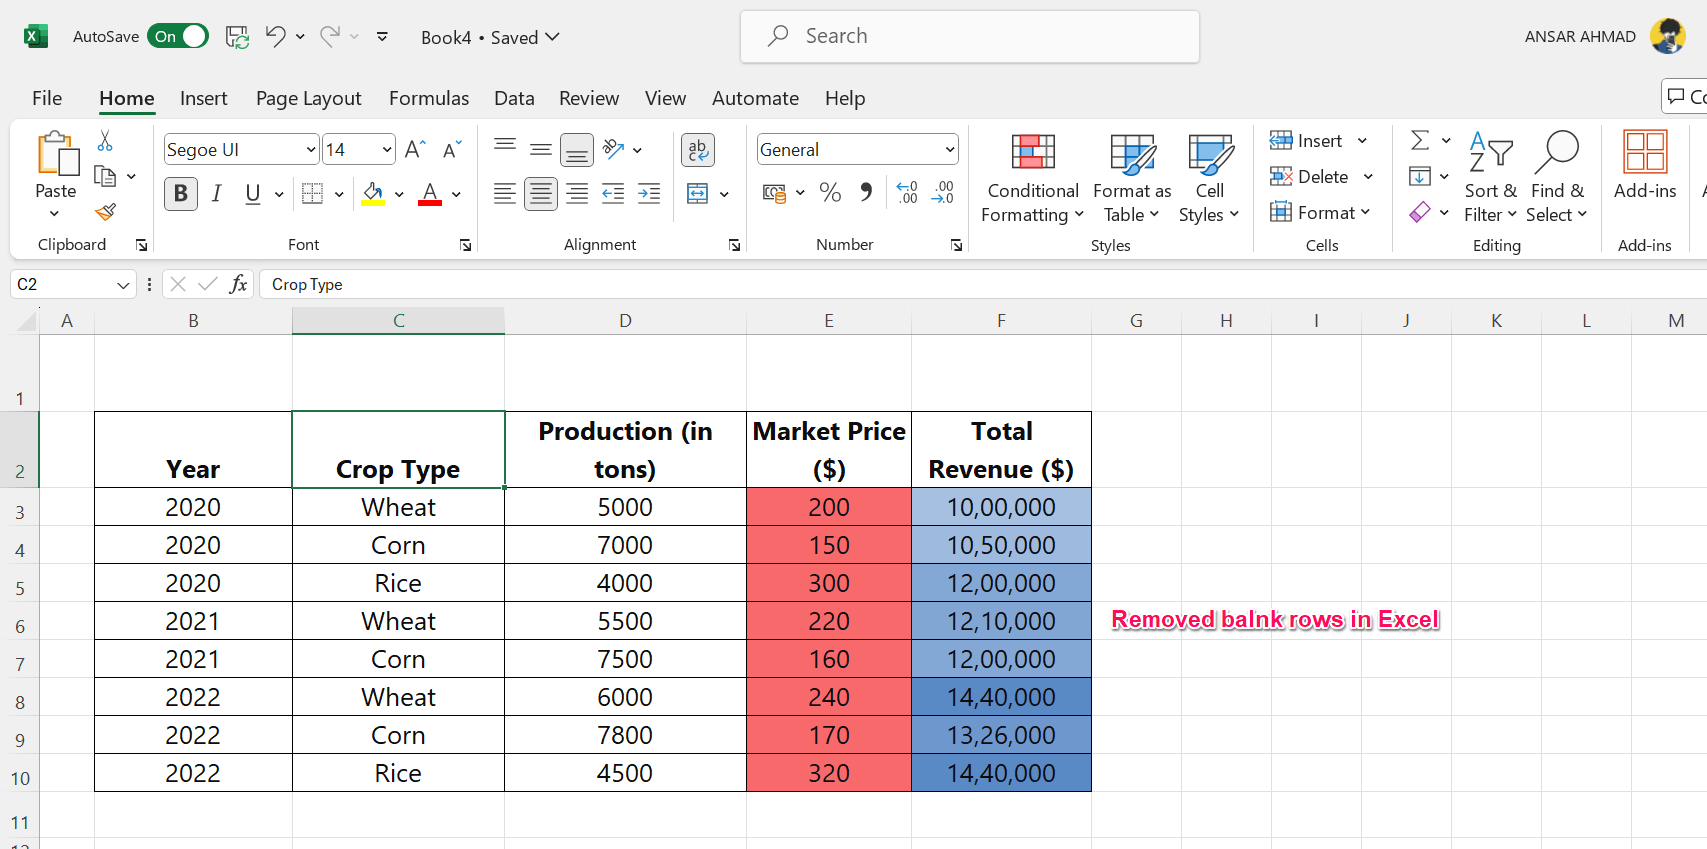
- Now you may notice that all your selected rows are removed from the spreadsheet.

Conclusion
That’s it. This is how you can easily remove blank rows in Excel. It is essential to delete unnecessary and blank rows or cells in the worksheet to give a minimal look, especially when preparing the sheets for an organization or school. We have outlined two different ways to remove blank rows in a spreadsheet. I hope you have found this guide helpful.
If you've any thoughts on How to Remove Blank Rows in Excel, then feel free to drop in below comment box. Also, please subscribe to our DigitBin YouTube channel for videos tutorials. Cheers!
