PAGE_FAULT_IN_NONPAGED_AREA is a Blue Screen of Death (BSOD) in Windows 11. The operating system stores the temporary data in the memory and storage drives. The error code 0xCD3DD628, 0x804EFC9A, and 0x00000050 is an indication that there is a serious problem in the machine. We have compiled a list of viable solutions that counters hardware and software-related solutions in Windows 11 machines.
What is PAGE_FAULT_IN_NONPAGED_AREA in Windows 11?
The operating system is designed for the average consumer but it is a combination of multiple components and software sequence. NONPAGED AREA plays a crucial role in functioning the system and I have listed a few numbers of reasons below.
- The Windows system stores active program data, background processes, and other activity data in the NONPAGED AREA. The system crashes when the temporary data is not found and you have PAGE_FAULT_IN_NONPAGED_AREA error on the screen.
- Random Access Memory (RAM) is the main culprit here and it could be faulty.
- Windows stores temporary data in the hard disk (HDD) or solid-state drive (SSD). The temporary stored in the storage drive is inaccessible and it leads to the system crash.
Restart your PC for a day and that will resolve the issue instantly.
Win 11 is the latest edition and the manufacturers need a lot of time to release stable drivers, software, and tools. You should apply the solutions if the problem is persisting regardless of updating the quality and features packages from Microsoft.
1. Storage Drive Health Status
Storage drives degrade over time and it’s a common phrase that all internal components go through. We have to put the hard disk or solid-state drive on the testing path and find out if they are fit to take on the day-to-day tasks.
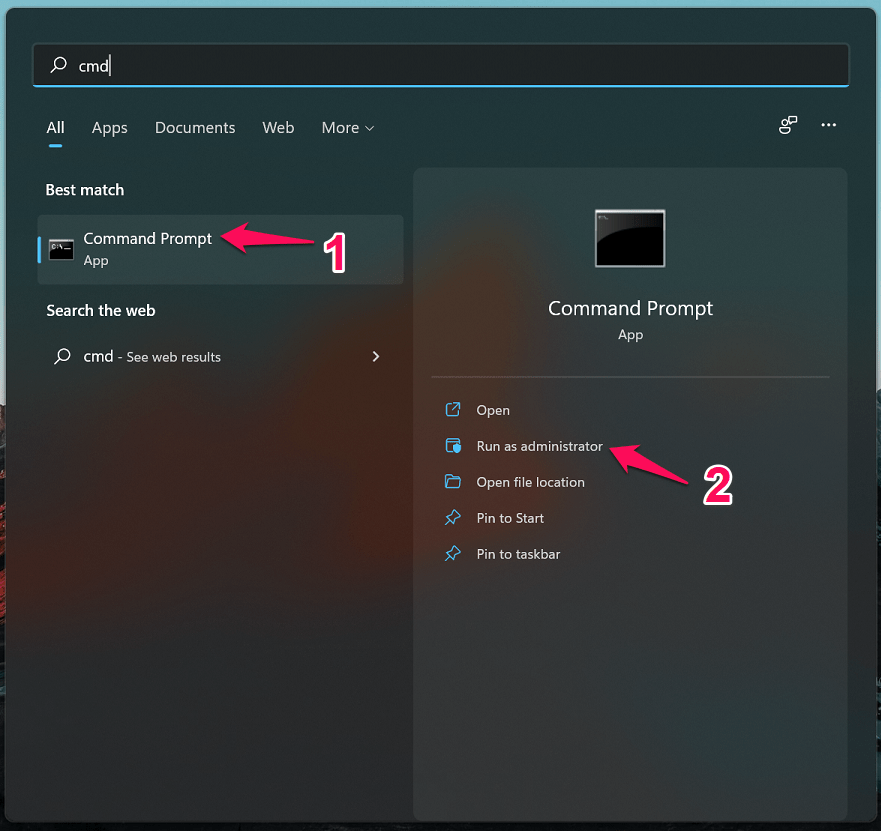
1. Open Command Prompt as administrator and you can use the search bar to locate it.
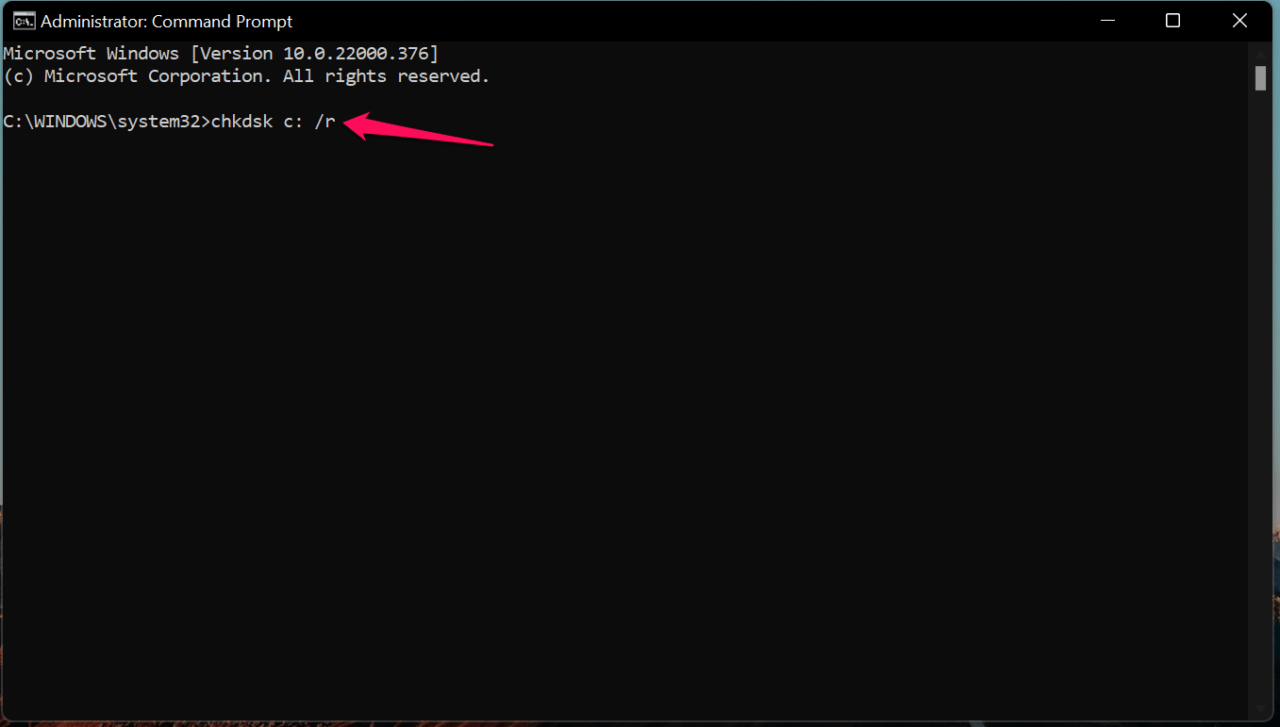
2. Type the command chkdsk c: /r and press the Enter key.
3. Type “Y” and press the Enter key.
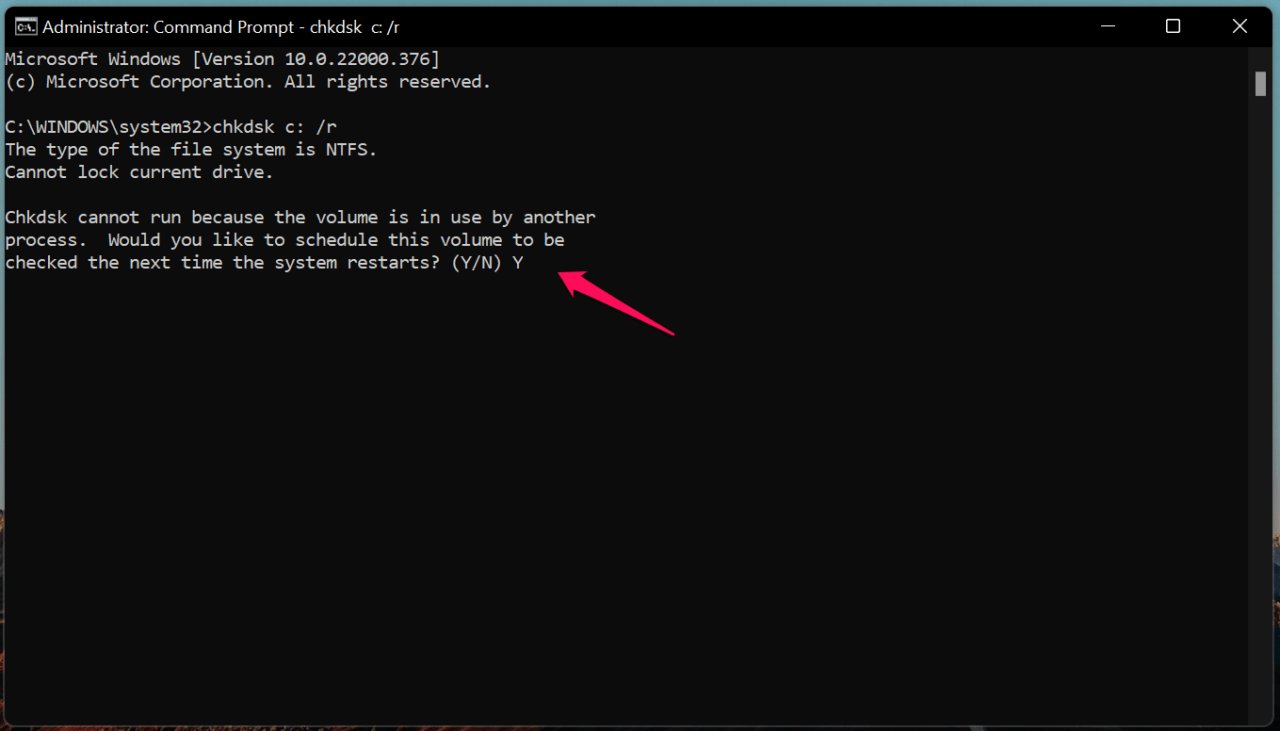
4. The volume will be scanned upon restarting the machine.
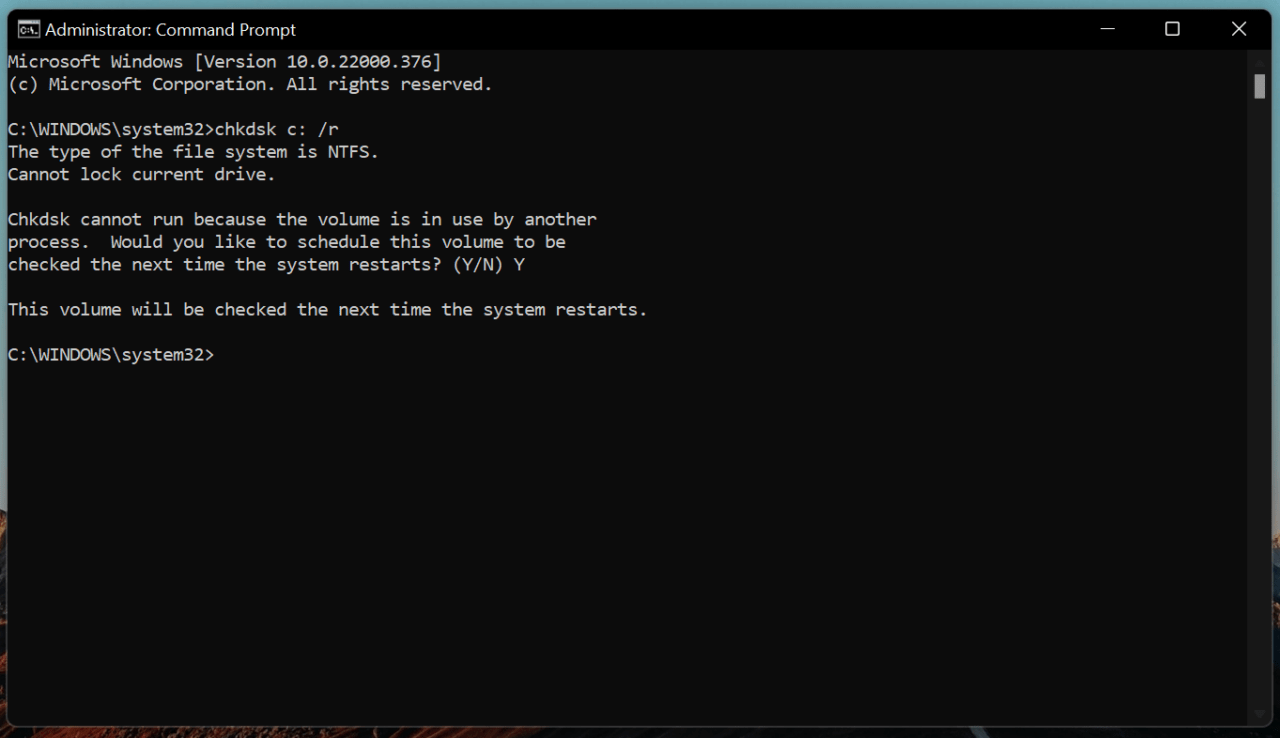
5. I have two partitions in the system and “D” is the second partition volume letter.

6. Type chkdsk D: /r and you have to replace the drive letter with yours.
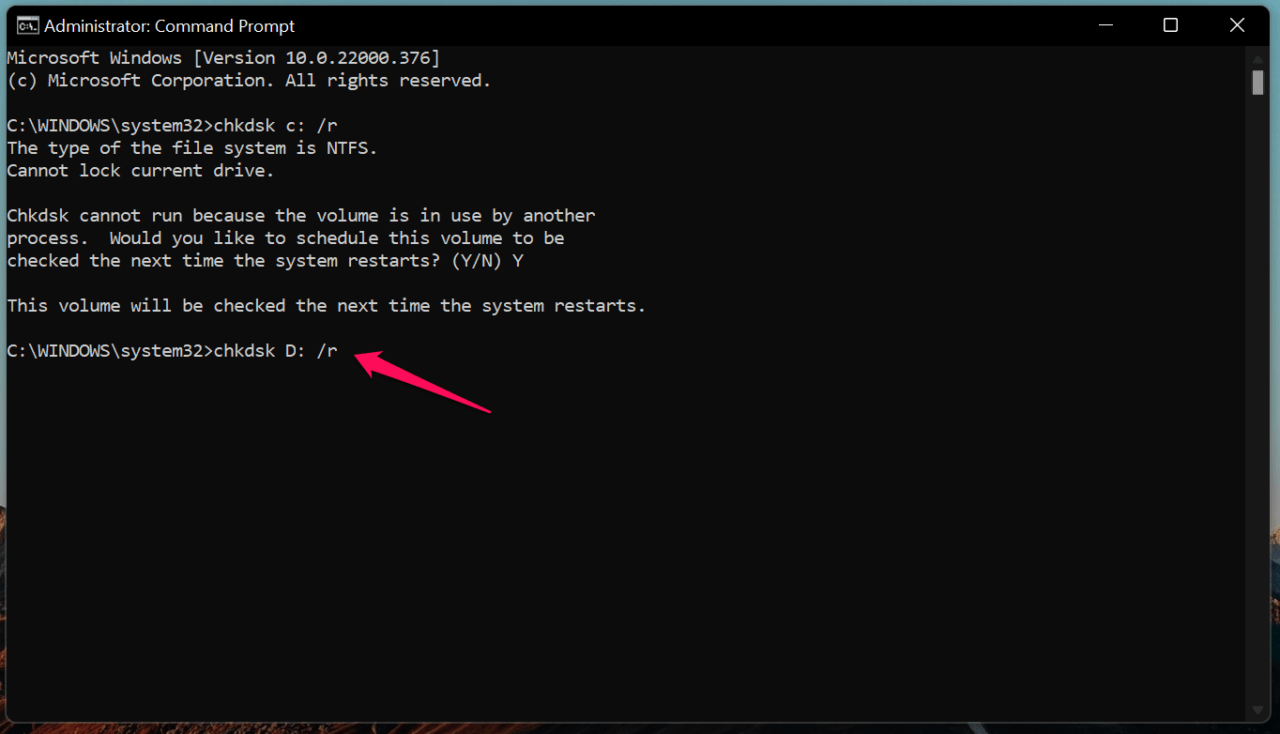
Press the Enter key.
7. Wait for the system to test the entire volume.
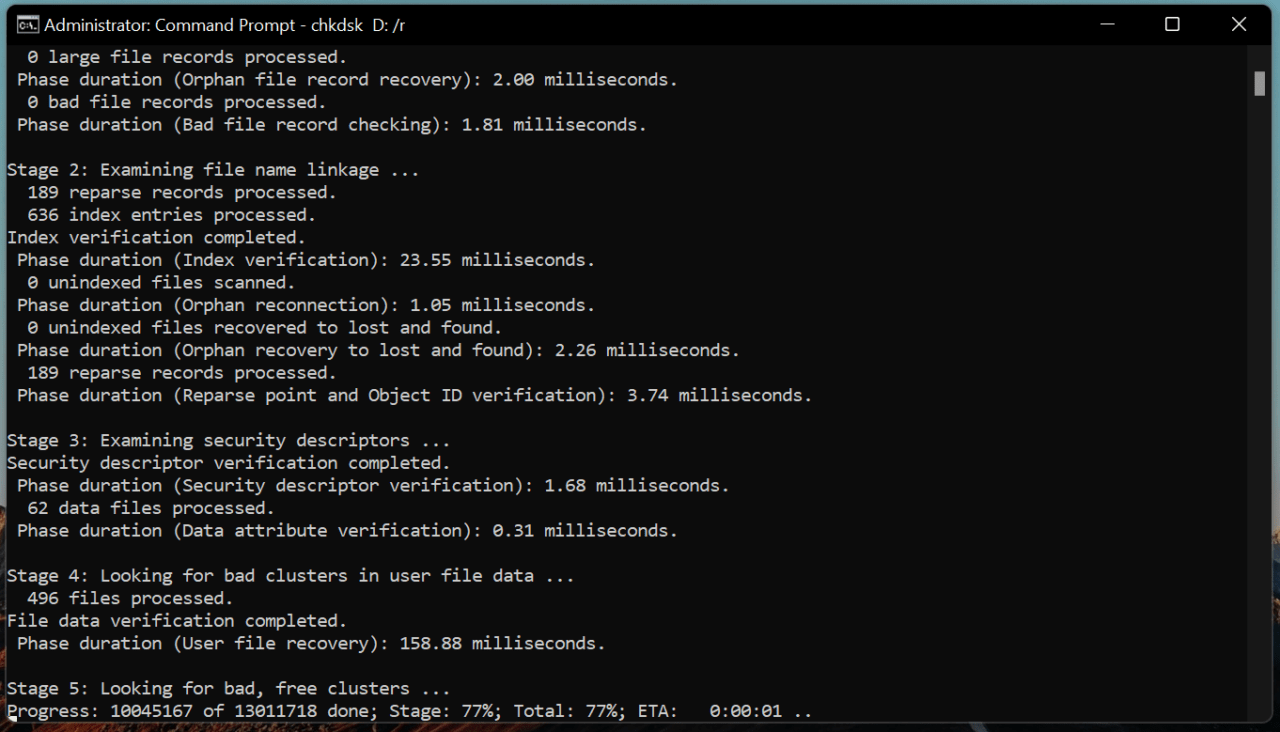
8. The scan results have come out and the volume is healthy.
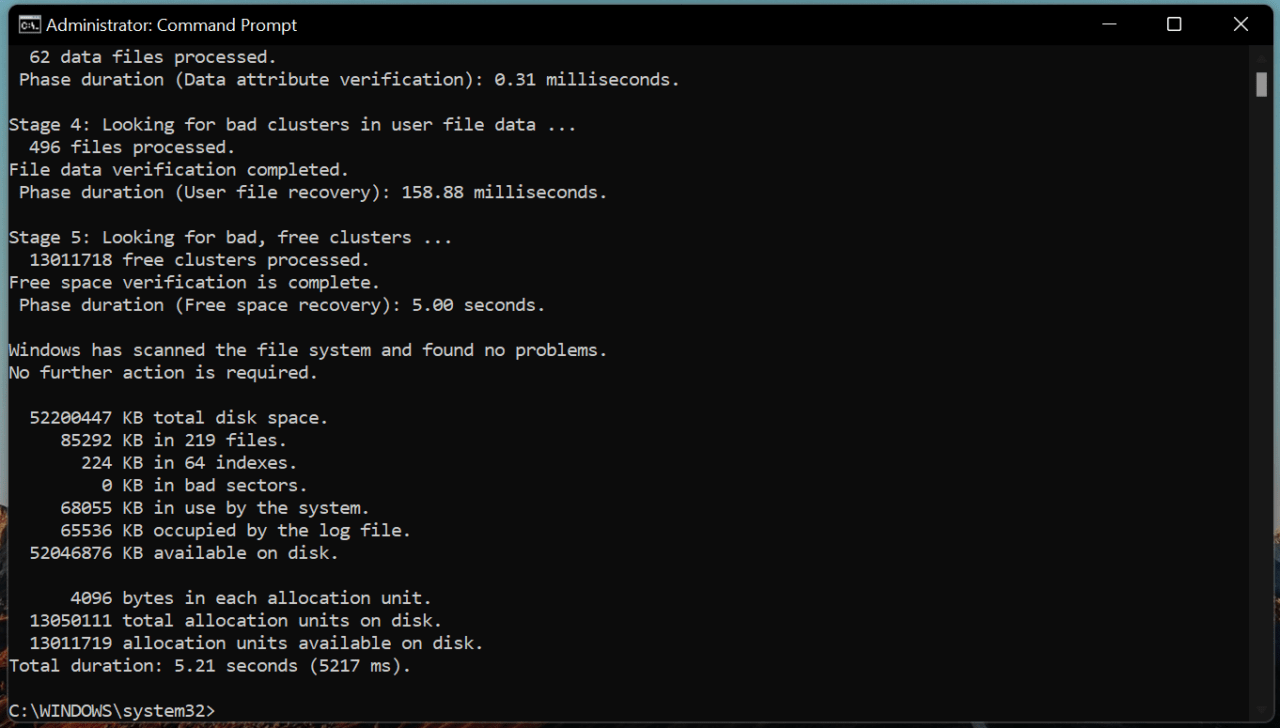
Windows will run a few tests when you restart the PC, so do not force shut down or pull the power cable from the socket. The command prompt couldn’t conduct the C drive because Windows is running on it.
2. Memory Module Health Status
You cannot ignore the RAM module at this point. Windows stores the NONPAGED FILES in RAM and that’s our next suspect. We will run a two-step test on the memory module and it will reveal the hardware component remaining healthy. We don’t have to look for a third-party tool to conduct the tests and have Windows inbuilt tool to carry out the test instead.
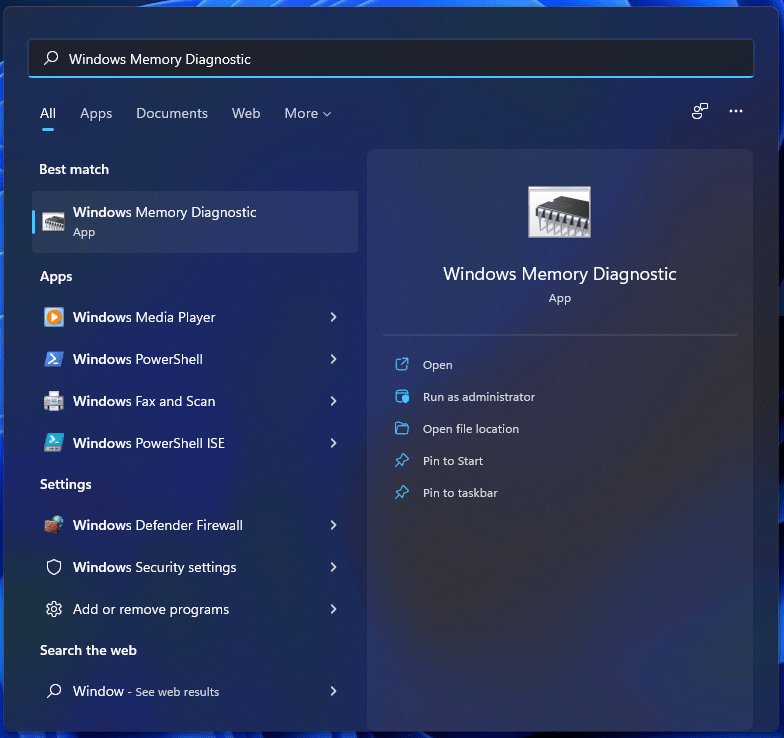
1. Open “Windows Memory Diagnostic” from the search bar.
2. The tool shows up on the screen. Click on the “Restart now and check for problems (Recommended)” option.
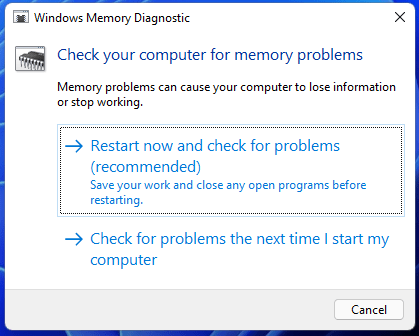
Note: Windows requires the RAM module to be in an inactive state, so make sure to save the background work.
3. Your PC restarts instantly and the memory testing sequence begins.
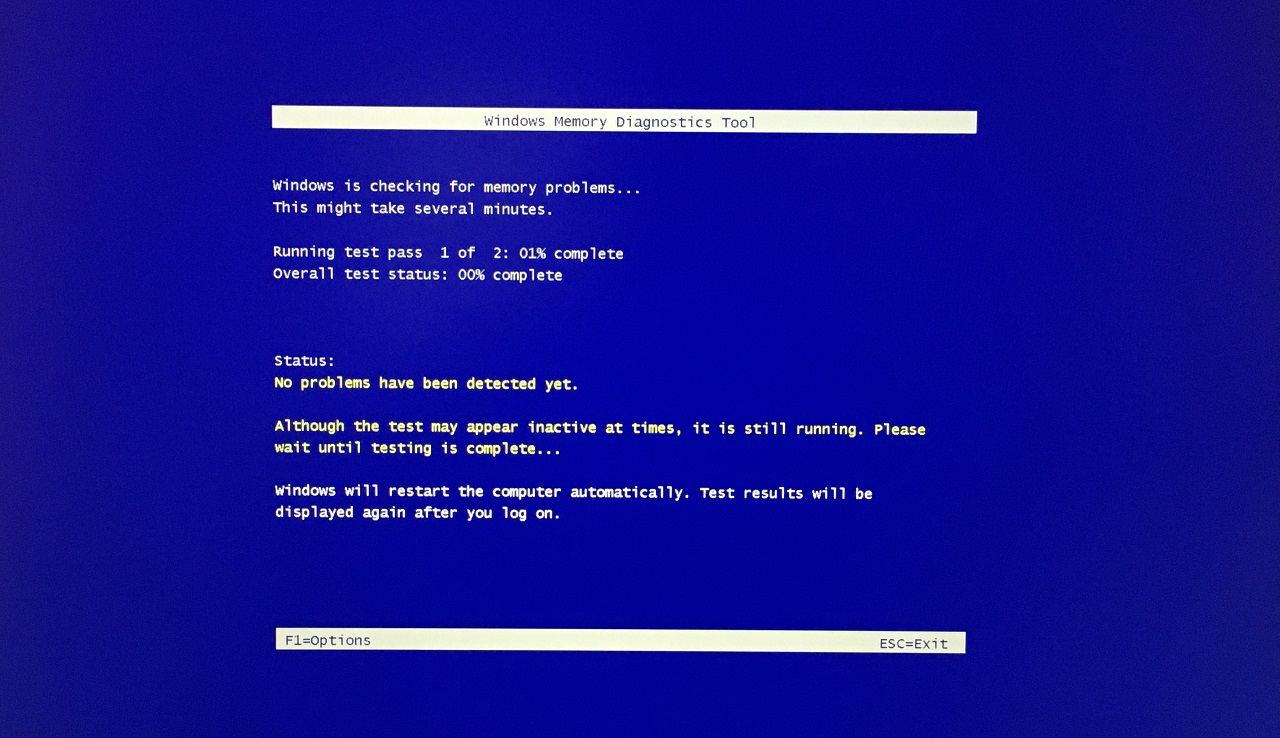
4. You have to wait for the second testing phase to complete.
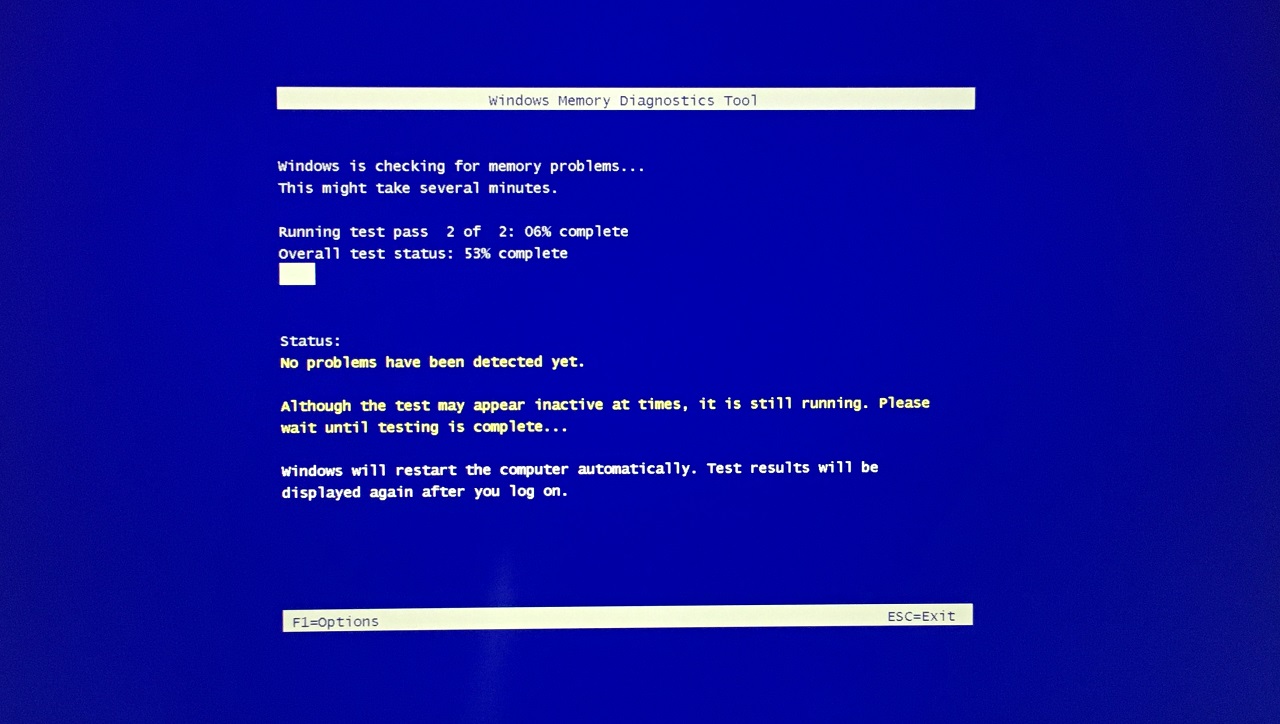
The entire memory testing process takes 30 minutes – 45 minutes to finish. Do not force shut down the machine and let the scanning finish from 0% o 100% for the sake of the hardware. Of course, the Windows PC will notify you whether there is a problem or the RAM module is healthy and in good sound.
3. Update Motherboard Drivers
You can rely on Windows Update to automate the process, but I recommend everyone to step up and install new drivers in the system. Let me show you how you can download drivers from the manufacturer’s official website.
Note: Create a restore point before uninstalling and installing the new drivers.
1. Open browser.
2. Type laptop/desktop motherboard model number in the search engine.
3. Open the official product listing page.
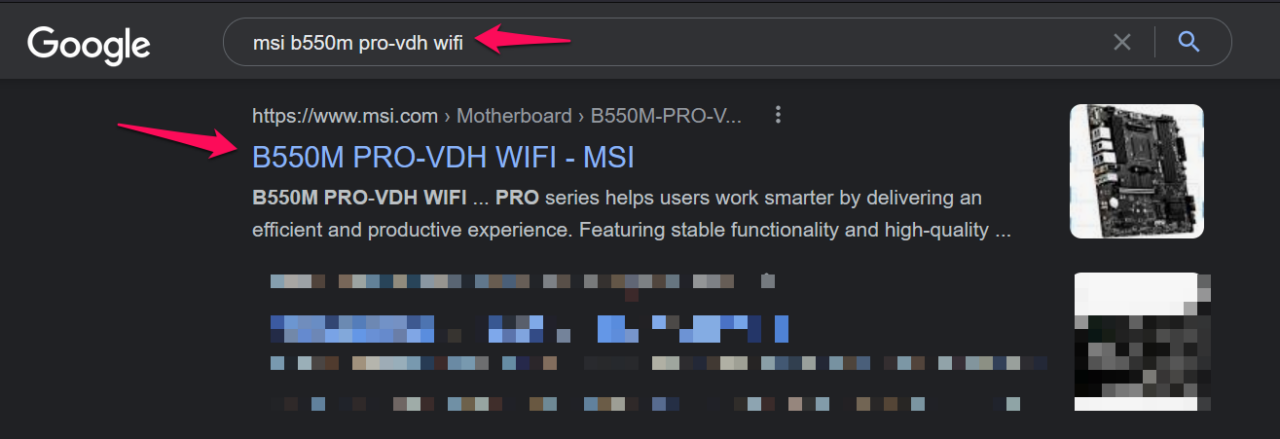
4. Choose the support or driver’s page.

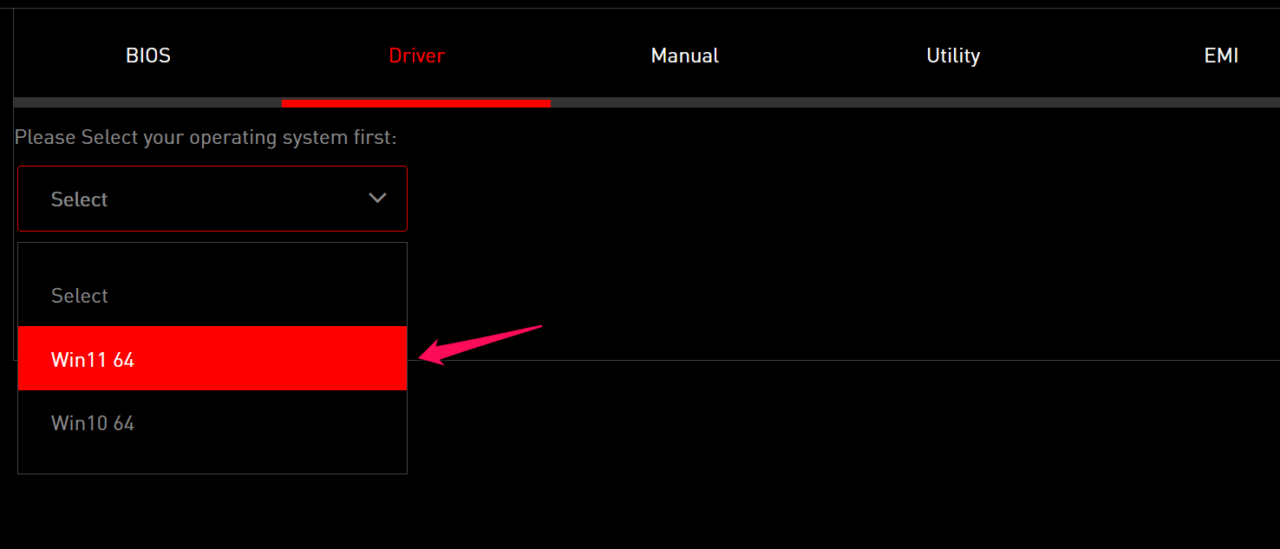
5. Choose the operating system.
6. Download all packages from the support page.
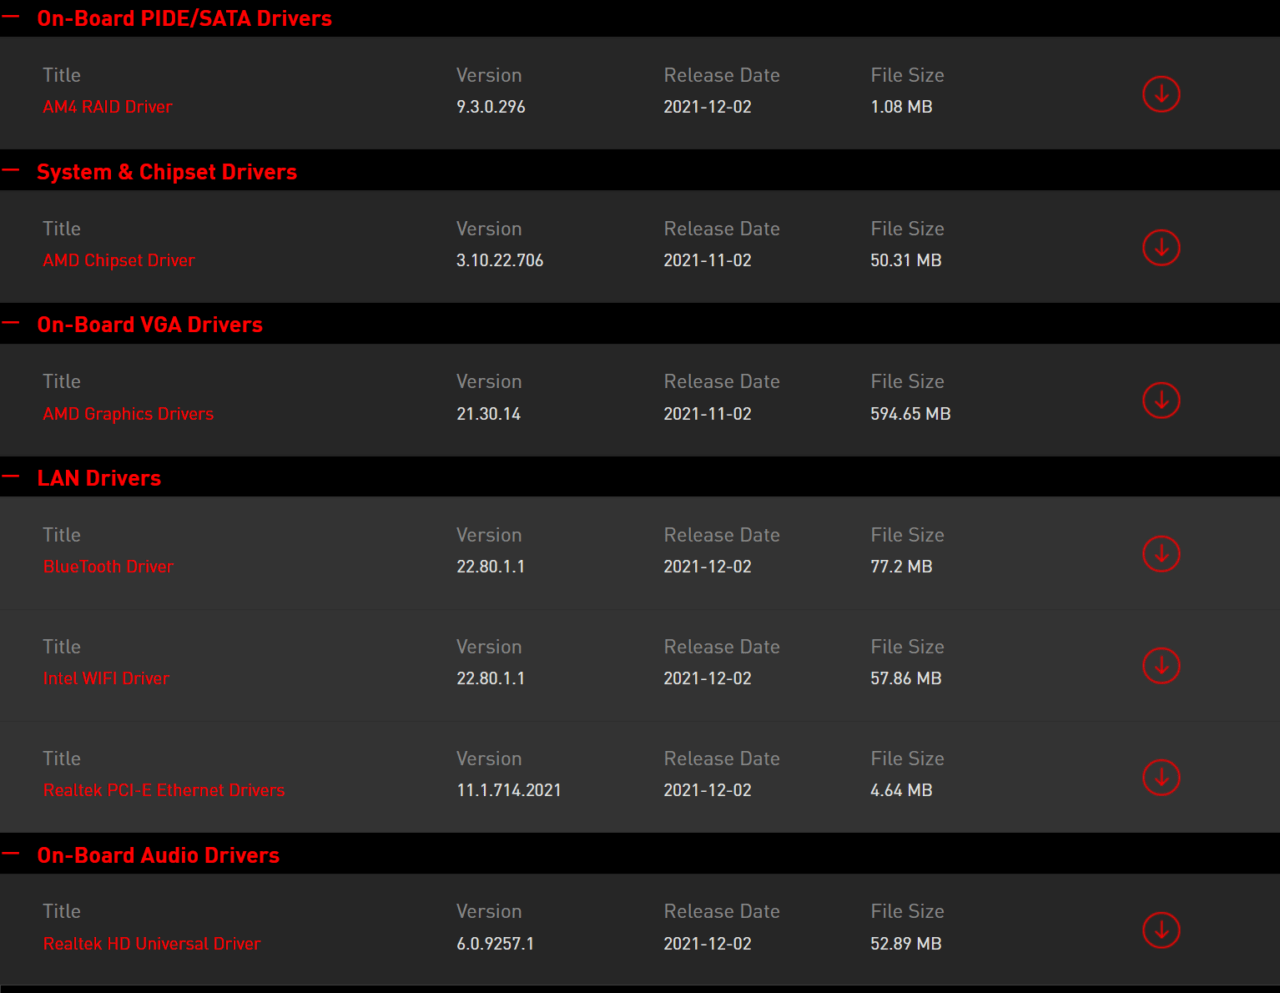
Uninstall every driver from the Windows machine and reinstall it manually, so there is no space for mistakes. Of course, you can choose to rely on Windows Update since it was designed to automate the process.
4. Install Quality & Feature Updates
Microsoft removed the option to opt-out from Windows operating system updates and they have started to force the users to install the newer updates. The frequency has increased over the years and it is irritating millions around the world.
We understand that the cumulative and feature updates have a significant impact on the overall performance, but they should limit the frequency. Nonetheless, you should avoid missing cumulative and feature updates in the Windows 11 software.
1. Press the Start key and open the Settings app.
2. Click on “Windows Update“ located on the left side panel.
3. Click on the “Check for updates” button.
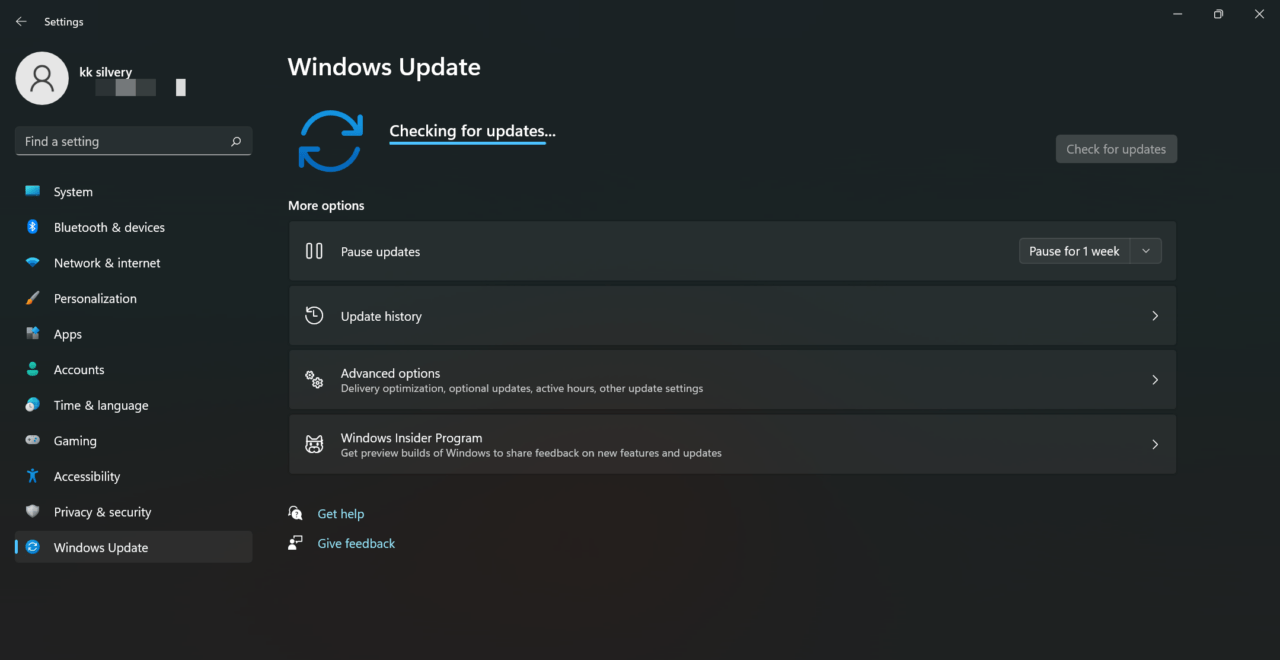
4. Click on the “Download” button.
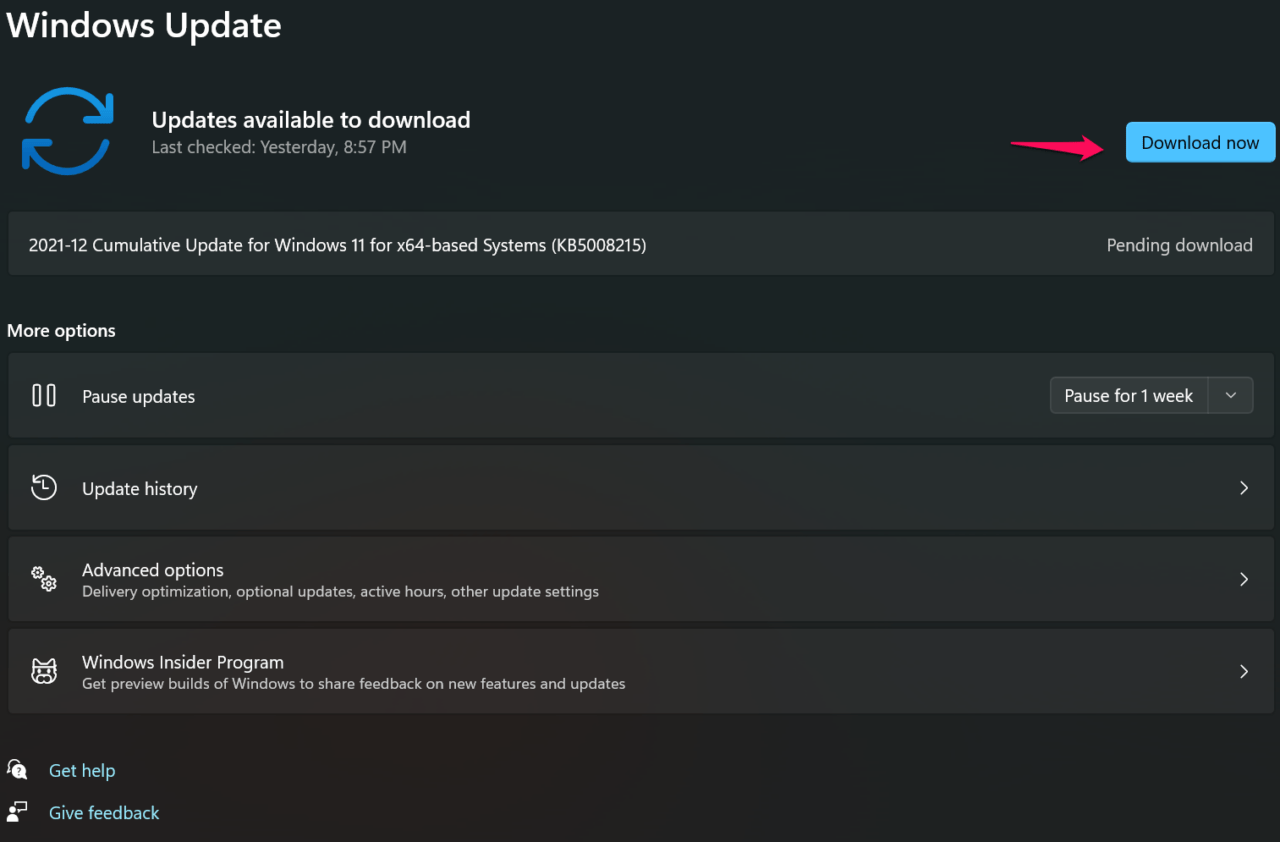
The software will reach out to the Microsoft servers and download the package, so be patient throughout the process.
5. The cumulative update was installed successfully in the Win 11 system.
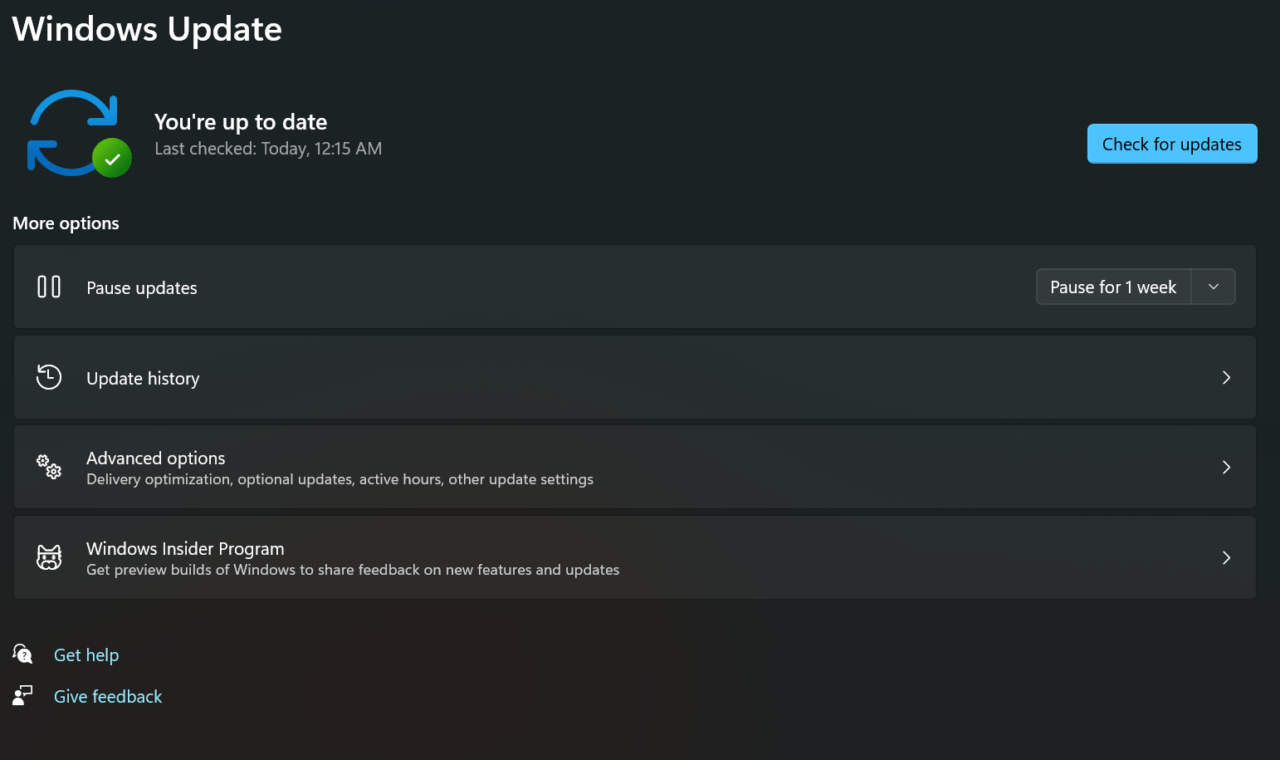
You shouldn’t miss the cumulative and quality software updates for the next year because they address multiple problems in the form of patch updates. Take time to create restore points for the time being and it will help you get back to an earlier point.
5. Troubleshoot Devices
Microsoft continued the troubleshoot feature in Windows 11 and you can use it to scan multiple devices. Take your time and scan peripherals, network adapter, wireless adapter, audio chip, etc. I will show you how to troubleshoot one device and spend some time checking the mentioned chips in the system.
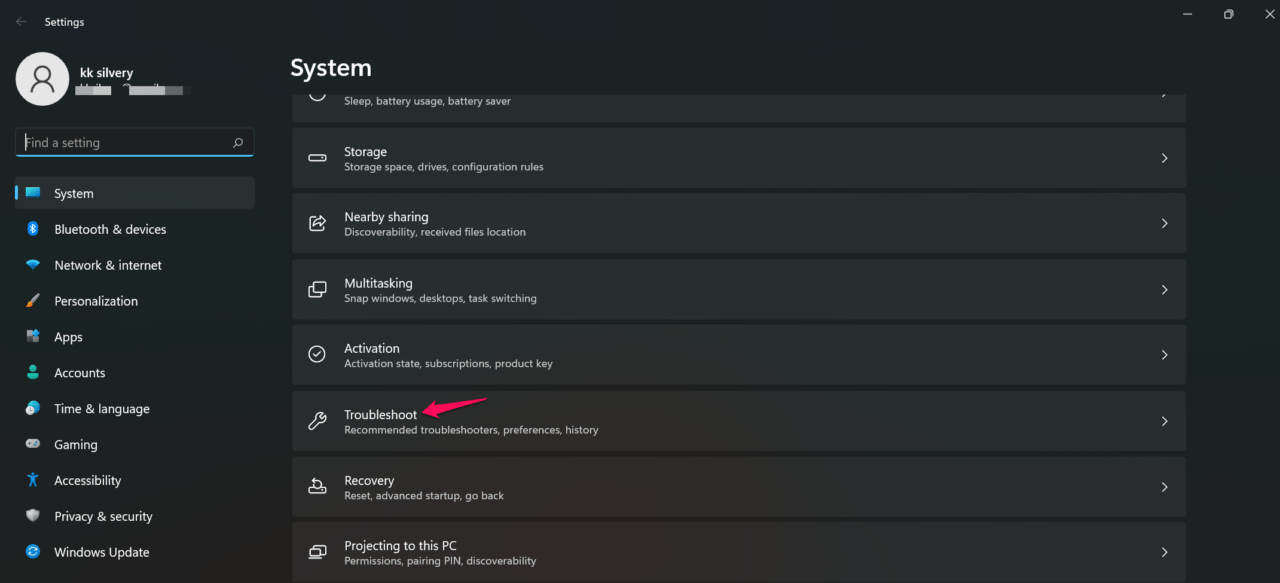
1. Open the “Settings” app.
2. Open “Troubleshoot” under the “System” menu.
3. Click on “Other troubleshooters” to continue.
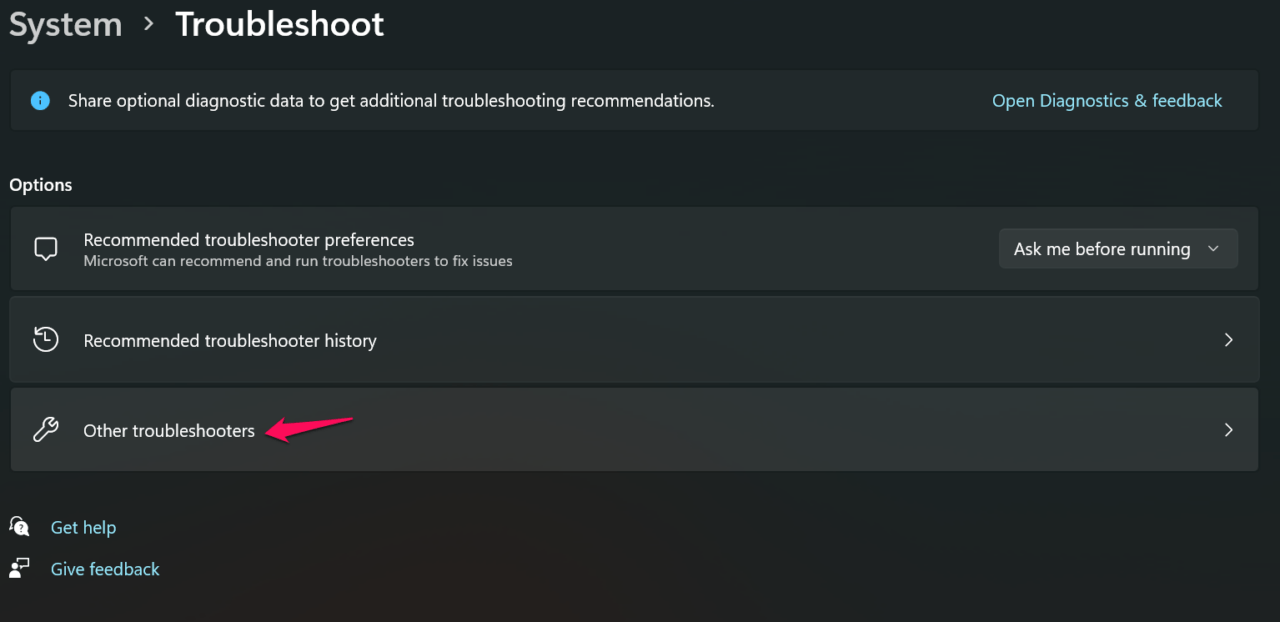
4. Find a device and click on the “Run” button.
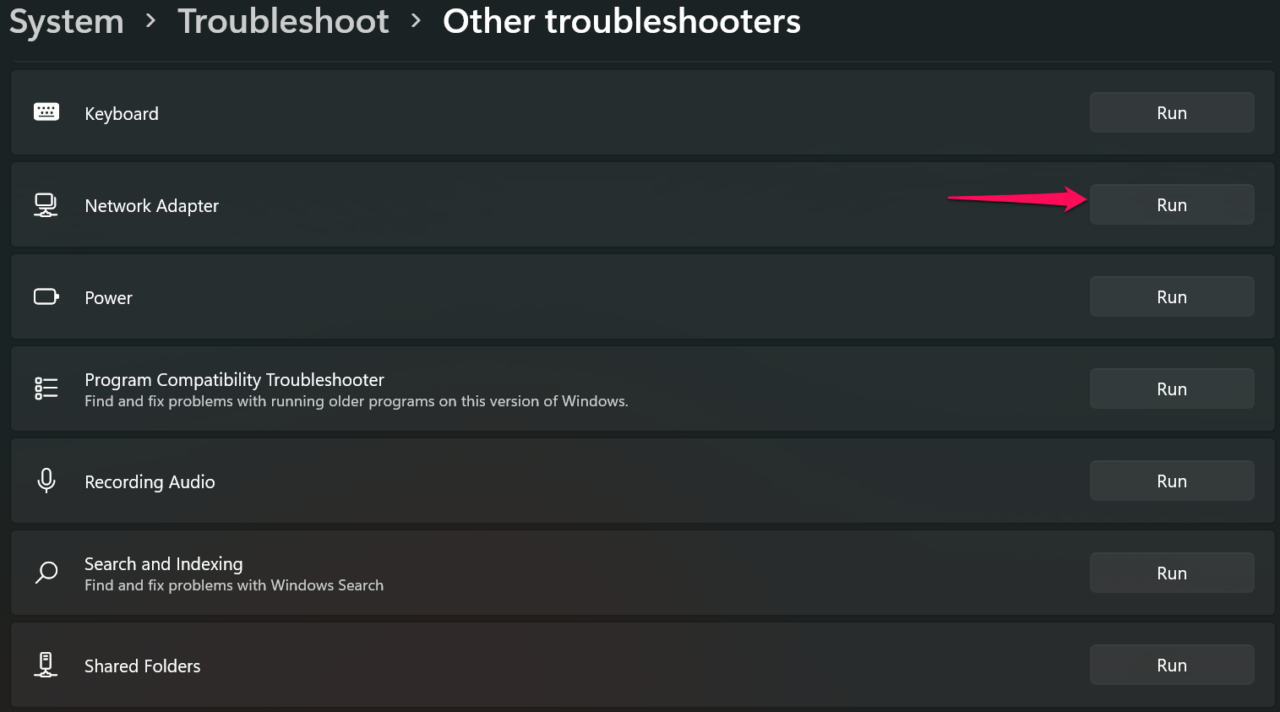
5. The troubleshoot window shows up on the screen and the diagnosis begins.
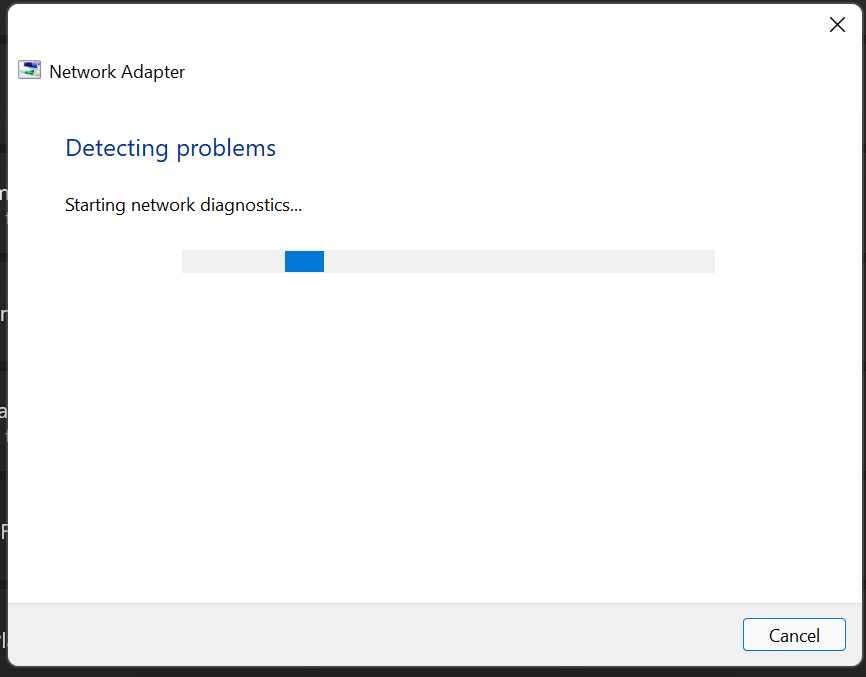
6. My device has no problems.
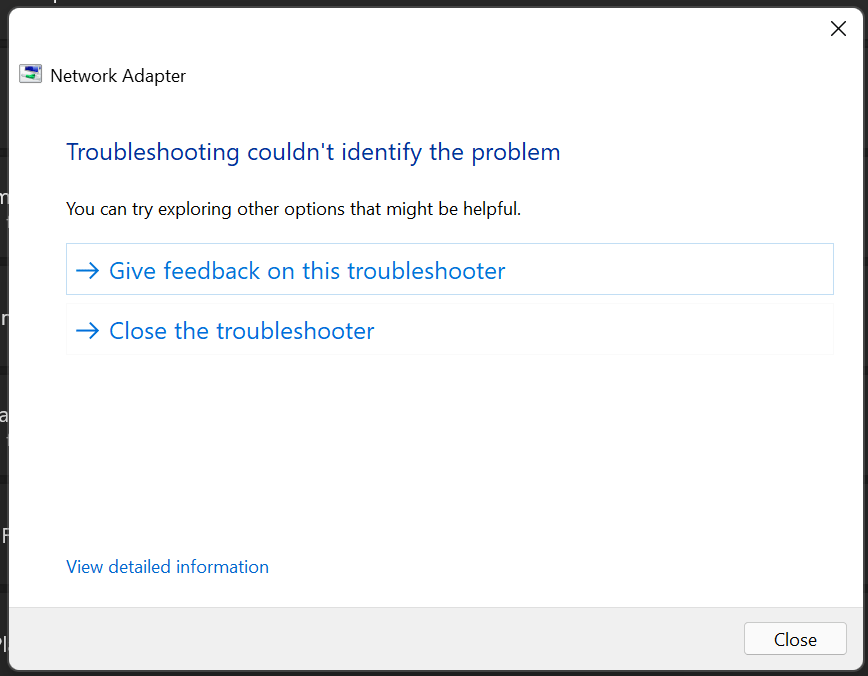
Scan all devices that I have mentioned above and find if they are working properly or not. Faulty drivers don’t work efficiently and they create problems from time to time and the troubleshooter exposes it.
6. Reset Windows
Windows has an option to reset the software and go back to original settings. Move the stored data in the external drive or cloud storage, so there is no risk of data loss. We don’t know if the software is corrupted or if you have installed an incorrect or modded driver in the system.
- Connect laptop/desktop to Wi-Fi or LAN network.
- Make sure the network is secure and doesn’t have any bandwidth limitations.
- Charge the Windows machine and keep it connected to the charging socket.
It’s time to reset the machine now that you are prepared for the task.
1. Open the “Settings” app.
2. Select “Recovery” under System.
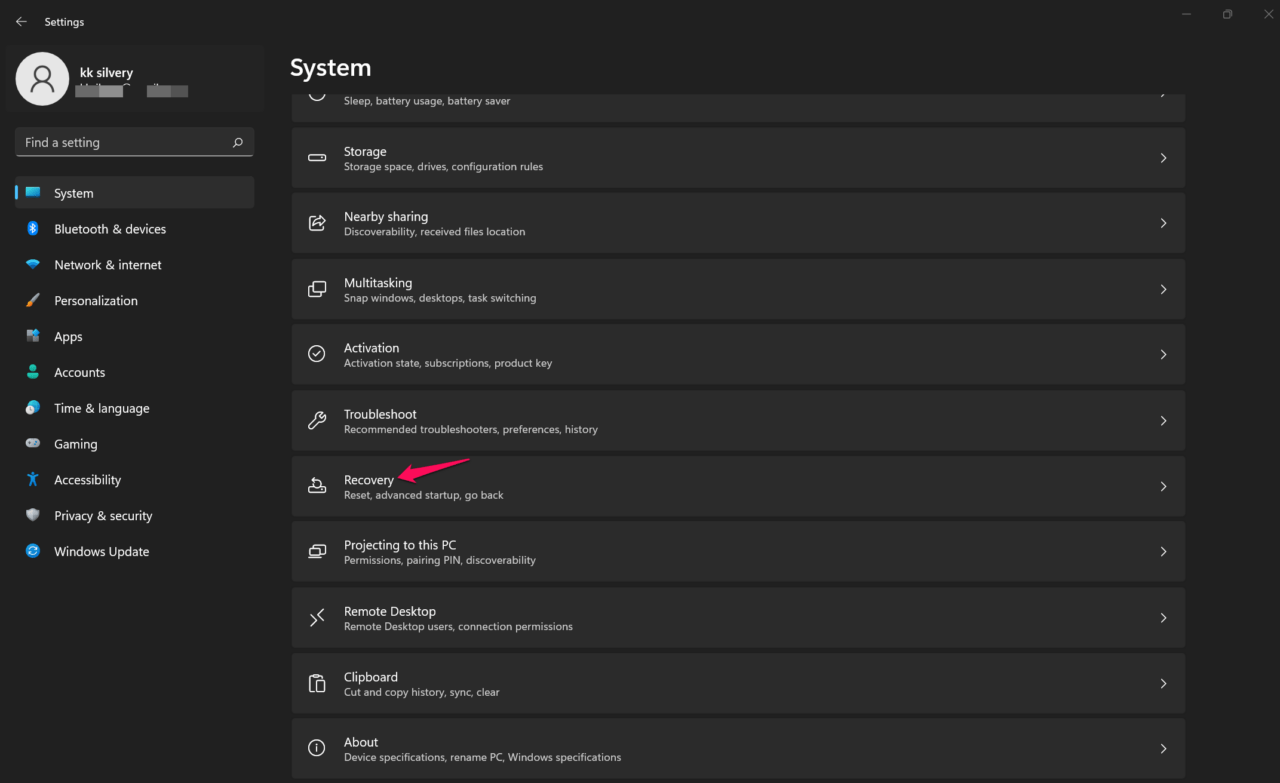
3. Click “Reset PC” from the options.
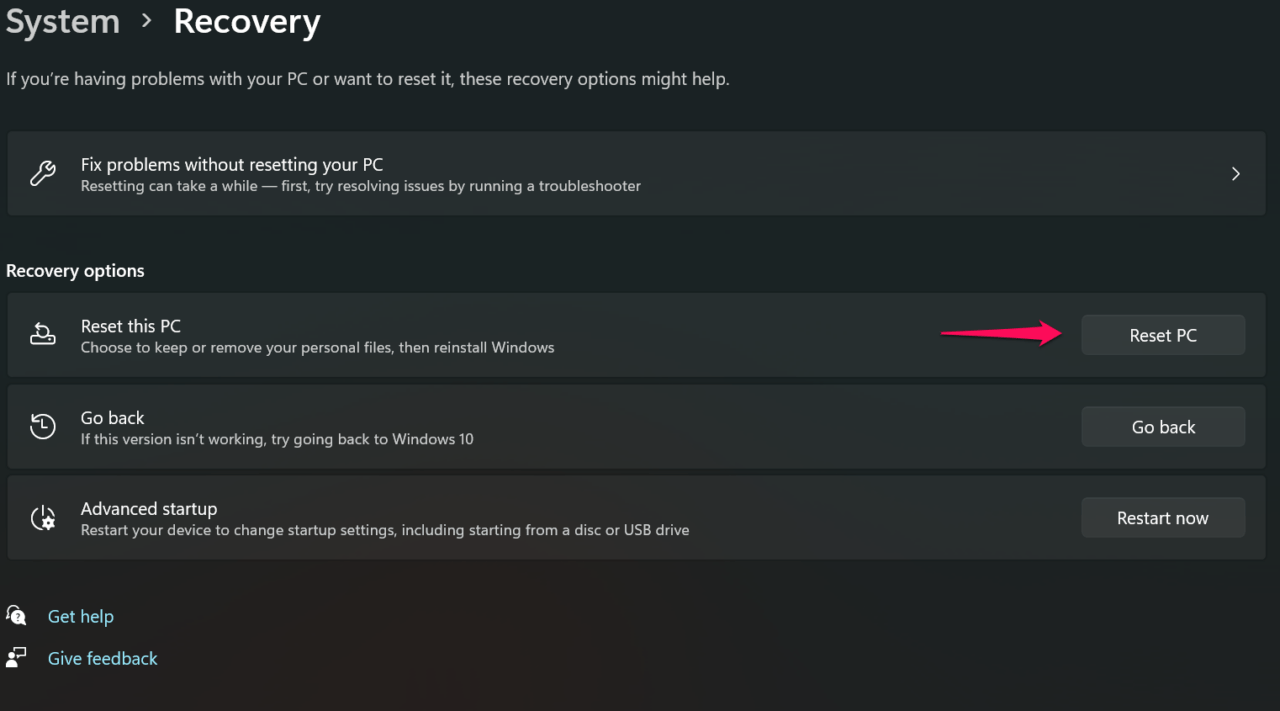
Note: You can choose “Go back” if you want to
4. Choose one option, and I recommend you to go for “Remove everything”.
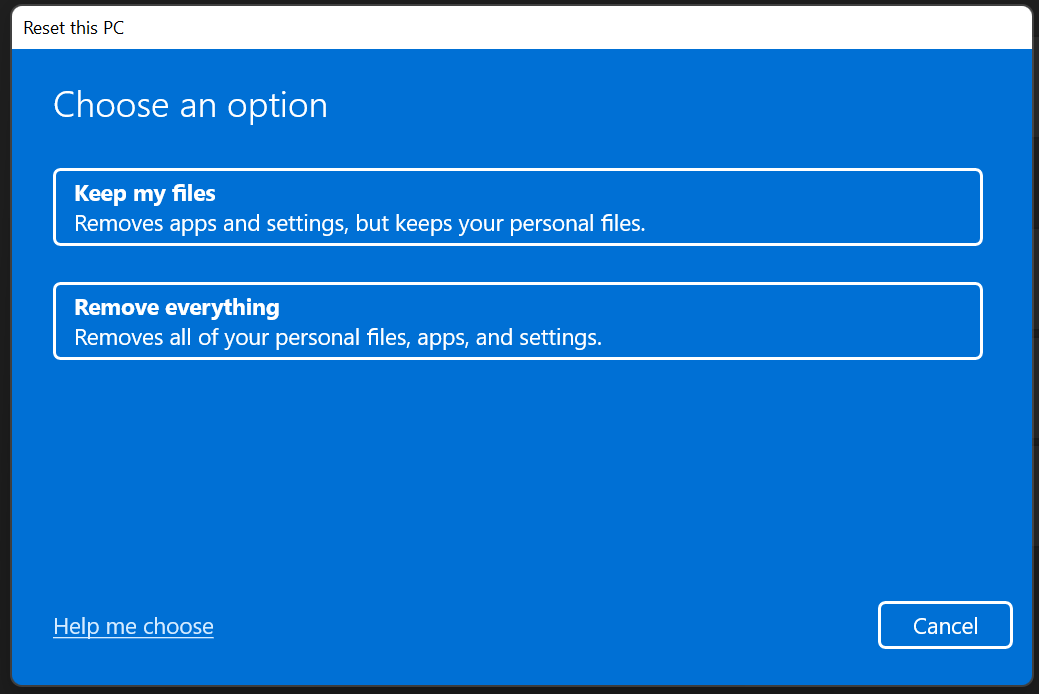
- Keep my files
- Remove everything
5. Choose one option.
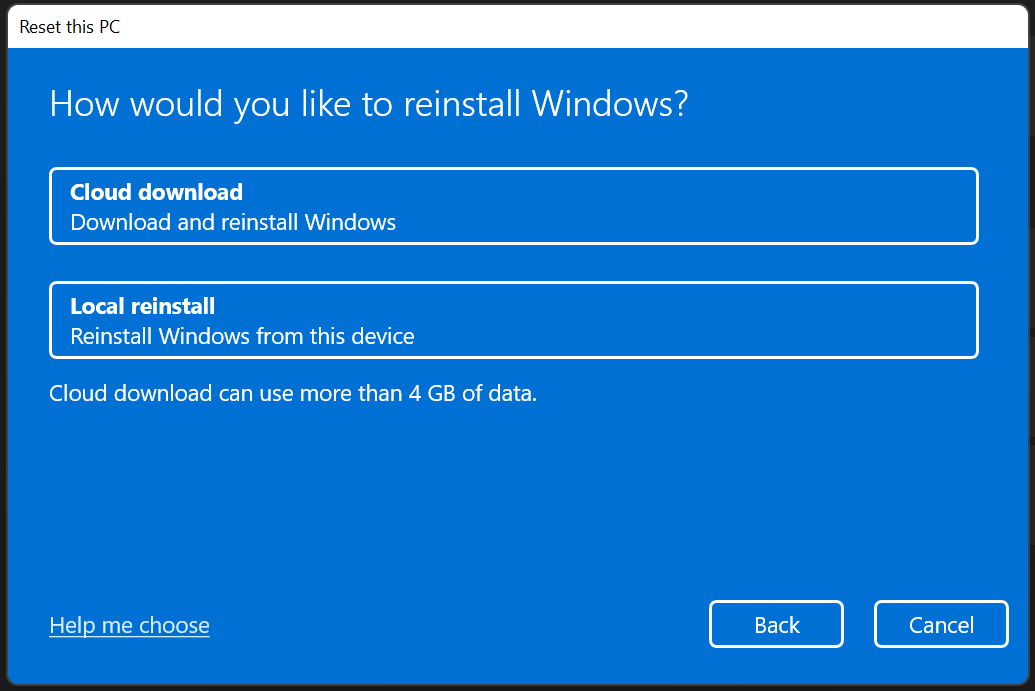
- Cloud download
- Local reinstall
The rest of the action is automated and follows the auto-wizard option. Make sure to sit tight because this is going to take a few hours in entry-level hardware.
Bottom Line
You should book an appointment with the service center and ask them to take a look at the PAGE_FAULT_IN_NONPAGED_AREA error in Windows 11. The laptop/desktop manufacturer can replace the RAM or storage drive if they are faulty. You don’t have to pay a single penny for the replacement cost if the machine is covered under warranty. Let us know how you solved 0xCD3DD628, 0x804EFC9A, and 0x00000050 error code in the comment section below.
If you've any thoughts on How to Fix PAGE_FAULT_IN_NONPAGED_AREA in Windows 11?, then feel free to drop in below comment box. Also, please subscribe to our DigitBin YouTube channel for videos tutorials. Cheers!
