Windows 10 is a daily driver for millions of desktops and laptops in the world. I could not contain my excitement when the Windows 11 beta was available in the public and I rushed to upgrade the software to the Windows 11 (beta/Dev Channel). I did not regret my decision but there were instances I had to consider going back to Windows 10, due to stability issues. Of course, if you are in the same boat as me, then I will show you how you can roll back from Windows 11 (beta) to Windows 10.
What do you need to know about Windows 11 Rollback?
Yes, you need to know a couple of things before getting started, so you won’t get caught by the surprises. I firmly believe in details because it saves you from additional problems later down the line and that is the reason, do not skip it.
My reason for downgrading from Windows 11 to Windows 10 is the gaming experience. I watched a YouTube video, where the reviewer claimed that the games were smooth and maintained stable frame rates. However, I experienced that AAA titles such as Apex Legends, Valorant, GTA 5 could not render the graphics properly due to poor optimization.
Sorry, it’s not the “poor optimization” that is causing the games to work incorrectly, it’s happening because the game developers never optimized the software for an unreleased Windows 11.
Here’s what you need to know about the Windows 11 roll-back.
- None of the programs from Windows 10 were affected, and they were all working properly.
- None of the saved data in HDD and SSD were tampered with or went missing, and I appreciate Microsoft developers for caring about the beta testers.
- All Windows 10 settings and customization were restored including the wallpaper choice.
- I encountered a Visual C++ error and I have installed it in Windows 11. Microsoft did warn about it during the roll back initiative and it wasn’t surprising whatsoever.
- Create a data backup because you don’t want to leave everything to fate.
Let me give you vital background information, so you can comprehend the scenario. I have installed the Visual C++ package for Apex Legends in Windows 11 and I started to get this error after rolling back to Windows 10.
In short, there is a higher potential of program failure and back-end packages failure after the rollback. However, I did not experience similar errors that were installed earlier in Windows 10, so it is safe to say that this is an error caused by Windows 11 shortcomings.
How to Downgrade Windows 11 to Windows 10?
Microsoft did work on the roll-back function and they have made it extremely easy for beginners to switch back to the Windows 10 edition. Let me inform you that the software won’t install the latest version or an old edition and roll back to whatever your machine had before Windows 11. Let me walk you through the roll-back process and show you how it’s done.
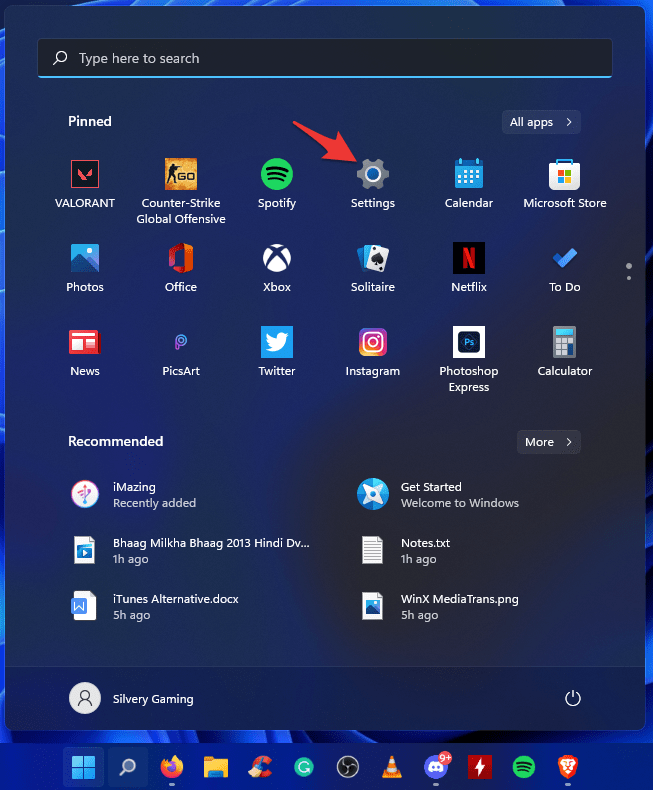
Step 1: Click the “Start” button and open “Settings” from the shortcut.
In case, if you have removed settings from the shortcuts, then you can search for it.
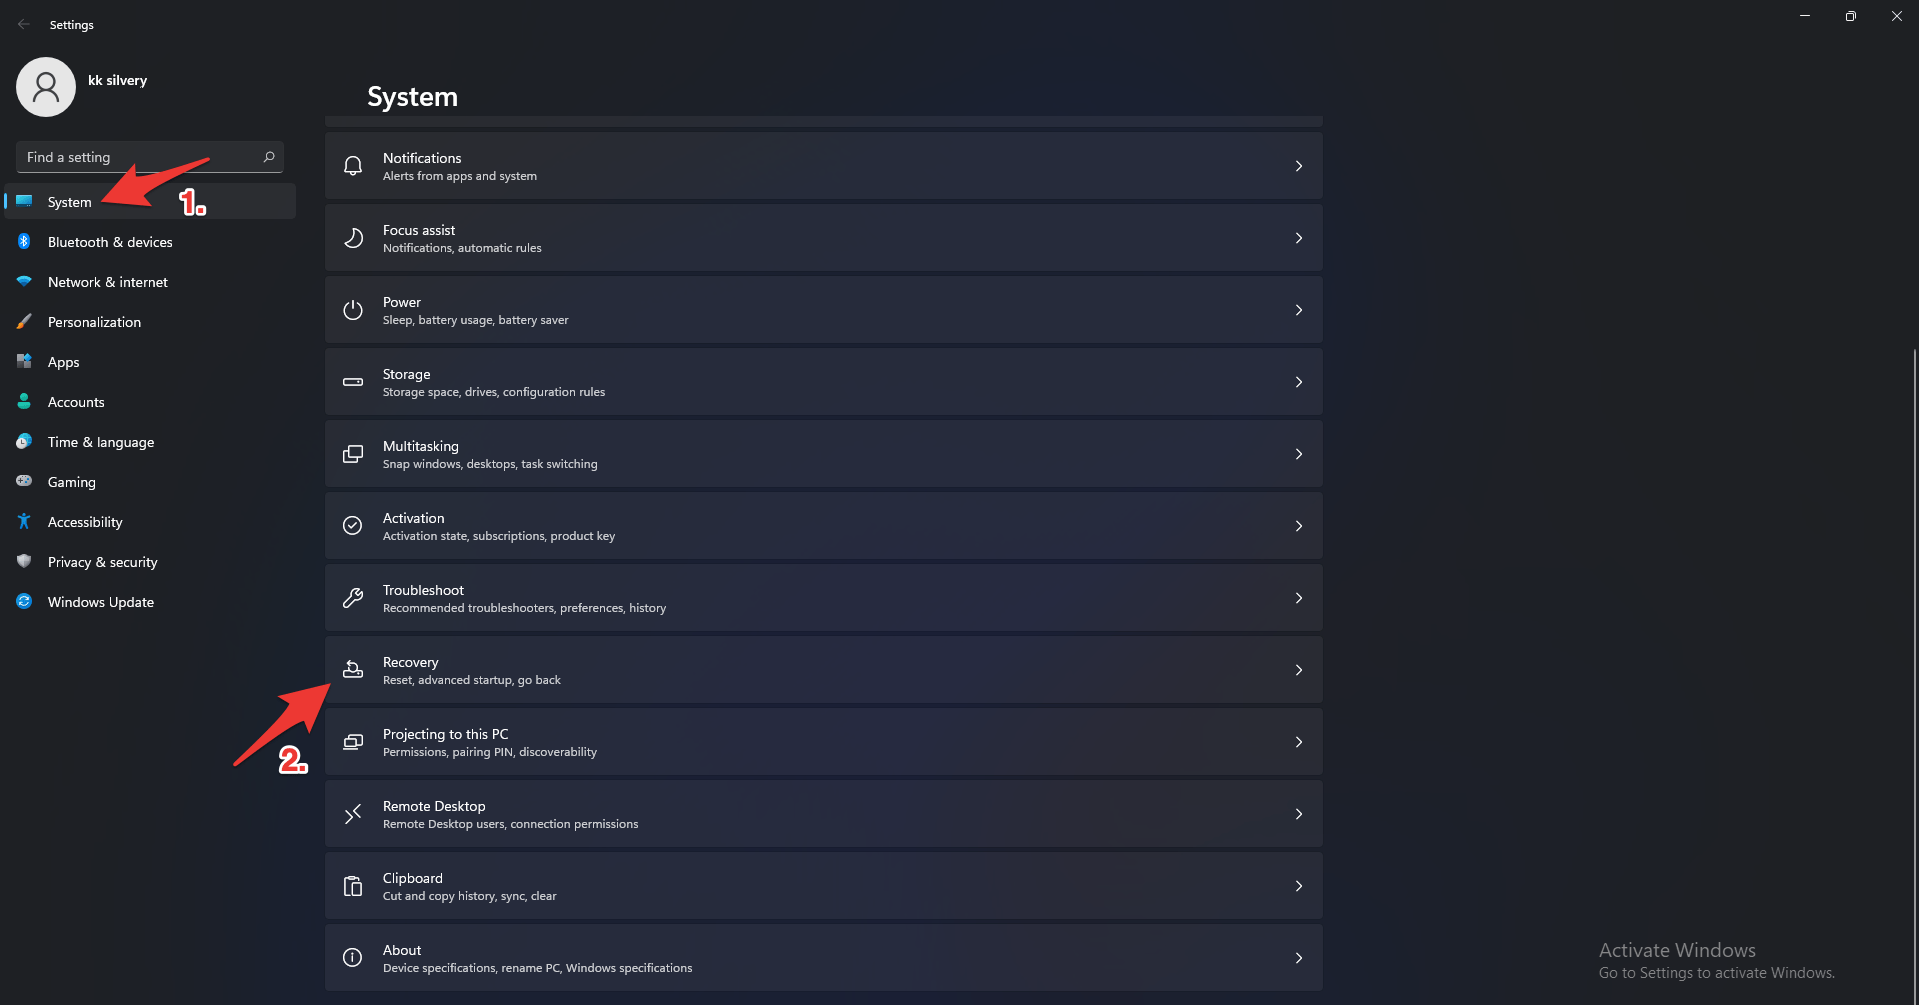
Step 2: Click on the “System”.
Step 3: Scroll down until the “Recovery” setting shows up on the screen and click to open it.
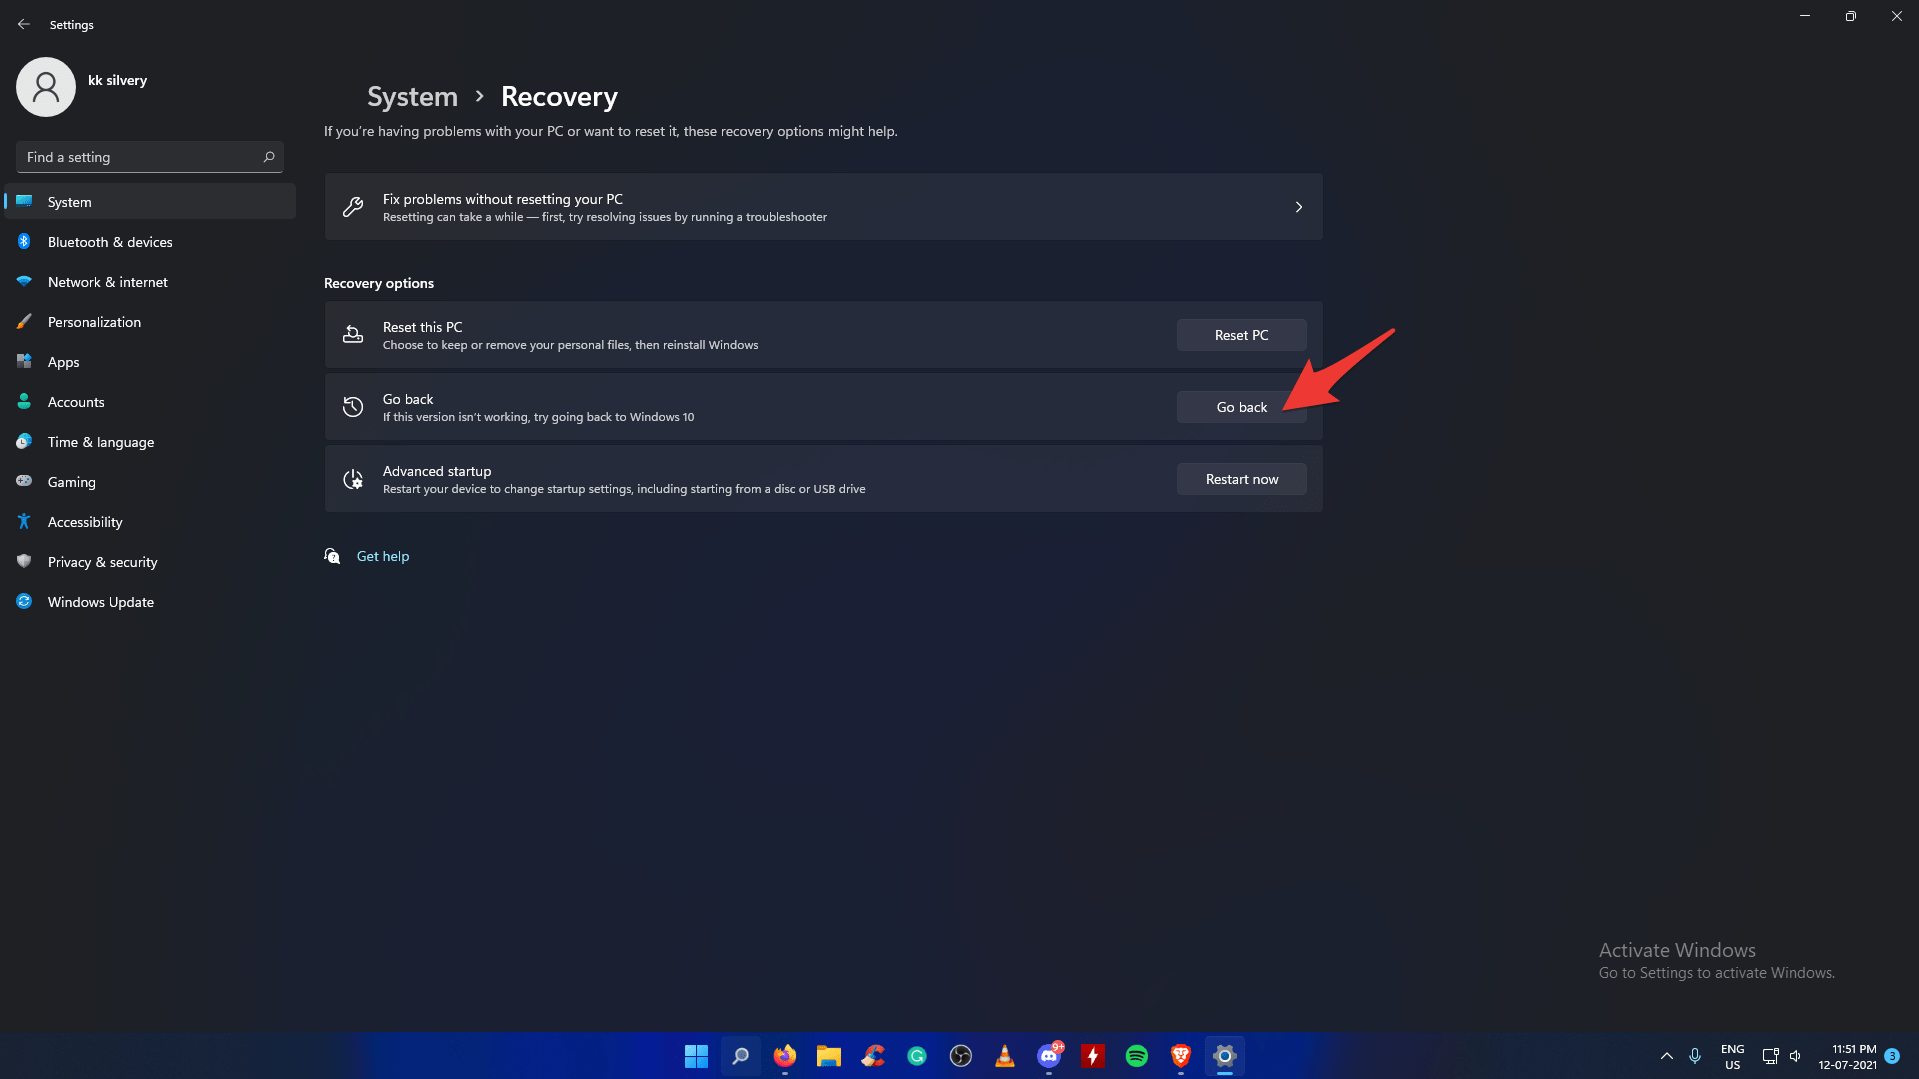
Step 4: Click on “Go back” to continue.
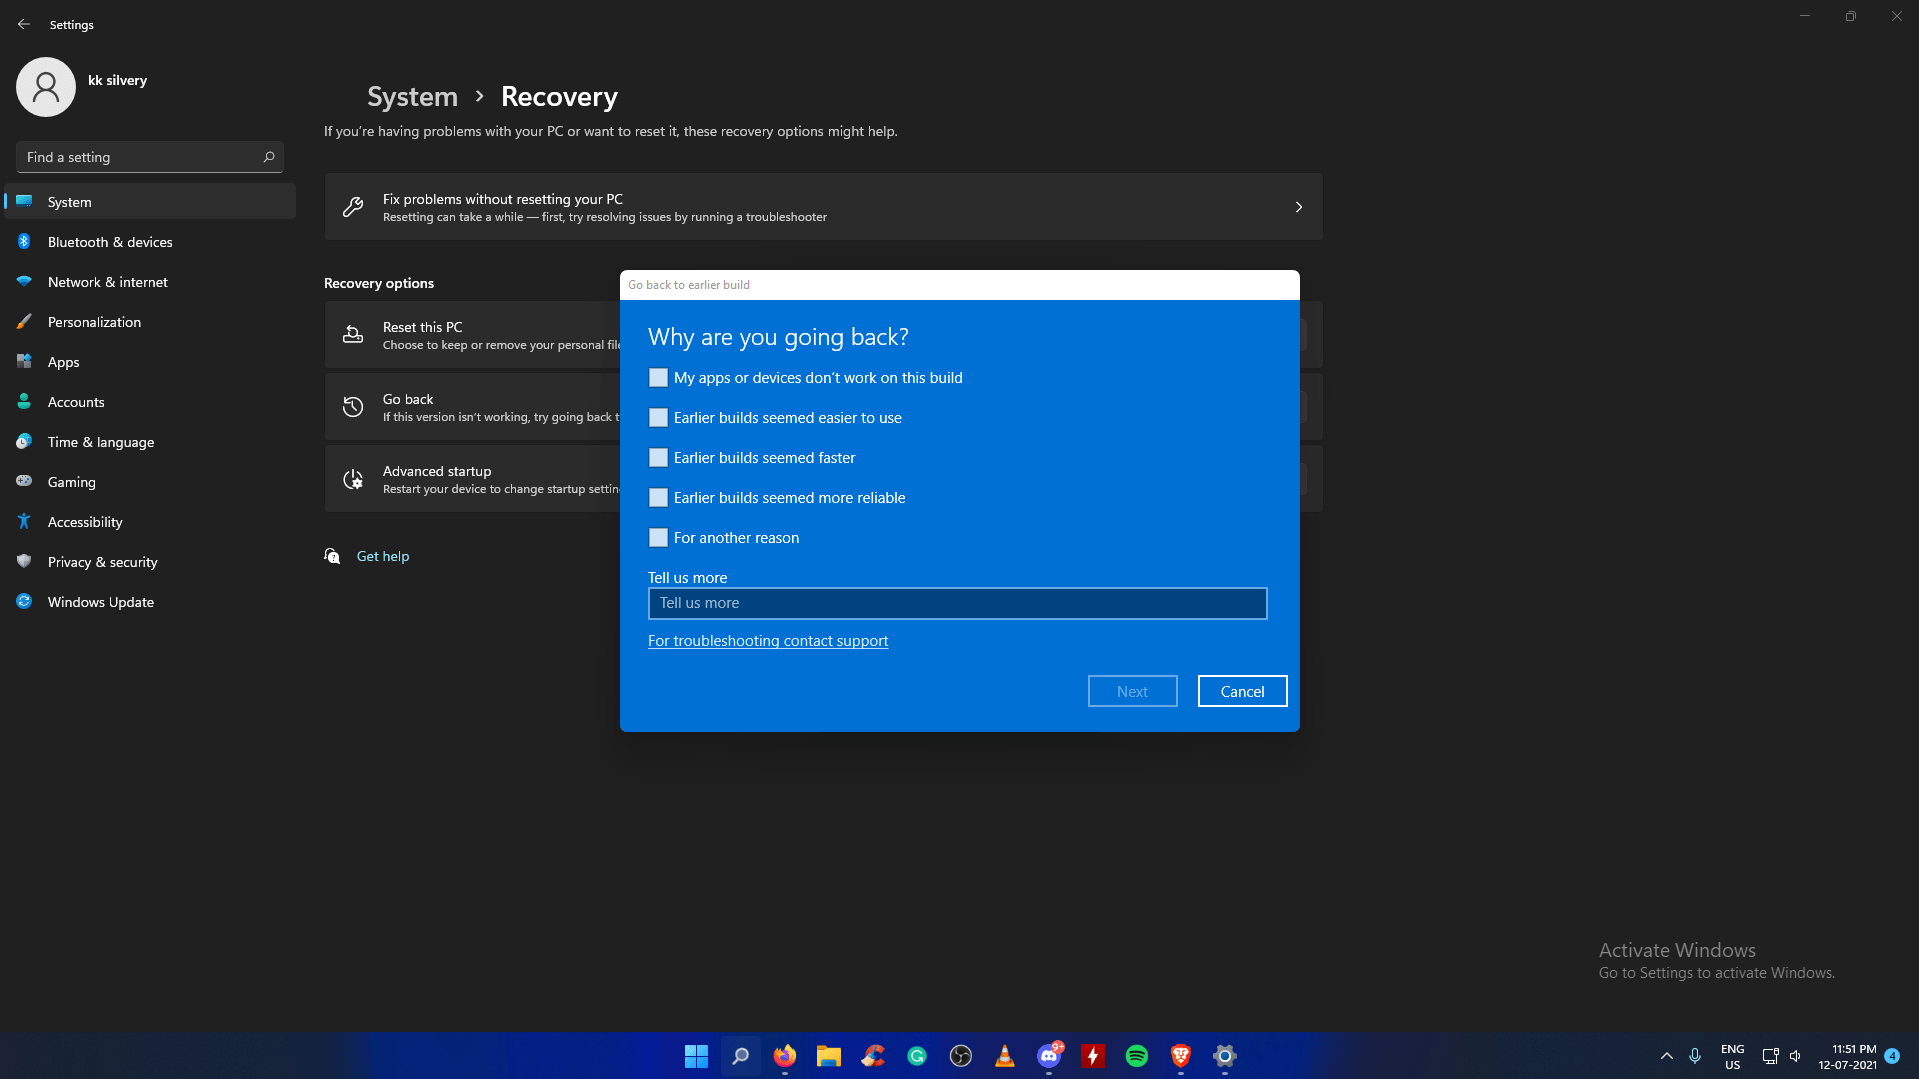
Step 5: A new window will pop up on the screen and tell them why you want to roll back to Windows 10.
Click on “Next”, once you have selected the reason.
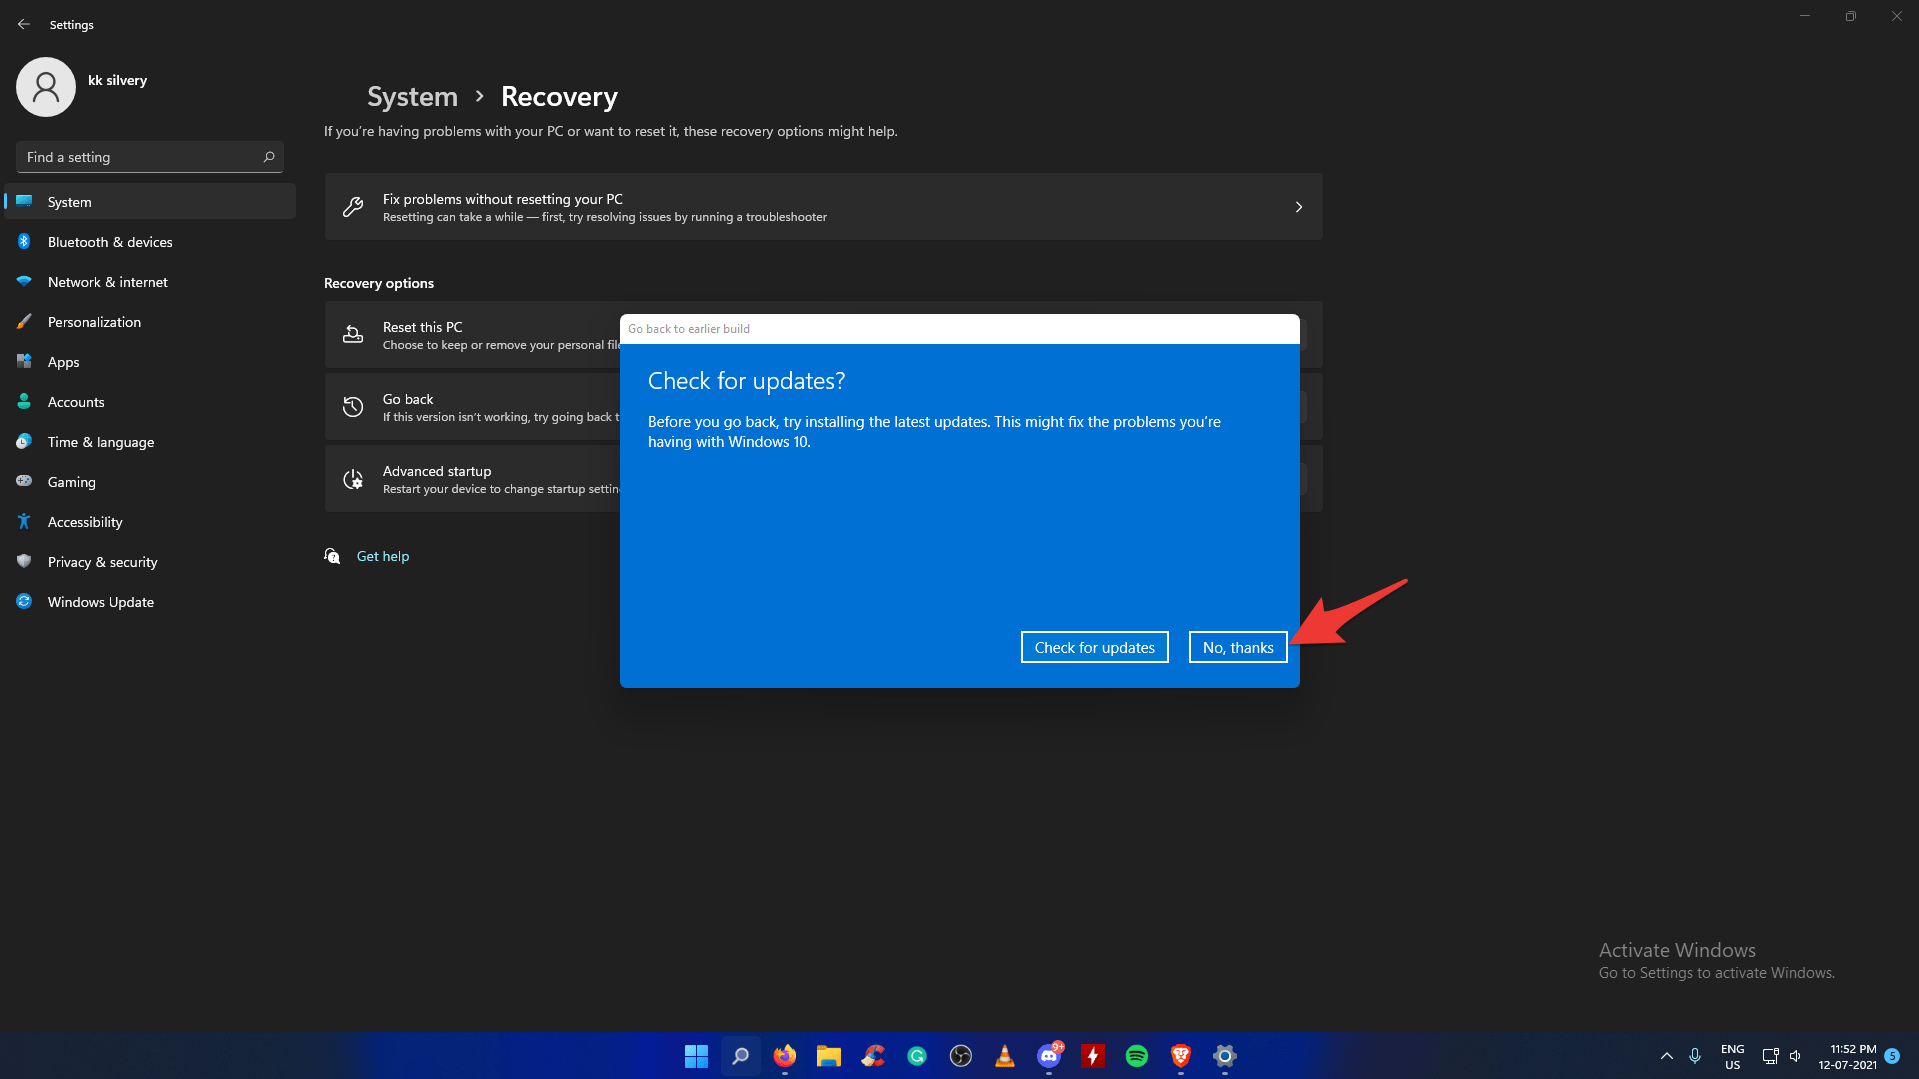
Step 6: The software will try to convince you to reconsider your decision, but click on “No, thanks” to continue.
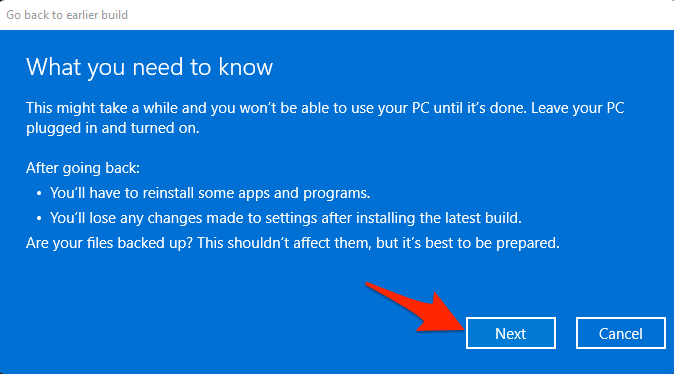
Step 7: A quick warning that you should read without skipping it and then click on “Next.”
You should back up the data because one corrupted file can lead to unresponsive software.
Step 8: Make sure that you remember the Windows 10 login password. And then click on “Next” to proceed.
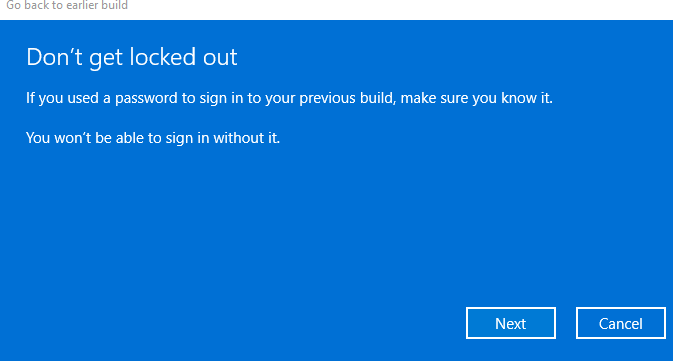
Step 9: Windows 11 will thank you for trying the latest beta build version. Click on “Go back to earlier build.”
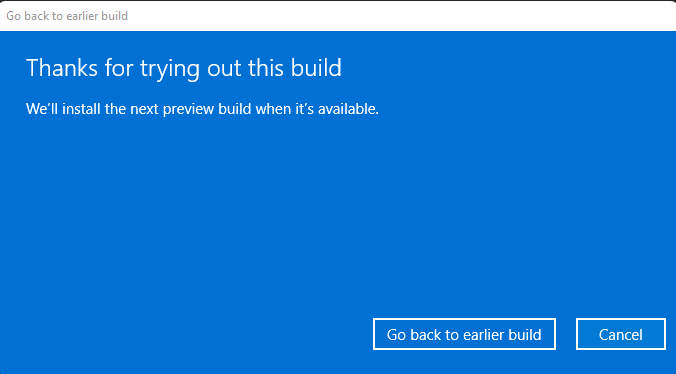
Your will PC will begin rolling back to an earlier version and you shouldn’t interrupt until the Windows 10 login screen shows up on the screen.
In our case, the entire roll-back process took 10 minutes on our mid-range machine. However, if you have a low-end machine with slower components such as HDD, 4 GB RAM, and processor, then it will take a maximum of 15 – 20 minutes to finish the process.
Bottom Line
I have been using a downgraded Windows 10 machine for ten days and I haven’t encountered additional problems apart from the Visual C++ package. In short, there is no harm in downgrading from Windows 11 (beta) to Windows 10 and I have tested it during my session. Let me know what do you think about Windows 11 in the comment section below.
If you've any thoughts on How to Roll Back Windows 11 to Windows 10?, then feel free to drop in below comment box. Also, please subscribe to our DigitBin YouTube channel for videos tutorials. Cheers!
