Windows 11 is the latest release of the Microsoft operating system. However, unlike other OS, its minimum requirement has been a matter of debate among all Windows users. To be specific, its TPM 2.0, and CPU requirement is the reason because of why most of Windows users are not able to upgrade to the latest version.
But now, Microsoft has released an official workaround via which you can upgrade to the latest OS even though your system doesn’t match the minimum requirement. So, let’s check out how to install Windows 11 on an unsupported PC.
We will be sharing two methods by which you can install Windows 11 on an unsupported PC. First is the official method released by Microsoft. Whereas, the second is DigitBin exclusive workaround.
How to Check if TPM is enabled on Windows PC?
Before proceeding to install Windows 11 on an unsupported PC, check if the machine has TPM and Secure Boot enabled.
These two elements can be found in the system BIOS.
- Restart your PC.
- As you see the OEM logo flash on the screen, continuously press the Esc/F1/F12 keys(varies from OEM to OEM) to load the BIOS settings.
- Once the BIOS screen loads, navigate to Security Settings.
- Go to TPM and check if it is set to Enabled.
- Similarly, check if secure boot is enabled.
- Save the changes and press Exit to go out of the BIOS.
With TPM and secure boot turned on installing Windows 11 on the unsupported machine will become possible.
How to Check for Missing Hardware Components Required to Run Windows 11?
Hardware and software work together to offer a robust operating system user experience. If you have access to Windows 11 OS but the PC lacks sufficient hardware components, it will be impossible to install an operating system easily.
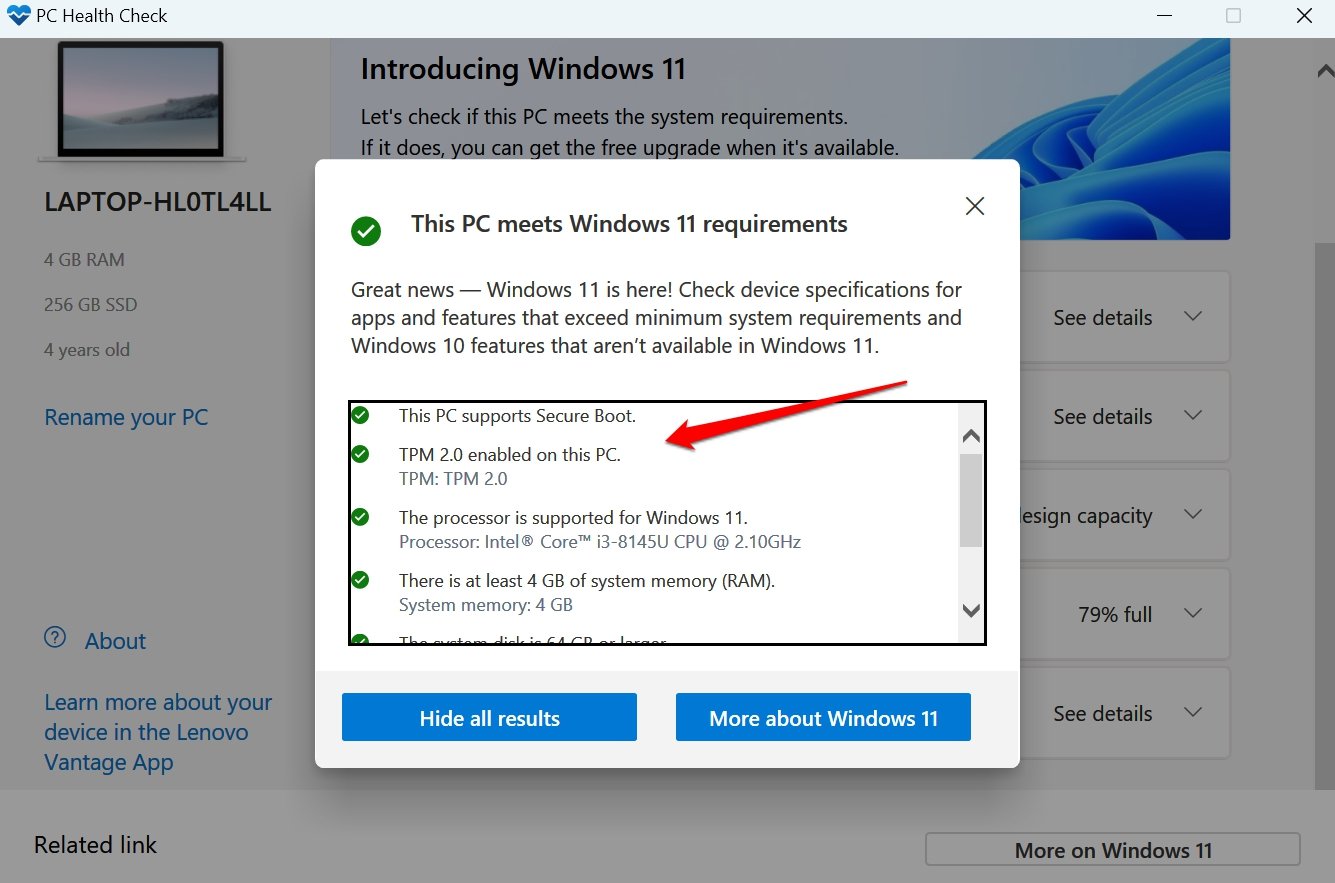
So, is there a way you know if the unsupported PC you have lacks the necessary hardware components to run Windows 11? This query can be answered by the Windows PC Health Check Tool from Microsoft.
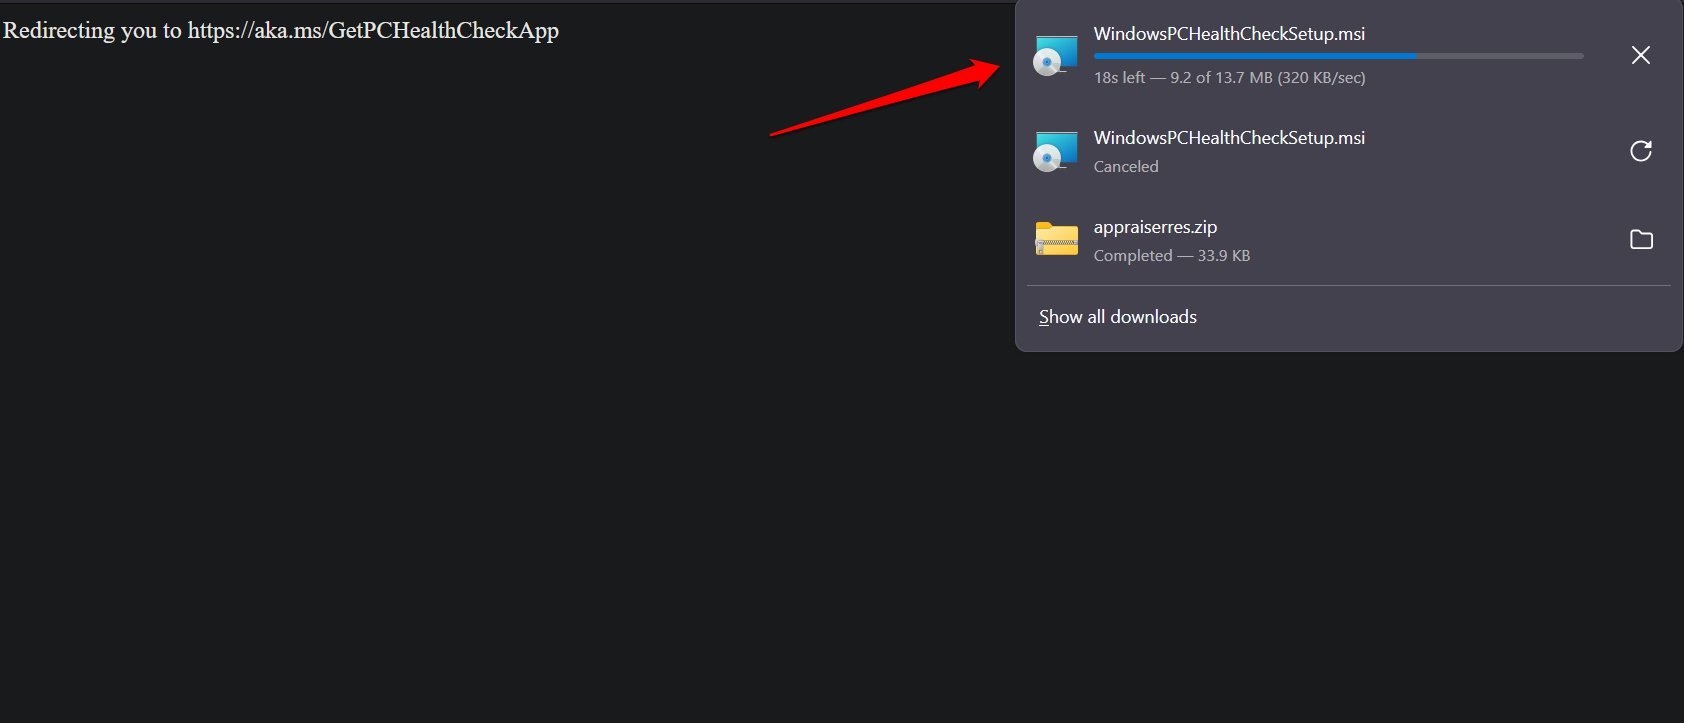
- Download the Windows PC Health Check Tool.

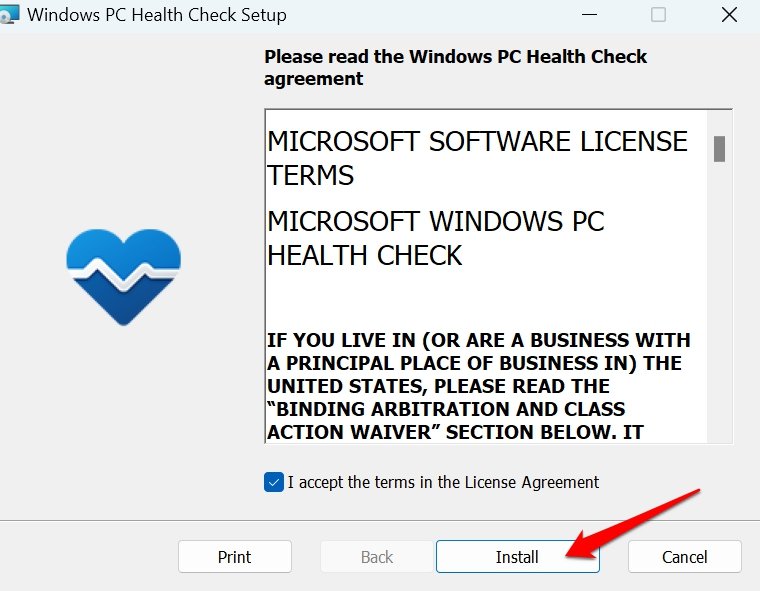
- Install the PC Health Check tool.

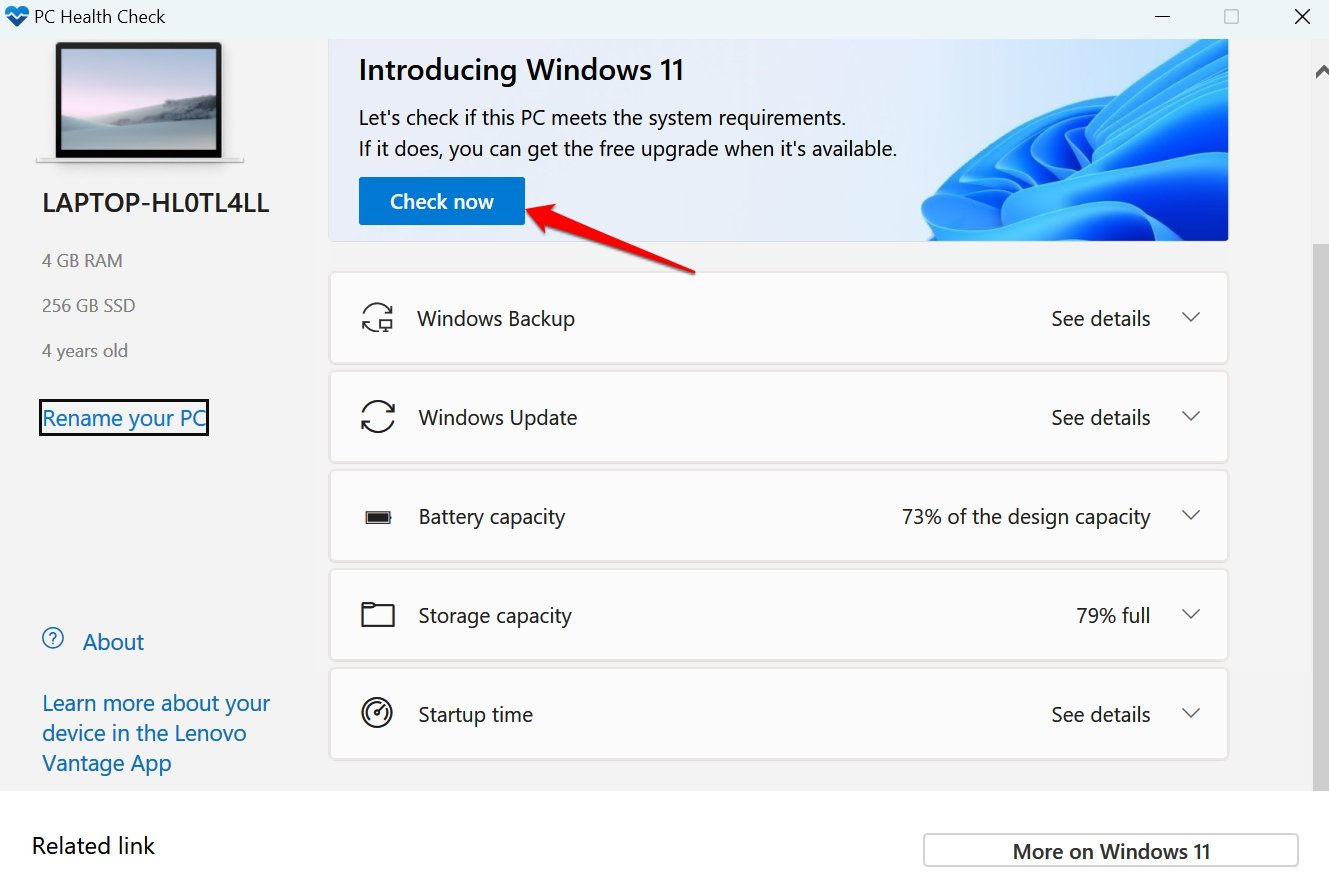
- Run the tool on your PC.

- After the tool completes the scan, note down if it reports any missing hardware components that are necessary to run Windows 11.

Your next move should be to upgrade the hardware on your PC. With necessary hardware upgrades installing Windows 11 won’t be a hassle anymore.
Disclaimer: Compatibility issues, system errors, dysfunctional apps, and runtime bugs may arise if Windows 11 is installed on a PC running hardware configuration that cannot support Windows 11
Method 1. Official Method to Install Windows 11 on Unsupported PC
Looking at the backlash received by Windows 11 due to its minimum requirement, Microsoft finally decided to release an official method to install the latest OS even on an unsupported PC. However, for this method as well your PC must have TPM 1.2. So, here’s what you need to do.
- Head towards the official Windows 11 download website. For your comfort, here’s the direct link to it – Windows 11 official download.

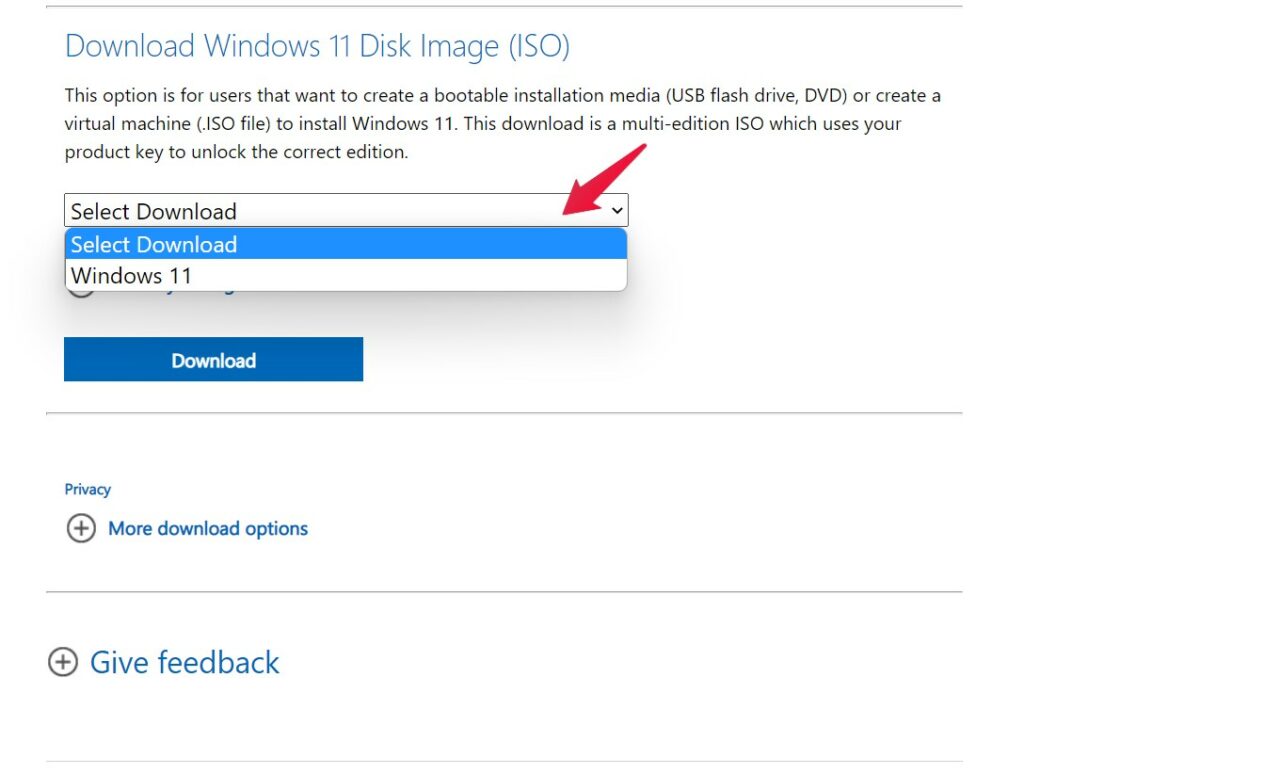
- On the website, scroll down, and under “Download Windows 11 Disk Image (ISO)” choose Windows 11 from the drop-down menu. After that, click on “Download“.

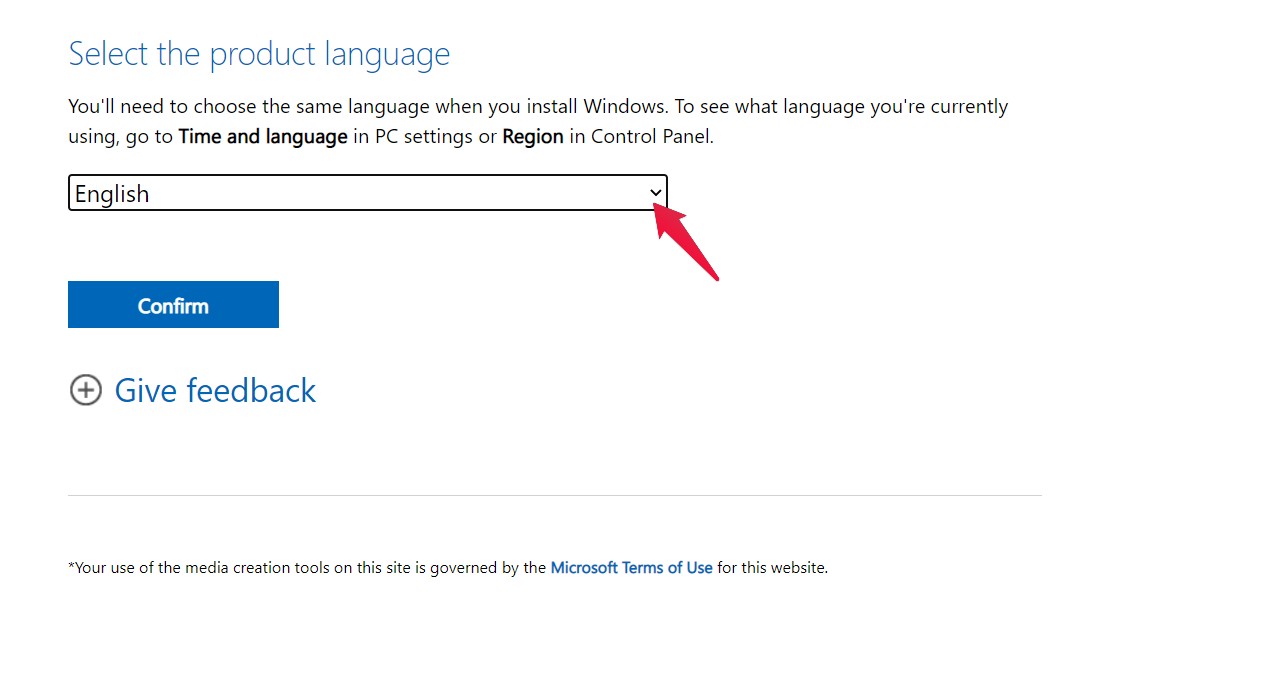
- Now, choose the product language, and after that click on confirm.

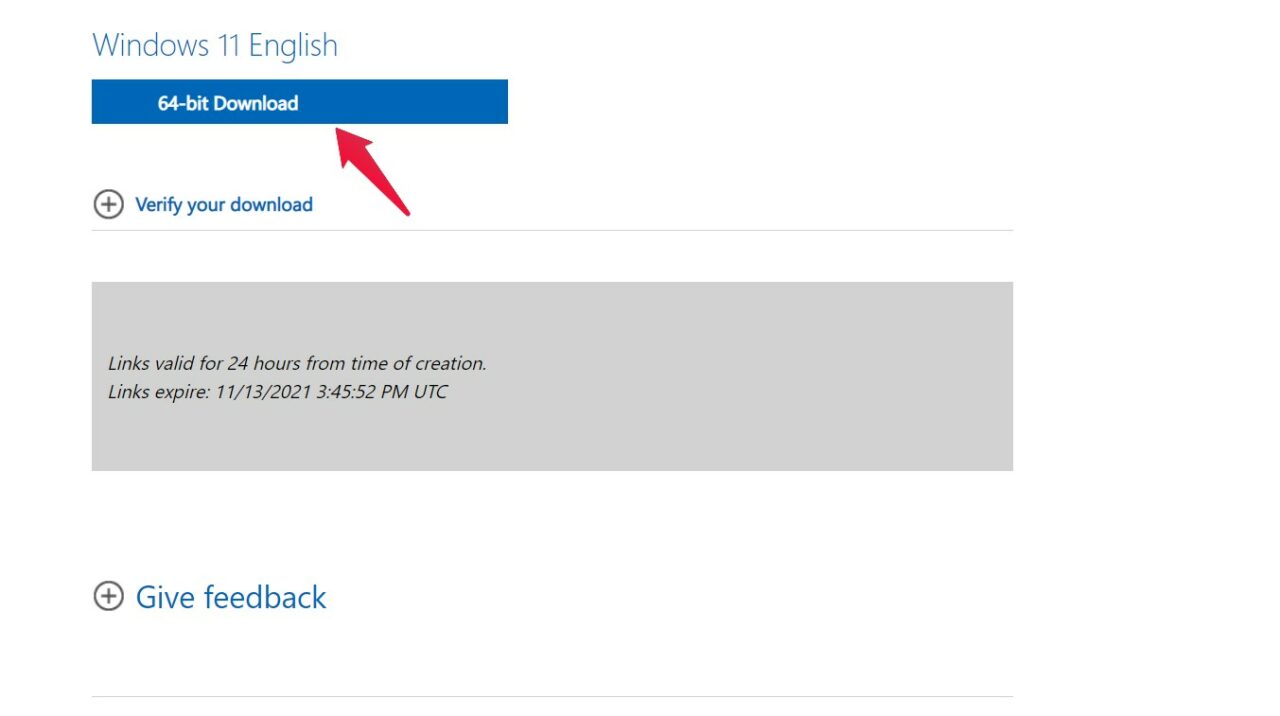
- Under “Windows 11 English” tap on 64-bit download to start the download.
While the Windows 11 file is downloading, you need to make a small change to your registry.
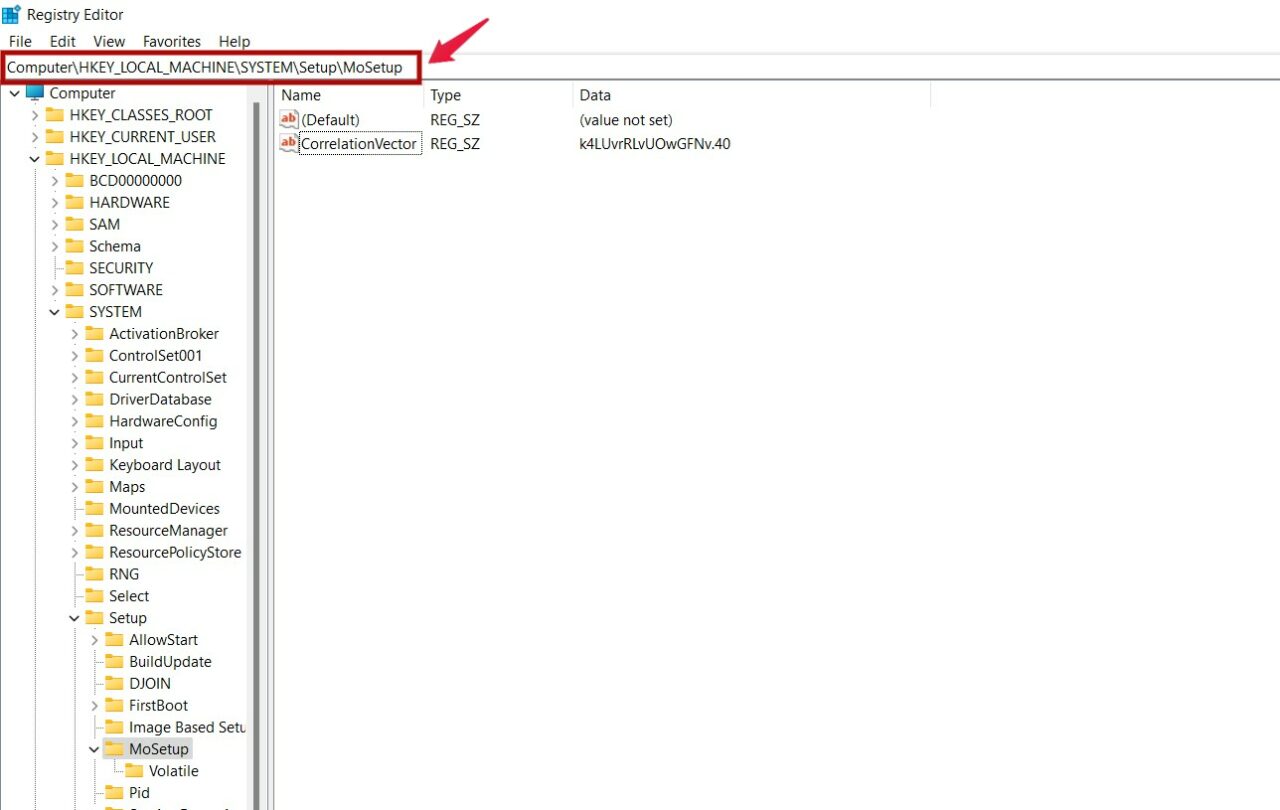
- Open the “Registry Editor” by typing the same on the search panel.

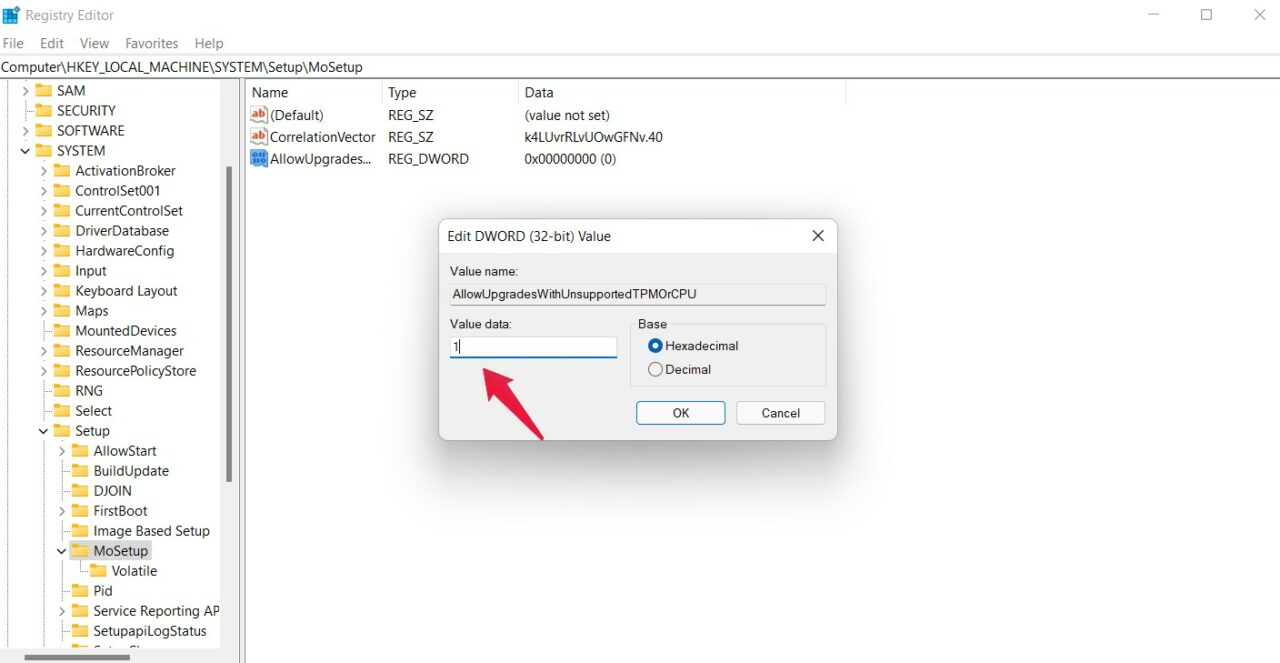
- Within the editor, you will have to navigate to a special location. For your convenience, here’s the direct location, Just copy-paste this value in the location field as shown in the picture.
Computer\HKEY_LOCAL_MACHINE\SYSTEM\Setup\MoSetup
- Now that you are in the correct location, on the right panel, check whether you already have a value for, “AllowUpgradesWithUnsupportedTPMOrCPU”.
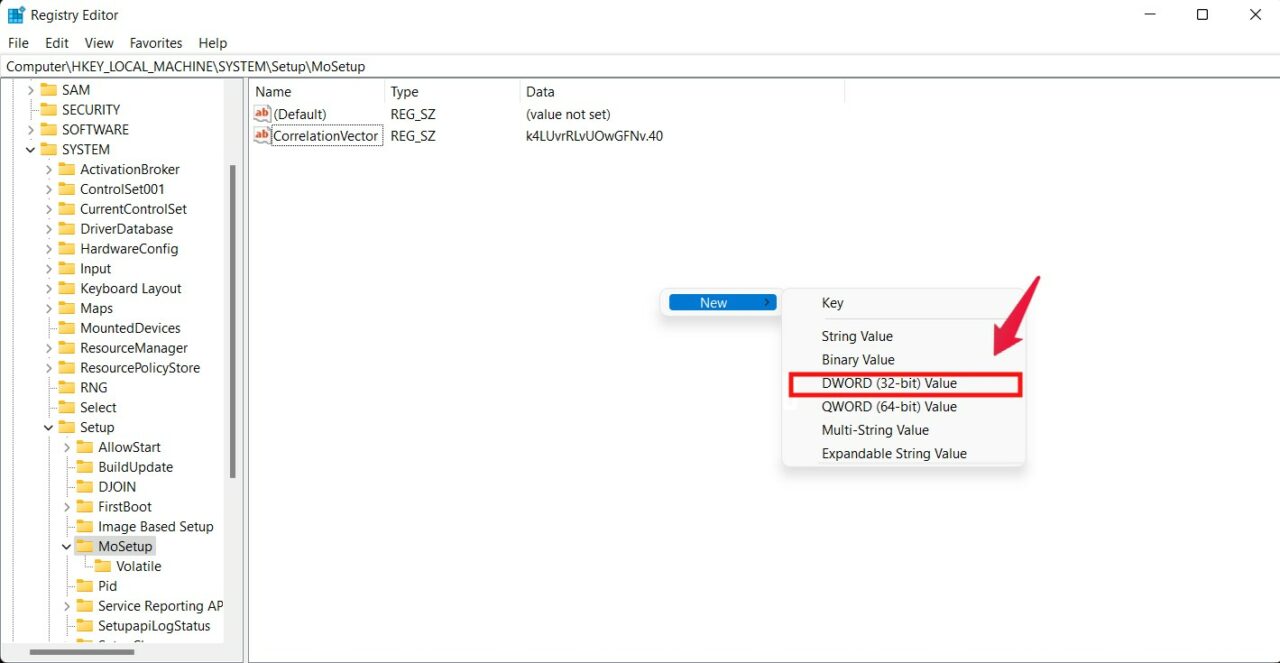
 It’s completely alright if you don’t have any assigned value. Simply right-click on the right panel, and then choose New > DWORD (32-bit) Value.
- Now name the newly made value, “AllowUpgradesWithUnsupportedTPMOrCPU”. After that, double-click on the newly created value, enter “1” in the value data, and then tap “Ok“.
So, that was all you need to change in the registry. By now, your Windows 11 ISO also must have been downloaded. Simply open the ISO file, and tap on the “setup” file.
This will kick off the Windows 11 installation process. And now, you won’t face any error because of your incompatible PC. But note that, you are doing the step at your own risk. And according to Microsoft, you may even not get security updates in the future if you follow this workaround.
It only lies in the future, whether it is just an empty threat, or Microsoft will actually follow through on it. So, according to us, you should only upgrade to Windows 11 via this method if you have an older PC that maybe you don’t care quite as much about.
Method 2. Install Windows 11 on an Unsupported PC by Changing the Minimum Requirement
If you have an extremely old PC, that doesn’t even have TPM 1.2, worry not, you can still install Windows 11. All you have to do is, just tweak with the minimum requirements, and you are all set to install Windows 11. So, here’s a step-by-step guide to what you need to do.
- First off, you will have to download the upgraded “appraiserres” file. Here’s the direct download link to it – “appraiserres.dll“.
- Now open the Windows 11 ISO file downloaded in the above method and the go-to the “sources” folder.

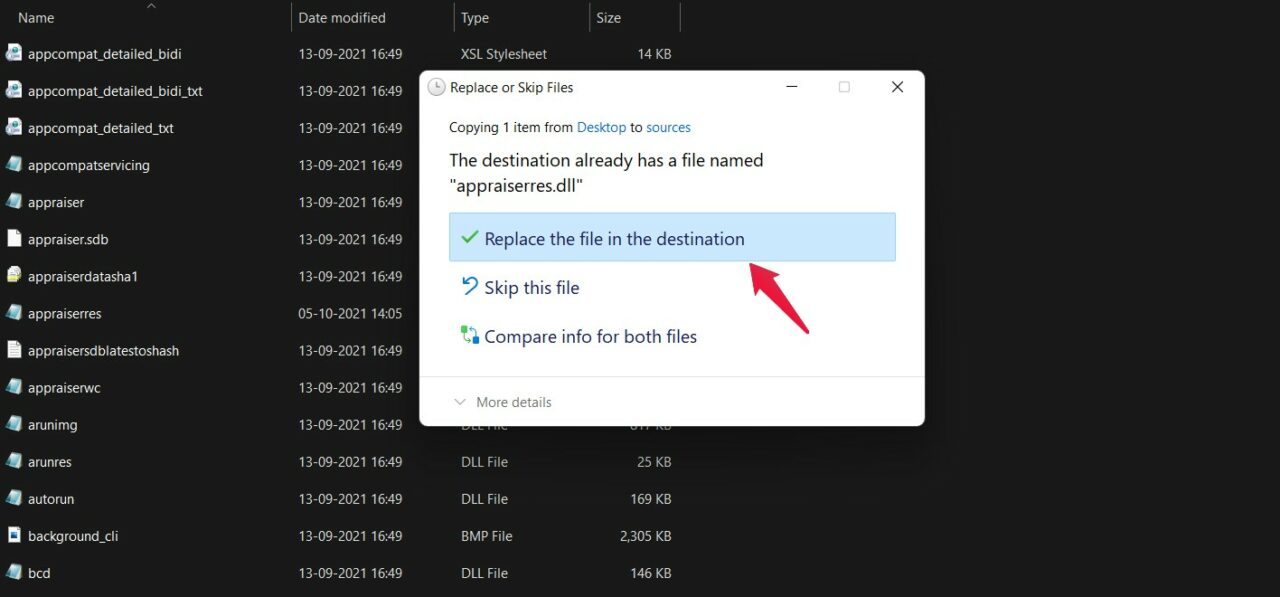
- Here paste the “appraiserres.dll” file you have downloaded. Tap on “Replace the file in the destination” if the pop-up says the destination already has a file named, “appraiserres.dll”.
That’s it. Now just tap on the “setup” file to start the installation process. And this time, you won’t face any issues regarding incompatibility.
Method 3: Install Windows 11 on an Unsupported PC [Official Method]
If you don’t want to go a heavily technical route to install Windows 11 on your unsupported PC, here is the official way to follow that Microsoft suggests. It is an easier process that doesn’t require you to hack the existing Windows system or use any external tools to perform the Windows 11 installation.
This specific method to install Windows 11 has been suggested by various users who did not want to follow any technically complex method or modify the Windows registry.
Here are the steps for you to follow.
- Download the latest Windows 11 OS from Microsoft’s official website.

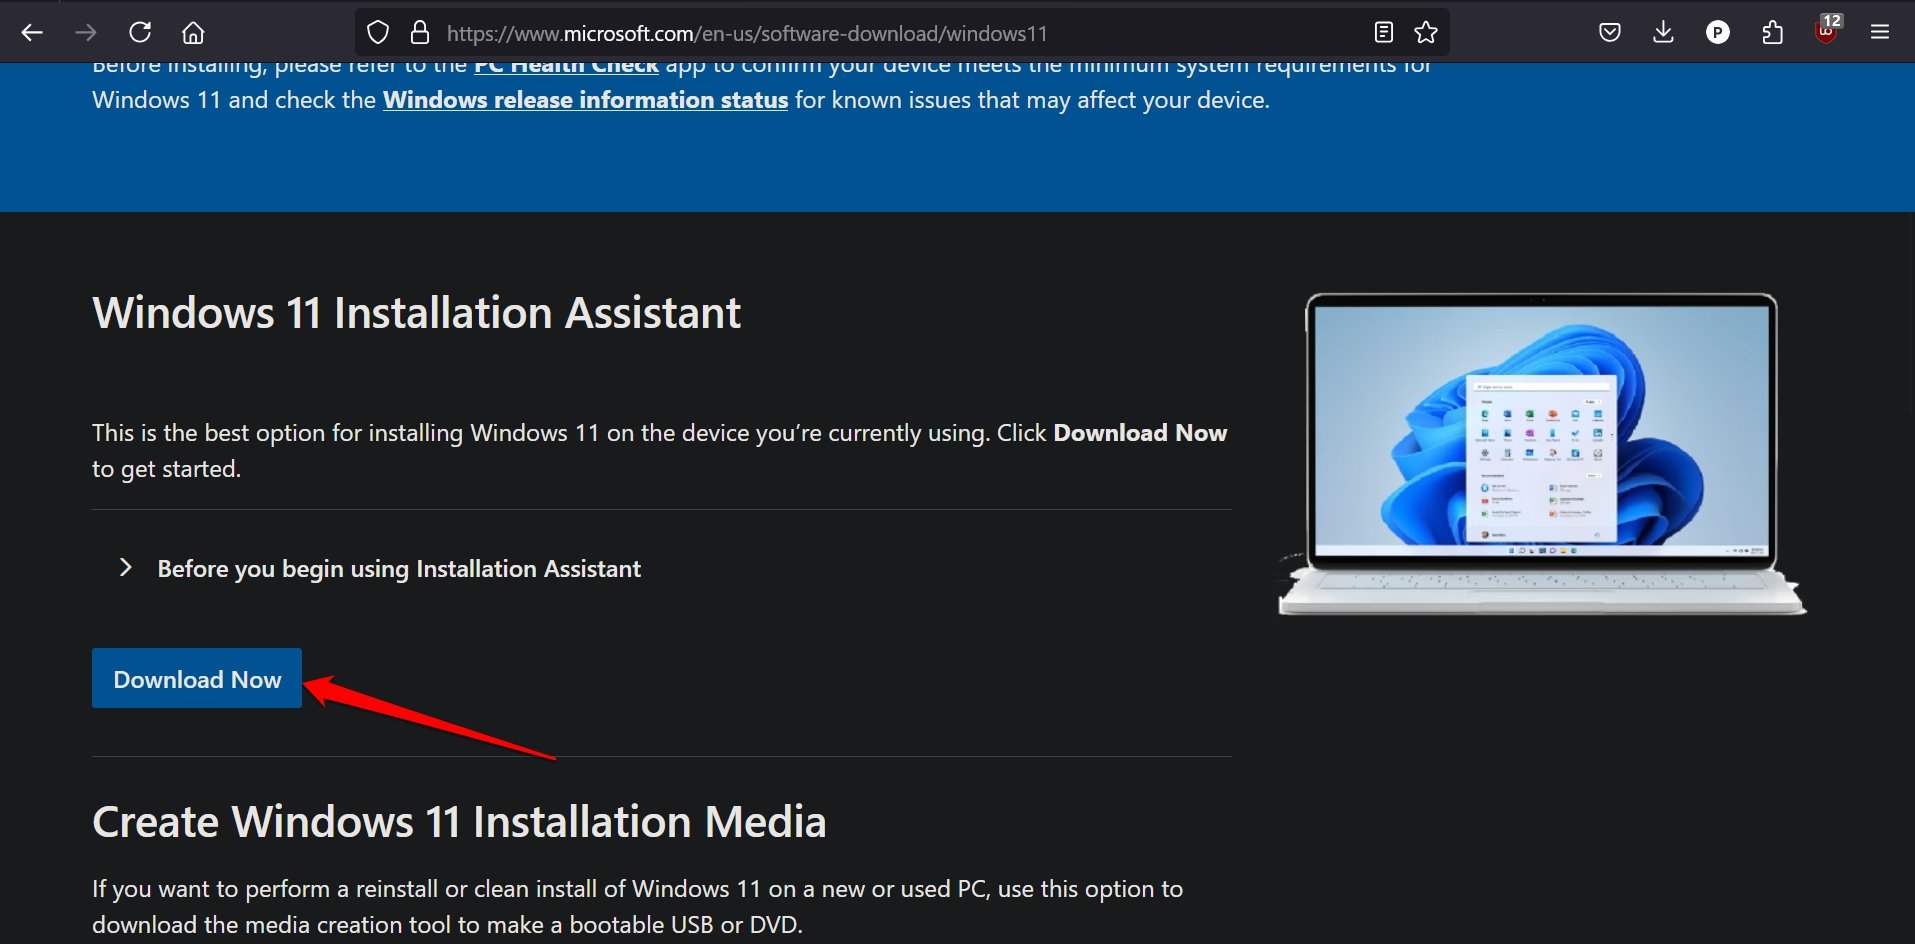
- Also, download the Windows 11 Installation Assistant.

- Right-click on the downloaded setup file and select Properties.
- Go to Run Compatibility > click on Run Compatibility Troubleshooter.
- Click Troubleshoot Program.
- Select Runs on Old Versions but Not Working Now.
- Click Next > I don’t know > Next > Test the Program.
- Once you see the End User License Agreement page on the screen, click Accept and Install.
- Let the computer perform the installation and restart to integrate the changes.
Once the PC reboots, you will now enter the Windows 11 OS on it.
Method 4: Install Windows 11 on an Unsupported PC by bypassing System Requirements
If you like to do things more technically, this method will suit you the best.
In this process, you have to create a bootable USB drive consisting of the Windows 11 ISO using a program called Rufus.
Before installing Windows 11, Rufus will offer an option to remove/bypass the requirement for Secure boot, minimum memory, and TPM to install Windows 11 image files.
Be mindful that, you may find it difficult to run Windows 11 even if you manage to install it on an unsupported device.
Having insufficient memory may not support several apps/programs that are designed to run smoothly on a Windows 11-based resource-intensive machine.
Follow these steps to use a bootable USB drive to perform Windows 11 installation on an unsupported computer.
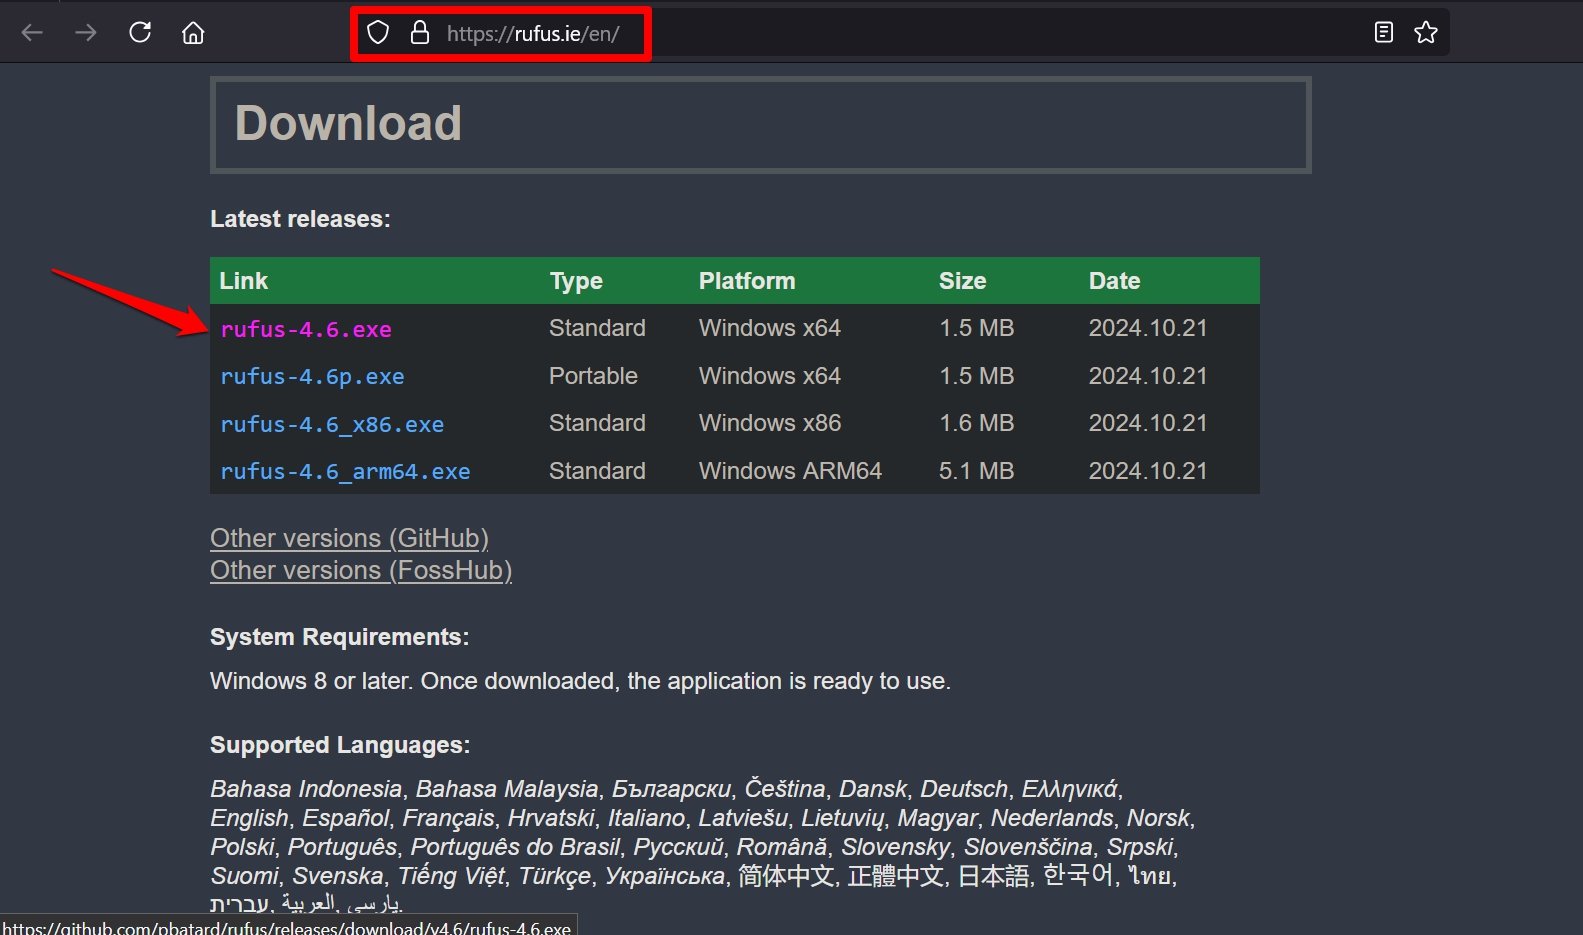
- Download the latest version of Rufus for Windows x64-based machines.

- Get a USB drive (preferably of 8GB or more storage) with empty storage or one that has been formatted properly.
- Download the ISO file of Windows 11 here.
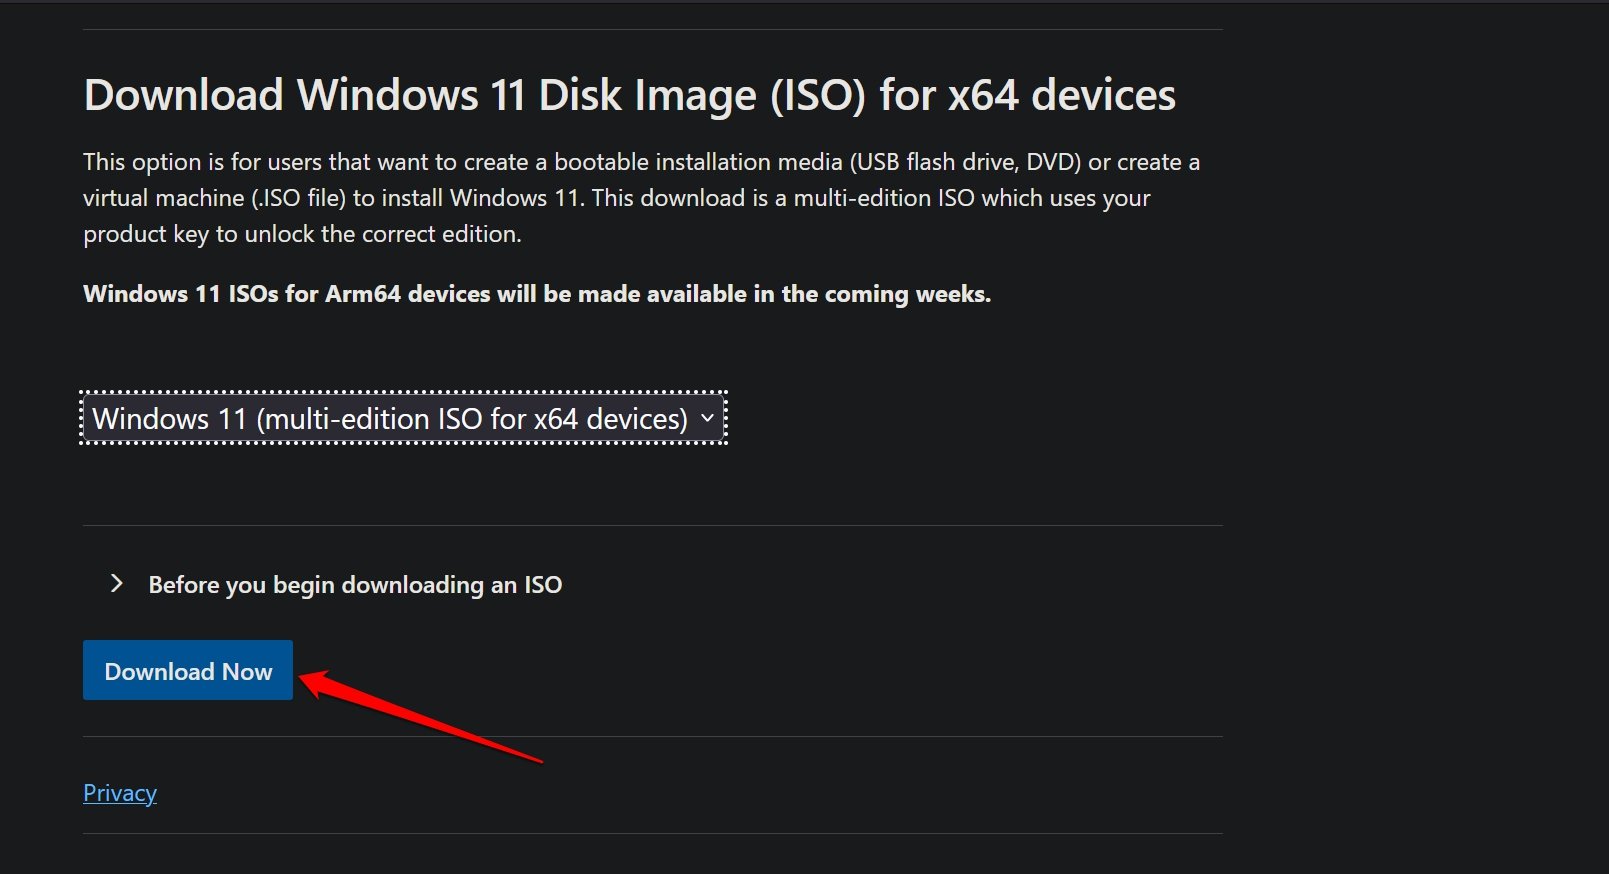
- On the Microsoft download page, scroll to Download Windows 11 Disk Image (ISO) for x64 devices.
- Click the dropdown Select Download and choose Windows 11 Multi-edition ISO for x64 devices.
- Press Download Now.

- Now, insert the USB drive into the PC/laptop.
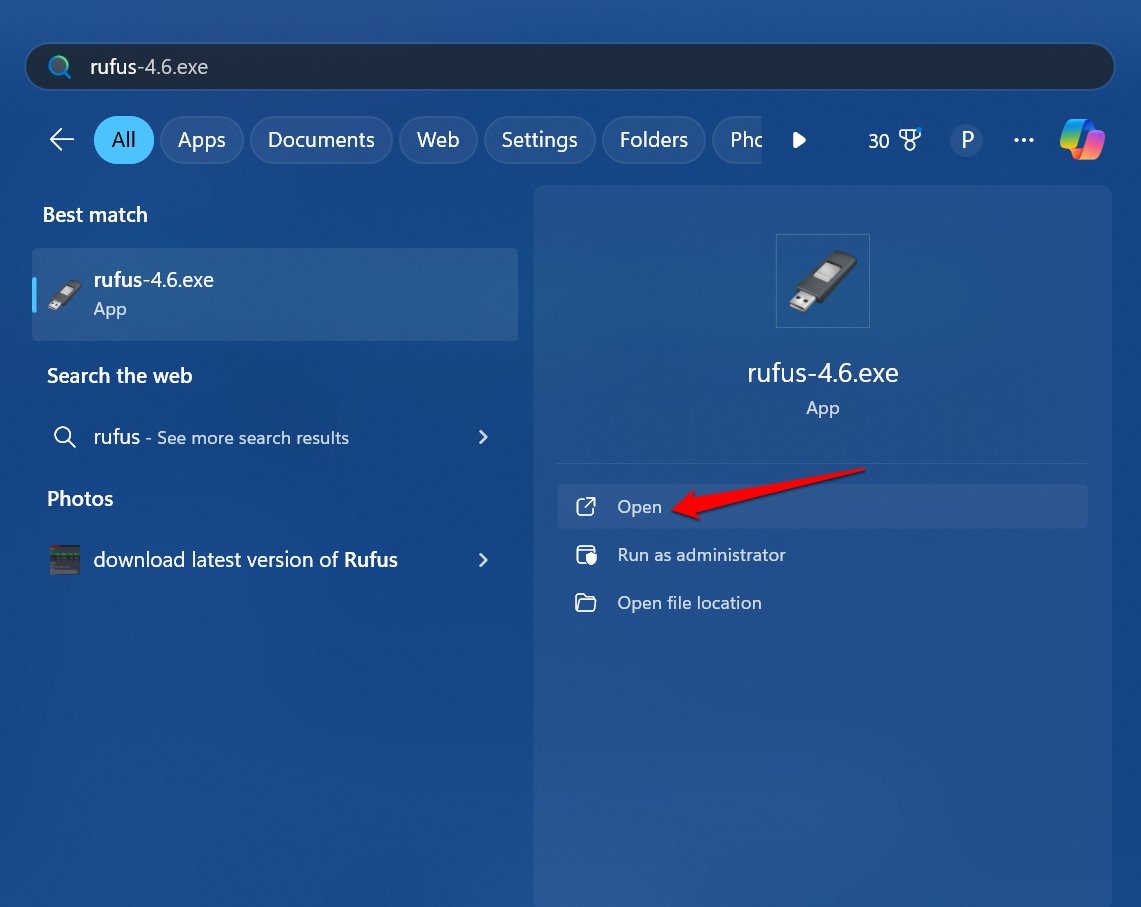
- Launch Rufus.

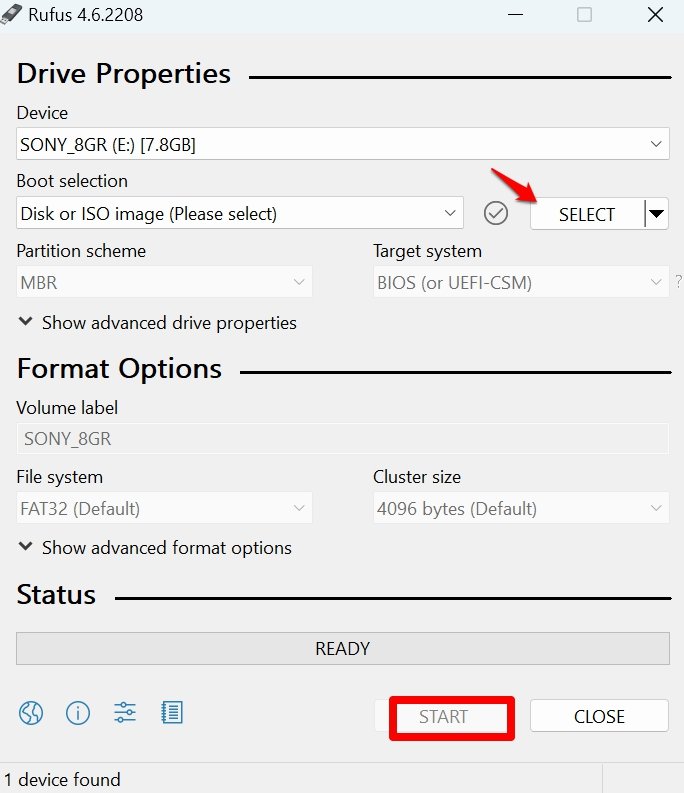
- In the Rufus dialog box, click Device and select the USB drive that you have set to use as the bootable drive.
- Click the Select dropdown next to Boot Selection and choose the ISO file of Windows 11 you downloaded earlier.
- Press Start at the bottom of the dialog box of Rufus to begin the Windows 11 ISO bootable disk creation.

- Now comes the most important step of this process. Once the Customize Windows Installation tab appears, click the checkbox Remove Requirement for 4GB+ RAM, Secure Boot, and TPM 2.0.
- Optionally, you may also check the box Remove Requirement for an online Microsoft Account.
- Click OK to proceed.
At this point, the setup files in the ISO image of Windows 11 will transfer to the blank USB drive. It means the bootable disk is being prepared.
Wait until the bootable drive is ready.
Now, follow these steps to install Windows 11.
- On your PC, access the USB drive through Windows Explorer (Win + E hotkeys).
- Launch the Windows 11 setup file within the USB drive to start installing the OS on your PC.
- Follow the on-screen instructions, accept the End User License Agreement, and click Install to start the Windows 11 installation.
Once you have the Windows 11 bootable USB drive, it is possible to install Windows 11 on any PC that may/may not support Windows 11.
Final Words
So, this was all about how to install Windows 11 on an unsupported PC. Let us know in the comments if you face any difficulty in installing Windows 11 by following the above-mentioned method.
If you've any thoughts on How to Install Windows 11 on an Unsupported PC?, then feel free to drop in below comment box. Also, please subscribe to our DigitBin YouTube channel for videos tutorials. Cheers!

 It’s completely alright if you don’t have any assigned value. Simply right-click on the right panel, and then choose New > DWORD (32-bit) Value.