Microsoft forces the users to update the operating system & drivers on the PC. The unstable updates make the way into the PC, and that’s when you have Windows Update Error Code 8024402c. There are multiple ways for the users to fix the problem and without assistance from third-party tools. The 8024402c error may seem like one specific error, but it can be triggered by a different problem. We have to solve the Windows error by applying official solutions, which don’t harm the software.
What Causes Windows Update Error 8024402c?
How can we solve a problem without knowing the root cause of it?
The 8024402c error is a Windows 10 Update error that is trying to tell the user that the system is not able to connect to Windows Update servers. Your PC might have scheduled to look for new updates available on the official server and the machine is not able to connect to the internet. There are several reasons behind the problem, and you have to apply multiple solutions to get rid of Windows Update Error Code 8024402c in Windows 7/8.1 Pro/10.
Best Methods to Fix Windows Update Error 8024402c
Here are Few Potential Solutions to Fix Windows 10 Update Error 8024402c on your PC
Turn off Security Walls
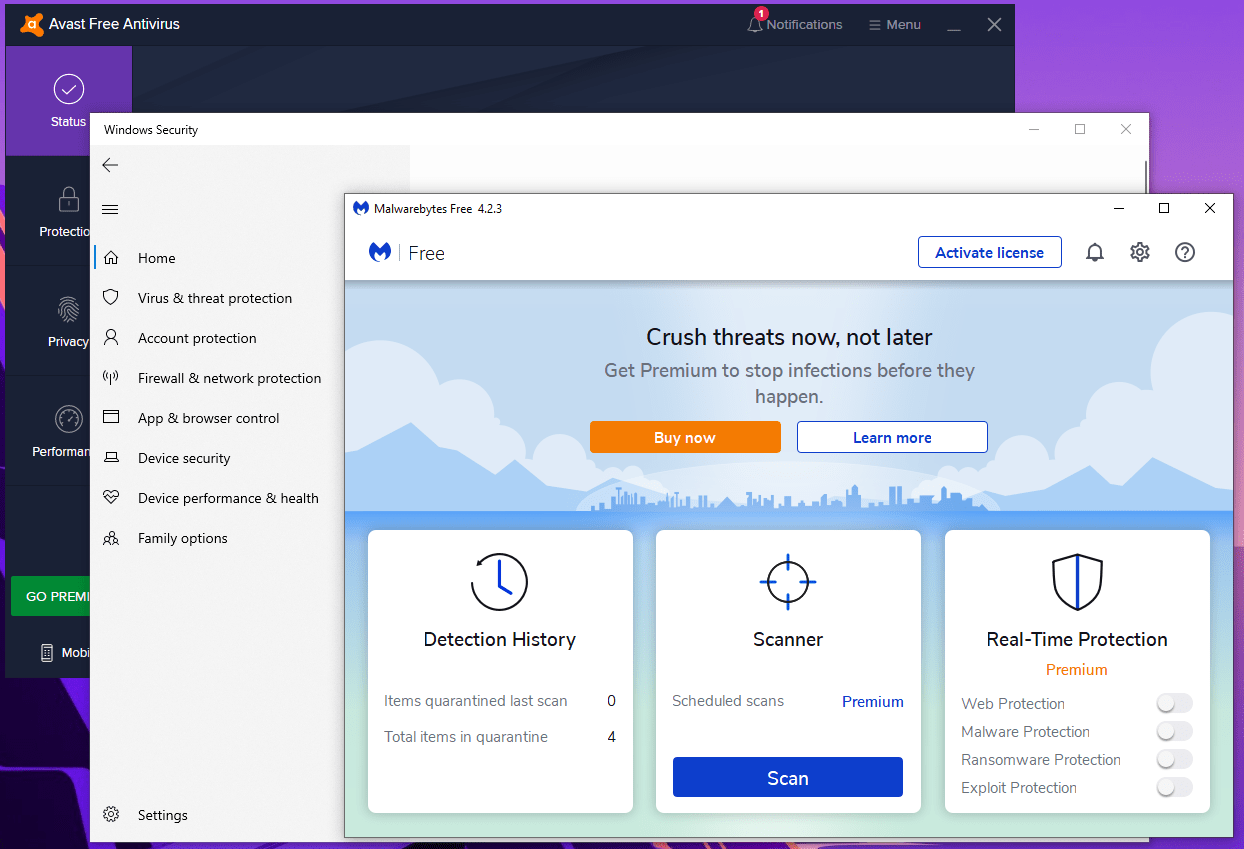
It is not recommended to the user to turn off the security layers of the PC but it could be interrupting the connection process. Modern security solutions like Avast, Bitdefender, and others are offering antivirus solutions along with an inbuilt firewall.
The inbuilt firewall will replace the Windows Firewall and take control over the environment from all zones. You have to disable the antivirus system and firewall for a couple of minutes to identify the culprit.
Troubleshooter
Microsoft brought troubleshooter feature in the latest edition of Windows 10 that has tons of services listed. The inbuilt troubleshooter will look for the potential culprit that assists the users to fix it or identify the culprit. Follow our lead to check out the function in the 20H2 build version.
Step 1: Press Windows Key + I to open “Settings” without additional actions.
Step 2: Choose “Update & Security” to continue.
Step 3: Click on “Troubleshoot” to continue.
Step 4: Select “Additional troubleshoot” to access the main options.
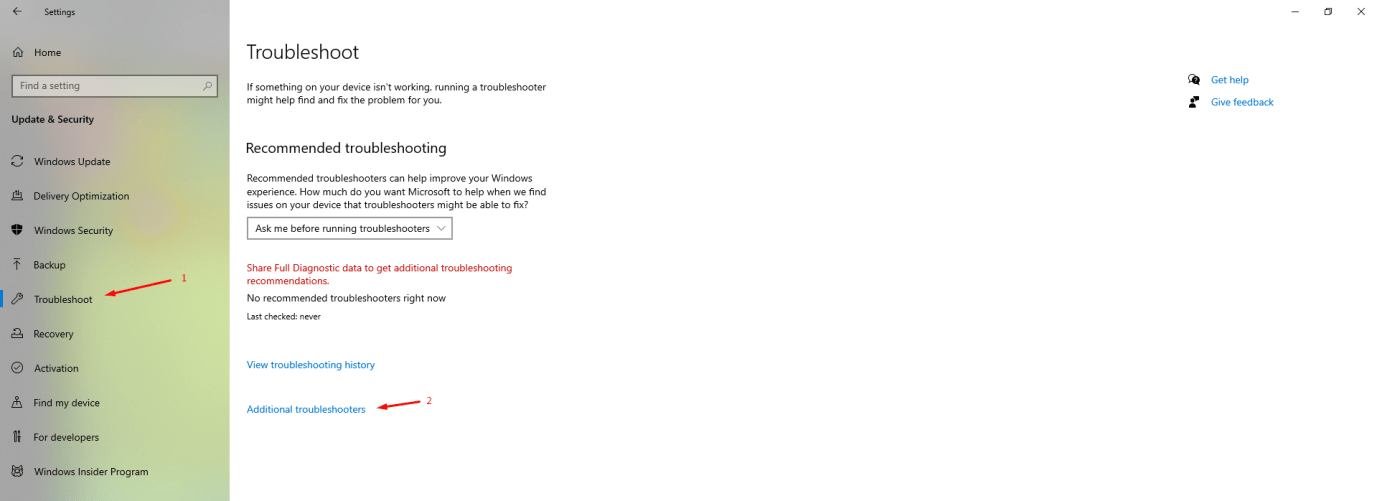
Step 5: Click on “Network Adapter” to reveal additional options and then click on “Run the troubleshooter” to start the process.
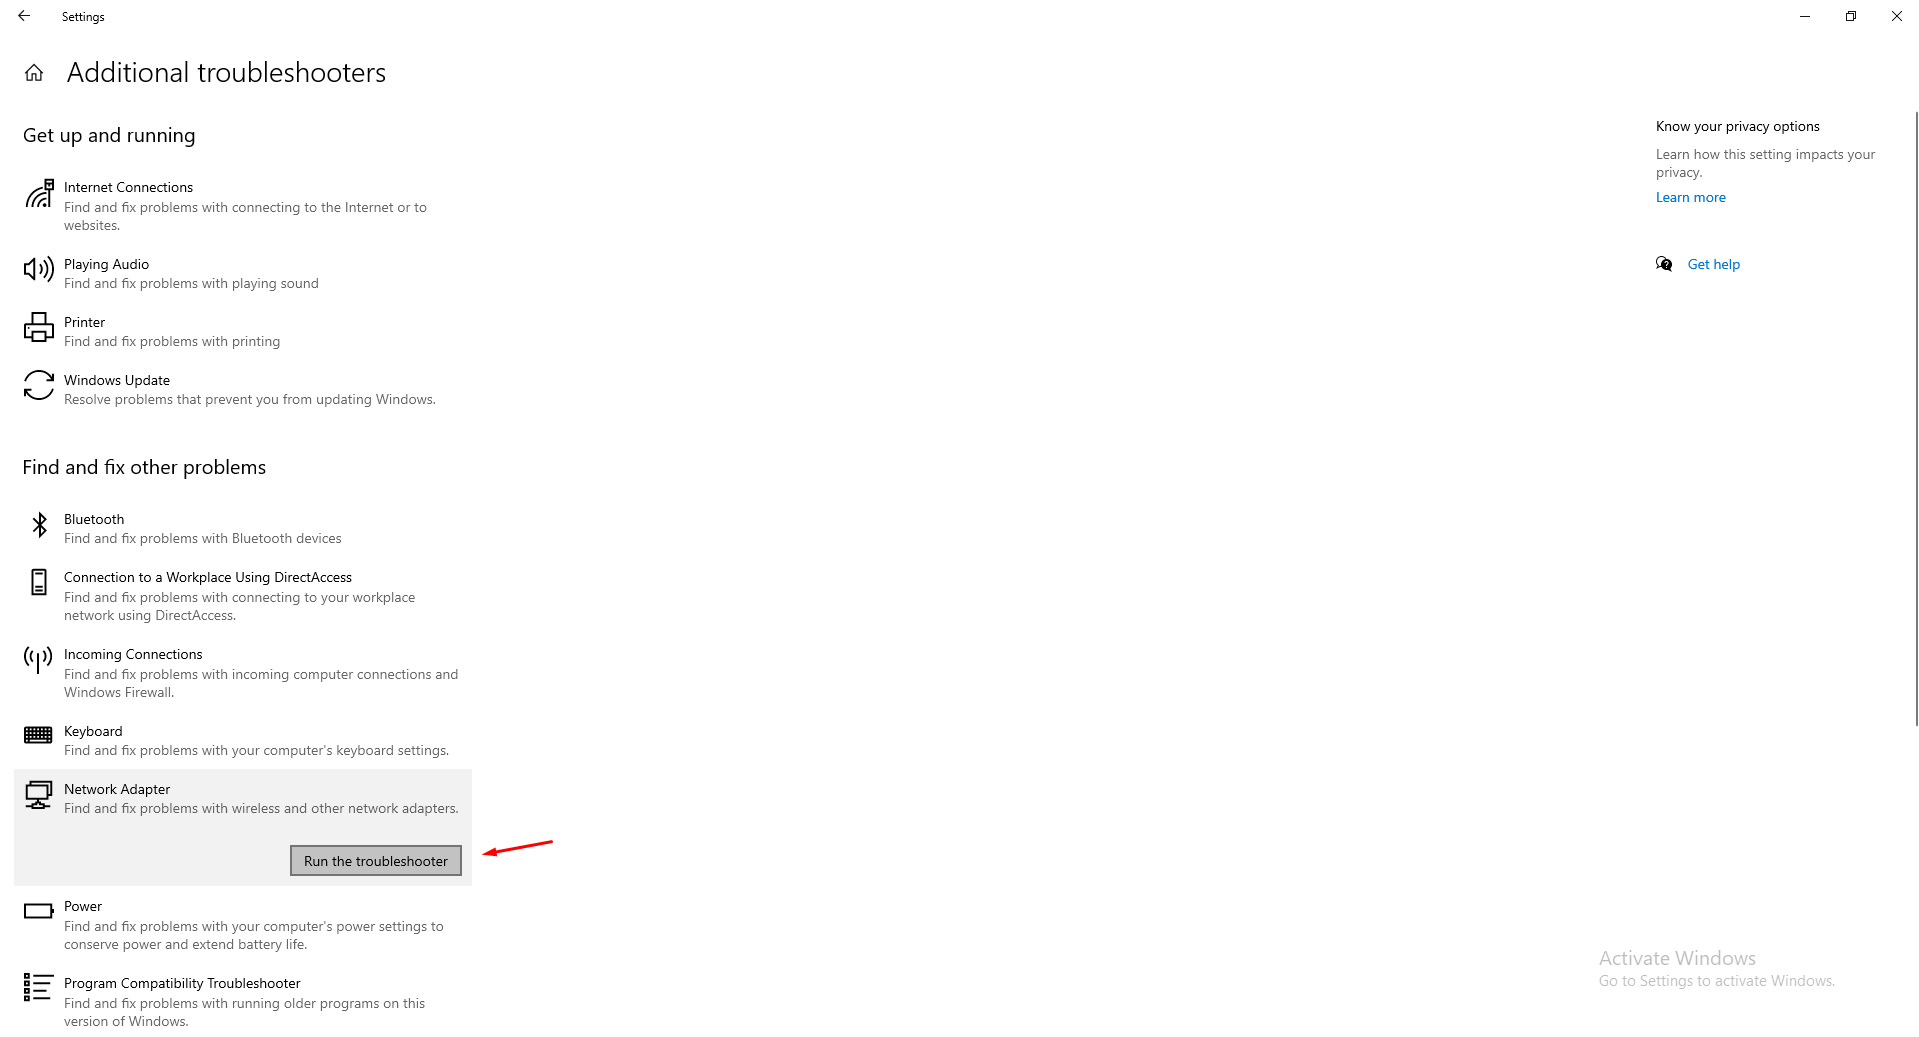
Step 6: A new window will show up on the screen to select “All network adapters” to continue.
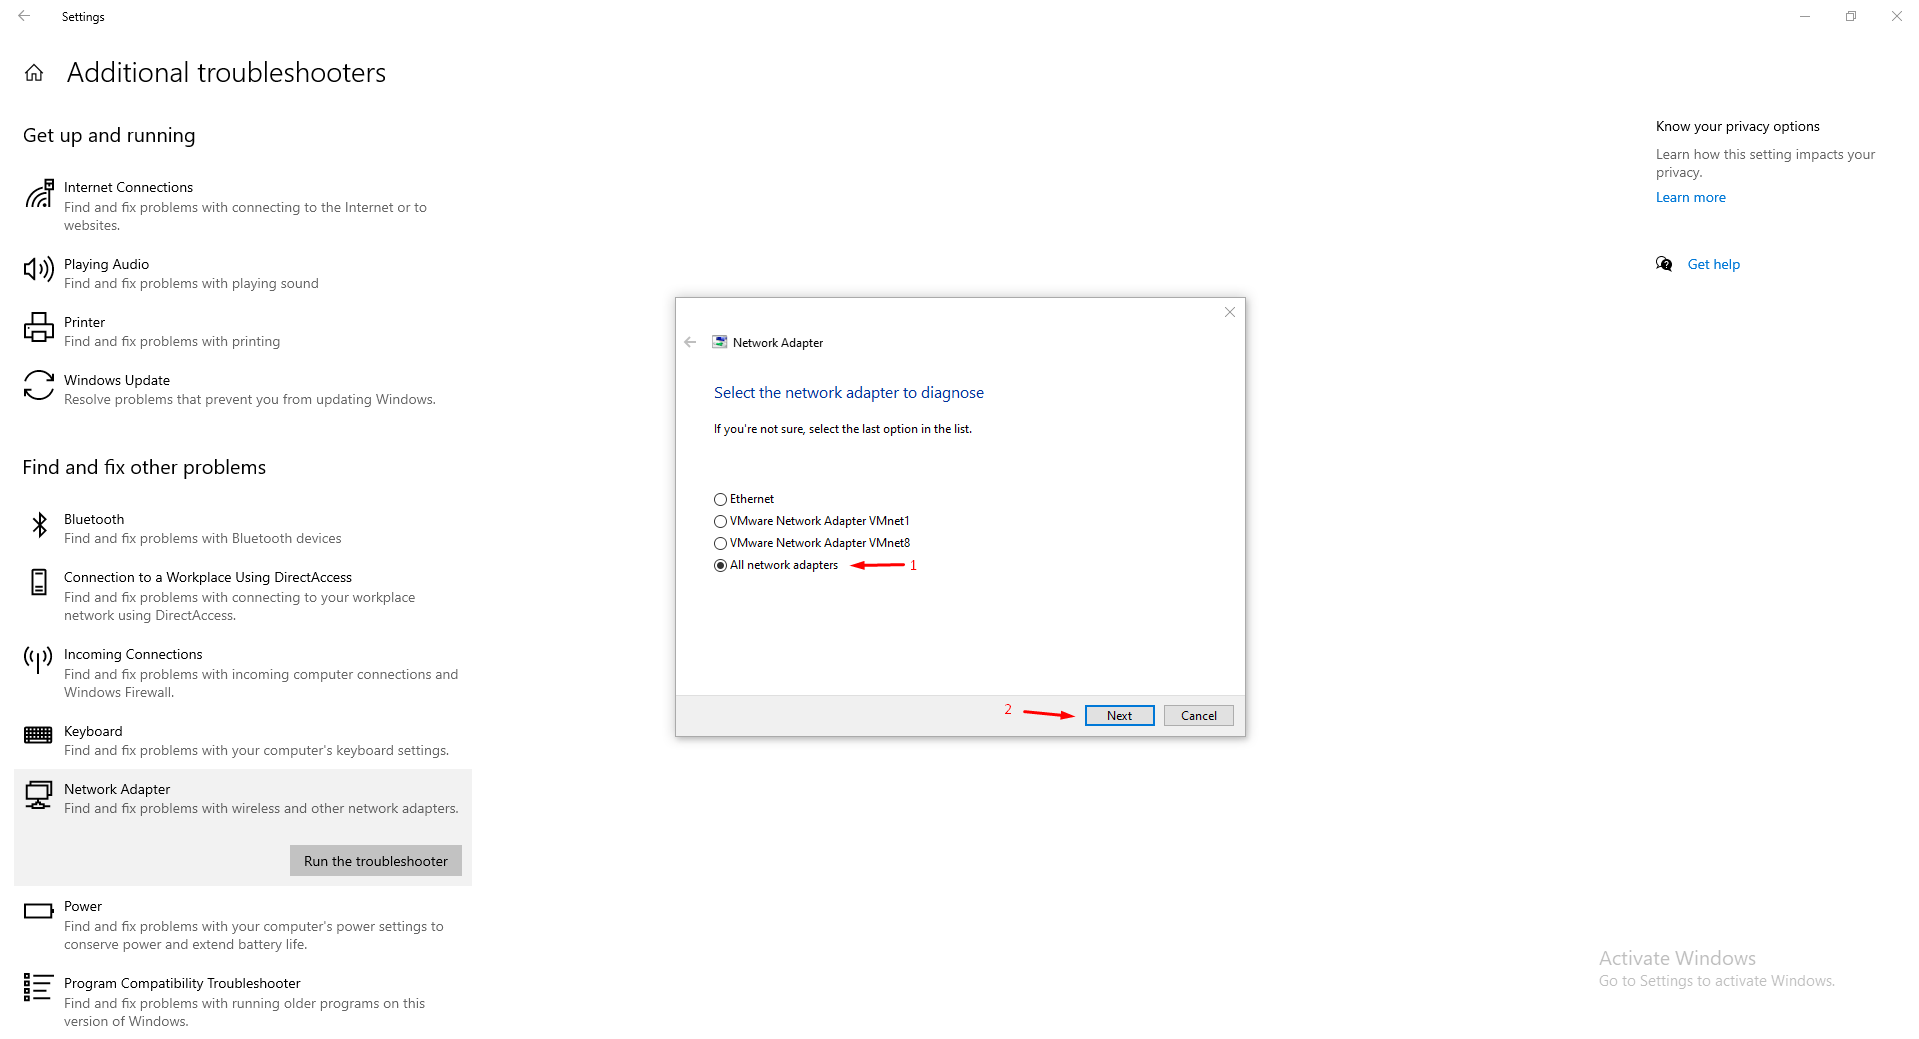
Step 7: We don’t have any network-related problems, so nothing has shown up on the screen.
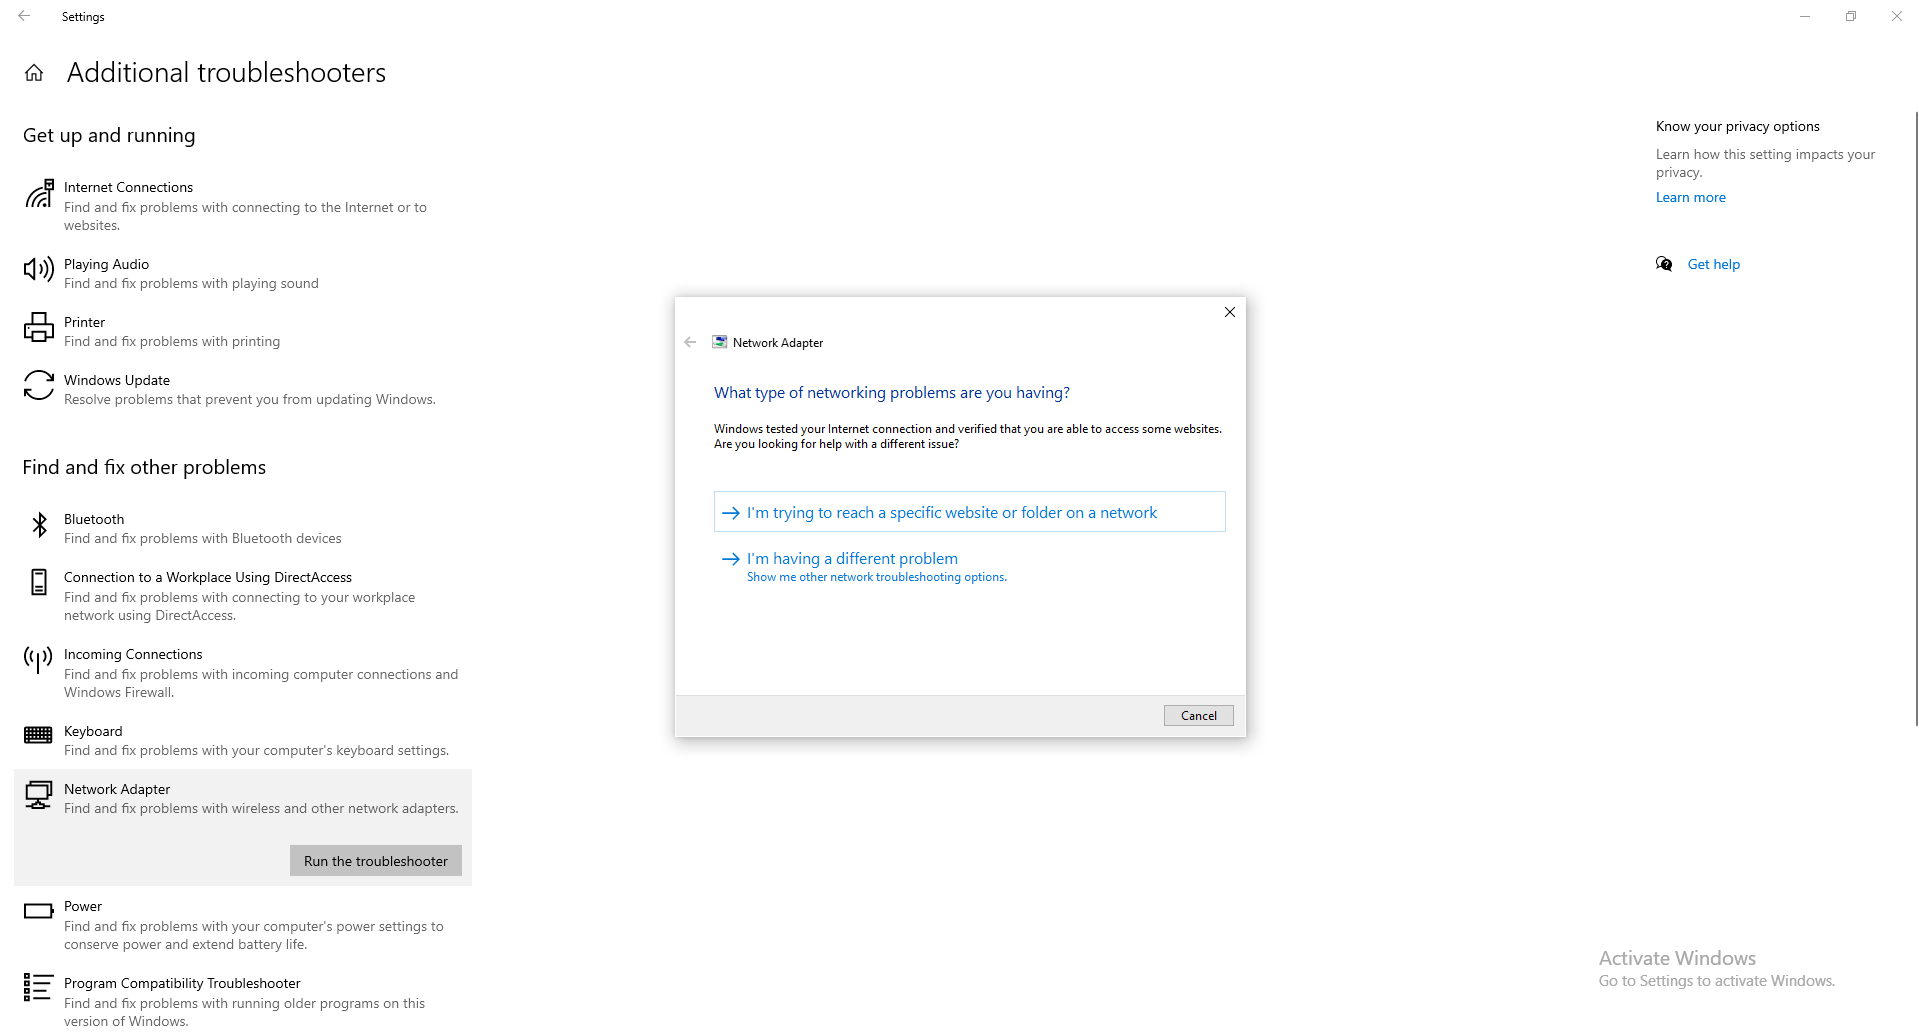
Choose the second option “I’m having a different problem” to check out other options. You can continue to the next solution if you have the same result.
Change Your PC DNS Address
Windows brought newer modifications in the latest edition but they did not meddle with the traditional yet important options in the 10th edition. You can make changes to the PC DNS address and fix the problem if needed, and you can consult with the ISP before messing around with the configuration.
Note: Take a screenshot of the existing configuration to revert the changes.
Step 1: Press Windows Key + R to open the “RUN” application.
Step 2: Type “ncpa.cpl” and then press enters to run the application.

Step 3: The network connections window will show up on the screen. Find the network adapter that is connected to the internet and we are connected to the internet via LAN cable.

Click to select the network adapter and then right-mouse click for more options and then choose “Properties” to continue.
Step 4: A new window will show on the screen and then select “Internet Protocol Version 4 (TCP/IPv4)” and then click “Properties” to reveal its options.
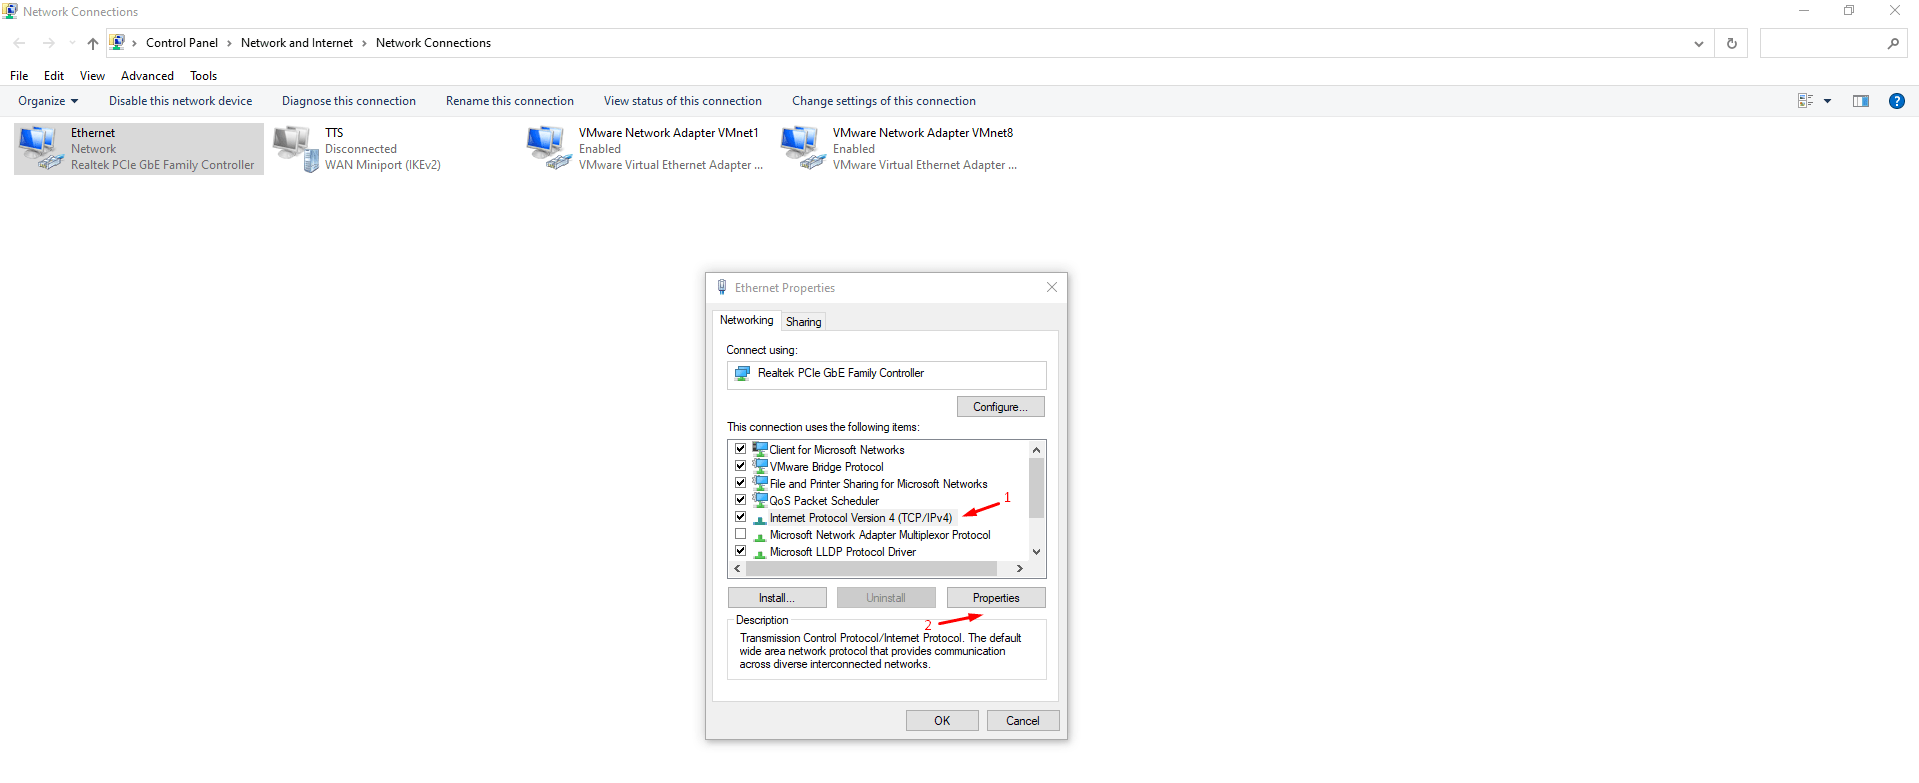
Step 5: Choose “Use the following IP address” to reveal the options.
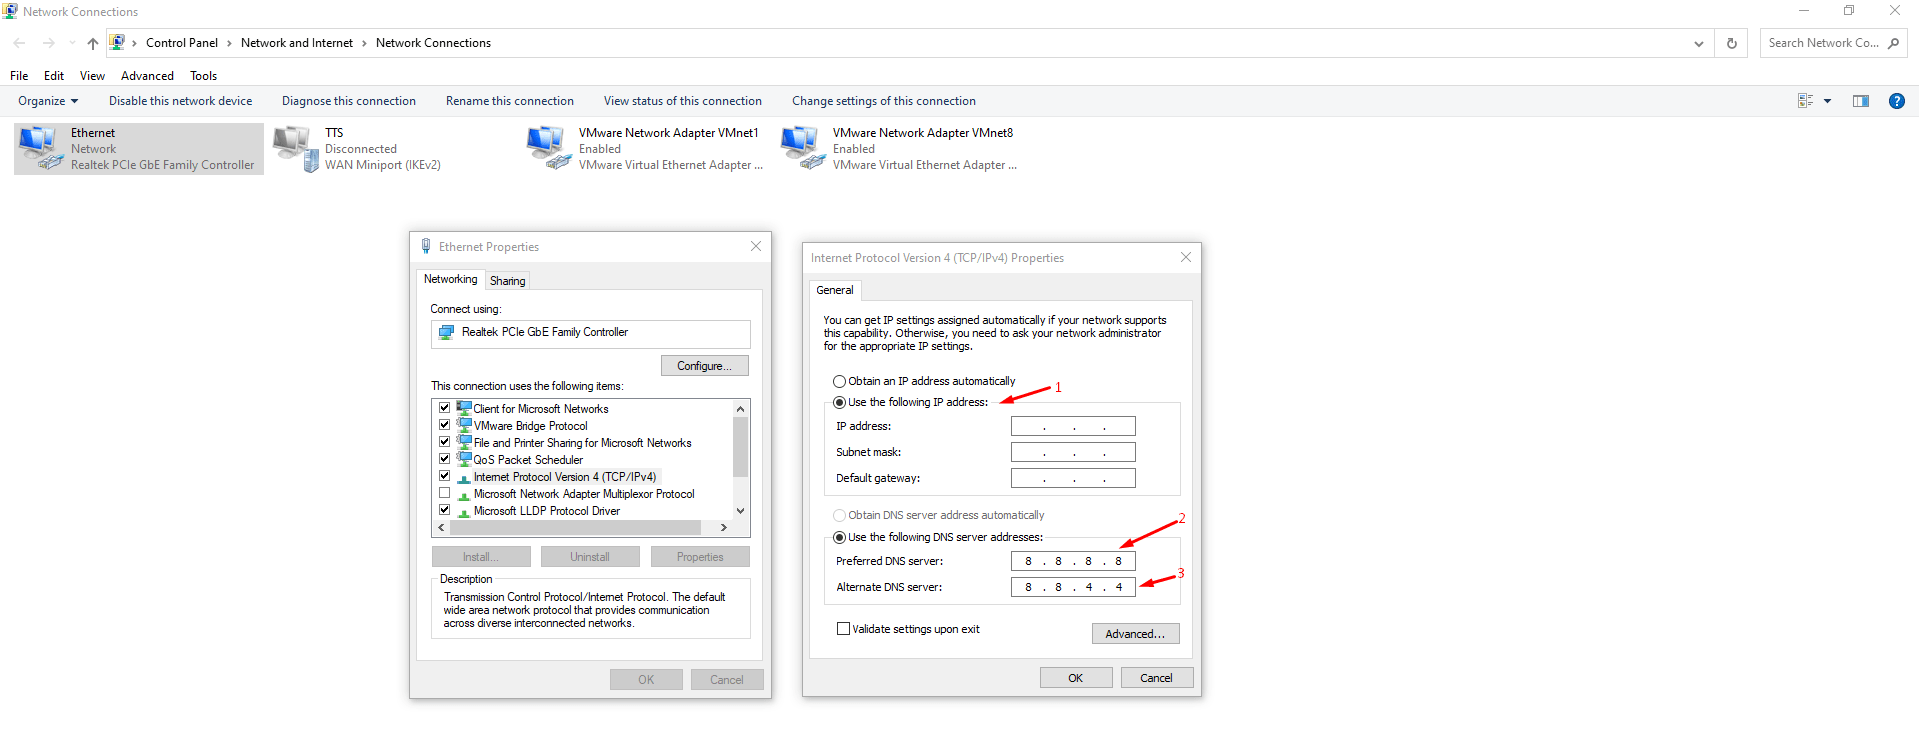
Preferred DNS Server: 8.8.8.8
Alternate DNS server: 8.8.4.4
Click on “OK” and then “OK” to save all changes and restart the PC to a new session.
The DNS server address is Google’s public DNS server addresses.
Update HDD/SSD Drivers
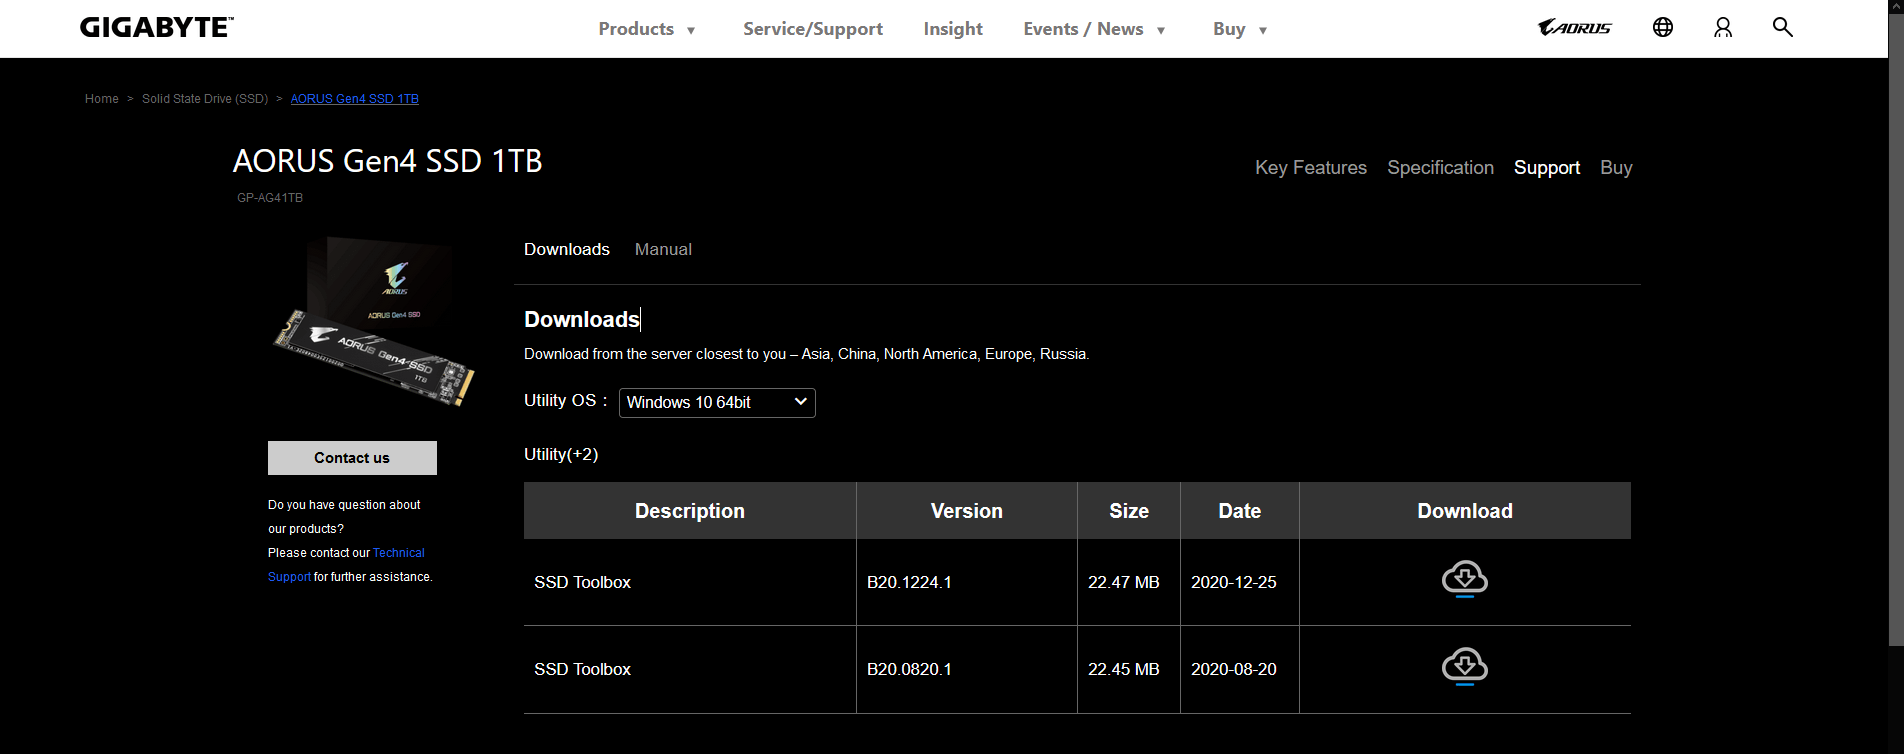
Millions of computers are running on mechanical hard drives and the latest solid-state drives. The older hardware doesn’t get enough support from the manufacturers, and the newer hardware is getting the latest driver updates from the manufacturer. Fortunately, Microsoft has a dedicated pool of drivers in the house, and you can update it to the latest version. In most cases, you have to rely on the driver’s available manufacturer’s official website.
Use Regedit to Fix Update Error
The update error 8024402C does look complicated because it is important to find the culprit. Windows Registry is a core component in the system, and messing around with it without responsibility can harm the PC. It is a good habit to close all background programs to ensure that none of the applications are interrupting it.
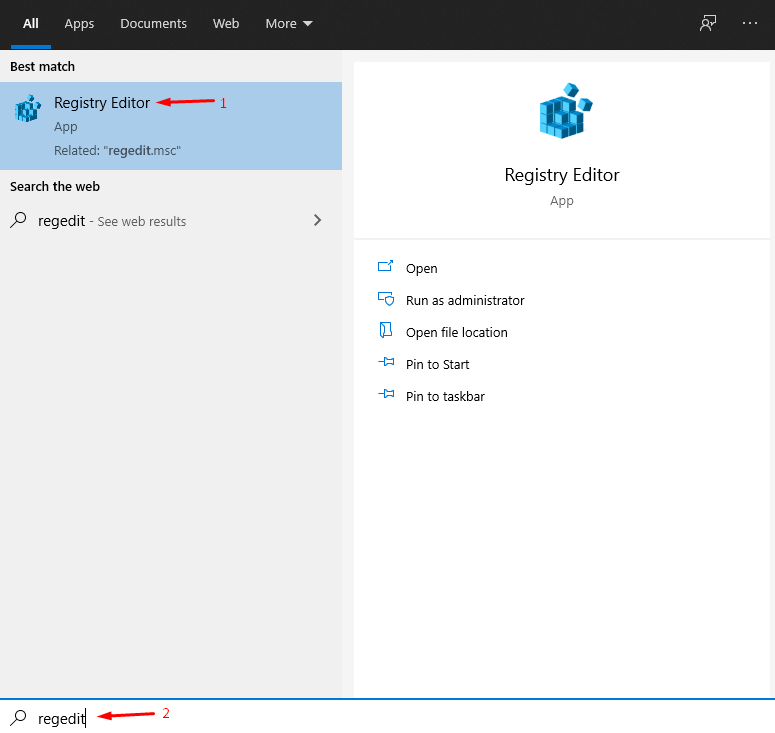
Step 1: Press Windows Key + S and then look for “Regedit” and then open as administrator.
Step 2: Copy and paste the (HKEY_LOCAL_MACHINE\SOFTWARE\Policies\Microsoft\Windows\WindowsUpdate\AU) location in the registry editor.
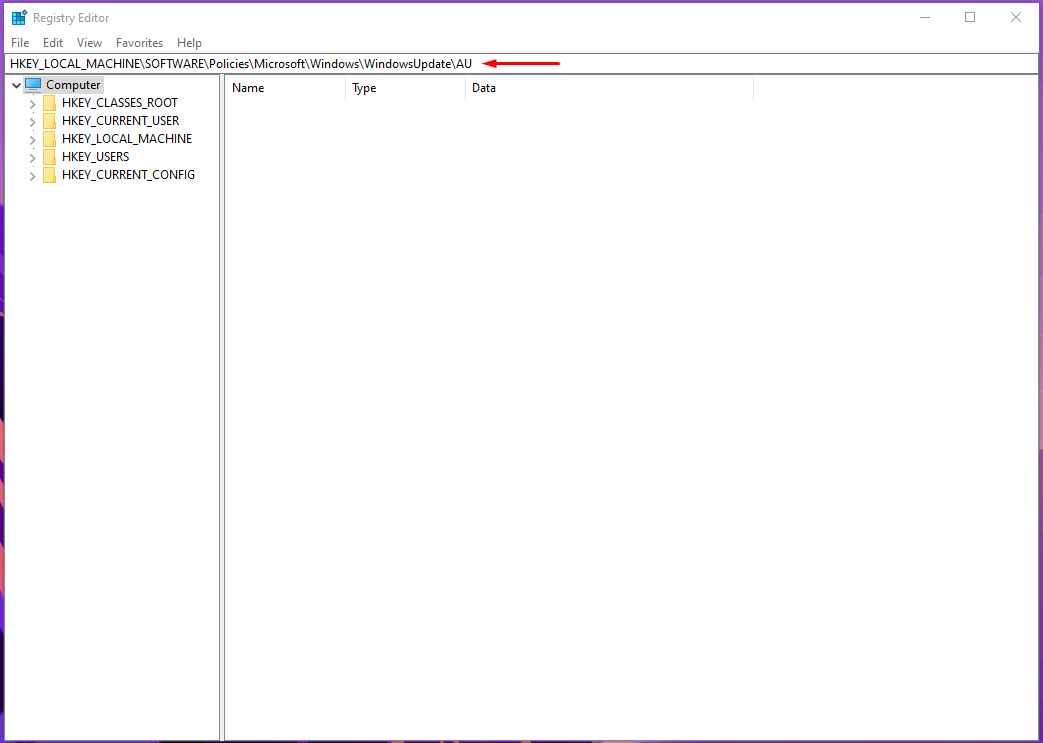
Note: Create a new string, if the folder is not available in the edition.
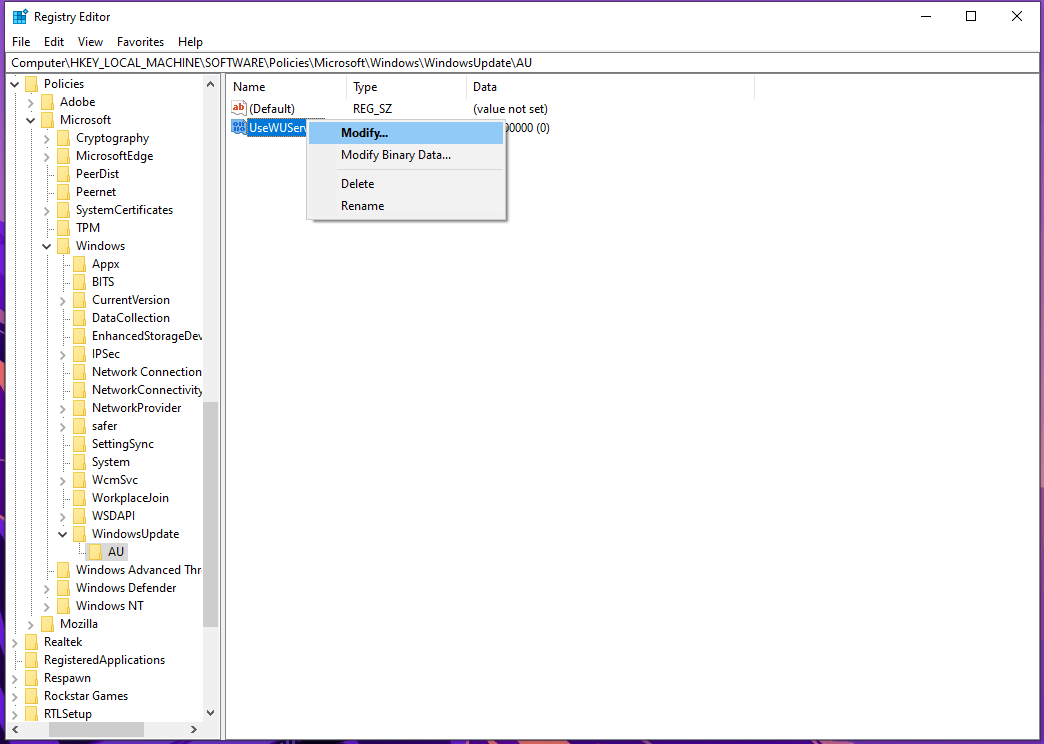
Step 3: Find the “UseWUServer” string and then right-mouse click to view more options. Choose “Modify” from the options to continue.
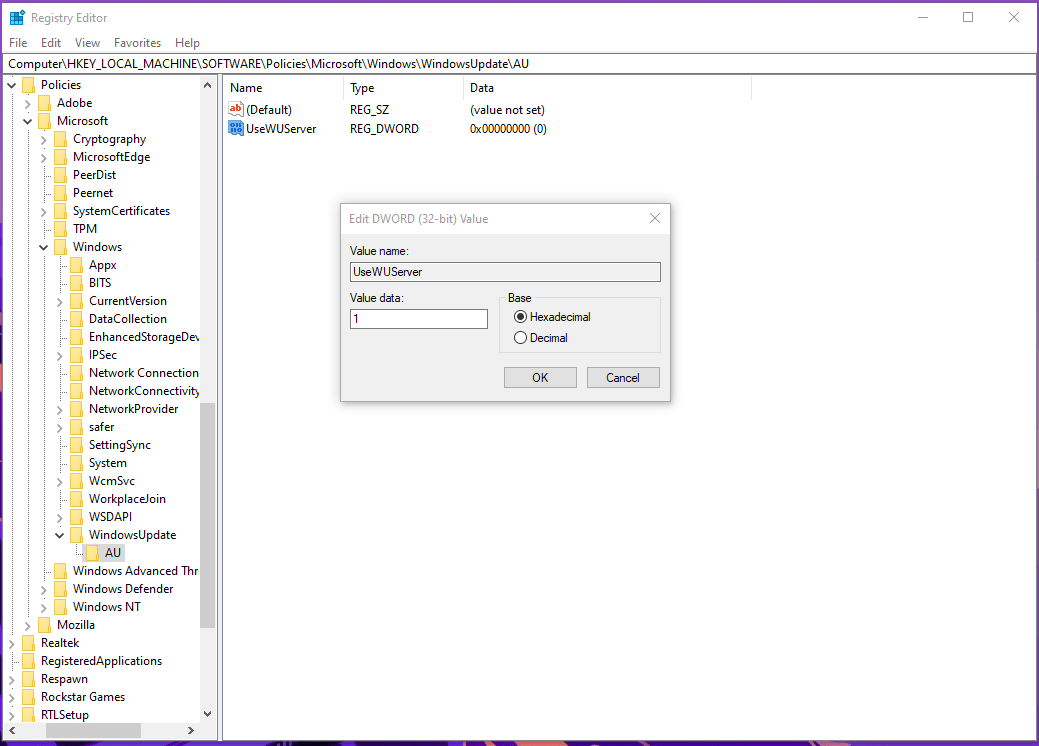
Step 4: Now, change the value from 0 to 1 to make it effective.
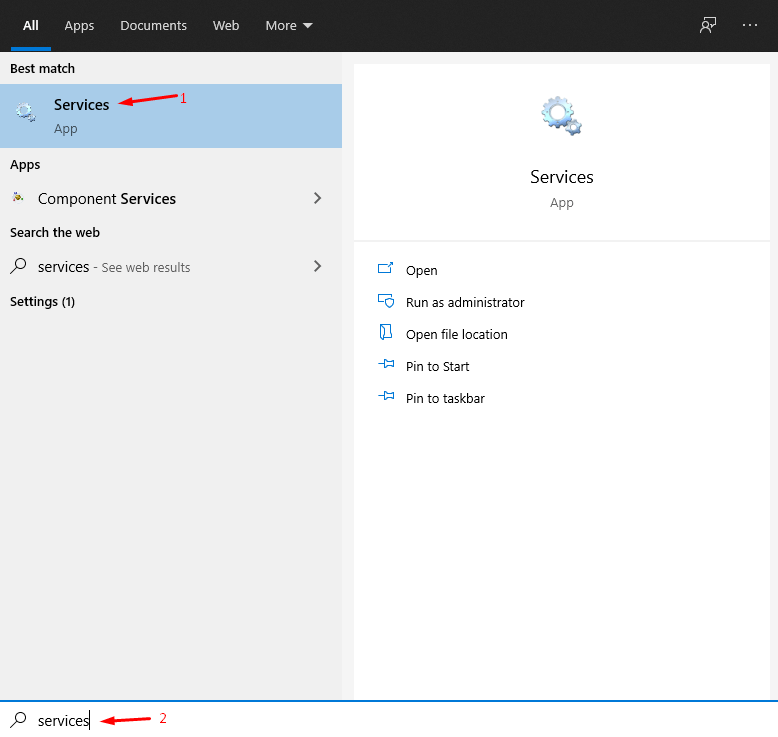
Step 5: Press Windows Key + S and then look for “services” to open as administrator.
Step 6: Find “Windows Update” and then right-mouse click to reveal more options and then “Properties”.
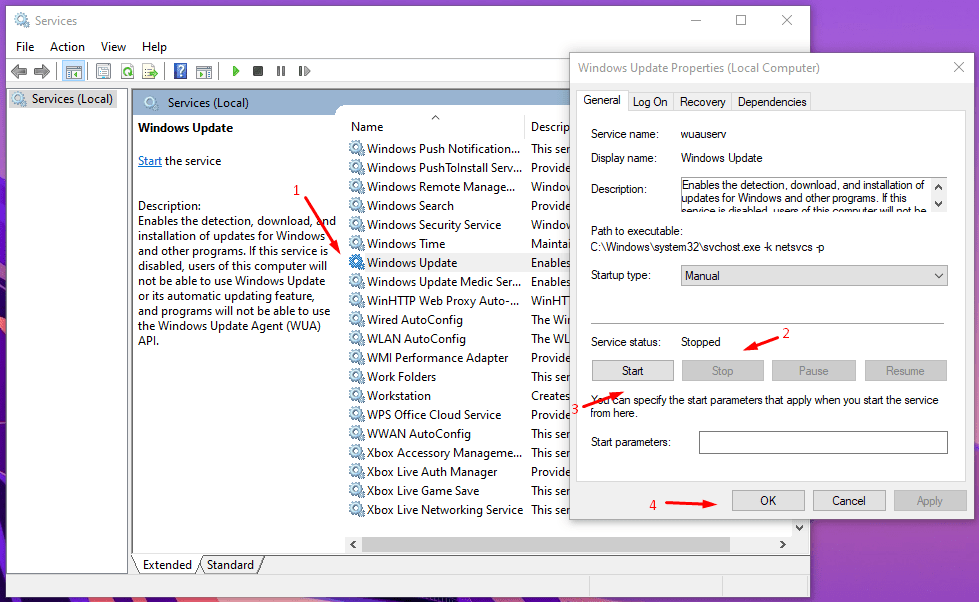
You have to “stop” the service if it is running and then click on “start” to restart it.
Click on “OK” once the service is restarted.
You can end the session by shutting down the PC and power it back on after a couple of minutes.
Bottom Line
Readers have several solutions on the table, but none of the third-party tools will fix Windows Update Error Code 8024402c. We do ask the readers to seek assistance from the Microsoft technical support team if none of the solutions resolves the error. The worst-case scenario would be reinstalling the Windows OS in the PC, which solves all software-related complications. Let us know which solution solved Windows Update Error Code 8024402c in the comment section below.
If you've any thoughts on How to Fix the Windows Update Error Code 8024402C?, then feel free to drop in below comment box. Also, please subscribe to our DigitBin YouTube channel for videos tutorials. Cheers!
