Kodi is a free and open-source media center that helps you stream media content and also organize the playlist. But Kodi is mainly used for live tv and movie streaming; Kodi is primarily used for streaming media over the internet. You just need to add the Repository to your Kodi, install the app, and enjoy seamless content for free.
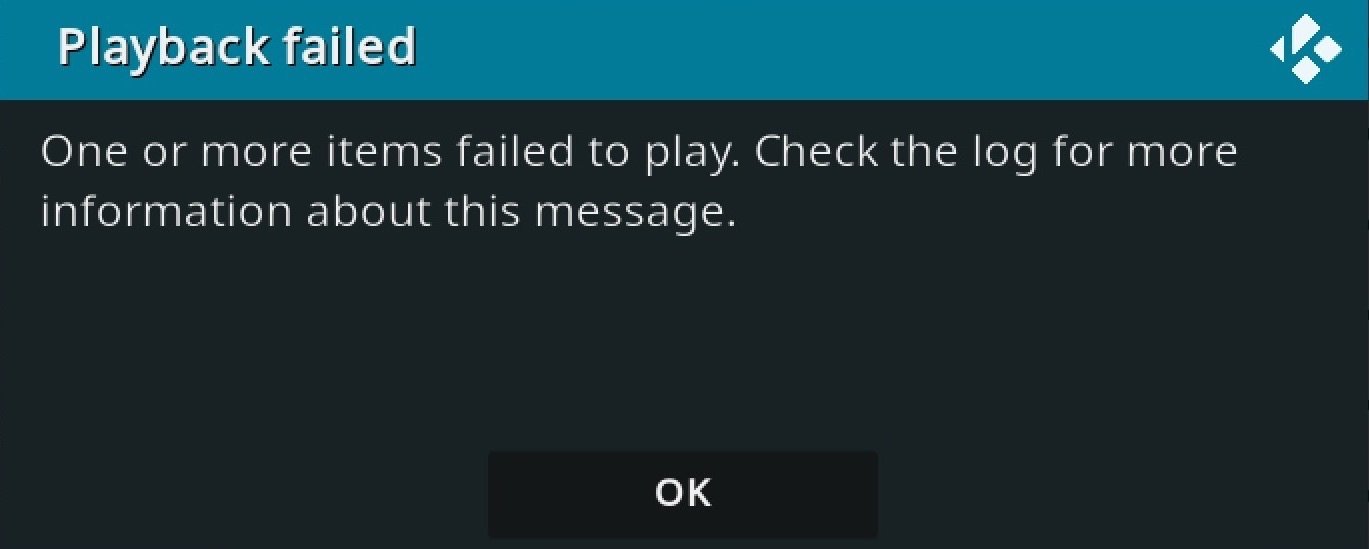
If you are using Kodi on MacBook, trying to stream Live TV or watch movies and tv series on your Mac PC but facing the video playback error “Playback Failed, One or More item Failed to Play. Check the Log for More Information about this Message”. This is a simple guide to fix Playback Failed Error on Kodi for Mac.
Basic Fixes you can Try
Before moving forward with the technical fixes, you can try this simple solution to see if these solutions can come in handy.
- Make sure you have the latest version of Kodi installed. If the latest version is causing the playback issue, roll back to an older version to see if the older version is working fine.
- Check your internet connection. If your connection is slow or unstable, it could cause problems with streaming.
- Restart your computer. Rebooting the PC will restart all system processes and close unwanted background processes.
1. Clear the Cache of Kodi
A cache is data that helps load the app and other app functions. It is best to delete the cache data of Kodi on your Mac PC to fix any streaming issues.
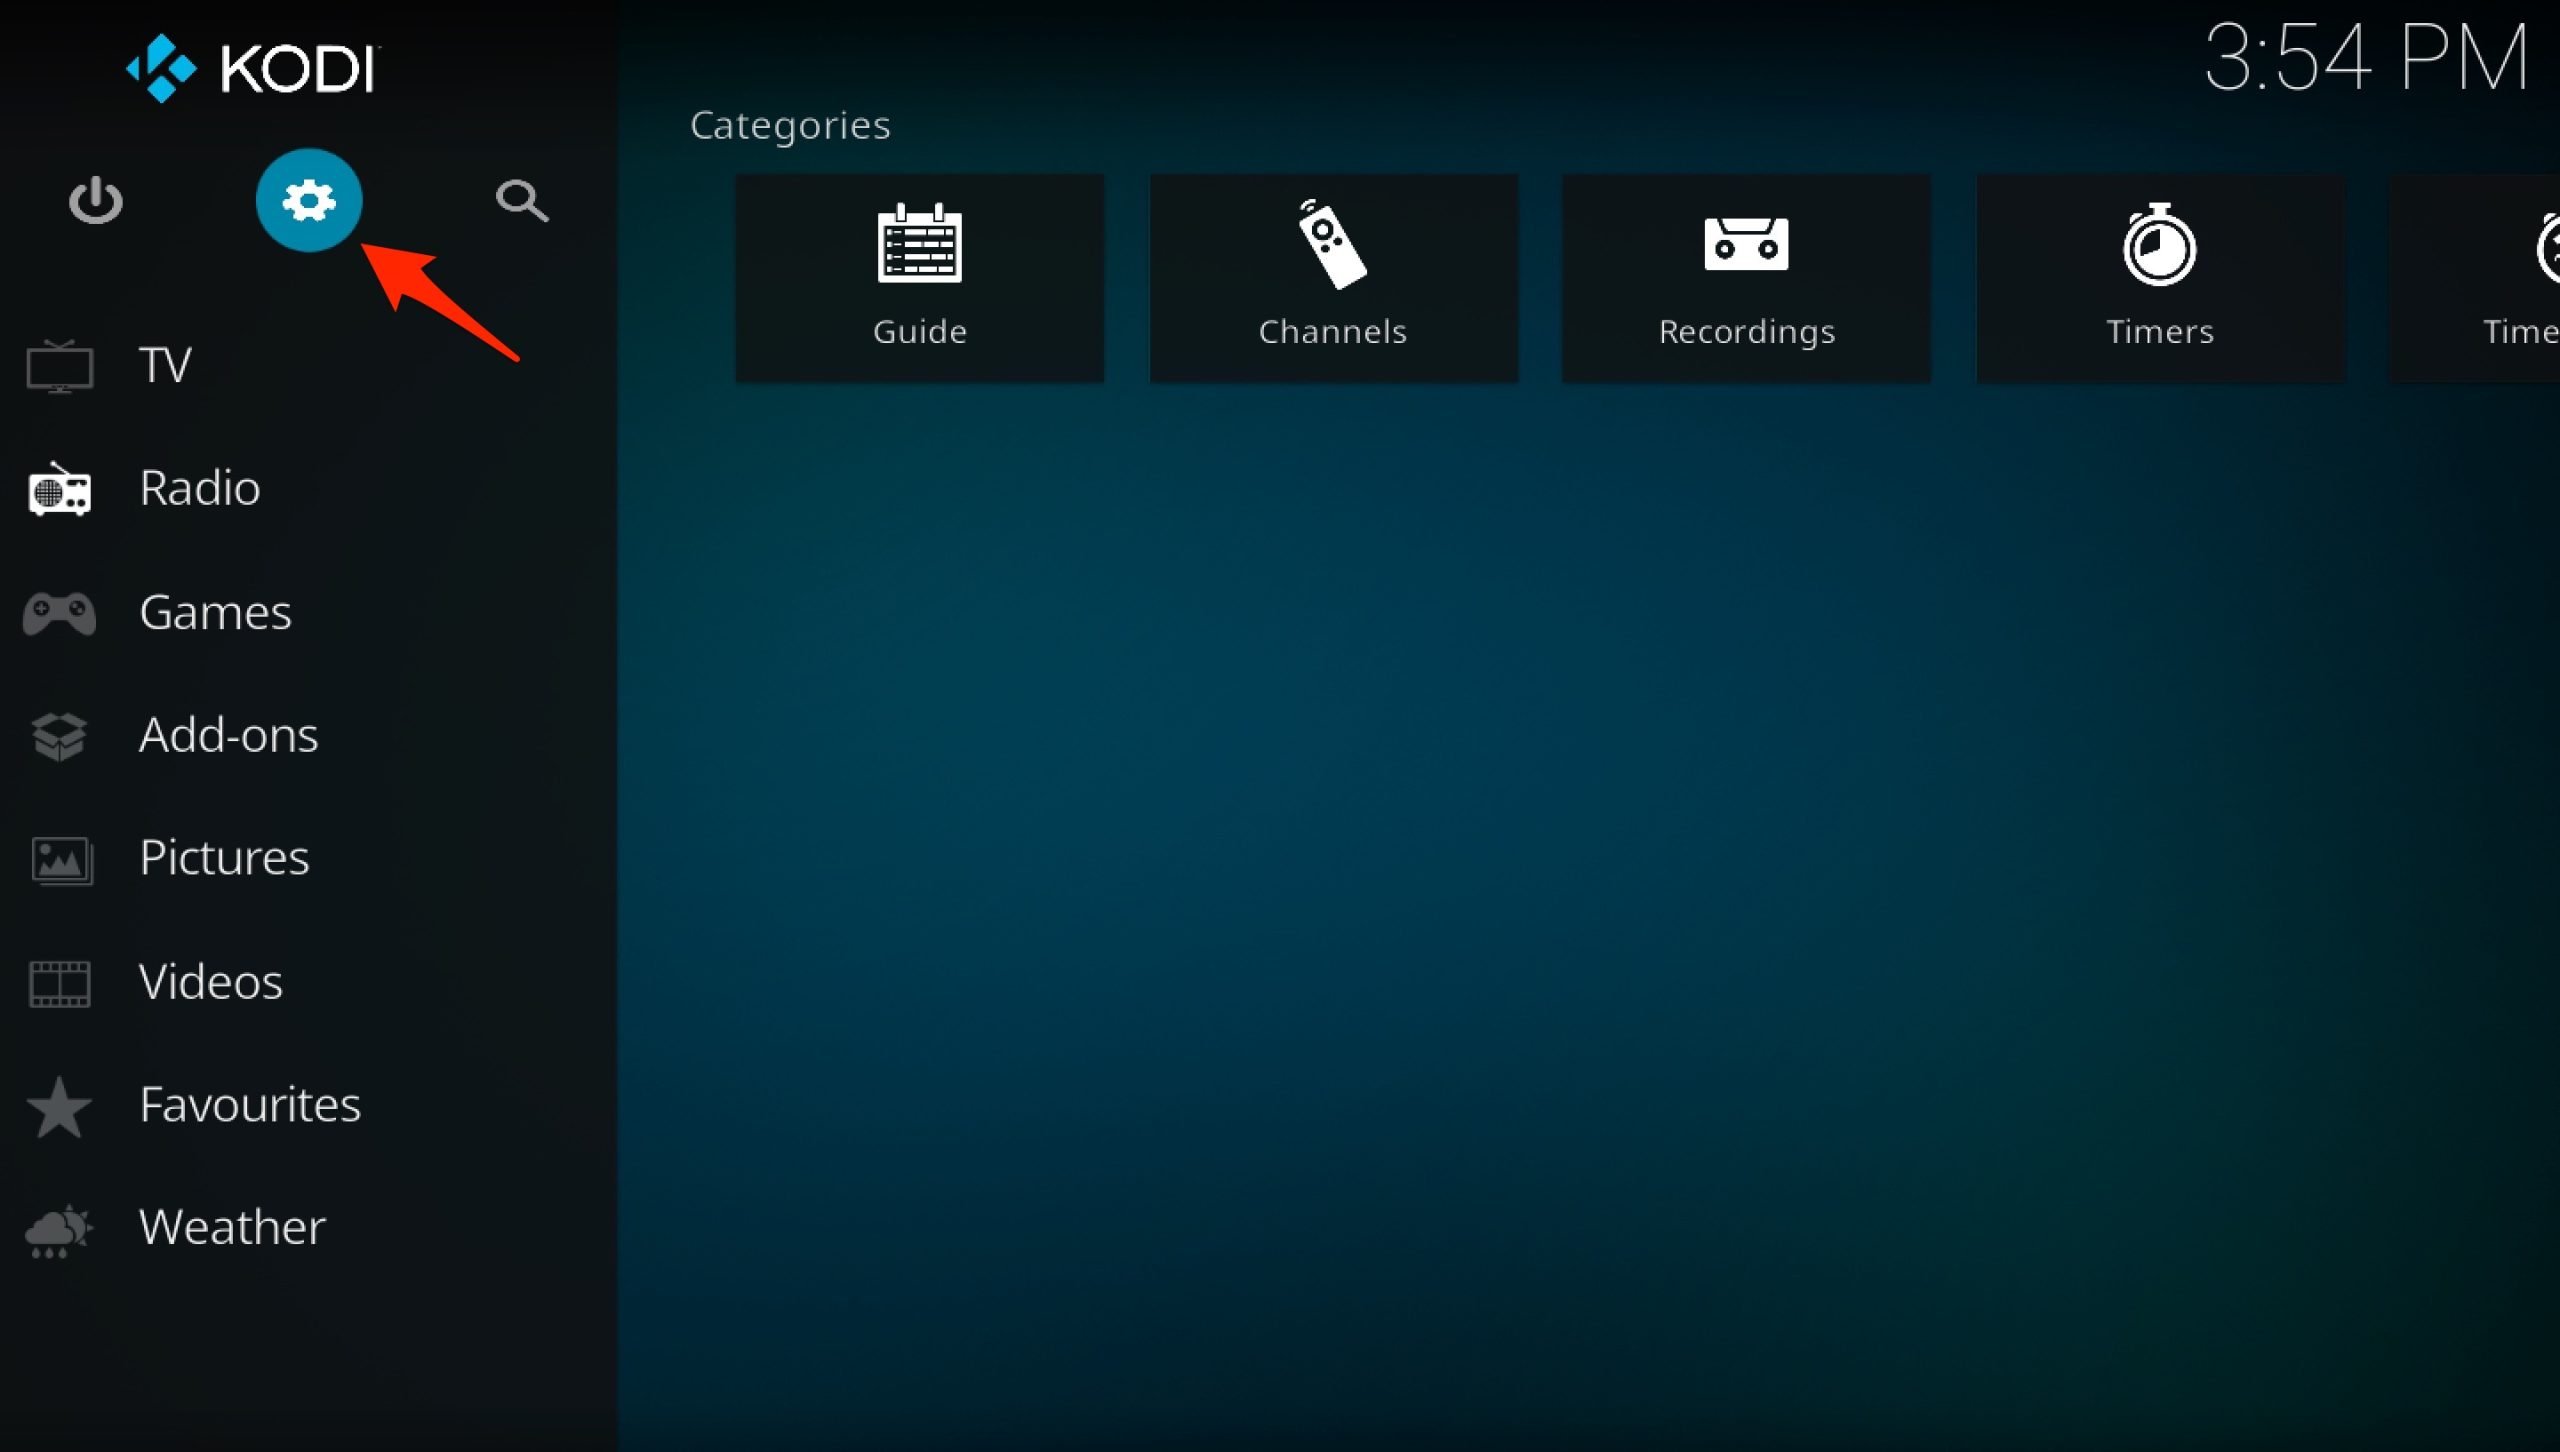
- Click the Settings gear icon.
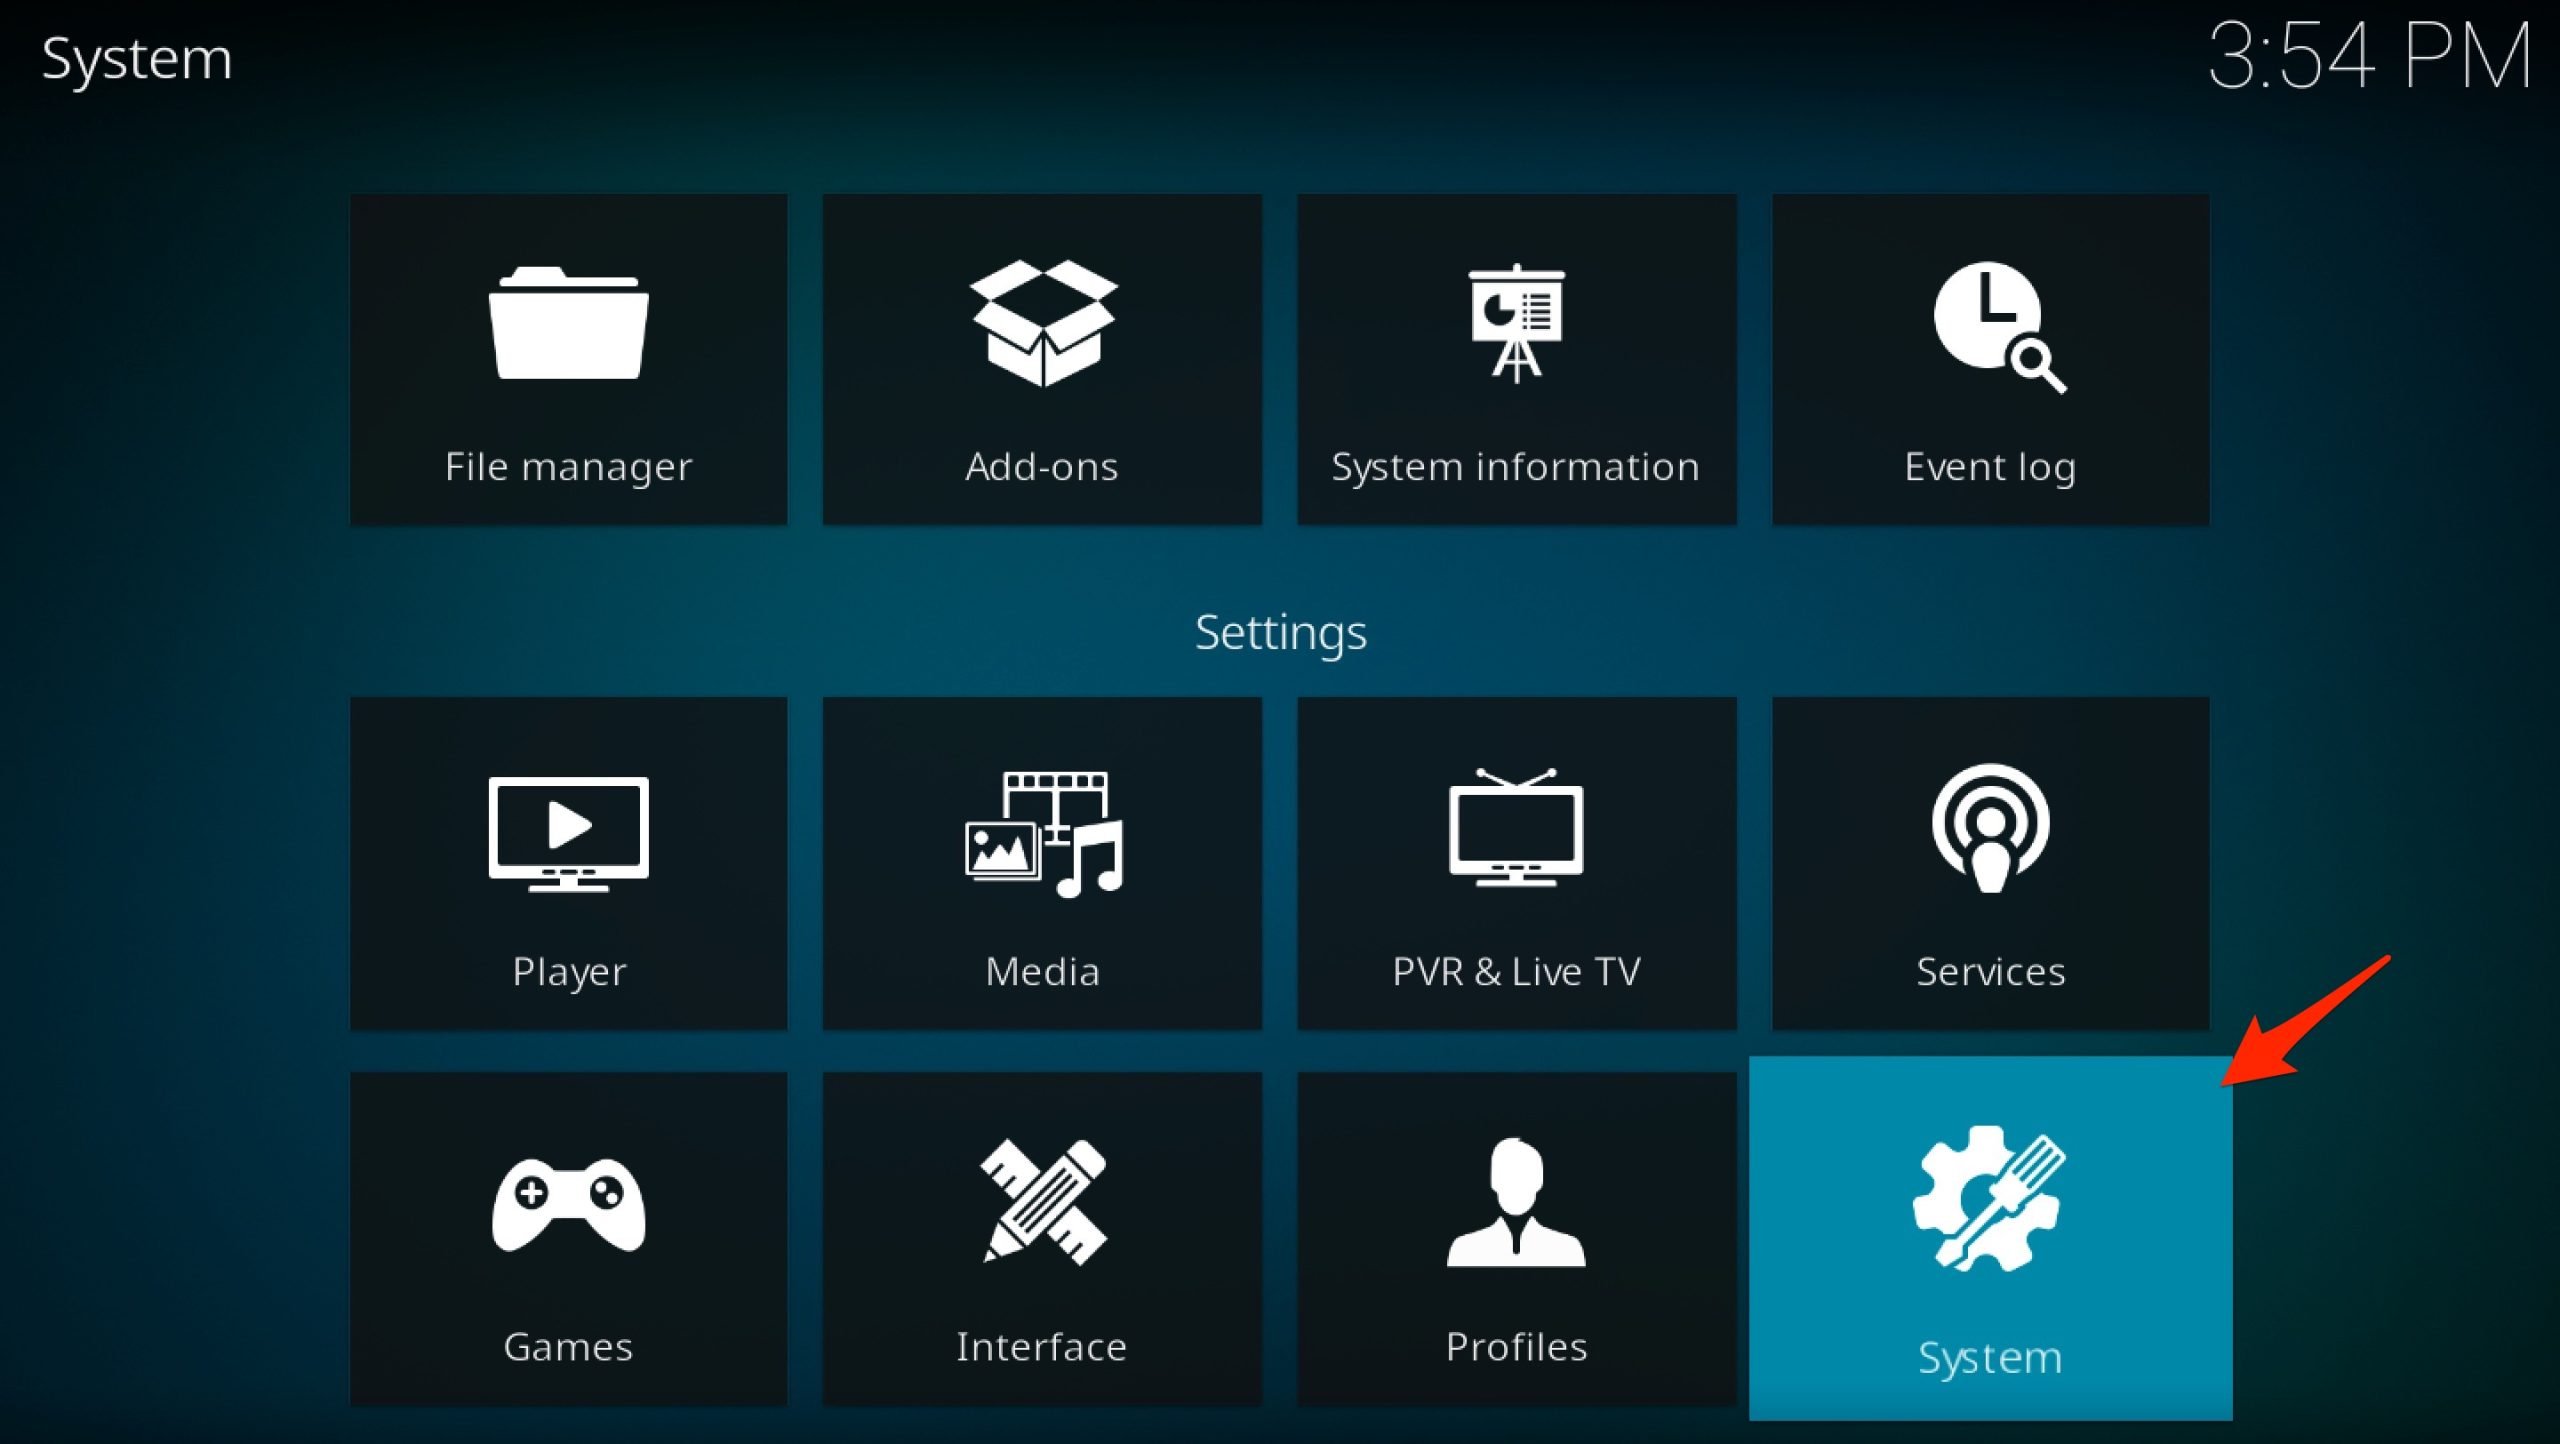
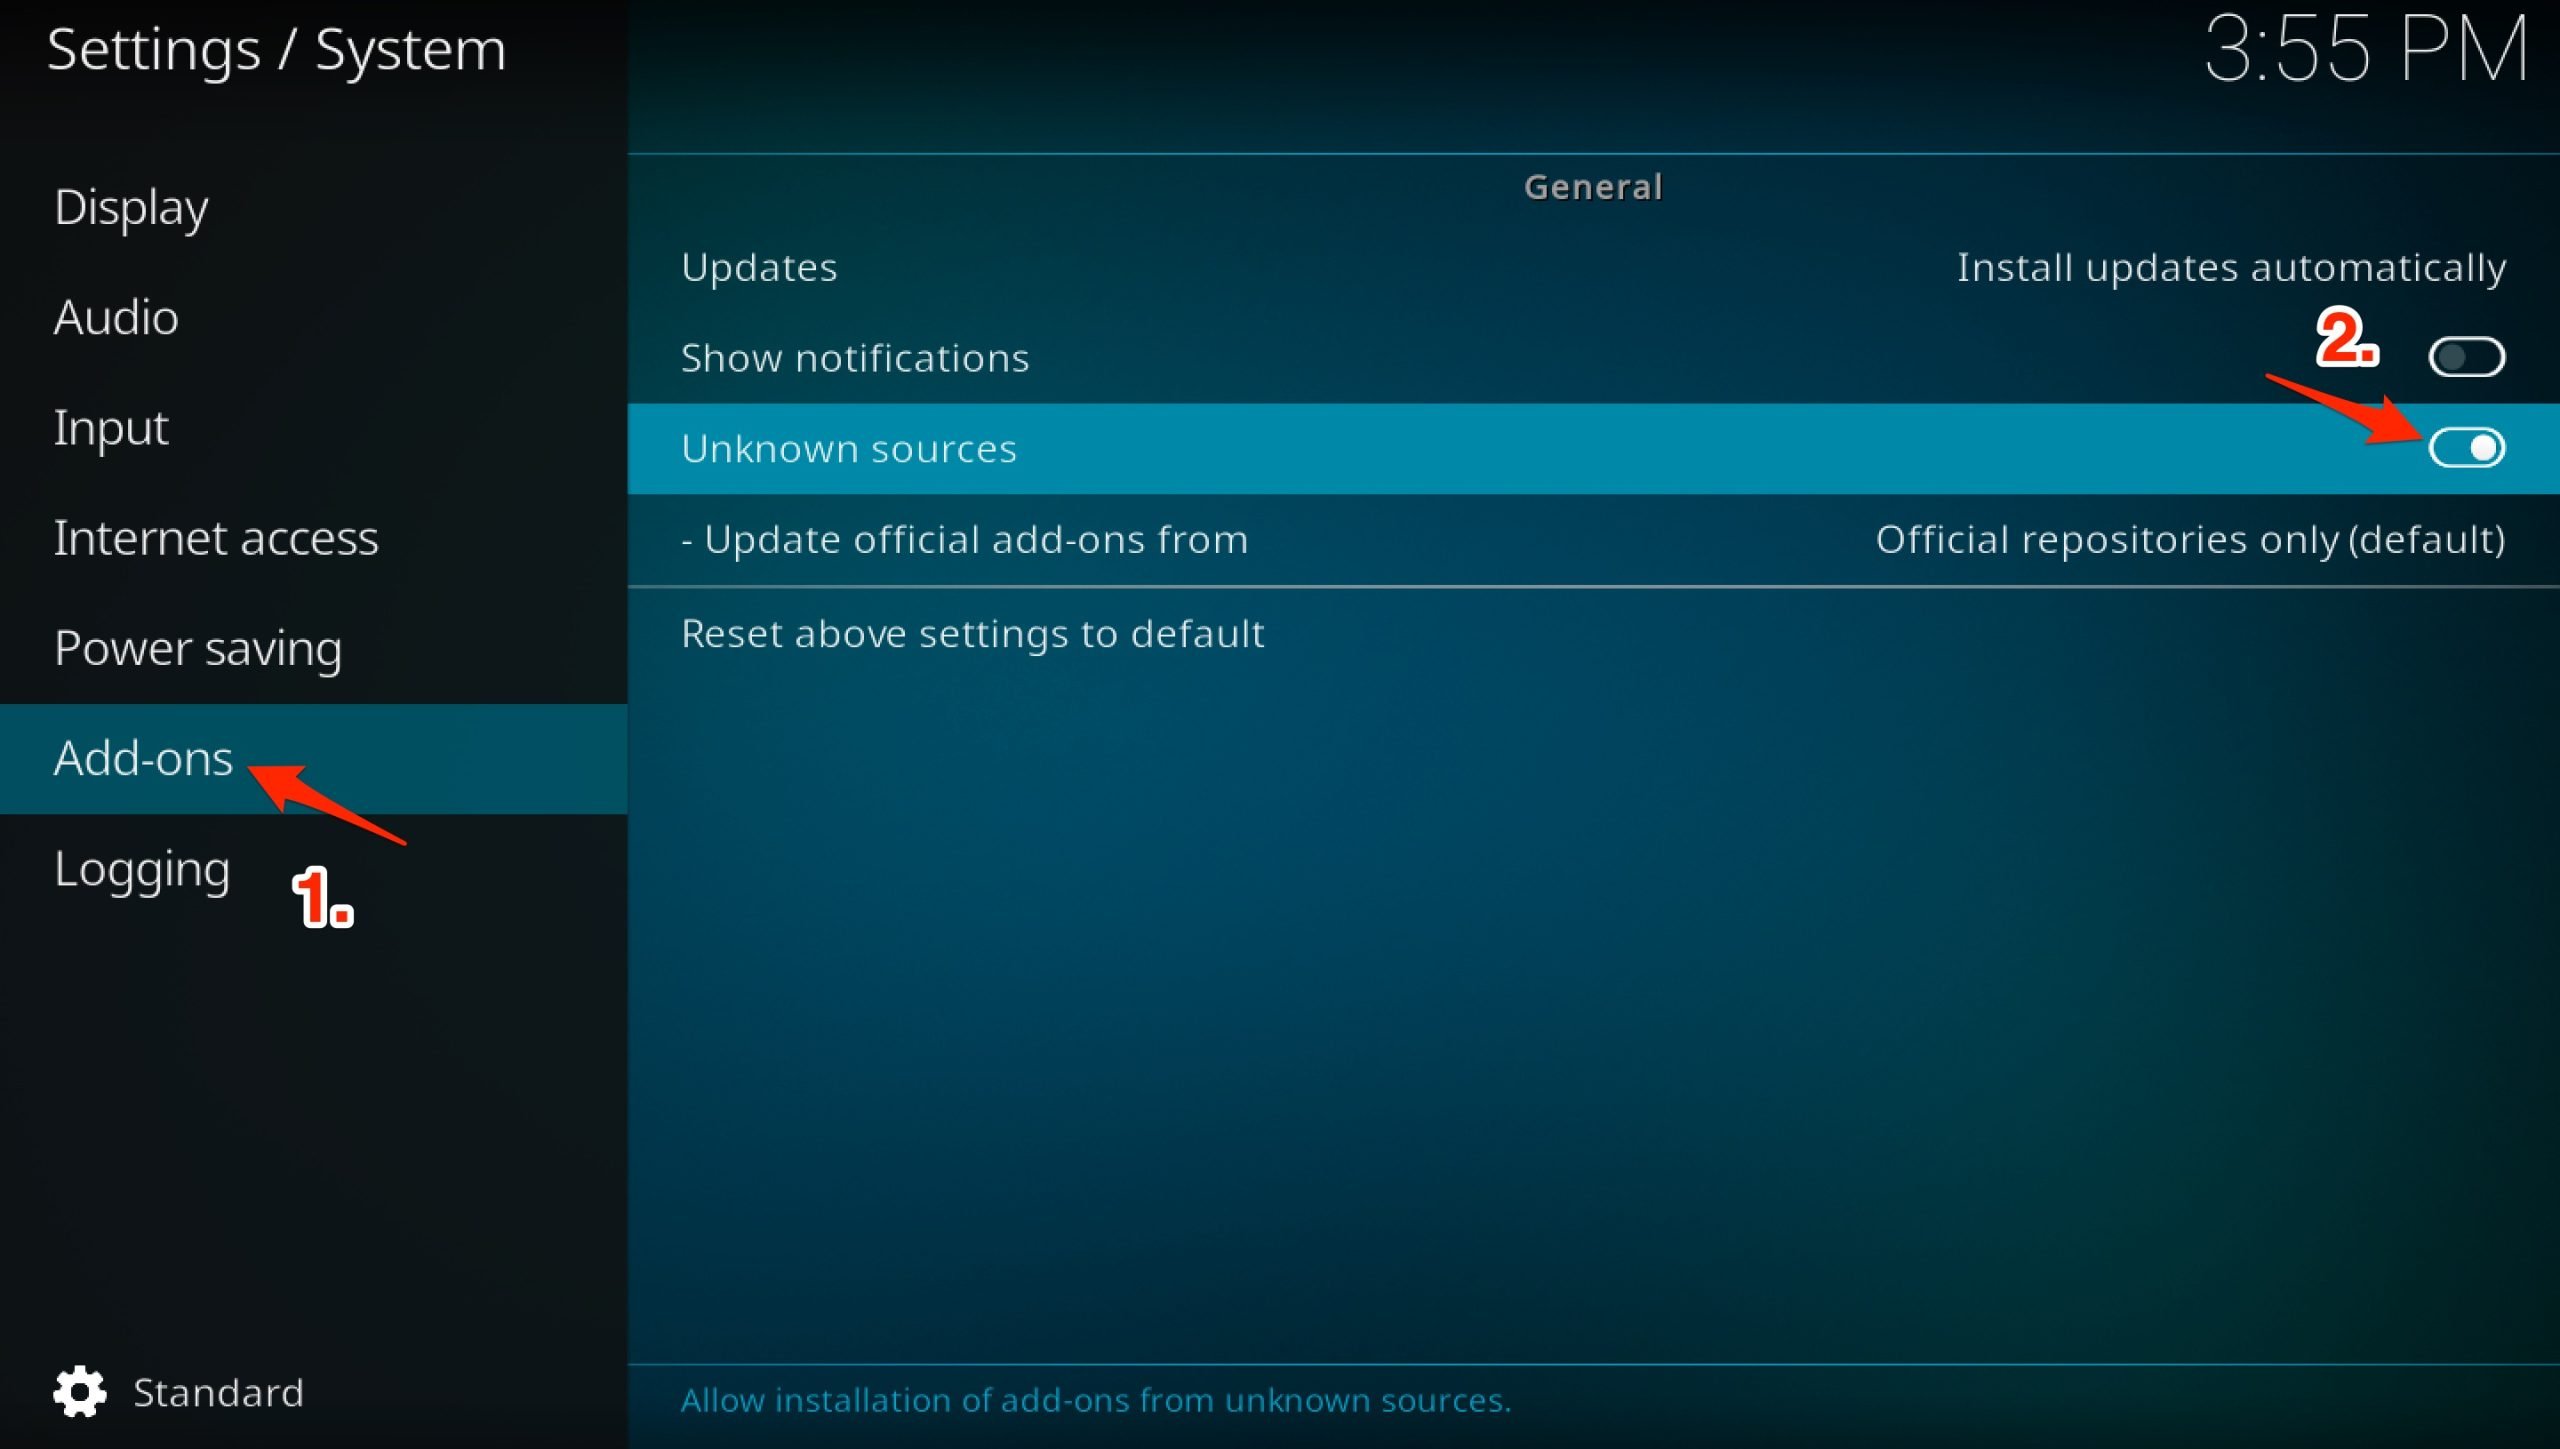
- Click on System.
- On the left sidebar, click on Addons.
- Enable the toggle next to Unable Sources.
- Now, again go homepage and click on the Settings gear icon.

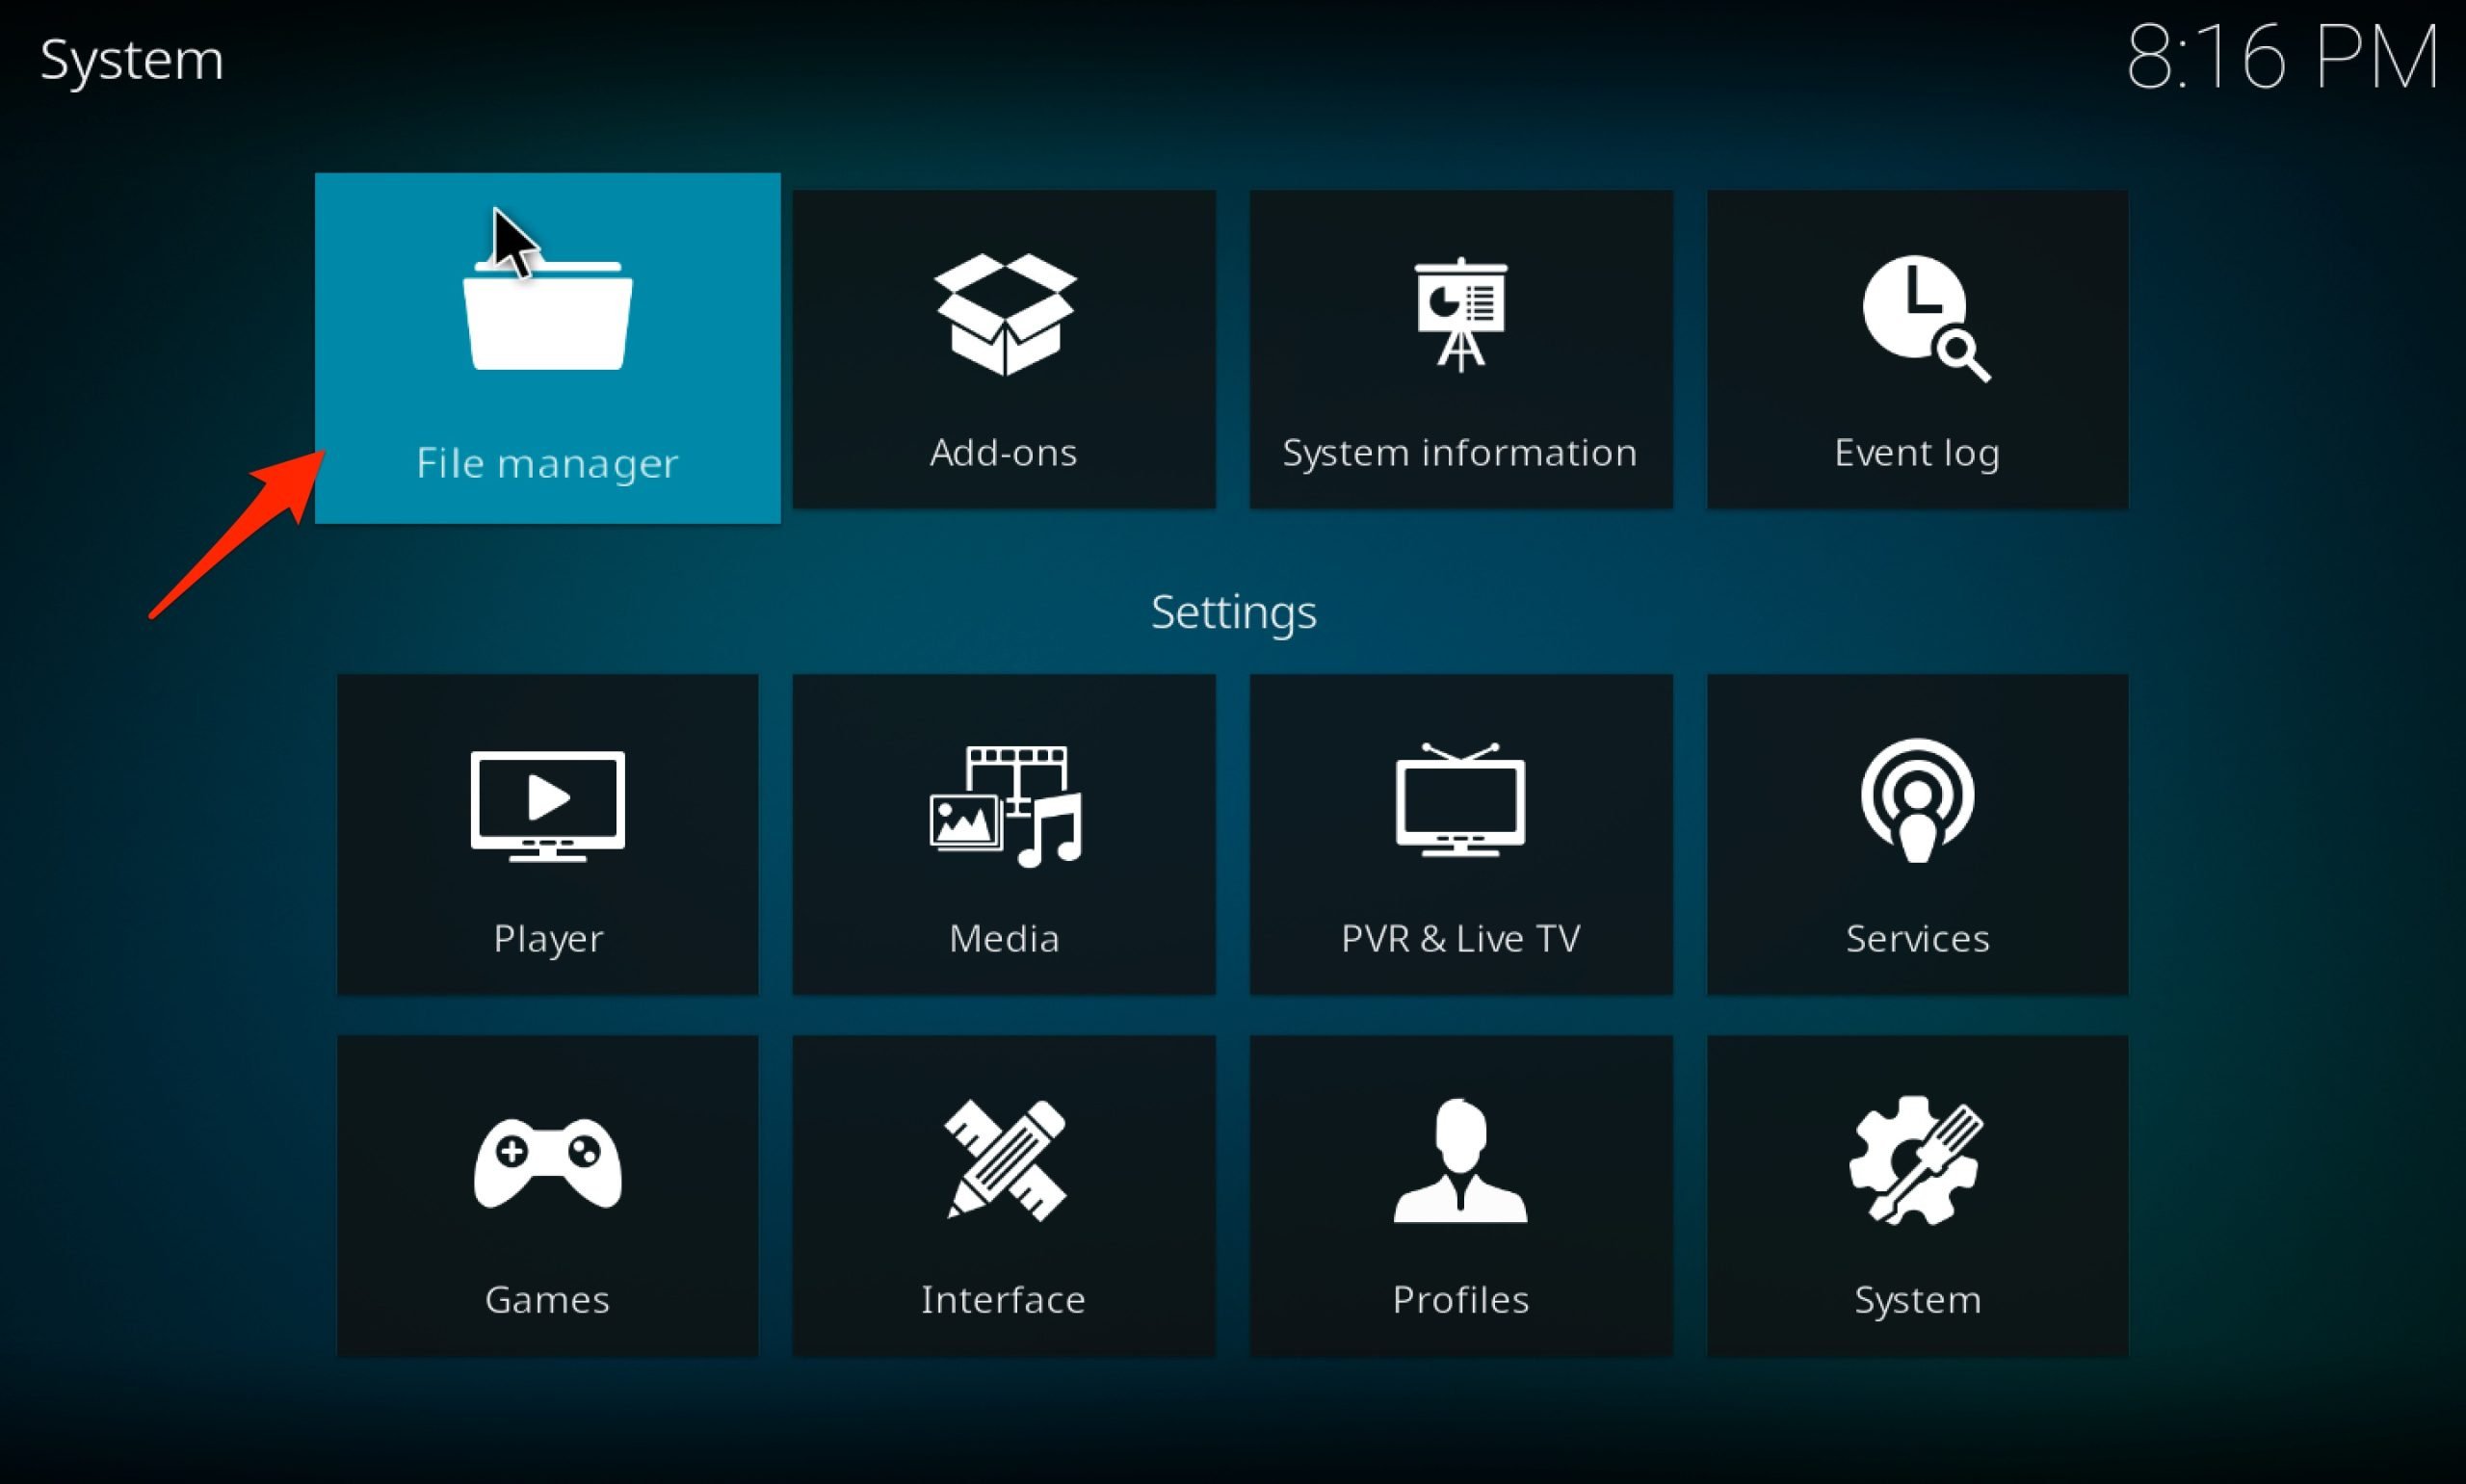
- Click on File Manager.
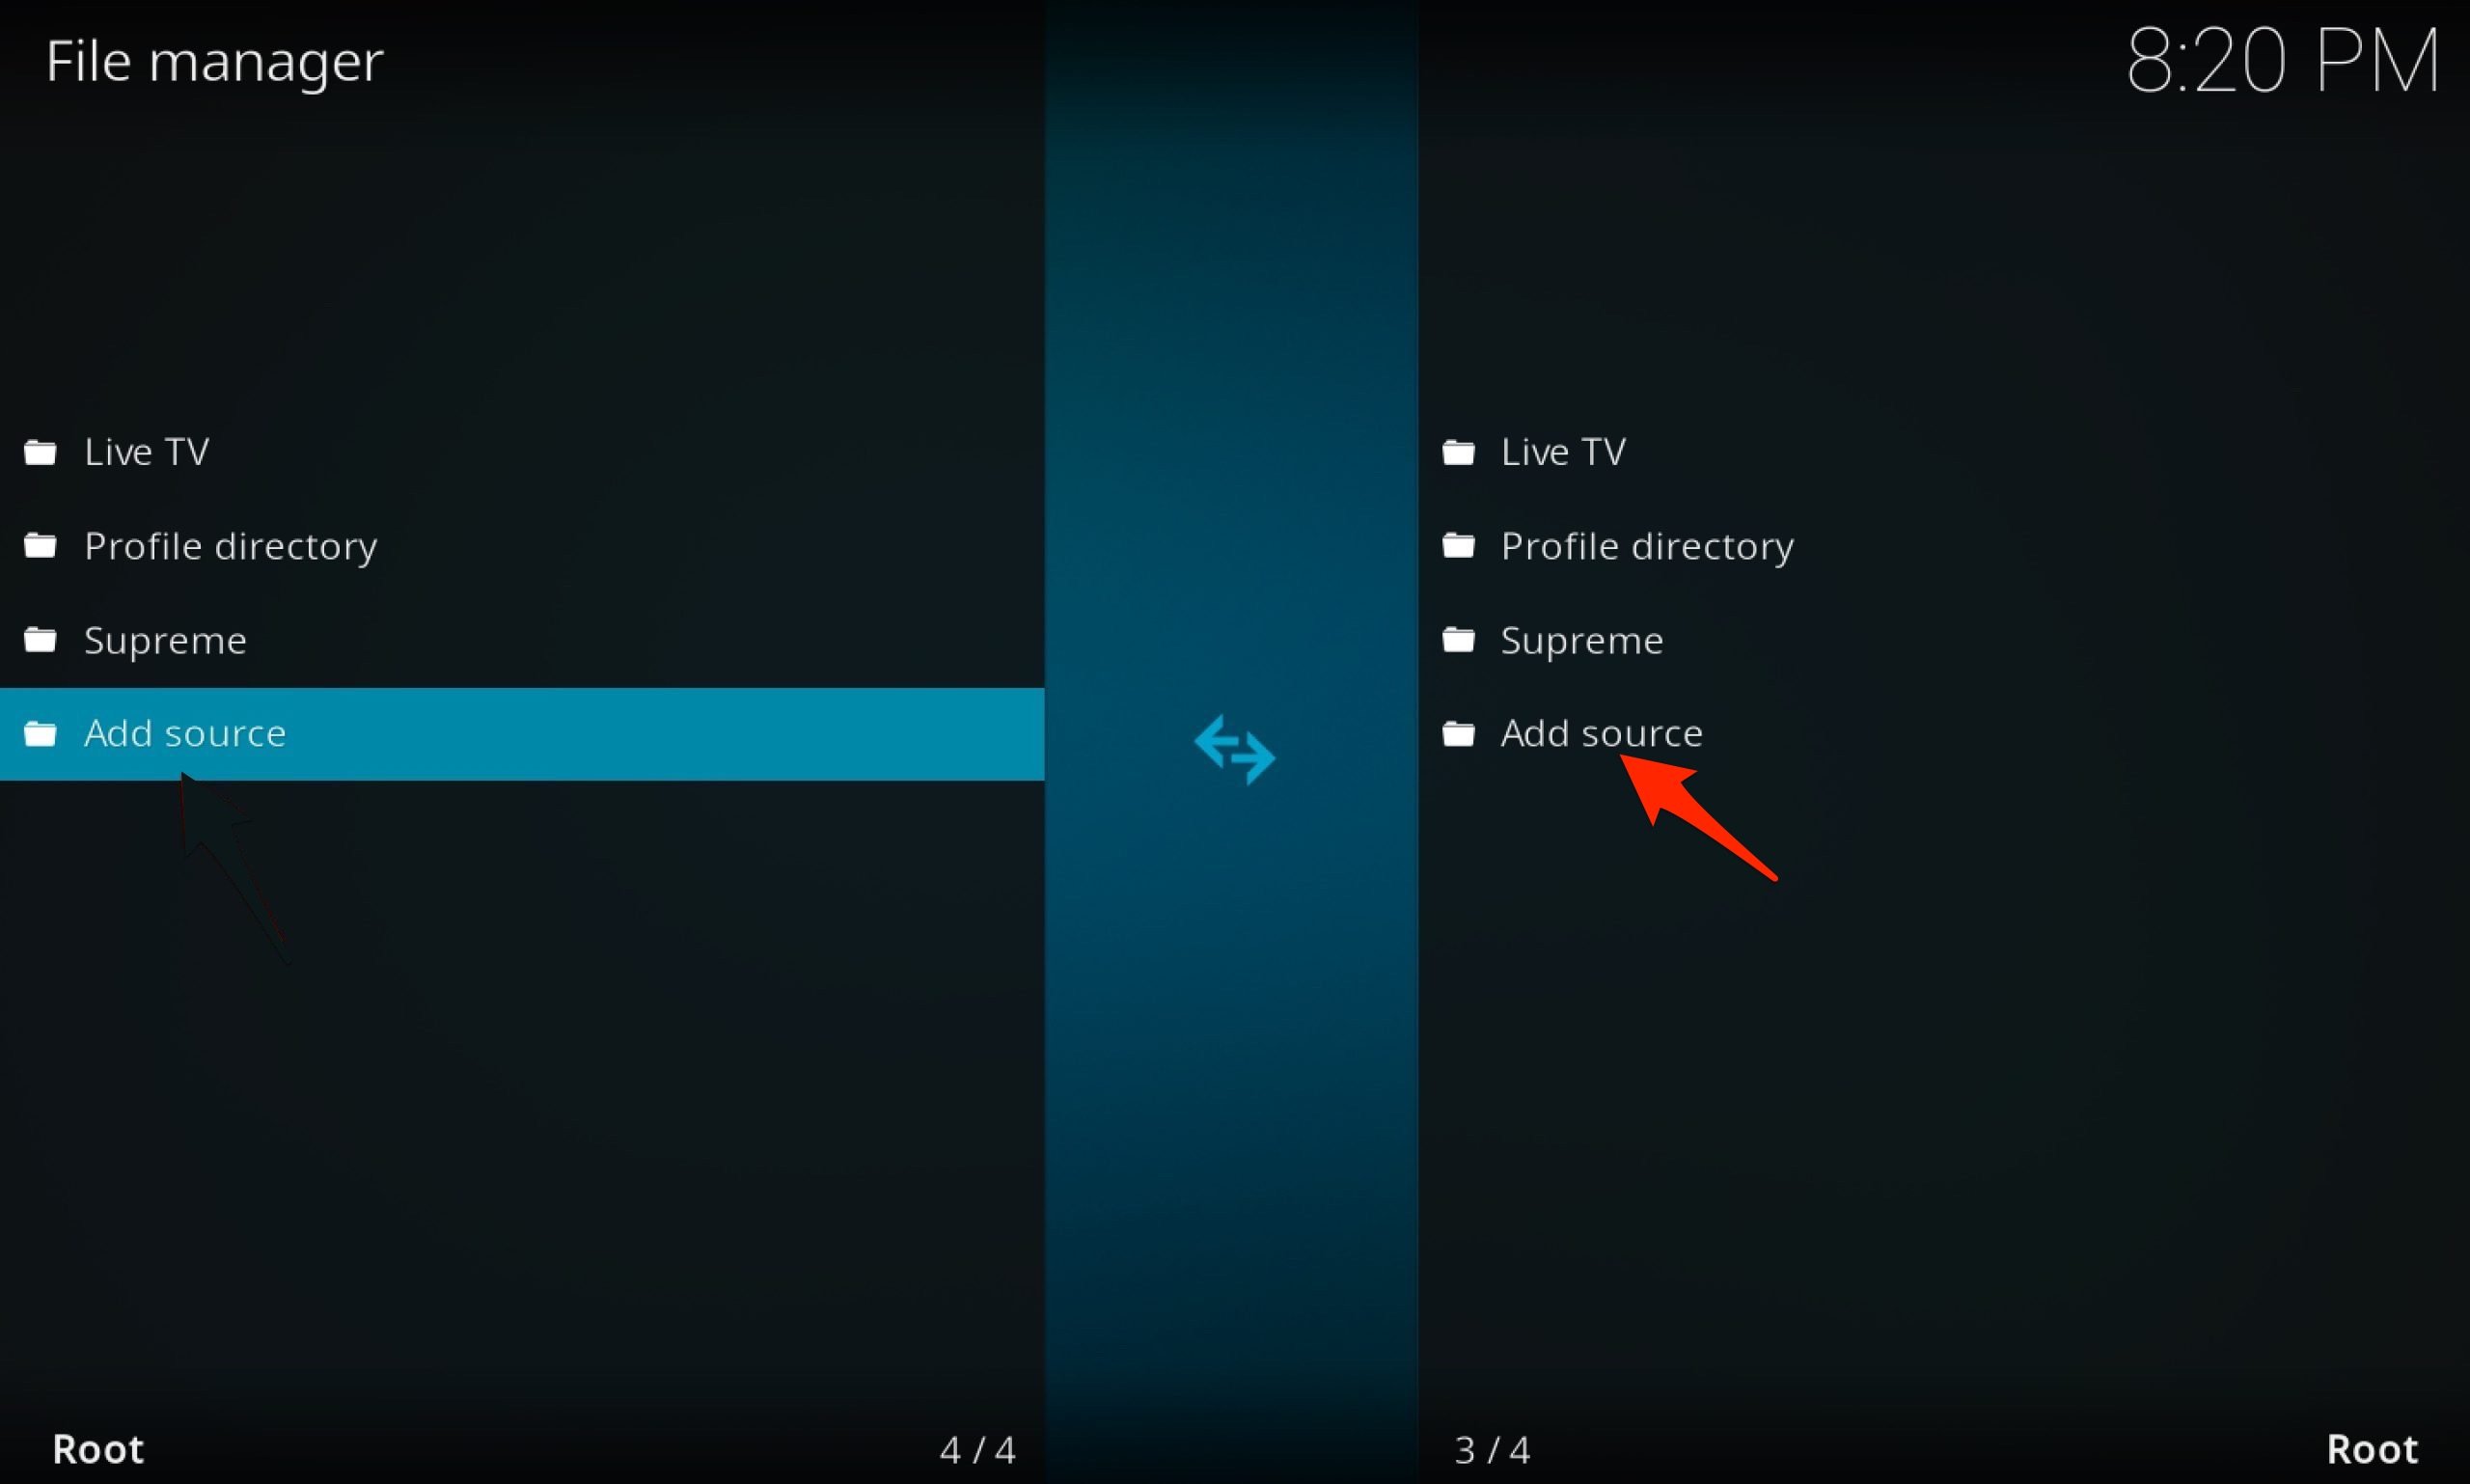
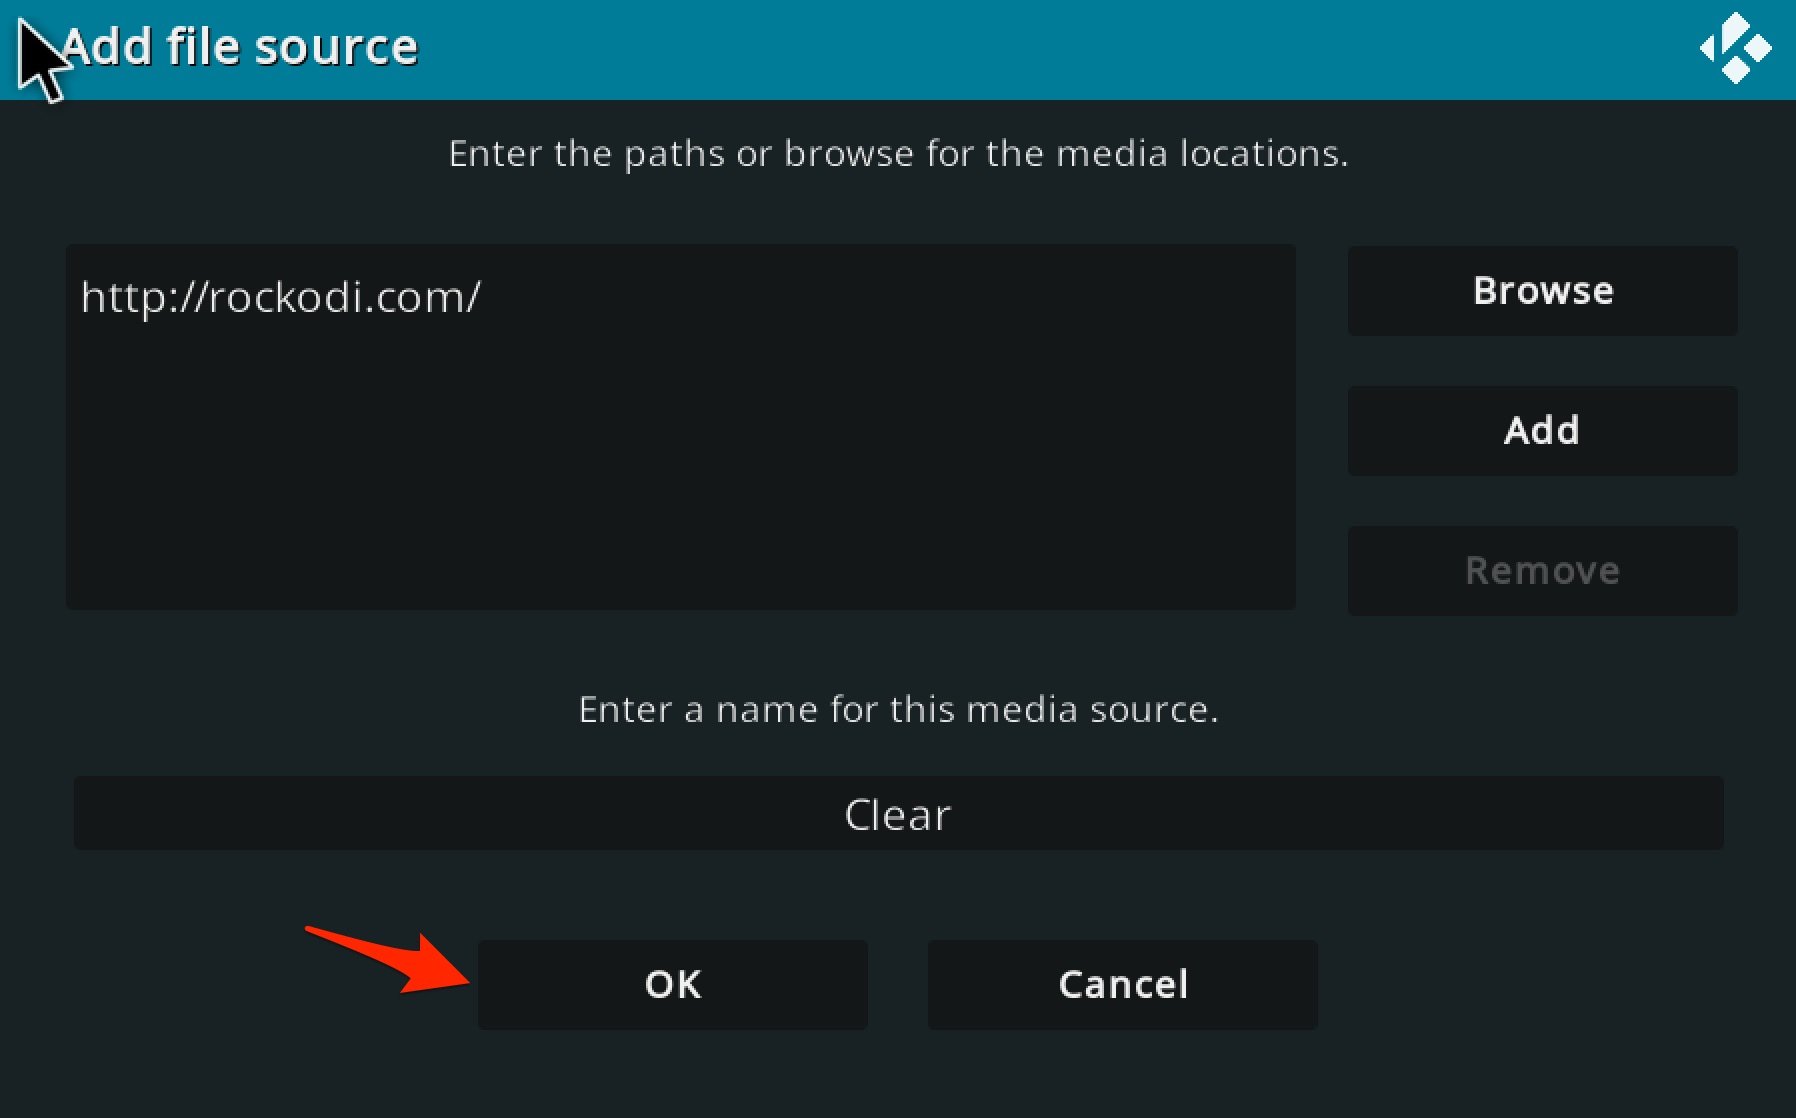
- Here click on Add Source.
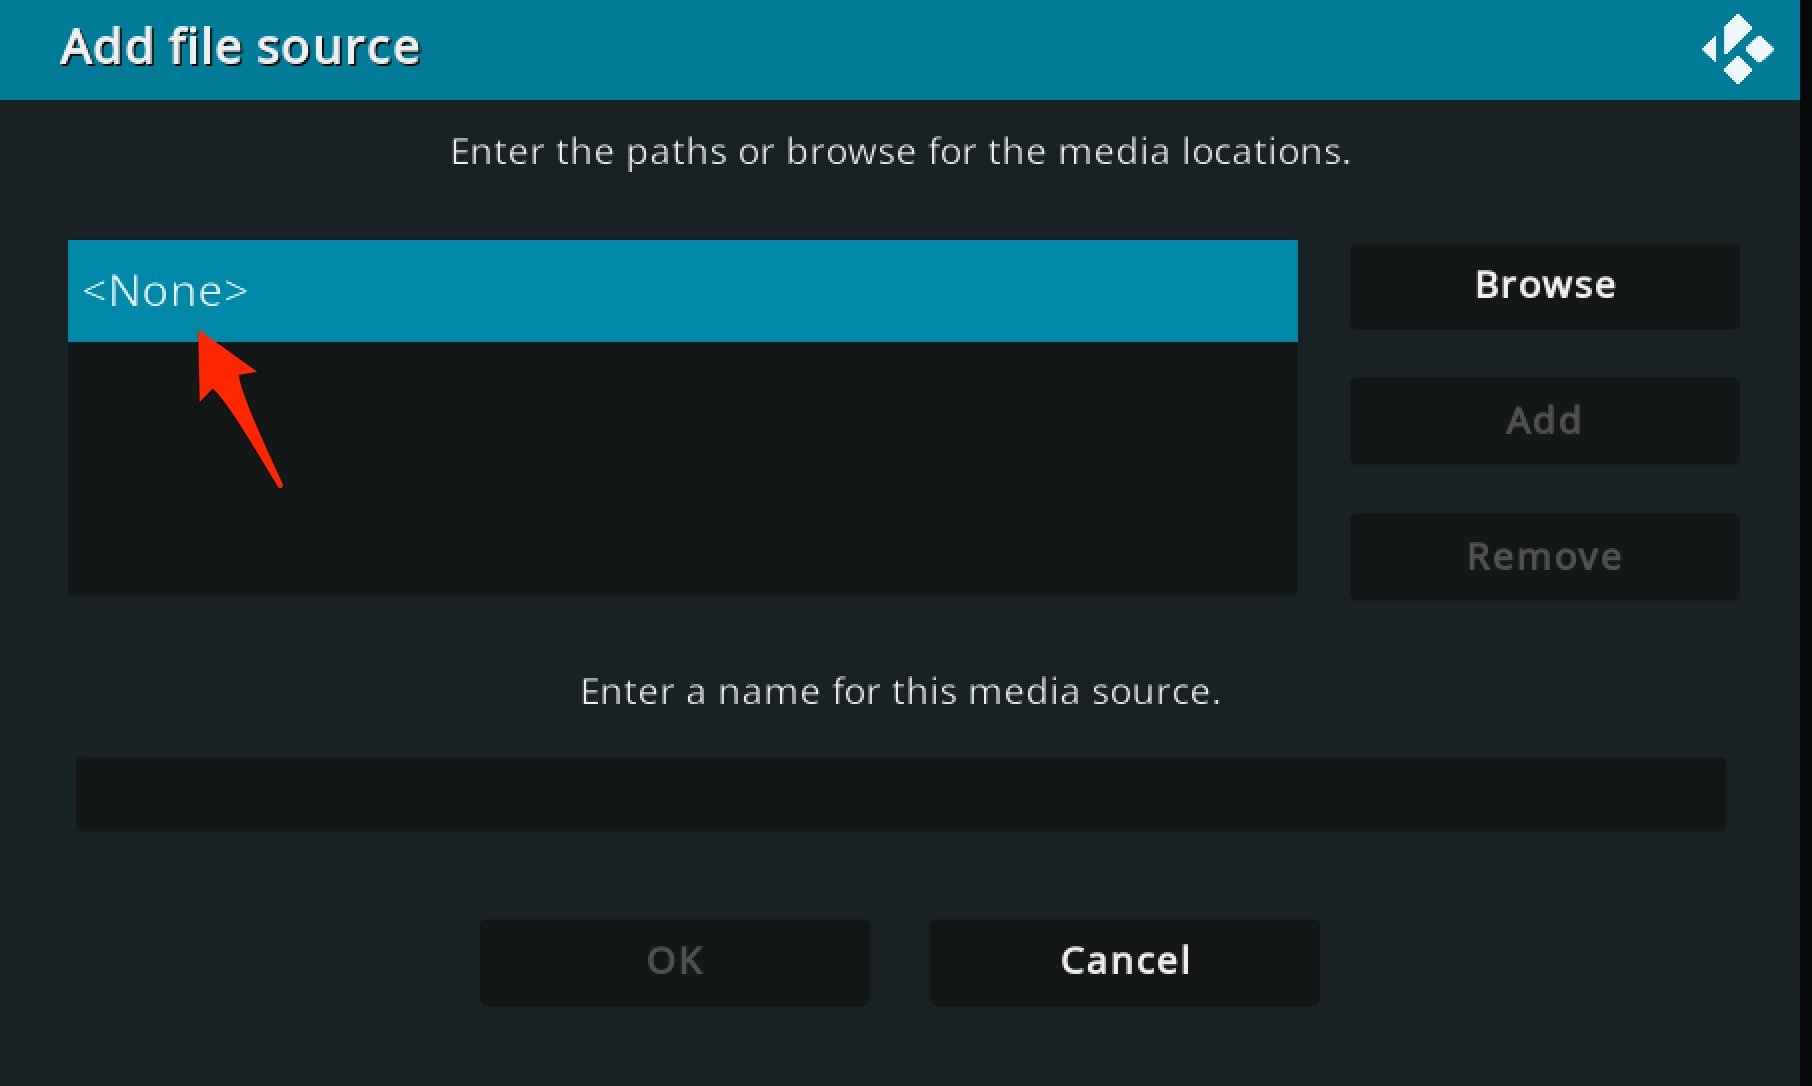
- Now click on None.
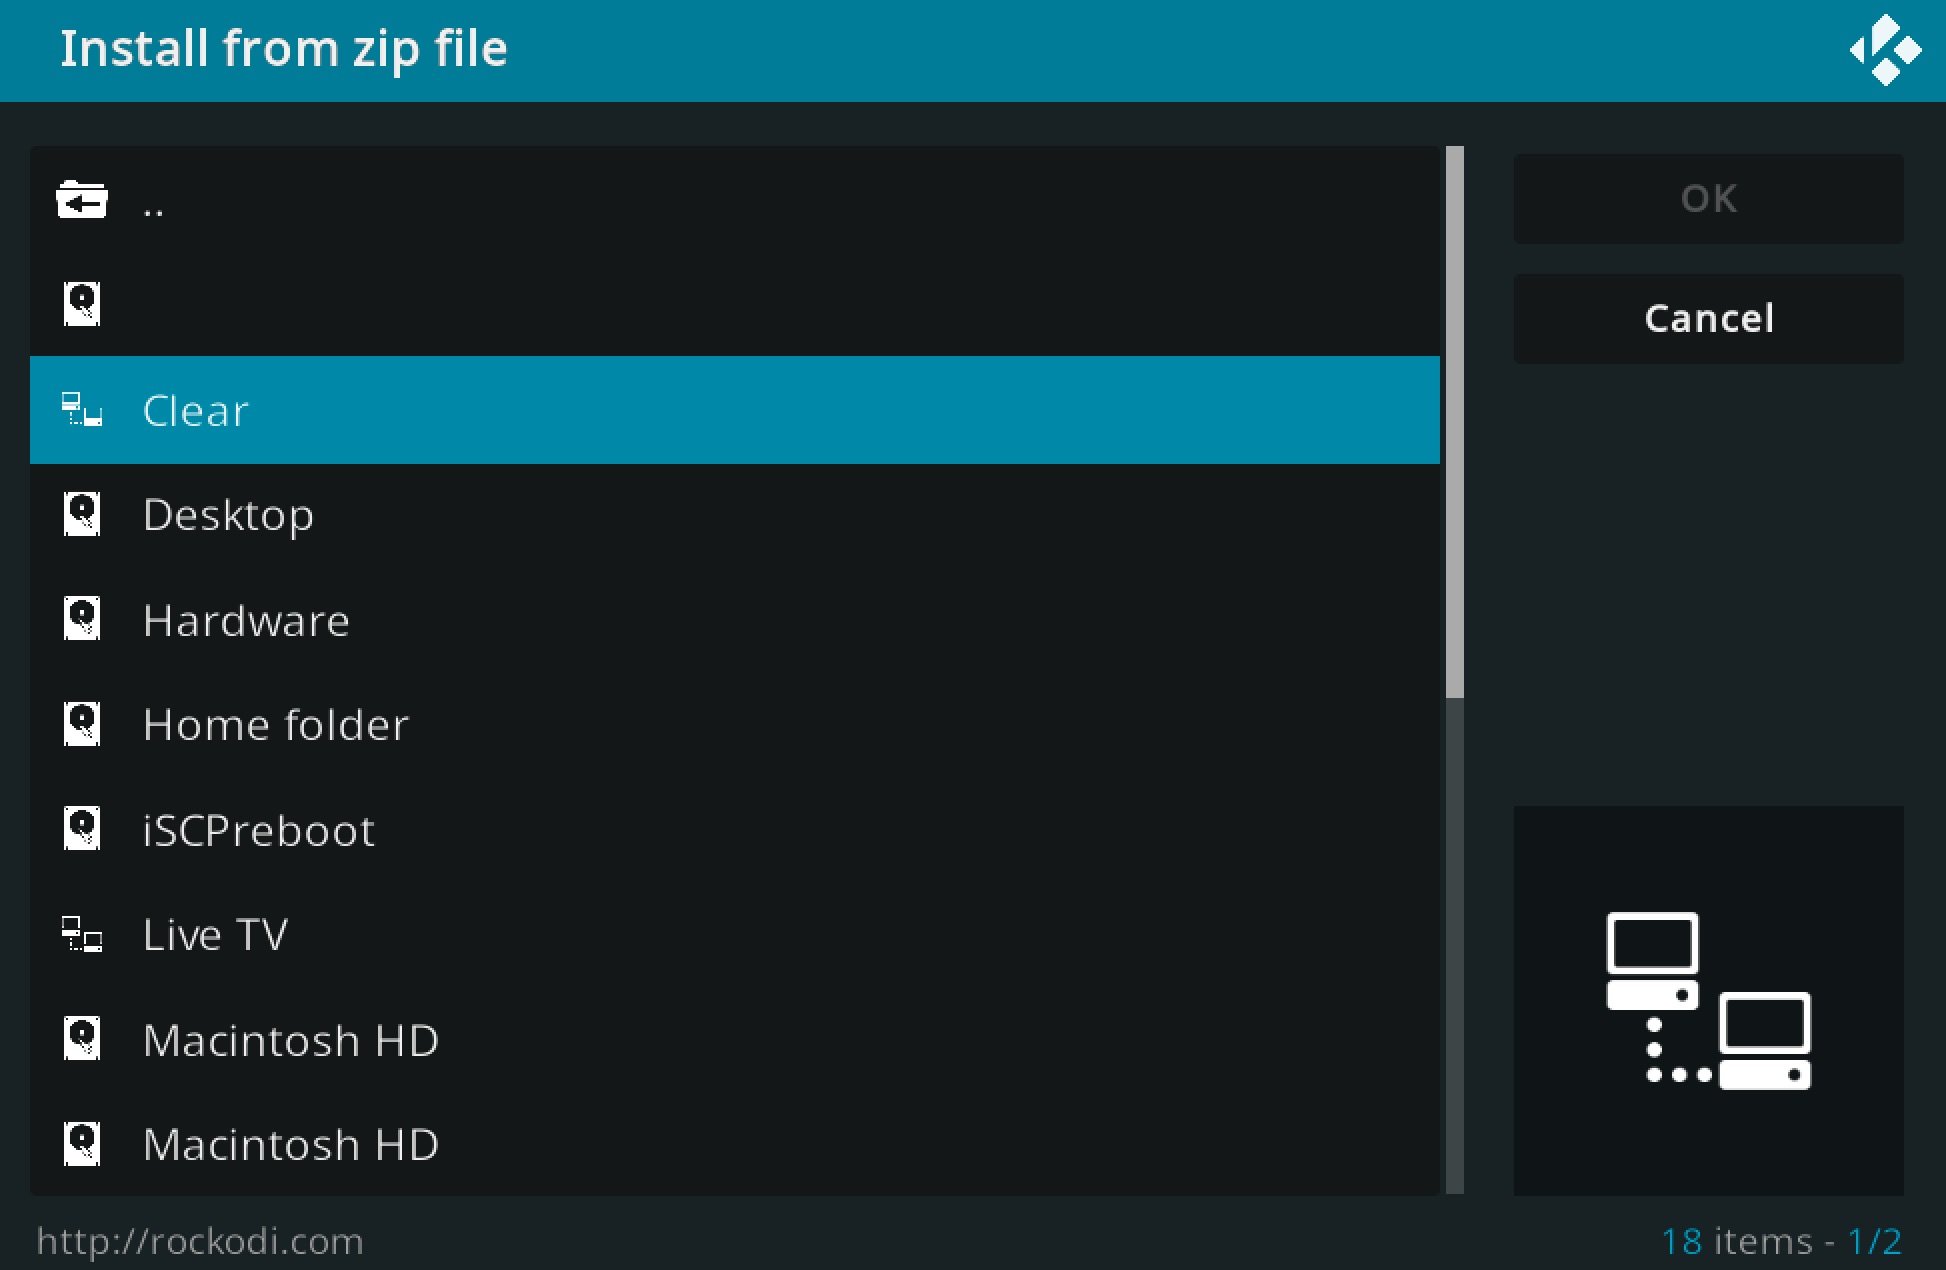
- Add the URL “thttp://rockodi.com/“. Give the repo a name (I gave the name Clear) and click OK.
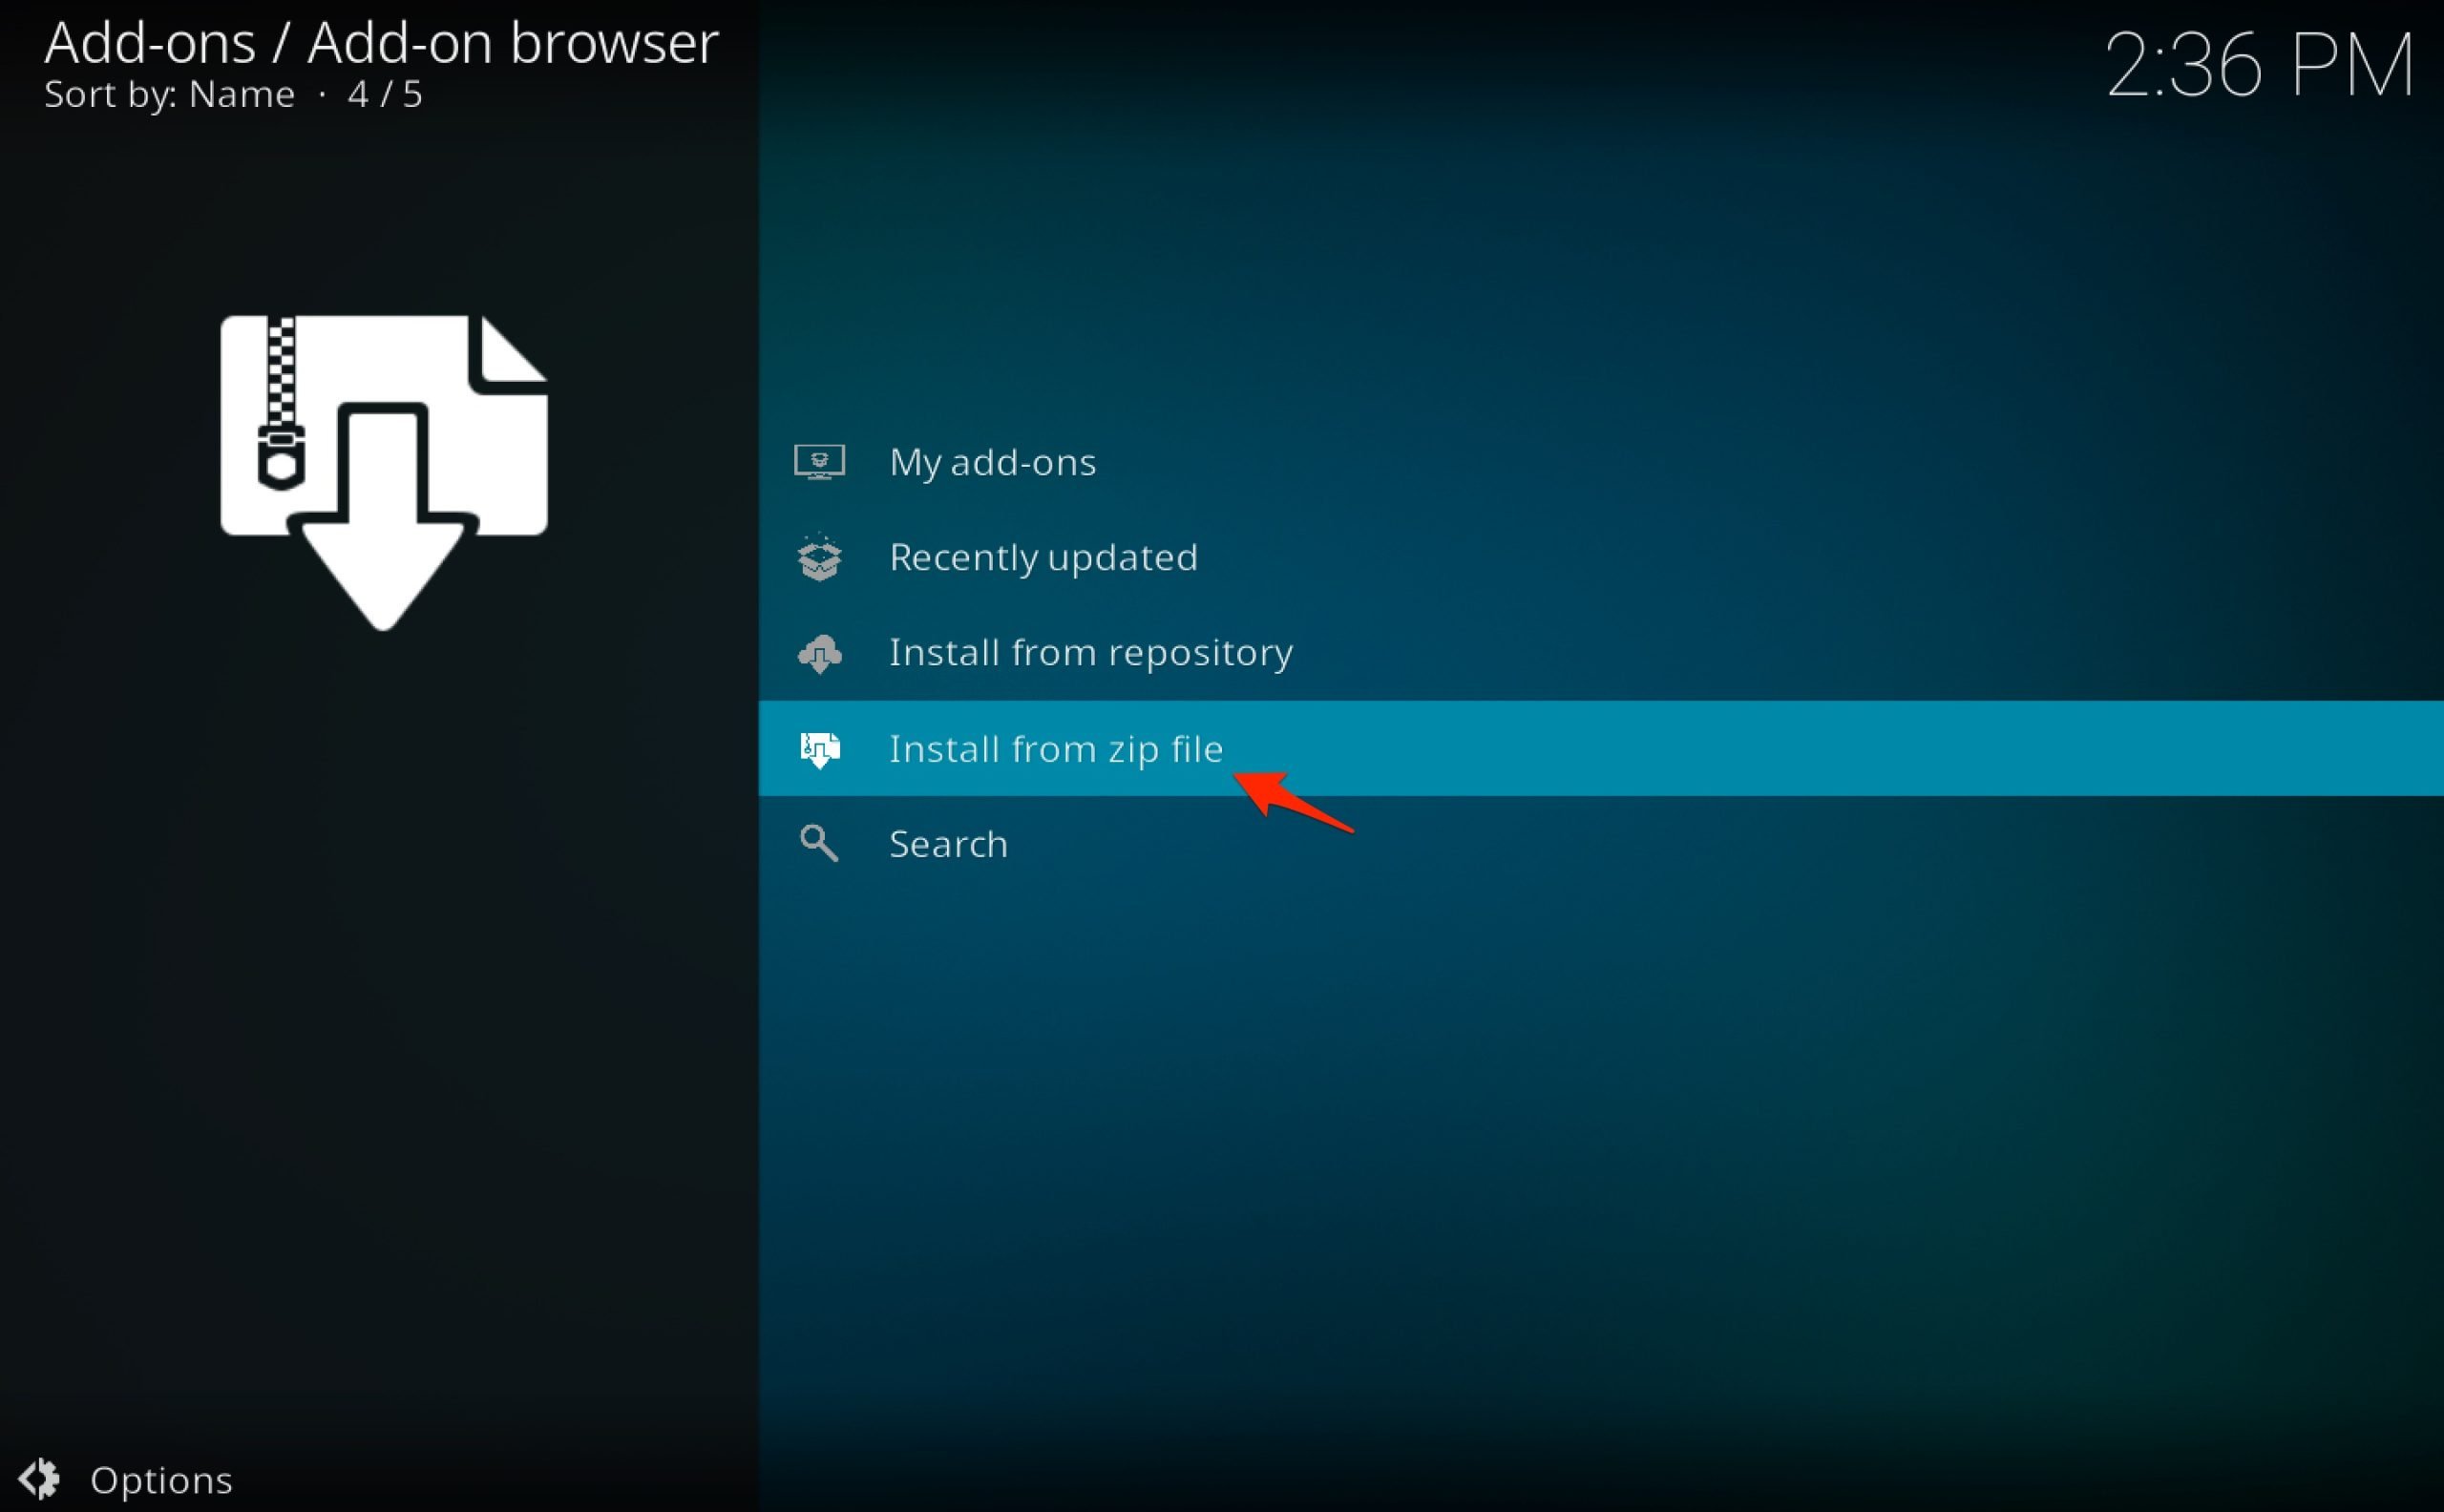
- Now go to Addons and click on Install from the Zip file.
- Locate the file.
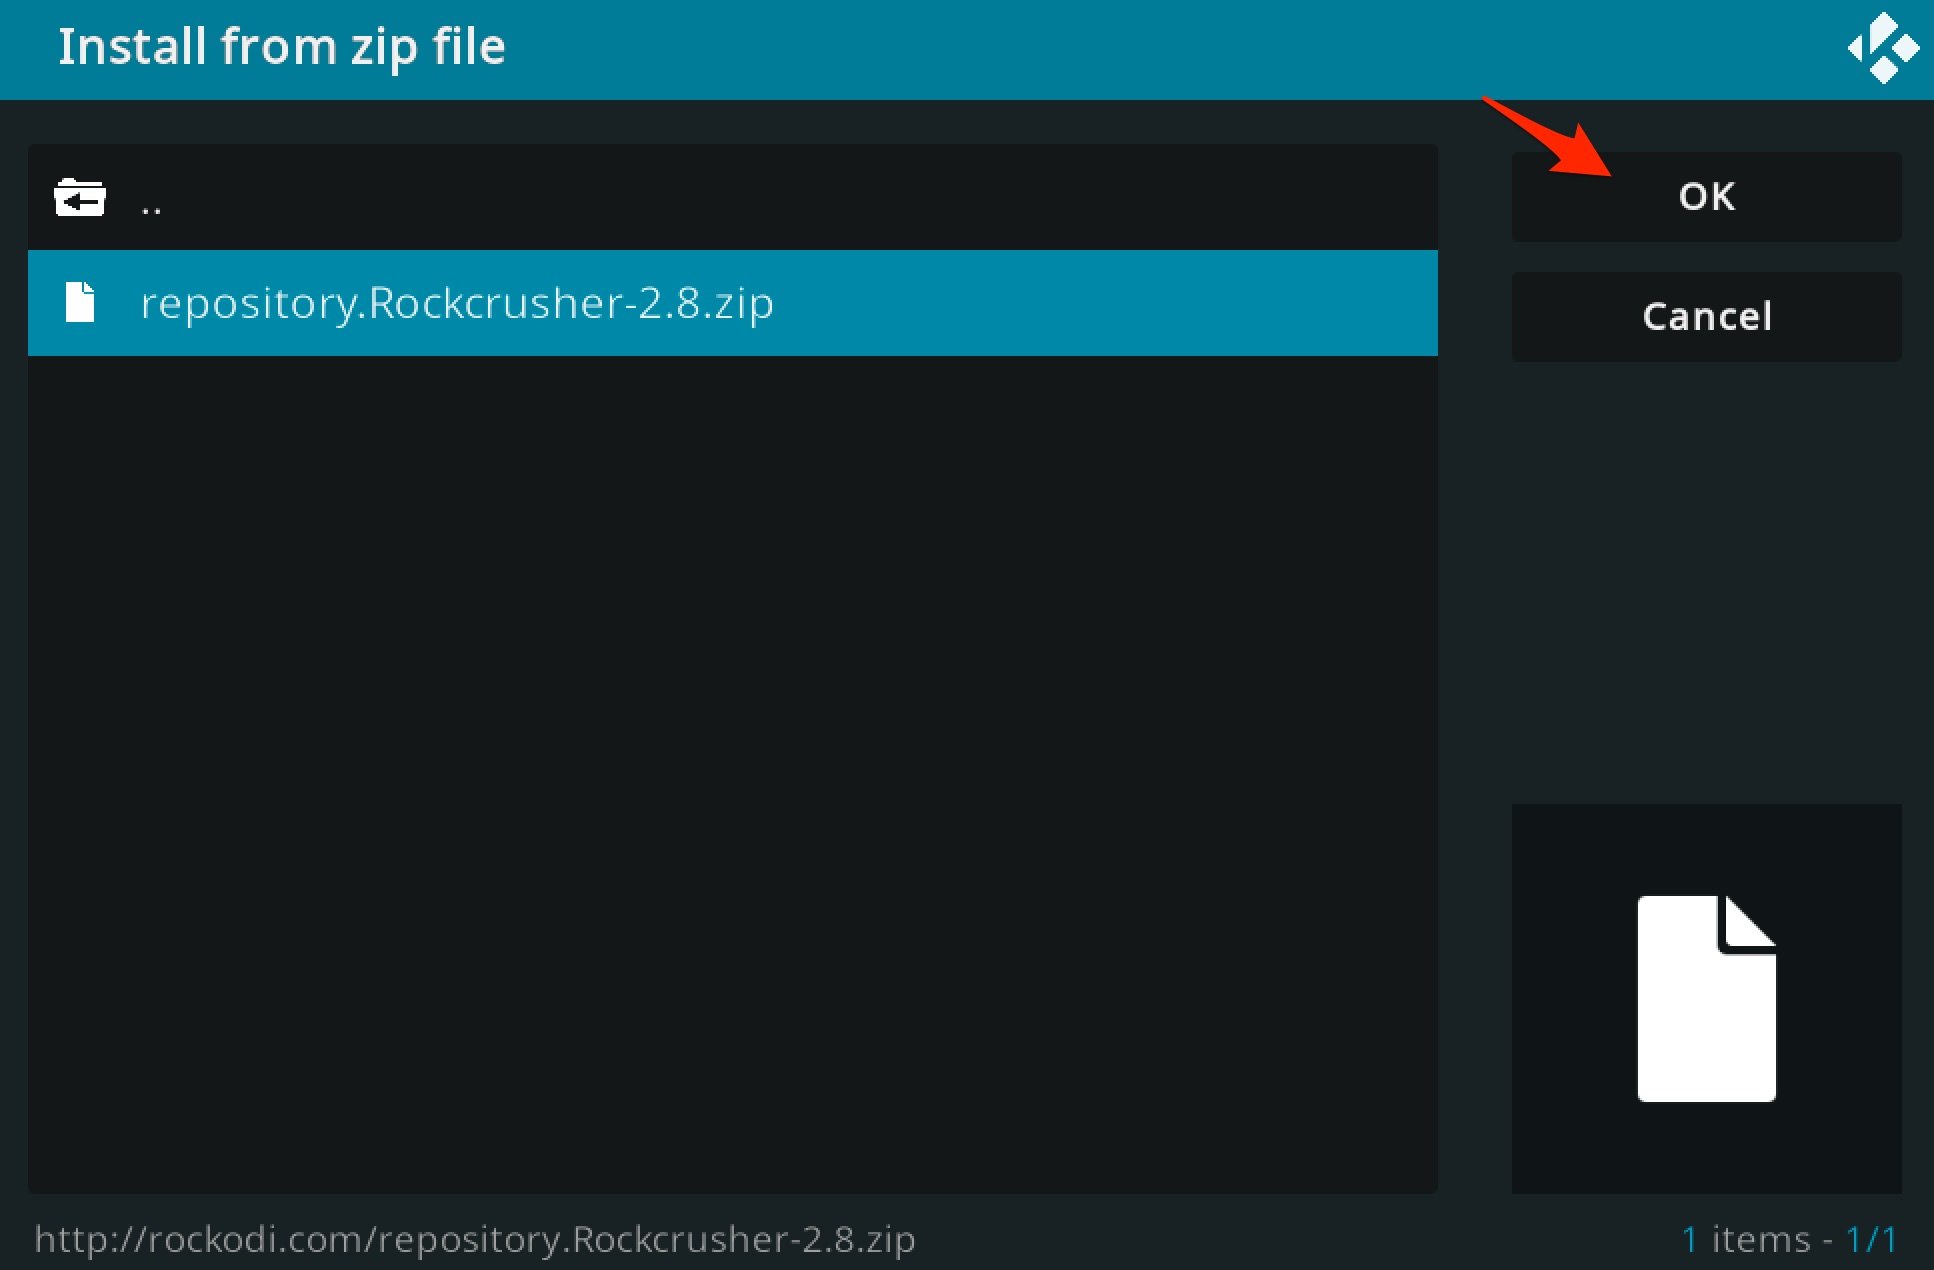
- Click OK to install the Repository Zip file.
- Now move to Install from the Repository.
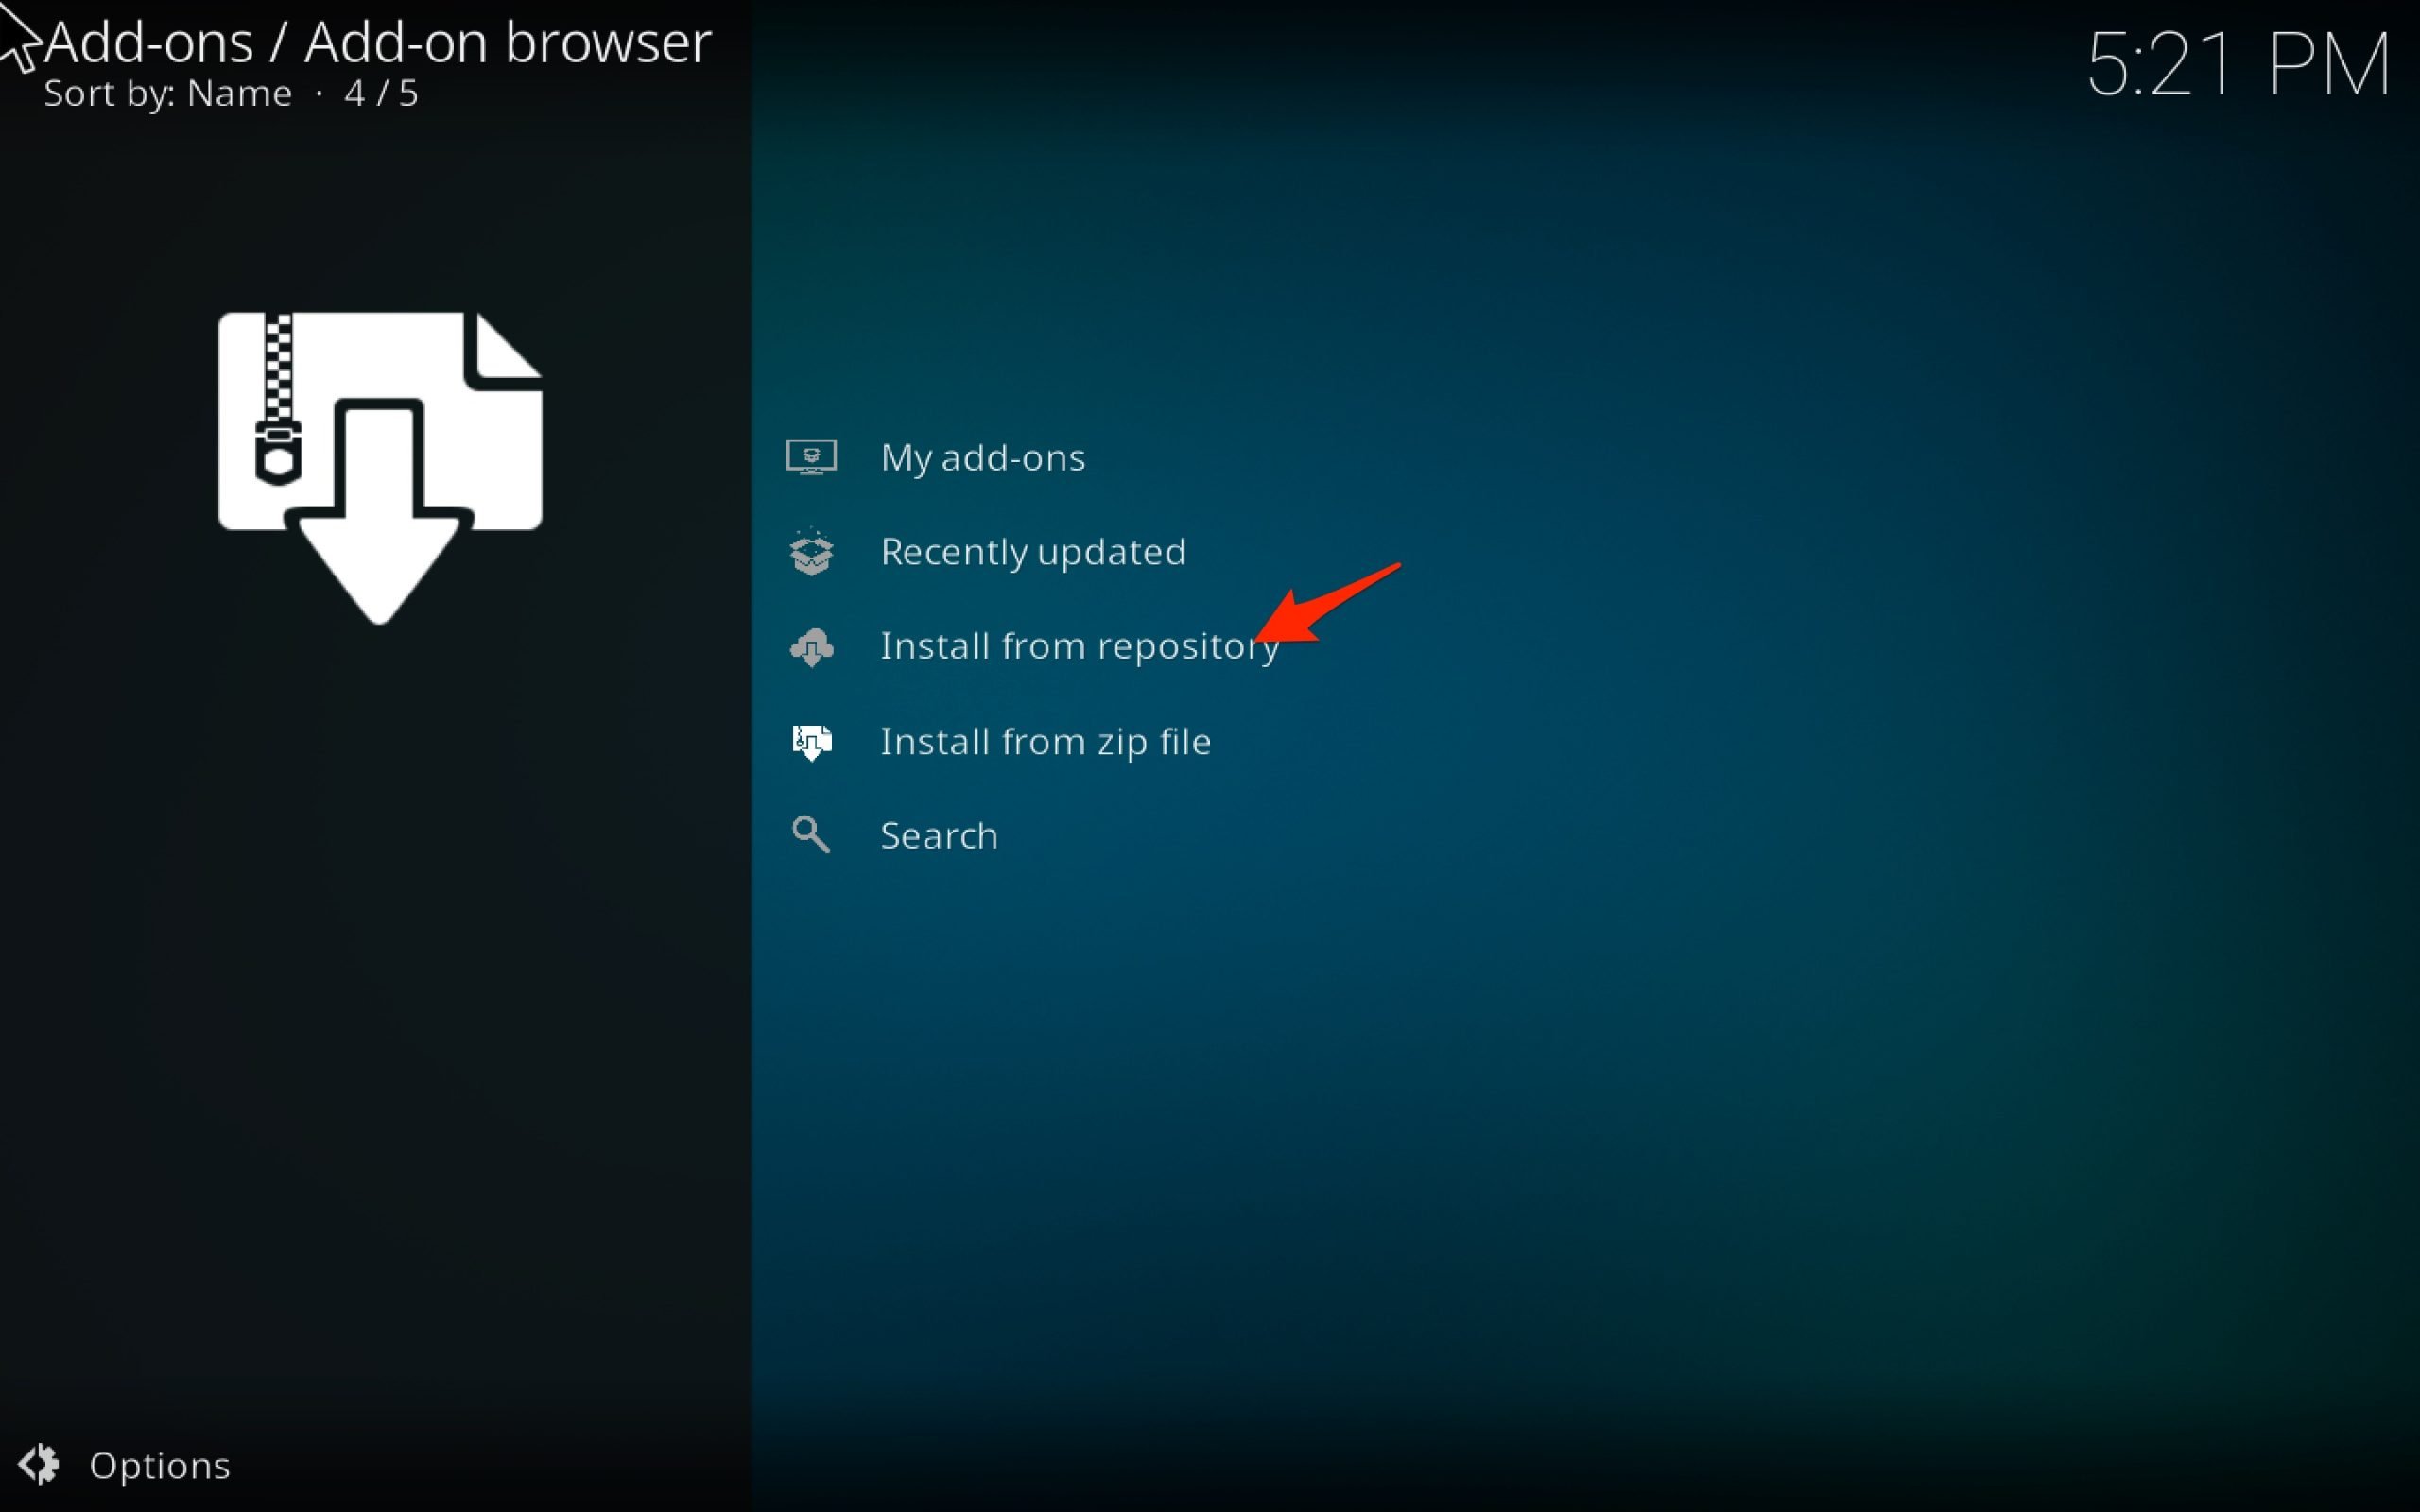
- Open Rock Repository.
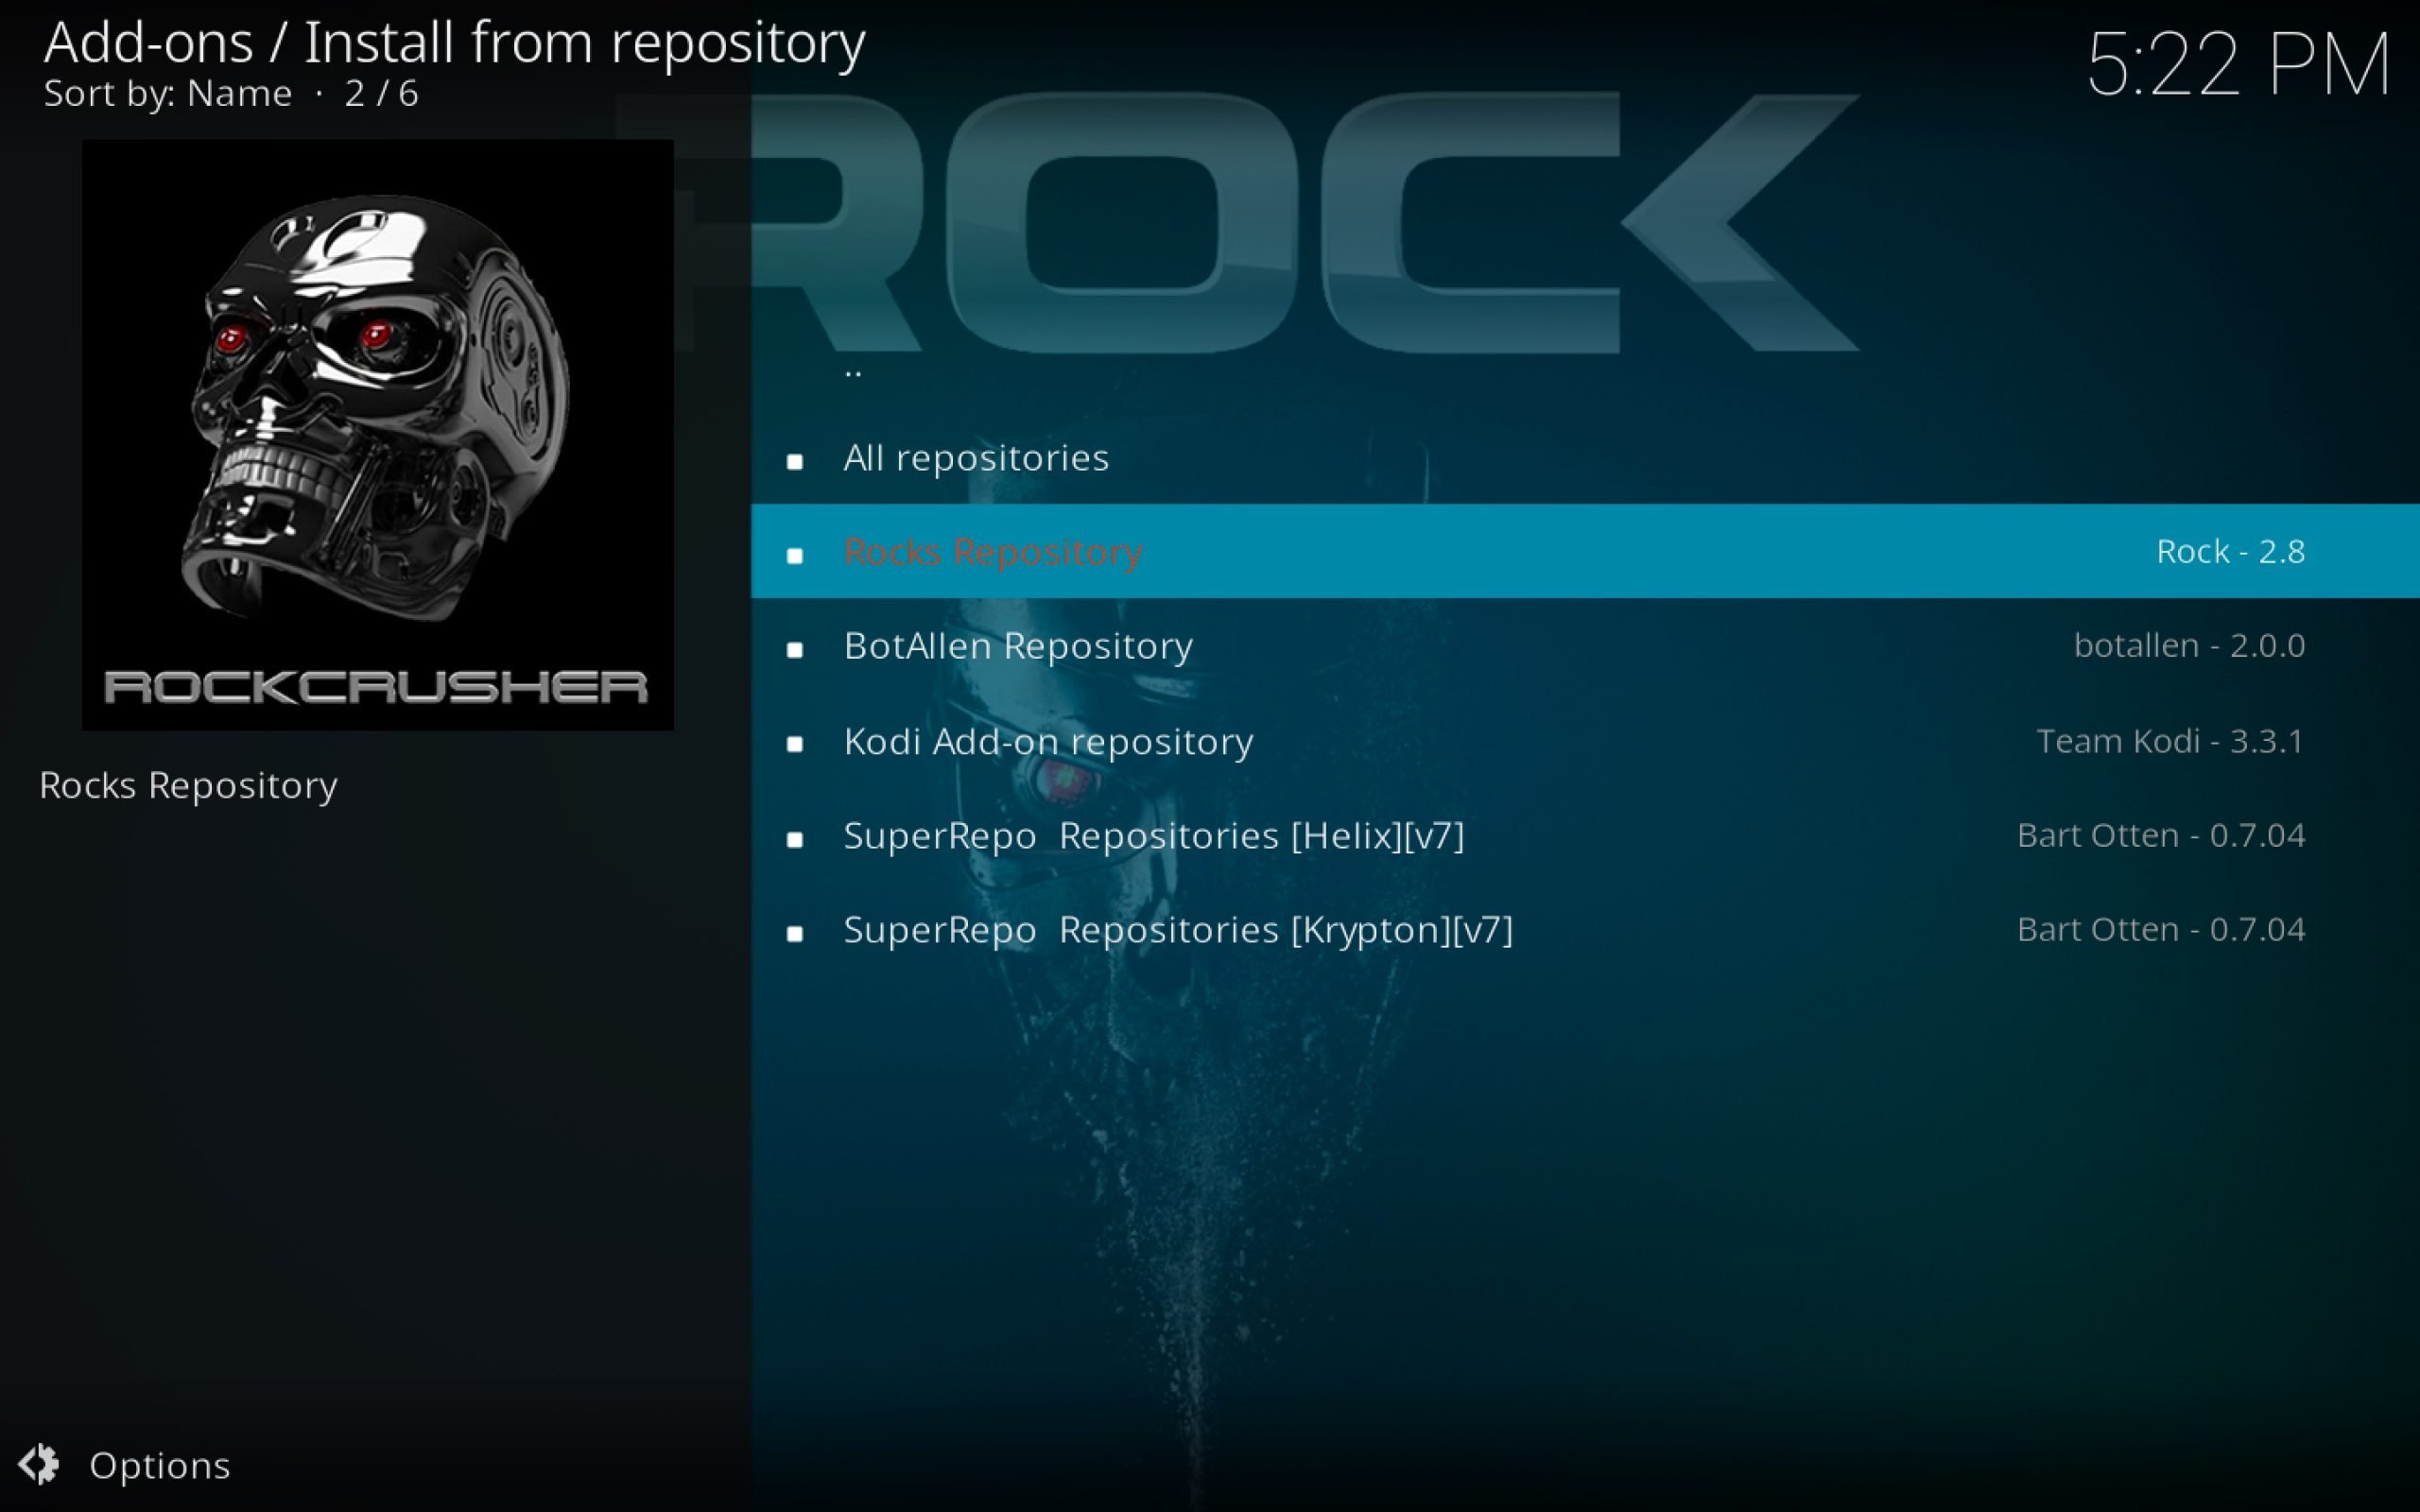
- Open program Addons.
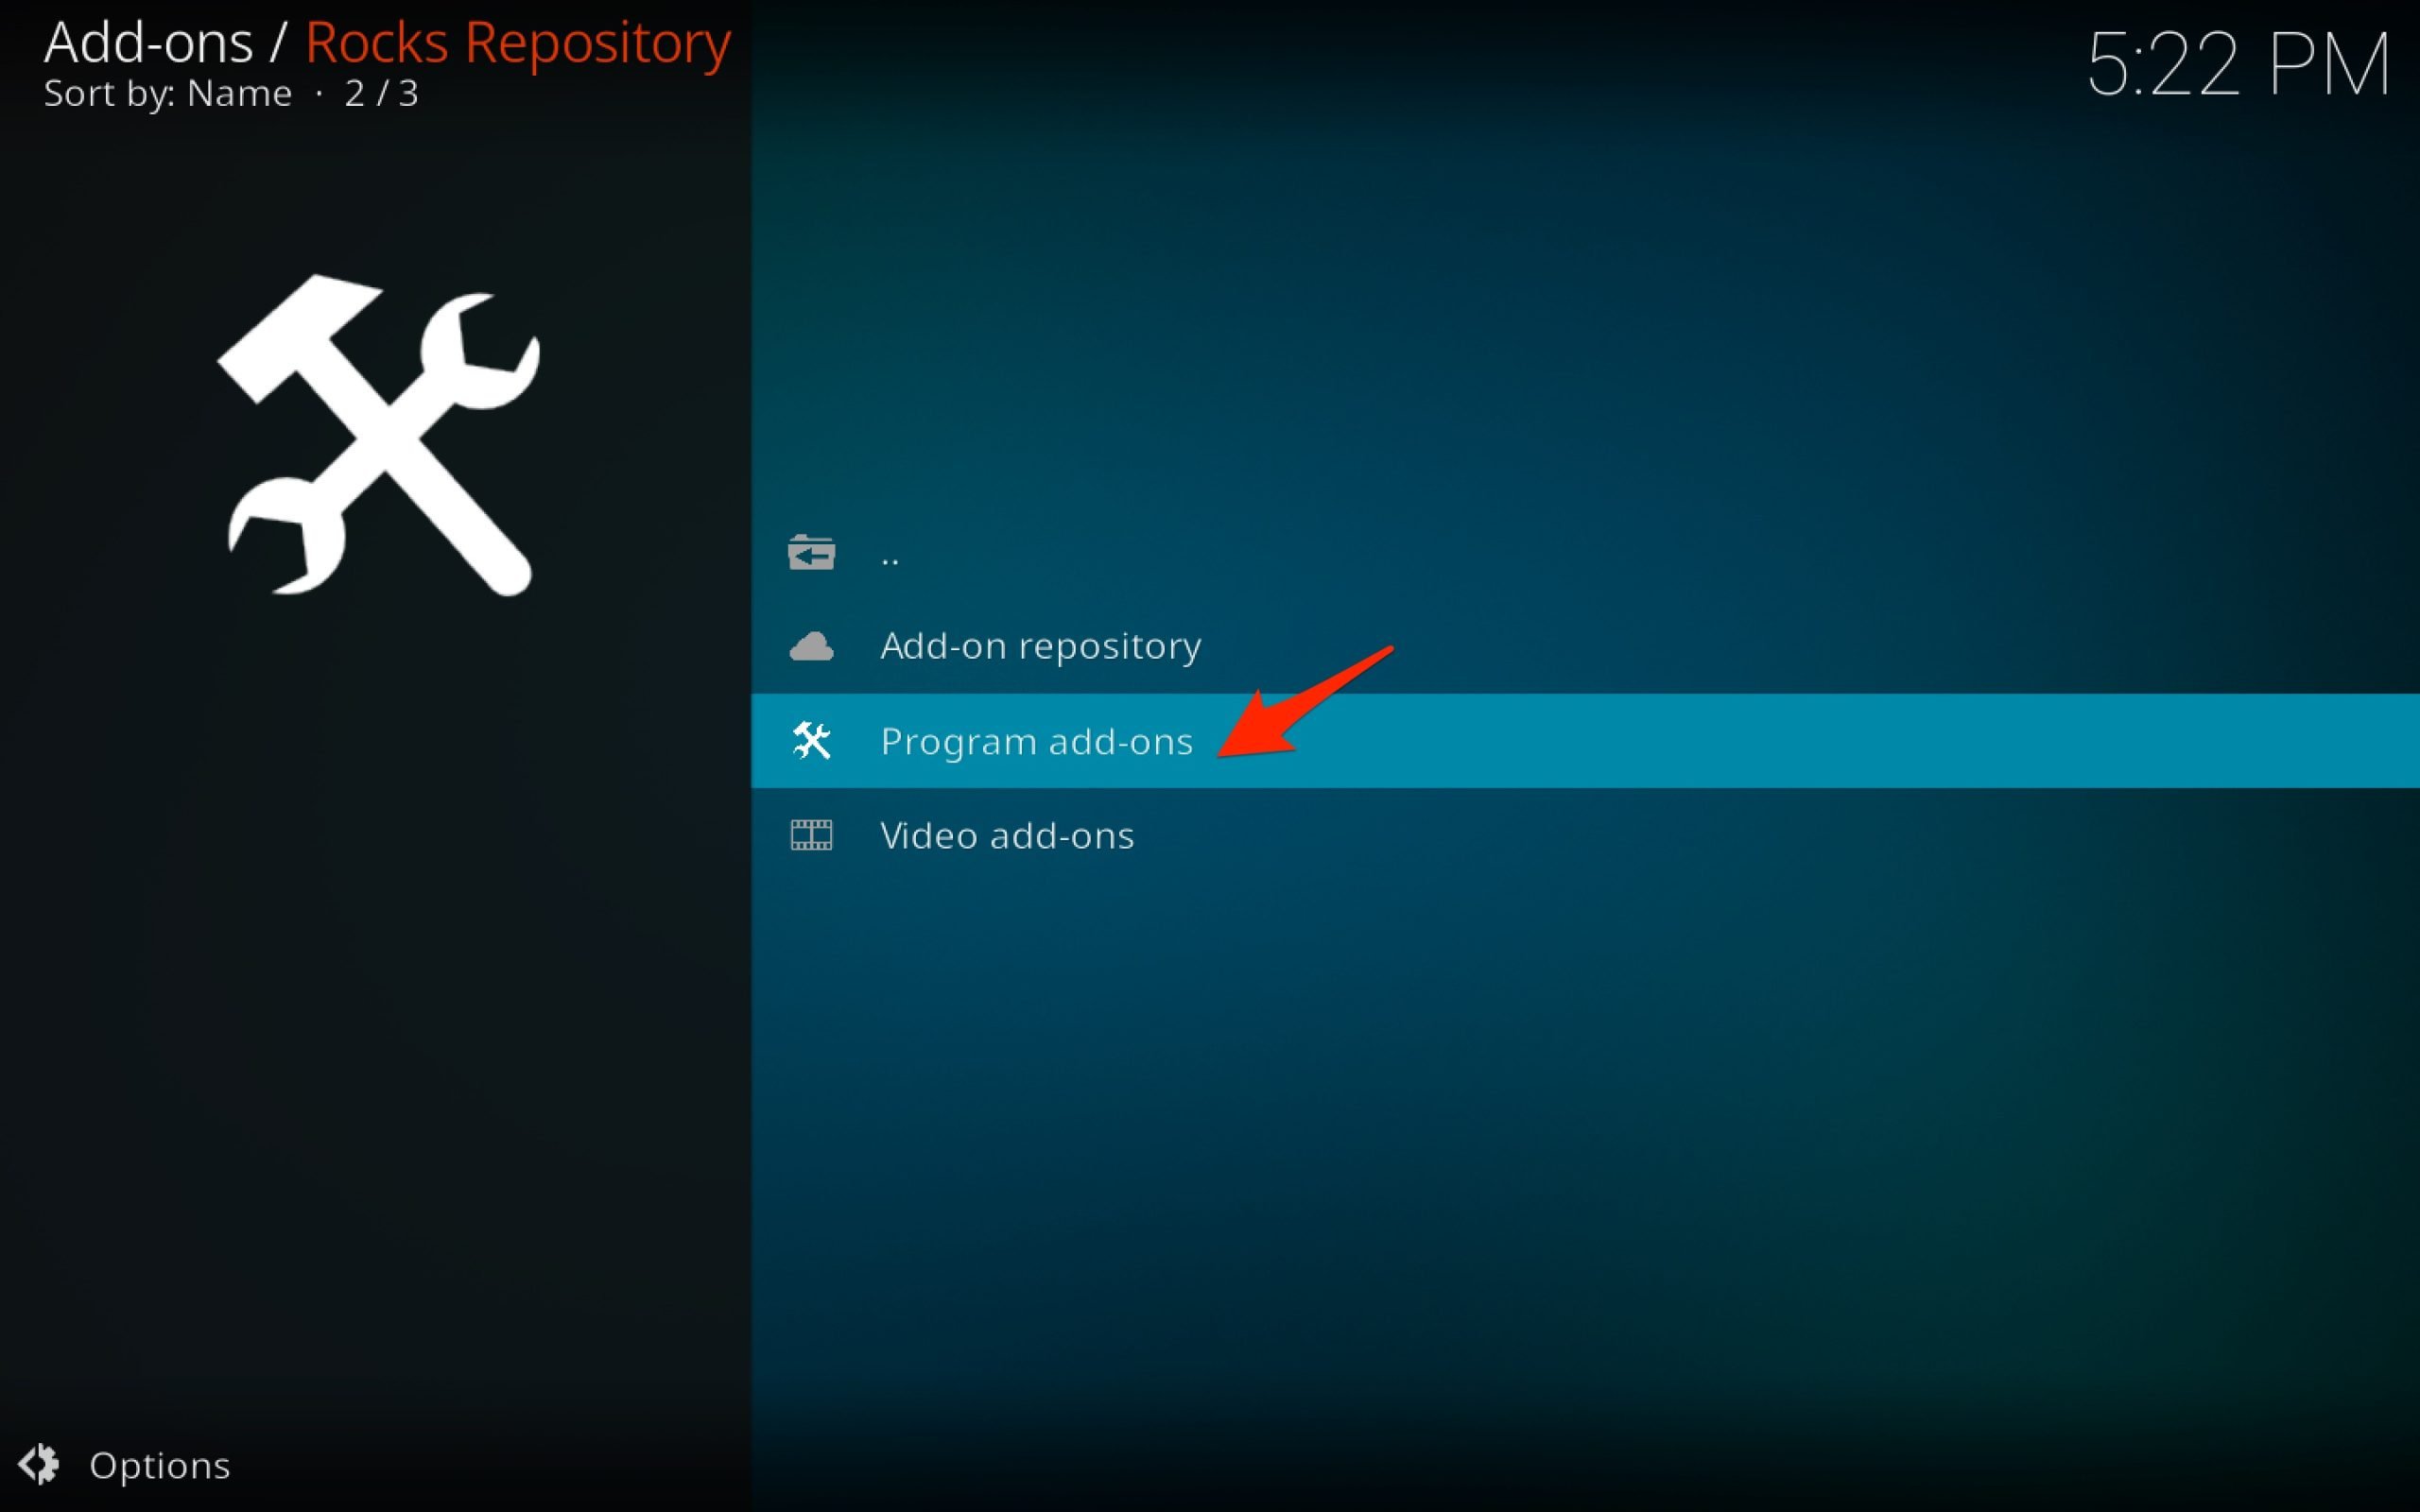
- Install the Repo on Kodi
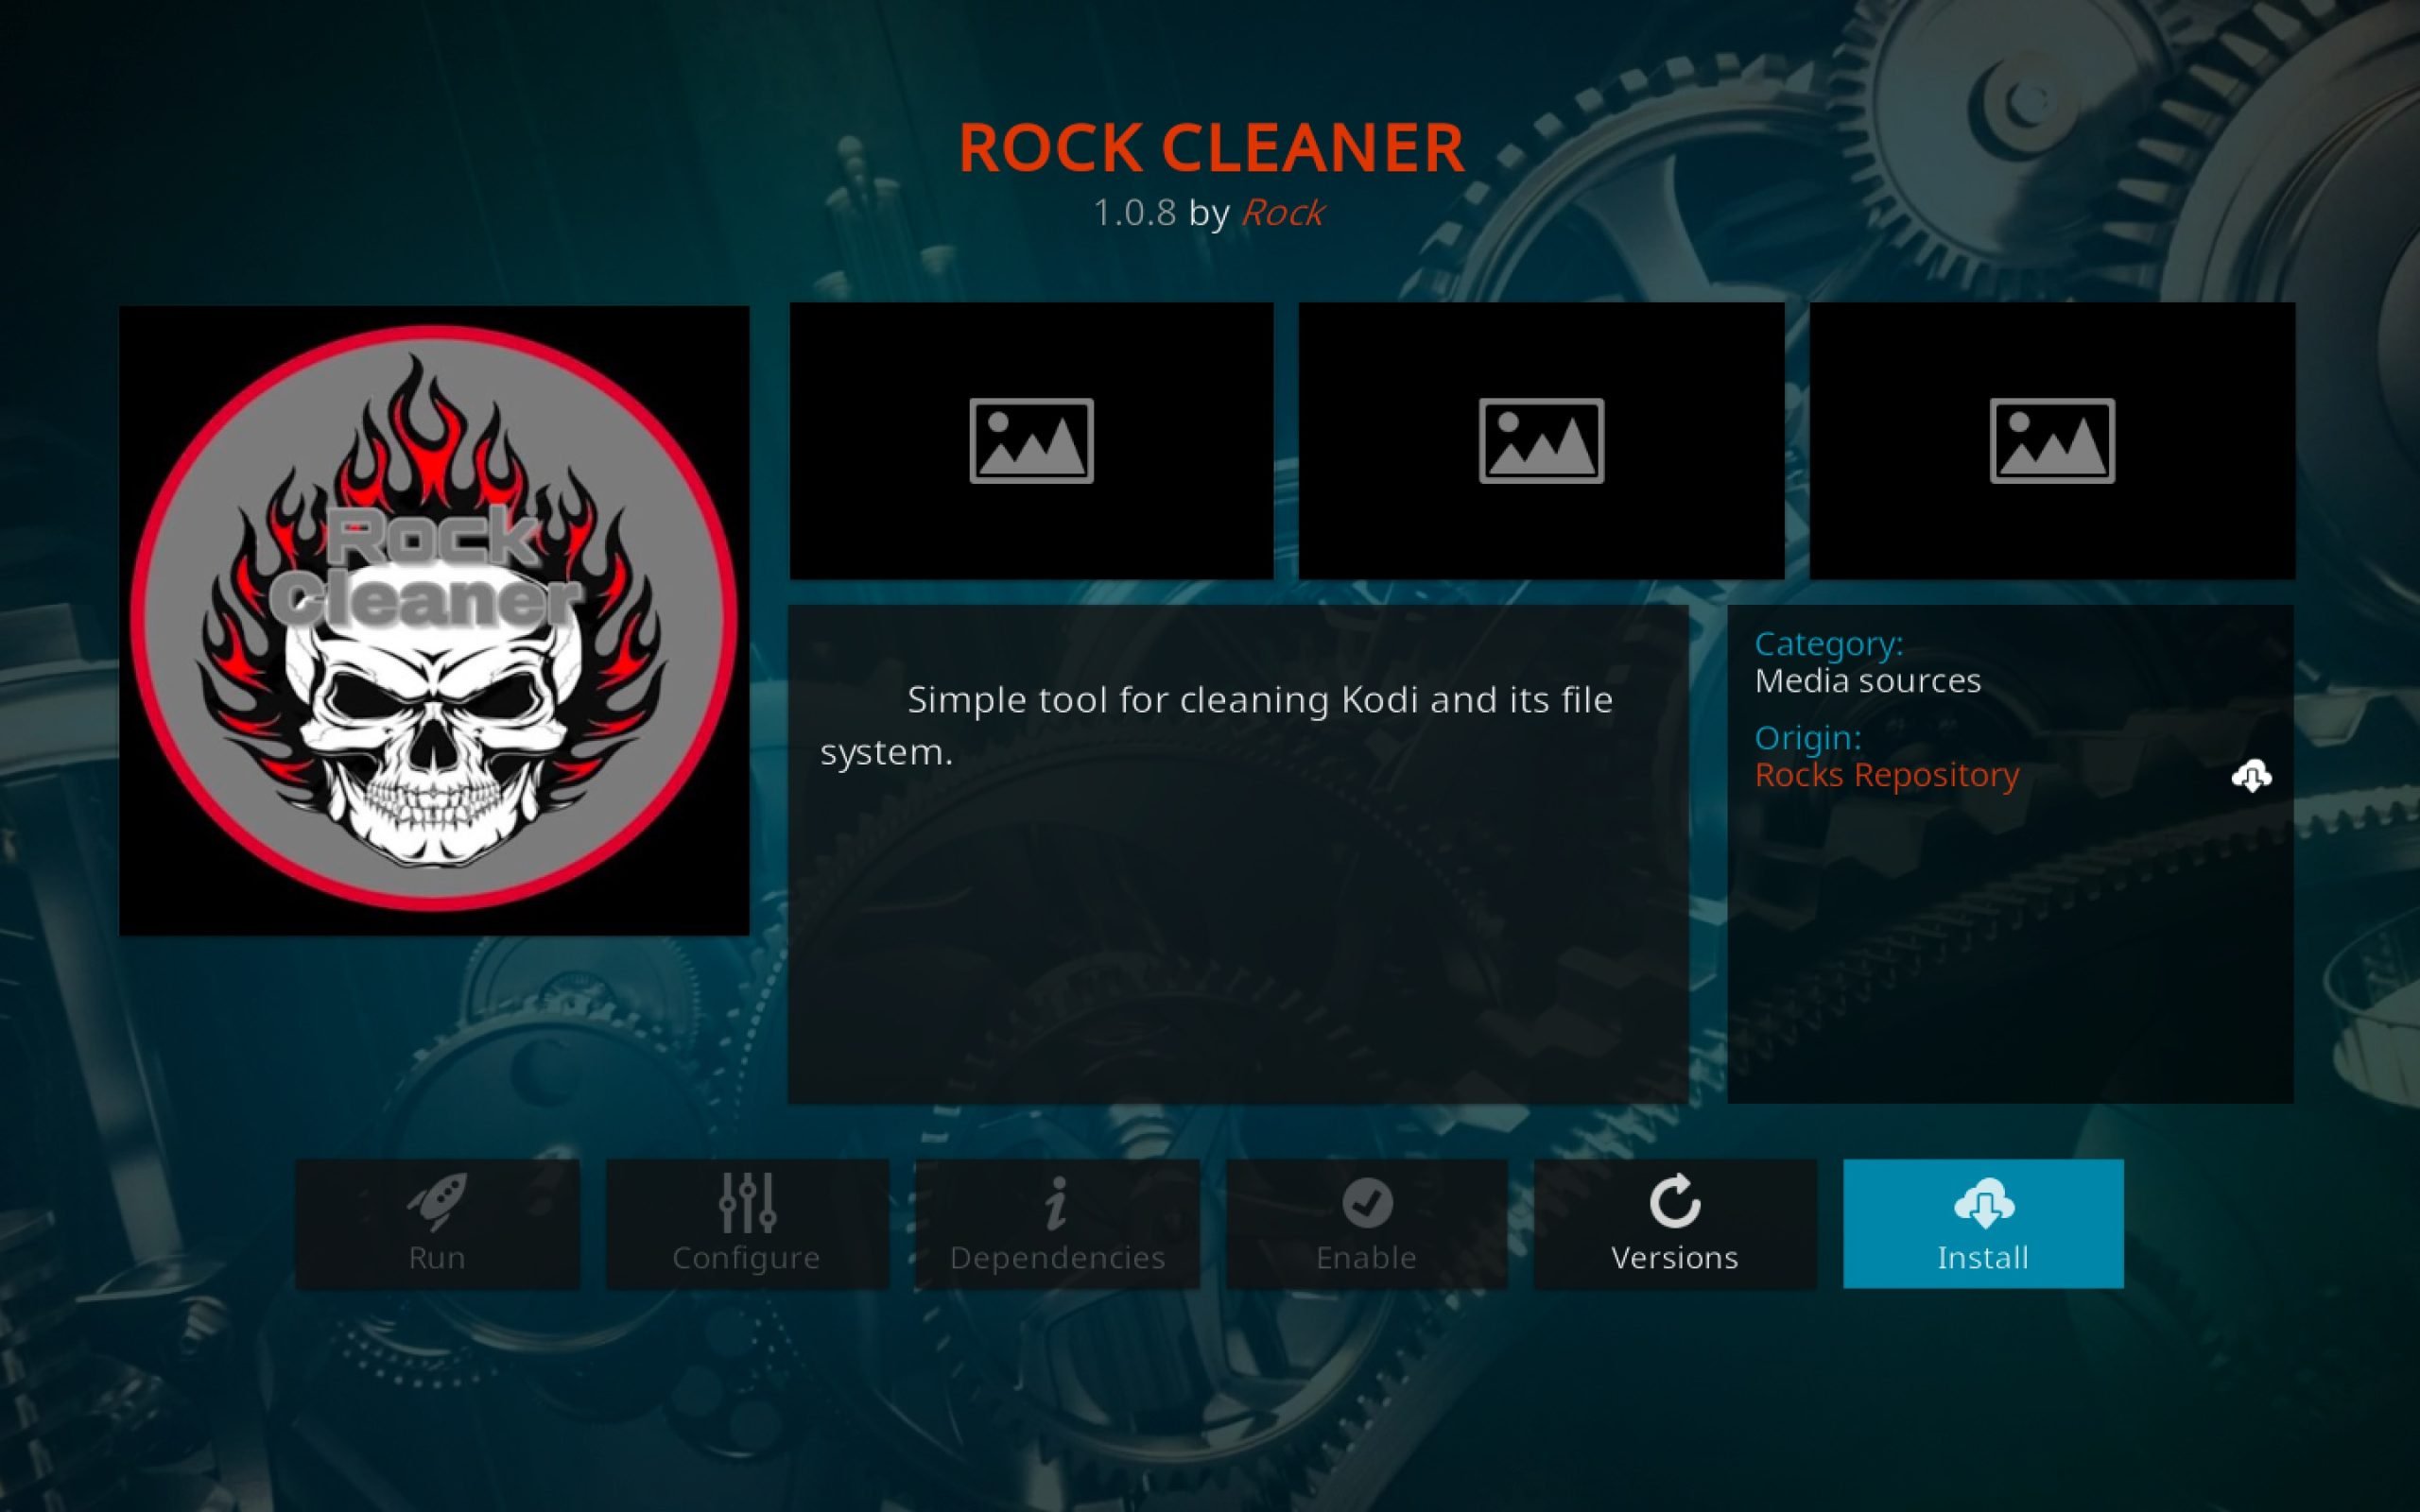
- Now open the installed Kodi Addon and Clear the Cache of Kodi.
2. Kodi Clear Database
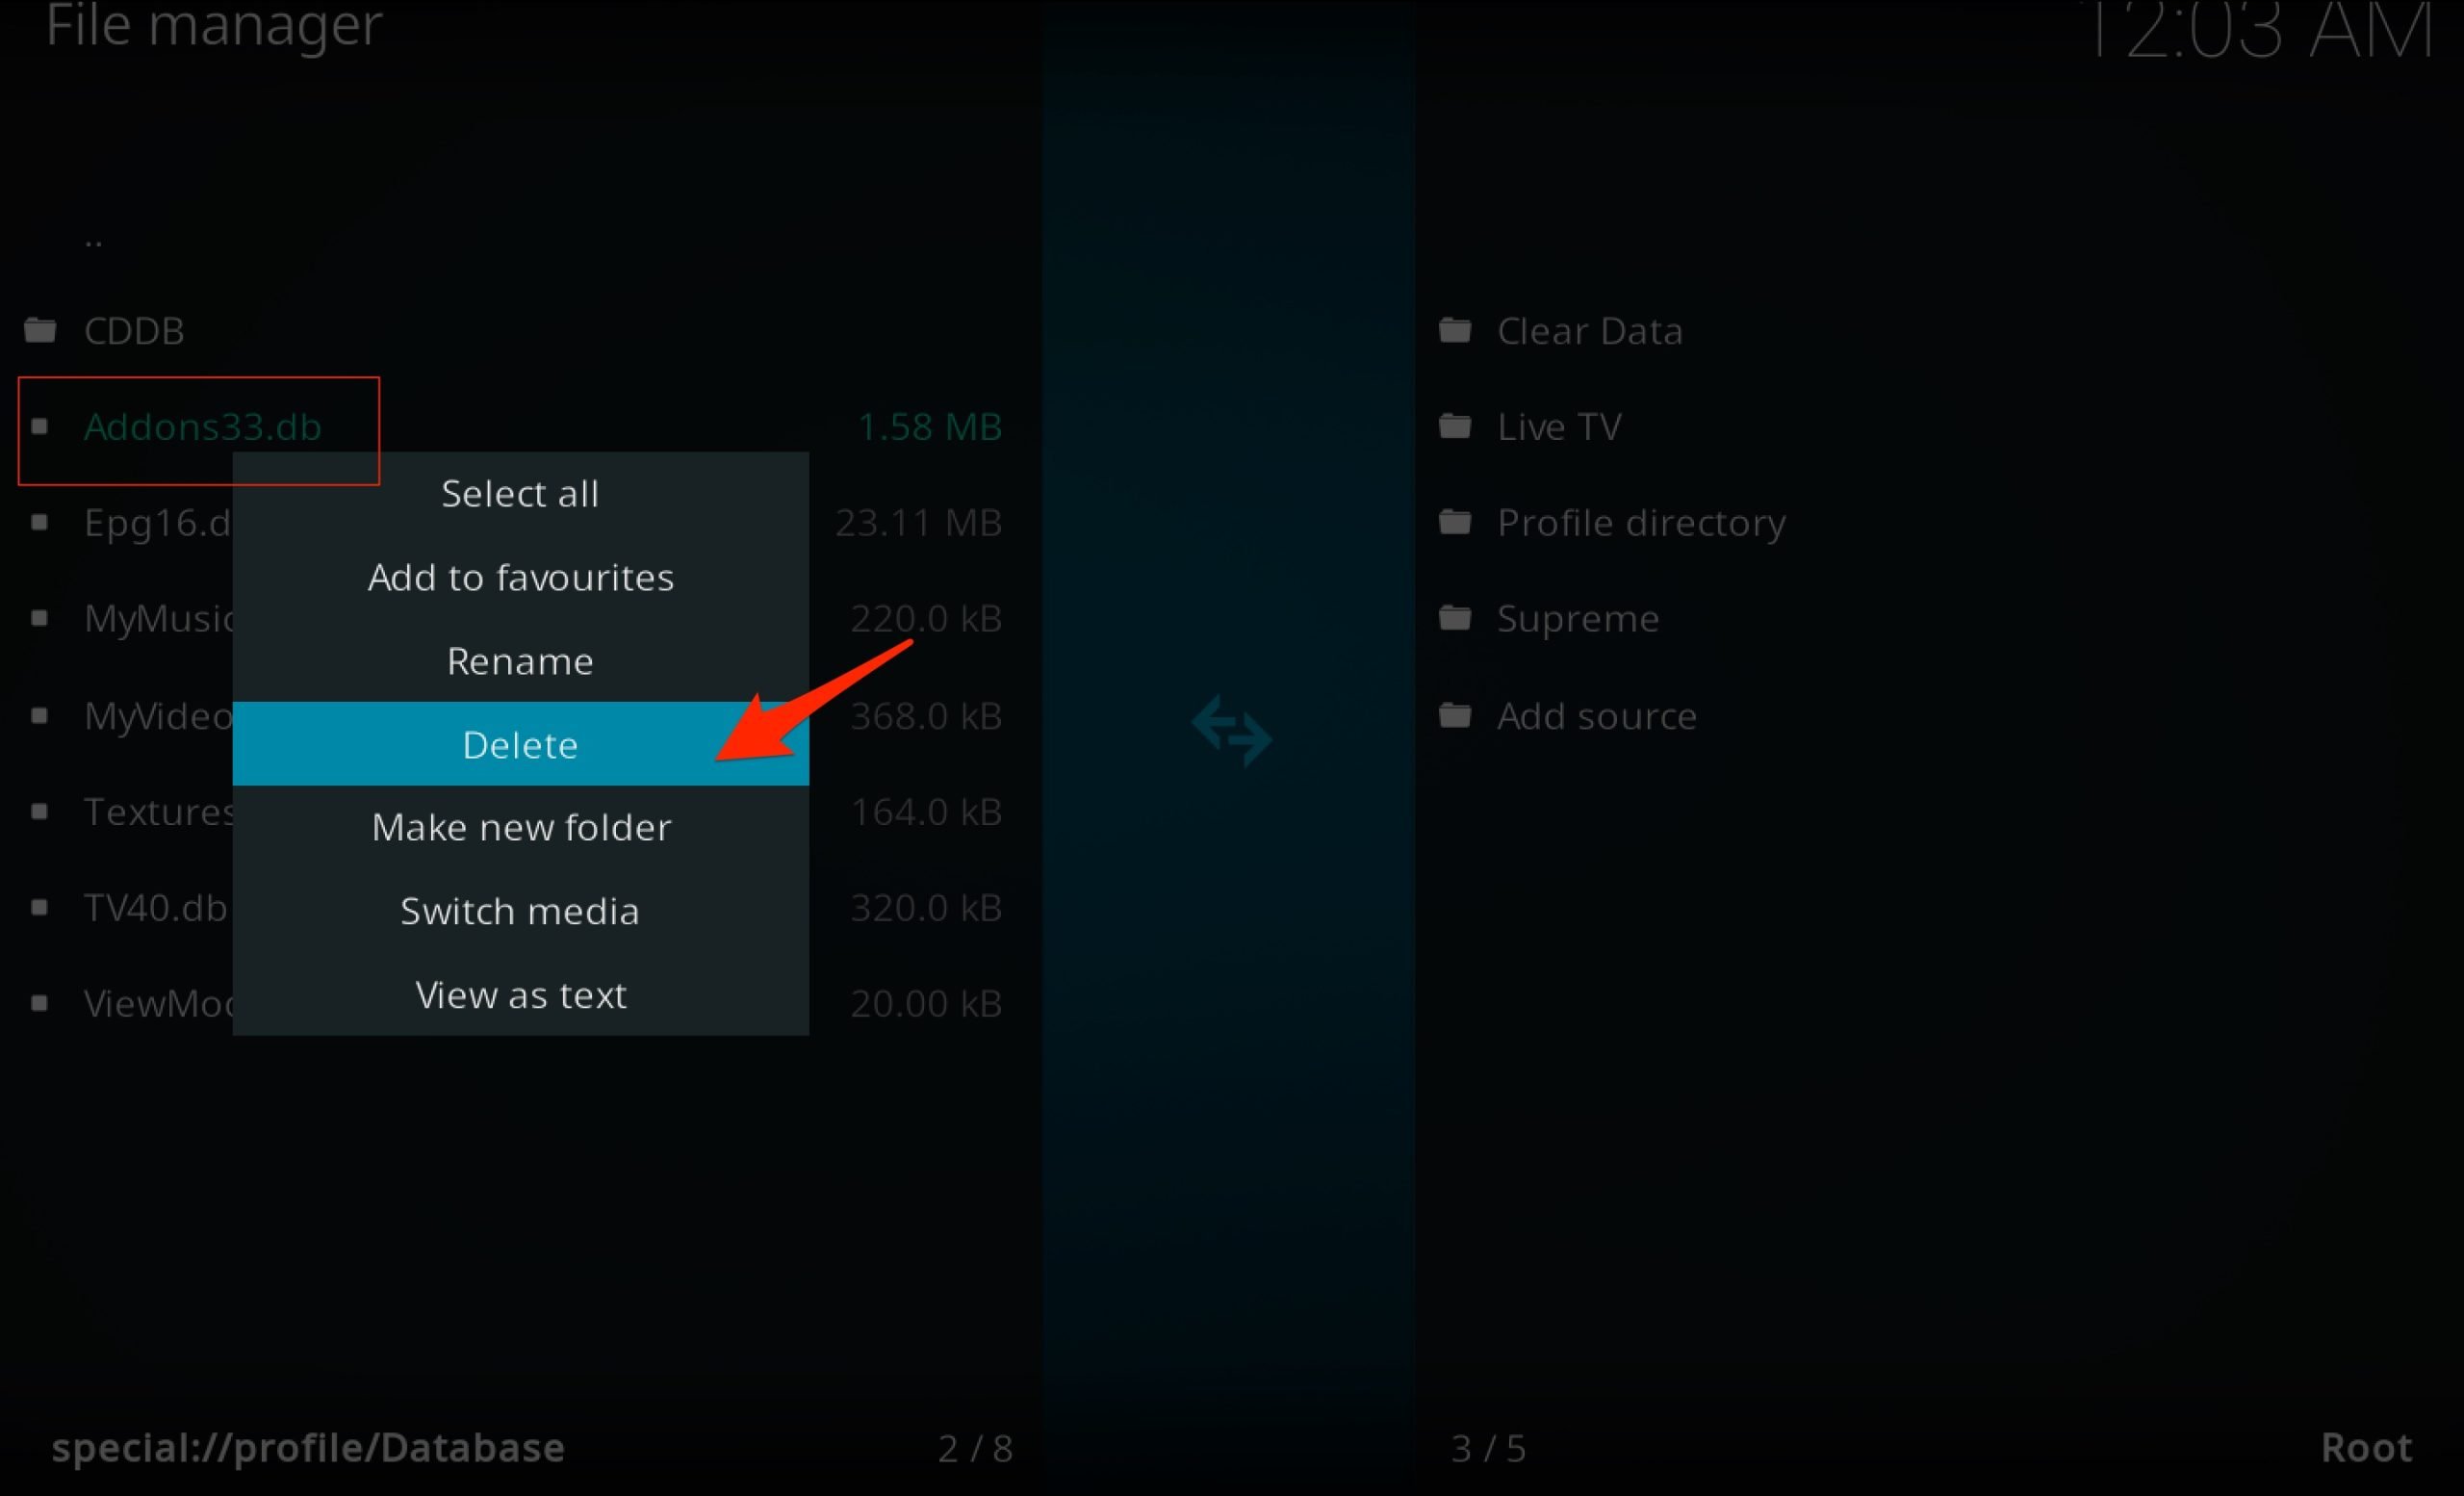
Kodi stores a set of database files for addons you have installed; these database files are temporary and can be deleted. Deleting the *.db files will fix any issues due to the wrong set of databases on your Kodi.
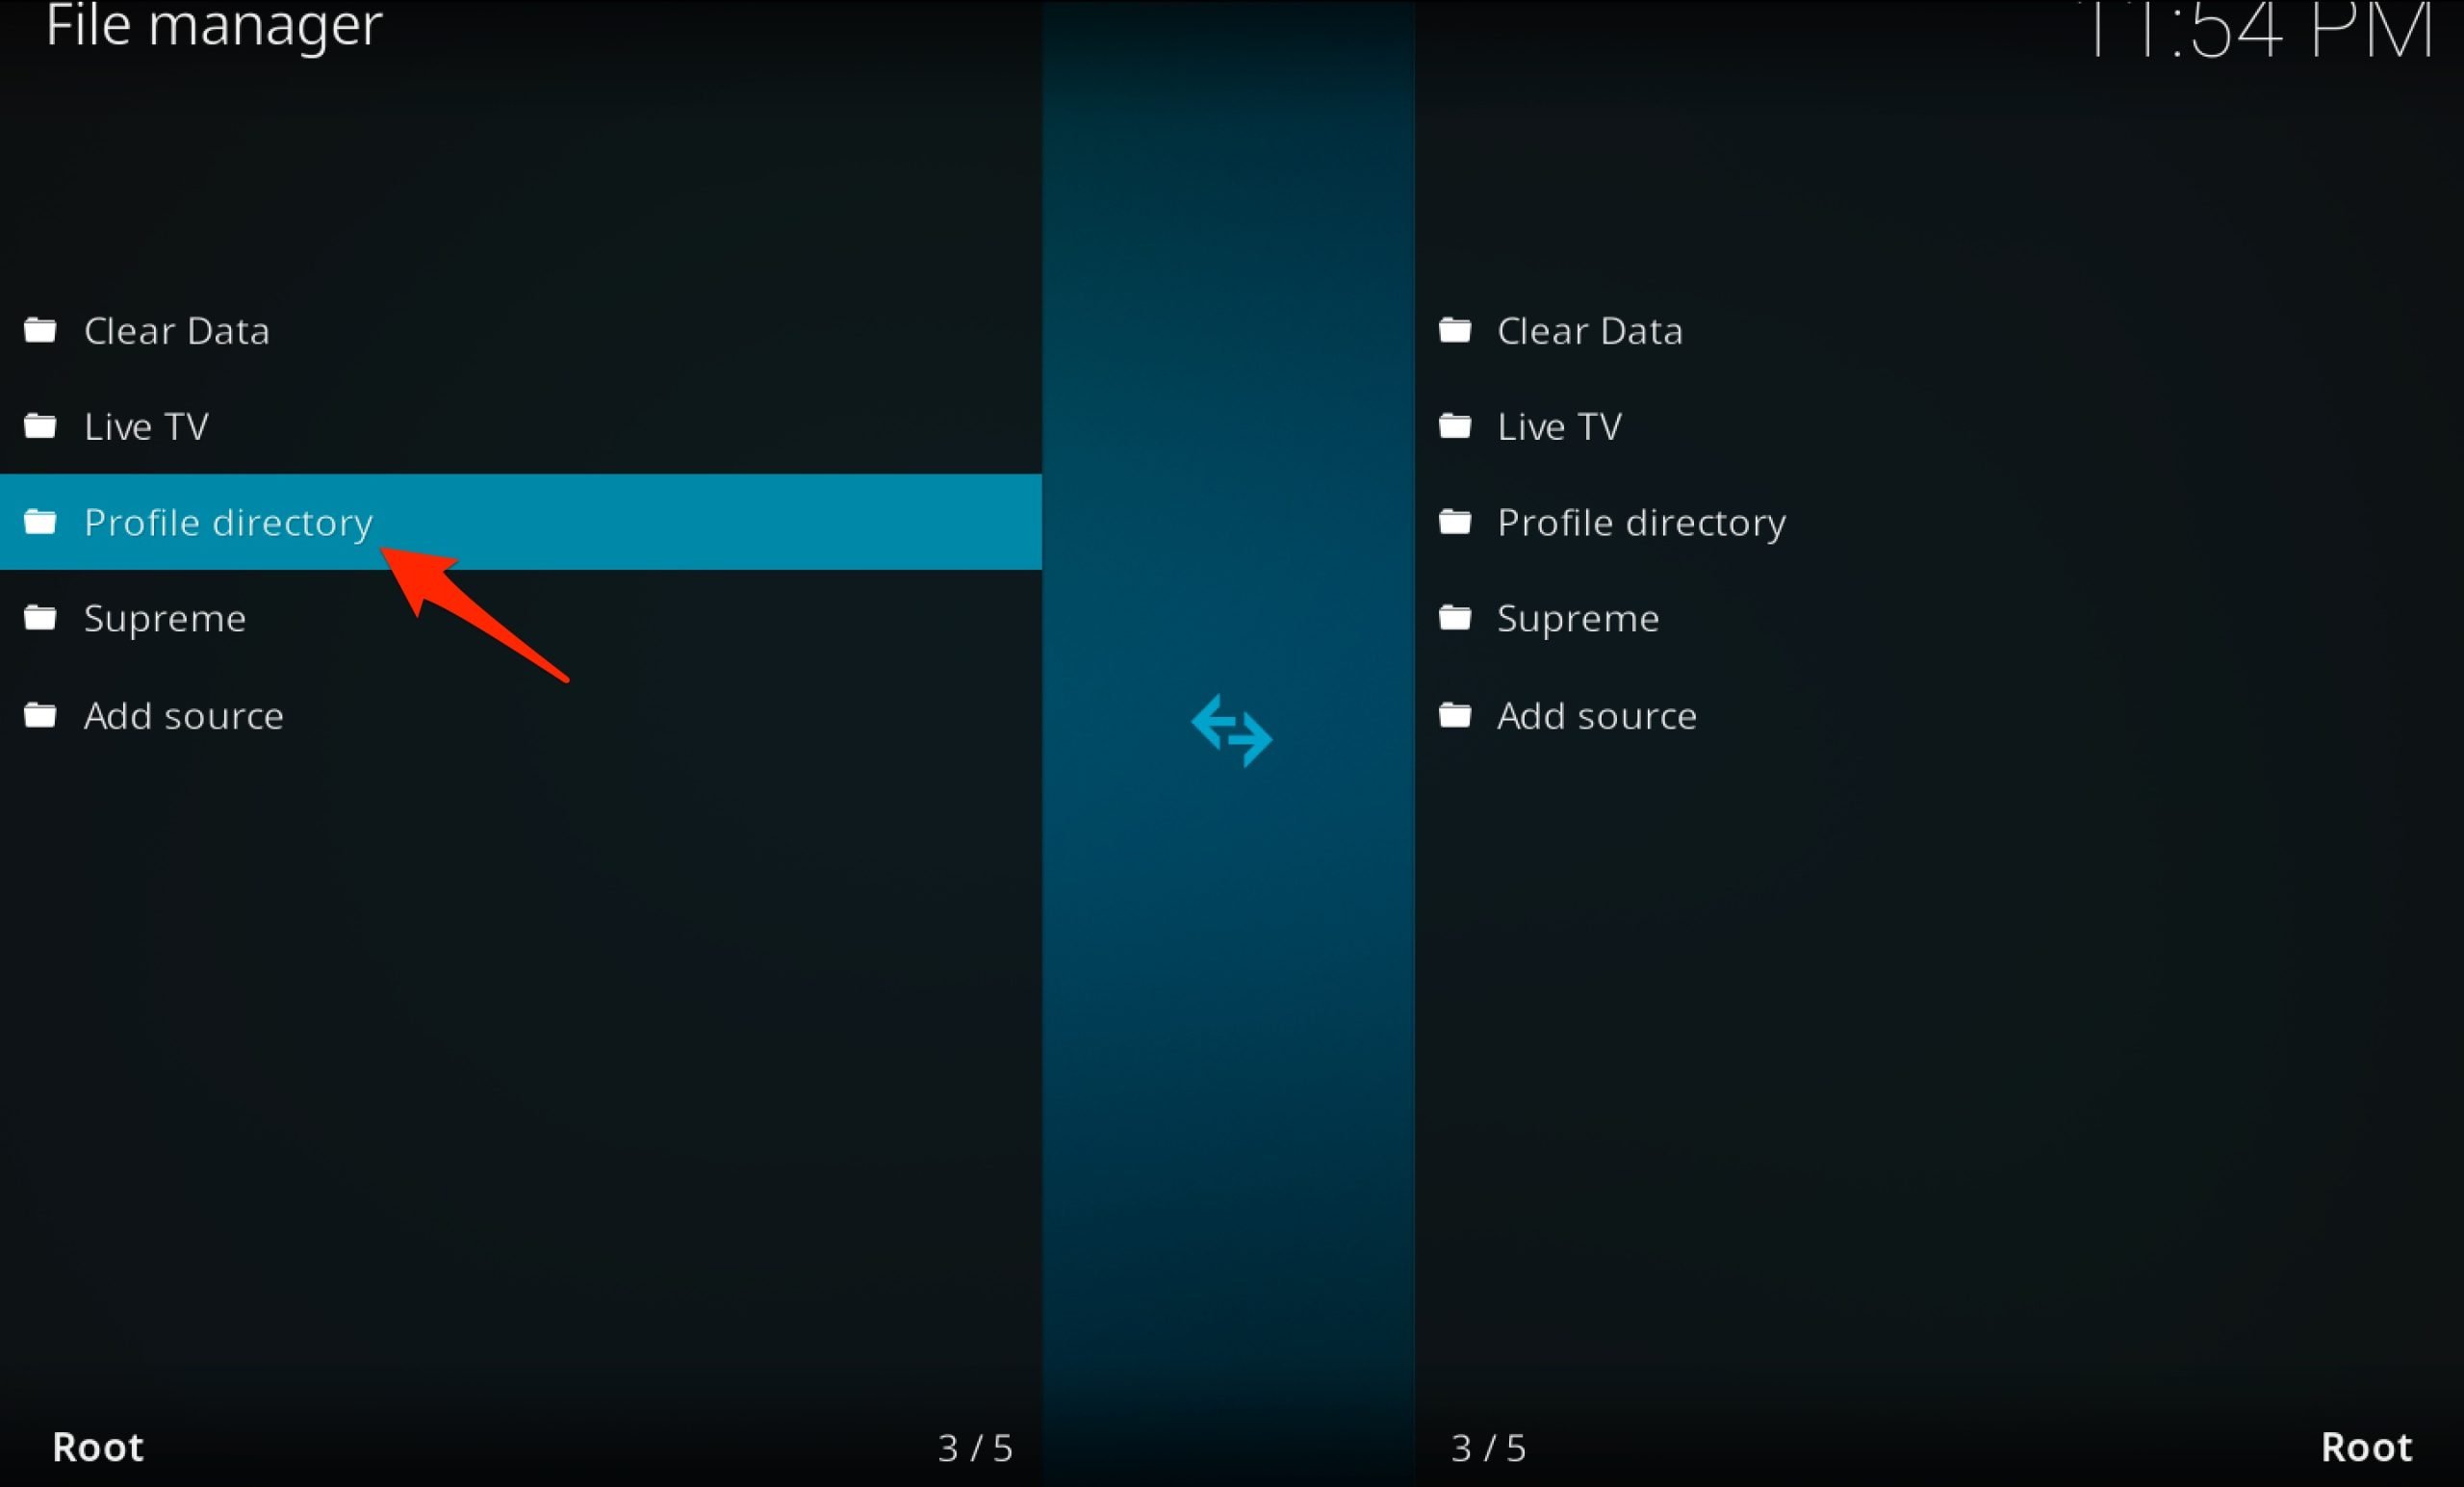
- Open Settings and click on File Manager.

- Here open Profile Directory.
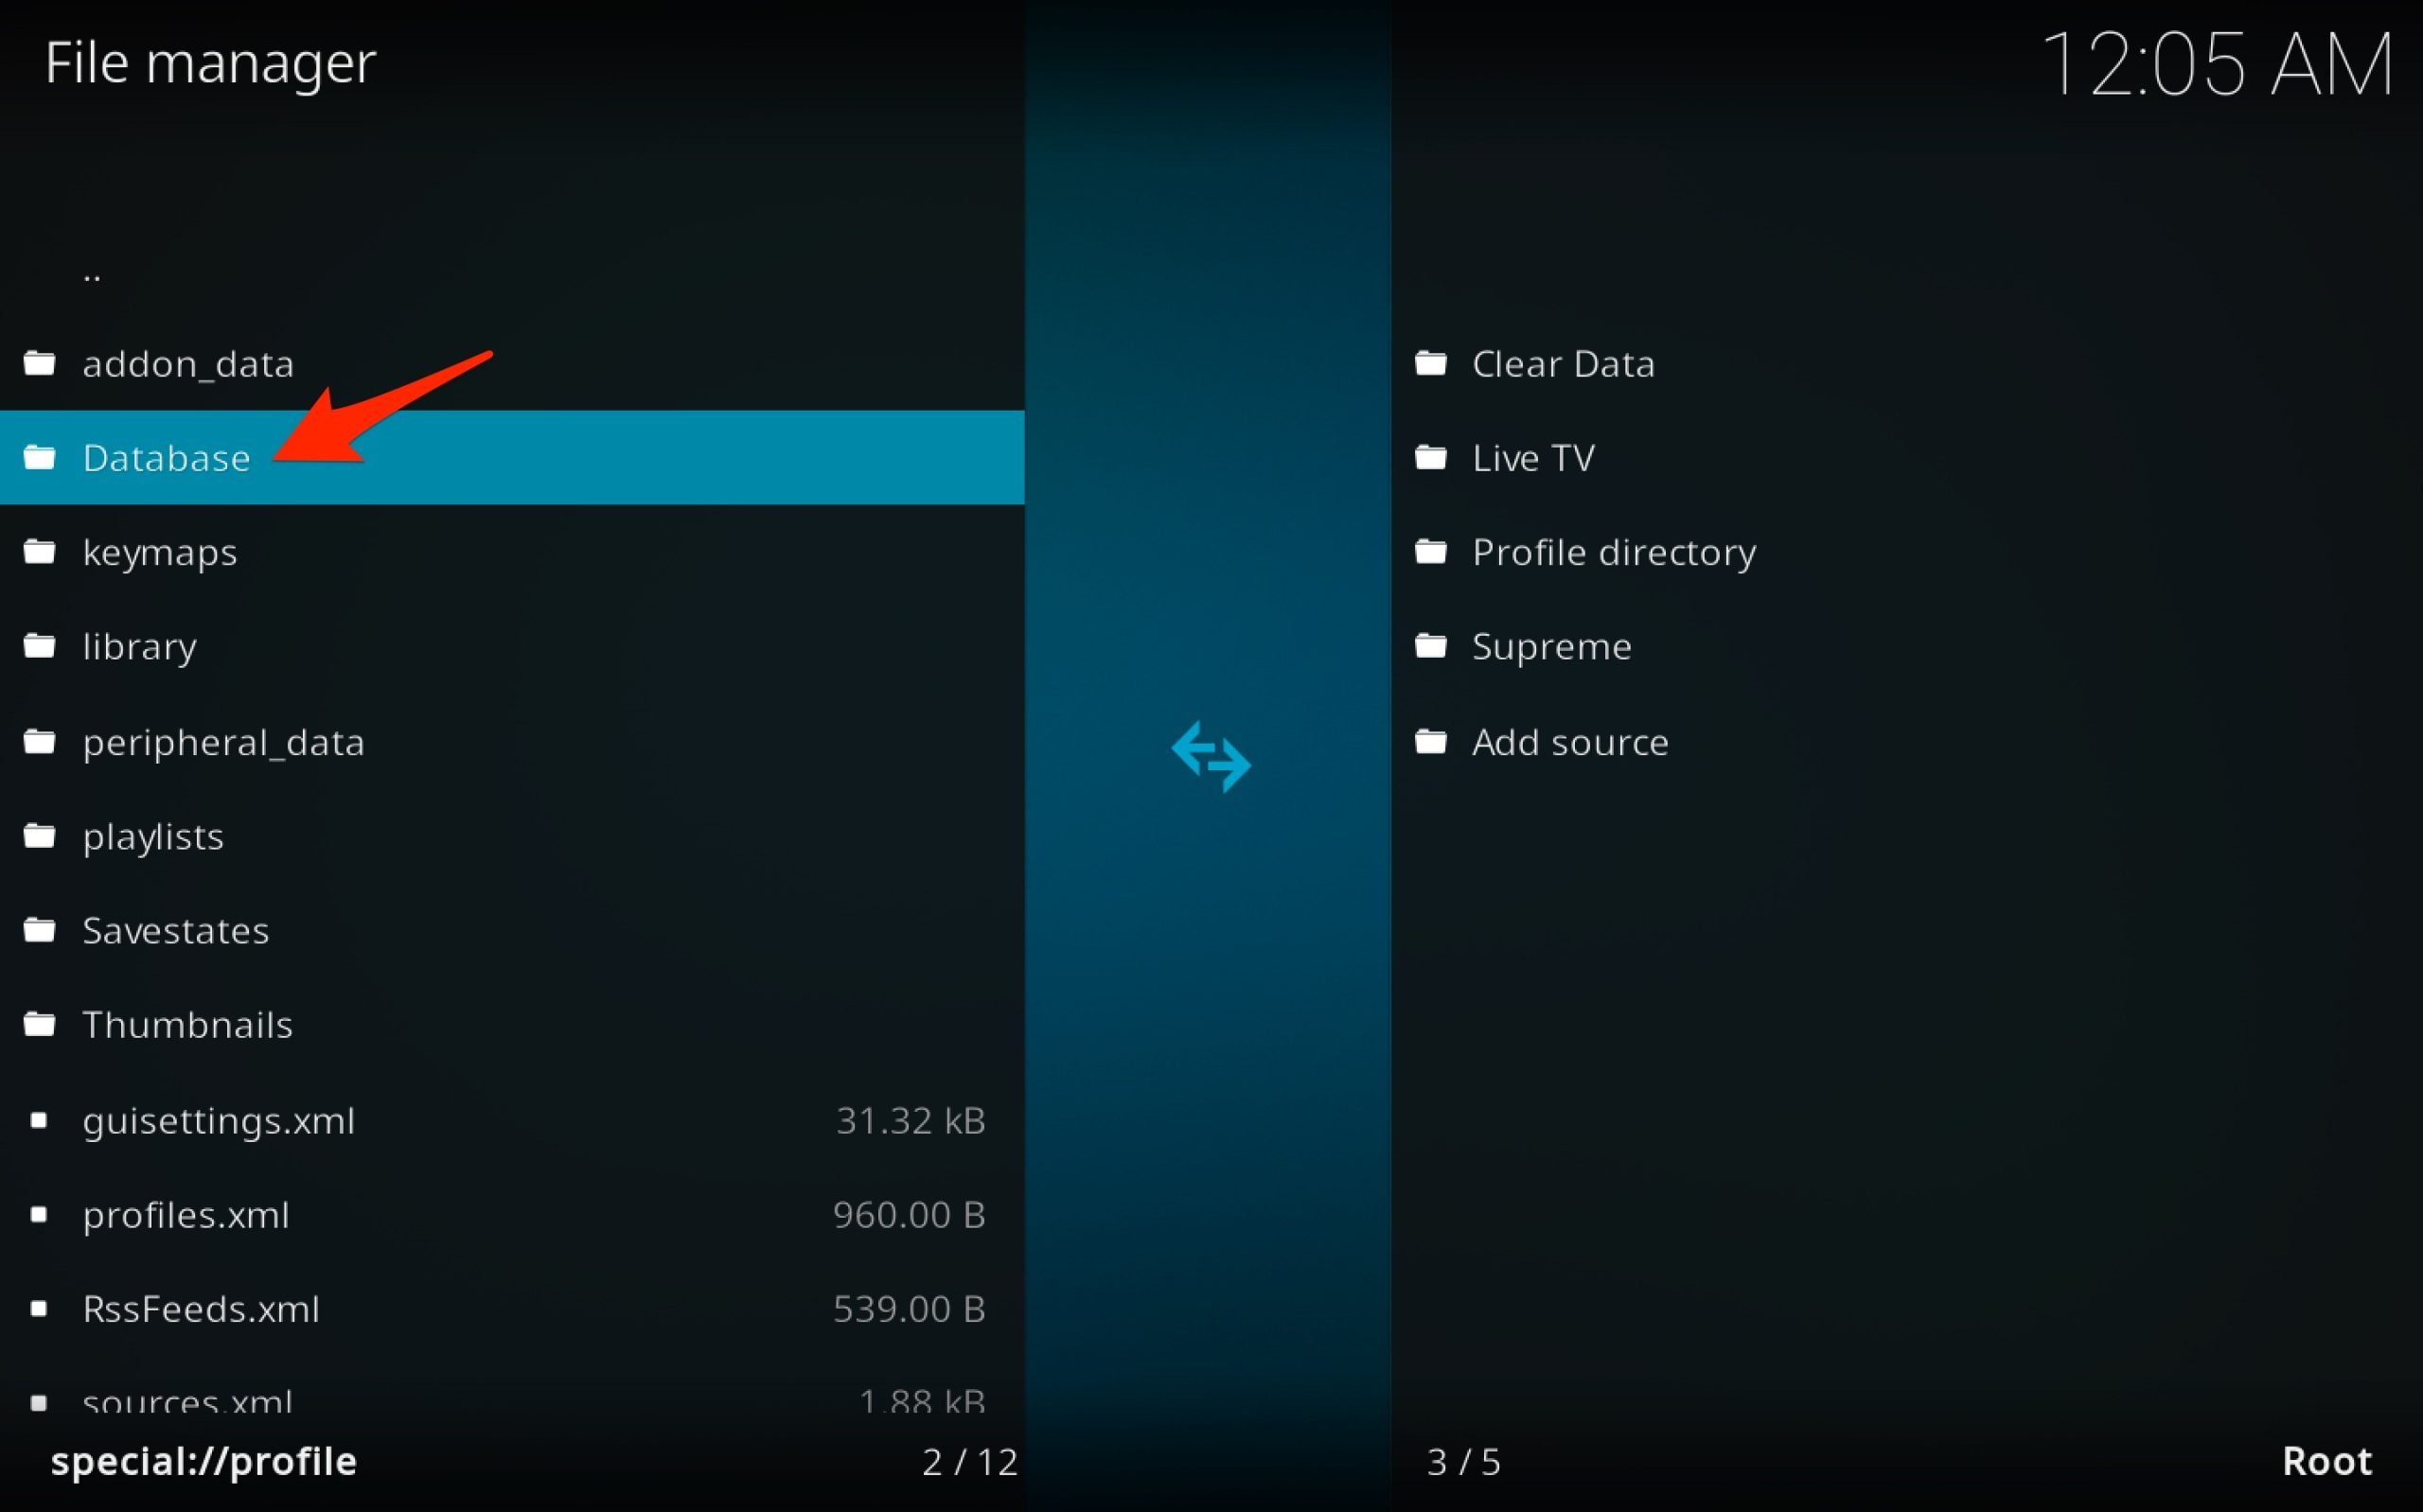
- Click on Database.
- Now right-click/double-finger tap on Addonxx.db and Delete the database *.db addon.
3. Set the Right Date and Time
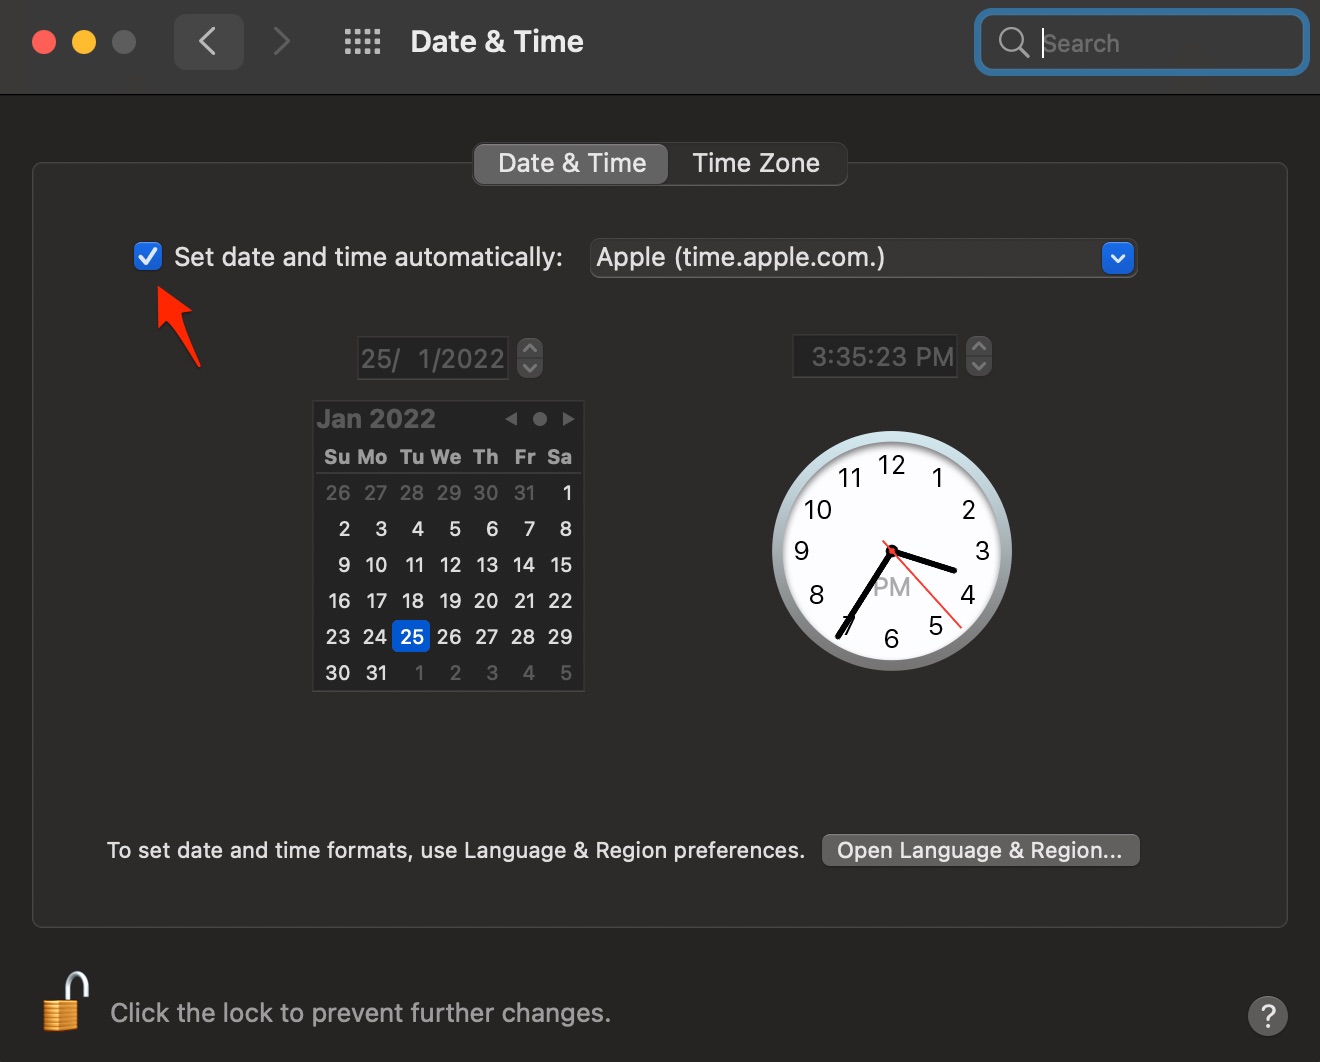
Kodi streams content online, and it collects data from servers; it is essential that the system data and time are correct, else the Kodi may show errors. You can automatically set the time and date on your Macbook in accordance with the network provider. The network will check your location and set the Time Zone removing any Kodi playback issues.
- Open MacBook Settings.
- Click on Date & Time.
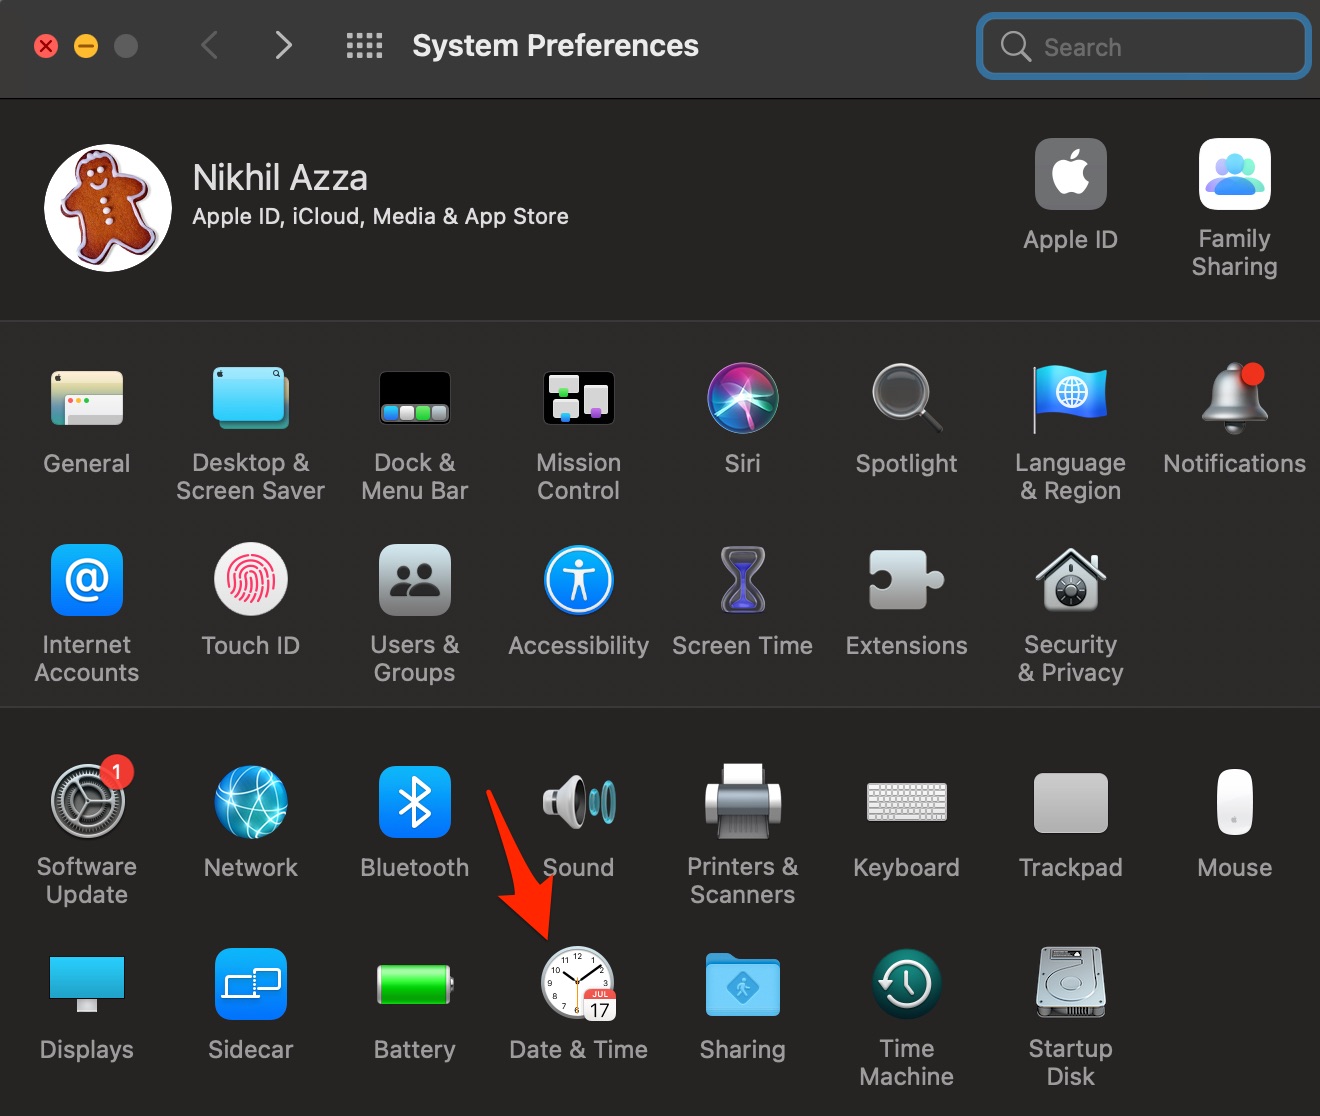
- Select Set Date and Time Automatically.
That’s it; with this simple guide, you can fix Playback Failed, One or More items Failed to Play error on Kodi for MacBook PC.
If you've any thoughts on How to Fix Playback Failed on Kodi for MacBook?, then feel free to drop in below comment box. Also, please subscribe to our DigitBin YouTube channel for videos tutorials. Cheers!


