Is the guest account not appearing on the login screen in Windows 11? A guest account allows one Windows computer to be shared by more than one user. With a guest account, the personal data of the principal owner or administrator account remains safe. The guest user gets a separate profile and uses it.
If you are not seeing the guest account on the login screen in Windows 11, the feature may not have been enabled on the PC. Also, sometimes when subjected to malware attacks, the guest account may not show up on the login screen. Using beta versions of Windows OS may also result in such bugs as the guest account option not appearing on the login screen.
Top Ways to Fix Guest Accounts Not Working on Login Screen in PC
Here are the various troubleshooting tips for reinstating the guest account option on Windows 11 login screen.
1. Enable the Guest Account Option on Windows
You must enable the guest account feature on Windows OS before seeing the option to use the guest account. Here are the steps to enable that.
- Press Windows + X to bring up a menu.
- Select the option Computer Management.
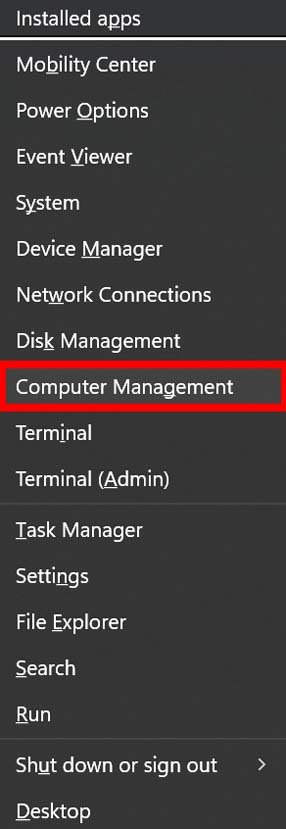
- On the left-hand panel, select the option Local Users and Groups.
- Double-click on the option Users on the left-hand side. You will see the list of all the public user accounts.
- Locate the Guest account and click on Properties from the associated menu.
- In the Properties dialog box, go to the General tab
- Uncheck the box beside the option This Account is Disabled.
- Click on Apply and click on OK to commit the changes.
- Finally, restart the computer.
Now, on the login screen, you will see the guest user accounts will appear.
2. Not able to See Local Users and Groups? Here’s What you Should Do
Additionally, if you cannot see the Local Users and groups option under the Computer Management window, then head to GitHub and download the lusrmgr executable file. You can then see options for Guest users and Groups.
- Download the lusrmgr file from the above link and open it.
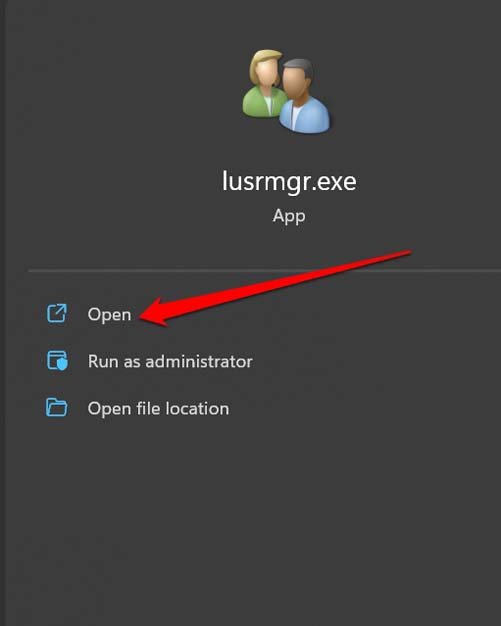
- You may also double-click on the executable file by browsing in the Downloads folder.
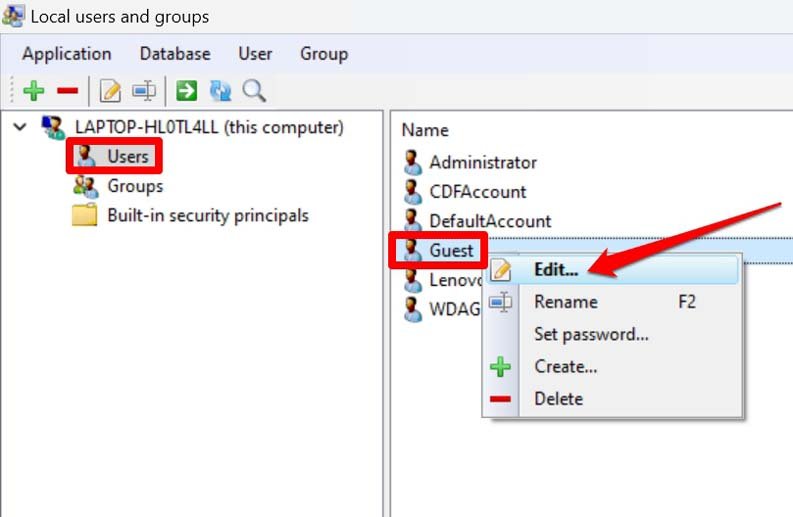
- On the left-hand, click on Users.
- Next, right-click on the Guest option and select Edit from the menu.
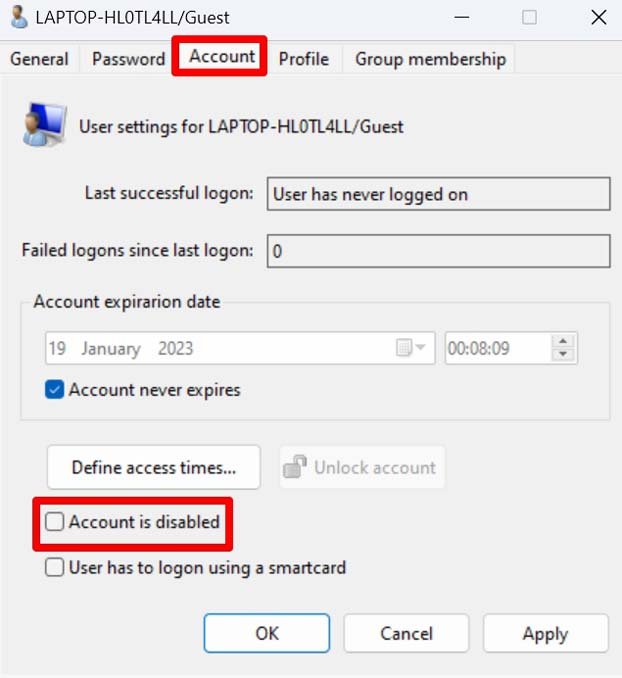
- In the Guest properties dialog box, click on the Account tab.
- Now, scroll down to the option Account is disabled. Make sure the box is unchecked.
- Then click on Apply, followed by OK.
- Also, to save the changes restart the PC.
3. Set Up a New Guest Account Using Command Prompt
You can use the trusted Command prompt in Windows to create a new guest account on the PC.
- Press Windows + S to bring up the Windows search console.
- Type cmd and click Run as Administrator when the Command Prompt shows up in the search result.
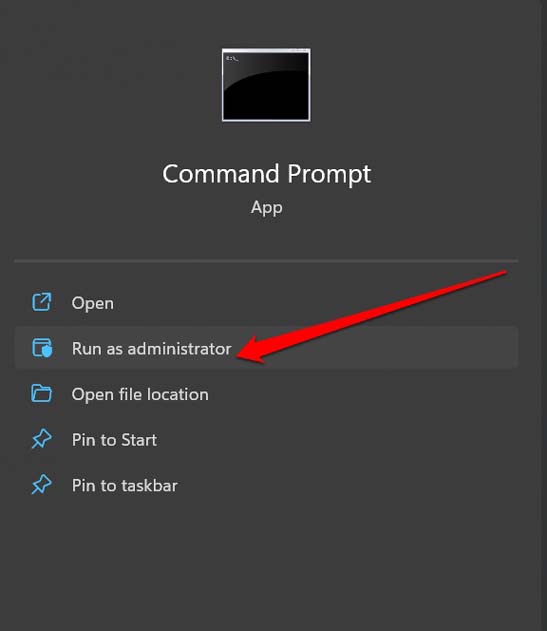
- Enter the command mentioned below.
net user Visitor /add /active: yes
- Enter the command below to set up a password for the new guest account.
net user Visitor *
- Next, set the password and re-enter it when prompted.
- Enter the following command to remove Standard account permission from the guest account.
net user Visitor /delete
- To assign permissions to the guest account, enter the command below and press enter.
net localgroup guest Visitor /add
4. Create a New Alternative Guest Account
If you think the command prompt is a bit tech-savvy for you, then here is a straightforward method to create a new guest account. Go for this if you cannot access an existing guest account.
- Press Windows + R to bring up the Run command box.
- Enter the command netplwiz and press enter.
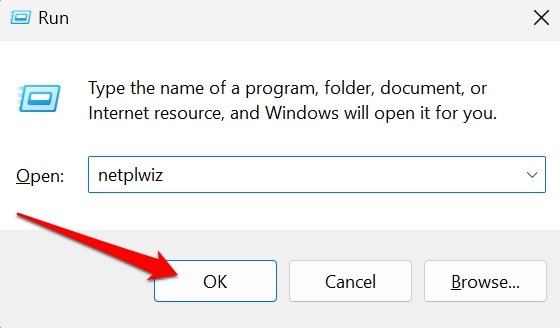
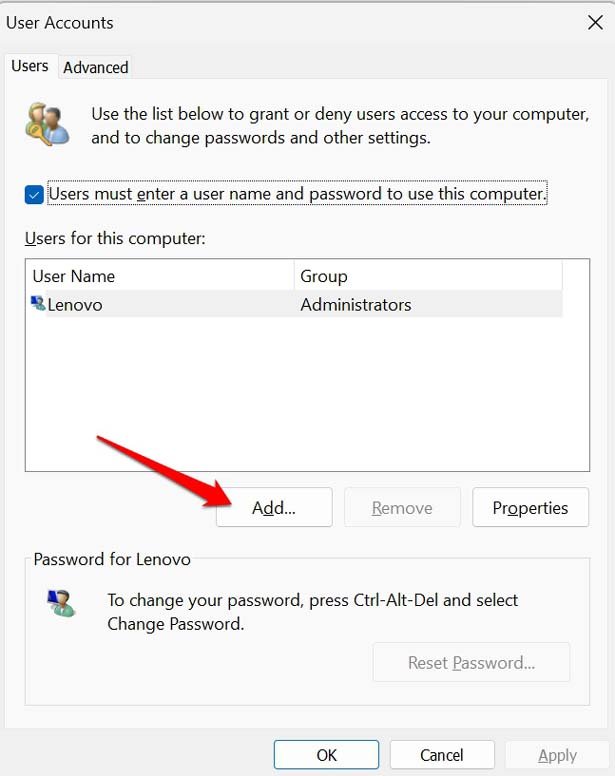
- When the User Accounts dialog box pops up, click on Add.
- “How Will This Person Sign in” dialog box appears, click on Sign in without Microsoft account.
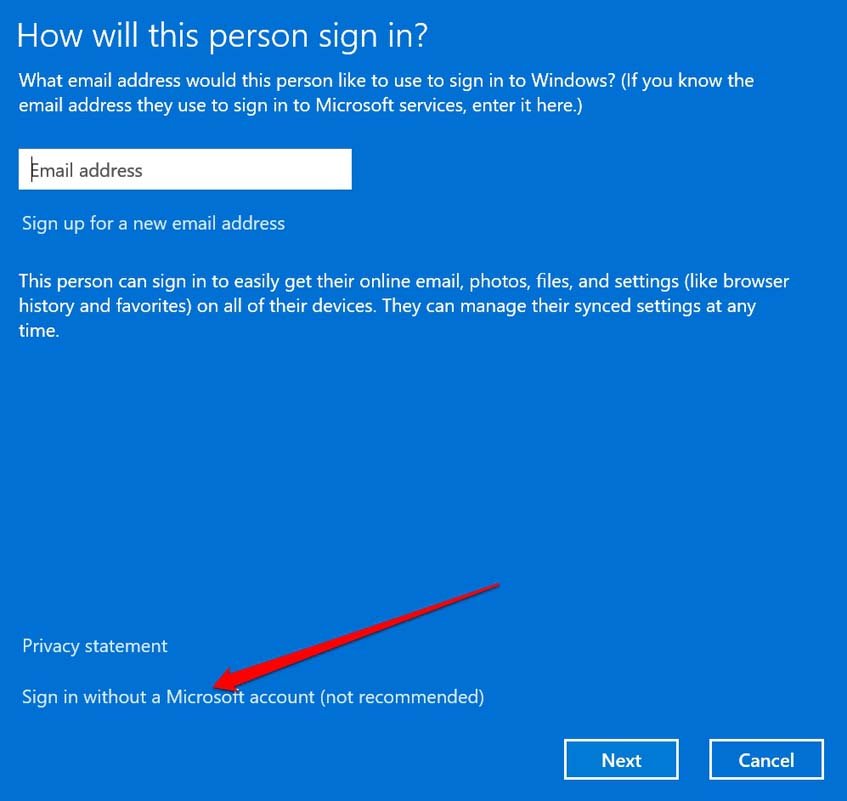
- Next, click on Local Account.
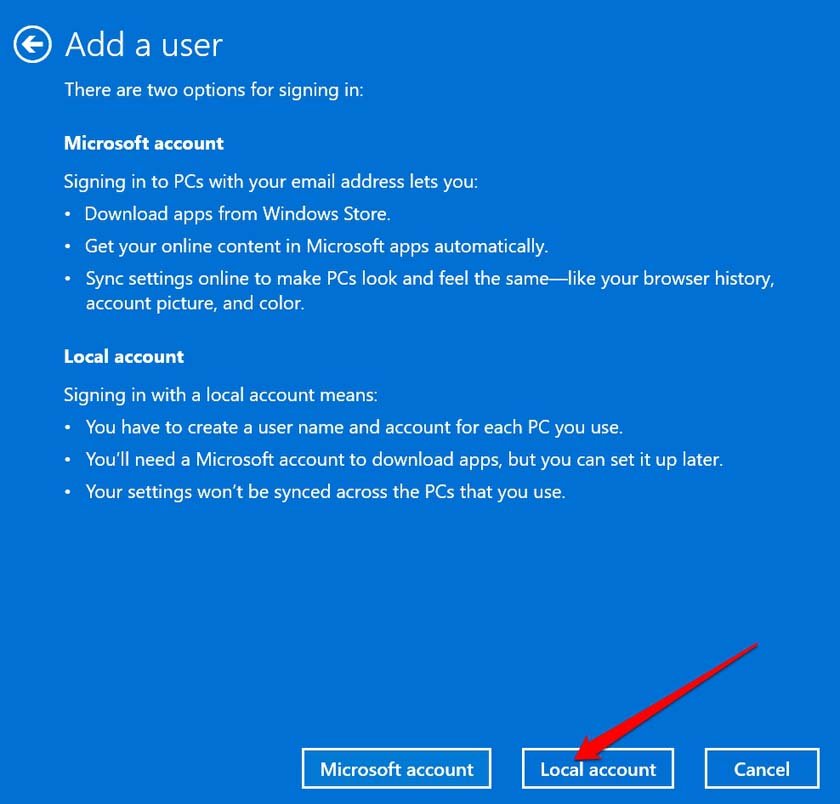
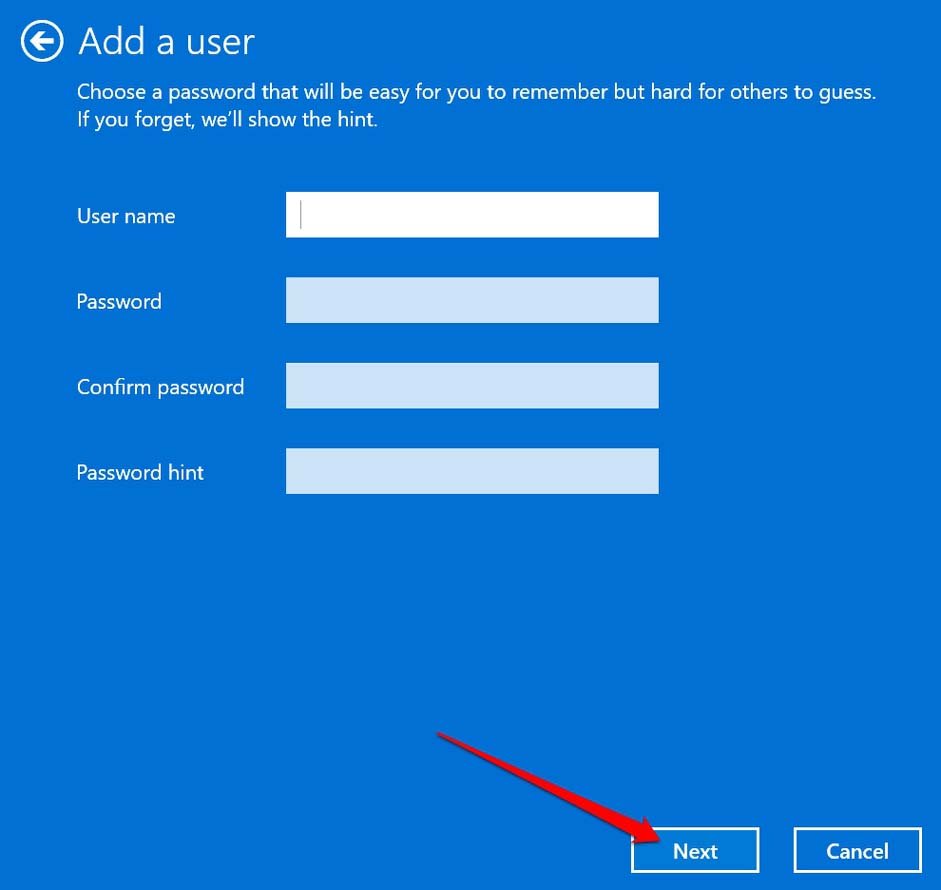
- The Add A User dialog box will now appear. Enter the name of the Local Account and create a password for that.
- Re-enter the password to complete the user account creation process.
- Click the Next button.
- The guest account gets created and it will show under the list within Users on This Computer.
- Click on the new guest user account > Click on Properties.
- Once the Properties dialog shows up, click on the tab Group Membership.
- Click on the Others option and select the option Guest from the drop-down list.
- Once you have completed the above steps, click on Apply and OK to save the changes.
5. Use Group Policy Editor to Enable Guest Account on Windows PC
You may also change the Group Policy Editor to enable a guest account on Windows. Note that if you are a Windows Professional user, then only you will have access to the Group Policy Editor.
- Press the Windows key to bring up the search console.
- Search for Group Policy Editor and click on Open.
- Follow the path mentioned below.
Computer Configuration > Windows Settings > Security Settings > Local Policies > User Rights Assignments. - Under User Rights Assignments, find the element Deny Log Locally.
- Double-click on it to start editing it.
- Click on the Guest account and click on Remove.
- Now, click on Apply and click OK to apply the changes.
- On the left-hand side, click on Security Options.
- Go to the Account settings.
- Set the Guest account state as enabled.
- Click on Apply to hold the changes.
Conclusion
If you've any thoughts on How to Fix Guest Account Not Appearing on Login Screen in Windows 11?, then feel free to drop in below comment box. Also, please subscribe to our DigitBin YouTube channel for videos tutorials. Cheers!
