Since its inception, Microsoft has been continuously trying to strengthen the security aspects of the Windows operating system. Primarily done to prevent malicious programs from harming the device, the Smart App Control is the newest addition to the long list of security features present in Windows PCs.
So what’s this Smart App Control or SAC all about, and how does it help achieve the goal? Let’s find out!
What is Smart App Control or SAC, and what does it do?
As mentioned earlier, Smart App Control or SAC is an advanced feature built within the Windows Security app that strengthens the security on your Windows 11 PC. The Smart App Control feature, if enabled, uses tools like Microsoft’s cloud-based Intelligent Security Graph to determine the authenticity of the app you intend to run. In case SAC is unable to reach a definite conclusion, it verifies the digital signature of the app and checks if it belongs to a trusted vendor or not.
If the signatures are conflicting, the programs are blocked from running on the system without you having an option to override this action.
The Smart App Control can only run on the clean installation of Windows so you need to perform a factory reset and then clean install Windows 11 to be able to use this feature. Initially, Microsoft only allows you to use SAC in Evaluation Mode, where the operating system evaluates whether SAC can function without any hindrance.
Now that you have a fair idea about the Smart App Control feature let’s see how you can enable it on your Windows 11 computer.
How to enable Smart App Control on Windows 11?
After the evaluation phase, if Windows determines that the Smart App Control (SAC) can work on the system, the feature gets automatically enabled. However, if SAC has been explicitly disabled on your system, you can follow the below steps to enable the feature:
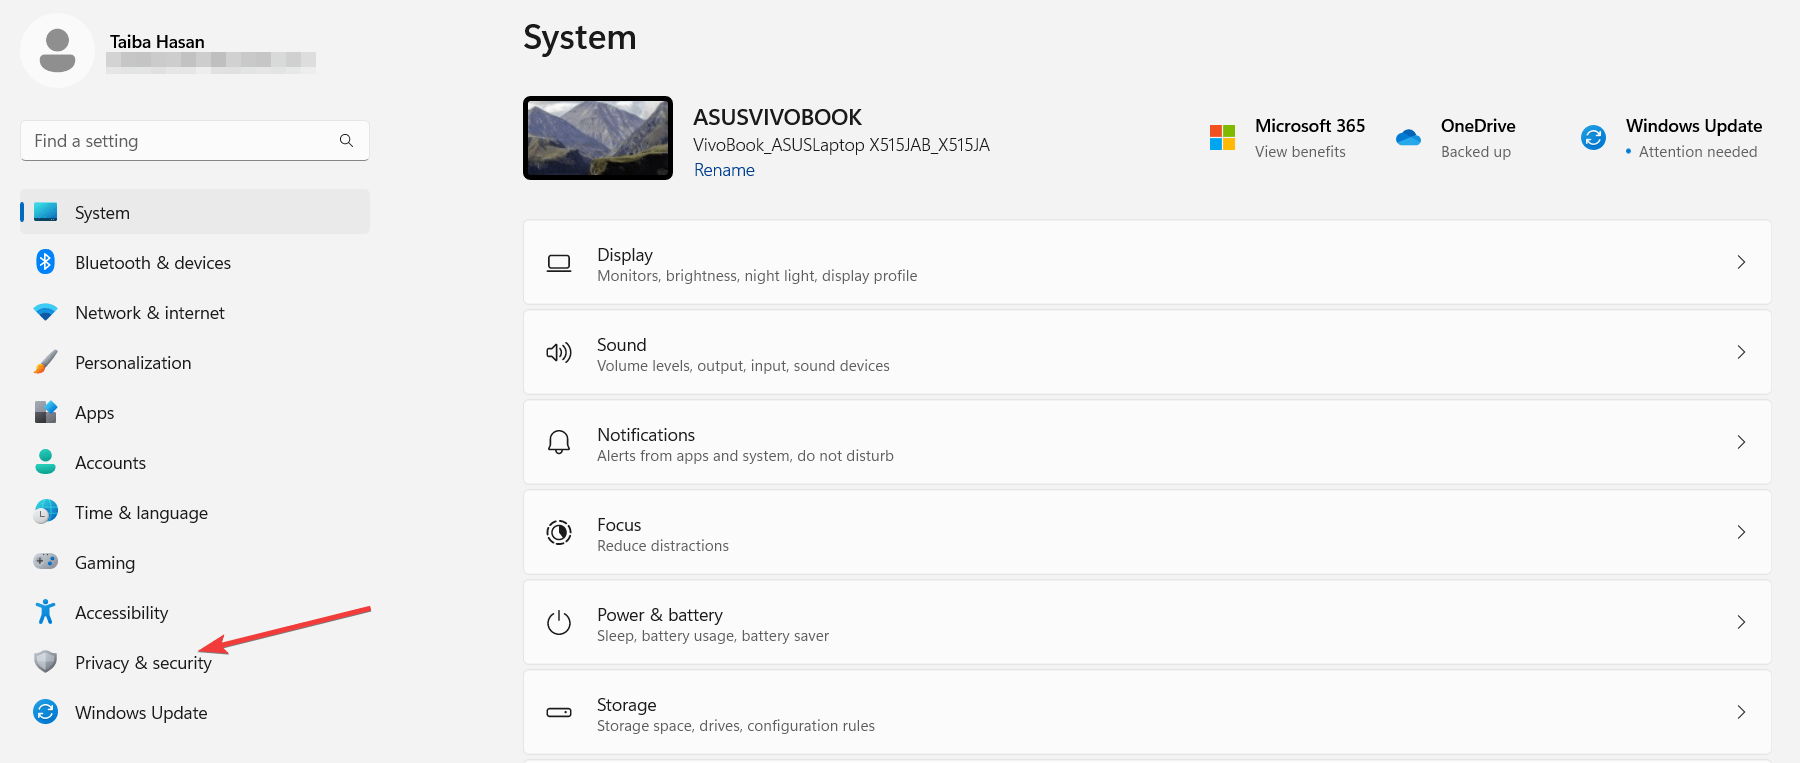
- Launch the Windows Settings app using the Windows + I shortcut.
- Select the Privacy & Security tab from the left sidebar.

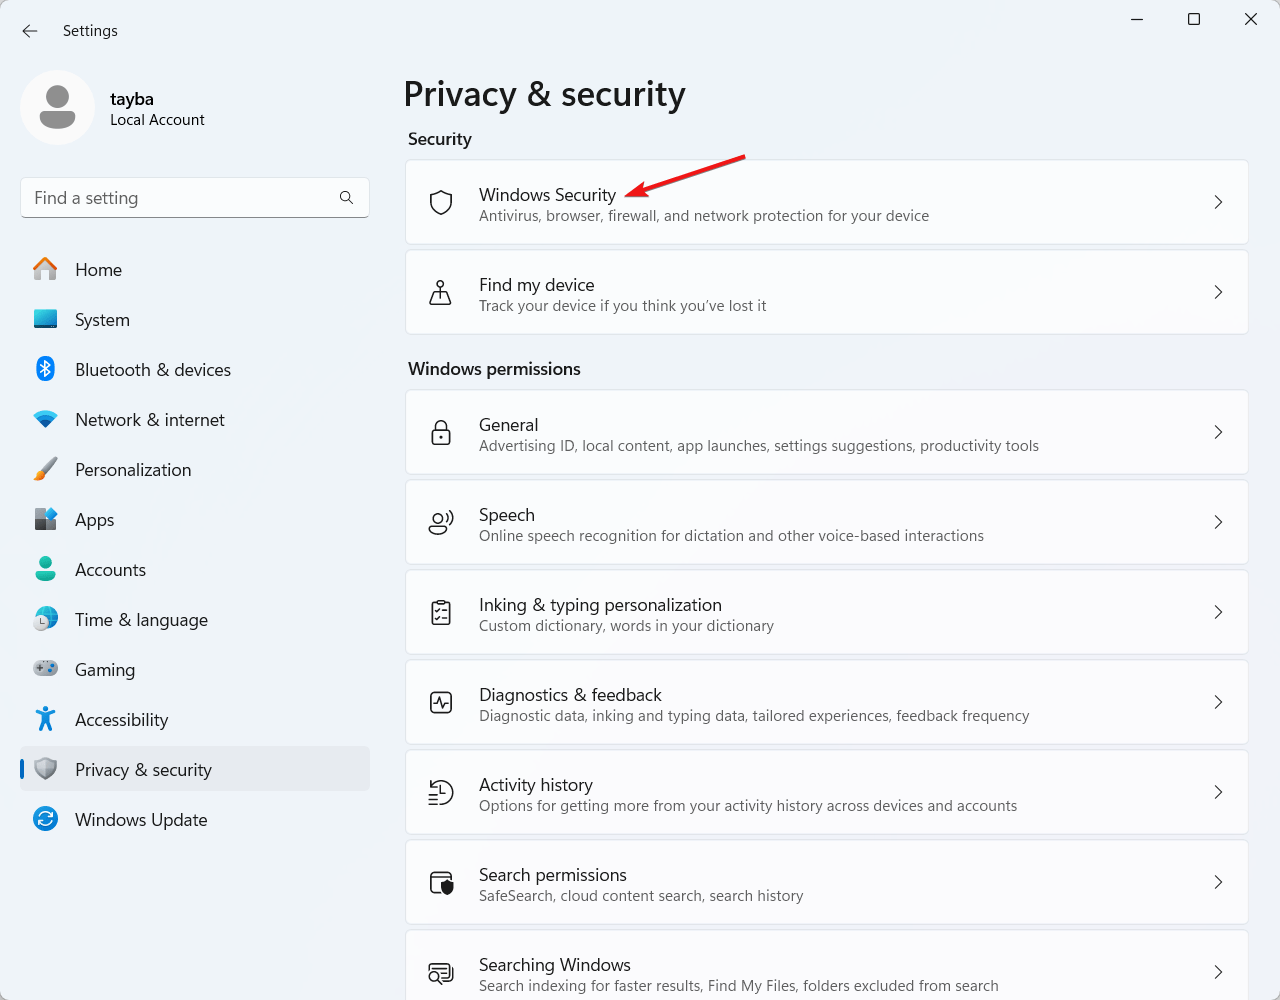
- Select the Windows Security option, located under the Security section on the right sidebar.

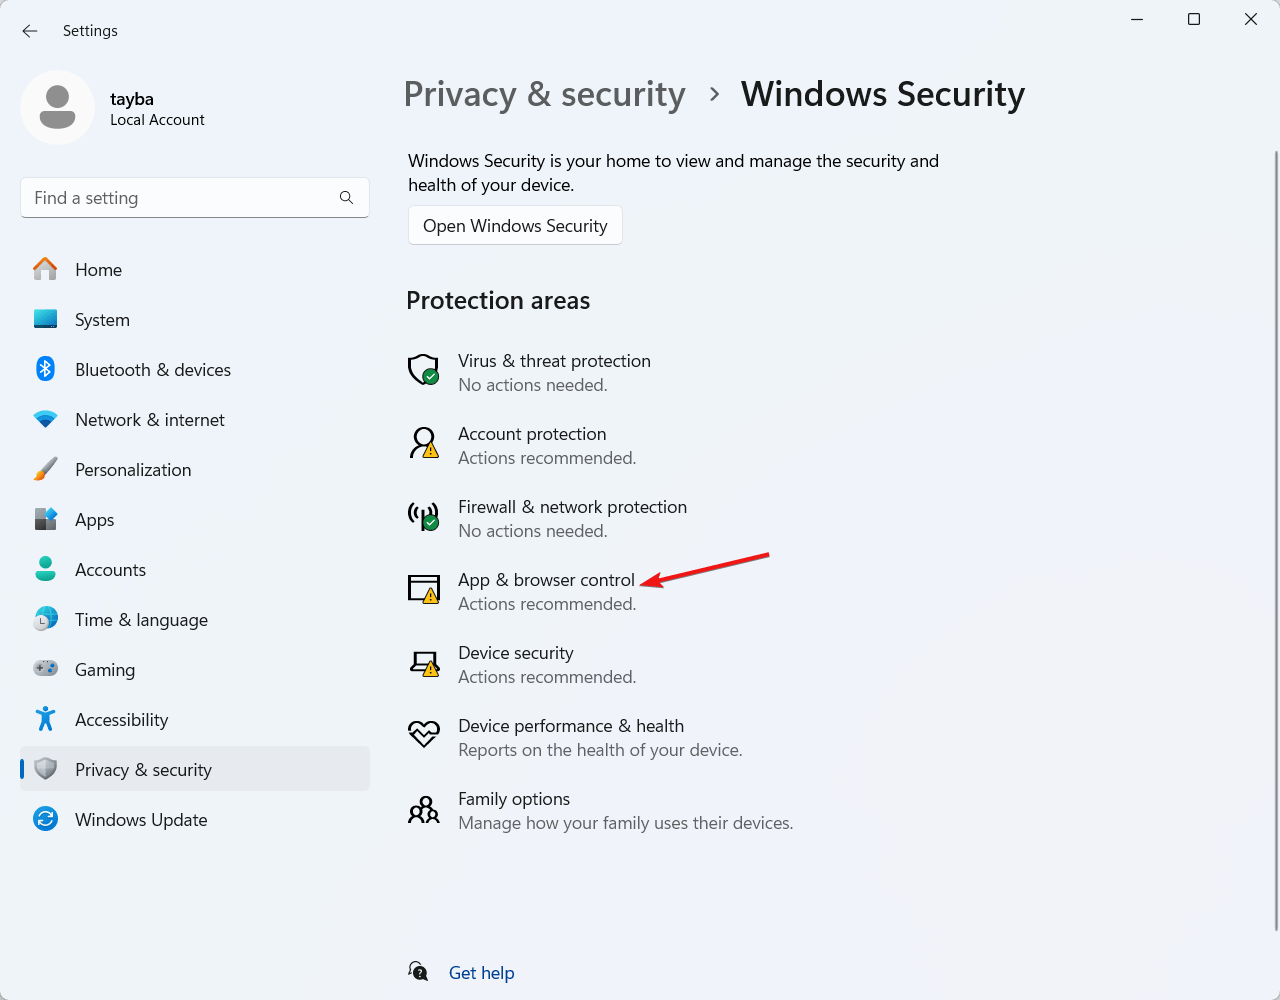
- Now, in the Windows Security app, choose the App & Browser Control option.

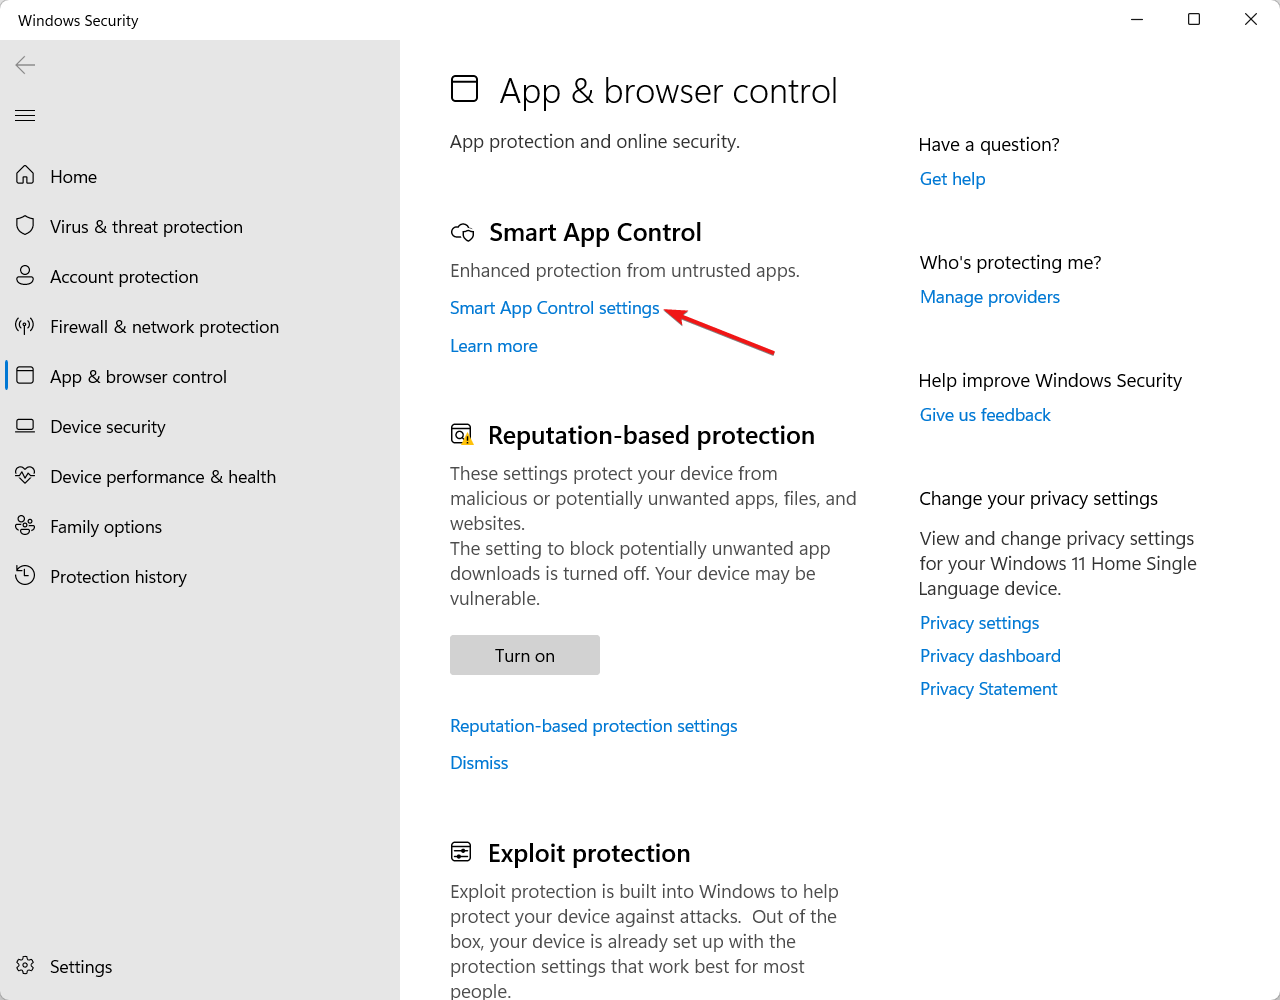
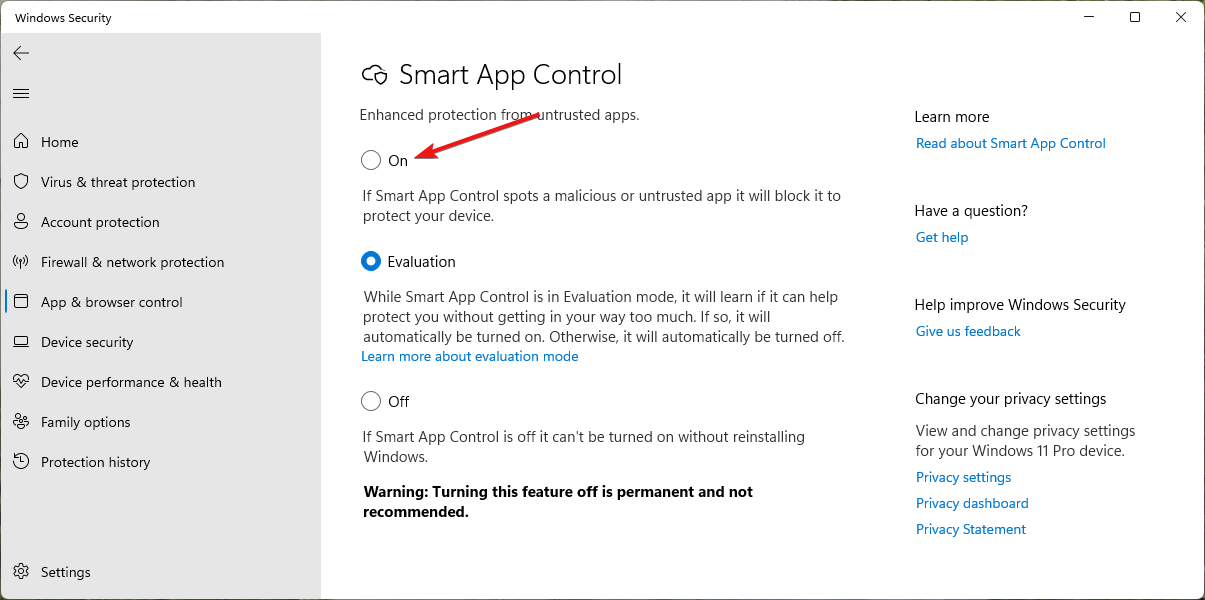
- In the App & browser control tab, look for the Smart App Control feature and select the Smart App Control Settings option.

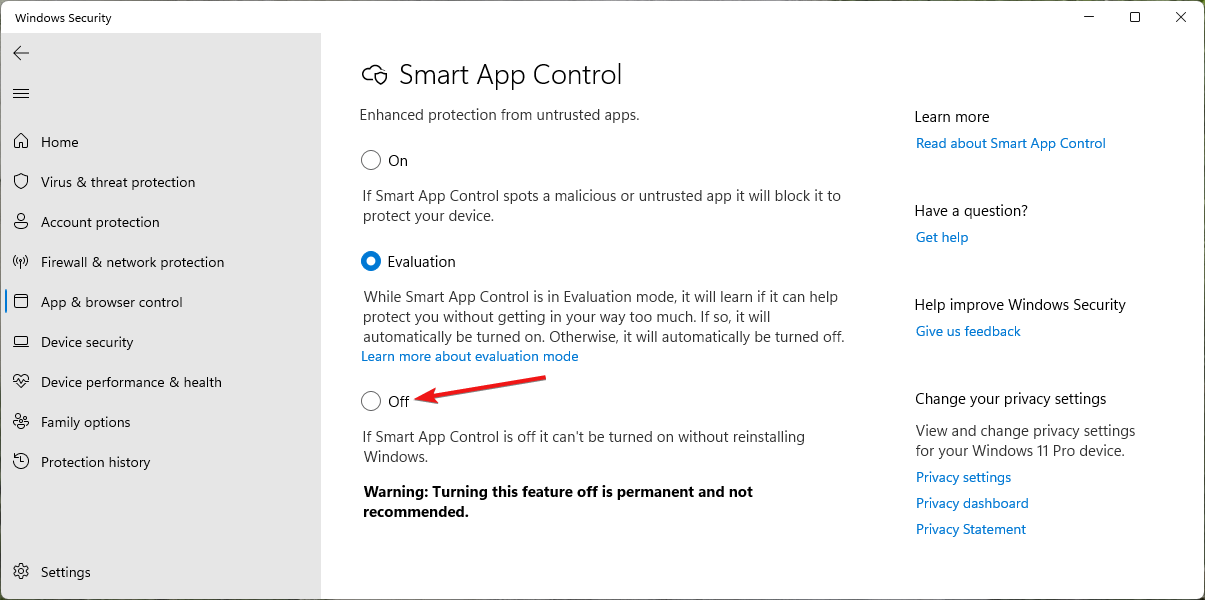
- Select the radio button next to the On option to allow SAC to continuously monitor and block suspicious apps and activities that can potentially harm your computer.

How to Force Enable Smart App Control on Windows 11?
If you were unable to enable the Smart App Control feature using the steps outlined above, you need to force enable it. To do this, you will have to make a few changes in your Windows Registry.
For security reasons, it is always advised to only enable this feature on the system running on a clean installation. However, if you want to modify the registry, we advise you to create a restore point before performing the following steps:
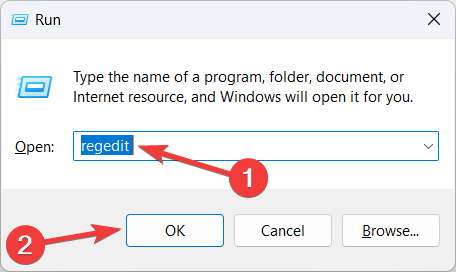
- Launch the Run dialog box using the Windows + I shortcut key. Type regedit in the command box and press the OK button to launch the Windows Registry Editor.

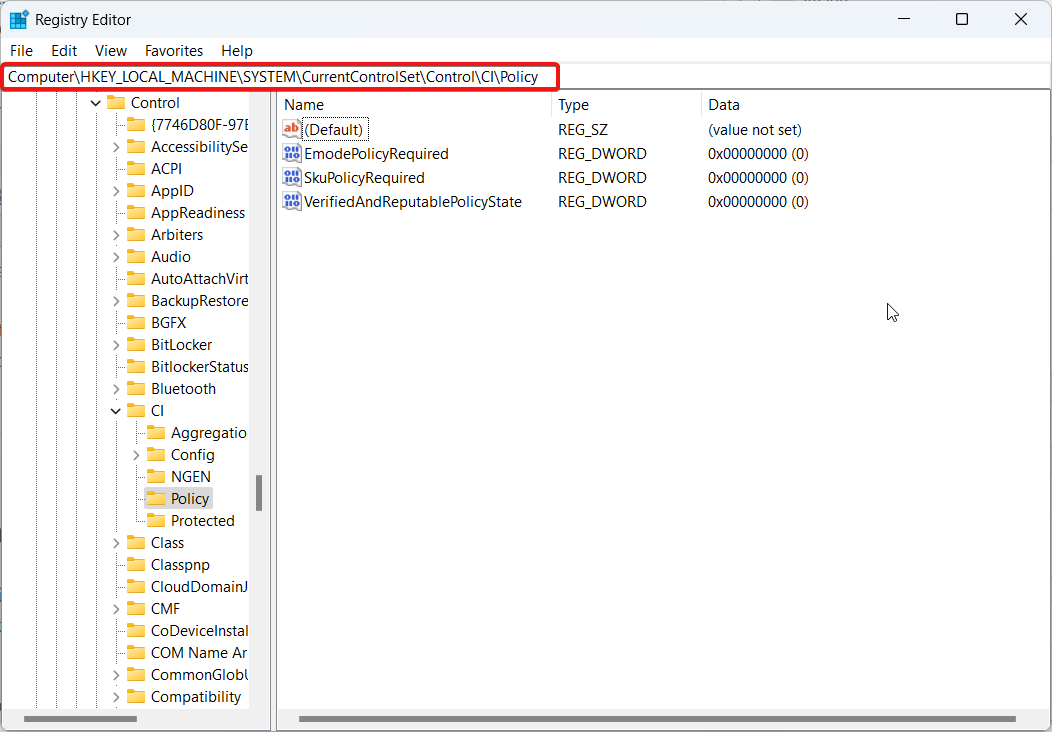
- In the Registry Editor window, go to the following location from the address path on the top:
Computer\HKEY_LOCAL_MACHINE\SYSTEM\CurrentControlSet\Control\CI\Policy

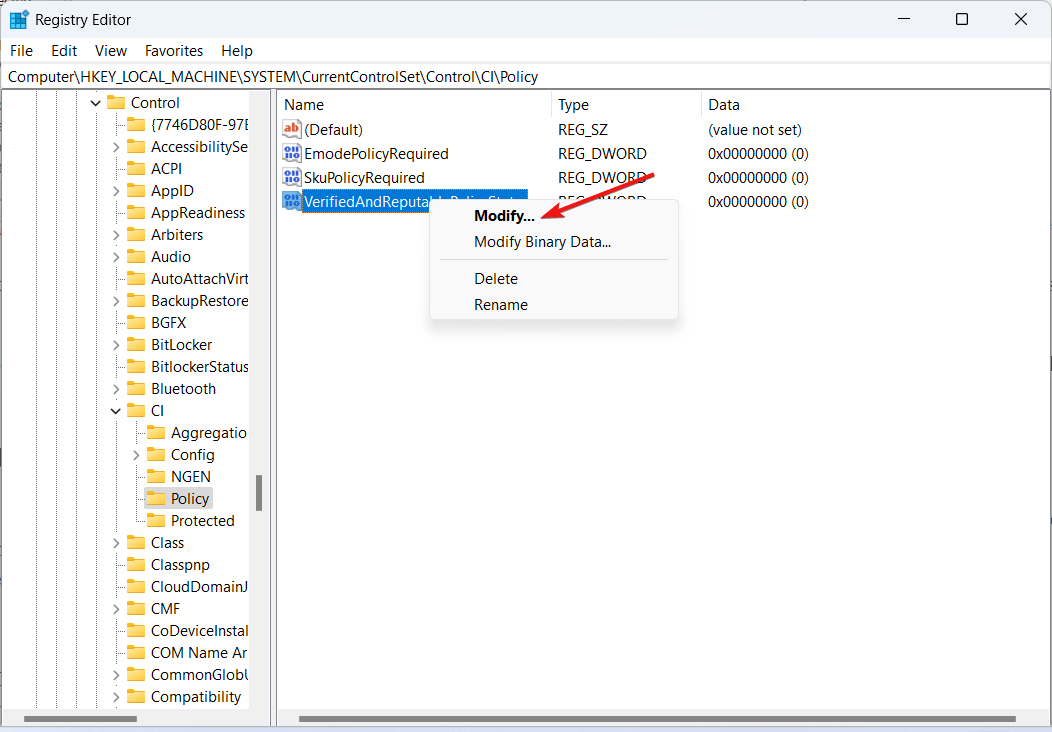
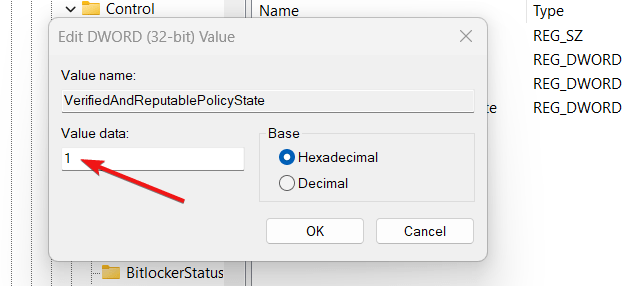
- Here, look for the VerifiedAndReputablePolicyState value in the right section of the registry editor window and choose Modify from the context menu.

- Now, in the Value Data field, input the value 1 which indicates Windows to enable the Smart App Control feature, and click the OK button to save the changes.

Now exit the Registry Editor and relaunch the Windows Security app. You’ll see that the Smart App Control feature has been enabled on your Windows 11 PC.
How to disable the Smart App Control feature on Windows 11?
Whenever you want to turn off the Smart App Control feature, you can do it easily from the Windows Security app. But before you proceed, once you disable the Smart App Control feature, you will be able to enable the Smart App Control feature only after reinstalling Windows or by making the changes in the Windows Registry as discussed in the previous section.
Having said that, let’s learn the procedure to disable the Smart App Control feature.
- Press the Windows + I keys simultaneously to bring up the Windows Settings app.
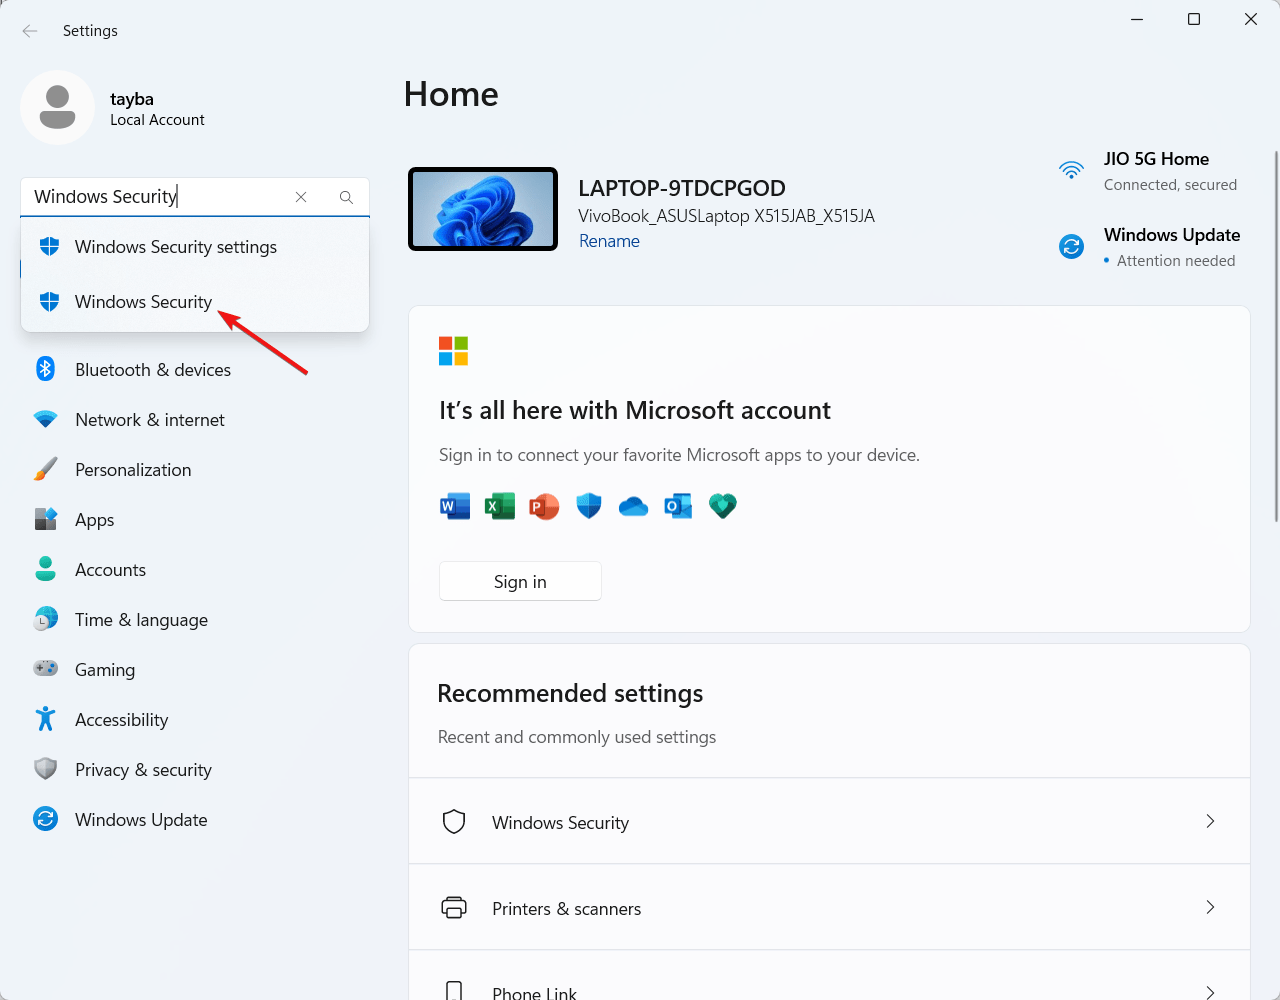
- Type Windows Security in the search box on the top left corner and click on the related search result to launch the Windows Security app.

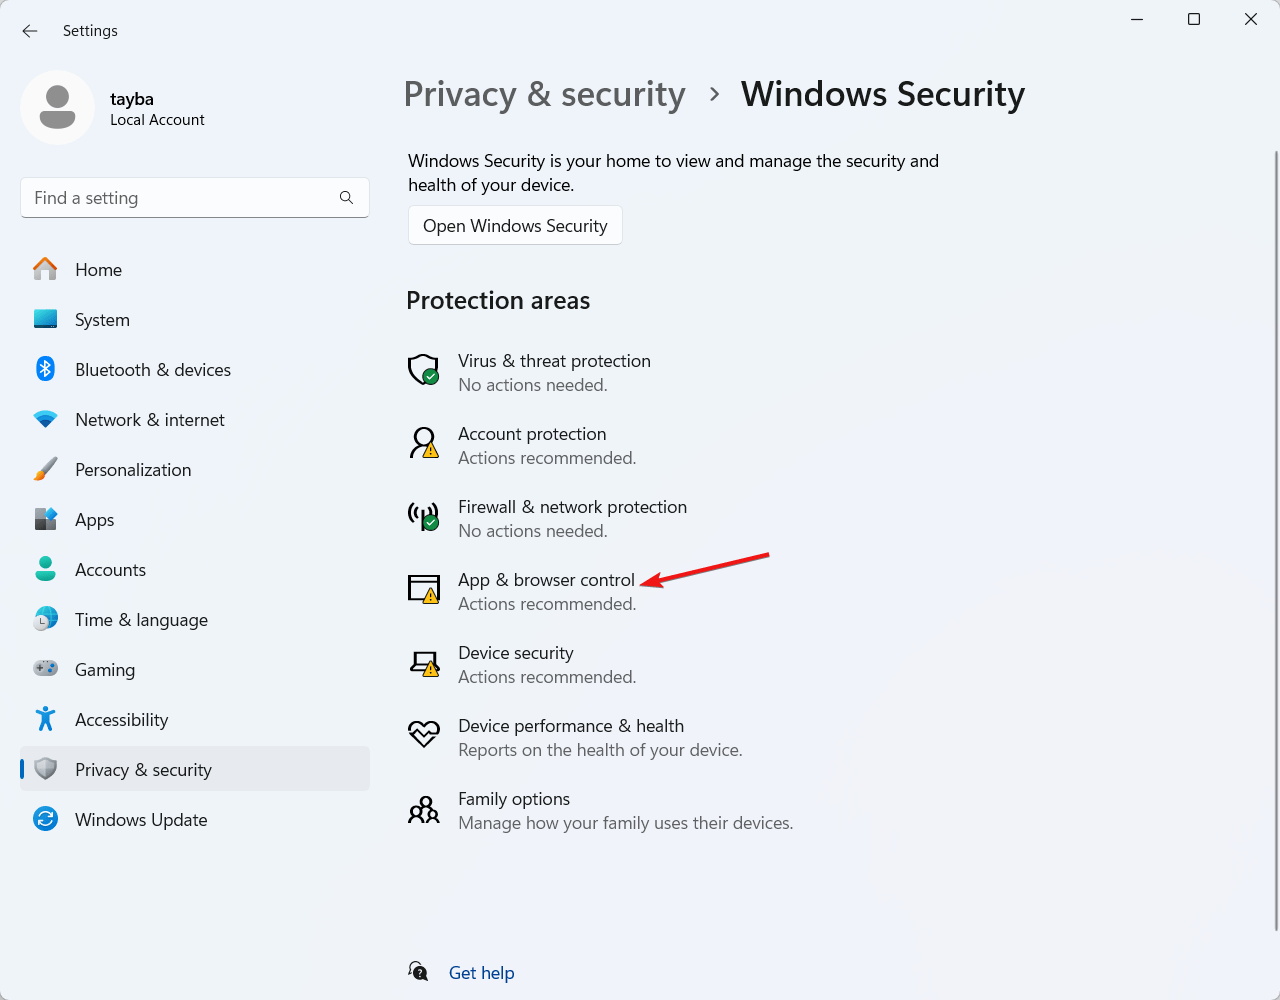
- Next, choose the App & browser control option from the Protection areas section.

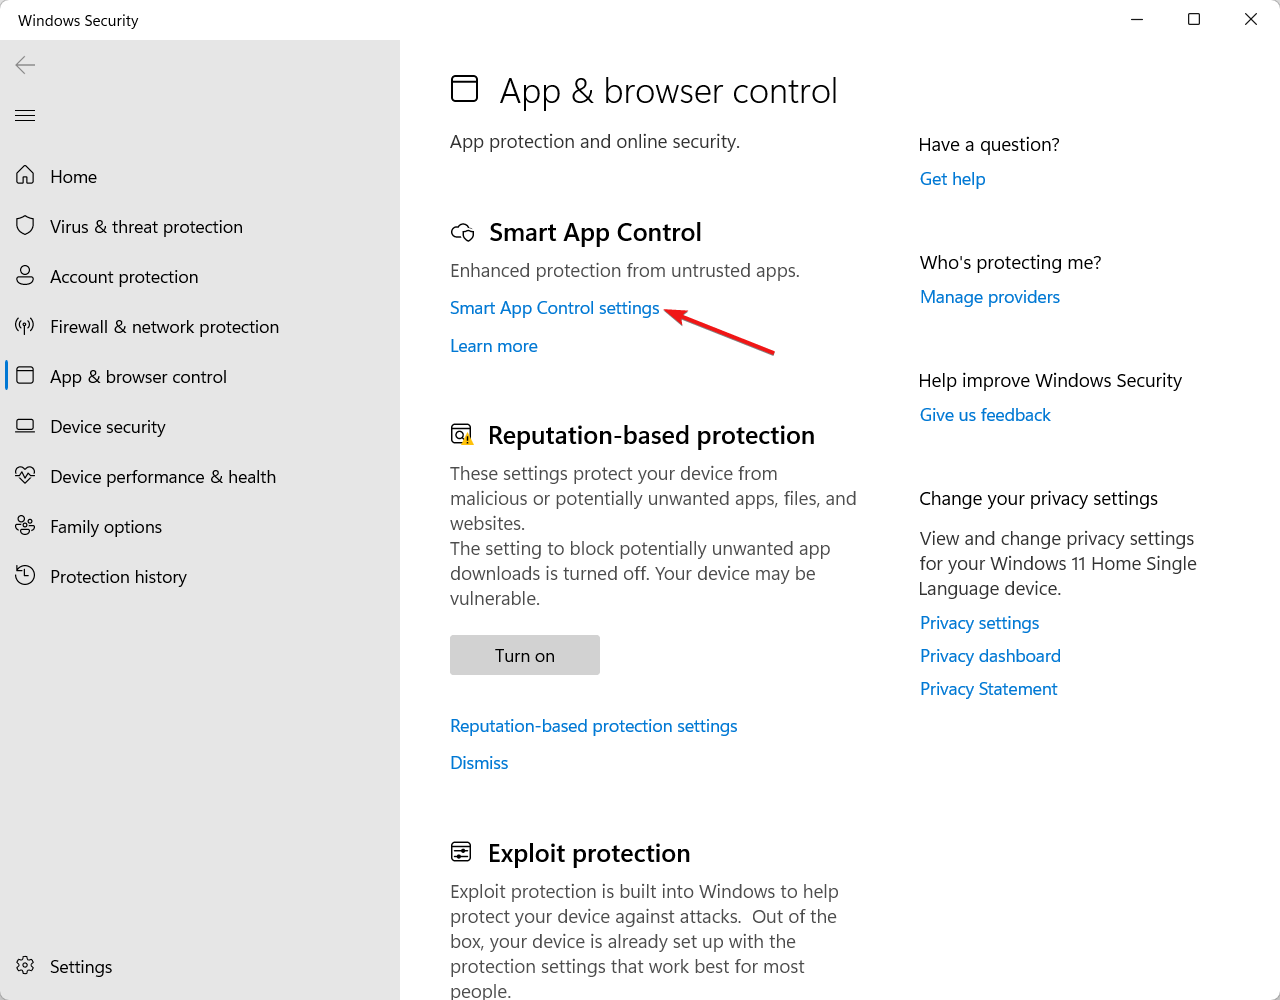
- Now find the Smart App Control feature and select the Smart App Control Settings link, located underneath.

- Select the radio button next to the Off option to prevent SAC from identifying and blocking the apps and activities that can damage your Windows PC.

- A confirmation dialog box will appear. Press the Yes, I’m Sure button to disable the Smart App Control feature.
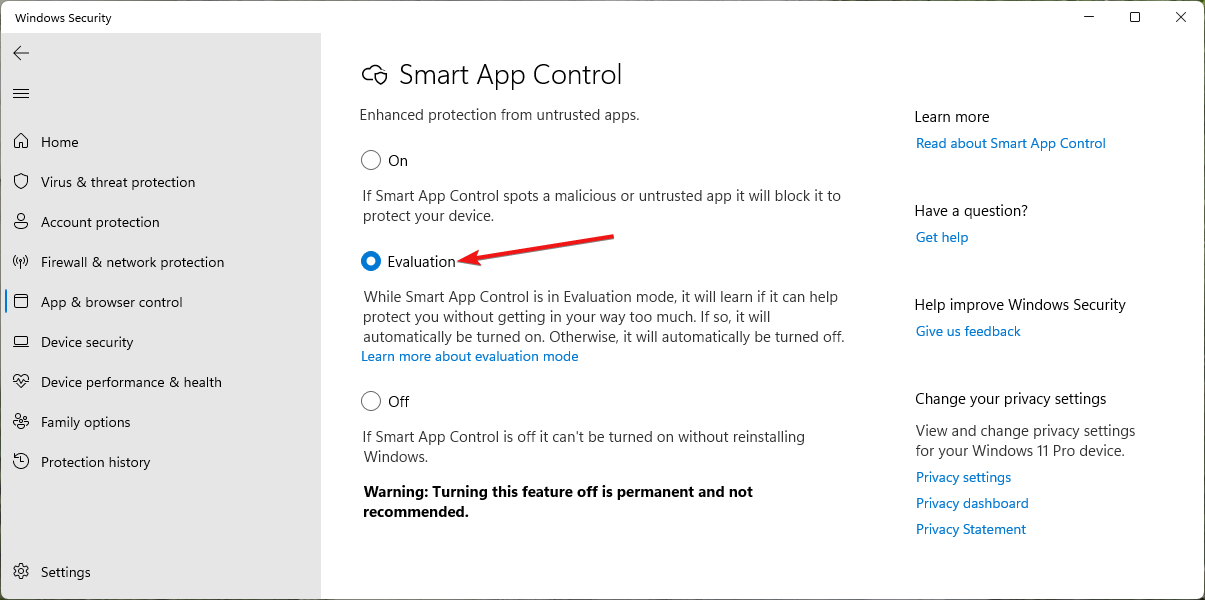
- If you do not want to turn off the Smart App Control feature completely, you can turn on the Evaluation mode instead. For this, you need to select the radio button next to the Evaluation option. This will allow the operating system to decide what’s best for your system.

Alternatively, you can edit the Windows registry as explained in the above section and type 0 in the value data field of the VerifiedAndReputablePolicyState key to turn off SAC. Furthermore, to put SAC in the Evaluation phase, simply type 2 in the value data field. Alternatively, type 2 to put SAC in Evaluation mode, or 0 to turn it off. You need to relaunch the Windows Security app to apply the changes.
Wrapping up
That’s pretty much everything you need to know about using the Smart App Control feature on your Windows 11 device. SAC can be considered a reliable solution to safeguard against intrusive programs that can cause a serious blow to your device. Have you tried the feature yet? What’s your opinion on the device? We are curious to hear your opinion!
If you've any thoughts on How to Use Smart App Control on Windows 11, then feel free to drop in below comment box. Also, please subscribe to our DigitBin YouTube channel for videos tutorials. Cheers!

