Quick Summary
Close tabs, end heavy tasks, switch to Google DNS, enable hardware acceleration & preloading, remove extensions, use ad blocker, enable key flags (chrome://flags), or reset Chrome. Relaunch after changes.
Even with a moderately powerful PC, I noticed my Chrome browser on Windows 11 had slowed down. Not only the browser itself but also general browsing became noticeably laggy.
While Google Chrome updates itself automatically, some users may miss out on the update. Hence, on an older build, they may face the issue of incompatibility. The build-up of browser cache is also one reason for slow performance.
Sluggish Google Chrome can also be due to extensions that are either incompatible with the browser or interfere with page loading.
Nevertheless, to fix the slow Google Chrome on Windows 11, I have put up some easy fixes that you can try. Let us move on to the troubleshooting part — these steps are easy to follow.

1. Close Unused Browser Tabs
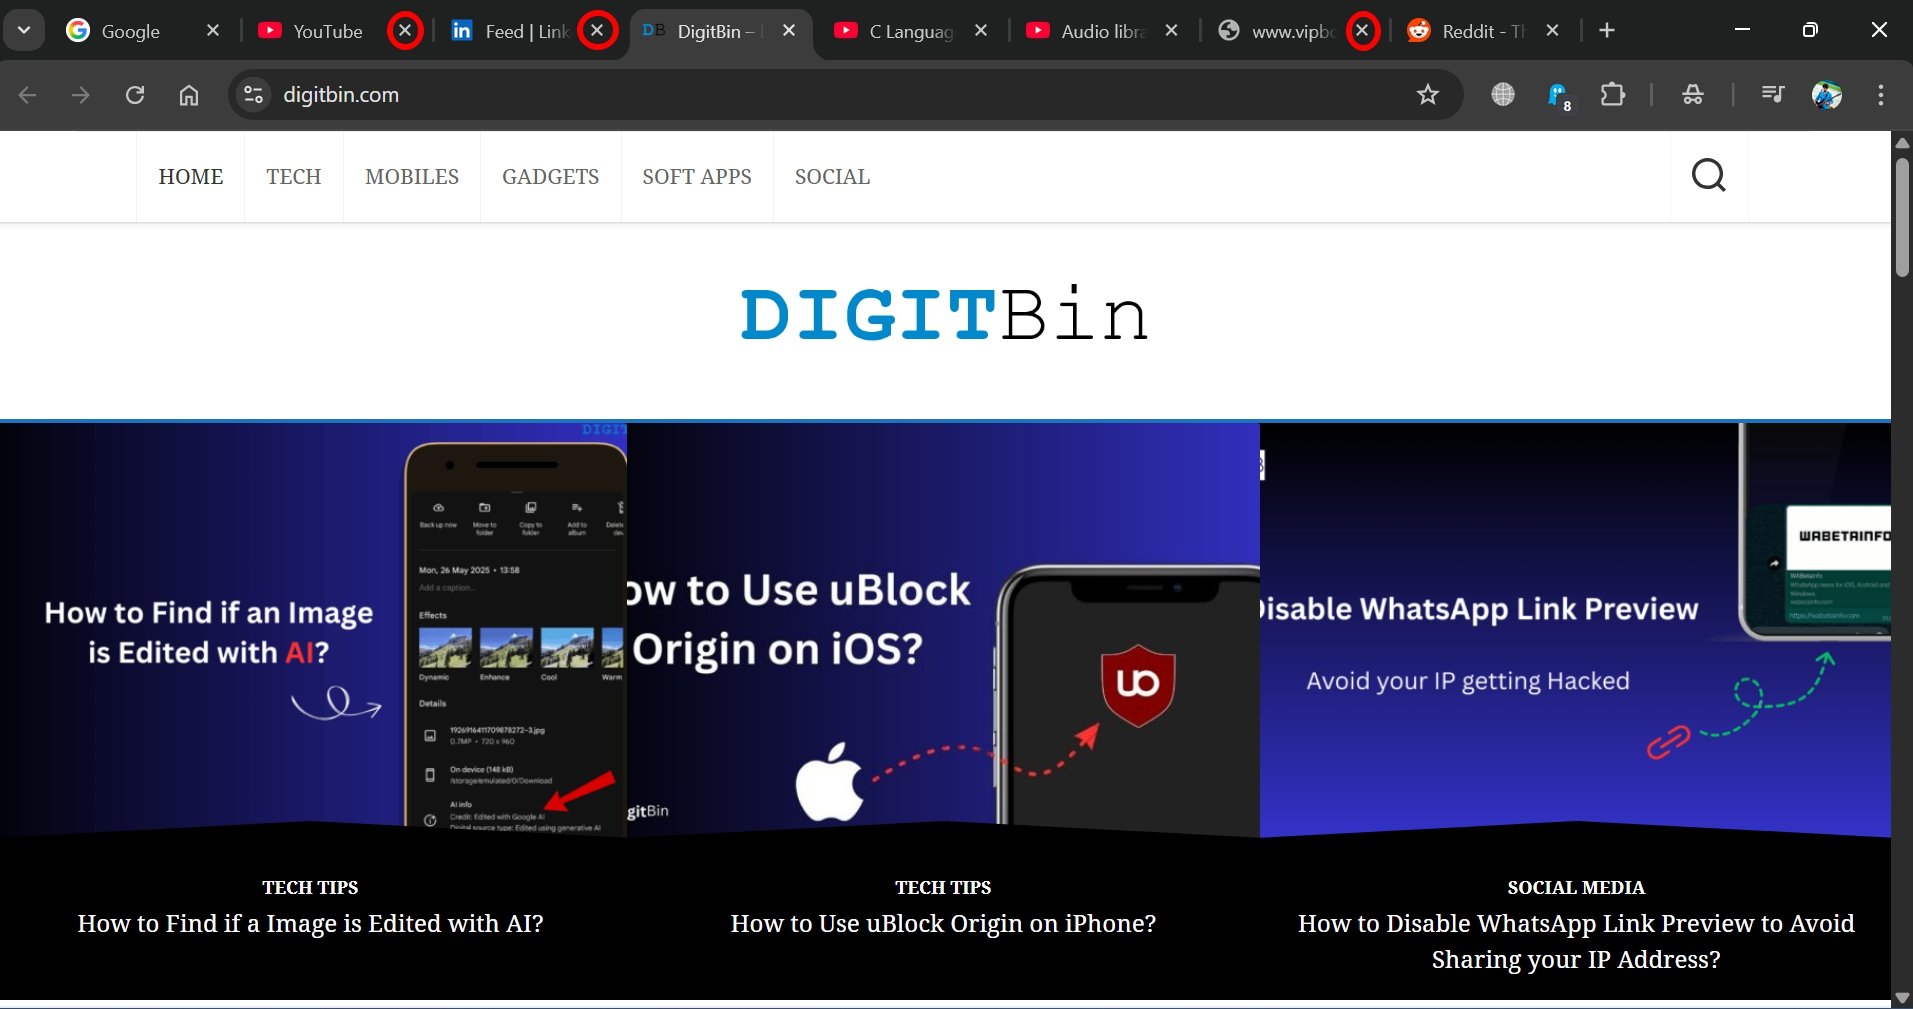
When you open several tabs on the browser but use a few of them, it can put a load on the CPU and the memory. This will lead to the browser performing very slowly and, in some cases, crashing or freezing.
So, only keep those tabs open that you are using and close the rest. That will free up the memory, and the browser’s speed will be enhanced. Also, if you opened more than one browser window and are not using them currently, close them as well.
2. End High CPU Chrome Processes
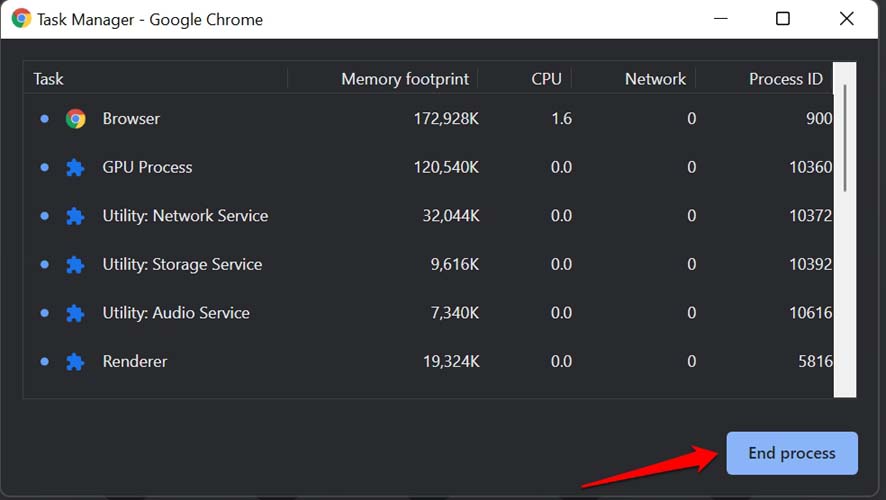
When you open and use multiple tabs on the Chrome browser, it will lead to more CPU consumption. To know which process on Google Chrome is consuming more power, open the native task manager of the Chrome browser.
- While the browser is open, press the keys Shift + Esc to invoke the Chrome Task Manager. Alternatively, click the menu button
 . Select More tools → Task Manager.
 - You will see the list of processes actively running on the Chrome browser.
- Check the Memory Footprint and the CPU Usage
- Close the processes that display high CPU usage.
- Click to highlight the process. Then click on End Process.

3. Change DNS Settings
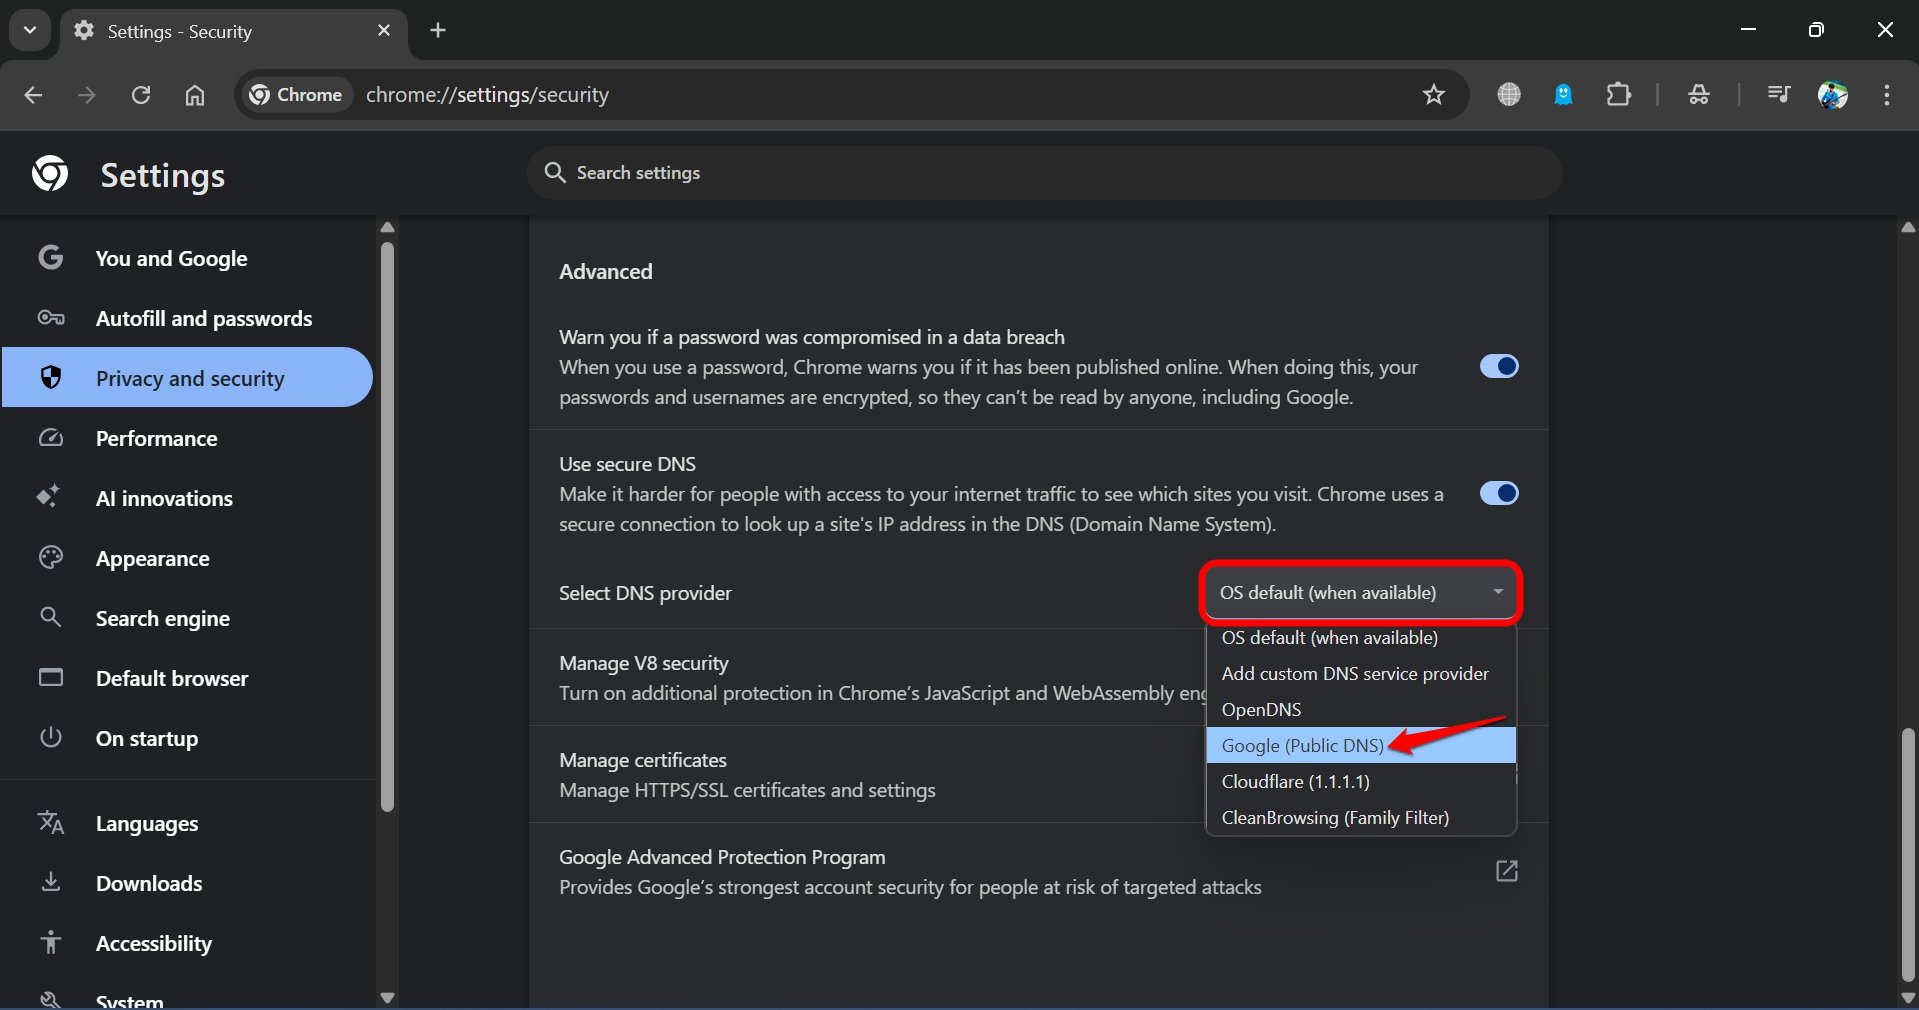
If the default DNS on your Chrome browser is slow, you can experience slow loading of webpages. To fix this, change the DNS settings on Chrome to Google DNS or OpenDNS.
- Launch Chrome browser and type chrome://settings in the URL bar to access the browser settings.
- Click Privacy and Security on the left sidebar.
- Scroll down and click on the tab Security.
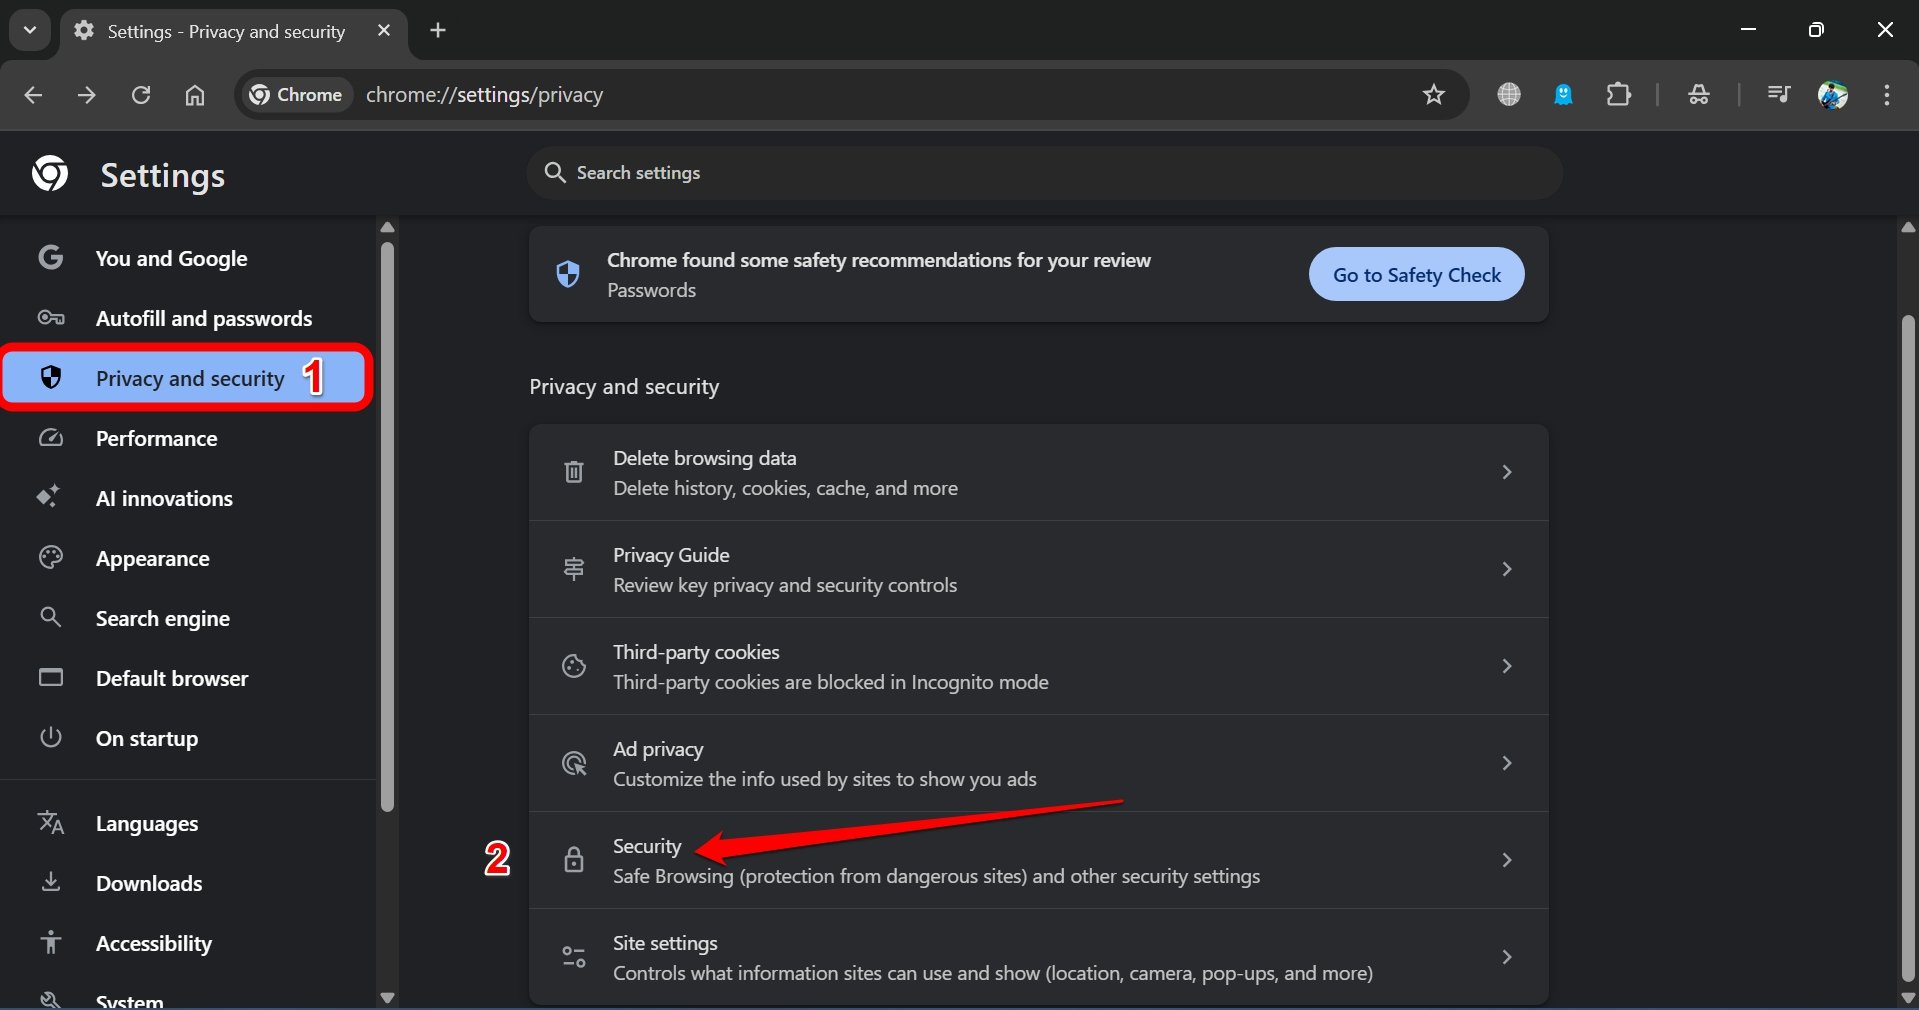

- Go to Select DNS Provider.
- From the drop-down menu, select Google Public DNS or OpenDNS.
4. Turn On Graphic Acceleration on Chrome
If a webpage has high resolution and rich graphics, it may take some time to load the entire webpage. At this point, your PC’s processor is managing the loading of this webpage.
However, if you enable graphic acceleration for Chrome, the processing duty will be shifted to the PC’s GPU.
When the browser slows down to load a rich graphics-intensive webpage and the CPU cannot handle it any faster, the GPU kicks into action and helps load the page faster on Chrome.
To enable graphic acceleration on Chrome,
- Launch Chrome and type Chrome://settings in the URL to access the browser settings.
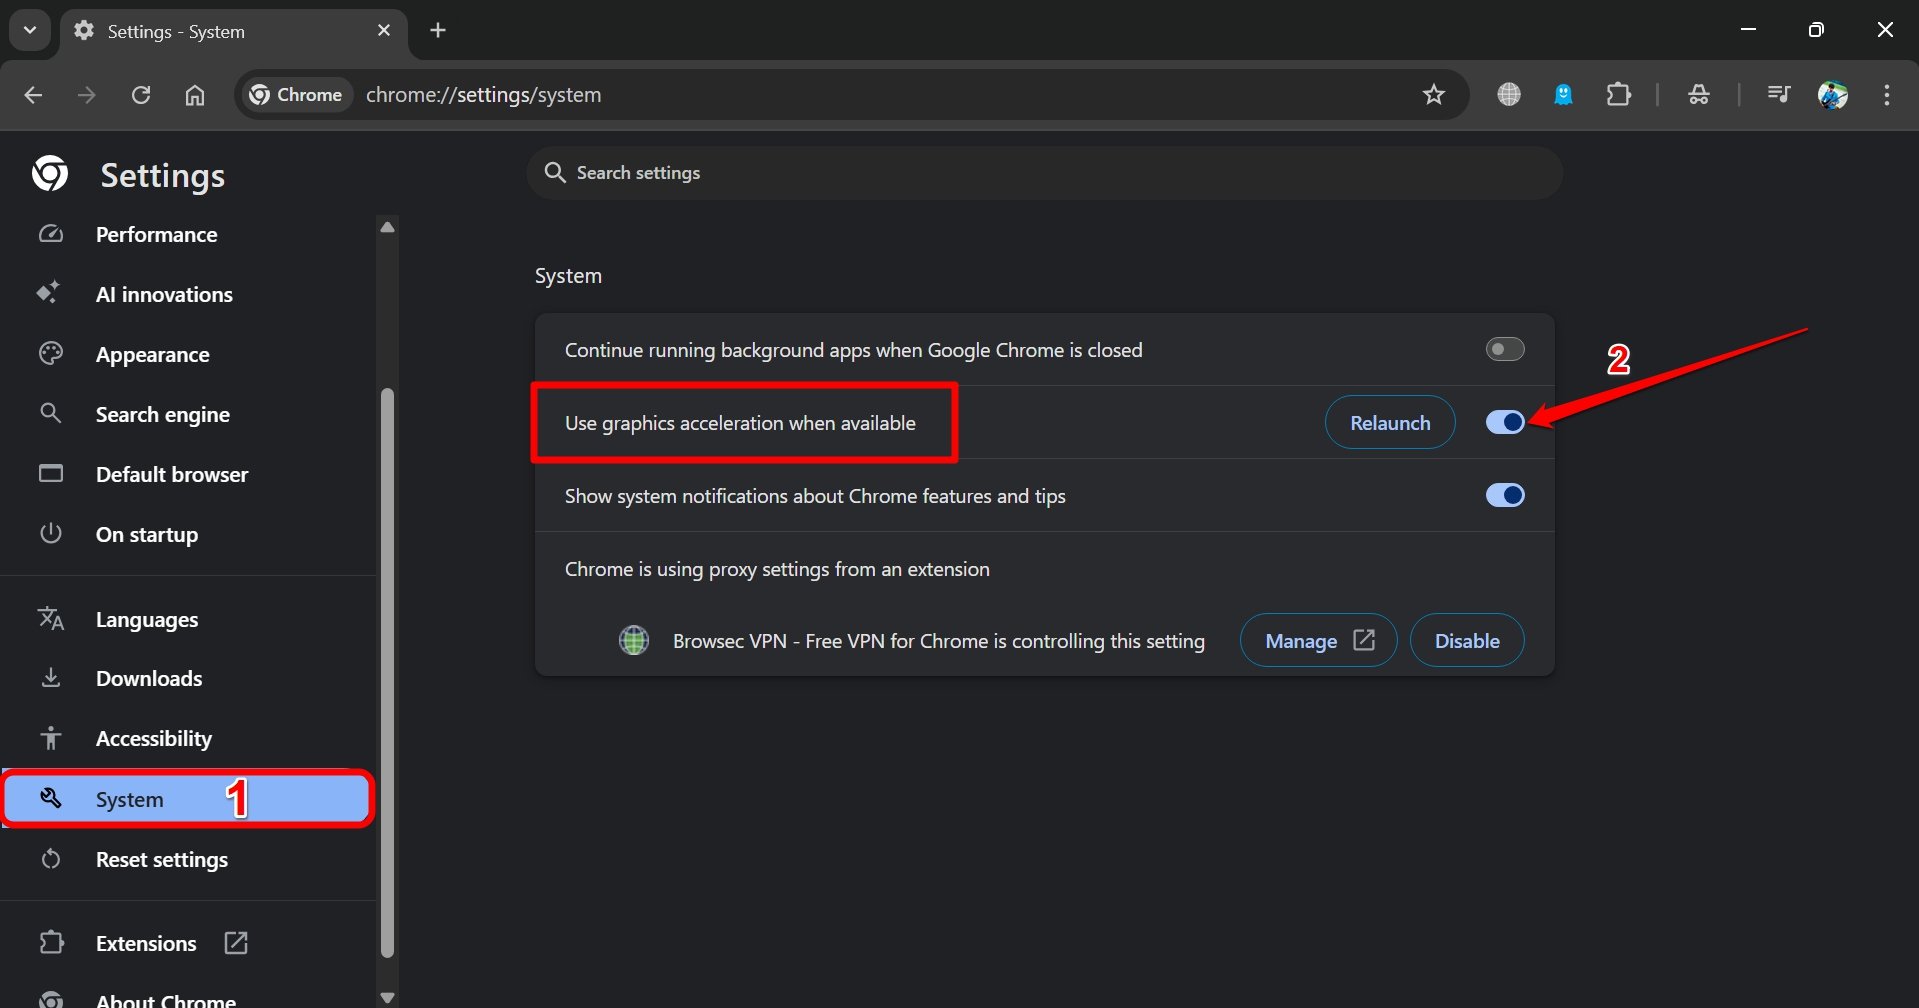
- Click on System on the left sidebar.
- Now, on the right, go to Use Graphic Acceleration when Available. Press the toggle next to it to enable the feature.

5. Turn on Preload Pages on Chrome
Page preloading is an advanced feature that allows Chrome to observe your browsing history, cursor behavior, and predict which webpages you are likely to visit.
When the feature is enabled, Chrome preloads the links on the pages, and when clicked the pages are loaded instantly. This saves you time and also speeds up the browser.
To enable Preload Pages on Chrome,
- Open Chrome settings by typing Chrome://settings in the URL bar.
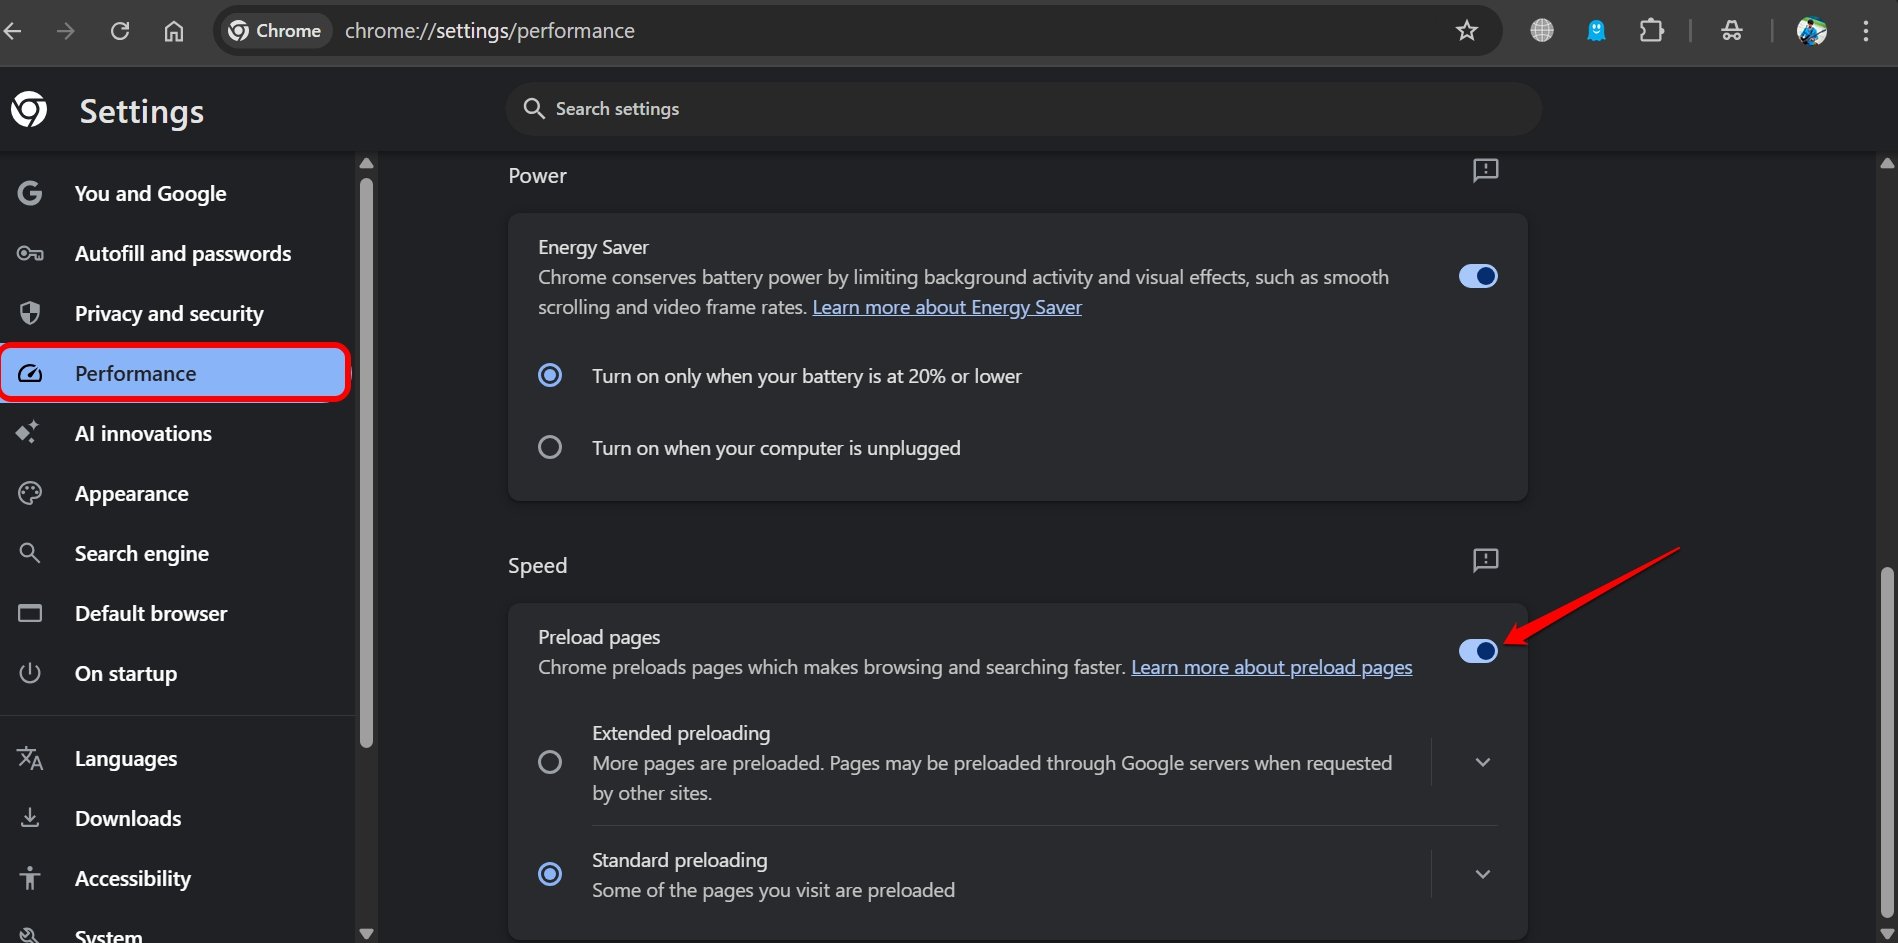
- Click Performance on the left sidebar.
- Scroll to Preload Pages and enable the toggle.
- Additionally, you can choose between Standard Preloading and Extended Preloading.

6. Enable Parallel Downloading on Chrome
To speed up the file download process on Chrome, enable the parallel downloading flag. It will download parts of the file instead of downloading it as a single file.
This will speed up the download. Also, the flag creates multiple download streams to the same file.
Here are the steps to enable parallel downloading on Chrome.
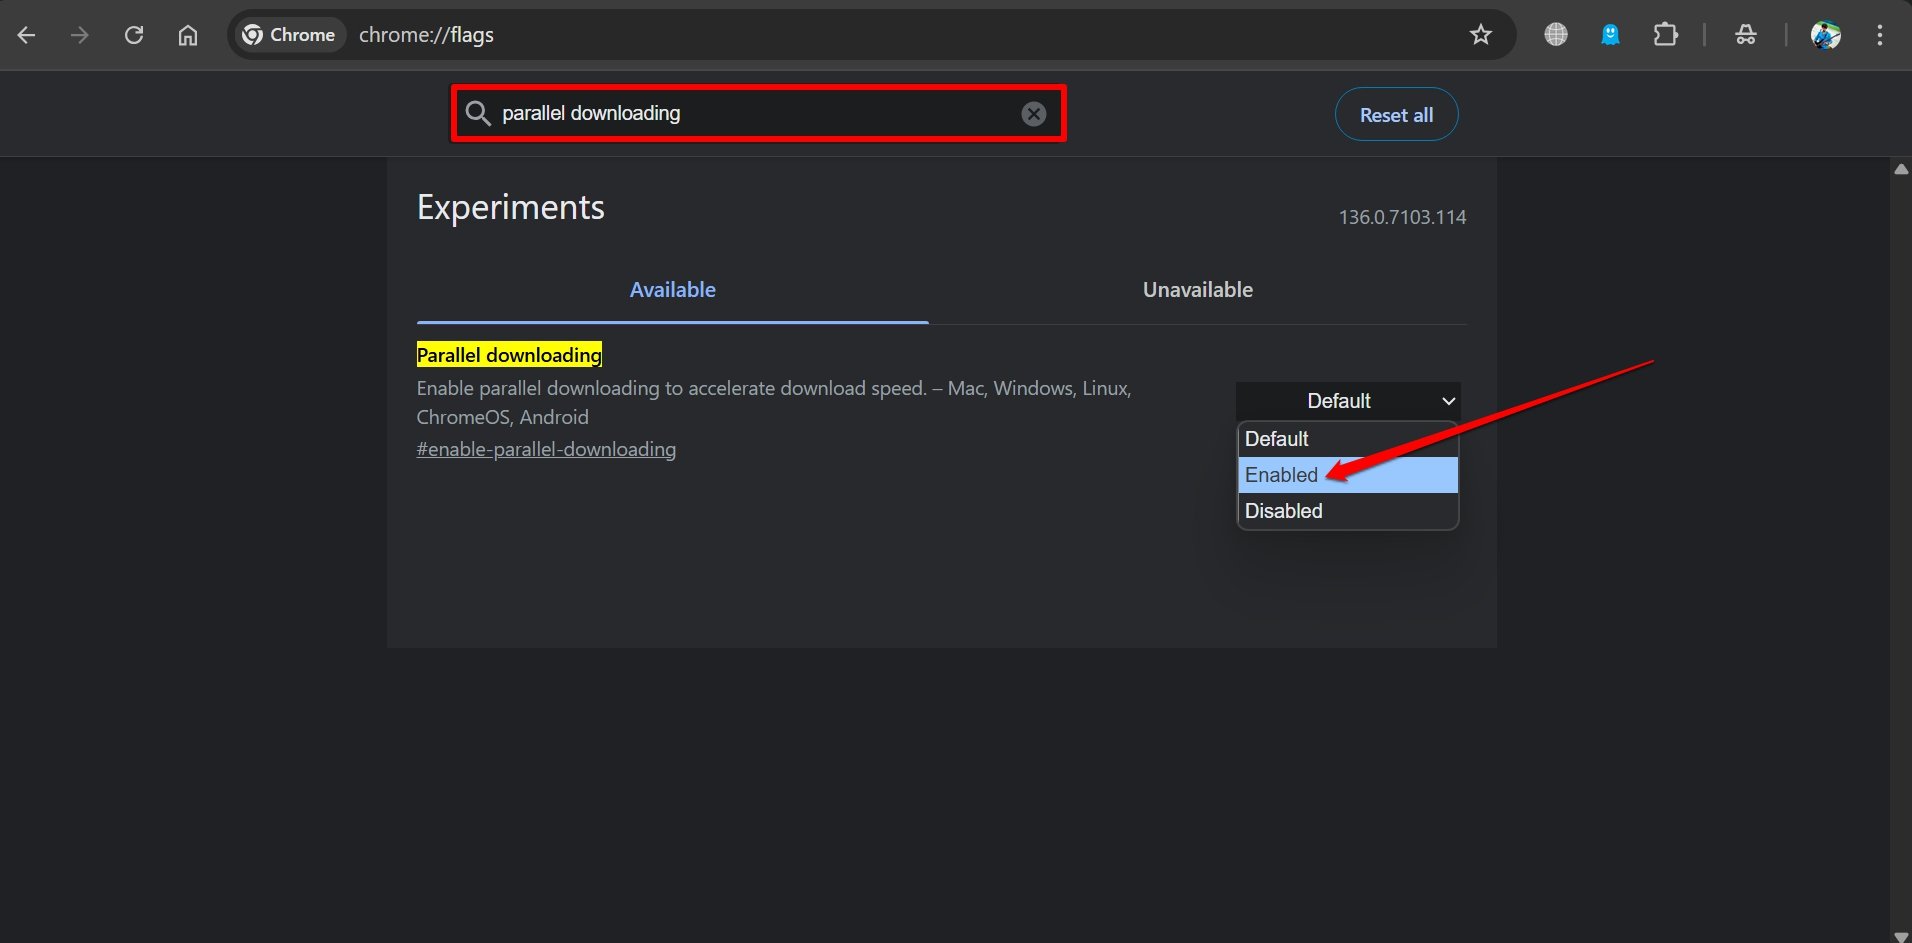
- Launch Chrome and type chrome://flags in the URL bar to access the experimental features page.
- In the search bar, type parallel downloading.
- Once you see the flag appear, click the drop-down menu next to it and choose Enabled.

- Relaunch Chrome browser.
7. Remove Chrome Extensions
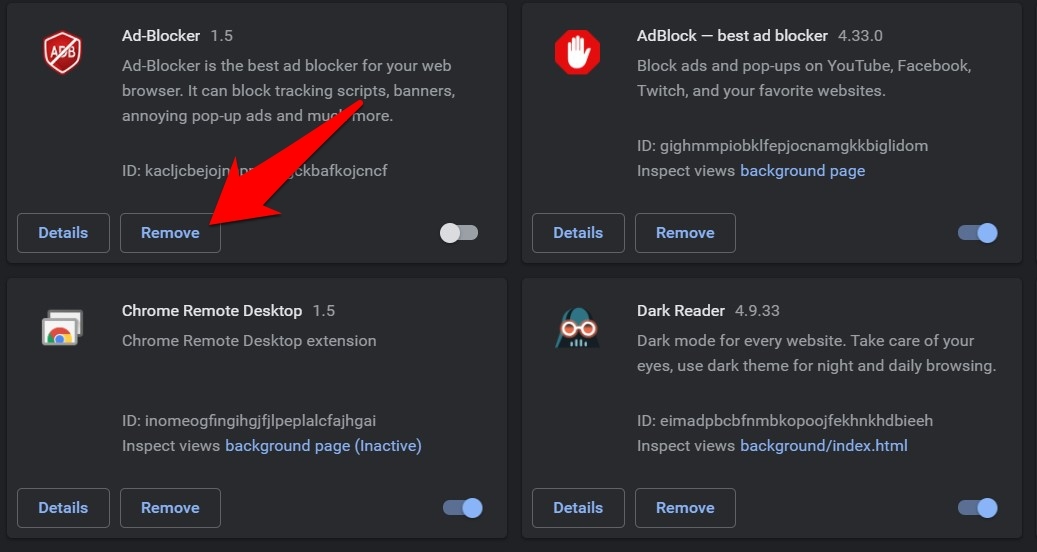
There may be Chrome extensions that you do not use, or they run scripts that may lag the page load. These extensions will perform actions on the page that will delay the loading. Also, a few extensions may be sitting idle in the Chrome browser, consuming memory. So, you can remove those extensions from the browser.
- In the address bar, type Chrome://Extensions to view all the extensions installed on Chrome.
- Each extension will have an option to remove beside it.
- Click on Remove for those extensions that you do not use.

Removing the unused and outdated extensions will drastically reduce the disk usage load on the browser, thus making the Chrome browser work smoothly.
8. Enable GPU Rasterization Flag
To speed up the page loading on Chrome, turn on the GPU rasterization. This will force the pages to be rendered by the GPU instead of the CPU for faster execution.
It will result in the page loading faster on Chrome and an eventual increase in the browser’s performance.
To enable this flag.
- Open Chrome and type chrome://flags in the URL bar to access the experimental features page.
- In the search bar, type GPU Rasterization.
- When it appears in the search result, select Enabled from the dropdown menu.


- Relaunch Chrome on your PC.
9. Use Experimental QUIC Protocol
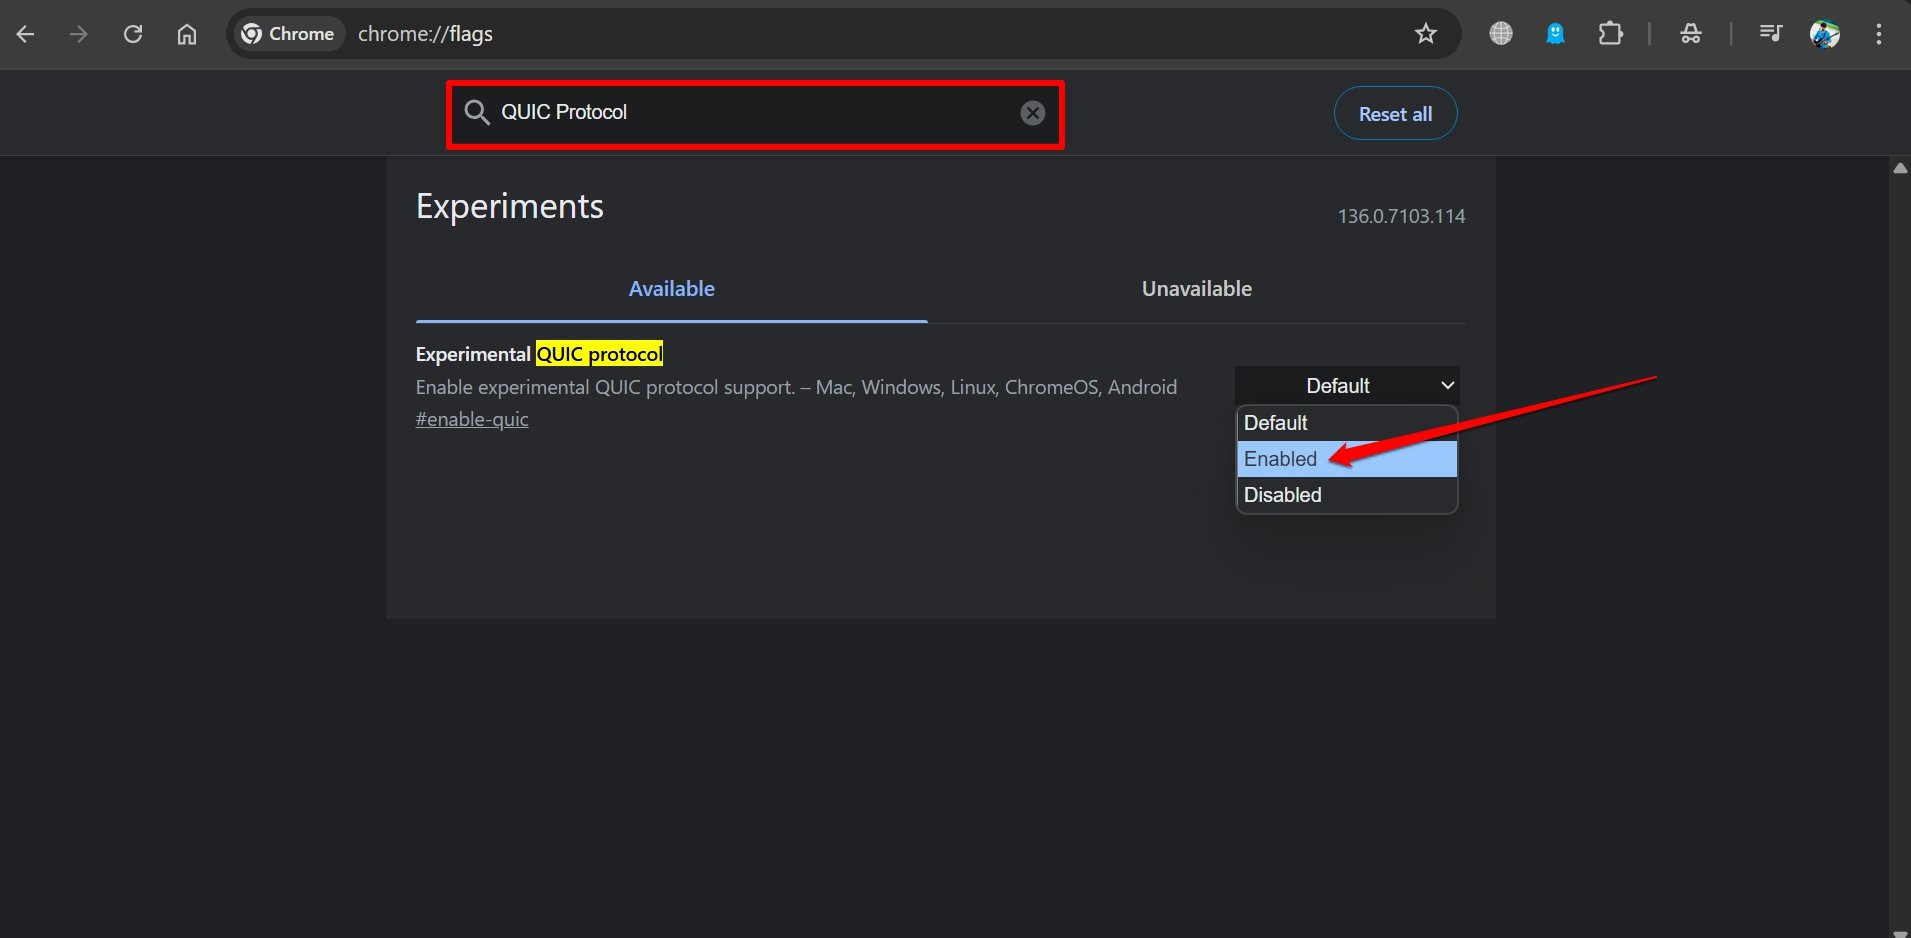
If you are on an unstable network, webpage loading can get very slow. To allow faster access to webpages from the Chrome browser, enable the Experimental QUIC Protocol through the Chrome flags.
- Open Chrome browser.
- Type chrome://flags in the URL bar to access the experimental features page.
- In the search bar, type Experimental QUIC Protocol.
- When it shows up in the search result, choose Enabled from the dropdown menu to turn on the feature.

10. Activate Zero Copy Rasterizer Flag on Chrome
Next, you need to enable the experimental flag named “Zero Copy Rasterizer”. When a task is to be executed, it is usually managed by the CPU, and then the task is available for the GPU for rendering.
When “Zero Copy Rasterizer” is enabled, the task is directly assigned to the GPU for faster execution. This allows Chrome to load pages faster without depending on the CPU at all times.
Follow these steps to enable the Zero Copy Rasterizer flag in Chrome.
- Open Chrome and type chrome://flags in the URL bar to access the experimental features page.
- In the search bar, type Zero Copy Rasterizer.
- When it shows up in the search result, select Enabled from the dropdown menu.


- Relaunch Chrome.
11. Use an Ad-Blocker Extension
Extensions are great browser enhancers. Ad-blocking extensions are the best tools for the browser if you wish to browse the web without any load of scripts and ad codes. Chrome takes around 10-15 secs to load a complete site without adblockers, while an adblocker can bring down the load time to a couple of seconds.
The scripts, trackers, and other ad codes also consume considerable memory and CPU as they trigger multiple microengines in the browser.
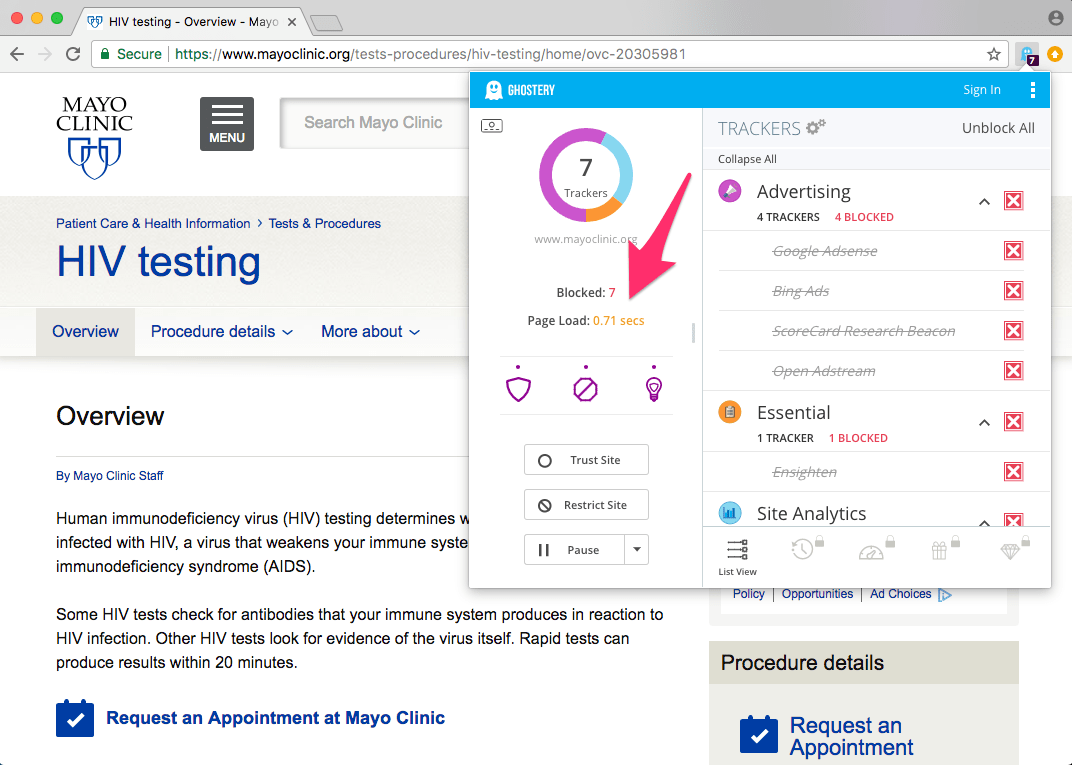
You can find several ad-block extensions just by visiting the Chrome Web Store to add AdBlocker on Chrome Browser.
12. Reset Chrome
You can reset the Chrome browser. This will restore the browser settings and fix all the technical issues with the browser, and solve any slow-loading issues on your Chromium browser.
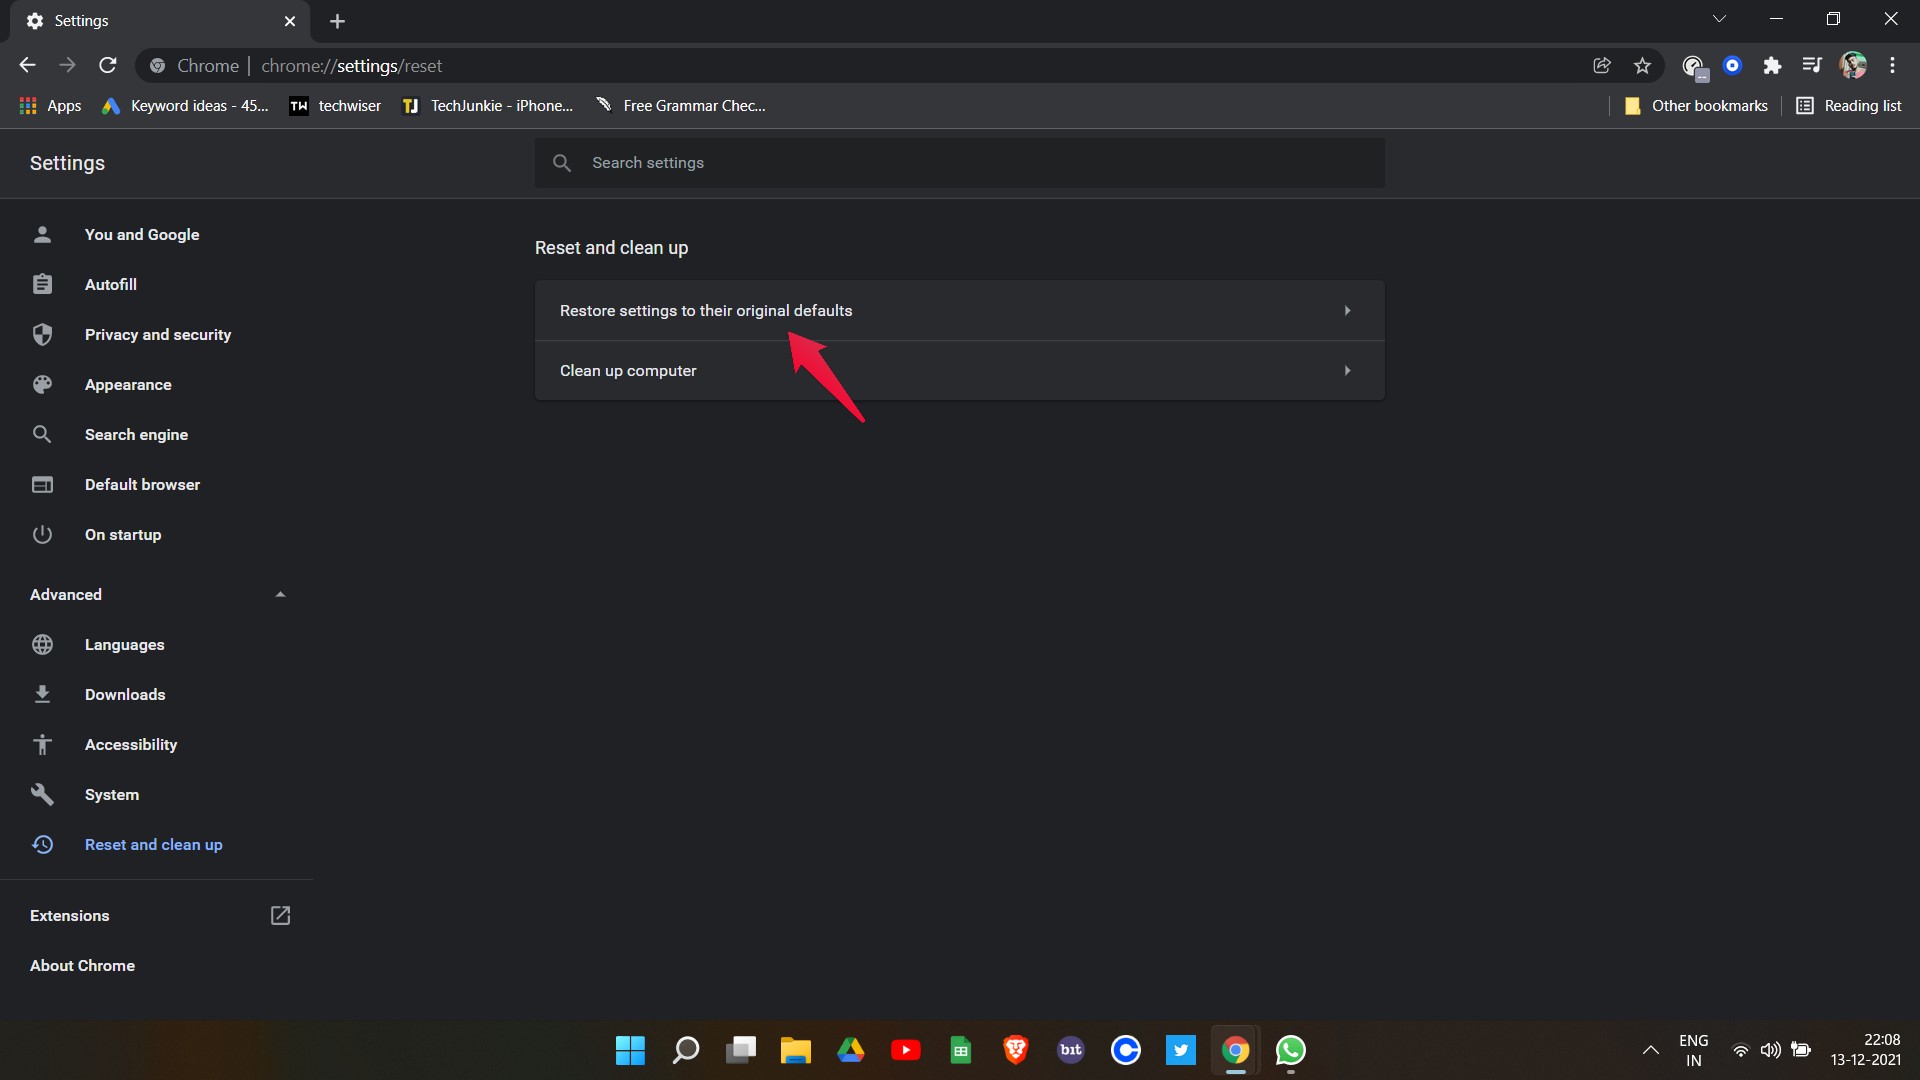
- Open Chrome and type Chrome://settings in the URL box.
- Click Reset Settings on the left sidebar.
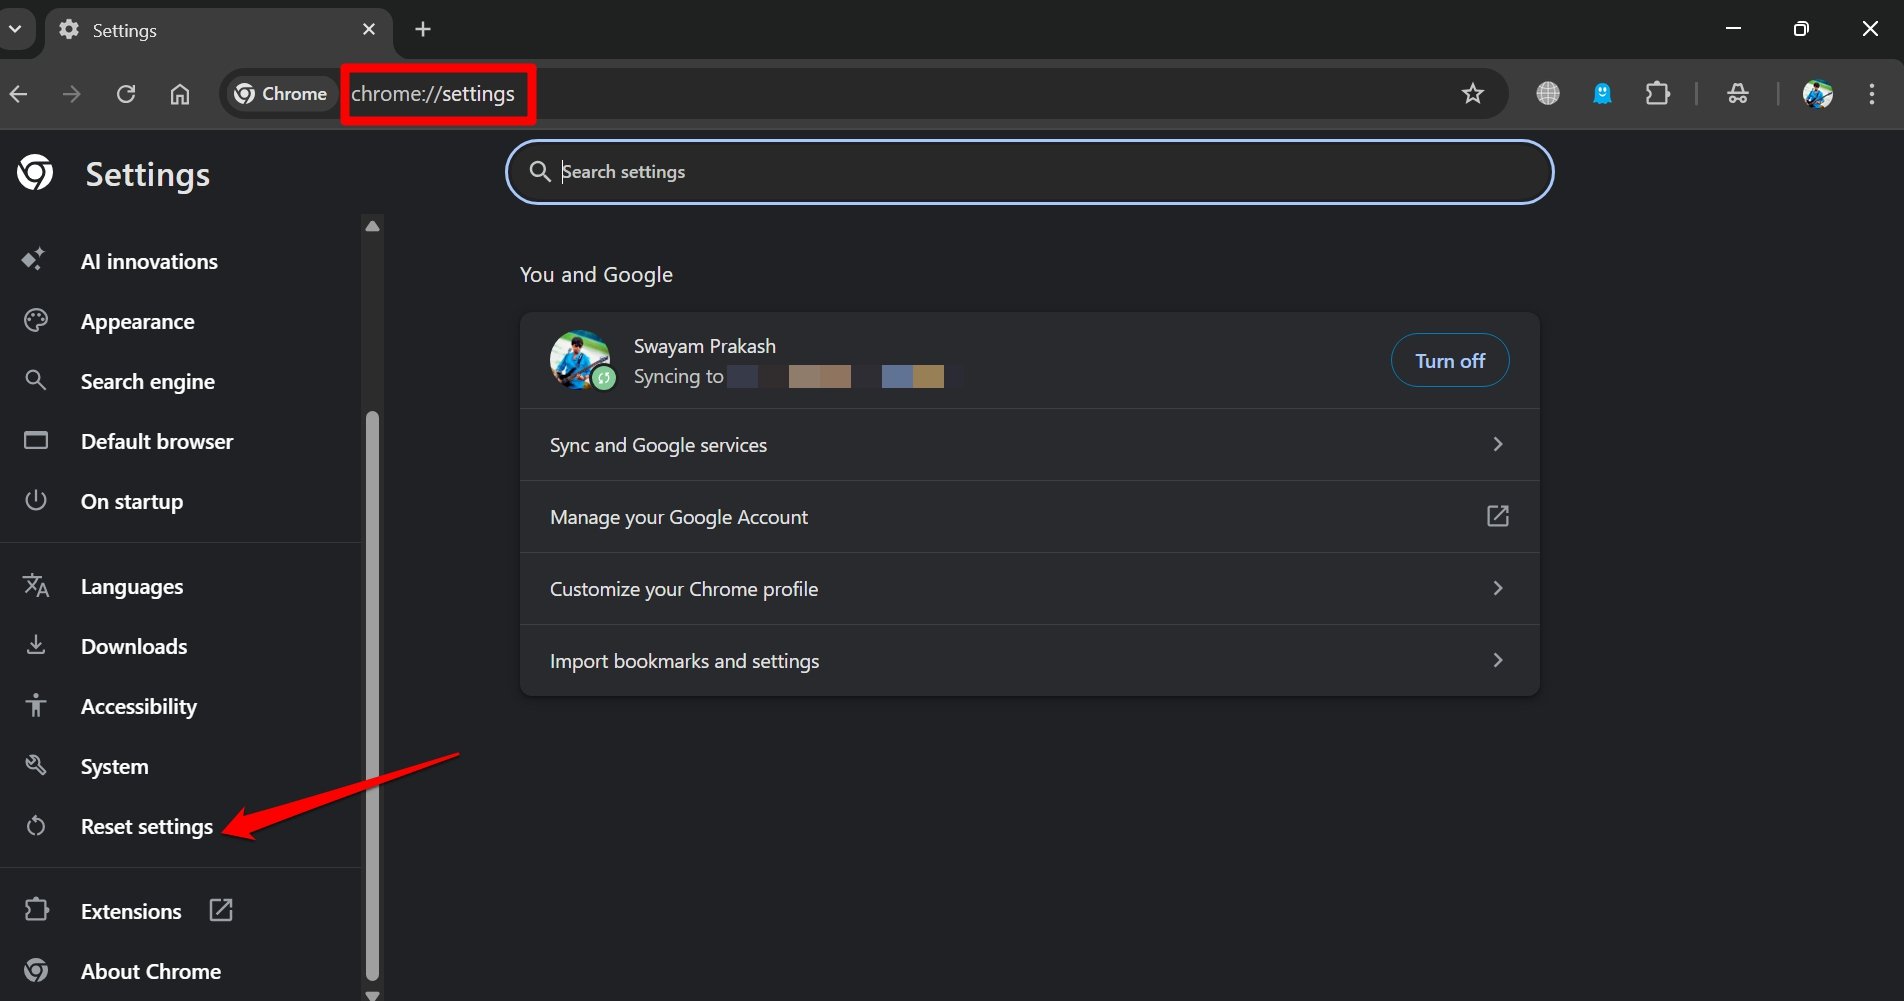

- Next, click on Restore Settings to their Original Default.

- Press the Reset Settings button on the confirmation dialog box.
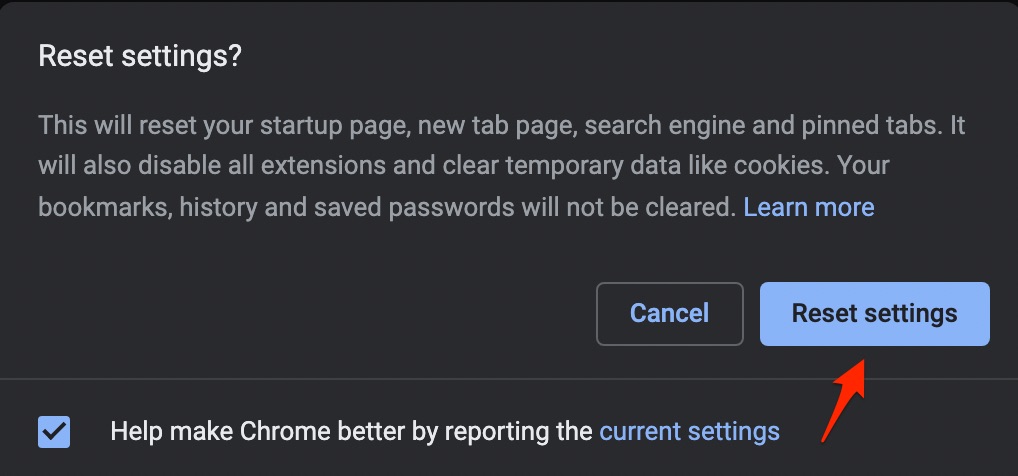

- Relaunch the Chrome browser, and you will see the browser loading faster.
Conclusion
Discover effective troubleshooting methods to fix the slow performance of Google Chrome on Windows 11. Learn how to optimize your browser by managing tabs, ending high CPU processes, adjusting DNS settings, enabling hardware acceleration, and more to enhance browsing speed.
If you've any thoughts on Slow Google Chrome on Windows 11: Tips to Make Chrome Faster 🚀, then feel free to drop in below comment box. Also, please subscribe to our DigitBin YouTube channel for videos tutorials. Cheers!


None of these fixes worked for me. Google Chrome worked without issue on Windows 10. After upgrading to Windows 11, the first Chrome window takes 5-10 seconds to open. Subsequent Chrome windows open immediately. I have disabled extensions, cleared history, uninstalled and reinstalled, etc. Everything you mention plus potential fixes mentioned at other sites. Nothing resolves the lag opening Chrome that first time. Closing all Chrome windows, then open a new Chrome window results in the same 5-10 second delay opening the first window. Very irritating.
Try Edge Browser.