Windows 11 is still in its early stages. It even gives you an official warning before you upgrade from Windows 10 to 11 that some programs may become unstable with it. All these indications tell us that Windows 11 is not a full-proof operating system, at least not for the time being. Several Windows 11 users have reported that their Windows 11 machine is throwing up the 0x8000fff error due to a Windows update.
This either puts their device into an automatic boot loop or affects the functionality of the Microsoft Store. This error usually happens when the Windows 11 system isn’t able to contact the official Windows servers. While there are a lot of other reasons behind this issue, this isn’t a problem that cannot be fixed.
It is where this guide comes into the picture. In this post, we will share with you multiple solutions to fix Windows 11 error code 0x8000fff. Following this guide, hopefully, you will be able to fix this problem. With that said, let us jump straight into the article itself.
Reasons that could Cause 0x8000fff Error
As already mentioned, there isn’t one specific reason that could trigger this problem. And before you go ahead and try to fix it, it is always better to understand the possible reasons behind an issue. Below are some of the common reasons that have triggered the problem for users:
- Downloading a new Windows update
- Trying to create a system restore point
- Installing a new app
- Damaged system files
- Malware
- Windows update errors
- Corrupt/damaged system drivers
- Damaged registry files
- Improperly configured system settings
Methods to fix Windows 11 error code 0x8000fff
Now that you understand what could be the reason behind this issue on your Windows 11 machine, let us take a look at the multiple methods that you can follow to fix this problem out of your PC.
1. Delete Microsoft Store Cache
This problem is reportedly related to Microsoft Store. So, it would be better if you delete the Microsoft Store cache files.
- Press Win+R keys to open the Run dialog.
- Type wsreset.exe and hit OK.
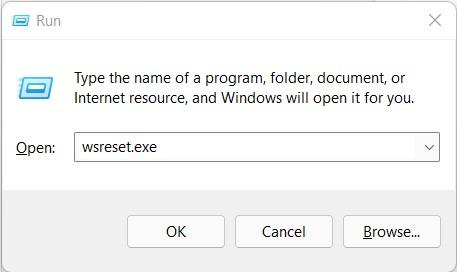
- A command prompt window will open, and it would automatically clear the Microsoft Store cache.
- If this doesn’t work, then you can copy the below command and enter it into the Run dialog box.
C:\Users\%USERNAME%\AppData\Local\Packages\Microsoft.WindowsStore_8wekyb3d8bbwe\LocalState
- If there already is a cache folder, then rename it as Cache.old
- Once done, follow steps 1 and 2, which would now work.
2. Run CHKDSK and SFC
Windows 11 PC offers CHKDSK and SFC scan tools that help you to check for any missing system files and fix them. Here are the steps to run CHKDSK and SFC.
- Open the Start menu and search for the command prompt. Run it as administrator.
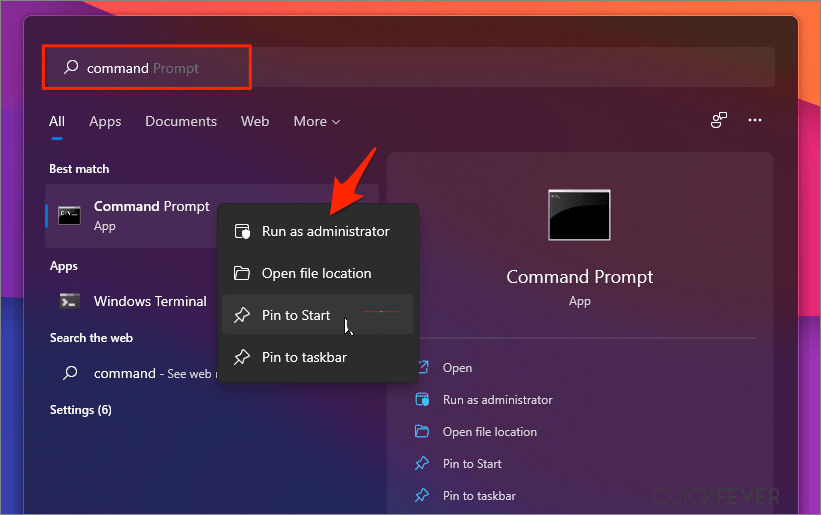
- Type chkdsk /r and hit the Enter button.
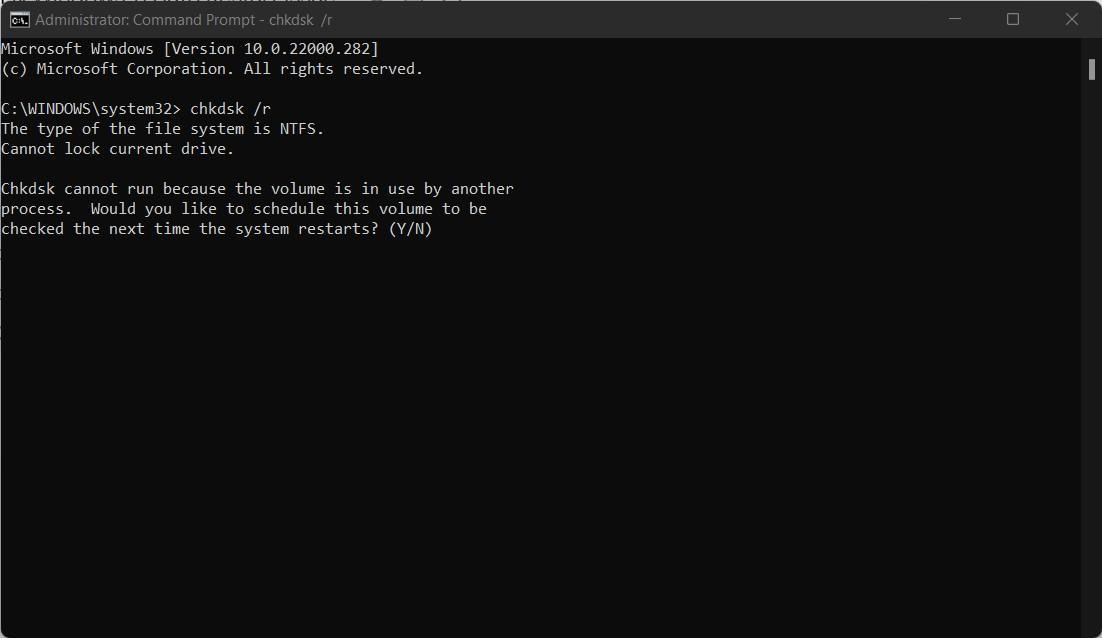
- This will check your system for errors and also fix the bugs along the way.
You can also the Windows System File Check (SFC), which will check for missing or corrupt system files. The difference between SFC and CHKDSK is SFC checks for Windows system files, whereas CHKDSK checks for entire errors. Here is how you can run SFC.
- Open command prompt as an administrator.
- Type in sfc /scannow and press Enter.
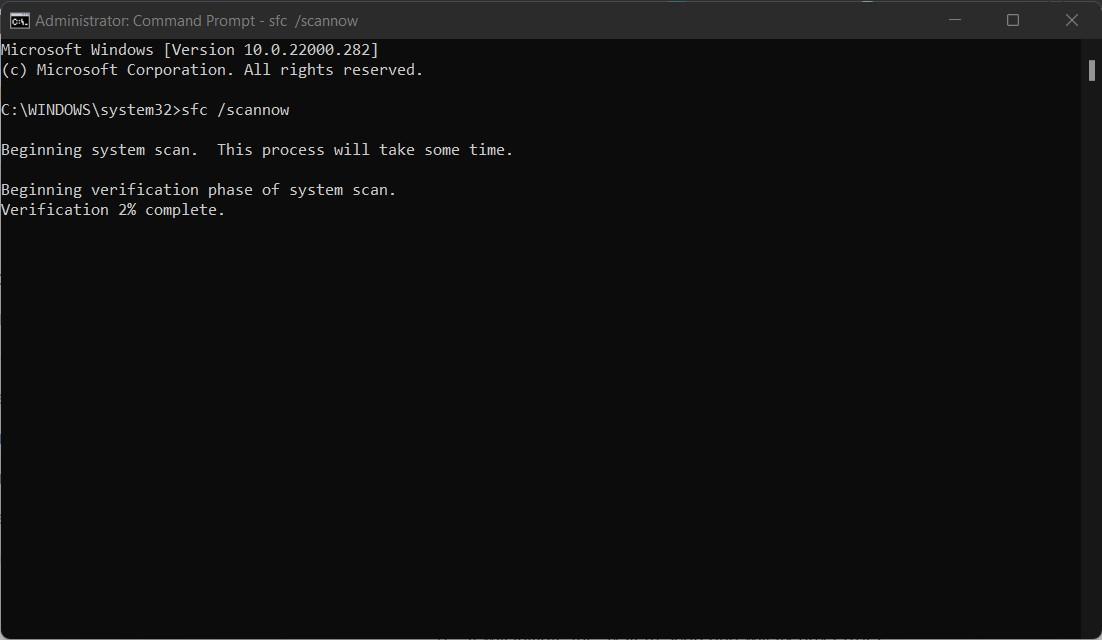
- It will initiate the system scan and will fix any errors.
3. Run the DISM Scan
DISM stands for Deployment Image & Servicing Management. This is a tool that Windows 11 offers built-in. It basically ensures the health of the PC is good, and if not, it restores the health of your PC.
- Right-click on the Start menu on the taskbar and open the command prompt as an administrator.
- In the cmd, type DISM /Online /Cleanup-Image /ScanHealth and press the Enter key.
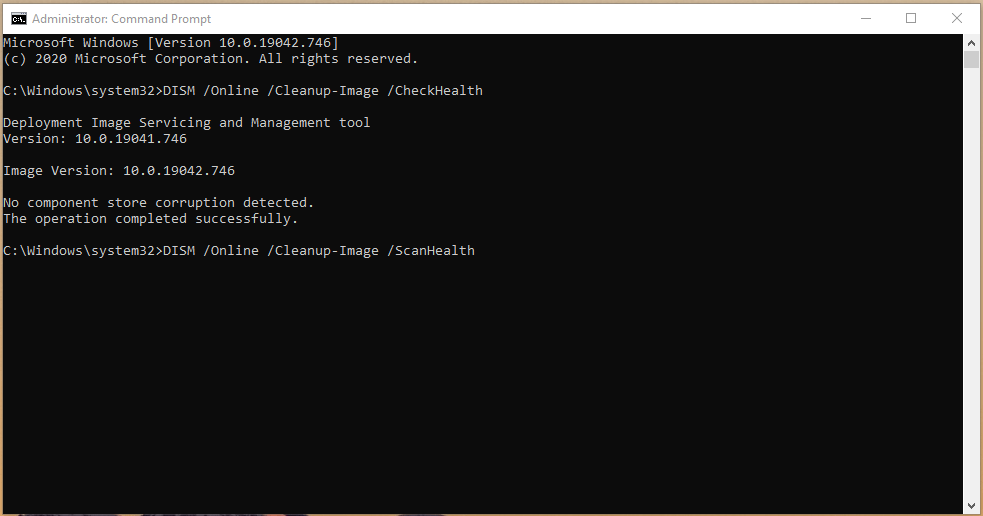
- The process will look for corrupt files.
- After this, type DISM /Online /Cleanup-Image /RestoreHealth and press the Enter key.
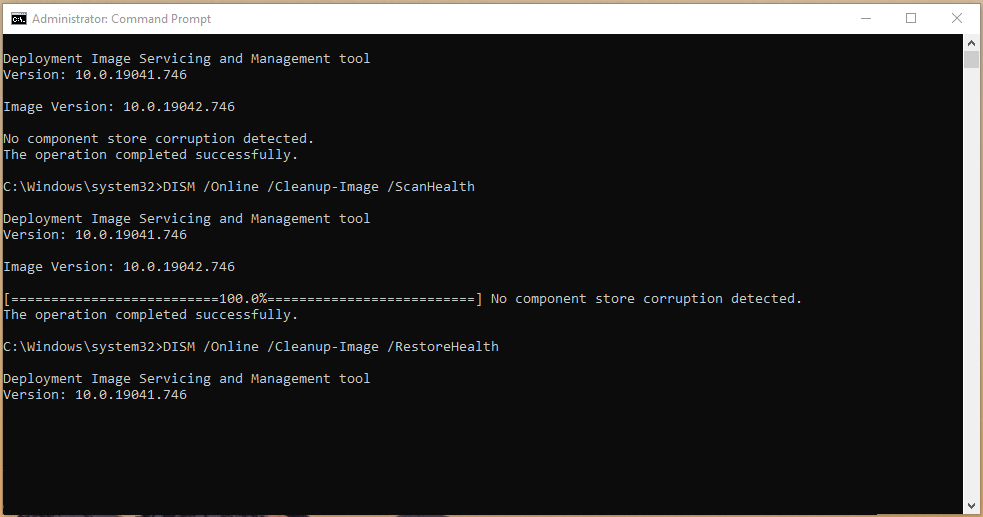
- Once the process is complete, reboot your Windows 11 machine and see if this fixes the issue or not.
4. Delete Software Distribution Folder
Several users have reported that deleting the software distribution folder helps fix this issue. While this may not work for everyone, it is worth giving it a try as the folder is related to Windows update, which is one of the reasons that pop up this error.
There are a few key points to remember. Deleting the software distribution folder will delete all of your Windows update histories. Moreover, updating the next time would take a few minutes more than usual.
- Open a command prompt on your Windows 11 machine and run it as an administrator.
- Type in net stop wuauserv and hit Enter.
- Then type in net stop bits and press Enter.
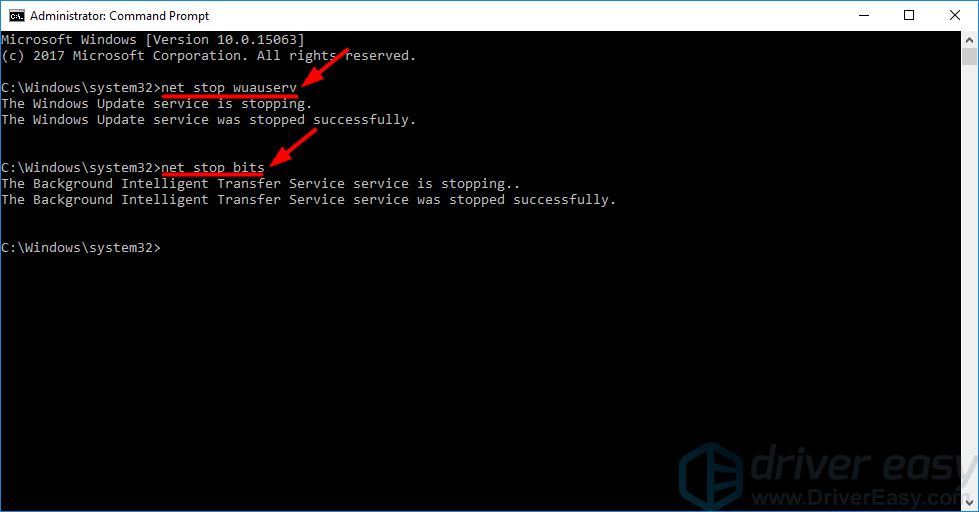
- Now, open the Windows File Explorer and paste C:\Windows\SoftwareDistribution into the address bar.
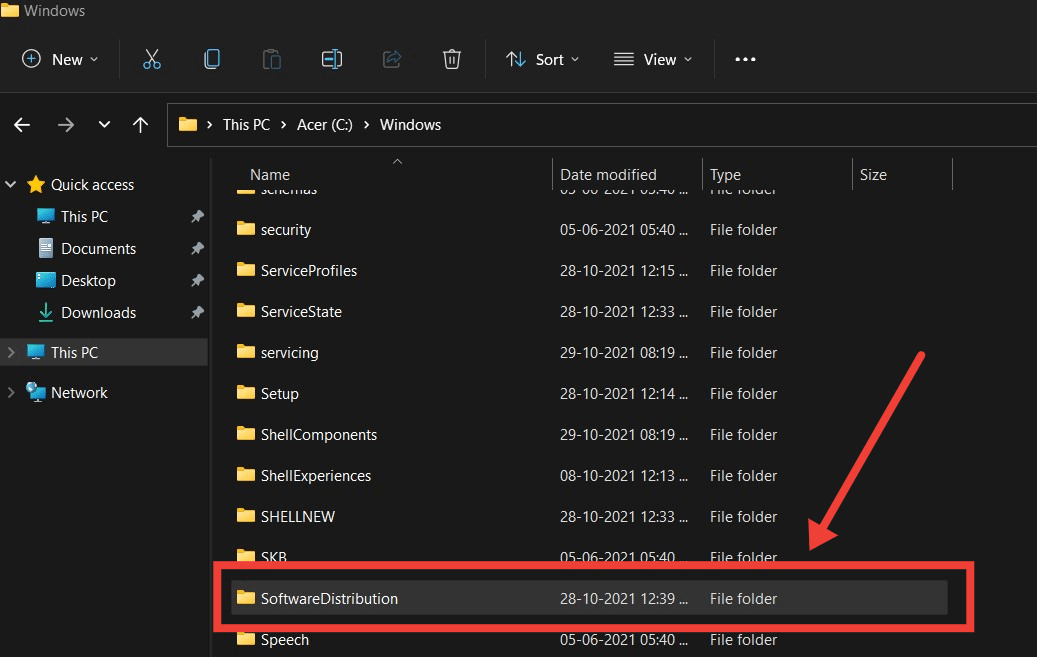
- Open the Software Distribution folder and select all files.
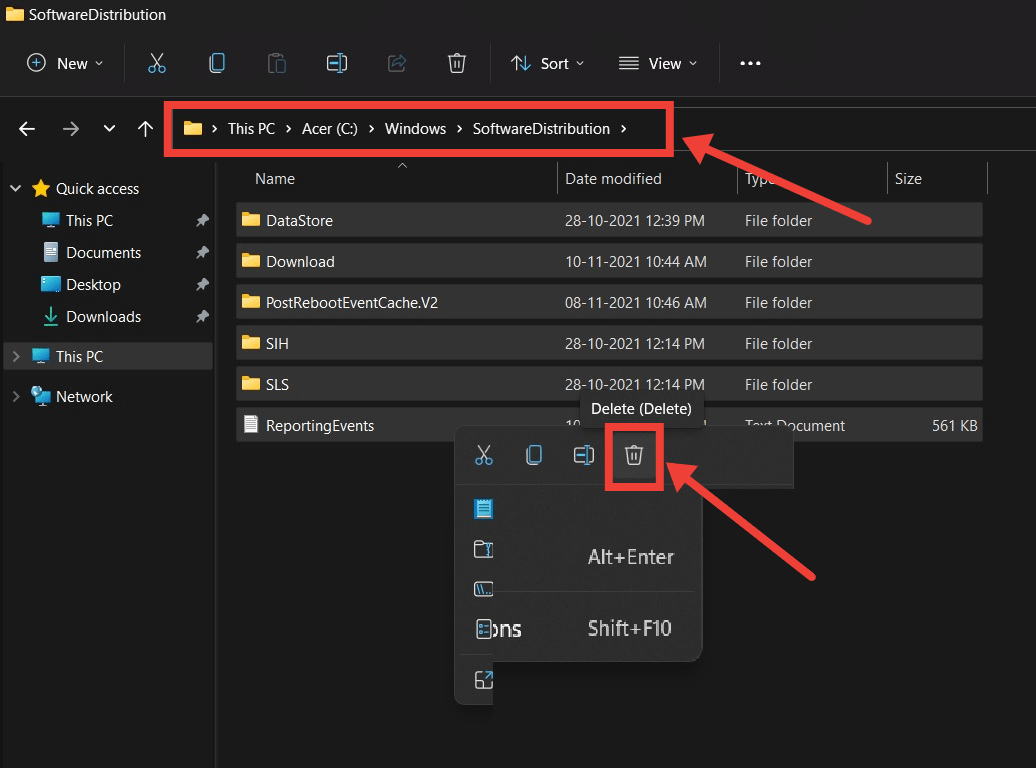
- Finally, delete everything by hitting the Delete button on your keyboard.
- Reboot your system and see if this fixes the issue or not.
5. Turn On Cryptographic Services
There is a Cryptographic Services (not at all related to the “Crypto coins”) on Windows update, which, if by any chance not working or has been turned off, would cause multiple issues. One of which is the 0x8000fff error.
- Open the Start menu from the taskbar and search for Services.
- Browse Cryptographic Services.
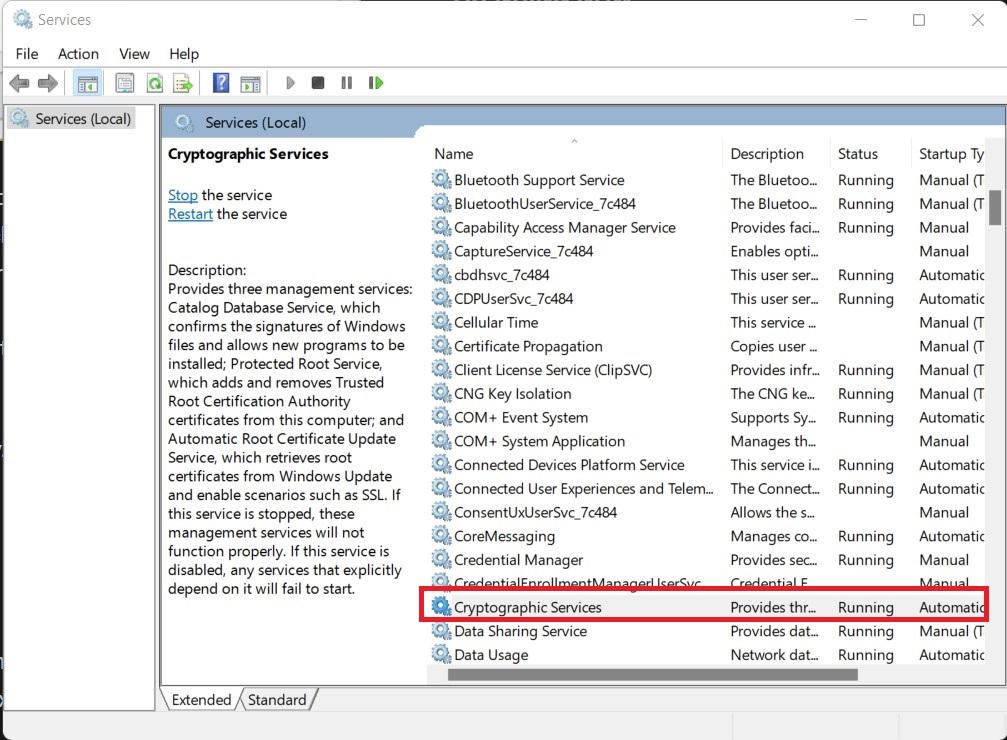
- Here, make sure that the service is set to automatically.
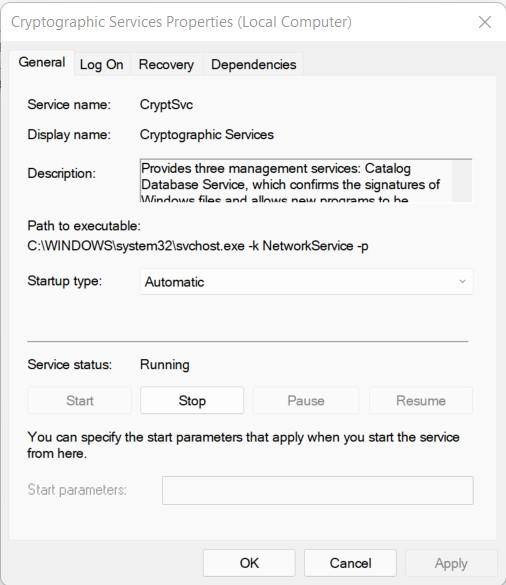
- If by any chance it is turned off, select Start.
If you've any thoughts on How to Fix Windows 11 Error Code 0x8000FFFF, then feel free to drop in below comment box. Also, please subscribe to our DigitBin YouTube channel for videos tutorials. Cheers!


