Does it happen to you that you are unable to install programs on Windows 11? Let me narrow it down. You are searching for some app, but it is not on the Microsoft Store. Then you make your way to the internet and try to install the program from some third-party source. Though you can download the executable file for that app, the Windows OS refuses to install it.
In this guide, I have shared a few tips on how to fix the error message from Windows saying “unable to install the program on Windows 11“. You need to first know what could be the possible reasons that are causing Windows to throw the error message every time you want to install a program from the internet. Mind you that this issue may not happen with all the apps that you may want to install. Only with a few programs, you can face installation errors.
Reasons for Getting Error Message “Unable to Install Programs on Windows 11”
It could be a bug on Windows 11 that is not allowing you to install a program from an unofficial source. The next reason can be compatibility issues. Is the program you are trying to install compatible with the hardware of your PC? Also, in some enterprise-based networks of computers, you need to have administrator rights to install or remove any program from any PC. If you do not have admin rights, you cannot modify anything on the PC.
Also, the app settings of Windows 11 have this feature that restricts you from installing any app that is not from the Microsoft store. You need to check if that option has been enabled. If you have a previous build of the same program already installed on your PC, then Windows will not allow you to install the app.
Best Ways to Fix Unable to Install Programs on Windows 11 Error
Check out the various troubleshooting tips to get the choice of your program installed on Windows 11.
1. Update Windows OS
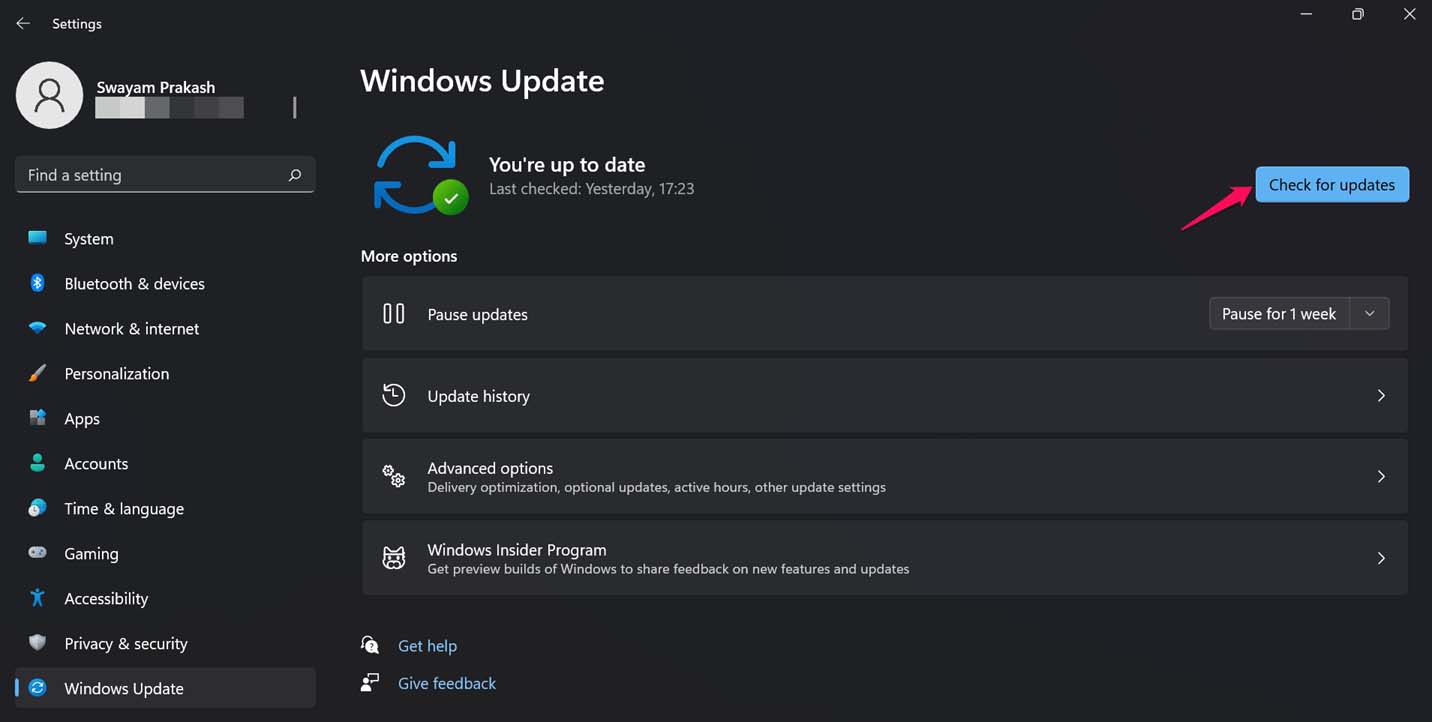
First, try to update the Windows OS to the latest build that is available. If your PC is connected to the internet, you should be able to know of incoming new software updates for Windows 11. To check for the updates manually, here are the steps you have to follow.
- Press Windows +I to go to the settings.
- On the left-hand panel, click on Windows Update.
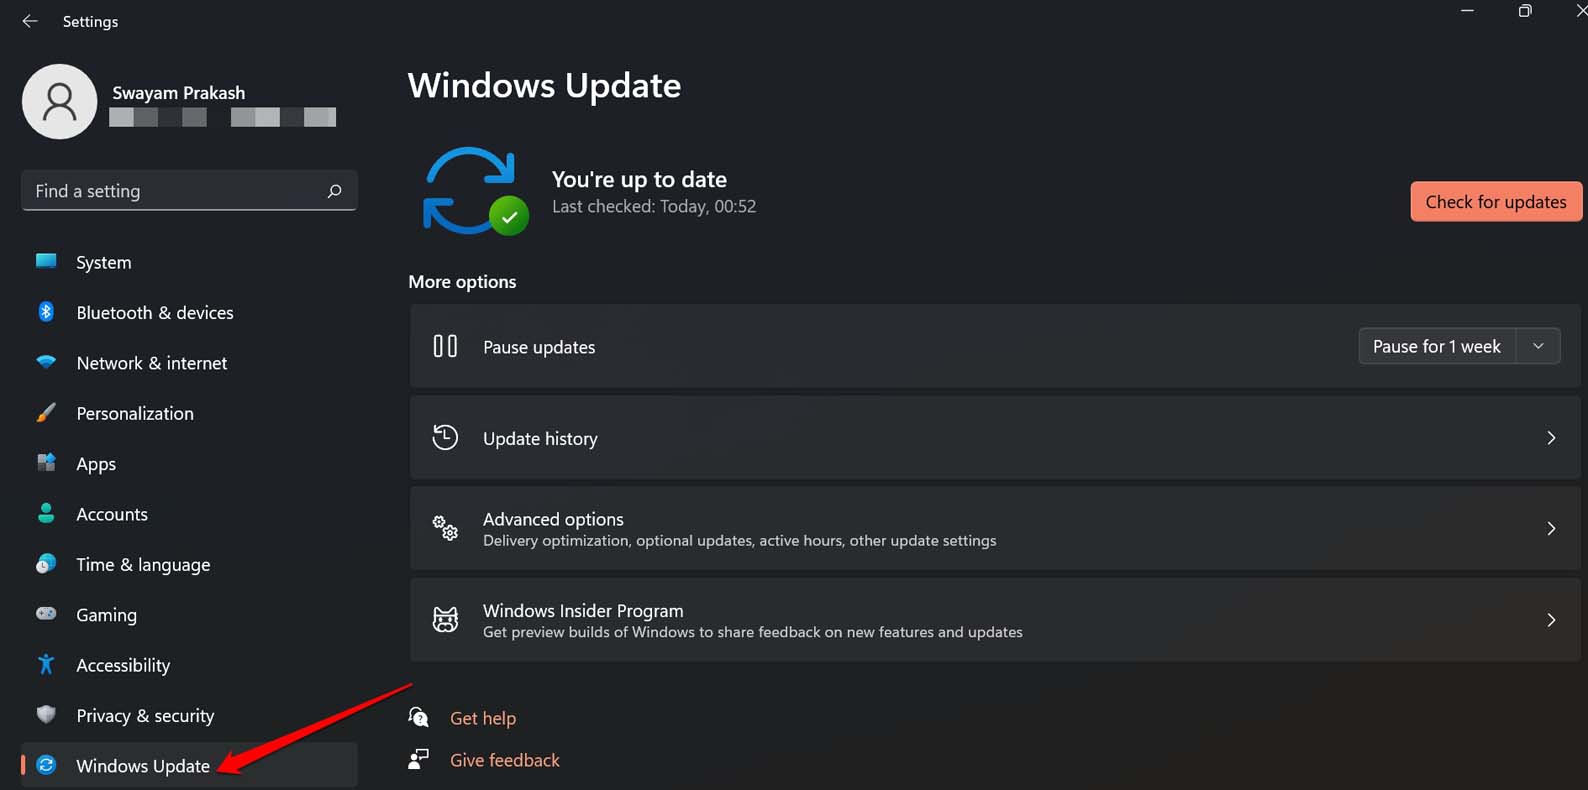
- Then click on Check for Updates.
- If an update shows up, prompting you to grab it, click on Download Now. The update download and installation will start shortly.
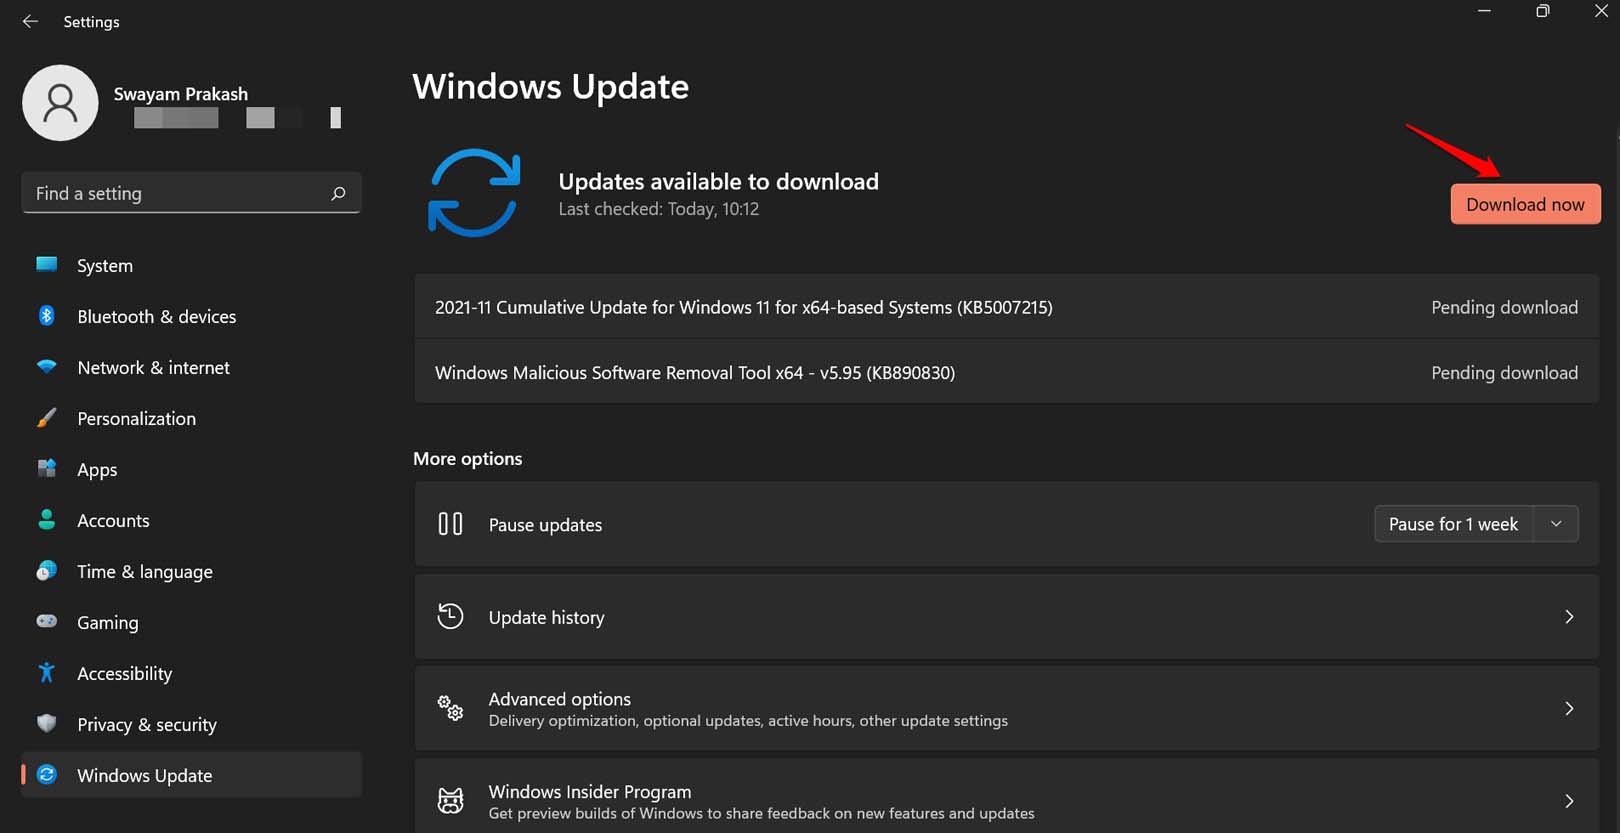
- Once the update installation finishes, restart the PC and now try to reinstall the program.
2. Is the Program Compatible with Windows 11?
Before downloading a program to install on your PC, check that the program is compatible with Windows 11. If you are downloading the program from its official website, then look for the technical specifications section.
Usually, they mention the program’s compatibility with a certain OS under the tech specifications. Also, you can get detailed information on whether the hardware installed on your PC is efficient enough to run that program.
3. Enable the Developer Mode on Windows
You may also try enabling the developer mode on Windows 11. This will allow you to install any program from both official and non-official sources. Keep in mind that installing apps in their beta states can bring bugs to your PC.
Also, to avoid any malware issues on your computer, thoroughly check that the website from which you are downloading the app is credible. Here are the steps to enable the developer mode on Windows 11.
- Press Windows +I hotkeys to launch the Windows OS settings.
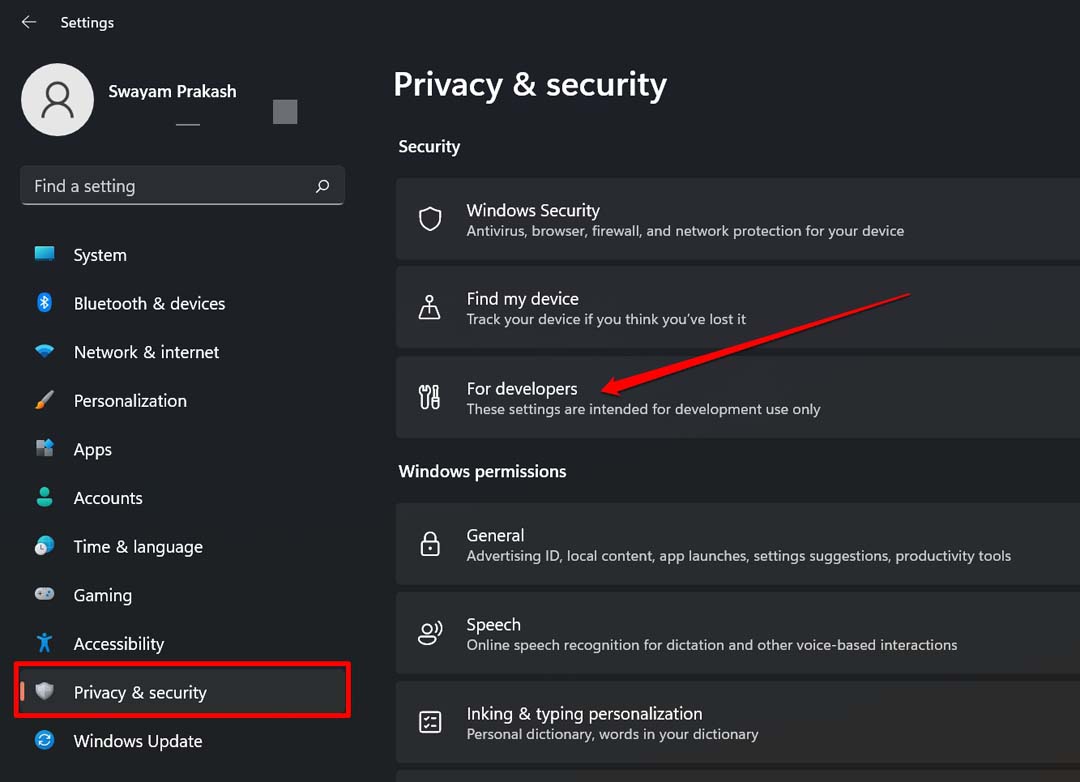
- Navigate to the left-hand panel and click on Privacy & Security.
- Next, click on For Developers.
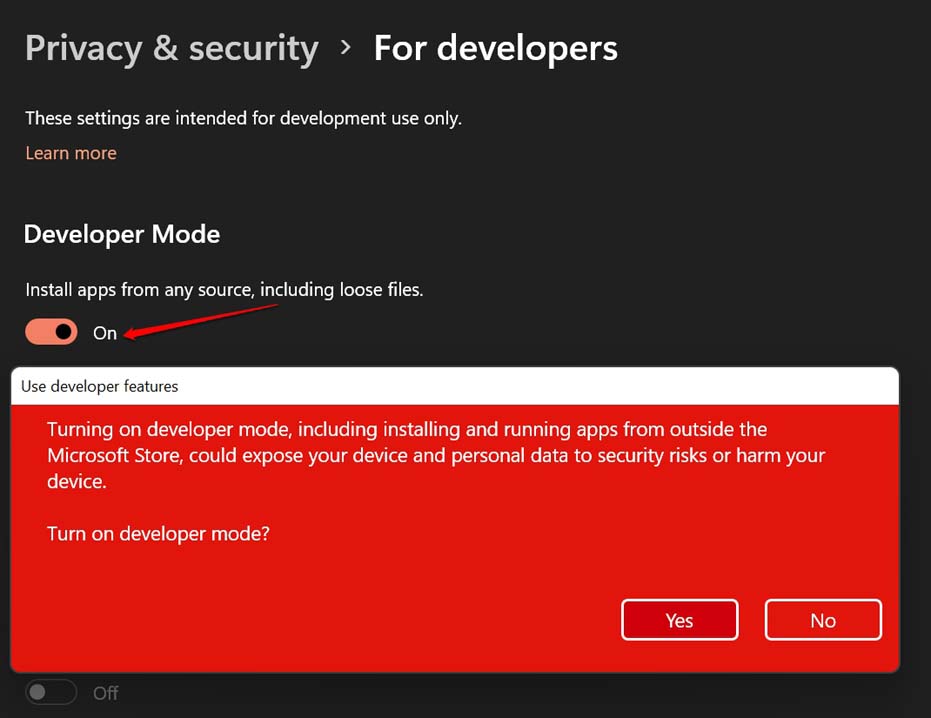
- Enable Developer Mode by clicking the toggle beside it.
- Confirm the move by clicking on Yes.
4. Uninstall the Previous Version of the Program from your PC
If an older version of the same program is already present on your PC, then you need to get rid of the existing app. Then you should try installing the new version of the same app.
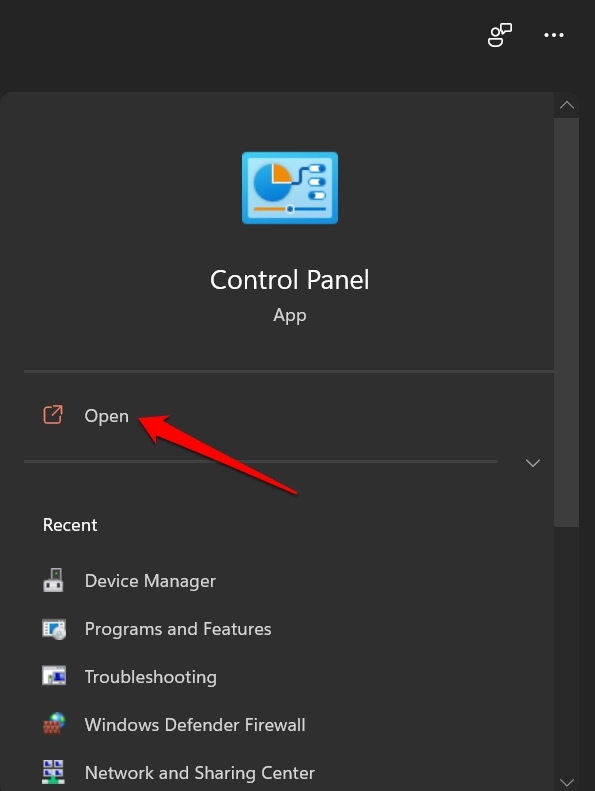
- Use the Windows search console to access Control Panel.
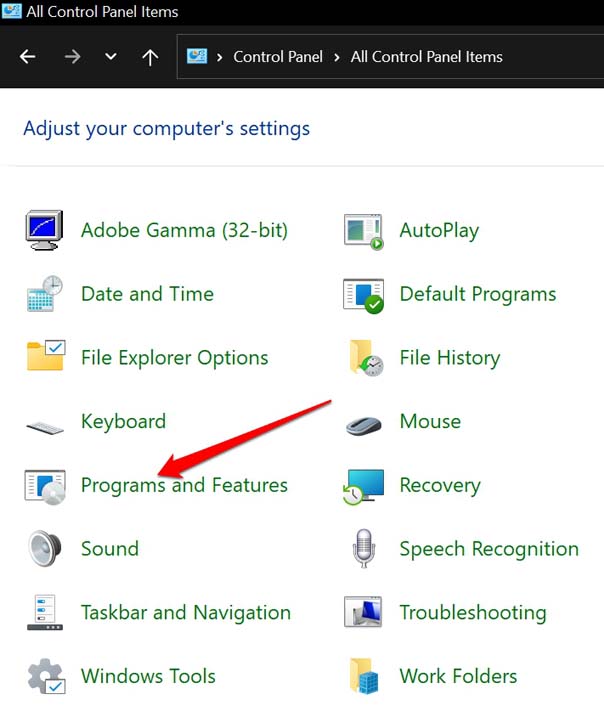
- Click on Programs and Features.
- Select the program that is already installed on your PC.
- Double click on the program name, and you will see an option to Uninstall/Change the existing program.
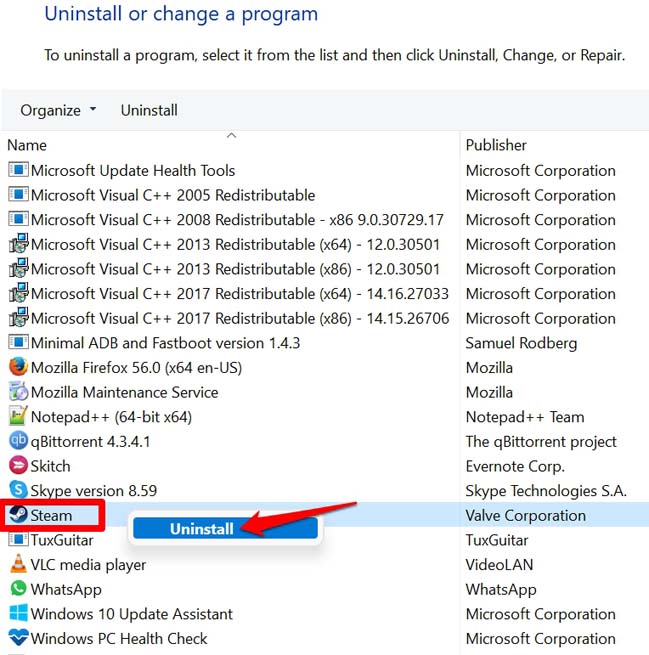
- Completely uninstall the program.
- Now, install the latest build of the program.
5. Gain Administrator Privilege to Install a Program on Windows 11
If you are not allowed to install an app on Windows 11, then try to install it as an administrator.
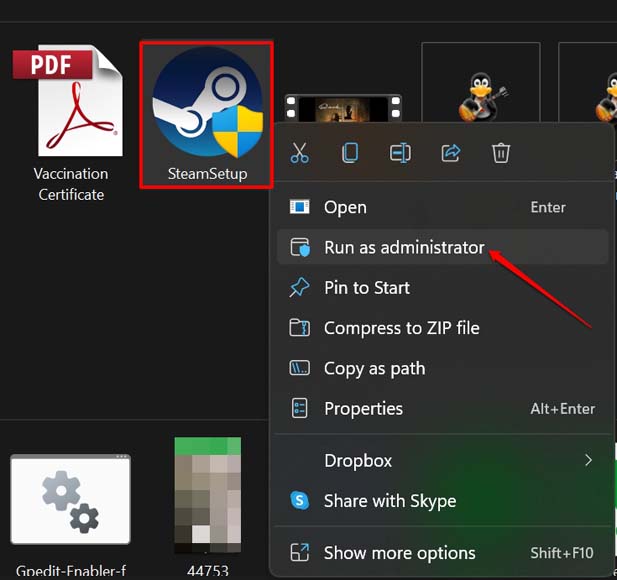
- Right-click on the executable file of the app.
- Then select the option Run As Administrator from the menu.
Otherwise, if you are working in an office where someone else may be the administrator, request the person to install the program you require for your work.
6. Allow Installation of Apps on Windows from Any Source
You need to allow Windows to permit the installation of apps from any sources available.
- Press the Windows key to bring up the search console.
- Then type in Apps & features.
- Click Open when the correct search result shows up.
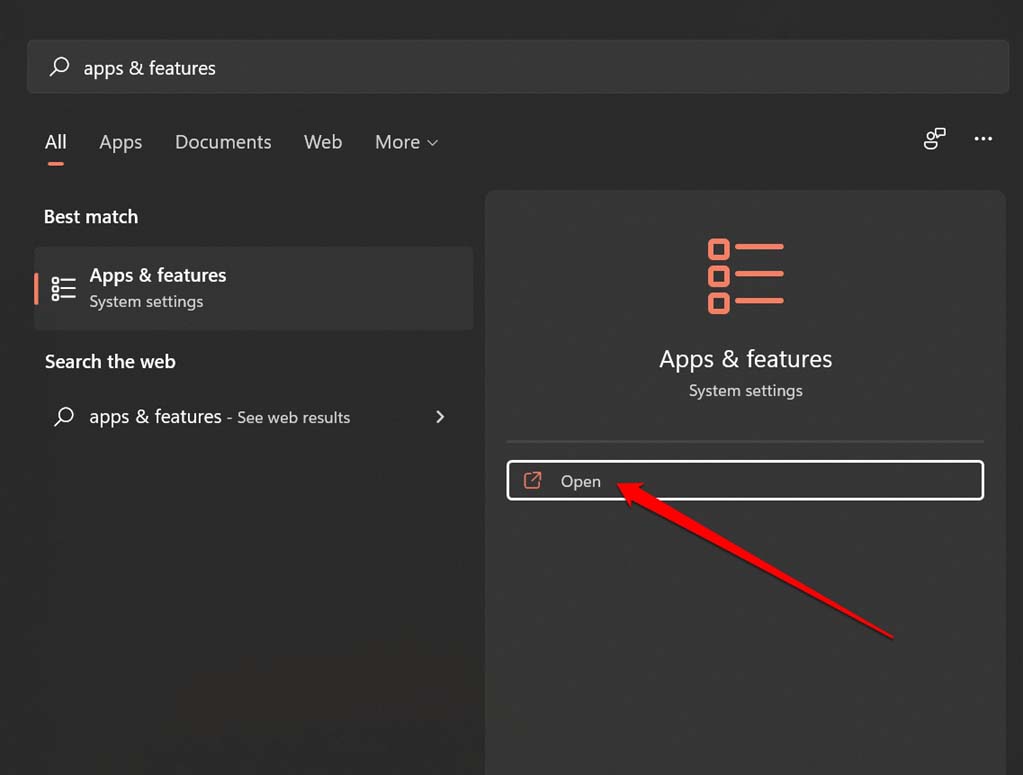
- You will land in the app settings of Windows 11.
- On the tab Choose Where to Get Apps, click on the dropdown beside and select Anywhere.

7. Use Microsoft Program Installation Troubleshooter
Microsoft offers a dedicated tool that you can use to troubleshoot the issue of Windows OS not installing a program on the PC.
- Download the Program Install and Uninstall troubleshooter.
- Run the troubleshooter.
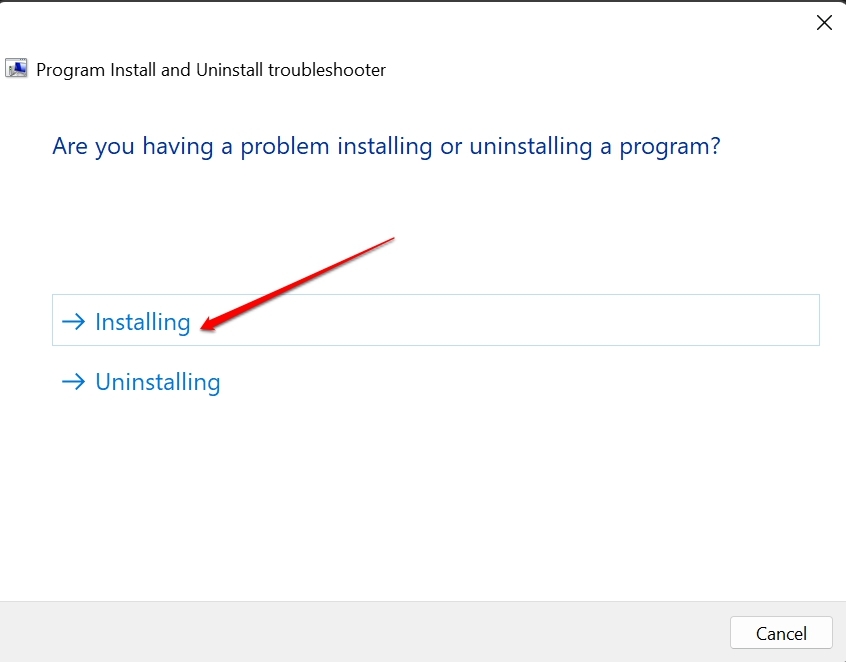
- The tool will ask you whether you face issues installing or uninstalling a program?
- As we are discussing program installation, select Installing.
- Select the program you are trying to install and click on Next to continue with the troubleshooting.
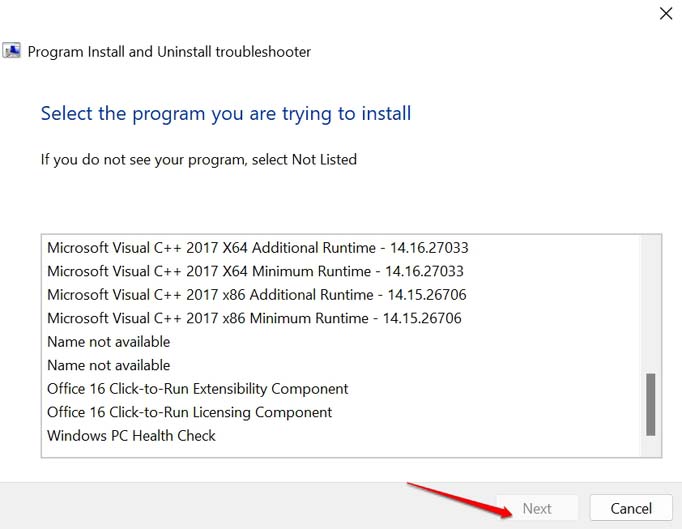
- Follow the instructions specified by the troubleshooting tool and get the program of your choice installed on your PC.
Conclusion
If the program you want to install on your computer is too essential for you, then you need to fix the Unable to Install Programs on Windows 11 error message. Unless there is a compatibility issue, you should be able to solve the installation problem quickly and load the apps that you want.
If you've any thoughts on How to Fix Software Apps Not Installing on Windows 11?, then feel free to drop in below comment box. Also, please subscribe to our DigitBin YouTube channel for videos tutorials. Cheers!
