Are you stuck on Authentication Problem on your Android WiFi? Does it not connect to the secured hotspot network near you? Relax ! here we have come up with few solutions to fix the problem. Android OS being a software product, you could be many technical glitches. The problems with WiFi internet connection is one such annoying issue.
Basically, when you try to connect with an available network the WiFi will scan the network and connect with the network by obtaining the IP Address and if the network is protected then you will be asked to enter the password. But if you are stuck with ‘Authentication error occurred’ then you need to make few changes in WiFi settings and in Android device. Let us look that in detail below.
Fix Authentication Error on Android Smartphone
Method 1. Reboot your Router
Some technical issues may occur with your Router so it is better to turn off your router for few minutes and restart it. Also, make sure you entered the passcode correctly in your Router and the same in your device.
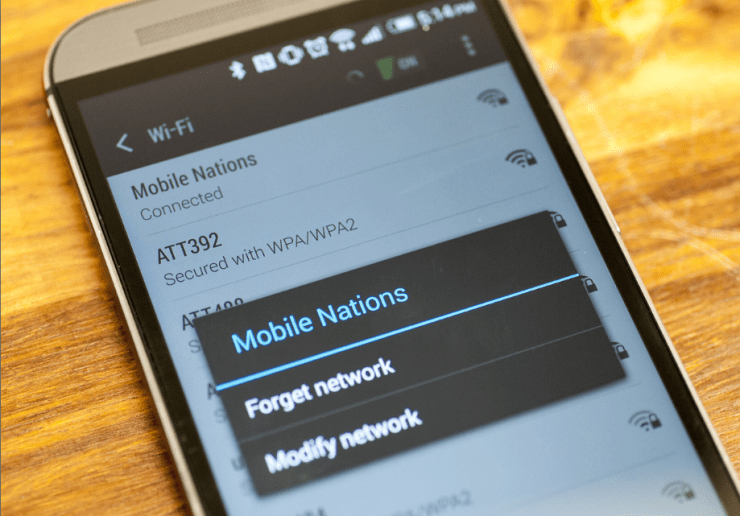
Before doing so you click on ‘Forget password’ in your Android device. After the WiFi is fully up, connect the device by entering the password.
Method 2. Change Security Protocol
Try changing security protocol, for example, if it’s WPA – change it to WPA2 on the Hotspot. And then try connecting to the Wi-Fi network.
You can even set your Android Wi-Fi manually by clicking ‘Forget network’ and under Advance, setting click on ‘Add network’ option and then select your preferred options.
Method 3. Use Static IP Address
- Go to Setting of Android.
- Open the Wi-Fi
- Here look for your desired network.
- Long press on the WiFi network and look for an option named Advanced Settings. You may also find this option under Modify Network or just by clicking on the network.
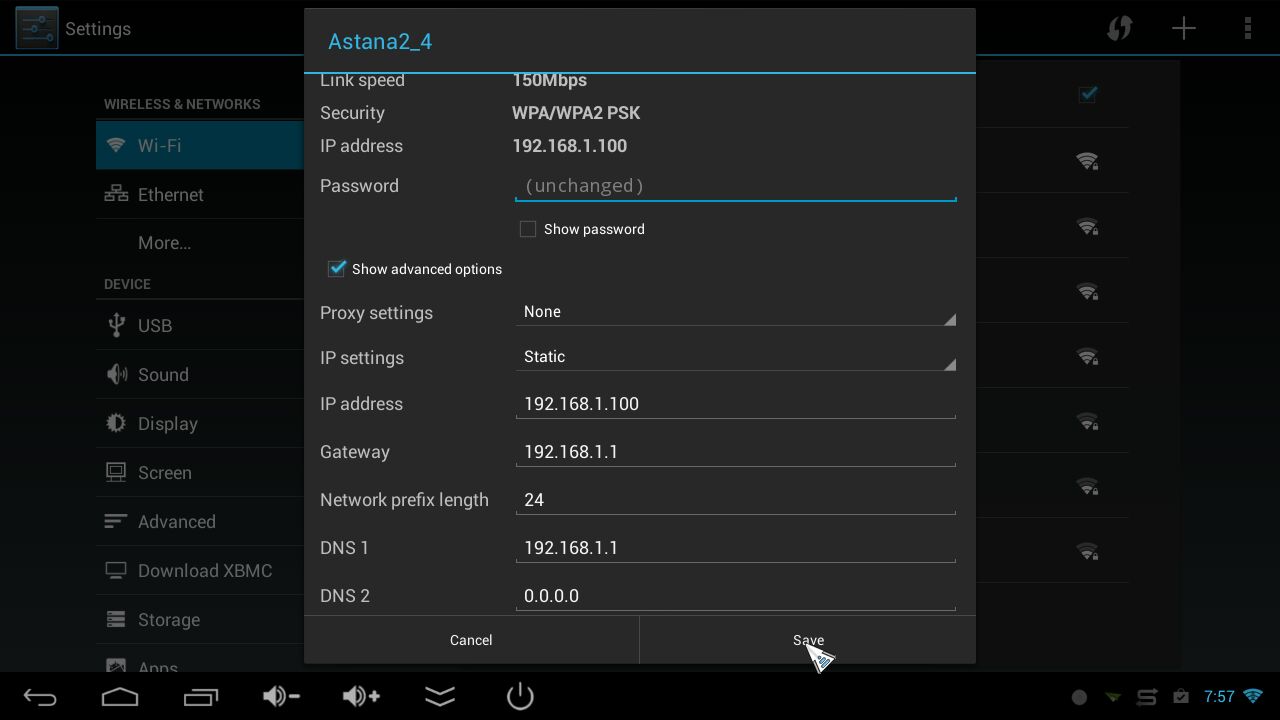
- Here change the IP setting from DHCP to Static.
- Now assign the IP Address 192.168.1.*** (Add any number from 1 to 225 at ***)

Static Setting in Android WiFi
- Leave everything else untouched.
- Save the changes and you will notice that your WiFi is connected.
Note: If the internet is not working even though the WiFi is connected then just simply switch back to DHCP while you are still connected. The problem will be solved.
Method 4. Delete Obsolete Files
For Rooted Device Only
- Download and install ES File Explorer on your device.
- Give it root permissions if asked.
- Go to Root explorer from menu.
- Go to /data/misc/dhcp/
- Delete all the files present there.
- Reboot the device and try to check if the problem is solved.
Conclusion: I hope the post was helpful also give your valuable thoughts in form of comments in the section provided below. Do share it on Social Sites to increase the awareness.
If you've any thoughts on How to Fix Wi-Fi ‘Authentication Problem’ Error on Android?, then feel free to drop in below comment box. Also, please subscribe to our DigitBin YouTube channel for videos tutorials. Cheers!


Tried these options and still no internet connection from WiFi
Don’t make excuses for failure, just find a way for success