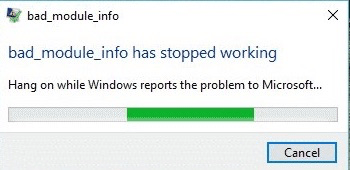
When you run a program on your Windows PC that requires powerful resources to run, you may come across the “Bad Module Info Has Stopped Working” Error. Normally, the users report that as the game or app requires an intense usage of resources to run on Windows, it causes the concerned app to crash.
The application crashes because one of its components or modules has become corrupt. The error may not occur regularly. However, if it happens every time and the app crashes, then the entire application may be corrupt. Also, it could be an issue with the GPU or certain optimization settings for the application causing the bad module error.
Top Way Fix Bad_Module_Info Has Stopped Working Error
Follow these troubleshooting tips to resolve the bad_module_info error on the affected program in your Windows PC.
1. Run the Affected Program in Compatibility Mode
If a game has some compatibility issues with the current resources used on your PC, you can run the affected app using Windows compatibility mode.
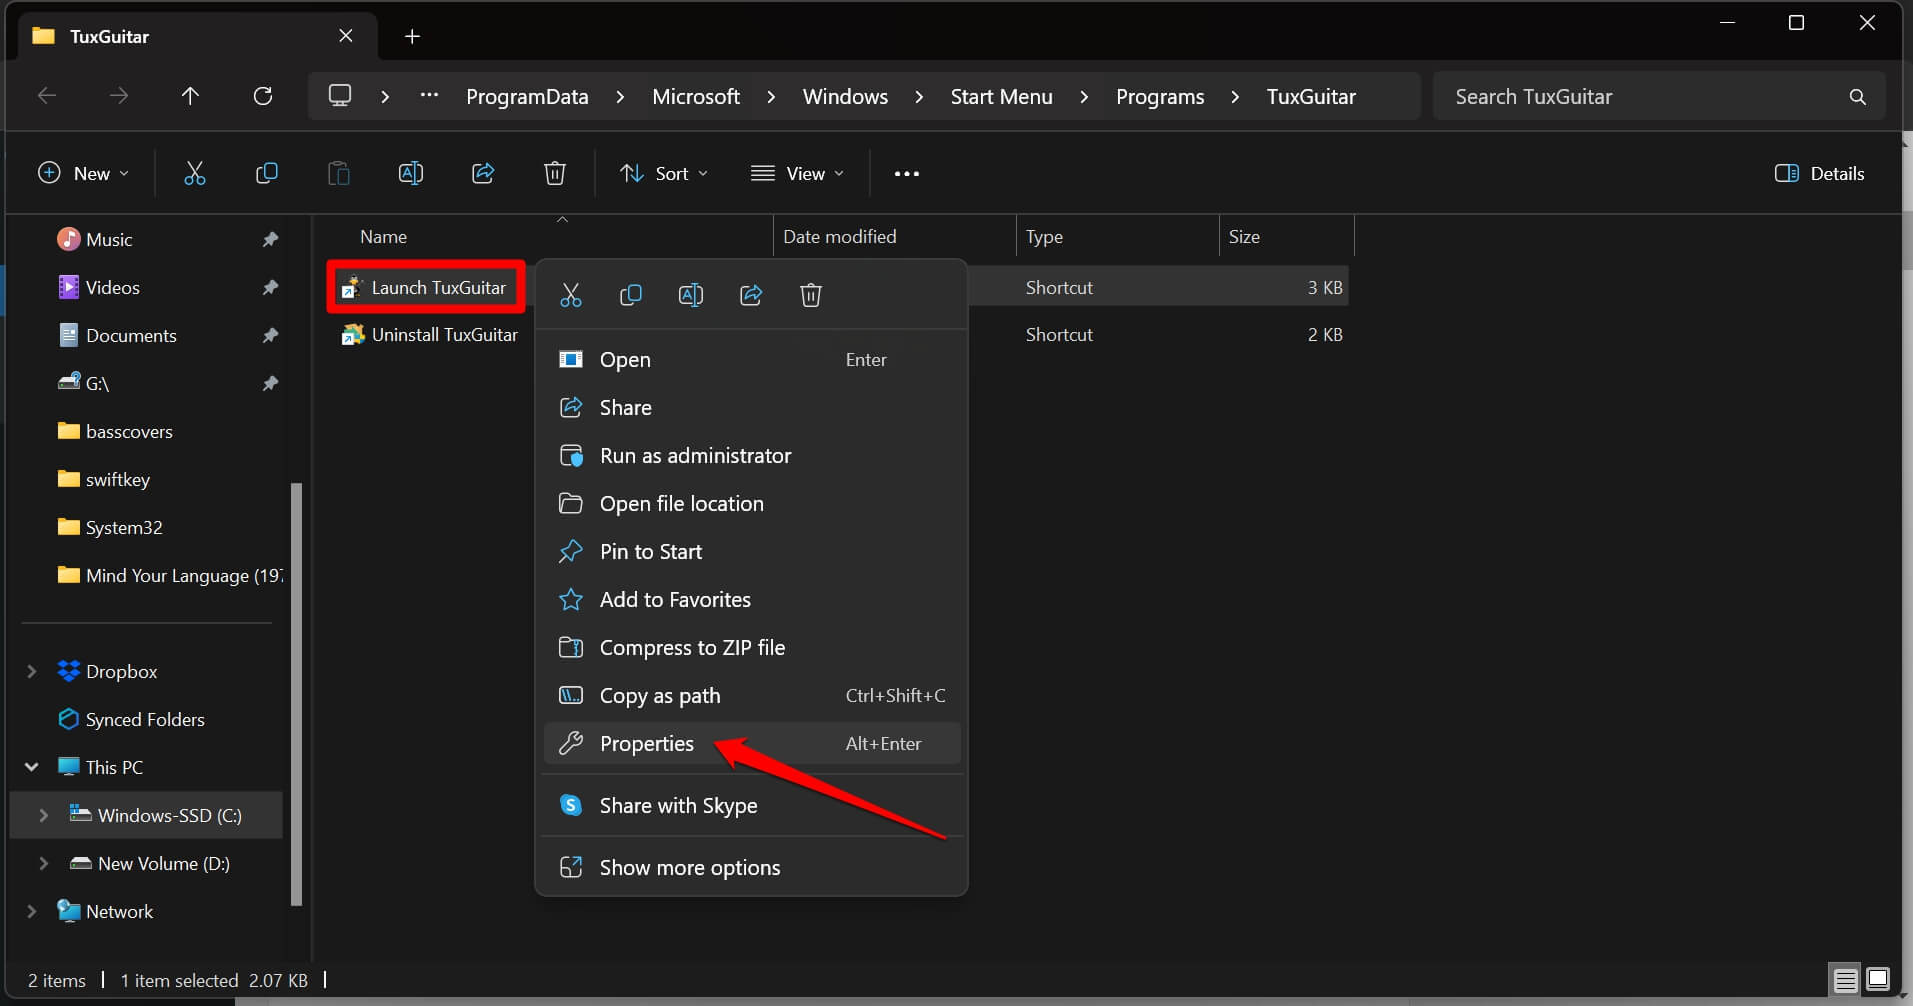
- Use File Explorer to go to the directory and folder where you have installed the game/app.
- Scroll to the executable file, right-click on it, and select Properties.

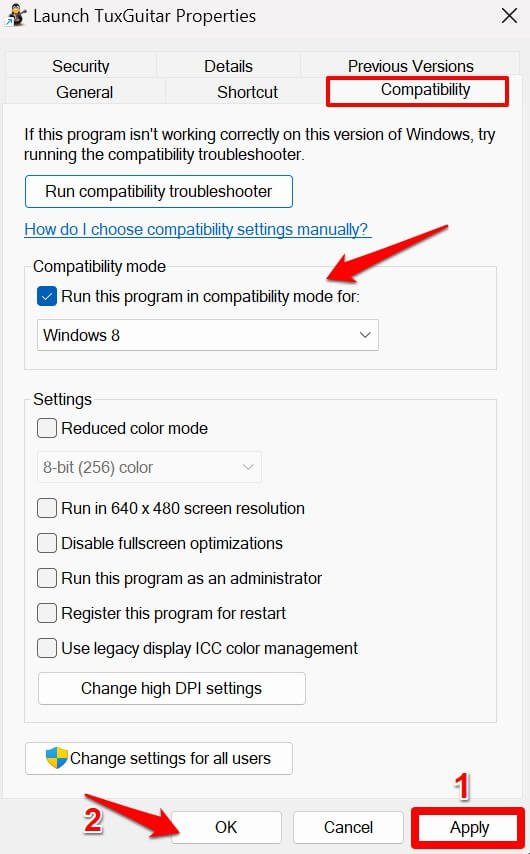
- In the Properties dialog box, click on the Compatibility tab.
- Click the checkbox beside ‘Run this program in compatibility mode for’.
- Select an older version of Windows on which the app will run on your computer without any compatibility issues.
- Click on Apply and OK to save the changes.

2. Turn Off Full-Screen Optimization
Some users have been reporting that disabling the full-screen optimization for the game/app that had been crashing has fixed the “Bad Module Info Has Stopped Working” error.
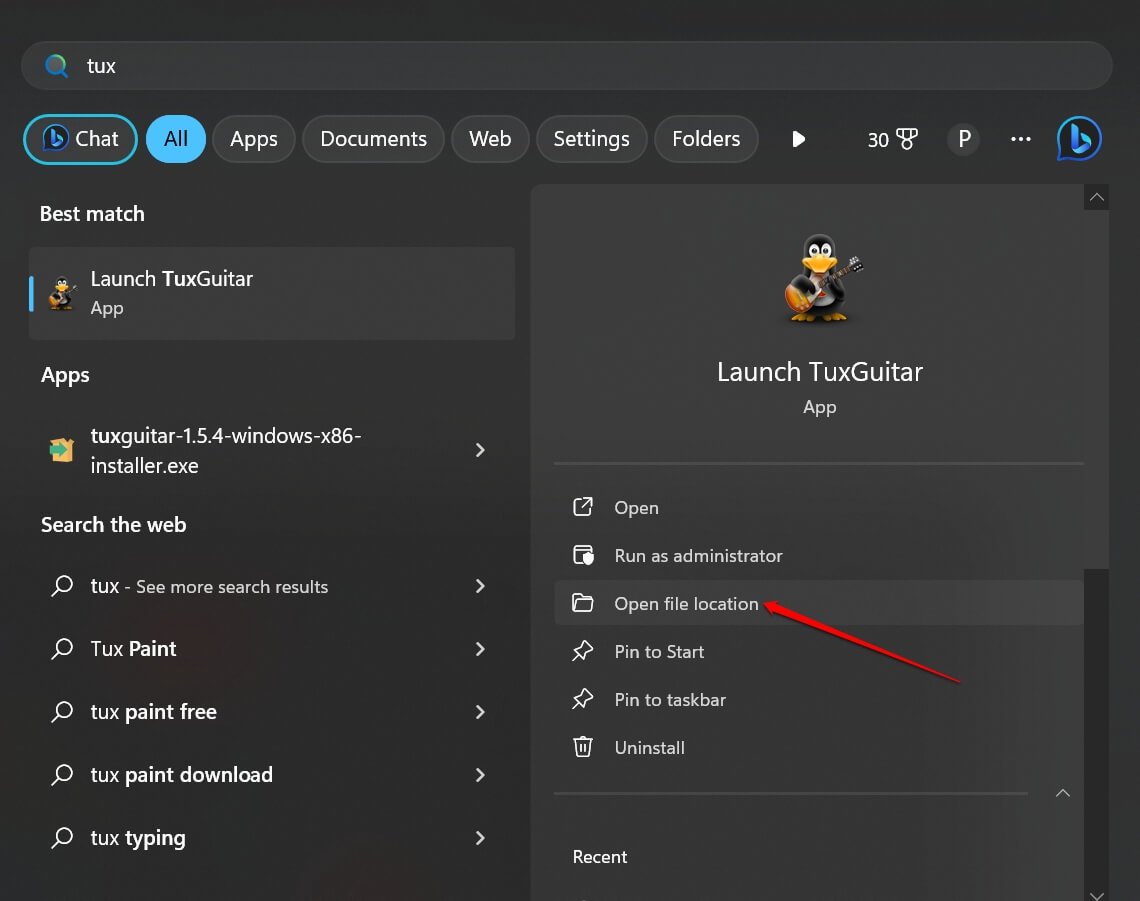
- Press the Windows key to bring up the search console.
- Type the game/app name, and click on Open File Location.

- Scroll to the application file and right-click on it.
- From the menu, select Properties.

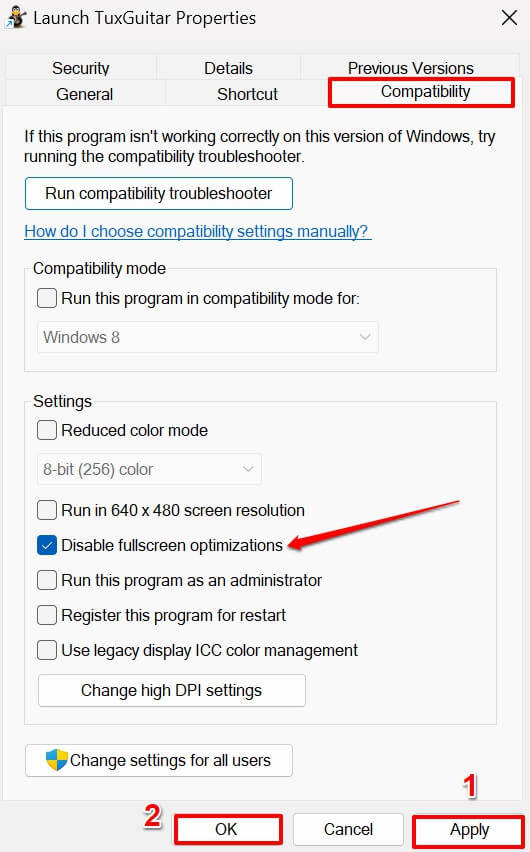
- In the Properties dialog box, click on the tab Compatibility.
- Under the Settings section, scroll to the checkbox Disable fullscreen Optimizations.
- Click on Apply followed by OK.

3. Update the Graphics Driver on your Windows PC
The graphics driver may have some bug, or it may not be of the latest build. Update the graphics driver from the Device Manager of Windows.
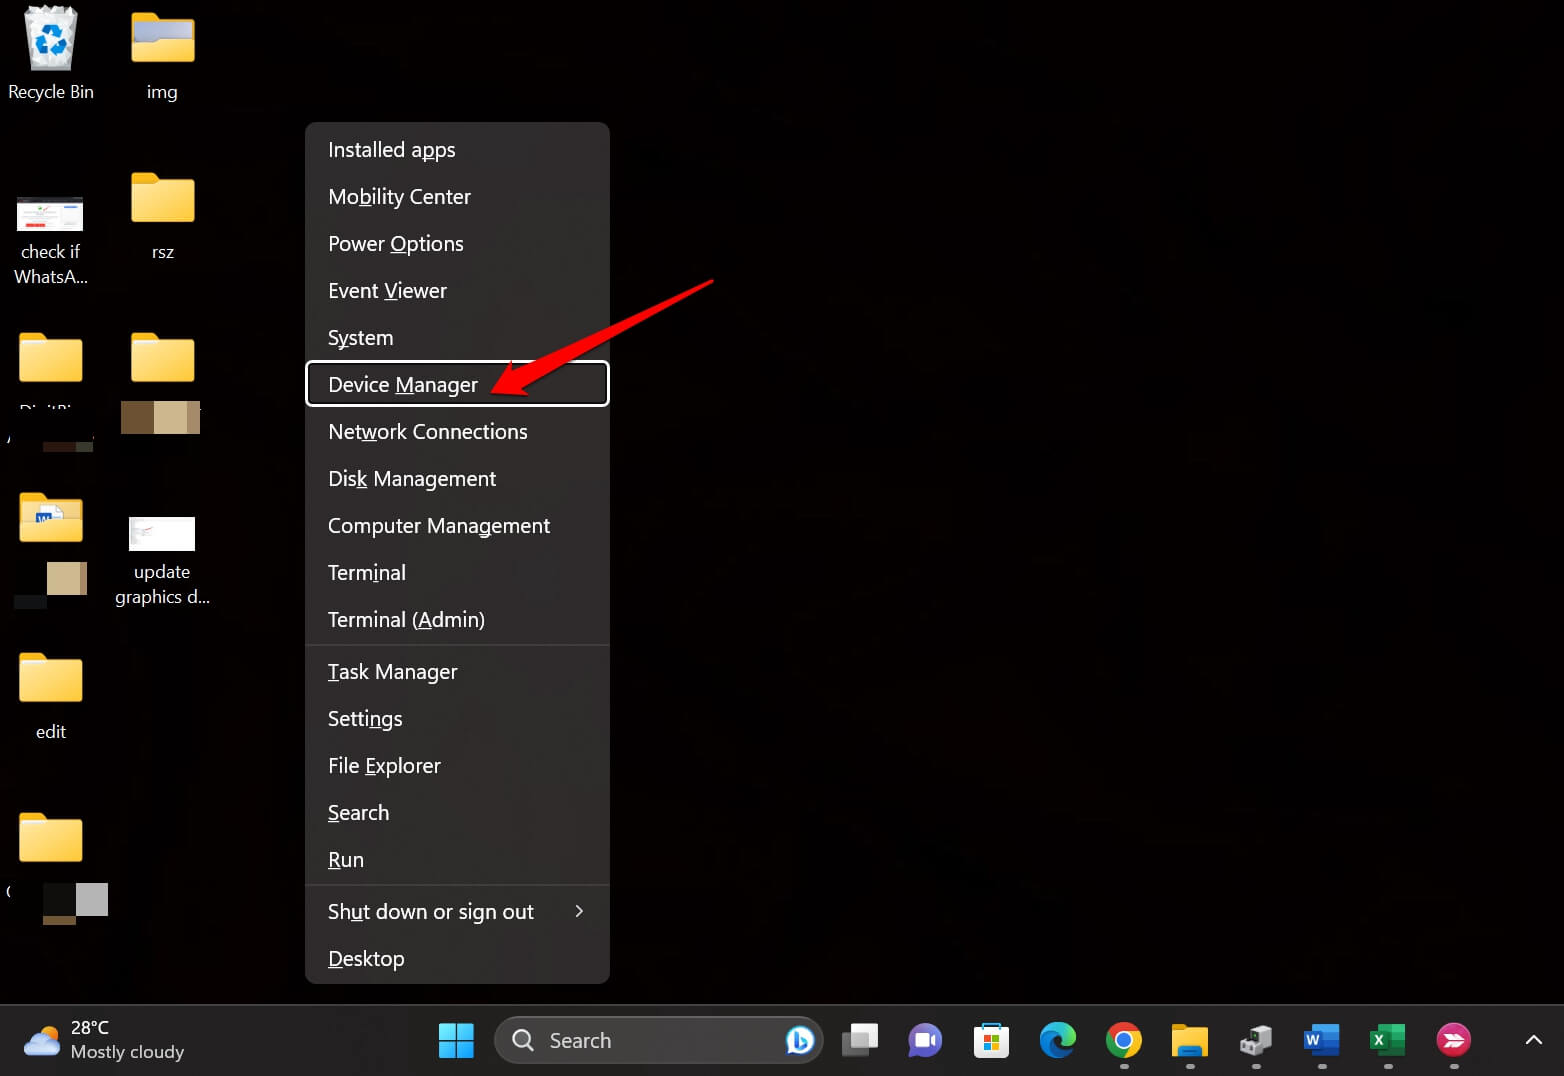
- Press Windows +X to bring up the power user menu.
- Select Device Manager from the menu.

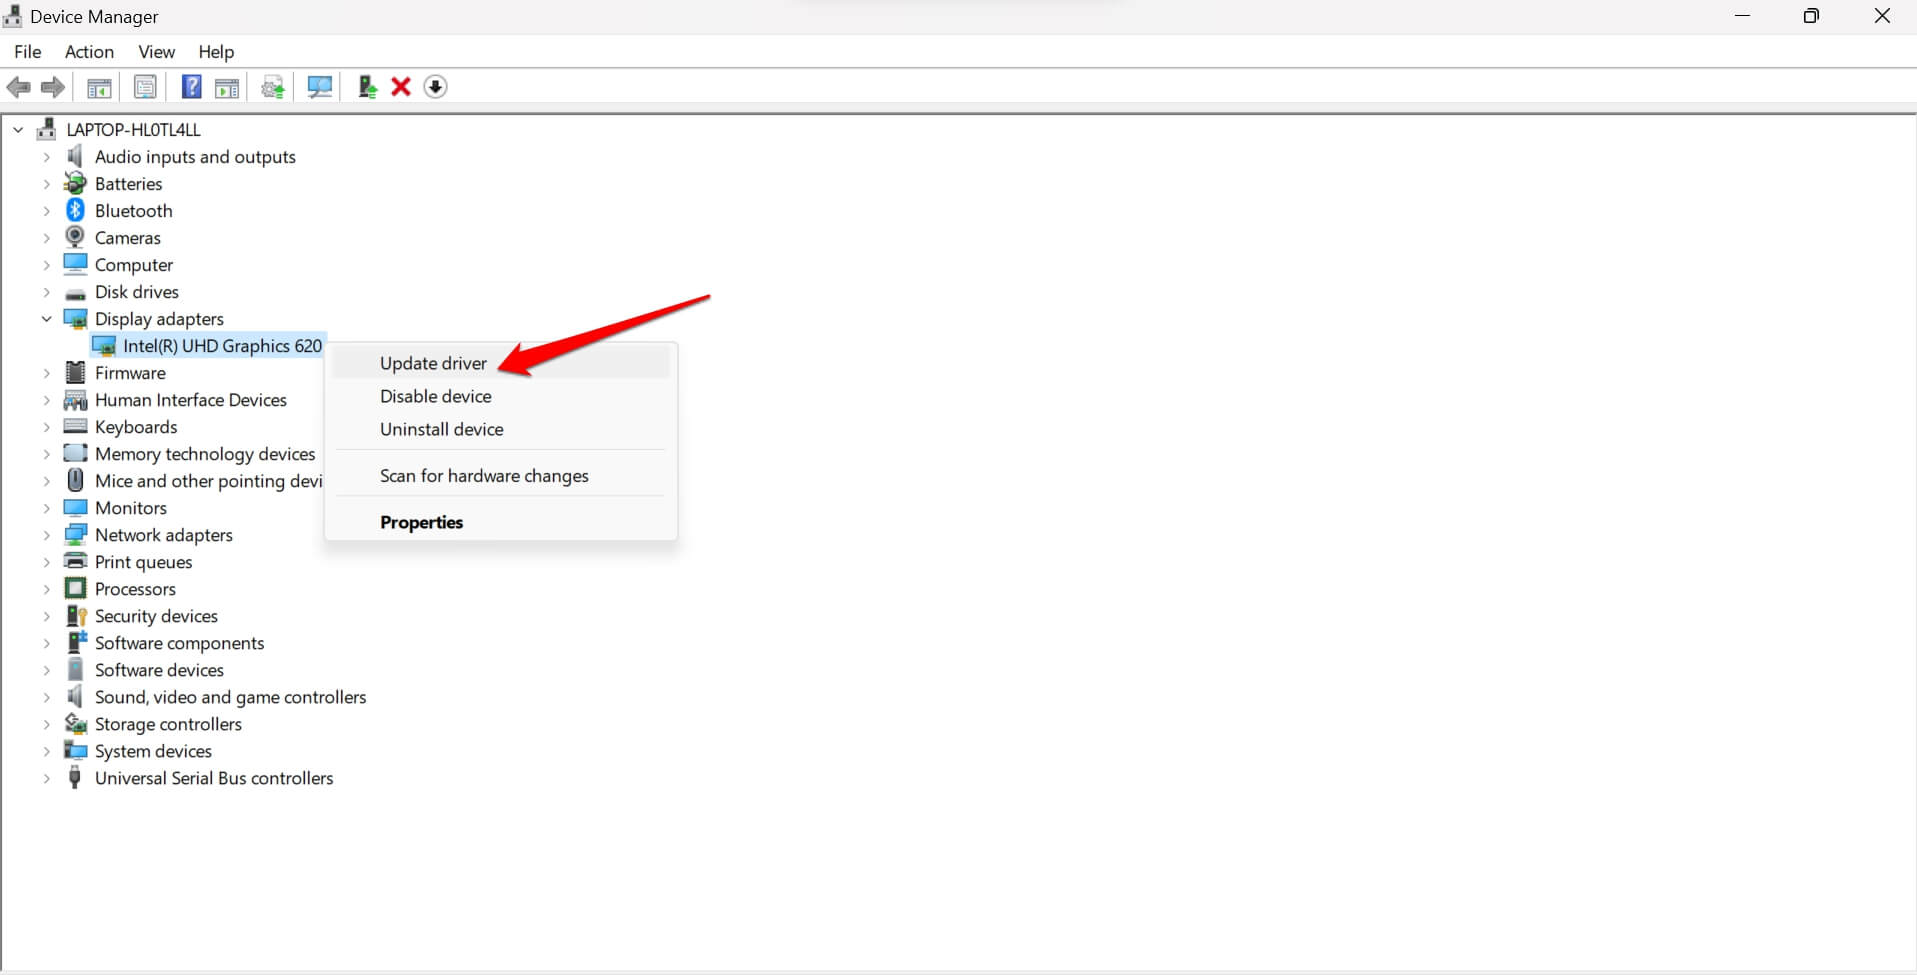
- Scroll to Display Adapters and click to expand it.
- Right-click on the respective GPU installed on your PC.
- Select Update Driver.

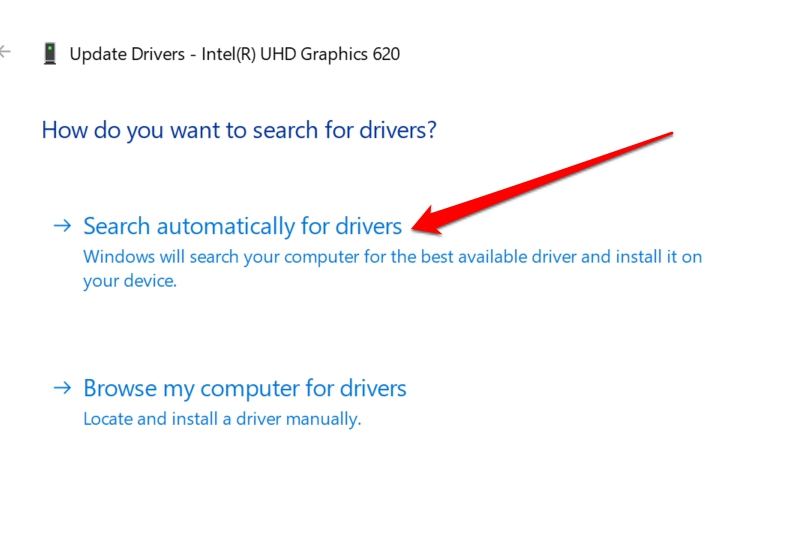
- Click on Search Automatically for Drivers.

Make sure that your computer is connected to the web. Windows will search for the latest driver available for your PC and install the same.
Otherwise, you can visit the official website of the GPU company. As per the model of GPU you use, download the available driver for the same. It will be free.
- Then follow all the steps till Step -5 described in the previous steps.
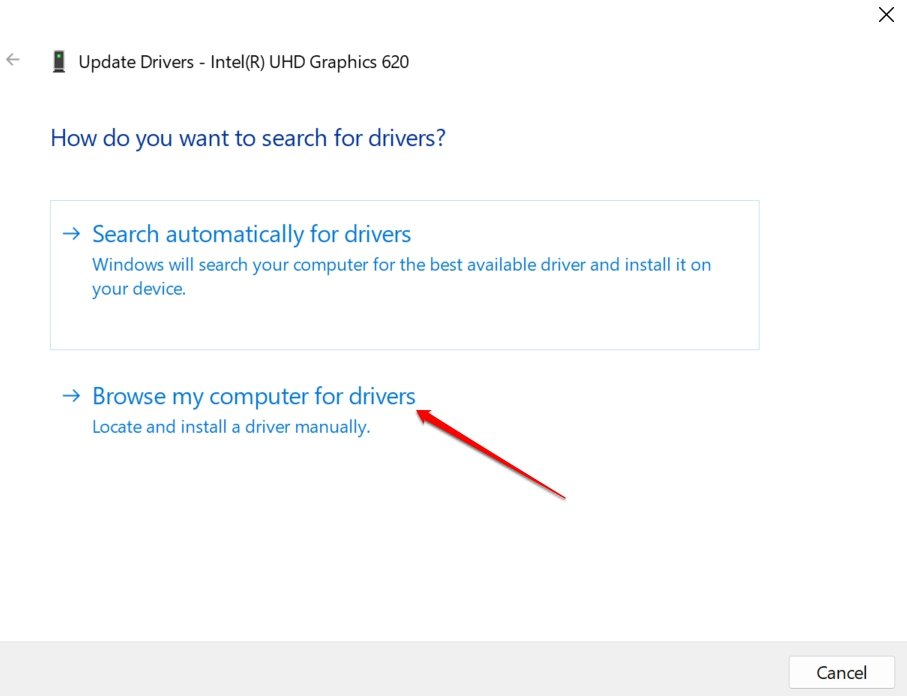
- Click on Browse My Computer for Drivers.

- Select the driver file you downloaded manually from the OEM website.
- Follow the instructions to complete the graphics driver update.
4. Force Close the App and Restart
Often, something as simple as force closing the app and restarting it may fix the “Bad Module Info Has Stopped Working” error.
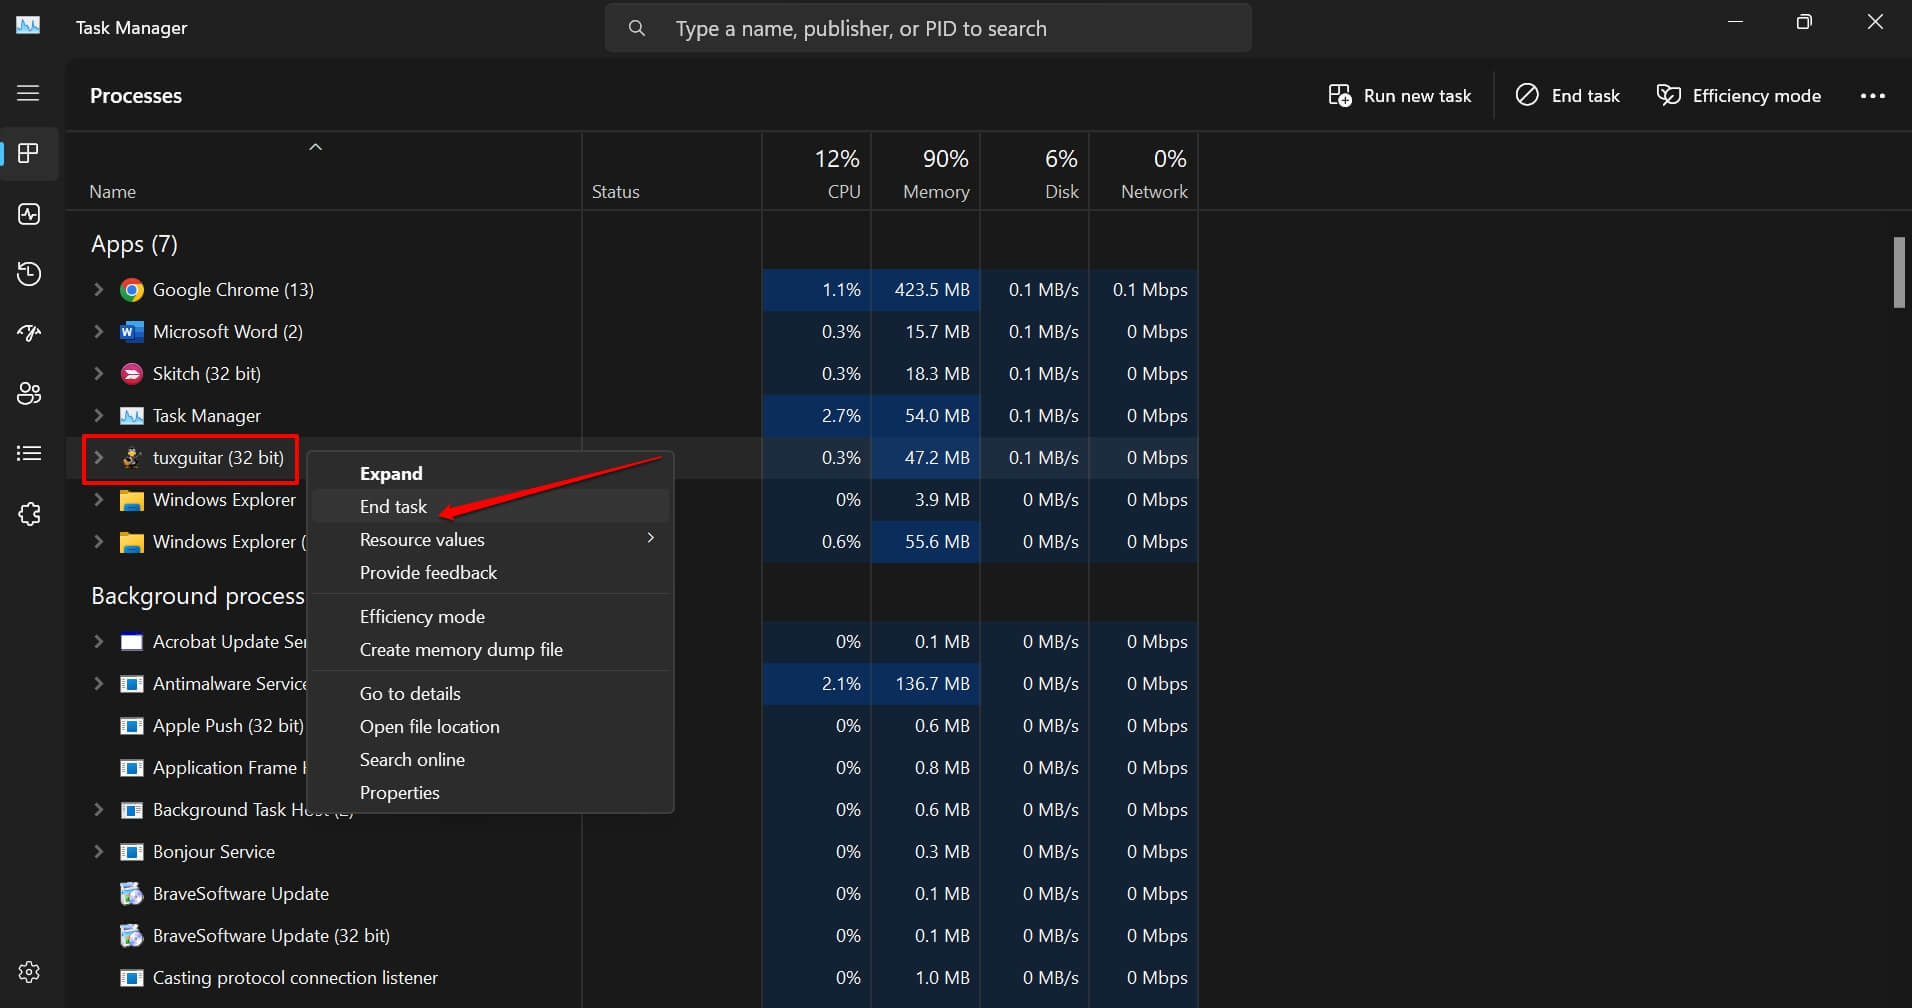
- Press Ctrl +Shift+Esc to launch the Task Manager.
- Scroll to the affected app and right-click on it.
- Select End Task.

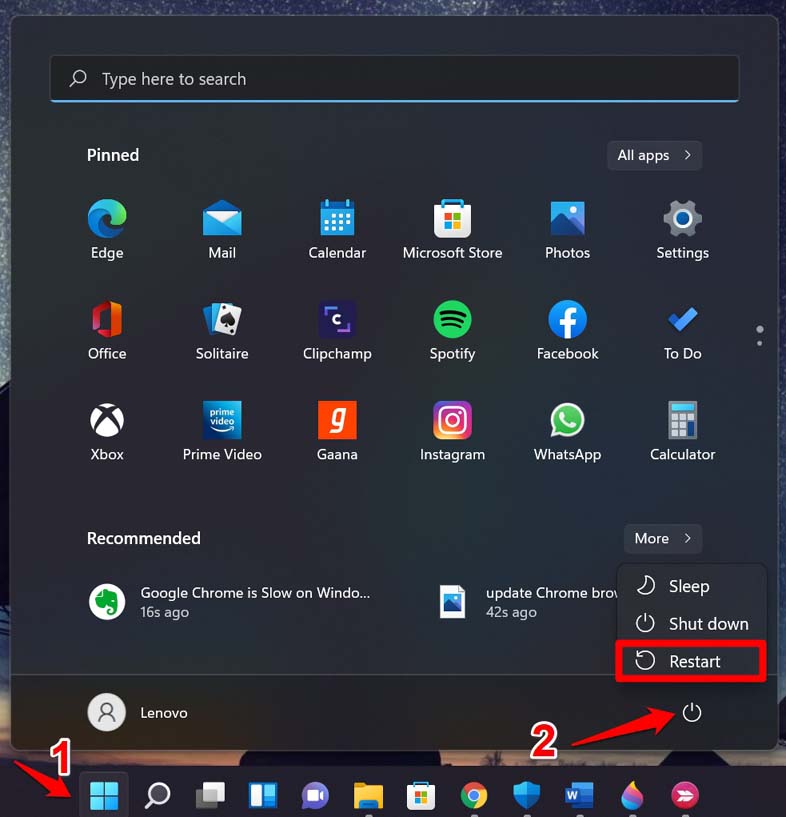
- Restart your PC.

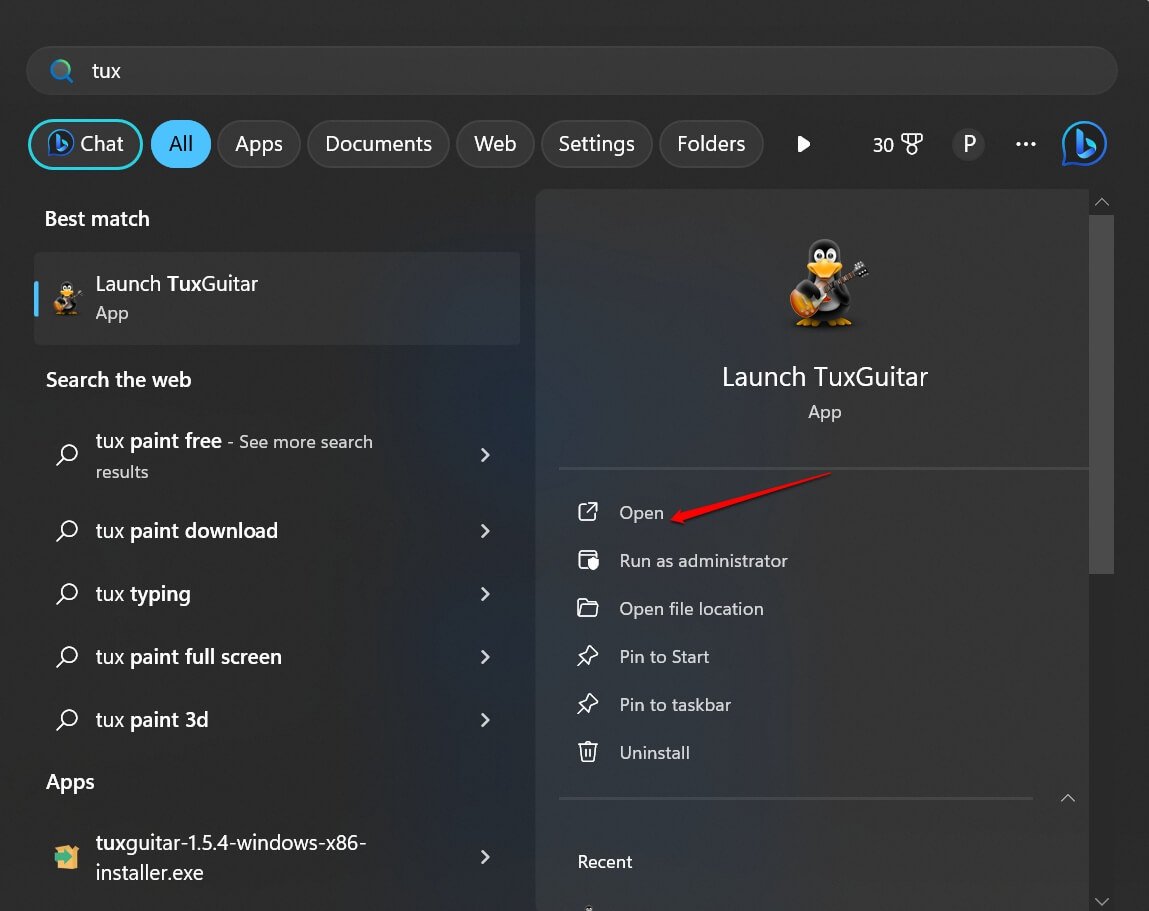
- Relaunch the application and observe if it is crashing with the “Bad Module Info Has Stopped Working” error message.

5. Perform a Windows Update
The Windows OS update bundles several driver updates and many more component updates. So, try installing the latest build of Windows 11 that is available. This will install important updates on your PC and most probably fix the issue causing the “Bad Module Info Has Stopped Working” Error.
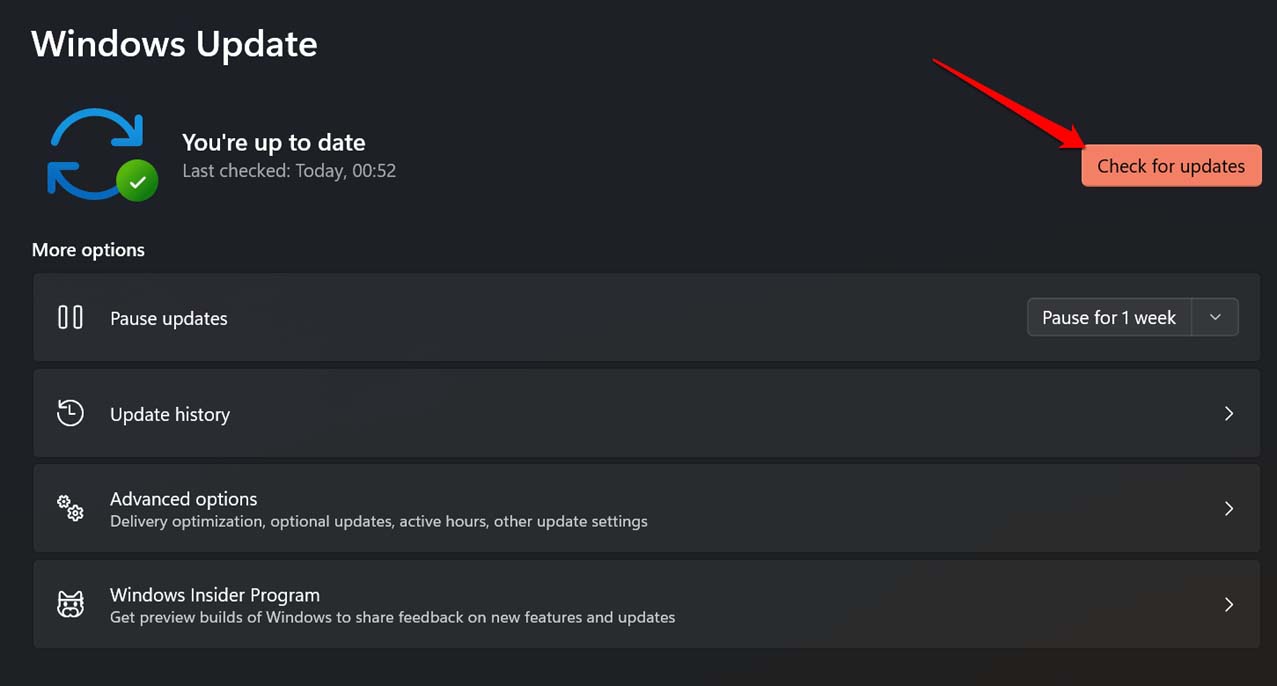
To search for new Windows Update,
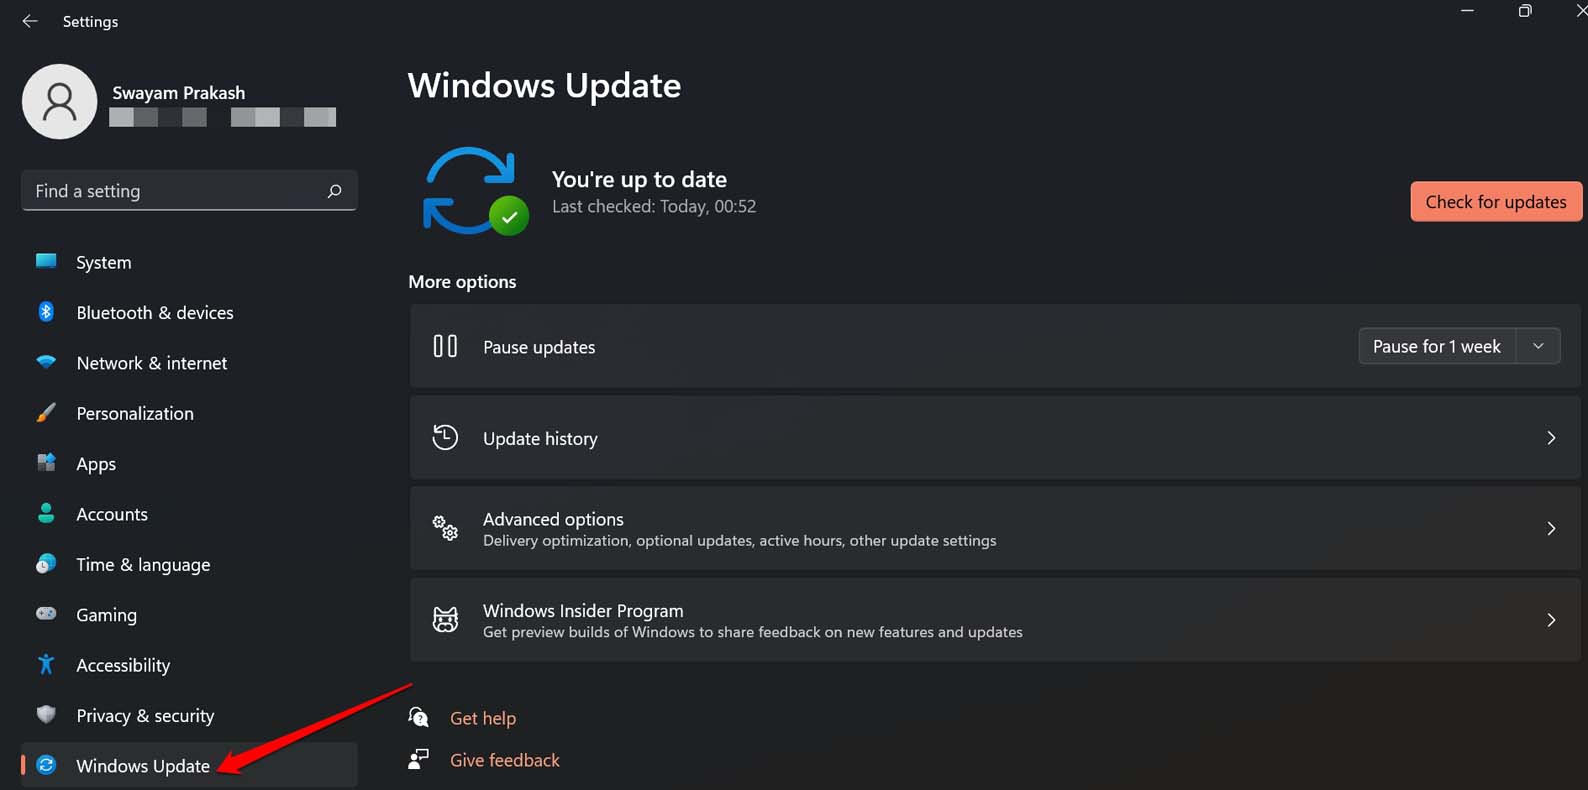
- Press the Windows key + I. You will be redirected to the Windows settings.
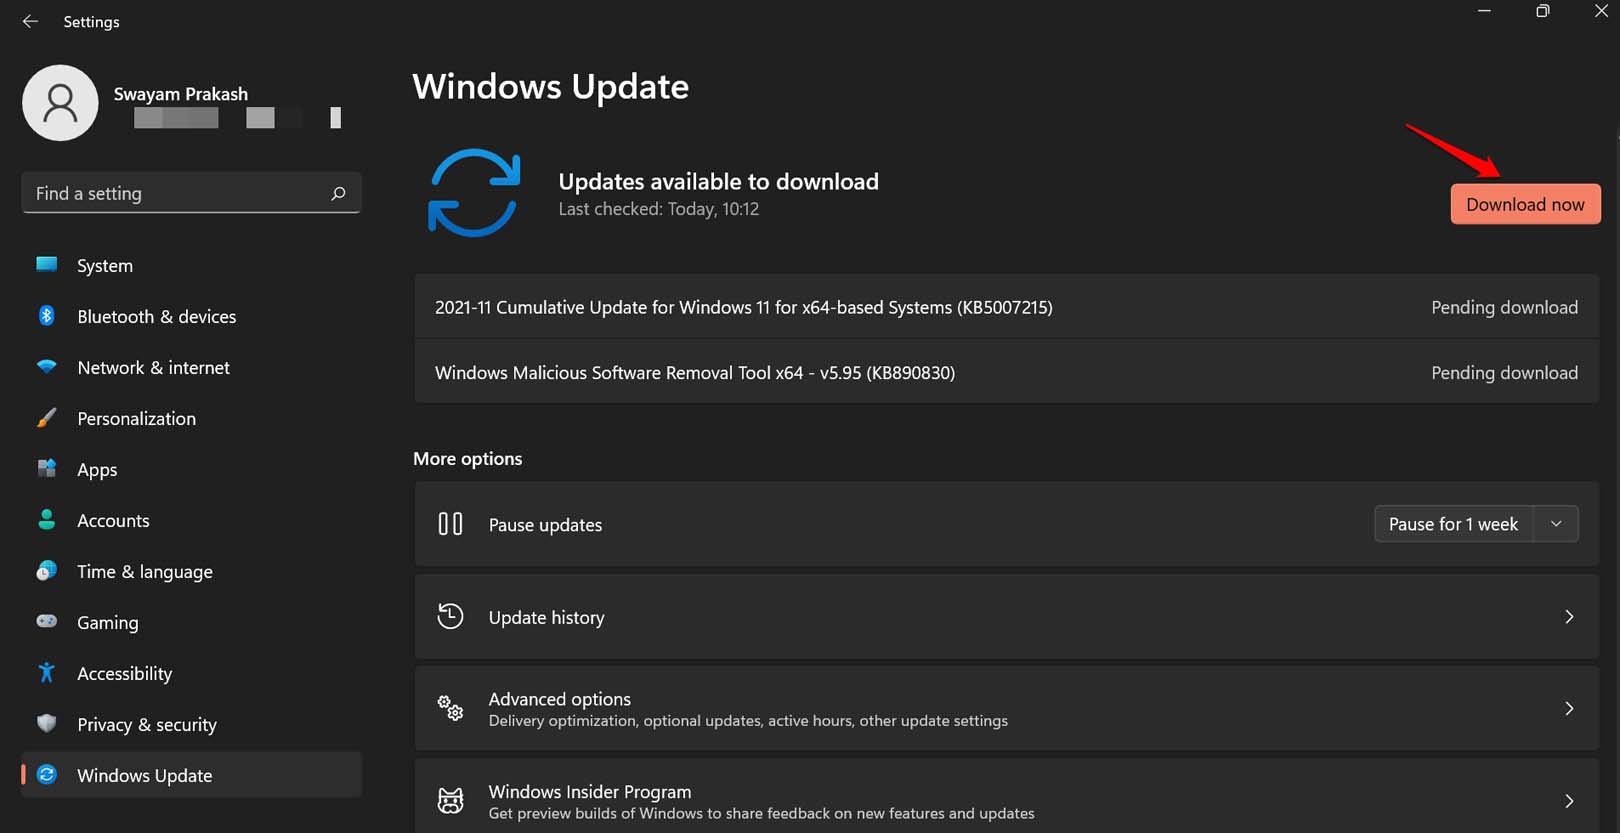
- Click on Windows Update on the left panel of settings.

- Next, click on Check for Updates.

- If a let’s Windows 11 update is pending to be installed, click on Download Now.

Restart the computer after installing the new software update. Launch the game or the app that was crashing earlier. It should run without any error if the latest OS update has fixed the issue that was previously causing the “Bad Module Info Has Stopped Working” error.
6. Uninstall the App and Reinstall
You may try all sorts of troubleshooting methods but if the entire app is corrupt, then nothing may work. So, the last resort is to uninstall the application from your PC completely. Then, reinstall the app on your computer and try launching it.
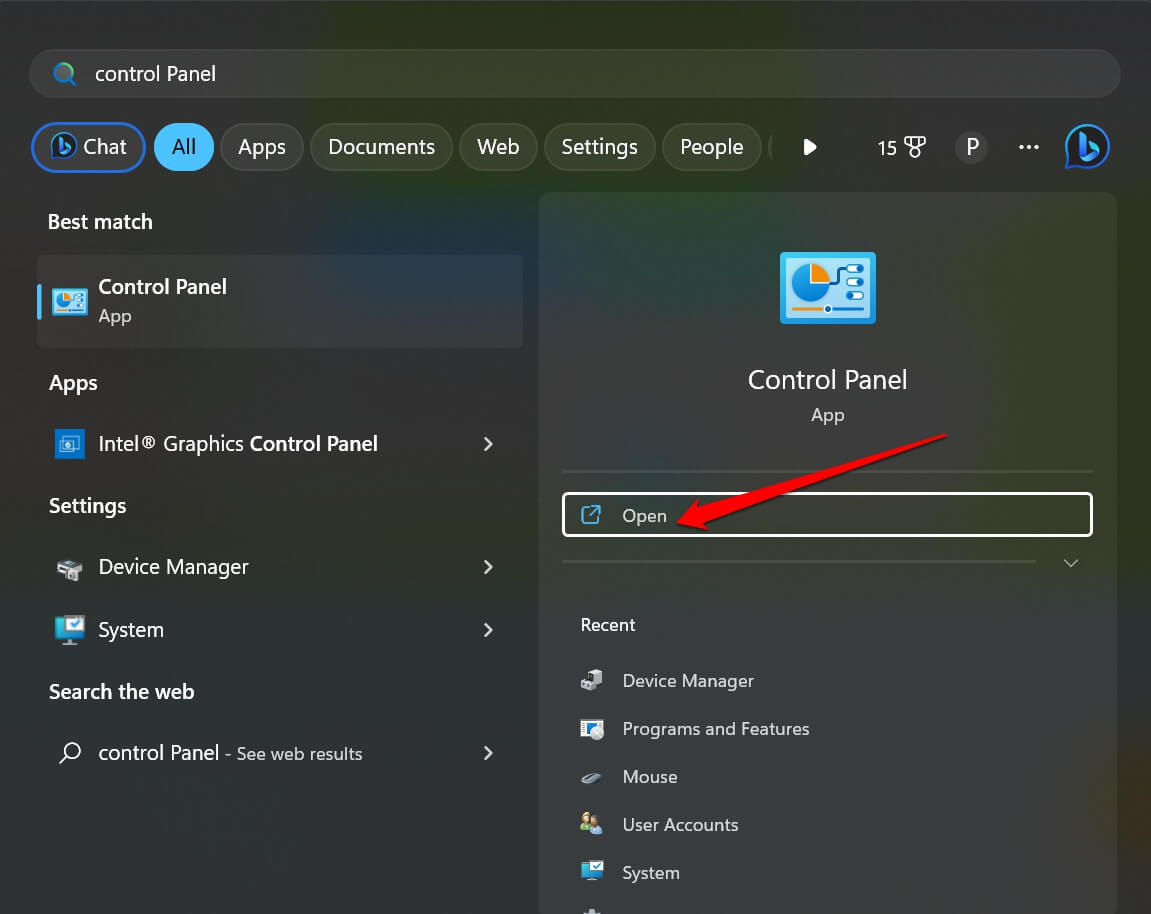
- Press Windows + S to bring up the Windows search.
- Type Control panel and click Open when the options show up.

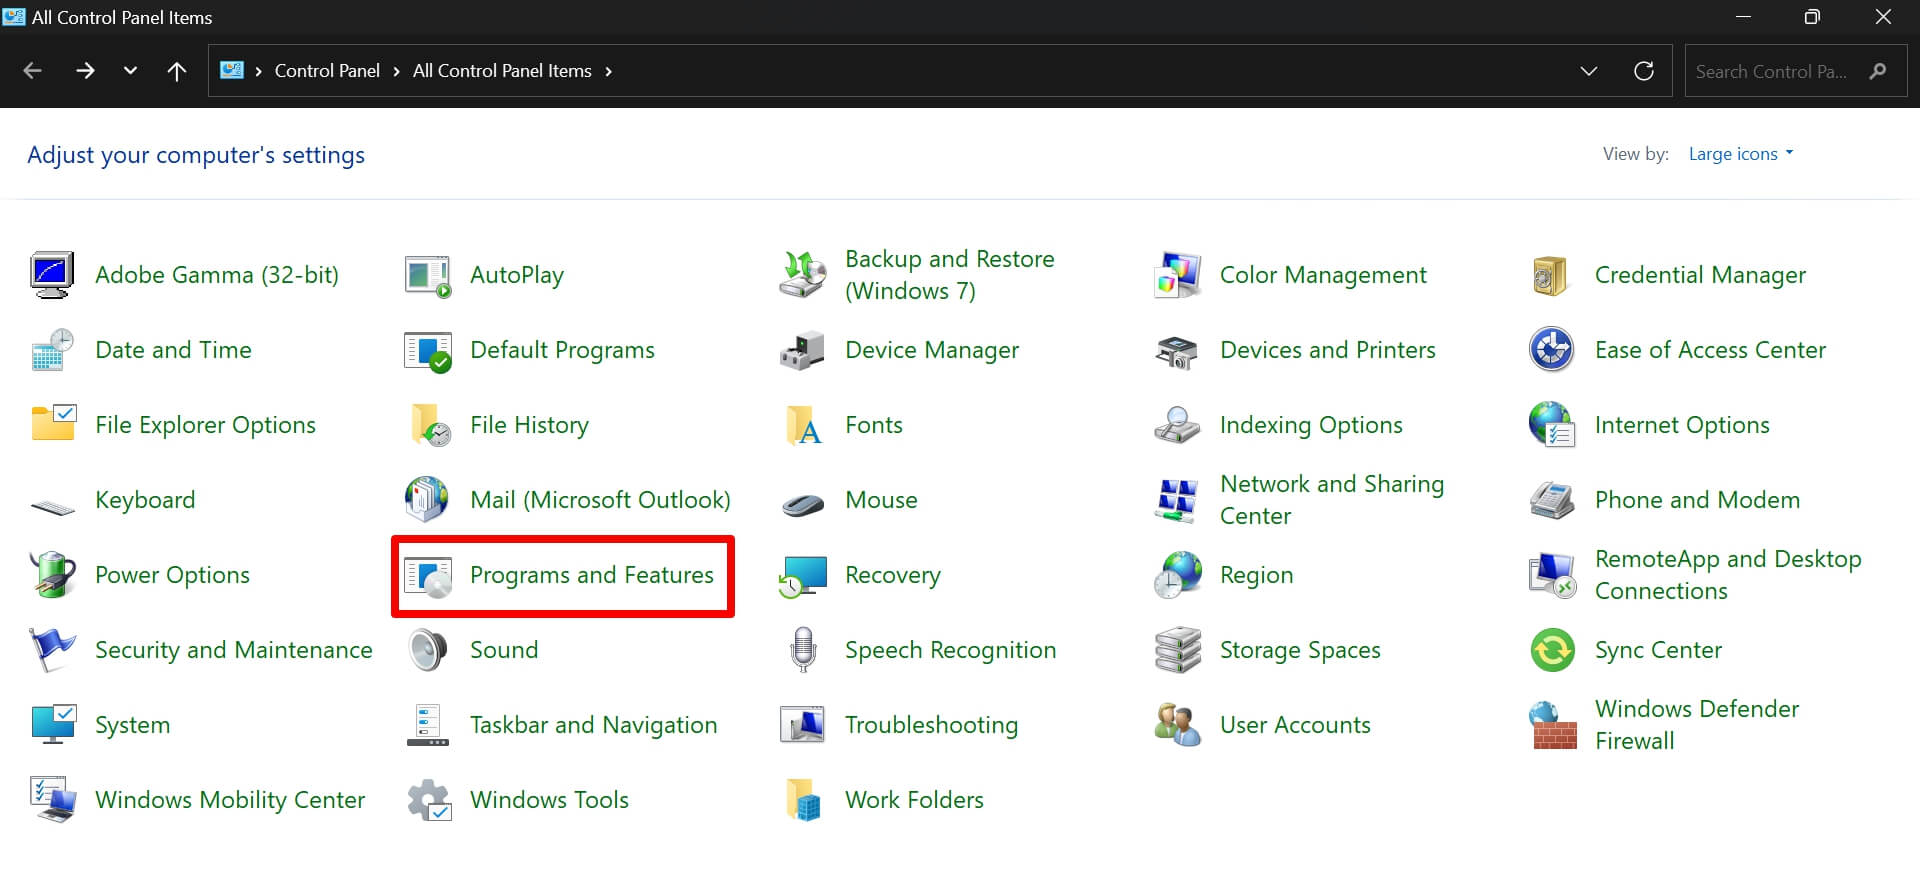
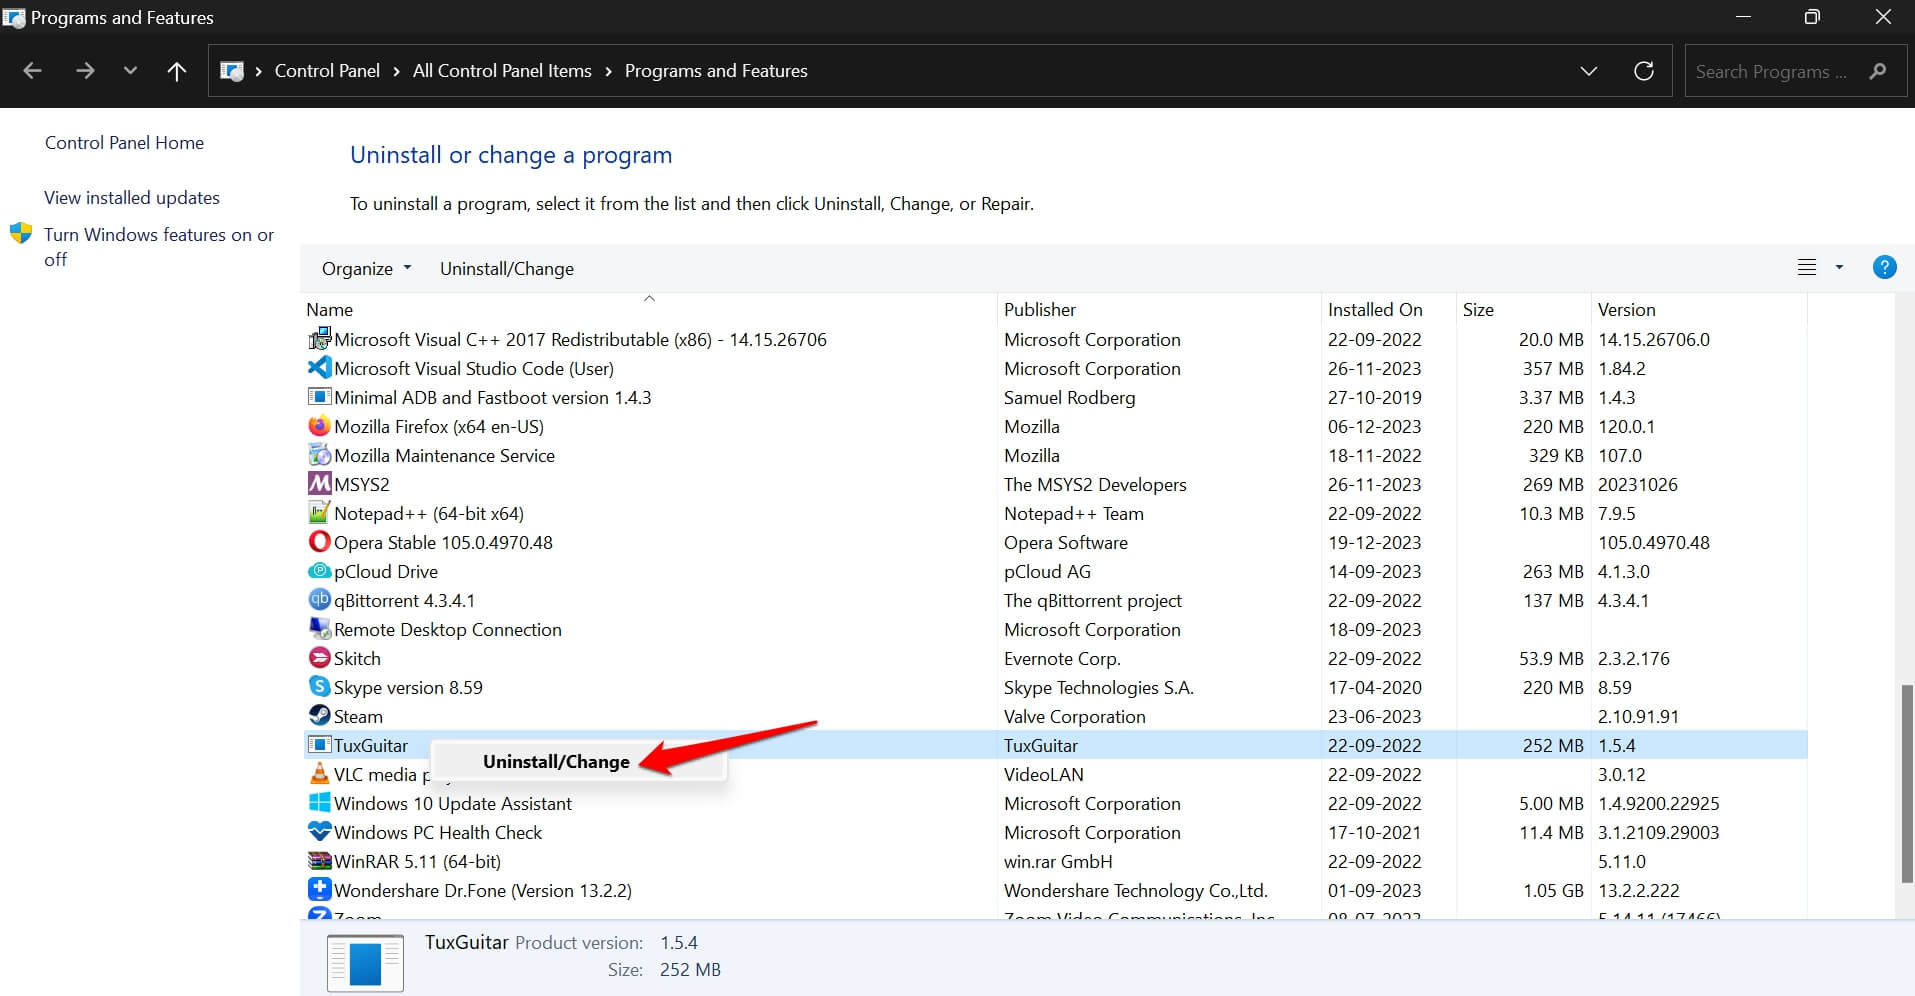
- Click on Programs and Features.

- Scroll to the concerned app, right-click on it, and select Uninstall.

- Select complete uninstallation from the PC.
- Now, visit the source website or forum to download the app/game.
- Follow the necessary instructions to reinstall it correctly on your PC.
- Once the app is reinstalled, launch it and start using it.
Observe if you still encounter the “Bad Module Info Has Stopped Working” error while using the app.
Bottom Line
With all these troubleshooting tips, you can easily fix the “Bad Module Info Has Stopped Working” Error on Windows 11. If none of the tips are solving the issue, and you constantly encounter the same problem, connect with Microsoft Support. Otherwise, contact a service point of your OEM near you. The technicians will provide you with a better solution.
If you've any thoughts on How to Fix ‘Bad Module Info Has Stopped Working’ Error on Windows 11?, then feel free to drop in below comment box. Also, please subscribe to our DigitBin YouTube channel for videos tutorials. Cheers!

