
Millions of active gamers want to record games on Windows PC and upload them on social media platforms for fun and for professional purposes. One search is enough to find programs and tools online but it’s a challenging task to find the ideal game recorder that can get the job done. Millions of players are gaming on laptops and it is important to record the game with minimal impact on the performance. Let’s look at how you can record games on Windows 10 with 1080p resolution output at 30fps/60fps.
What are the System Requirements to Record Games on Windows PC?
Every gaming machine is unique in its own way because we have multiple components and alternatives available in the market. Let’s look at the system requirements, so we don’t have to worry about shortcomings and focus on what’s important.
Note: I have streamed many games on YouTube and everything is coming from real-life experience.
Game: The game itself plays an important role because you have to know how much resources it is consuming.
Note down CPU, GPU, RAM, and SSD/HDD usage in the notepad.
If the game is consuming 99% CPU, 99% GPU, 90% RAM, then your PC can’t record games.
CPU: Minimum 6-Core and 6-Thread count processor

GPU: Minimum GTX 10-series (example: 1050Ti) or AMD RX-series (RX 570) graphics card
RAM: Minimum 2GB free RAM
Storage Drive: SSD is recommended with 30GB of free space
If you have check-marked on each point that I have mentioned above, then your PC has met the system requirements for smooth recording and high-quality output. Many assume that they can record 720p@30fps on a GT-series card, but it is a challenging task for the video card. The good part is that all your PC needs a good processor or a good graphics card, and we will show you how you can make the most of the hardware.
How to Install OBS Studio?
You may agree or disagree or have a debate but nothing can come close to what OBS Studio can achieve in the recording and streaming department. The open-source project has brought millions of opportunities for free-of-cost, and you don’t have to spend a dime on it.
The OBS Studio is backed by the worldwide community, and no multi-billion dollar company is behind its success. Name big-time players in the gaming community, and 89% to be precise are using OBS Studio for recording and streaming.
Step 1: Go to the official OBS Project site.
Step 2: Download the Windows version.

Step 3: Run the setup file as administrator and keep clicking “Next” until the program is installed.

The developers made the installation process easy, and you have to click one or two times to install OBS software. There is no doubt that OBS is superior in many scenarios, and it is recommended for Windows, macOS, and Linux PC. We will show you how to configure the OBS Studio for recording and streaming without laggy output.
How to Set Up OBS Studio?
We will go through the simple process at the beginning and move to the advanced options. All you have to do is to read the tutorial multiple times and implement the settings yourself to master it.
Step 1: Launch OBS on the PC.
Step 2: Click on “Tools” to reveal options and choose “Auto-Configuration Wizard” to continue.

Step 3: A new pop-up shows up on the screen and chooses “Optimize for recording, I will not be streaming” and then click on “Next” to continue.

Step 4: Keep the settings to default, and you can change the resolution and FPS, but I would not mess around with it. However, I recommend the users to keep the settings to default and click on “Next” to continue.

Step 5: Click on “Apply Settings” to finish the process.

OBS Studio will run a couple of GPU & CPU benchmark tests to determine the best settings for the PC. The Auto-Configuration Wizard works flawlessly, and I am saying this even after mastering the OBS Studio settings.
How to Make Changes in Advanced Settings?
If you go through this tutorial, and then you will master the controls and know what to do and what not to do.
Click on “Settings” located at the bottom left side to open the advanced OBS settings.

#1 Video:
The first advanced setting that we should check out is “Video” because that’s where the video quality fate is decided.

Base (Canvas) Resolution: It is the monitor resolution, and I have a 1080p monitor, which is why OBS has set 1920×1080 resolution. I don’t think that you should meddle with it for the sake of video quality.
Output (Scaled) Resolution: The recorded video output can be set here. If you have a 720p monitor then you can push the output scale to 1080p here but it requires a good CPU or GPU.
Downscale Filter: You have four options on the table but do not mess around unless you know what you are doing.
Common FPS Value: Low-end machine users should choose 30fps and mid-range or high-end machine users can choose 60fps.
#2 Output:
The recorded video is called “output” and this is where you can improve the quality. You will find all settings under “Recording” and if you are planning to stream in the future then you can modify the settings under the “Streaming” section.

Recording Path: All files will be saved in the mentioned location, and you can change the file destination folder from here.
Recording Quality: The “High Quality, Medium File Size” is an ideal choice for low-end and mid-range machines.
Recording Format: Users have MP4, FLV, MPV, M3U8, MKV, TS, and MOV file format.
Encoder: Users have three options, and each of them has a meaning behind it.
- Software (x264)
OBS will use processors to record games, and it will increase processor usage.
- Software (x264 low CPU usage preset but increases file size)
OBS will use the processor, but it will apply low CPU usage preset this time, but it will increase the output file size.
- Hardware (AMD) or Hardware (Intel) or Hardware (Nvidia)
OBS will use an integrated or dedicated graphics card to record the games.
#3 Audio:
Focus on Video & Output settings, and once you hold a grip on it, and then you can play around with Audio settings. New users can leave the audio output alone as the default settings are more than enough.
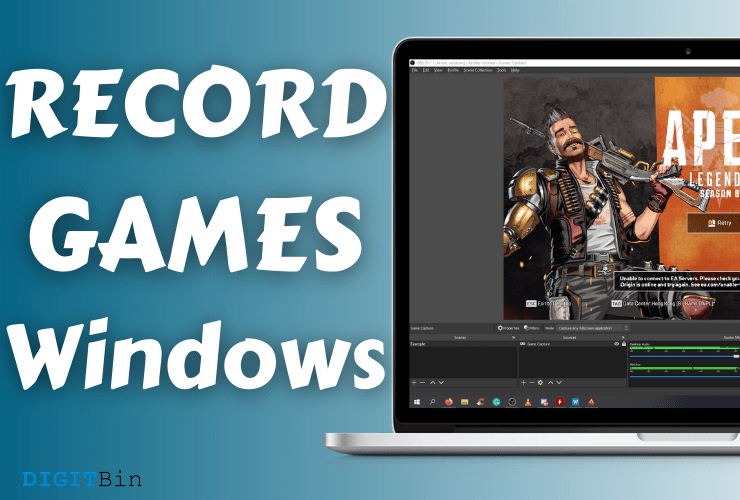
You can always come back to change the setting from CPU to GPU. Remember, I told you that the gaming PC needs a good CPU or GPU to record, and this is where you can experiment. You can let the powerful 6-Core & 6-Threads CPU take care of the game recording. Our gaming rig has RX 570 (4GB) that cannot handle Apex Legends game recording, and that’s where the CPU comes in handy.
How to Create Scenes in OBS?
Adding scenes and sources is the final stage of recording, and none of this is intimating once you give this a shot. Readers have to play around with OBS Studio for half an hour to understand how it works, and it will be piece of cake in a couple of days.
Step 1: Click on the + icon under “Scenes” and name whatever you want.

Step 2: Click on the + button under “Resources” to reveal more options.

As you can see, you got tons of options that you may not know about it.
- Audio Input Capture: Records your microphone, but you don’t need it.
- Audio Output Capture: Records game audio, and you don’t need it either until or unless you want to mute desktop audio and record game audio-only.
- Browser: You can add notification elements like subscriber, follower, followers count, and other notifications.
- Game Capture: This is an important function that captures “Full Screen” programs, and all games have the “Full Screen” mode.
- Image: Add an image.
- Image Slide Show: Add image slide shows and many streamers use it to promote sponsors like Intel, Logitech, AMD, etc.
- Media Source: You can play videos or media files from local storage.
- Scene: 99% of the users won’t need it.
- Text (GDI+): Add text in the videos/streams.
- Video Capture Device: Add Webcam or camera to the recording similar to what streamers do on Twitch.
- Window Capture: This function will help the user to capture specific Window like Apex Legends, and it won’t record the desktop screen when minimized.
Step 3: Choose “Game Capture” from the options.

Step 4: Launch the game, and it will appear in OBS Studio.

Step 5: You can lower the desktop volume to decrease game sound and teammates’ audio. You can increase or decrease microphone volume in the recorded video, and if this option doesn’t appear in the panel, then you can add “Audio Input Capture” from resources.

Step 6: Click on “Start Recording” to record the game.
Users can add multiple elements to the game recording, but you have to spend half an hour or an hour learning and implement it. OBS was an intimidating task in the beginning, but now it’s child play for me.
Bottom Line
OBS Studio is a one-stop solution to record AAA games in Windows machines. I have tested OBS Studio on all platforms, and it works flawlessly on macOS and Linux as well. Play around with the features for a couple of days, and you will master the controls. Let us know what do you think about OBS in the comment section below.
This post was last modified on April 5, 2021 8:05 pm